Nvidia Jetson AGX Orin 初体验(八)关于3个USB摄像头的尝试


其实有了 https://bbs.huaweicloud.com/blogs/351089 和 https://bbs.huaweicloud.com/blogs/351316 的经验,张小白猜想,将3台USB摄像头全部接上Jetson AGX Orin,然后并行启动三个darknet代码,就可以运行三套摄像头的YoLoV4-tiny推理的程序。
真的是这样的吗?
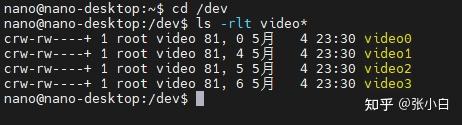
在这之前先看看/dev/video*:
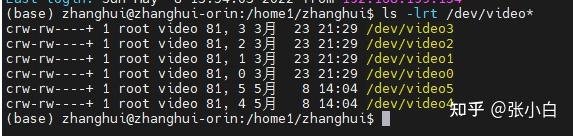
其中0,2是1080p摄像头,4是海康720p摄像头。
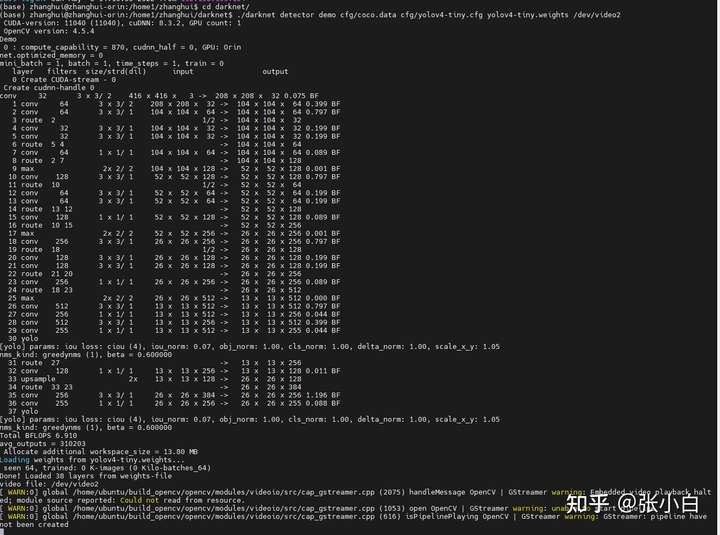
在CSI摄像头执行时,是一个很长的命令:
./darknet detector demo cfg/coco.data cfg/yolov4-tiny.cfg yolov4-tiny.weights "nvarguscamerasrc ! video/x-raw(memory:NVMM), width=1280, height=720, format=NV12, framerate=30/1 ! nvvidconv flip-method=2 ! video/x-raw, width=1280, height=720, format=BGRx ! videoconvert ! video/x-raw, format=BGR ! appsink"
其实,前面那些都可以不变,我们把最后一个变成/dev/videoxx就行了。
每个窗口开一个:
./darknet detector demo cfg/coco.data cfg/yolov4-tiny.cfg yolov4-tiny.weights /dev/video0
./darknet detector demo cfg/coco.data cfg/yolov4-tiny.cfg yolov4-tiny.weights /dev/video2
./darknet detector demo cfg/coco.data cfg/yolov4-tiny.cfg yolov4-tiny.weights /dev/video4
不过张小白发现,启动2个可以,第三个就启动不起来:
不知道是不是因为MobaXterm启动不了三个窗口。
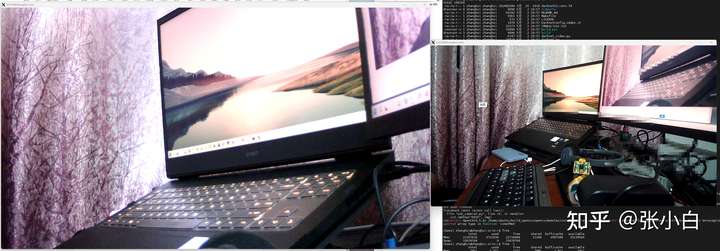
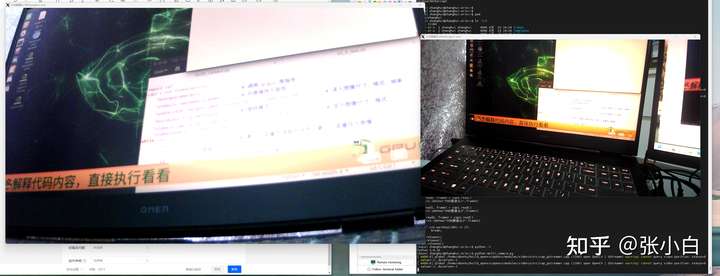
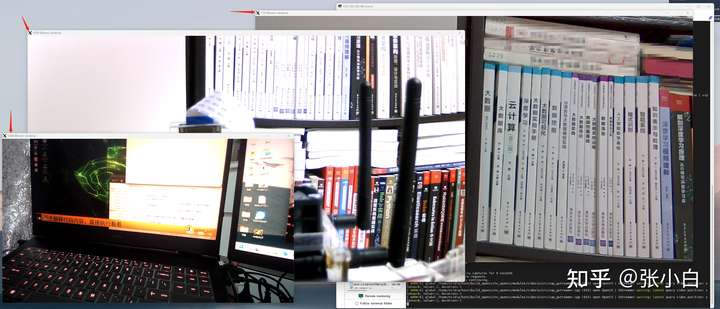
但看这两个窗口:(一个是720p的,一个是1080p的)
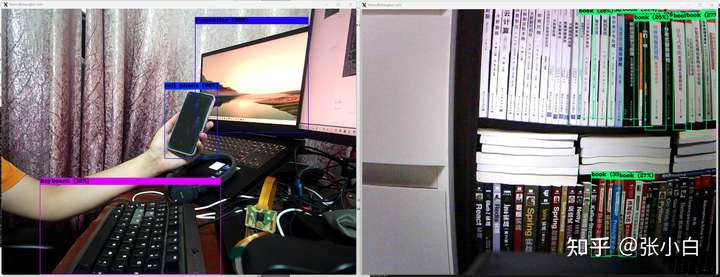
手机、键盘,笔记本,书这些有些能识别出来,有些不能。
我们停止这代码运行。
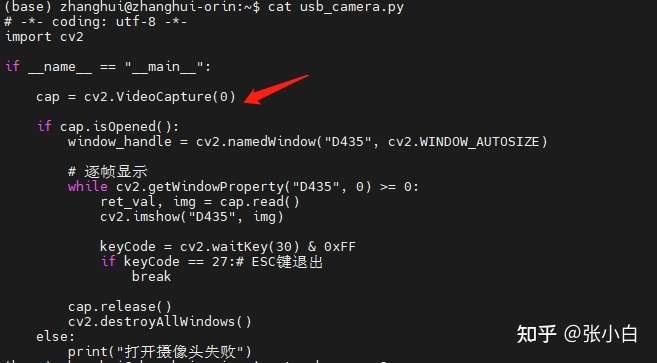
看看直接使用usb_camera.py能不能同时打开三个摄像头:
usb_camera.py

usb_camera2.py
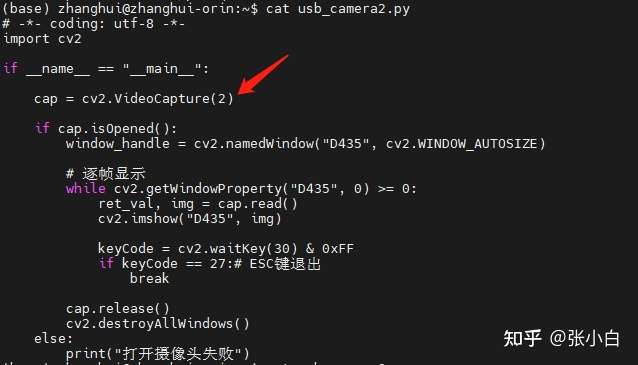

usb_camera3.py
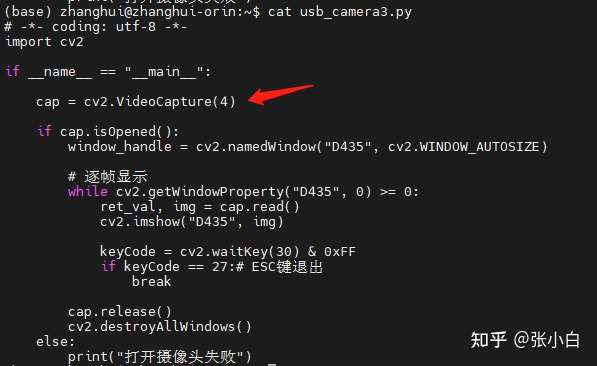

有点怪异,0打不开,2/4可以打开。
再回头试试口罩识别(原来用两个没问题)
确实只能启动2个。。无论是opencv,还是darknet,都是这样。。

同样一部剧,由于一个摄像头的画面过于亮白,导致还以为他戴了口罩。。
这个结果让张小白有点郁闷。二郎神的三只眼难道就不能发挥神力了吗?
打开Nvidia专家的视频介绍:https://cloud.tencent.com/developer/article/1664999

我们用v4l2检测看看:
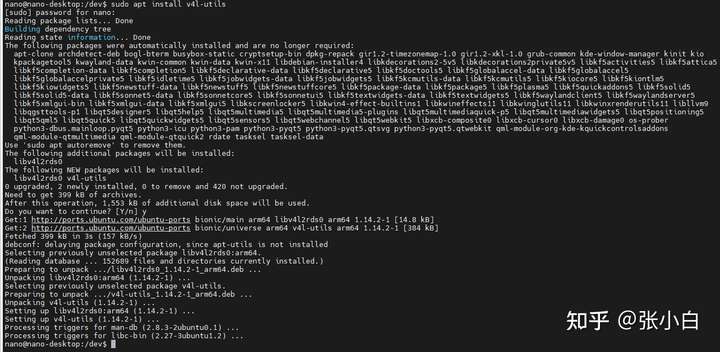
sudo apt install v4l-utils
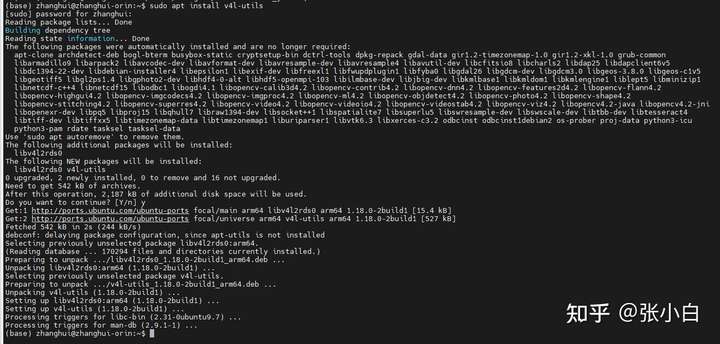
v4l2-ctl --list-devices
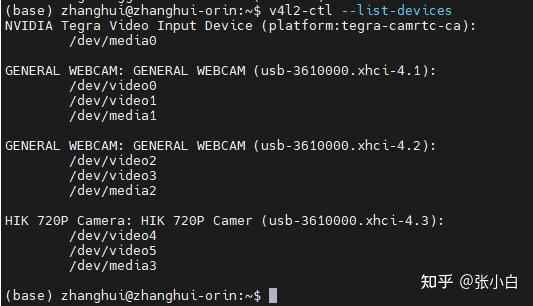
奇怪,视频中USB摄像头只会显示一个,而张小白这边会显示多个。
查看每个摄像头的详细信息:
1080p第一个:
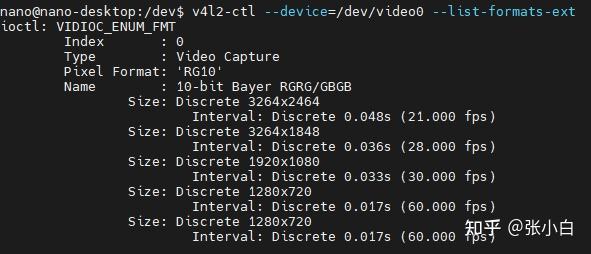
v4l2-ctl --device=/dev/video0 --list-formats-ext
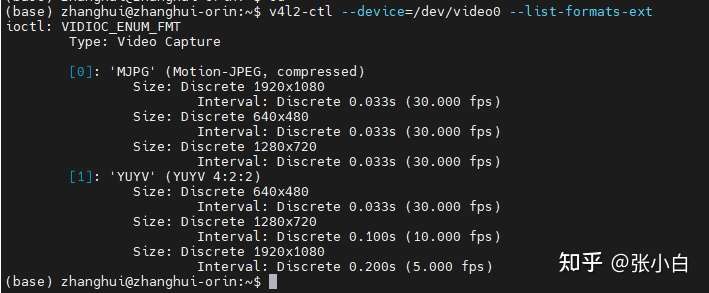
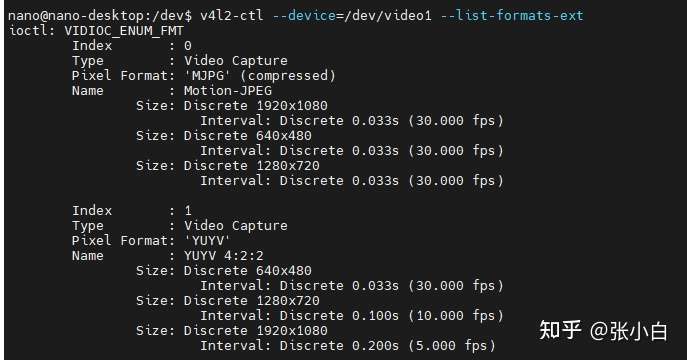
看来确实支持到1080p。
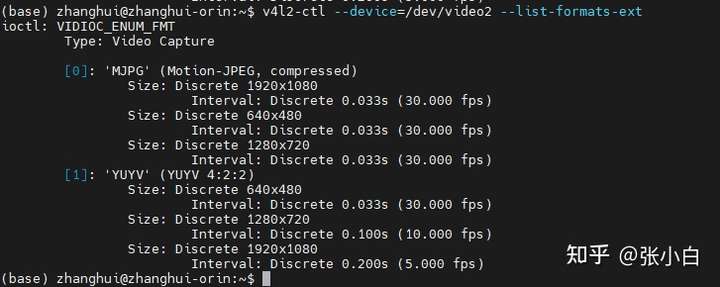
1080p第二个:
v4l2-ctl --device=/dev/video2 --list-formats-ext
海康威视720p的:
v4l2-ctl --device=/dev/video4 --list-formats-ext
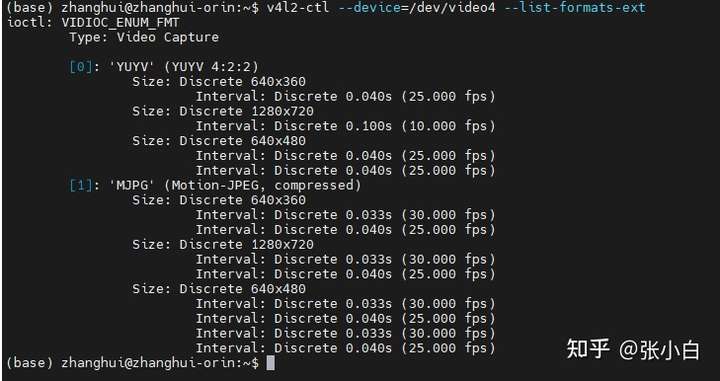
确实只支持到720p。
另外尾数为奇数的设备确实看不到:
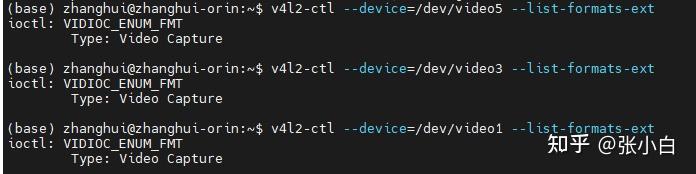
视频中有2个CSI摄像头和2个USB摄像头,但是张小白有3个USB摄像头,而且貌似/dev/video0无法被cv2打开。。。
所以暂时写成这样:
import cv2

cap0 = cv2.VideoCapture(2)
cap1 = cv2.VideoCapture(4)
#cap2 = cv2.VideoCapture(0)

while cap0.isOpened():
    read0, frame0 = cap0.read()
    cv2.imshow("USB摄像头1",frame0)

    read1, frame1 = cap1.read()
    cv2.imshow("USB摄像头2",frame1)

#    read2, frame2 = cap2.read()
#    cv2.imshow("USB摄像头3",frame2)

    if cv2.waitKey(100) == 27:
        break;

cap0.release()
cap1.release()
#cap2.release()
写成2个,就可以打开:
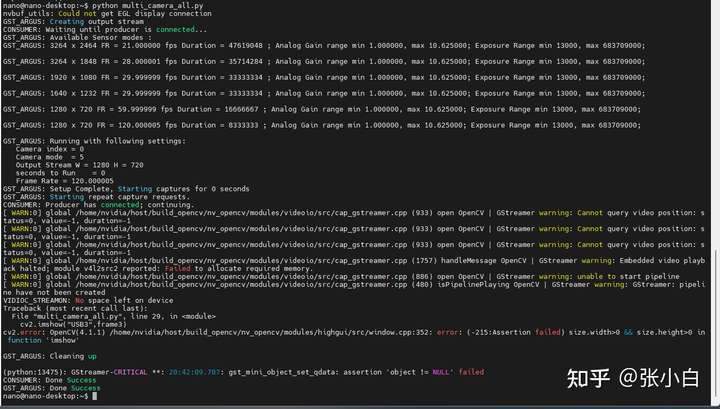
但是写成3个:
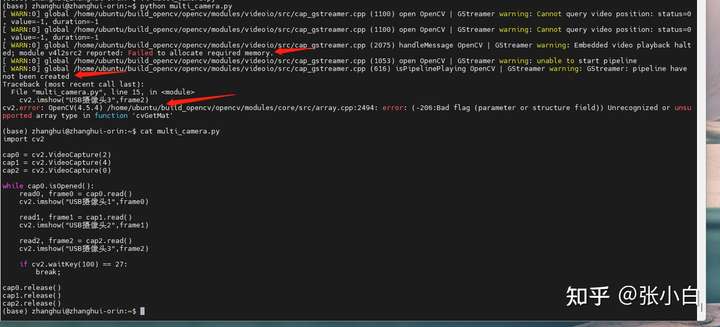
就直接报错了:
[ WARN:0] global /home/ubuntu/build_opencv/opencv/modules/videoio/src/cap_gstreamer.cpp (1100) open OpenCV | GStreamer warning: Cannot query video position: status=0, value=-1, duration=-1
[ WARN:0] global /home/ubuntu/build_opencv/opencv/modules/videoio/src/cap_gstreamer.cpp (1100) open OpenCV | GStreamer warning: Cannot query video position: status=0, value=-1, duration=-1
[ WARN:0] global /home/ubuntu/build_opencv/opencv/modules/videoio/src/cap_gstreamer.cpp (2075) handleMessage OpenCV | GStreamer warning: Embedded video playback halted; module v4l2src2 reported: Failed to allocate required memory.
[ WARN:0] global /home/ubuntu/build_opencv/opencv/modules/videoio/src/cap_gstreamer.cpp (1053) open OpenCV | GStreamer warning: unable to start pipeline
[ WARN:0] global /home/ubuntu/build_opencv/opencv/modules/videoio/src/cap_gstreamer.cpp (616) isPipelinePlaying OpenCV | GStreamer warning: GStreamer: pipeline have not been created
Traceback (most recent call last):
  File "multi_camera.py", line 15, in <module>
    cv2.imshow("USB摄像头3",frame2)
cv2.error: OpenCV(4.5.4) /home/ubuntu/build_opencv/opencv/modules/core/src/array.cpp:2494: error: (-206:Bad flag (parameter or structure field)) Unrecognized or unsupported array type in function 'cvGetMat'
从错误日志上看,好像是内存不足引起的(Failed to allocate required memory.)。。。但是张小白的Orin明明有32G内存啊。。。
我们到回头来看看在Jetson Nano B01上接入这3个USB摄像头,1个CSI摄像头是什么情况。
确实跟Jetson AGX Orin的情况不一样:
只显示了4个摄像头。
同样的,安装v4l-utils:
sudo apt install v4l-utils
v4l2-ctl --list-devices
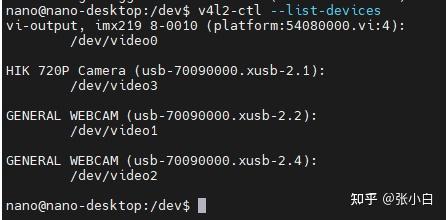
1个CSI,3个USB,很清晰。
video0是CSI的:
v4l2-ctl --device=/dev/video0 --list-formats-ext
video1是1080p的:
v4l2-ctl --device=/dev/video1 --list-formats-ext
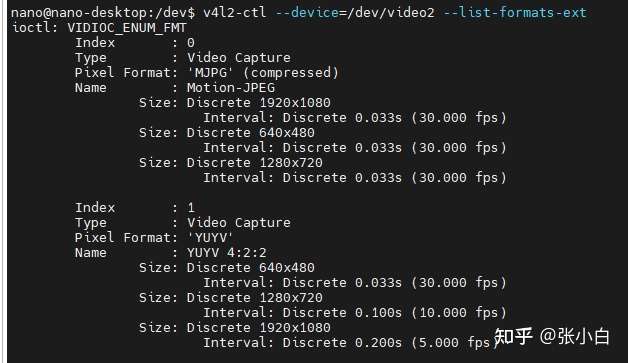
video2是1080p的:
v4l2-ctl --device=/dev/video2 --list-formats-ext
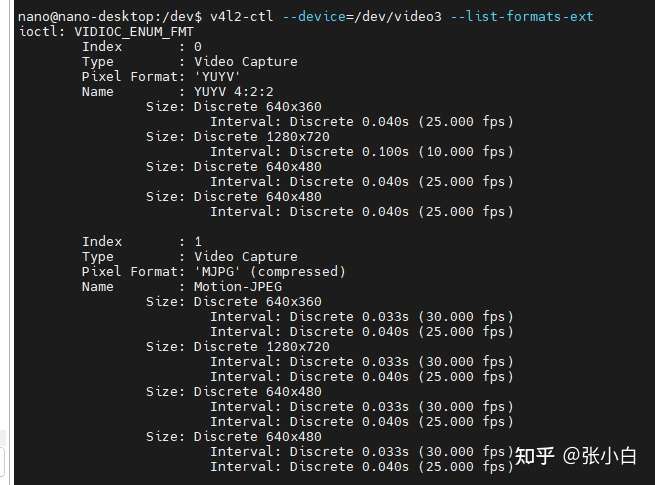
video3是1080p的:
v4l2-ctl --device=/dev/video3 --list-formats-ext
先单独测试:
csi_camera.py
# -*- coding: utf-8 -*-
import cv2

# 设置gstreamer管道参数
def gstreamer_pipeline(
    capture_width=1280, #摄像头预捕获的图像宽度
    capture_height=720, #摄像头预捕获的图像高度
    display_width=1280, #窗口显示的图像宽度
    display_height=720, #窗口显示的图像高度
    framerate=60,       #捕获帧率
    flip_method=0,      #是否旋转图像
):
    return (
        "nvarguscamerasrc ! "
        "video/x-raw(memory:NVMM), "
        "width=(int)%d, height=(int)%d, "
        "format=(string)NV12, framerate=(fraction)%d/1 ! "
        "nvvidconv flip-method=%d ! "
        "video/x-raw, width=(int)%d, height=(int)%d, format=(string)BGRx ! "
        "videoconvert ! "
        "video/x-raw, format=(string)BGR ! appsink"
        % (
            capture_width,
            capture_height,
            framerate,
            flip_method,
            display_width,
            display_height,
        )
    )


if __name__ == "__main__":
    capture_width = 1280
    capture_height = 720
    display_width = 1280
    display_height = 720
    framerate = 60
    flip_method = 0

    # 创建管道
    print(gstreamer_pipeline(capture_width,capture_height,display_width,display_height,framerate,flip_method))

    #管道与视频流绑定
    cap = cv2.VideoCapture(gstreamer_pipeline(flip_method=0), cv2.CAP_GSTREAMER)

    if cap.isOpened():
        window_handle = cv2.namedWindow("CSI Camera", cv2.WINDOW_AUTOSIZE)

        # 逐帧显示
        while cv2.getWindowProperty("CSI Camera", 0) >= 0:
            ret_val, img = cap.read()
            cv2.imshow("CSI Camera", img)

            keyCode = cv2.waitKey(30) & 0xFF
            if keyCode == 27:# ESC键退出
                break

        cap.release()
        cv2.destroyAllWindows()
    else:
        print("打开摄像头失败")
运行:
python csi_camera.py
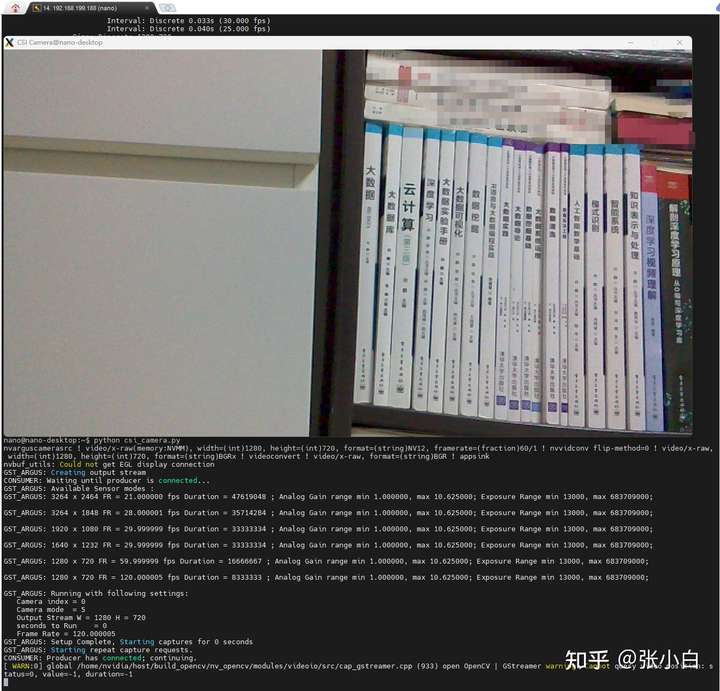
没问题。
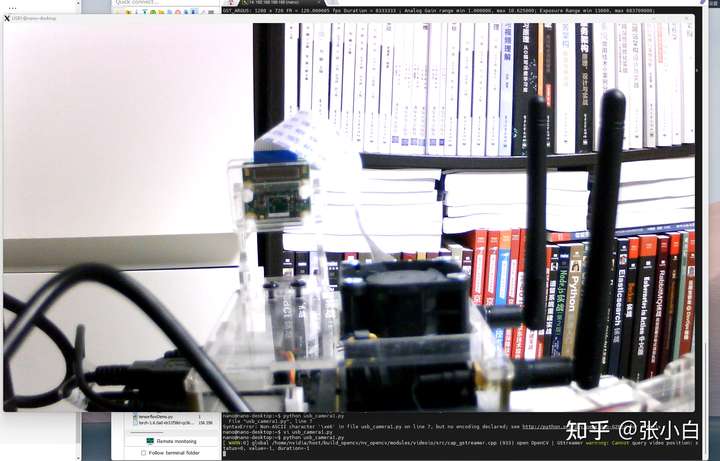
usb_camera1.py
import cv2

cap1 = cv2.VideoCapture(1)

while cap1.isOpened():
    read1, frame1 = cap1.read()
    cv2.imshow("USB1",frame1)

    if cv2.waitKey(100) == 27:
        break;

cap1.release()
usb_camera2.py
import cv2

cap2 = cv2.VideoCapture(2)

while cap2.isOpened():
    read2, frame2 = cap2.read()
    cv2.imshow("USB2",frame2)

    if cv2.waitKey(100) == 27:
        break;

cap2.release()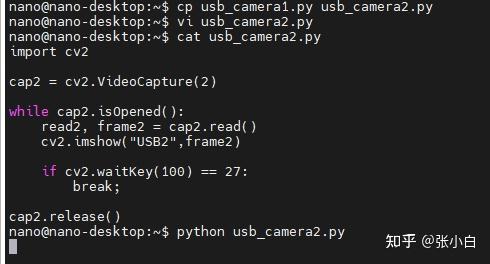
这个摄像头好像确实有点问题。
打开后好像报错了:

usb_camera3.py
import cv2

cap3 = cv2.VideoCapture(3)

while cap3.isOpened():
    read3, frame3 = cap3.read()
    cv2.imshow("USB3",frame3)

    if cv2.waitKey(100) == 27:
        break;

cap3.release()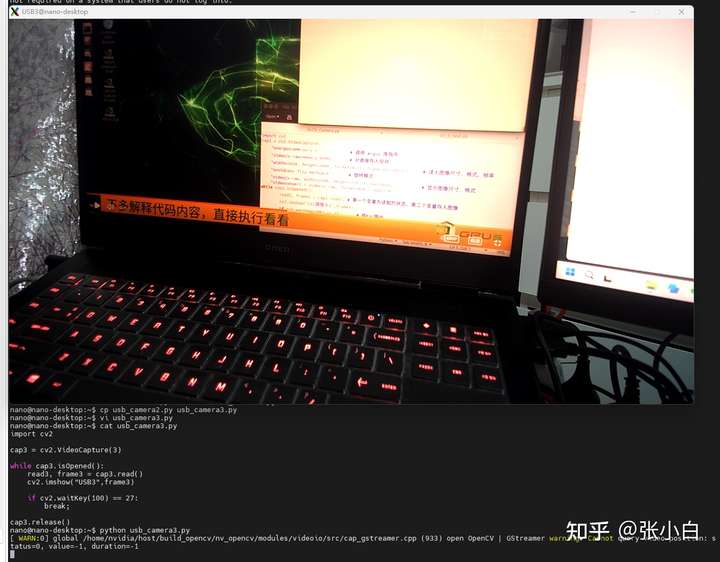
这么看来,感觉是我的第二个1080p的摄像头坏了。不然也解释不清楚为啥会不能三个同时用。
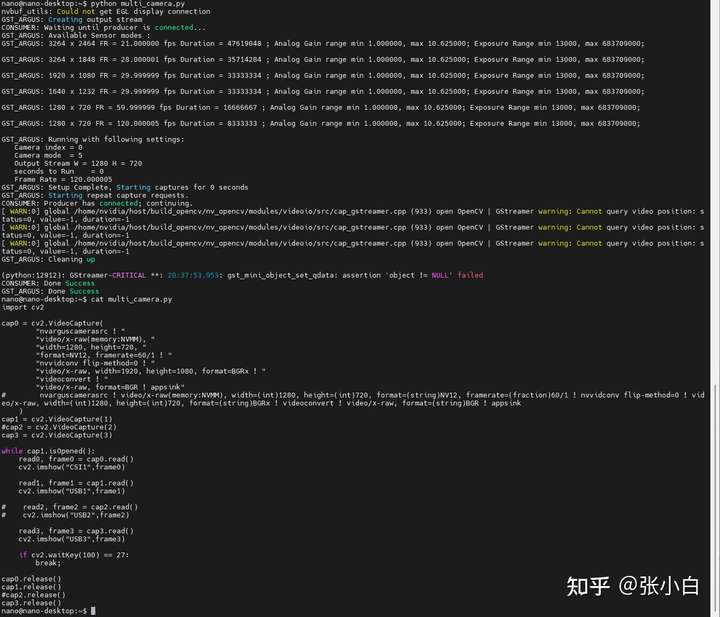
我们来一个程序打开多个摄像头,先把2个USB摄像头和1个CSI摄像头放进来:usb1(好的1080p),usb3(海康)
multi_camera.py
import cv2

cap0 = cv2.VideoCapture(
        "nvarguscamerasrc ! "
        "video/x-raw(memory:NVMM), "
        "width=1280, height=720, "
        "format=NV12, framerate=60/1 ! "
        "nvvidconv flip-method=0 ! "
        "video/x-raw, width=1920, height=1080, format=BGRx ! "
        "videoconvert ! "
        "video/x-raw, format=BGR ! appsink"
#        nvarguscamerasrc ! video/x-raw(memory:NVMM), width=(int)1280, height=(int)720, format=(string)NV12, framerate=(fraction)60/1 ! nvvidconv flip-method=0 ! video/x-raw, width=(int)1280, height=(int)720, format=(string)BGRx ! videoconvert ! video/x-raw, format=(string)BGR ! appsink
    )
cap1 = cv2.VideoCapture(1)
#cap2 = cv2.VideoCapture(2)
cap3 = cv2.VideoCapture(3)

while cap1.isOpened():
    read0, frame0 = cap0.read()
    cv2.imshow("CSI1",frame0)

    read1, frame1 = cap1.read()
    cv2.imshow("USB1",frame1)

#    read2, frame2 = cap2.read()
#    cv2.imshow("USB2",frame2)

    read3, frame3 = cap3.read()
    cv2.imshow("USB3",frame3)

    if cv2.waitKey(100) == 27:
        break;
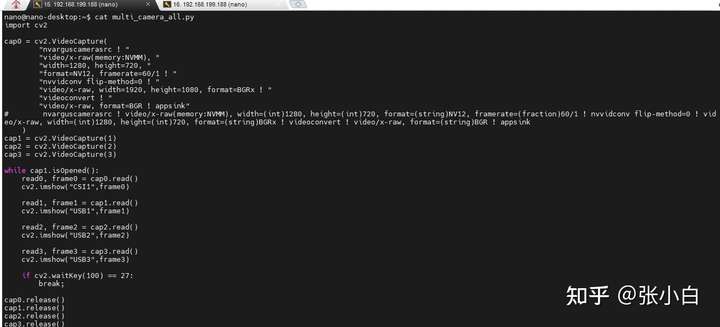
打开4个:multi_camera_all.py
nano@nano-desktop:~$ cat multi_camera_all.py
import cv2

cap0 = cv2.VideoCapture(
        "nvarguscamerasrc ! "
        "video/x-raw(memory:NVMM), "
        "width=1280, height=720, "
        "format=NV12, framerate=60/1 ! "
        "nvvidconv flip-method=0 ! "
        "video/x-raw, width=1920, height=1080, format=BGRx ! "
        "videoconvert ! "
        "video/x-raw, format=BGR ! appsink"
#        nvarguscamerasrc ! video/x-raw(memory:NVMM), width=(int)1280, height=(int)720, format=(string)NV12, framerate=(fraction)60/1 ! nvvidconv flip-method=0 ! video/x-raw, width=(int)1280, height=(int)720, format=(string)BGRx ! videoconvert ! video/x-raw, format=(string)BGR ! appsink
    )
cap1 = cv2.VideoCapture(1)
cap2 = cv2.VideoCapture(2)
cap3 = cv2.VideoCapture(3)

while cap1.isOpened():
    read0, frame0 = cap0.read()
    cv2.imshow("CSI1",frame0)

    read1, frame1 = cap1.read()
    cv2.imshow("USB1",frame1)

    read2, frame2 = cap2.read()
    cv2.imshow("USB2",frame2)

    read3, frame3 = cap3.read()
    cv2.imshow("USB3",frame3)

    if cv2.waitKey(100) == 27:
        break;
python multi_camera_all.py
做一个multi_camera_3.py: 只打开csi和 usb2(坏的1080p),usb3(海康)
import cv2

cap0 = cv2.VideoCapture(
        "nvarguscamerasrc ! "
        "video/x-raw(memory:NVMM), "
        "width=1280, height=720, "
        "format=NV12, framerate=60/1 ! "
        "nvvidconv flip-method=0 ! "
        "video/x-raw, width=1920, height=1080, format=BGRx ! "
        "videoconvert ! "
        "video/x-raw, format=BGR ! appsink"
#        nvarguscamerasrc ! video/x-raw(memory:NVMM), width=(int)1280, height=(int)720, format=(string)NV12, framerate=(fraction)60/1 ! nvvidconv flip-method=0 ! video/x-raw, width=(int)1280, height=(int)720, format=(string)BGRx ! videoconvert ! video/x-raw, format=(string)BGR ! appsink
    )
#cap1 = cv2.VideoCapture(1)
cap2 = cv2.VideoCapture(2)
cap3 = cv2.VideoCapture(3)

while cap0.isOpened():
    read0, frame0 = cap0.read()
    cv2.imshow("CSI1",frame0)

#    read1, frame1 = cap1.read()
#    cv2.imshow("USB1",frame1)

    read2, frame2 = cap2.read()
    cv2.imshow("USB2",frame2)

    read3, frame3 = cap3.read()
    cv2.imshow("USB3",frame3)

    if cv2.waitKey(100) == 27:
        break;

cap0.release()
#cap1.release()
cap2.release()
cap3.release()
python multi_camera_3.py

用这种替换的方法应该能看出是 cap2对应的1080p的摄像头坏了。
这个得去找卖家了。张小白好像确认收货确认早了。。唉。。
(未完待续)

- 点赞
- 收藏
- 关注作者
评论(0)