【ModelArts Course3】Built-in Algorithm for Flowers Classification

Using Built-in Algorithm for Flowers Classification (Image Classification)
This Experiment Describes How to Use the Flowers Dataset to Retrain a Pre-Configured Model on HUAWEI CLOUD ModelArts to Quickly Build a Flower Image Classification Application.
1. Prepare Data
1.1 Creating an OBS Bucket
Log in to the HUAWEI CLOUD console, move the cursor to the left pane, and choose Service List > Storage > Object Storage Service, as shown below.
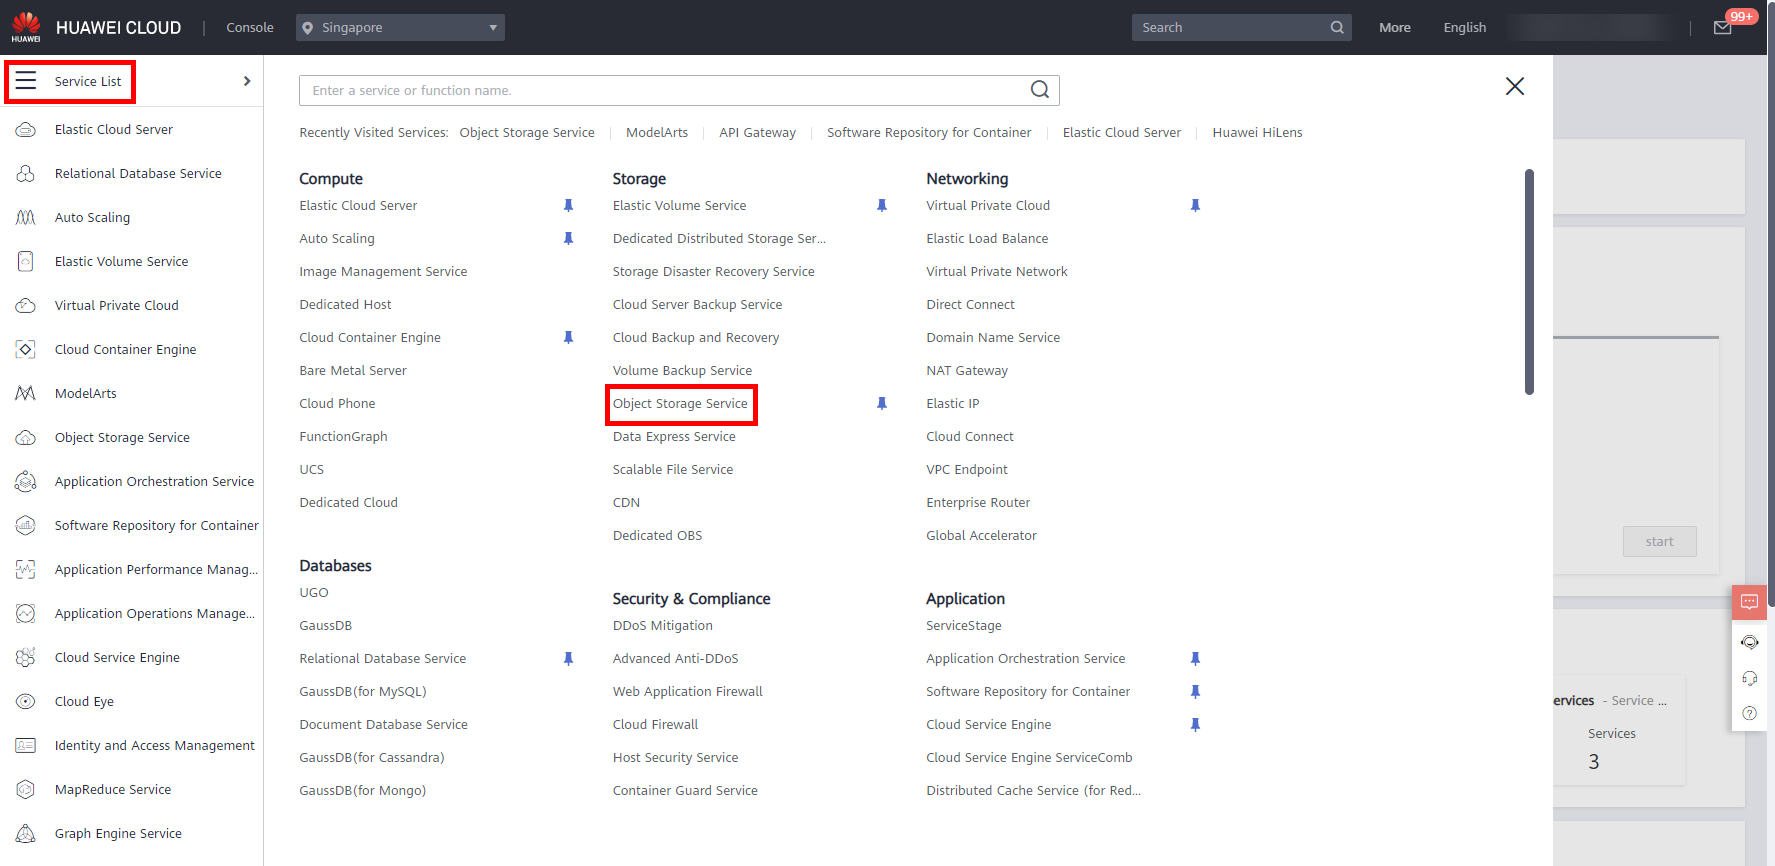
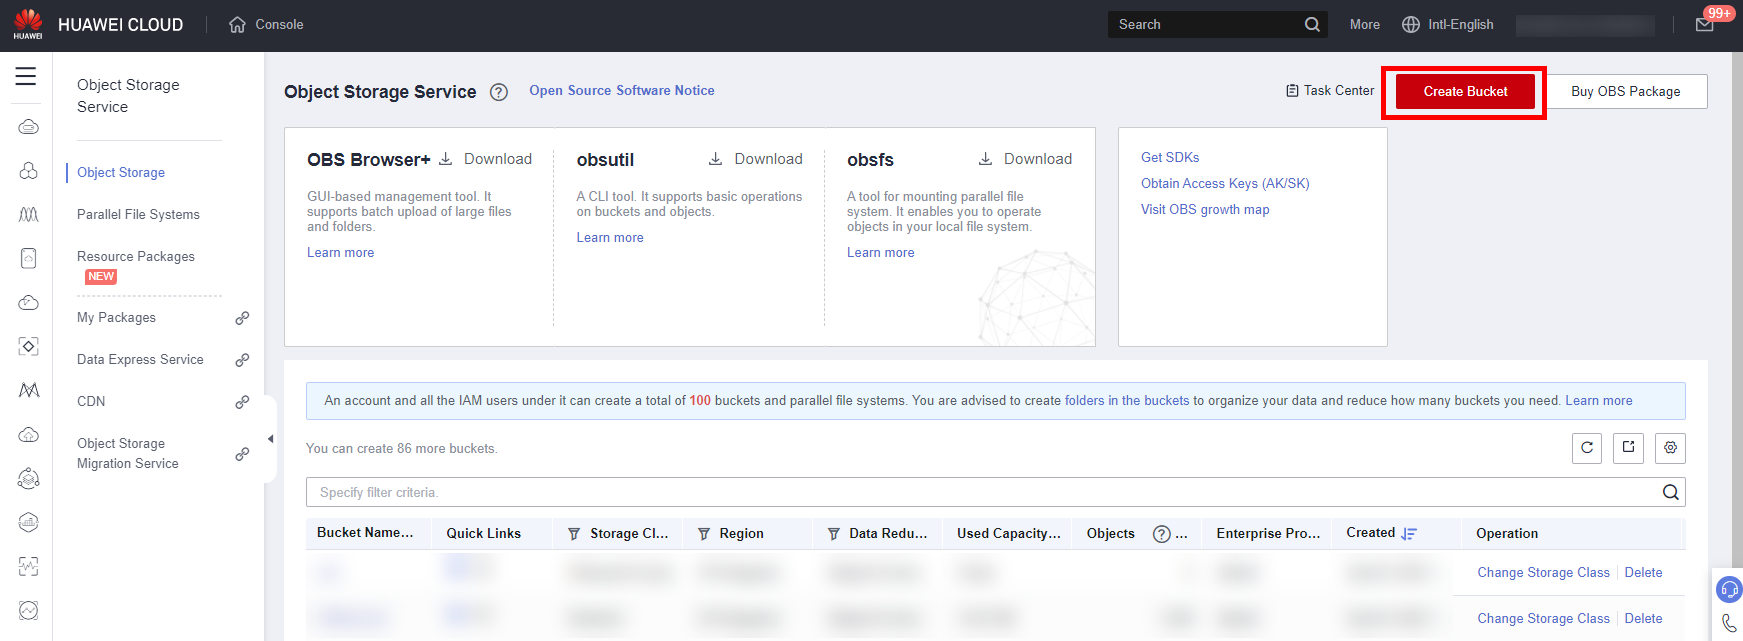
Click Create Bucket to access the creation page.
Start the creation. The parameters are as follows:
- Region: AP-Singapore;
- Bucket Name: User-defined;
- Data Redundancy Policy: Single-AZ storage;
- Default Storage Class: Standard;
- Bucket Policy: Private;
- Default Encryption: Default Disable;
Click Create Now > OK. And click Bucket name > Objects > Create Folder to create a folder named dataset.

1.2 Downloading Datasets
The experiment prepares a dataset for classification of four categories of the flower images.
This dataset contains four categories of flower images: daisy, sunflower, rose, and dandelion, with 10 images of each category and 40 images in total.You can download and unzip the dataset: flowers_40.
Now, you need to upload the dataset to the decompressed folder created in the OBS bucket in the previous step.
Back to the OBS page, and access the folder created in the previous step. And click Upload Object, click add file in the dialog box.

Select all the files in the folder, you can use CTRL + A to select all files, and then click Upload.

2. Training Model
Next, retrain the Build-in Image Classification-ResNet_v1_50 algorithm by using the training set to obtain a new model.
Click Subscribe. If Subscribed is displayed, click Access Console, as shown below.


And then select service region: AP-Singapore, click OK, as shown in the following figure.

The Algorithm Management page is displayed, you can view the subscribed algorithms in the My Subscriptions list. Click the drop-down button, select the latest version, and click Create Training Job on the right.

Access the training job page. Set the parameters as follows:
- Name: User-defined, for example, job-flowers
- Description: Optional
- Creation By: The latest version of the subscribed algorithm is selected by default
- Input: Click Data path on the right, select the uploaded dataset: flowers_40, and click OK

- Output: Click the Data path on the right and create a folder in the OBS bucket created in 1.1 to store training output. You are advised to select an empty directory
- Hyperparameters: Default
- Resource Pool: Public resource pool
- Resource Type: GPU
- Instance Flavor: GPU: 1*NVIDIA-V100-pcie-32gb(32GB) | CPU: 8 vCPUs 64GB 780GB
- Compute Nodes: 1
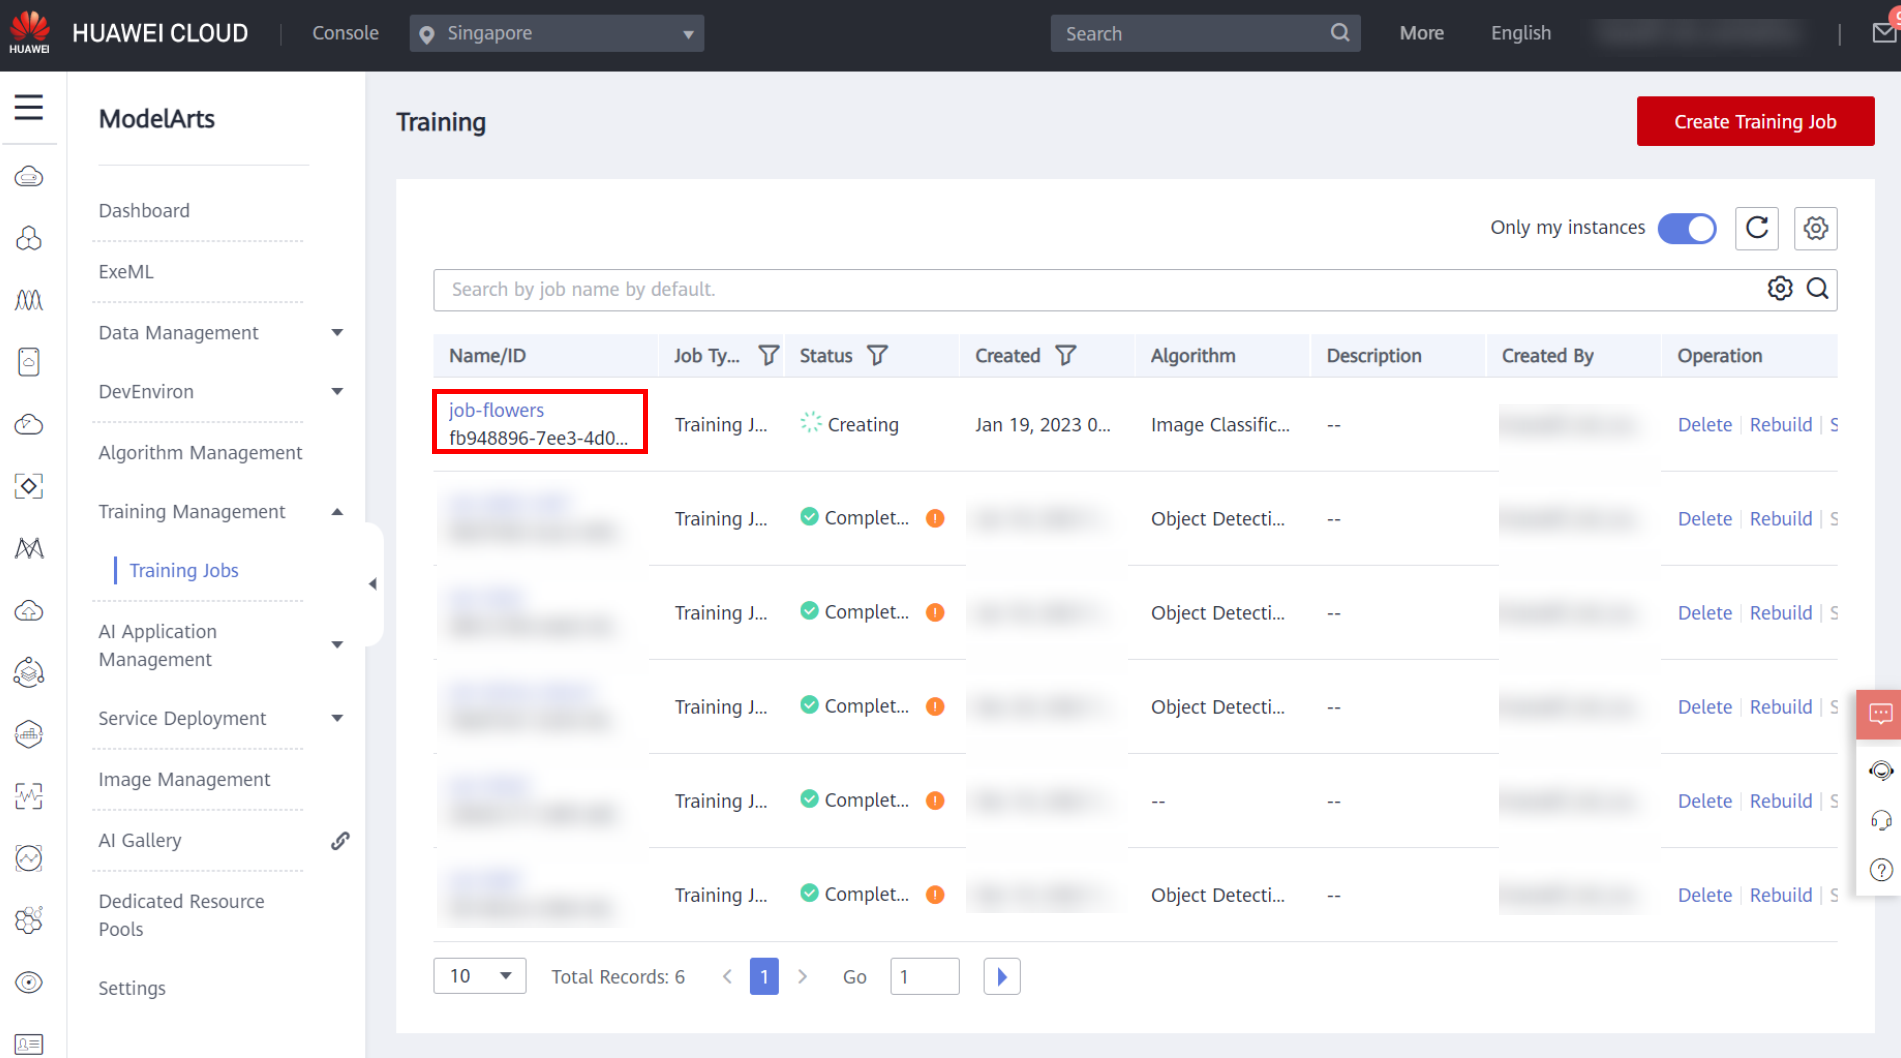
Retain the default values for other parameters. Click Submit. After confirming the parameters, click OK. The system automatically returns to the ModelArts-training job list. In the Training Job list, click the job name to access the training job details page.


On the left of the training job details page, you can view basic information about the training job and algorithm configuration. On the right of the training job details page, you can view the system logs of the training job. The training log window provides the log preview, log download, and keyword search capabilities. and resource usage.

3. Deployment Model
After training model is completed, you can create an AI application and deploy the model as a real-time prediction service. The procedure is as follows:
3.1 Creating an AI Application
Click Create AI Application in the upper right corner. The Create AI Application page is displayed.

Set the parameters as follows:
- Name: model-flowers;
- Version: Default;
- Meta Model Source: Select from Training, and then select the model trained in step 2;
- AI Engine: Default;
- Deployment type: Real-Time Service;
Retain the default values for other parameters. After confirming the parameters, click Create Now to complete the model creation.

Return to the AI application list. If the AI application status is Normal, the AI application is successfully created.
Note: Importing a model takes about 3 minutes.

3.2 Deploying Real-Time Services
Click the drop-down button next to the created AI application name, click Deploy in the Operation column, and select Real-Time Services in the deployment menu bar. Alternatively, click the AI application name to access the model details page, click Deploy in the upper right corner of the page, and choose Real-Time Services from the deployment menu.

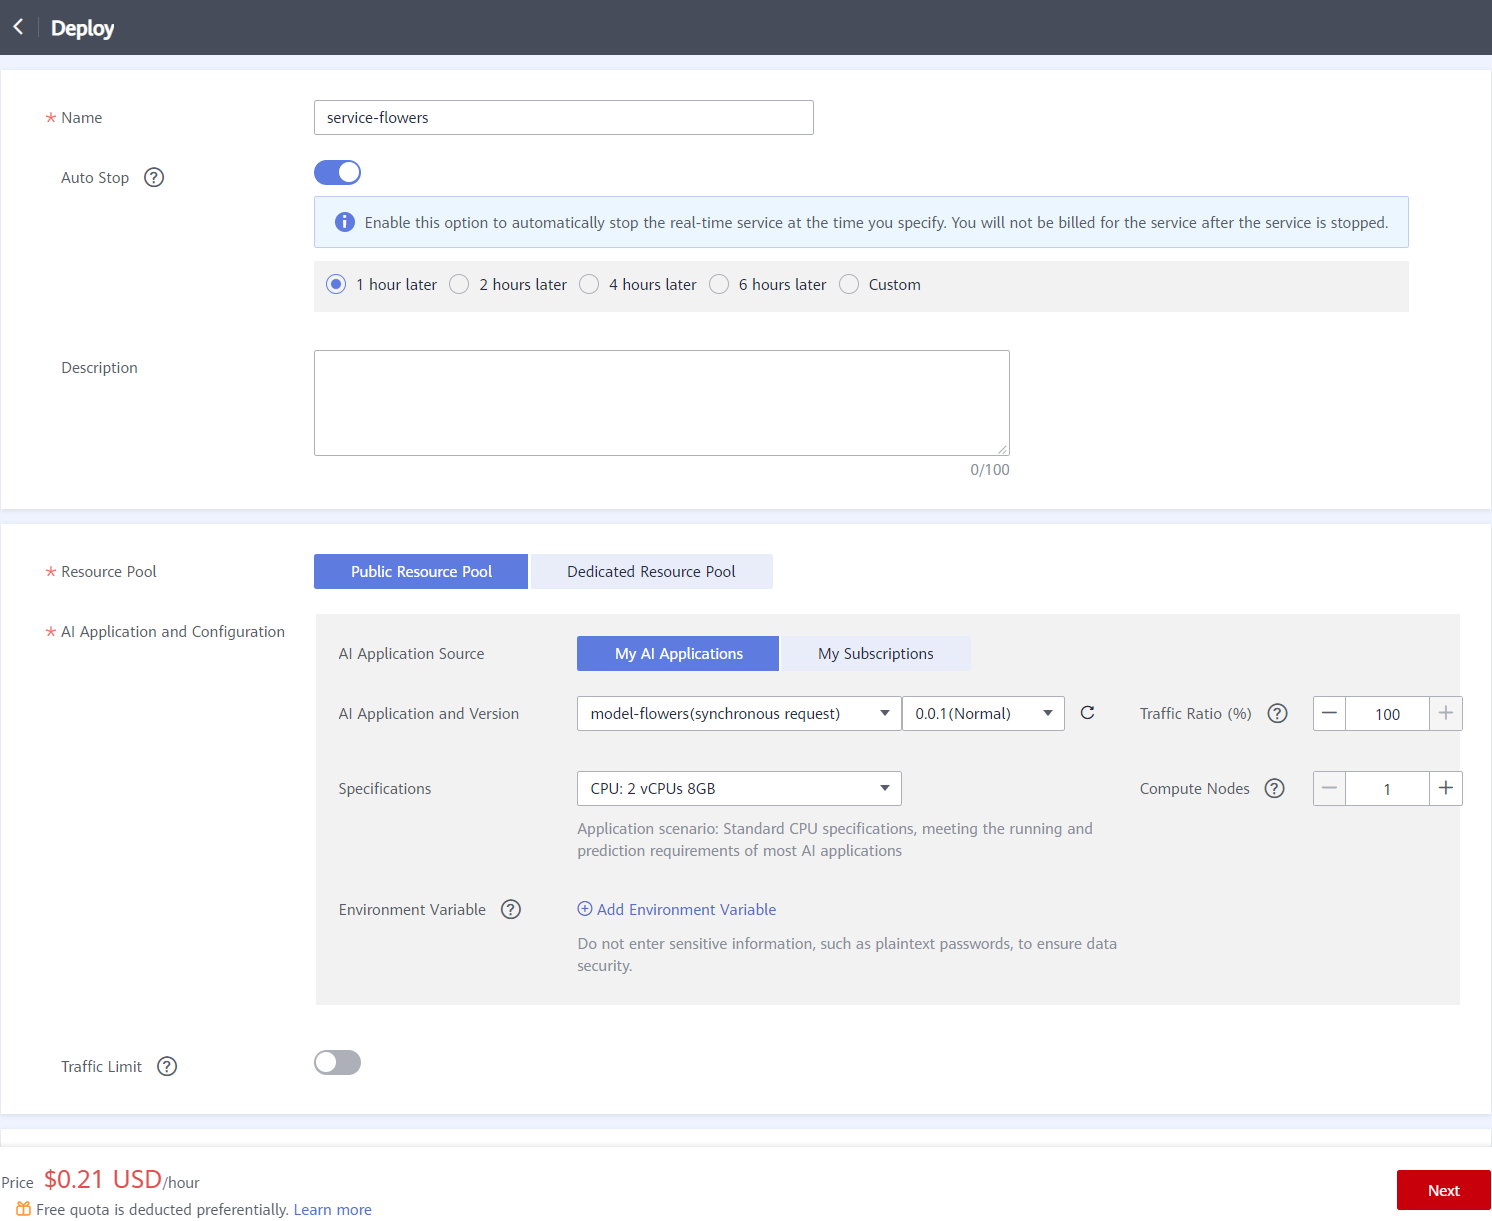
Set the parameters as follows:
- Name: service-flowers;
- Auto stop: Enable, 1 hour later;
- Description: User-defined
- Resource pool: Public Resource Pool
- AI Application and Configuration: AI Application Source from My AI Applications; AI Application and Version- Default Auto-Filled ; Specifications- CPU: 2 vCPUs 8GB
After the parameters are set, click Next and click Submit as prompted to complete the deployment of the real-time service. You can access the Real-Time Service List page and wait until the service deployment is complete. When the service status changes to Running, the service deployment is successful.
Note: The deployment model is the imported model. After the deployment is created, wait for about 2 minutes for the deployment to be successful. If the deployment service status is Running, proceed to the next step.
4. Initiate a Prediction Request
You can download test image. And click the name of the real-time service that has been deployed (completed deployment) to access the service details page. Click Prediction tab to perform real-time prediction, as shown in the following figure.
Operation: Click Upload on the left, select the downloaded image to be predicted, and click Predict.

The returned values are shown in the following figure.

The prediction result shows that the matching degree of the selected image with the four types of flowers is:
dandelion: 1.000 (100% matching degree: 0.000)
daisy: 0.000 (0% matching degree: 0%)
sunflower: 0.000 (0% matching degree: 0%)
rose: 0.000 (0% matching degree: 0%)

- 点赞
- 收藏
- 关注作者
评论(0)