Nginx核心实战配置(配置文件详解、代理配置、HTTPS)

@[toc]
前言
本篇博客是对Nginx配置文件详解、代理配置、HTTPS的梳理,如有问题请指出!
所有博客文件目录索引:博客目录索引(持续更新)
一、下载与安装
Nginx:HTTP的反向代理服务器。
好处:
- 实现动态静态资源分离。例如你再服务器上部署一个tomcat服务器,你将静态资源放置在nginx而不是tomcat中,这样的话静态资源无需经过Tomcat,Tomcat只负责处理动态请求。
- 可单独作为静态服务器。
- 实现负载均衡。
1.1、windows下载
下载
下载地址:nginx-download
停止服务时的坑:nginx: [error] CreateFile() “D:\nginx-1.20.1/logs/nginx.pid“ failed (2: The system cannot find the
相关命令:
start nginx # 启动,下载好之后到指定目录下执行启动命令即可
nginx -s quit  # 关闭nginx
nginx -s reload  # 优雅重启

# 若是想要停止服务还可以使用这个命令或者使用任务管理器找到nginx.exe来关闭
taskkill /IM nginx.exe /F   # 关闭所有正在启动的nginx服务
netstat -aon|findstr "4567"  # 查找指定的端口号,查询到pid进程号
taskkill -PID 7136 -F  # 关闭指定进程号应用
1.2、Linux中安装nginx
# 安装一下yum工具集
yum install yum-utils

# 新建一个文件,该repo就是一个源信息,也就是说告诉yum这个nginx可以到哪里下载
vim /etc/yum.repos.d/nginx.repo

# 配置信息如下(这里是centos7的yum源)
[nginx-stable]
name=nginx stable repo
baseurl=http://nginx.org/packages/centos/7/$basearch/
gpgcheck=1
enabled=1
gpgkey=https://nginx.org/keys/nginx_signing.key
module_hotfixes=true

[nginx-mainline]
name=nginx mainline repo
baseurl=http://nginx.org/packages/mainline/centos/7/$basearch/
gpgcheck=1
enabled=0
gpgkey=https://nginx.org/keys/nginx_signing.key
module_hotfixes=true

# 查看一下yum源中有哪些nginx包
yum list | grep nginx

# 选择一个稳定版本即可下载
yum install nginx 1:1.16.1-1.el7.ngx

# 安装成功后,我们查看一下版本
nginx -v
二、配置文件详解(nginx.conf与default.conf)
默认不指定nginx配置就会自动去加载nginx.conf!
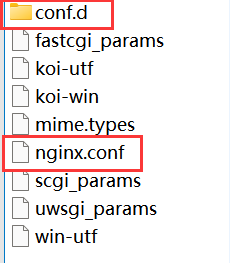
nginx.conf:
语法:
;:表示结果含义。{}:组织多条指令。include:引入的意思。#:注释的含义$:变量的意思。拿到真正的变量值
user  nginx;  # 运行用户,默认是nginx
worker_processes  auto;  # nginx进程数,一般设置为和cpu核数一样

error_log  /var/log/nginx/error.log notice;   # 全局错误日志路径
pid        /var/run/nginx.pid;  # 进程pid路径


events {
    worker_connections  1024;  # 最大连接数
}

# 设置http服务器
http {
    include       /etc/nginx/mime.types;
    default_type  application/octet-stream;

    # 设置打印日志的格式
    log_format  main  '$remote_addr - $remote_user [$time_local] "$request" '
                      '$status $body_bytes_sent "$http_referer" '
                      '"$http_user_agent" "$http_x_forwarded_for"';

    # 访问日志的路径(记录http请求以及ip地址等一些头部信息)
    access_log  /var/log/nginx/access.log  main;

    # 开启高效传输模式(默认开启)
    sendfile        on;
    #tcp_nopush     on;

    # 长连接超时时间,单位是秒
    keepalive_timeout  65;

    #传输时是否压缩,压缩的话需要解压,但是传的大小就小了
    #gzip  on;

    #加载其他的配置文件,一带多,这里模糊匹配多个
    include /etc/nginx/conf.d/*.conf;
}
default.conf:
server {
    listen       80;
    server_name  localhost;  # 服务器主机名(一般为ip地址)

    #access_log  /var/log/nginx/host.access.log  main;

	# 匹配指定/请求
    location / {
        root   /usr/share/nginx/html;  # 默认匹配到文件目录路径,会进行转发到该目录下
        index  index.html index.htm;  # 指定的主页
    }

    #error_page  404              /404.html;

    # redirect server error pages to the static page /50x.html
    # 发生错误时跳转的地址
    error_page   500 502 503 504  /50x.html;
    location = /50x.html {
        root   /usr/share/nginx/html;   # 直接跳转至该目录并访问50x.html
    }

    # proxy the PHP scripts to Apache listening on 127.0.0.1:80
    #
    #location ~ \.php$ {
    #    proxy_pass   http://127.0.0.1;
    #}

    # pass the PHP scripts to FastCGI server listening on 127.0.0.1:9000
    #
    #location ~ \.php$ {
    #    root           html;
    #    fastcgi_pass   127.0.0.1:9000;
    #    fastcgi_index  index.php;
    #    fastcgi_param  SCRIPT_FILENAME  /scripts$fastcgi_script_name;
    #    include        fastcgi_params;
    #}

    # deny access to .htaccess files, if Apache's document root
    # concurs with nginx's one
    #
    #location ~ /\.ht {
    #    deny  all;
	#}
}
三、编写配置文件来进行代理
三步骤
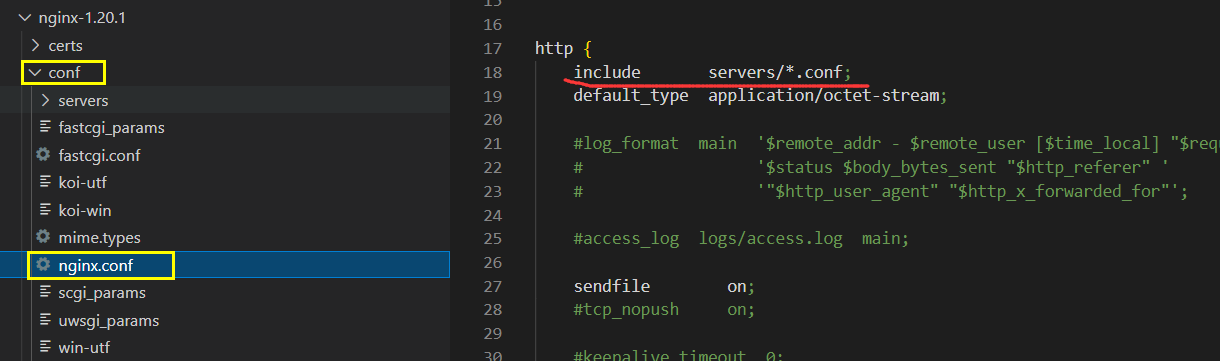
step1:找到conf/ngin.conf配置文件,设置include
含义是让当前servers目录下匹配所有*.conf令其生效:
include servers/*.conf;
step2:编写配置文件,配置监听
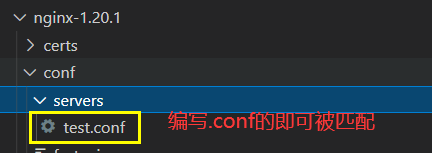
server{
    listen  80;  # 监听端口号
    server_name test.com;  # 发送方的主机名


    location / {
        proxy_pass  http://127.0.0.1:5500;  # 反向代理到的目标地址(这是本地起的服务器)
        proxy_set_header Host $host; # 设置发送方为原本发送主机(不设置就是为127.0.0.1:5500,设置为test.com),$host就是每个请求带过来的host
    }
}
额外说明:一旦通过nginx进行代理转发,那么对应服务器响应的头就是指定的配置的地址:经过代理之后,host就会被修改,实际就是由nginx来进行二次请求发送到指定服务器
注意:这里配置的主机名需要在本地host文件中配置,否则可能就会访问到外网的主机去了!
step3:配置windows的hosts文件
位置:C:\Windows\System32\drivers\etc

127.0.0.1 test.com
使用命令来生效hosts文件:ipconfig /flushdns,刷新所有 dns内容
之后我们访问url:http://test.com,即可跳转至本地的运行在5500端口的服务。
三、代理配置与代理缓存
暂未学习
四、HTTPS
4.1、开启https服务
描述
HTTP是不安全的,在传输过程中很有很能被拦截,传输的内容就会被读取,是明文传输的过程!
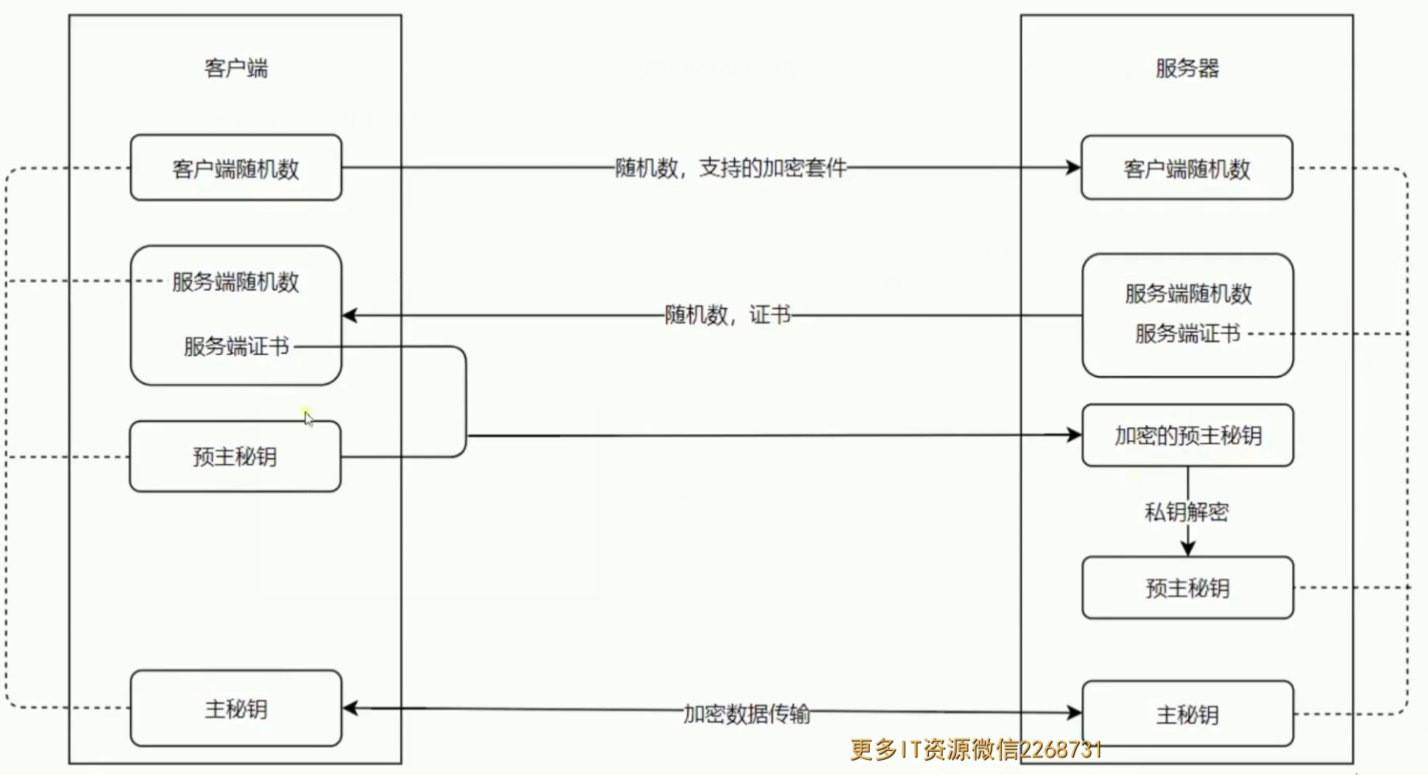
HTTPS具有私钥与公钥
使用公钥加密过后的数据传输到服务器后使用私钥进行解密,注意了只能够通过私钥才能够解密。私钥放在服务器端。
公钥私钥主要是用在握手的时候进行传输,传输的是加密字符串。
本机配置测试
使用git bush工具来生成公钥与私钥:
openssl req -x509 -newkey rsa:2048 -nodes -sha256 -keyout localhost-privkey.pem -out localhost-cert.pem
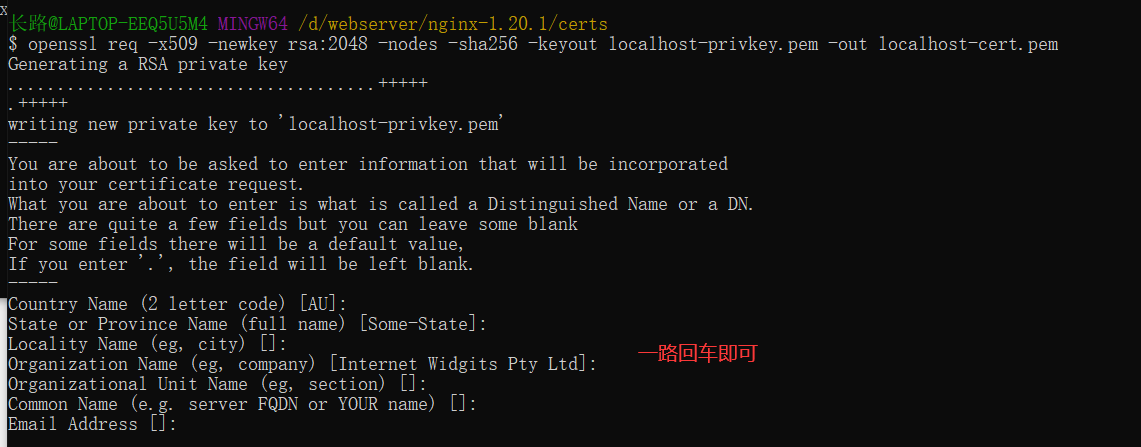
我们将其放置在certs目录下:

公钥私钥准备好之后,来进行配置!
注意配置https时默认使用的是443端口,之前都是监听的80端口也就是http默认请求访问的端口!新增的配置内容就是其中的6-8行
server{
    listen  443 ssl;  # 1、添加ssl,表示开启ssl。(下面ssl on在启动nginx时会报错就不使用了)
    server_name test.com;

    # 支持https
    # ssl on;  # 开启ssl,就是https加密算法
    ssl_certificate_key ../certs/localhost-privkey.pem;  # 2、设置ssl密钥
    ssl_certificate ../certs/localhost-cert.pem;  # 3、公钥

    location / {
        proxy_pass  http://127.0.0.1:5500;
        proxy_set_header Host $host;
    }
}
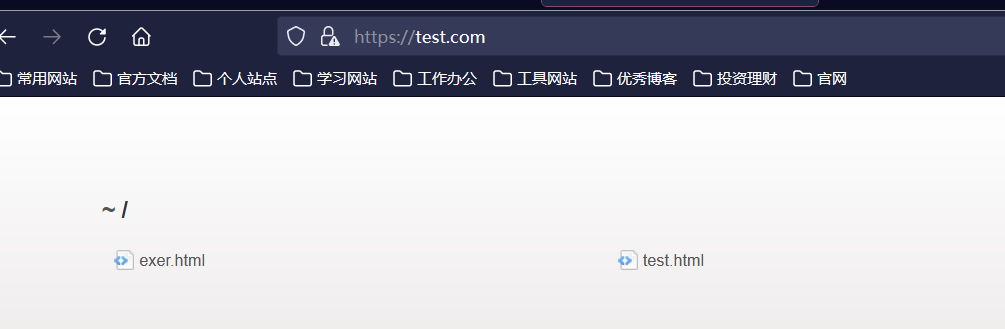
此时我们来访问网址:https://test.com

证明https服务已经可以访问了!为什么会有下面的提示呢,是因为像chrome这类浏览器它们认为的安全证书是要通过一个有权威的机构去签发的,权威机构签发证书首先会验证你的域名确定是你的并且能够保证这个服务是你来运行的,这个时候才会给你签发证书,所以这里的话仅仅是生成用来测试所以会出现这样的情况!
我们直接选择高级…,继续访问即可,下面访问成功!
4.2、实现访问HTTP的时候就访问HTTPS
对于访问http时访问https,我们让nginx来监听80端口,接着进行重定向使用https来访问我们当前的服务器!
核心:17-22行,配置一个监听端口,之后来进行重定向转发
server{
    listen  443 ssl;
    server_name test.com;

    # 支持https
    # ssl on;  # 开启ssl,就是https加密算法
    ssl_certificate_key ../certs/localhost-privkey.pem;
    ssl_certificate ../certs/localhost-cert.pem;

    location / {
        proxy_pass  http://127.0.0.1:5500;
        proxy_set_header Host $host;
    }
}

# 支持访问http时跳转https
server{
    listen 80 default_server;
    listen [::]:80 default_server;  # 表示使用http的情况
    server_name test.com;  # 设置访问的服务器主机名
    return 302 https://$server_name$request_uri;
        # 举例:http://test.com/user/api=>https://test.com/user/api
}
此时我们来访问http://test.com,就会自动进行重定向进行https访问!

实战
1、静态网页部署(https)
注意:我们vue打包好的静态资源传入到服务器后,一定要配置11-12行的内容,否则实际访问页面时css不会加载
server {
    listen       443 ssl;       # 监听服务器的80端口
    server_name  blog.changlu.xyz;# 你之前配置的二级域名 若是没有域名的话,填ip地址也是可以的,无非进行访问ip地址转发
    ssl_certificate certs/1_blog.changlu.xyz_bundle.crt;
    ssl_certificate_key certs/2_blog.changlu.xyz.key;
    ssl_session_timeout 5m;
    ssl_protocols TLSv1 TLSv1.1 TLSv1.2;
    ssl_ciphers ECDHE-RSA-AES128-GCM-SHA256:HIGH:!aNULL:!MD5:!RC4:!DHE;
    ssl_prefer_server_ciphers on;
    location / {
        include mime.types;
        default_type application/octet-stream;
        root   /home/dist;
        index  index.html index.htm;
    }
    access_log /home/logs/blog.changlu.xyz.log;  # 注意注意:需要提前创建在对应路径下创建logs目录,后面的blog.changlu.xyz.log可以不创
}

server {
   listen 80;
   server_name blog.changlu.xyz;
   return 301 https://$server_name$request_uri;
}
2、跨域配置
server {
  listen 80;
  server_name xy.xxx.com; // 接口的域名
  access_log  /data/www/logs/nginx/access.log main;
  # 添加请求头
  add_header 'Access-Control-Allow-Origin' '*' always;
  add_header 'Access-Control-Allow-Credentials' 'true';
  add_header 'Access-Control-Allow-Headers' 'Origin, X-Requested-With, Content-Type, Accept, Connection, User-Agent, Cookie,Content-Type, Authorization';
  add_header 'Access-Control-Allow-Methods' 'PUT,POST,GET,DELETE,OPTIONS' ;
  include nginx_xxx.conf;
  location / {
  	# 代理服务器地址
    proxy_pass http://192.168.1.212:8136;
    include nginx_proxy.conf;
  }
  error_page   500 502 503 504  /502.html;
  location = /50x.html {
    root   html;
  }
}
如上代码的含义是:监听80端口号,然后我们定义的接口的域名为 xy.xxx.com, 然后当我们访问 http://xy.xxx.com/xxxx这样的接口的时候,它会通过 location / {} 这样的反向代理到 http://192.168.1.212:8136上来,当然对于我们的host也需要绑定下 192.168.1.212 xy.xxx.com 就可以了。
3、代理服务器(多组)
当然如果代理服务器是一组服务器的话,我们可以使用upstream指令配置后端服务器组。如下代码:
# 服务器组指令
upstream proxy_xxx {
  server http://192.168.1.211:8136/xxx;
  server http://192.168.1.212:8136/xxx;
  server http://192.168.1.213:8136/xxx;
}

server {
  xxx
  location / {
    # 对应上面的upstream 后面的 proxy_xxx
    proxy_pass proxy_xxx;
    xxx
  }
  xxx
}
若是上面server接口没有指明协议的话,需要在 proxy_pass上加上:
# 服务器组指令
upstream proxy_xxx {
  server 192.168.1.211:8136/xxx;
  server 192.168.1.212:8136/xxx;
  server 192.168.1.213:8136/xxx;
}

server {
  server_name xy.xxx.com; // 接口的域名
  location / {
    # 这里加上对应的请求协议http
    proxy_pass http://proxy_xxx;
    xxx
  }
  xxx
}
注意点:若是使用proxy_pass http://192.168.1.212:8136/yyy,指明http的话,客户端还是以 http://xy.xxx.com/xxx访问接口的时候,那么nginx服务器就会将请求地址指向与http://192.168.1.212:8136/yyy了,此时对应的请求地址就会改变,所以我们一般反向代理到 ip地址+端口号即可。
proxy_pass中带上/的区别
首先第一组:location /
location / {
    #配置1 proxy_pass http://192.168.1.212:8136;
    #配置2 proxy_pass http://192.168.1.212:8136/;
    include nginx_proxy.conf;
}
客户端的接口请求是:http://xy.xxx.com/xxx的时候,不管使用配置1还是配置2,都会指向内部服务器 http://192.168.1.212:8936/xxx.
第二组情况:location /bus/
location /bus/ {
    #配置1 proxy_pass http://192.168.1.212:8136;
    #配置2 proxy_pass http://192.168.1.212:8136/;
    include nginx_proxy.conf;
}
结论:若是访问如/bus/这样子请求路径,你设置proxy_pass的请求地址有带/,那么访问就会出问题!
4、本地动静分离
完整
server {
    listen       80;
    server_name  localhost;

    #charset koi8-r;
    #access_log  /var/log/nginx/log/host.access.log  main;

    # 官网首页
    location / {
        alias   /usr/share/nginx/html/front;
        index  index.html index.htm;
    }

    # 服务器转发
    location /api {
        proxy_pass  http://127.0.0.0:8999/api;
        # proxy_set_header Host $host;
        # proxy_set_header X-Real-Ip $remote_addr;
        # proxy_set_header X-Forwarded-For $remote_addr;
        # 最大请求体为20MB
        client_max_body_size 20m;
    }

    # 访问管理页面
    location /admin/ {
        alias   /usr/share/nginx/html/admin/;
        index  index.html index.htm;
    }

}
局部:
# 服务器转发
location /api {
    # 无论是http://192.168.1.109:8999/api或者http://192.168.1.109:8999不带我都能够使用nginx来进行转发实现
    proxy_pass http://192.168.1.109:8999/api;
    proxy_set_header Host $host;
    proxy_set_header X-Real-Ip $remote_addr;
    proxy_set_header X-Forwarded-For $remote_addr;
}

- 点赞
- 收藏
- 关注作者
评论(0)