使用segmentation_models.pytorch图像分割框架实现对人物的抠图

@[toc]
摘要
在前面的文章中,我提到过segmentation_models.pytorch语义分割框架,今天这篇文章向大家展示如何使用segmentation_models.pytorch实现语义分割算法。
通过这篇文章,你可以学到:
1、如何使用segmentation_models.pytorch图像分割框架实现语义分割算法?
2、如何使用和加载语义分割数据集?
3、如何使用交叉熵和diceloss组合?
4、如何使用wandb可视化。
5、了解二分类语义分割的常用做法。
6、如何实现二分类语义分割的训练。
7、如何实现二分类语义分割的预测。
我会在文章的末尾放上本文用的代码和数据集,可以让无法复现的朋友,通过下载我的代码快速复现算法,但是我还是希望大家能一步一步的去操作。如果有错误,也欢迎大家指正,谢谢!
二分类语义分割的常用做法
关于二分类一般有两种做法:
第一种输出是单通道,即网络的输出 output 为 [batch_size, 1, height, width] 形状。其中 batch_szie 为批量大小,1 表示输出一个通道,height 和 width 与输入图像的高和宽保持一致。
在训练时,输出通道数是 1,网络得到的 output 包含的数值是任意的数。给定的 target ,是一个单通道标签图,数值只有 0 和 1 这两种。为了让网络输出 output 不断逼近这个标签,首先会让 output 经过一个sigmoid 函数,使其数值归一化到[0, 1],得到 output1 ,然后让这个 output1 与 target 进行交叉熵计算,得到损失值,反向传播更新网络权重。最终,网络经过学习,会使得 output1 逼近target。
训练结束后,网络已经具备让输出的 output 经过转换从而逼近 target 的能力。首先将输出的 output 通过sigmoid 函数,然后取一个阈值(一般设置为0.5),大于阈值则取1反之则取0,从而得到预测图 predict。后续则是一些评估相关的计算。
如果网络的最后一层使用sigmoid,则选用BCELoss,如果没有则选择用BCEWithLogitsLoss,例:
最后一层没有sigmod
output = net(input)  # net的最后一层没有使用sigmoid
loss_func1 = torch.nn.BCEWithLogitsLoss()
loss = loss_func1(output, target)
加上sigmod
output = net(input)  # net的最后一层没有使用sigmoid
output = F.sigmoid(output)
loss_func1 = torch.nn.BCEWithLoss()
loss = loss_func1(output, target)
预测的时:
output = net(input)  # net的最后一层没有使用sigmoid
output = F.sigmoid(output)
predict=torch.where(output>0.5,torch.ones_like(output),torch.zeros_like(output))
第二种输出是多通道,即网络的输出 output 为 [batch_size, num_class, height, width] 形状。其中 batch_szie 为批量大小,num_class 表示输出的通道数与分类数量一致,height 和 width 与输入图像的高和宽保持一致。
在训练时,输出通道数是 num_class(这里取2)。给定的 target ,是一个单通道标签图,数值只有 0 和 1 这两种。为了让网络输出 output 不断逼近这个标签,首先会让 output 经过一个 softmax 函数,使其数值归一化到[0, 1],得到 output1 ,在各通道中,这个数值加起来会等于1。对于target 他是一个单通道图,首先使用onehot编码,转换成 num_class个通道的图像,每个通道中的取值是根据单通道中的取值计算出来的,例如单通道中的第一个像素取值为1(0<= 1 <=num_class-1,这里num_class=2),那么onehot编码后,在第一个像素的位置上,两个通道的取值分别为0,1。也就是说像素的取值决定了对应序号的通道取1,其他的通道取0,这个非常关键。上面的操作执行完后得到target1,让这个 output1 与 target1 进行交叉熵计算,得到损失值,反向传播更新网路权重。最终,网络经过学习,会使得 output1 逼近target1(在各通道层面上)。
训练结束后,网络已经具备让输出的 output 经过转换从而逼近 target 的能力。计算 output 中各通道每一个像素位置上,取值最大的那个对应的通道序号,从而得到预测图 predict。
训练选择用的loss是加插上损失函数,例:
output = net(input)  # net的最后一层没有使用sigmoid
loss_func = torch.nn.CrossEntropyLoss()
loss = loss_func(output, target)
预测时
output = net(input)  # net的最后一层没有使用sigmoid
predict = output.argmax(dim=1)
本次实战选用的第二种做法。
下载代码后,解压到本地,如下图:

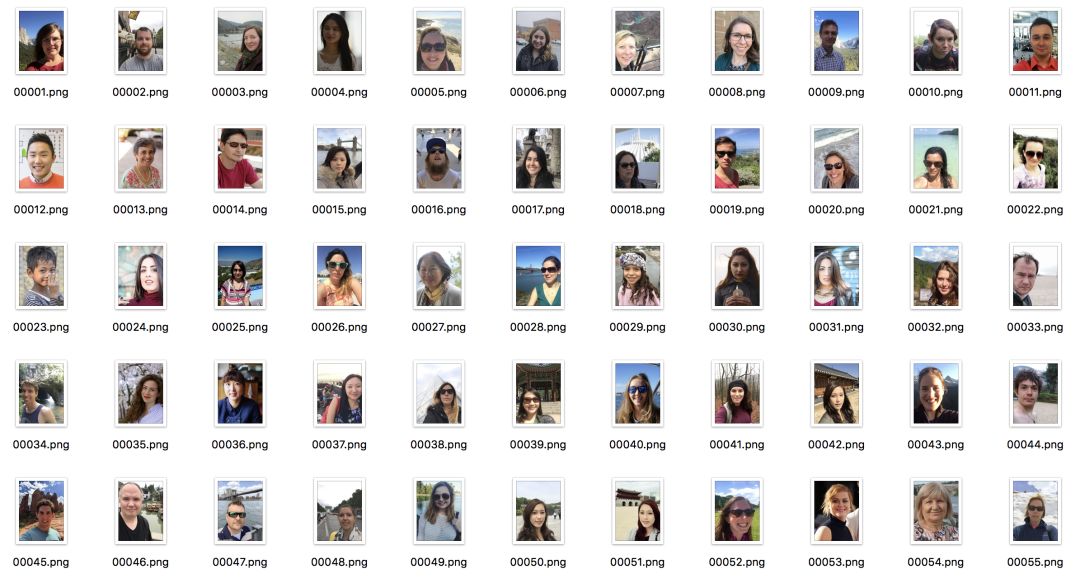
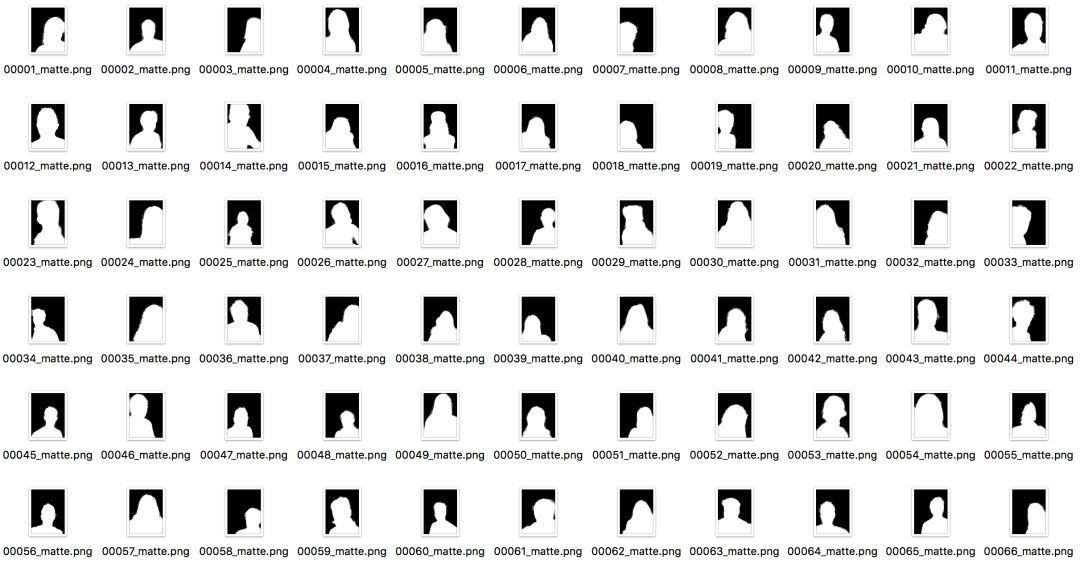
数据集
数据集地址:http://www.cse.cuhk.edu.hk/~leojia/projects/automatting/,发布于2016年。
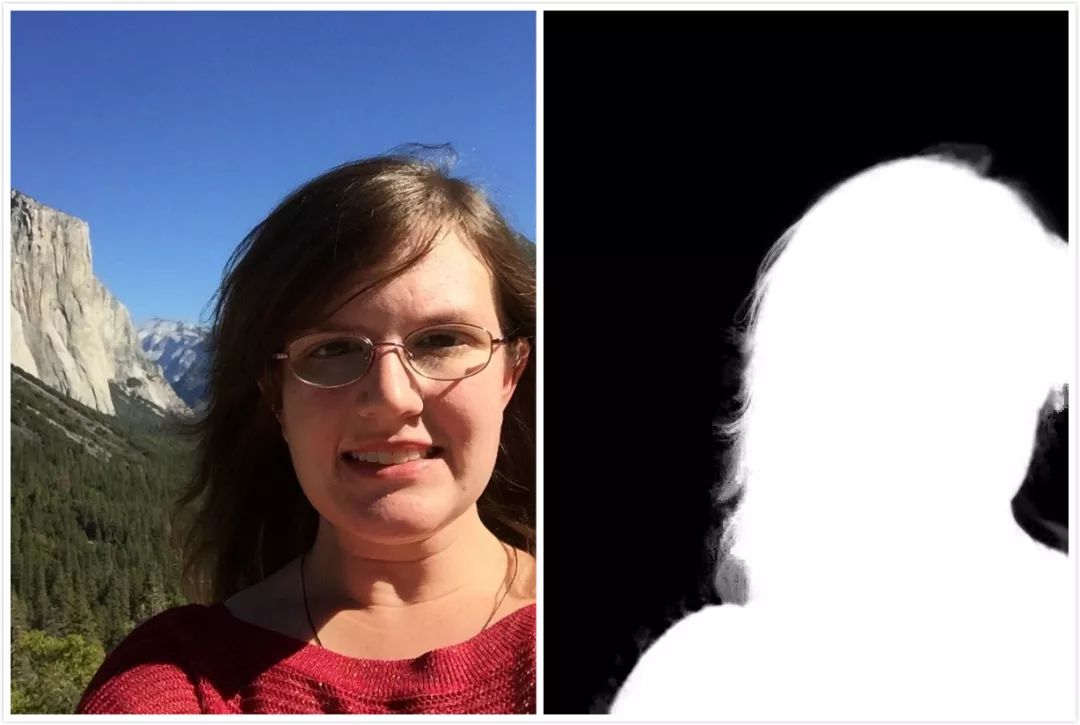
数据集包含2000张图,训练集1700张,测试集300张,数据都是来源于Flickr的肖像图,图像原始分辨率大小为600×800,其中Matting用closed-form matting和KNN matting方法生成。
由于肖像分割数据集商业价值较高,因此公开的大规模数据集很少,这个数据集是其中发布较早,使用范围也较广的一个数据集,它有几个比较重要的特点:
(1) 图像分辨率统一,拍摄清晰,质量很高。
(2) 所有图像均为上半身的肖像图,人像区域在长度和宽度均至少占据图像的2/3。
(3) 人物的姿态变化很小,都为小角度的正面图,背景较为简单。
[1] Shen X, Tao X, Gao H, et al. Deep Automatic Portrait Matting[M]// ComputerVision – ECCV 2016. Springer International Publishing, 2016:92-107.
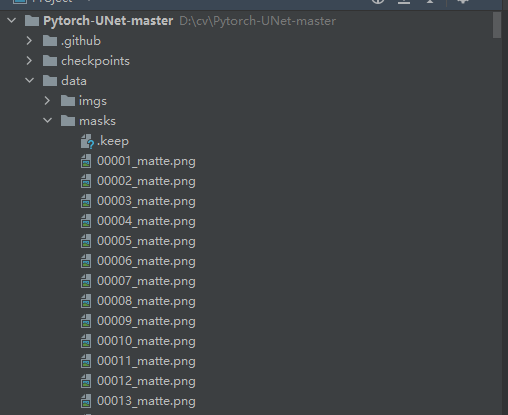
将数据集下载后放到将训练集放到data文件夹中,其中图片放到imgs文件夹中,mask放到masks文件夹中,测试集放到test文件夹下面:
由于原程序是用于Carvana Image Masking Challenge,所以我们需要修改加载数据集的逻辑,打开utils/data_loading.py文件:
class CarvanaDataset(BasicDataset):
    def __init__(self, images_dir, masks_dir, scale=1):
        super().__init__(images_dir, masks_dir, scale, mask_suffix='_matte')
将mask_suffix改为“_matte”。
针对segmentation_models.pytorch,我们需要将图片的尺寸统一修改为512×512大小的,修改方法如下:
   def preprocess(cls, pil_img, scale, is_mask):
        # w, h = pil_img.size
        # newW, newH = int(scale * w), int(scale * h)
        # assert newW > 0 and newH > 0, 'Scale is too small, resized images would have no pixel'
        pil_img = pil_img.resize((512, 512), resample=Image.NEAREST if is_mask else Image.BICUBIC)
        img_ndarray = np.asarray(pil_img)
        if len(img_ndarray.shape) == 2:
            img_ndarray = np.expand_dims(img_ndarray, axis=0)
        if img_ndarray.ndim == 2 and not is_mask:
            img_ndarray = img_ndarray[np.newaxis, ...]
        elif not is_mask:
            img_ndarray = img_ndarray.transpose((2, 0, 1))
        if img_ndarray.max() > 1:
            img_ndarray = img_ndarray / 255
        return img_ndarray
segmentation_models.pytorch简介与使用
segmentation_models_pytorch是一个基于PyTorch的图像分割神经网络
这个新集合由俄罗斯的程序员小哥Pavel Yakubovskiy一手打造。
github地址:https://github.com/qubvel/segmentation_models.pytorch
该库的主要功能是:
- 高级API(只需两行即可创建神经网络)
- 用于二分类和多类分割的9种模型架构(包括传奇的Unet)
- 113 个可用编码器(以及 400 多个来自 timm 的编码器)
- 所有编码器均具有预训练的权重,以实现更快更好的收敛
一、安装
PyPI version:
pip install segmentation-models-pytorch
- Latest version from source:
pip install git+https://github.com/qubvel/segmentation_models.pytorch
二、创建模型
- 由于该库是基于PyTorch框架构建的,因此创建的细分模型只是一个PyTorch nn.Module,可以轻松地创建它:
import segmentation_models_pytorch as smp
model = smp.Unet()
除了Unet,还有很多其他的模型,如下图:
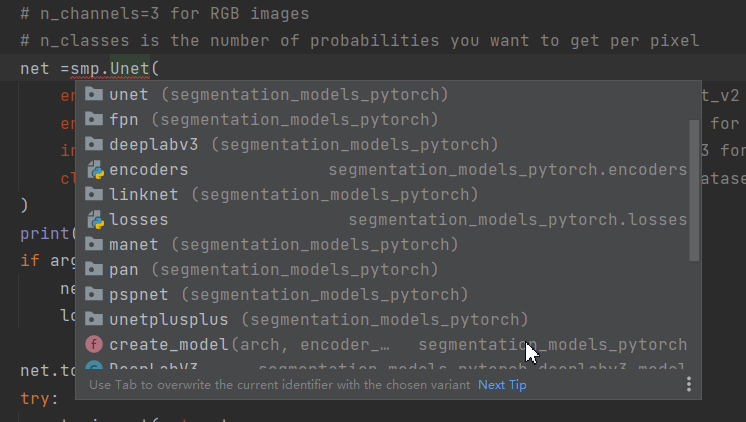
- 根据任务的不同,您可以通过选择具有更少或更多参数的主干并使用预训练的权重来初始化它来更改网络体系结构:
model = smp.Unet('resnet34', encoder_weights='imagenet')
- 更改模型中输出类的数量:
model = smp.Unet('resnet34', classes=3, activation='softmax')
- 所有模型均具有预训练的编码器,因此您必须按照权重预训练的相同方法准备数据:
from segmentation_models_pytorch.encoders import get_preprocessing_fn
preprocess_input = get_preprocessing_fn('resnet18', pretrained='imagenet')
对于segmentation_models.pytorch,我的态度是:使用框架一时爽,一直使用一直爽。
训练
打开train.py,先查看全局参数:
def get_args():
    parser = argparse.ArgumentParser(description='Train the UNet on images and target masks')
    parser.add_argument('--epochs', '-e', metavar='E', type=int, default=300, help='Number of epochs')
    parser.add_argument('--batch-size', '-b', dest='batch_size', metavar='B', type=int, default=16, help='Batch size')
    parser.add_argument('--learning-rate', '-l', metavar='LR', type=float, default=0.001,
                        help='Learning rate', dest='lr')
    parser.add_argument('--load', '-f', type=str, default=False, help='Load model from a .pth file')
    parser.add_argument('--scale', '-s', type=float, default=0.5, help='Downscaling factor of the images')
    parser.add_argument('--validation', '-v', dest='val', type=float, default=10.0,
                        help='Percent of the data that is used as validation (0-100)')
    parser.add_argument('--amp', action='store_true', default=False, help='Use mixed precision')
    return parser.parse_args()
epochs:epoch的个数,一般设置为300。
batch-size:批处理的大小,根据显存的大小设置。
learning-rate:学习率,一般设置为0.001,如果优化器不同,初始的学习率也要做相应的调整。
load:加载模型的路径,如果接着上次的训练,就需要设置上次训练的权重文件路径,如果有预训练权重,则设置预训练权重的路径。
scale:放大的倍数,这里设置为0.5,把图片大小变为原来的一半。
validation:验证验证集的百分比。
amp:是否使用混合精度?
比较重要的参数是epochs、batch-size和learning-rate,可以反复调整做实验,达到最好的精度。接下来是设置模型:
 net =smp.UnetPlusPlus(
        encoder_name="efficientnet-b3",  # choose encoder, e.g. mobilenet_v2 or efficientnet-b7
        encoder_weights='imagenet',  # use `imagenet` pretreined weights for encoder initialization
        in_channels=3,  # model input channels (1 for grayscale images, 3 for RGB, etc.)
        classes=2,  # model output channels (number of classes in your dataset)
    )
    print(net)
    if args.load:
        net.load_state_dict(torch.load(args.load, map_location=device))
        logging.info(f'Model loaded from {args.load}')
导入方式:
import segmentation_models_pytorch as smp
定义模型为UnetPlusPlus。
encoder_name:设置encoder的编码为efficientnet-b3。
encoder_weights:imagenet预训练权重。
in_channels:输入的channels为3.
classes:类别为2。
完成对模型的定义和参数的设置后,我们继续修改train_net函数。
try:
    dataset = CarvanaDataset(dir_img, dir_mask, img_scale)
except (AssertionError, RuntimeError):
    dataset = BasicDataset(dir_img, dir_mask, img_scale)

# 2. Split into train / validation partitions
n_val = int(len(dataset) * val_percent)
n_train = len(dataset) - n_val
train_set, val_set = random_split(dataset, [n_train, n_val], generator=torch.Generator().manual_seed(0))
# 3. Create data loaders
loader_args = dict(batch_size=batch_size, num_workers=4, pin_memory=True)
train_loader = DataLoader(train_set, shuffle=True, **loader_args)
val_loader = DataLoader(val_set, shuffle=False, drop_last=True, **loader_args)
上面的代码主要是对数据集的加载,主要过程有:
1、加载数据集。
2、按照比例切分训练集和验证集。
3、将训练集和验证集放入DataLoader中。
 # (Initialize logging)
    experiment = wandb.init(project='smp', resume='allow', anonymous='must')
    experiment.config.update(dict(epochs=epochs, batch_size=batch_size, learning_rate=learning_rate,val_percent=val_percent,save_checkpoint=save_checkpoint, img_scale=img_scale,amp=amp))
设置wandb,wandb是一款非常好用的可视化工具。安装和使用方法见:https://blog.csdn.net/hhhhhhhhhhwwwwwwwwww/article/details/116124285。
    optimizer = optim.AdamW(net.parameters(), lr=learning_rate, weight_decay=1e-3)
    scheduler = optim.lr_scheduler.ReduceLROnPlateau(optimizer, 'max', patience=2)  # goal: maximize Dice score
    grad_scaler = torch.cuda.amp.GradScaler(enabled=amp)
    criterion = nn.CrossEntropyLoss()
    global_step = 0
1、设置优化器optimizer为AdamW,我也尝试了改为SGD,通常情况下SGD的表现好一些。
2、ReduceLROnPlateau学习率调整策略,和keras的类似。本次选择用的是Dice score,所以将mode设置为max,当得分不再上升时,则降低学习率。
3、设置loss为 nn.CrossEntropyLoss()。交叉熵,多分类常用的loss。
接下来是train部分的逻辑,这里需要修改的如下:
注释如下代码:
# assert images.shape[1] == net.n_channels, \
                #     f'Network has been defined with {net.n_channels} input channels, ' \
                #     f'but loaded images have {images.shape[1]} channels. Please check that ' \
                #     'the images are loaded correctly.'
接下来修改loss计算的逻辑:
with torch.cuda.amp.autocast(enabled=amp):
    masks_pred = net(images)
    true_masks = F.one_hot(true_masks.squeeze_(1), 2).permute(0, 3, 1, 2).float()
    loss = criterion(masks_pred, true_masks) \
                           + dice_loss(F.softmax(masks_pred, dim=1).float(),
                                       true_masks,
                                       multiclass=True)
masks_pred的shape是[batch, 2, 400, 300],2对应的是类别。true_masks.shape是[batch, 1, 400, 300],所以要对true_masks做onehot处理。如果直接对true_masks做onehot处理,你会发现处理后的shape是[batch, 1, 400, 300,2],这样就和masks_pred 对不上了,所以在做onehot之前,先将第二维(也就是1这一维度)去掉,这样onehot后的shape是[batch, 400, 300,2],然后调整顺序,和masks_pred 的维度对上。
接下来就要计算loss,loss分为两部分,一部分时交叉熵,另一部分是dice_loss,这两个loss各有优势,组合使用效果更优。dice_loss在utils/dice_sorce.py文件中,代码如下:
import torch
from torch import Tensor

def dice_coeff(input: Tensor, target: Tensor, reduce_batch_first: bool = False, epsilon=1e-6):
    # Average of Dice coefficient for all batches, or for a single mask
    assert input.size() == target.size()
    if input.dim() == 2 and reduce_batch_first:
        raise ValueError(f'Dice: asked to reduce batch but got tensor without batch dimension (shape {input.shape})')
    if input.dim() == 2 or reduce_batch_first:
        inter = torch.dot(input.reshape(-1), target.reshape(-1))
        sets_sum = torch.sum(input) + torch.sum(target)
        if sets_sum.item() == 0:
            sets_sum = 2 * inter
        return (2 * inter + epsilon) / (sets_sum + epsilon)
    else:
        # compute and average metric for each batch element
        dice = 0
        for i in range(input.shape[0]):
            dice += dice_coeff(input[i, ...], target[i, ...])
        return dice / input.shape[0]

def dice_coeff_1(pred, target):
    smooth = 1.
    num = pred.size(0)
    m1 = pred.view(num, -1)  # Flatten
    m2 = target.view(num, -1)  # Flatten
    intersection = (m1 * m2).sum()
    return 1 - (2. * intersection + smooth) / (m1.sum() + m2.sum() + smooth)

def multiclass_dice_coeff(input: Tensor, target: Tensor, reduce_batch_first: bool = False, epsilon=1e-6):
    # Average of Dice coefficient for all classes
    assert input.size() == target.size()
    dice = 0
    for channel in range(input.shape[1]):
        dice += dice_coeff(input[:, channel, ...], target[:, channel, ...], reduce_batch_first, epsilon)

    return dice / input.shape[1]
def dice_loss(input: Tensor, target: Tensor, multiclass: bool = False):
    # Dice loss (objective to minimize) between 0 and 1
    assert input.size() == target.size()
    fn = multiclass_dice_coeff if multiclass else dice_coeff
    return 1 - fn(input, target, reduce_batch_first=True)
导入到train.py中,然后和交叉熵组合作为本项目的loss。
 loss = criterion(masks_pred, true_masks) \
        + dice_loss(F.softmax(masks_pred, dim=1).float(),
                                       true_masks,
                                       multiclass=True)
注释下面部分的代码:
 # for tag, value in net.named_parameters():
                        #     tag = tag.replace('/', '.')
                        #     histograms['Weights/' + tag] = wandb.Histogram(value.data.cpu())
                        #     histograms['Gradients/' + tag] = wandb.Histogram(value.grad.data.cpu())
segmentation_models.pytorch创建的模型没有named_parameters()方法。
接下来是对evaluate函数的逻辑做修改。
 mask_true = mask_true.to(device=device, dtype=torch.long)
 mask_true = F.one_hot(mask_true.squeeze_(1), 2).permute(0, 3, 1, 2).float()
 with torch.no_grad():
     # predict the mask
     mask_pred = net(image)
     num_classes=2
     # convert to one-hot format
     if num_classes == 1:
          mask_pred = (F.sigmoid(mask_pred) > 0.5).float()
         # compute the Dice score
          dice_score += dice_coeff(mask_pred, mask_true, reduce_batch_first=False)
     else:
          mask_pred = F.one_hot(mask_pred.argmax(dim=1), 2).permute(0, 3, 1, 2).float()
                    # compute the Dice score, ignoring background
         dice_score += multiclass_dice_coeff(mask_pred[:, 1:, ...], mask_true[:, 1:, ...],
                                                    reduce_batch_first=False)
增加对mask_trued的onehot逻辑。
定义num_classes为2,由于官方的模型没有类别数量的定义,所以只能自己定义类别数。
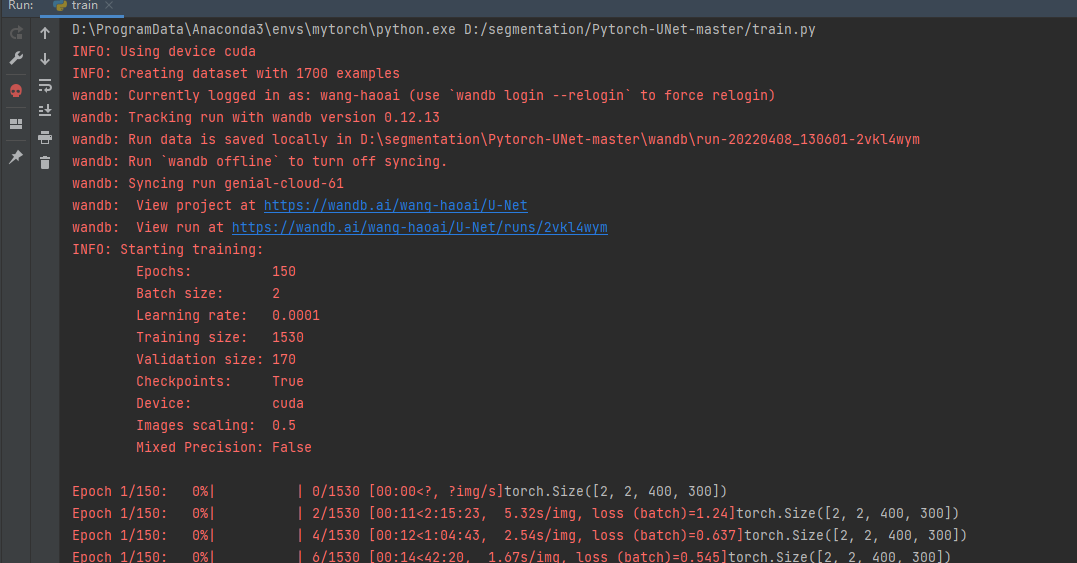
修改完上面的逻辑就可以开始训练了。
测试
完成训练后就可以测试了。打开predict.py,修改全局参数:
def get_args():
    parser = argparse.ArgumentParser(description='Predict masks from input images')
    parser.add_argument('--model', '-m', default='checkpoints/checkpoint_epoch150.pth', metavar='FILE',
                        help='Specify the file in which the model is stored')
    parser.add_argument('--input', '-i', metavar='INPUT',default='test/00002.png', nargs='+', help='Filenames of input images')
    parser.add_argument('--output', '-o', metavar='INPUT',default='00001.png', nargs='+', help='Filenames of output images')
    parser.add_argument('--viz', '-v', action='store_true',
                        help='Visualize the images as they are processed')
    parser.add_argument('--no-save', '-n', action='store_true',default=False, help='Do not save the output masks')
    parser.add_argument('--mask-threshold', '-t', type=float, default=0.5,
                        help='Minimum probability value to consider a mask pixel white')
    parser.add_argument('--scale', '-s', type=float, default=0.5,
                        help='Scale factor for the input images')
model:设置权重文件路径。这里要改为自己训练的路径。
scale:0.5,和训练的参数对应上。由于训练时,图片的输入为512×512,所以这个参数现在不起作用了。
viz:表示是否可视化。
no-save:表示测试时,是否保存mask结果。
 net = smp.UnetPlusPlus(
        encoder_name="efficientnet-b3",  # choose encoder, e.g. mobilenet_v2 or efficientnet-b7
        encoder_weights='imagenet',  # use `imagenet` pretreined weights for encoder initialization
        in_channels=3,  # model input channels (1 for grayscale images, 3 for RGB, etc.)
        classes=2,  # model output channels (number of classes in your dataset)
    )
  device = torch.device('cuda' if torch.cuda.is_available() else 'cpu')
  logging.info(f'Loading model {args.model}')
  logging.info(f'Using device {device}')
定义模型,参数和训练的模型参数一致。
接下来看预测部分:
    with torch.no_grad():
        output = net(img)
        n_classes=2
        if n_classes > 1:
            probs = F.softmax(output, dim=1)[0]
        else:
            probs = torch.sigmoid(output)[0]
        tf = transforms.Compose([
            transforms.ToPILImage(),
            transforms.Resize((full_img.size[1], full_img.size[0])),
            transforms.ToTensor()
        ])
        full_mask = tf(probs.cpu()).squeeze()
    if n_classes == 1:
        return (full_mask > out_threshold).numpy()
    else:
        return F.one_hot(full_mask.argmax(dim=0), n_classes).permute(2, 0, 1).numpy()
这一部分是预测的核心逻辑,主要步骤有:
1、输出预测结果。
2、定义类别为2.
3、然后输入到softmax中。
4、使用transforms将结果放大正常尺寸。
4、将softmax输出的结果,做one_hot,然后返回。
接下来,将预测的结果转为mask图片,代码如下:
def mask_to_image(mask: np.ndarray):
    if mask.ndim == 2:
        return Image.fromarray((mask * 255).astype(np.uint8))
    elif mask.ndim == 3:
        img_np=(np.argmax(mask, axis=0) * 255 / (mask.shape[0]-1)).astype(np.uint8)
        print(img_np.shape)
        print(np.max(img_np))
        return Image.fromarray(img_np)
img_np=(np.argmax(mask, axis=0) * 255 / (mask.shape[0]-1)).astype(np.uint8)这里的逻辑需要修改。
源代码:
return Image.fromarray((np.argmax(mask, axis=0) * 255 / mask.shape[0]).astype(np.uint8))
我们增加了一类背景,所以mask.shape[0]为2,需要减去背景。
可视化结果的方法也需要修改;
def plot_img_and_mask(img, mask):
    print(mask.shape)
    classes = mask.shape[0] if len(mask.shape) > 2 else 1
    fig, ax = plt.subplots(1, classes + 1)
    ax[0].set_title('Input image')
    ax[0].imshow(img)
    if classes > 1:
        for i in range(classes):
            ax[i + 1].set_title(f'Output mask (class {i + 1})')
            ax[i + 1].imshow(mask[i, :, :])
    else:
        ax[1].set_title(f'Output mask')
        ax[1].imshow(mask)
    plt.xticks([]), plt.yticks([])
    plt.show()
将原来的ax[i + 1].imshow(mask[:, :, i])改为:ax[i + 1].imshow(mask[i, :, :])。
执行命令:
python predict.py -i test/00002.png -o output.png -v
输出结果:
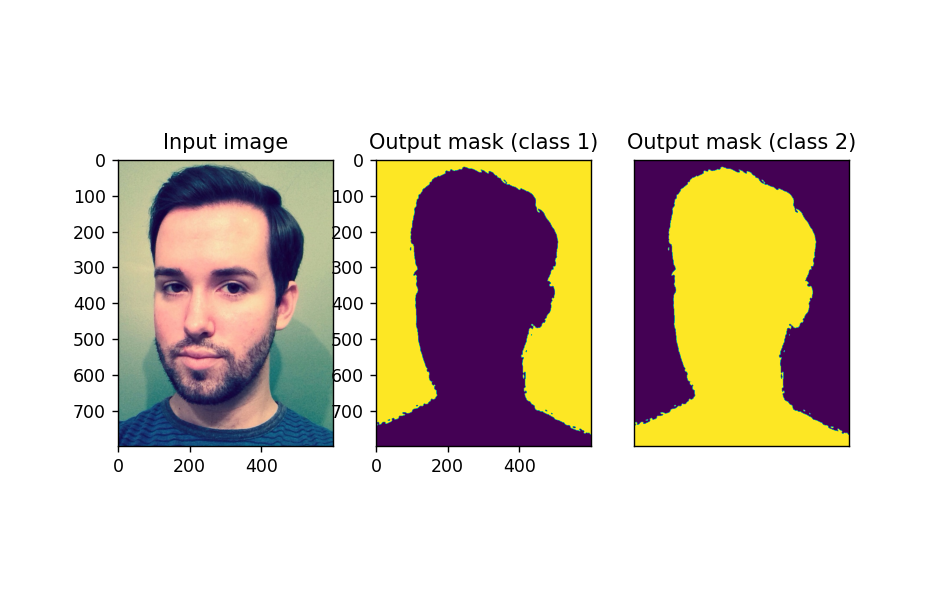
到这里我们已经实现将人物从背景图片中完整的抠出来了!
总结
到这里,本文就写完了。我们再次回顾本文的内容:
本文向大家展示如何使用segmentation_models.pytorch实现语义分割算法。
通过这篇文章,你可以学到:
1、如何使用segmentation_models.pytorch图像分割框架实现语义分割算法?
2、如何使用和加载语义分割数据集?
3、如何使用交叉熵和diceloss组合?
4、如何使用wandb可视化。
5、了解二分类语义分割的常用做法。
6、如何实现二分类语义分割的训练。
7、如何实现二分类语义分割的预测。
完整的代码:
https://download.csdn.net/download/hhhhhhhhhhwwwwwwwwww/85102556

- 点赞
- 收藏
- 关注作者
评论(0)