Flutter笔记:Widgets Easier组件库(8)使用图片
Visit me at CSDN: https://jclee95.blog.csdn.net
My WebSite:http://thispage.tech/
Email: 291148484@163.com.
Shenzhen China
Address of this article:https://blog.csdn.net/qq_28550263/article/details/138342923
HuaWei:https://bbs.huaweicloud.com/blogs/426716
组件库地址:
【介绍】:本文介绍Widgets Easier组件库中基础图片组件的使用。
本库是一个 Flutter 组件库,旨在提供用于Flutter开发的组件,使得开发者能够更简单地构建出更丰富地界面效果。项目地址为:
在你的Flutter项目中,运行下面的命令:
flutter pub add widgets_easier
即可安装最新版本的 Widgets Easier 库。
Picture类是一个自动处理字符串加载图片的Flutter组件,它具有以下的特点:
-
如果指定的字符串为url,则以网络图片形式加载图片;
- 如果指定cache参数为true,则自动缓存该网络图片,默认cache参数为false;
- 网络图片必须以相应的图片文件后缀名结尾,比如png、jpg、svg等等;
-
如果指定的字符串表示一个svg的XML文本,则将svg的的XML文本显示出来;
-
如果指定的字符串为assets,则加载assets图片。这需要确保在项目的pubspec
-
支持 Base64 编码后的图片字符串。将解码为图片文件后,依据图片类型进行加载。
Picture(
  source: 'https://via.placeholder.com/200',
  width: 200,
  height: 200,
  fit: BoxFit.cover,
),
注意,如果将Flutter用于Web,网络请求跨域时,需要处理跨域问题,这对于网络图片也不例外。多使用代理服务器的方式。
Container(
  color: Colors.blue,
  child: Picture(
    source:
        'https://storage.googleapis.com/cms-storage-bucket/ec64036b4eacc9f3fd73.svg',
    width: 200,
    height: 80,
    fit: BoxFit.contain,
  ),
),

Picture(
  source: 'assets/local-image.png',
  width: 150,
  height: 150,
  fit: BoxFit.fill,
),

注意:使用资源图片文件时,需要确保该文图文件存在于相应的目录中,并且正确地将该图片注册到你项目的pubspec.yaml文件中
Picture(
  source: svgStr,
  width: 100,
  height: 100,
  fit: BoxFit.scaleDown,
),

// 其中
const svgStr = '''<?xml version="1.0" encoding="UTF-8" standalone="no"?>
<svg
   t="1714364507282"
   class="icon"
   viewBox="0 0 937.16203 938.10914"
   version="1.1"
   p-id="1484"
   width="183.03946"
   height="183.22444"
   id="svg6"
   sodipodi:docname="image.svg" xmlns:sodipodi="http://sodipodi.sourceforge.net/DTD/sodipodi-0.dtd" xmlns="http://www.w3.org/2000/svg" xmlns:svg="http://www.w3.org/2000/svg">
<path
   style="fill:#800080;stroke-width:0.997079"
   d="M 36.29547,936.91559 C 20.12193,933.38609 6.80232,921.18509 1.88903,905.39869 0.04735,899.48129 0,888.55049 0,469.26735 0,49.984192 0.0474,39.053352 1.88903,33.136023 6.87389,17.119633 20.15934,5.0967225 36.76123,1.5777825 c 9.92501,-2.10371 853.80671,-2.10371 863.73171,0 16.9257,3.58758 30.9354,16.6007105 35.1883,32.6851205 1.5323,5.79537 1.6337,38.264443 1.3648,436.998587 l -0.2903,430.7381 -2.3428,5.8072 c -5.1636,12.7997 -15.9696,23.1294 -29.0652,27.784 l -6.481,2.3036 -428.24538,0.1741 c -353.24463,0.1433 -429.31024,-0.058 -434.32574,-1.1529 z m 808.23037,-259.1571 v -167.9062 l -109.4294,-60.88633 -109.4294,-60.88629 -16.9504,16.76496 c -9.3227,9.22072 -113.19339,111.83296 -230.82374,228.02726 -117.63039,116.1943 -214.02298,211.6067 -214.20578,212.0276 -0.18278,0.4209 152.93112,0.7651 340.25316,0.7651 H 844.52584 Z M 367.42357,512.54239 C 582.19144,300.36119 587.40544,295.24912 592.76334,291.609 c 9.791,-6.65187 27.0214,-8.77961 38.3886,-4.74049 3.0167,1.07194 51.5103,27.39175 107.7636,58.48847 56.2532,31.0967 103.0282,56.82714 103.9444,57.17872 1.552,0.59558 1.6659,-9.96254 1.6659,-154.51318 V 92.870066 H 468.62707 92.728338 V 438.58598 784.30189 l 31.158712,-30.9698 c 17.1373,-17.0333 126.72873,-125.3887 243.53652,-240.7897 z"
   id="path922" />
<path
   style="fill:#ff0000;fill-opacity:1;stroke-width:0.997079"
   d="m 325.04772,389.38497 c -15.01325,-2.79073 -25.99183,-6.39644 -38.38754,-12.60771 -12.06223,-6.04416 -18.87849,-11.05592 -30.75907,-22.6161 -11.21321,-10.91079 -18.52381,-20.77861 -25.00098,-33.74622 -18.53943,-37.11688 -16.2817,-83.81637 5.70543,-118.01261 18.79211,-29.22708 46.73517,-48.32745 80.67276,-55.14354 10.25862,-2.06036 34.74422,-2.05899 45.6118,0.003 36.86516,6.9932 70.91935,32.77236 88.31051,66.85142 35.54125,69.6454 -2.76142,152.28798 -79.97502,172.55556 -8.29589,2.17756 -12.36336,2.61484 -26.73486,2.87416 -9.32268,0.16819 -18.07205,0.0973 -19.44303,-0.15749 z"
   id="path919" />
</svg>
''';

这个例子演示了使用一个实际上不存在地网络地址演示图片加载错误:
Picture(
  source: 'https://example.com/image_that_does_not_exist.png',
  width: 200,
  height: 200,
  fit: BoxFit.cover,
  errorBuilder:
      (BuildContext context, Object error, StackTrace? stackTrace) {
    return const Text('Failed to load image');
  },
)

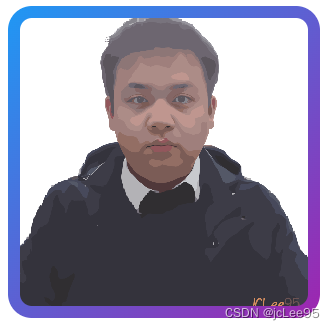
Pictrue 组件的 clipper 属性接受一个ShapeBorderClipper,这意味着图片很容易添加任何形状的边框并裁剪成各种想要的形状。
你可以直接使用 Widgets Easier 库中预定义好的各种边框类型。
关于 Widgets Easier 库中边框的用法,可以参考:《Widgets Easier组件库(1):使用边框》 一文,地址:https://jclee95.blog.csdn.net/article/details/138342762
比如使用SolidShapeBorder实现实线型边框:
Picture(
  source: 'assets/jclee95.png',
  width: 200,
  height: 200,
  clipper: ShapeBorderClipper(
    shape: SolidBorder(
      width: 8,
      borderRadius: BorderRadius.circular(12),
      color: Colors.blue,
      gradient: const LinearGradient(
        colors: [Colors.blue, Colors.purple],
        begin: Alignment.topLeft,
        end: Alignment.bottomRight,
      ),
    ),
  ),
  fit: BoxFit.cover,
  errorBuilder:
      (BuildContext context, Object error, StackTrace? stackTrace) {
    return const Text('Failed to load image');
  },
)
- 点赞
- 收藏
- 关注作者



评论(0)