Mysql数据库实战之部署wordpress网站
一、Mysql数据库介绍
1.1 Mysql介绍
MySQL是一个广泛使用的关系型数据库管理系统,是一款开源的数据库管理系统。MySQL使用C和C++语言编写而成,适用于各种不同规模的应用程序,从小型个人应用到大型企业级应用都可以使用。MySQL是跨平台的,支持在多种操作系统上运行,包括Windows、Linux、Unix、macOS等。MySQL提供了多种编程语言的API,如C、C++、Java、Python等,使得开发人员可以方便地使用MySQL进行数据存储和数据查询。
1.2 Mysql特点
MySQL是一种开源关系型数据库管理系统(RDBMS),具有以下特点:
- 可靠性高:MySQL经过长期的发展和测试,具有良好的可靠性,能够稳定地运行。
- 高性能:MySQL的设计和实现极其精细,具有较高的性能,能够高效地处理大量数据。
- 可扩展性强:MySQL支持多种存储引擎,可以根据需要选择最适合的存储引擎,从而实现高效的数据存储和访问。
- 易于学习和使用:MySQL的语法简单易懂,容易理解和使用,对开发者友好。
- 开放源代码:MySQL是开放源代码的,可以自由地修改、使用、分发和共享。
- 跨平台支持:MySQL可以在各种操作系统平台上运行,包括Windows、Linux、Unix等。
- 良好的社区支持:MySQL拥有庞大的用户社区和开发者社区,能够提供丰富的技术资料和支持。
二、wordpress介绍
WordPress是一个开源的博客系统,也是一个用PHP开发的内容管理系统(CMS)。它基于MySQL数据库,可以在Web服务器上运行。
三、本次实践介绍
3.1 环境规划
本次实践环境为个人测试环境,使用操作系统为centos7.6。
| hostname | IP地址 | 系统版本 | 内核版本 | mysql版本 |
|---|---|---|---|---|
| jeven | 192.168.3.166 | centos7.6 | 3.10.0-957.el7.x86_64 | 5.7.40 |
3.2 本次实践介绍
1.本次实践为个人测试环境,生产环境请谨慎;
2.灵活部署、配置mysql数据库,可以远程连接Mysql数据库;
3.部署LAMP环境,部署wordpress网站应用。
四、安装php和httpd软件
4.1 配置yum仓库
- 安装国内的镜像源,如果已经安装可以跳过。
curl -o /etc/yum.repos.d/CentOS-Base.repo https://mirrors.aliyun.com/repo/Centos-7.repo
sed -i -e '/mirrors.cloud.aliyuncs.com/d' -e '/mirrors.aliyuncs.com/d' /etc/yum.repos.d/CentOS-Base.repo
- 检查yum仓库的各镜像源状态
[root@jeven ~]# yum repolist enabled
Loaded plugins: fastestmirror, langpacks
Repodata is over 2 weeks old. Install yum-cron? Or run: yum makecache fast
Determining fastest mirrors
repo id                                                                  repo name                                                                                       status
!base/7/x86_64                                                           CentOS-7 - Base - mirrors.aliyun.com                                                            10,072
!extras/7/x86_64                                                         CentOS-7 - Extras - mirrors.aliyun.com                                                             515
!updates/7/x86_64                                                        CentOS-7 - Updates - mirrors.aliyun.com                                                          4,996
repolist: 15,583
4.2 安装php
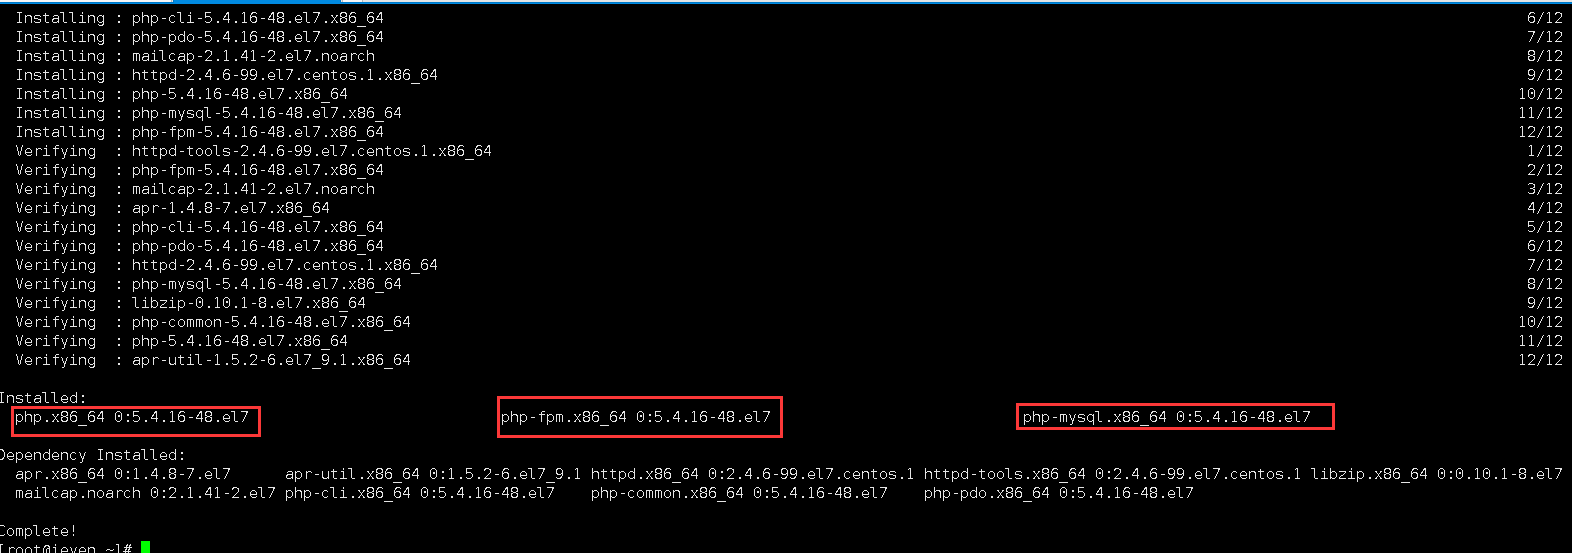
安装php相关软件
yum -y install php php-fpm php-mysql
4.3 安装httpd
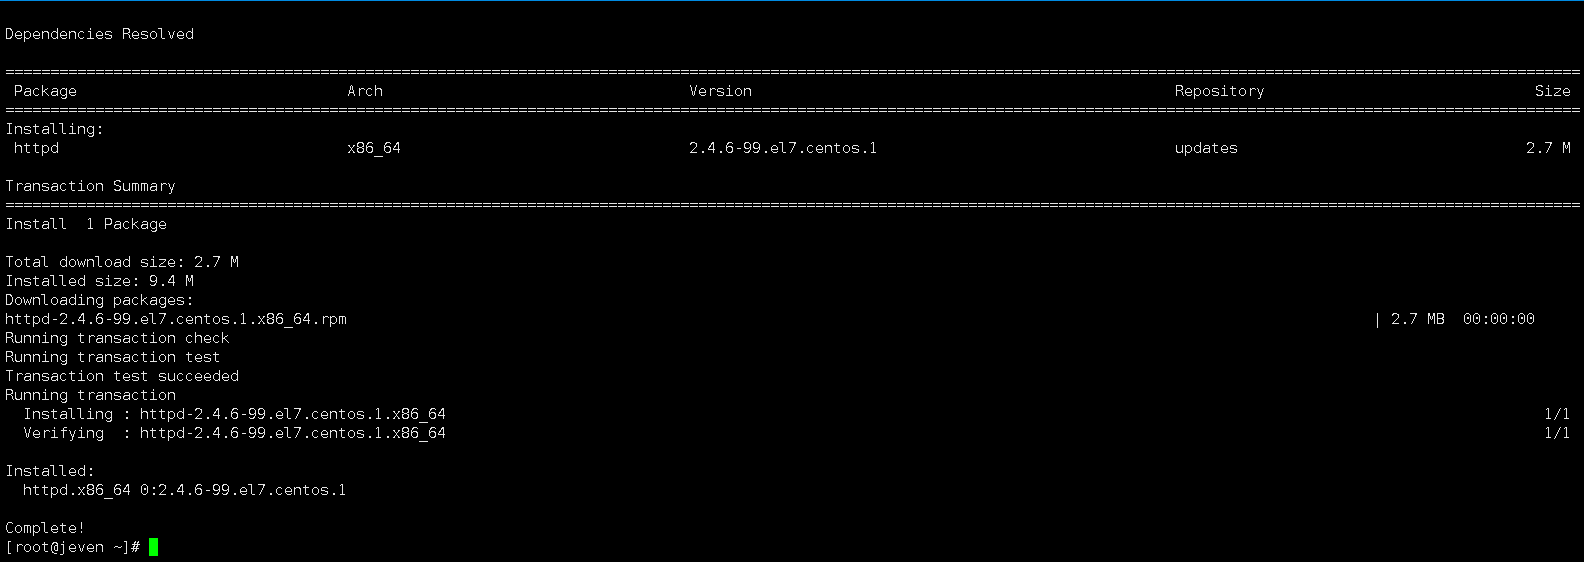
使用yum安装httpd
yum -y install httpd
4.4 修改httpd配置文件
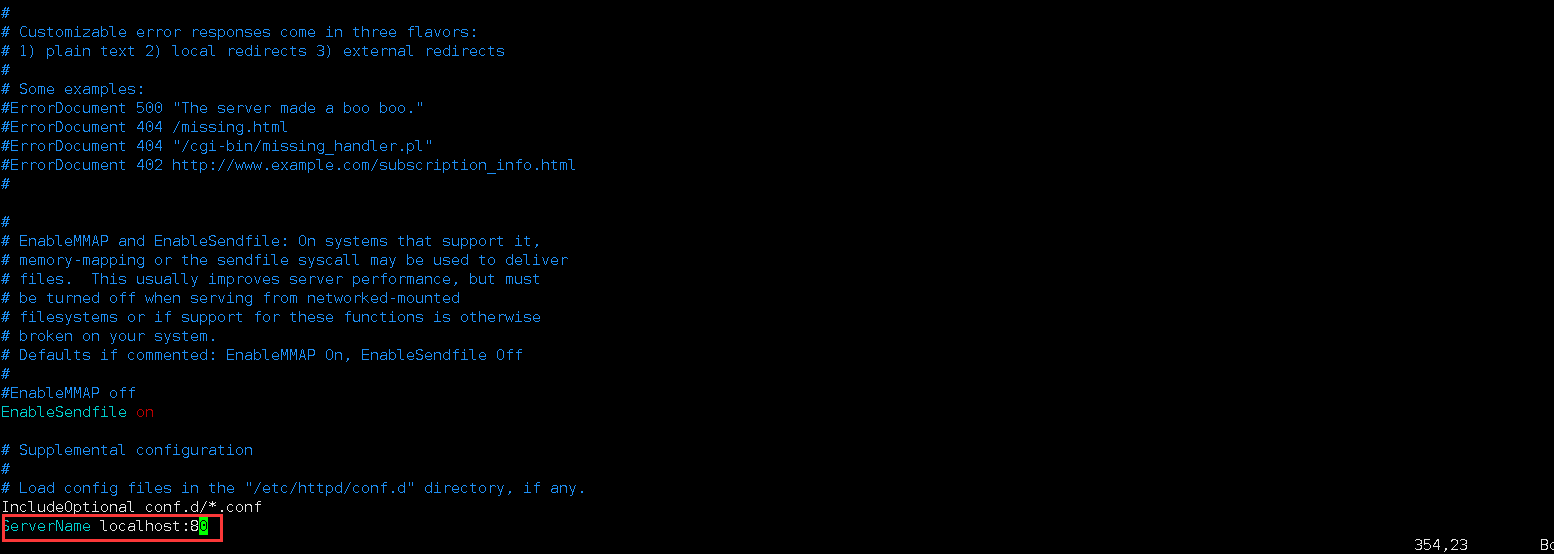
httpd配置文件位置:/etc/httpd/conf/httpd.conf
在配置文件最后一行新增ServerName localhost:80
Listen 80
#ServerName www.example.com:80
ServerName localhost:80
4.5 设置防火墙和selinux
- 关闭selinux
sed -i 's/SELINUX=enforcing/SELINUX=disabled/' /etc/selinux/config
setenforce 0
- 关闭防火墙,选择防火墙开启需要放行80端口。
systemctl stop firewalld && systemctl disable firewalld
4.6 测试php环境
- 编辑info.php文件
echo "<?php phpinfo(); ?>" > /var/www/html/index.php
- 启动httpd服务
systemctl enable httpd --now
- 重启httpd服务
systemctl restart httpd
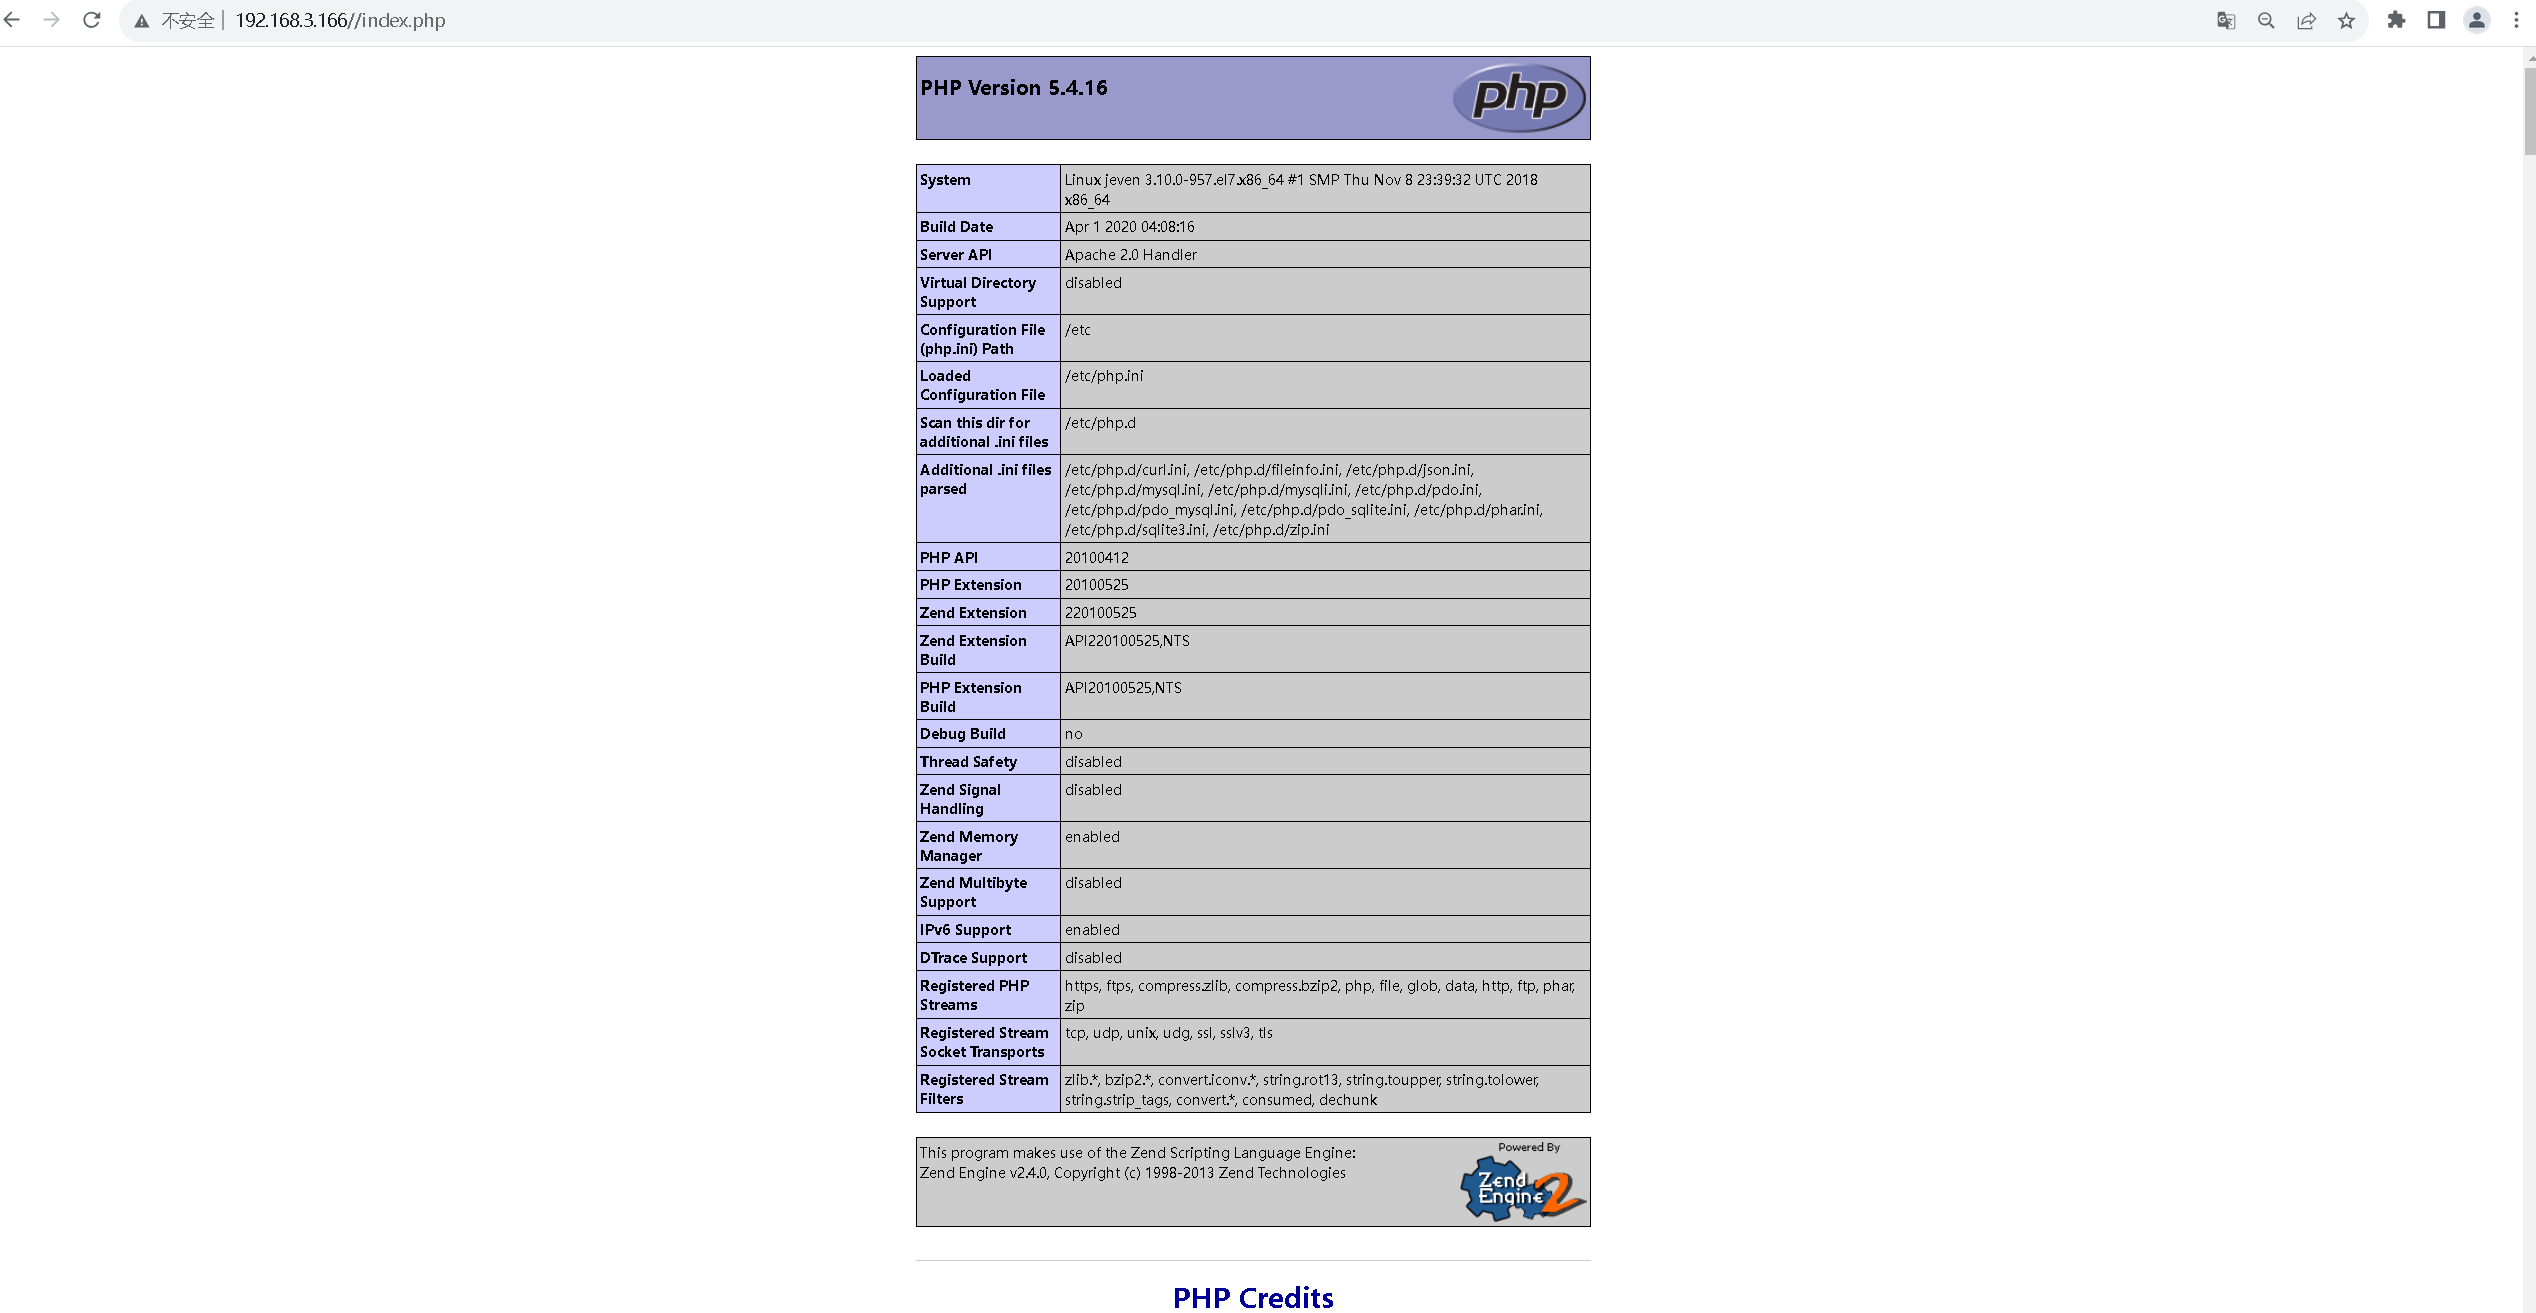
- 测试PHP是否安装成功,通过浏览器访问http://服务器IP地址/index.php,判断PHP是否安装成功,当可以正常PHP信息的web界面,则表示PHP正常安装。
五、安装mysql
5.1 配置yum仓库
配置mysql的yum仓库镜像源
yum localinstall https://dev.mysql.com/get/mysql57-community-release-el7-11.noarch.rpm -y
取消gpgcheck验证
sed -i "s/gpgcheck=1/gpgcheck=0/g" /etc/yum.repos.d/mysql-community.repo
查看查看mysql-community.repo文件
[root@jeven ~]# cat /etc/yum.repos.d/mysql-community.repo
[mysql-connectors-community]
name=MySQL Connectors Community
baseurl=http://repo.mysql.com/yum/mysql-connectors-community/el/7/$basearch/
enabled=1
gpgcheck=0
gpgkey=file:///etc/pki/rpm-gpg/RPM-GPG-KEY-mysql

[mysql-tools-community]
name=MySQL Tools Community
baseurl=http://repo.mysql.com/yum/mysql-tools-community/el/7/$basearch/
enabled=1
gpgcheck=0
gpgkey=file:///etc/pki/rpm-gpg/RPM-GPG-KEY-mysql

# Enable to use MySQL 5.5
[mysql55-community]
name=MySQL 5.5 Community Server
baseurl=http://repo.mysql.com/yum/mysql-5.5-community/el/7/$basearch/
enabled=0
gpgcheck=0
gpgkey=file:///etc/pki/rpm-gpg/RPM-GPG-KEY-mysql

# Enable to use MySQL 5.6
[mysql56-community]
name=MySQL 5.6 Community Server
baseurl=http://repo.mysql.com/yum/mysql-5.6-community/el/7/$basearch/
enabled=0
gpgcheck=0
gpgkey=file:///etc/pki/rpm-gpg/RPM-GPG-KEY-mysql

[mysql57-community]
name=MySQL 5.7 Community Server
baseurl=http://repo.mysql.com/yum/mysql-5.7-community/el/7/$basearch/
enabled=1
gpgcheck=0
gpgkey=file:///etc/pki/rpm-gpg/RPM-GPG-KEY-mysql

[mysql80-community]
name=MySQL 8.0 Community Server
baseurl=http://repo.mysql.com/yum/mysql-8.0-community/el/7/$basearch/
enabled=0
gpgcheck=0
gpgkey=file:///etc/pki/rpm-gpg/RPM-GPG-KEY-mysql

[mysql-tools-preview]
name=MySQL Tools Preview
baseurl=http://repo.mysql.com/yum/mysql-tools-preview/el/7/$basearch/
enabled=0
gpgcheck=0
gpgkey=file:///etc/pki/rpm-gpg/RPM-GPG-KEY-mysql

[mysql-cluster-7.5-community]
name=MySQL Cluster 7.5 Community
baseurl=http://repo.mysql.com/yum/mysql-cluster-7.5-community/el/7/$basearch/
enabled=0
gpgcheck=0
gpgkey=file:///etc/pki/rpm-gpg/RPM-GPG-KEY-mysql

[mysql-cluster-7.6-community]
name=MySQL Cluster 7.6 Community
baseurl=http://repo.mysql.com/yum/mysql-cluster-7.6-community/el/7/$basearch/
enabled=0
gpgcheck=0
gpgkey=file:///etc/pki/rpm-gpg/RPM-GPG-KEY-mysql
5.2 检查yum仓库状态
检查当前yum仓库可用镜像源,mysql的yum镜像源处于正常状态。
[root@jeven ~]#  yum repolist enabled
Loaded plugins: fastestmirror, langpacks
Loading mirror speeds from cached hostfile
repo id                                                                          repo name                                                                               status
base/7/x86_64                                                                    CentOS-7 - Base - mirrors.aliyun.com                                                    10,072
extras/7/x86_64                                                                  CentOS-7 - Extras - mirrors.aliyun.com                                                     518
mysql-connectors-community/x86_64                                                MySQL Connectors Community                                                                 227
mysql-tools-community/x86_64                                                     MySQL Tools Community                                                                      100
mysql57-community/x86_64                                                         MySQL 5.7 Community Server                                                                 678
updates/7/x86_64                                                                 CentOS-7 - Updates - mirrors.aliyun.com                                                  5,176
repolist: 16,771
5.3 安装mysql
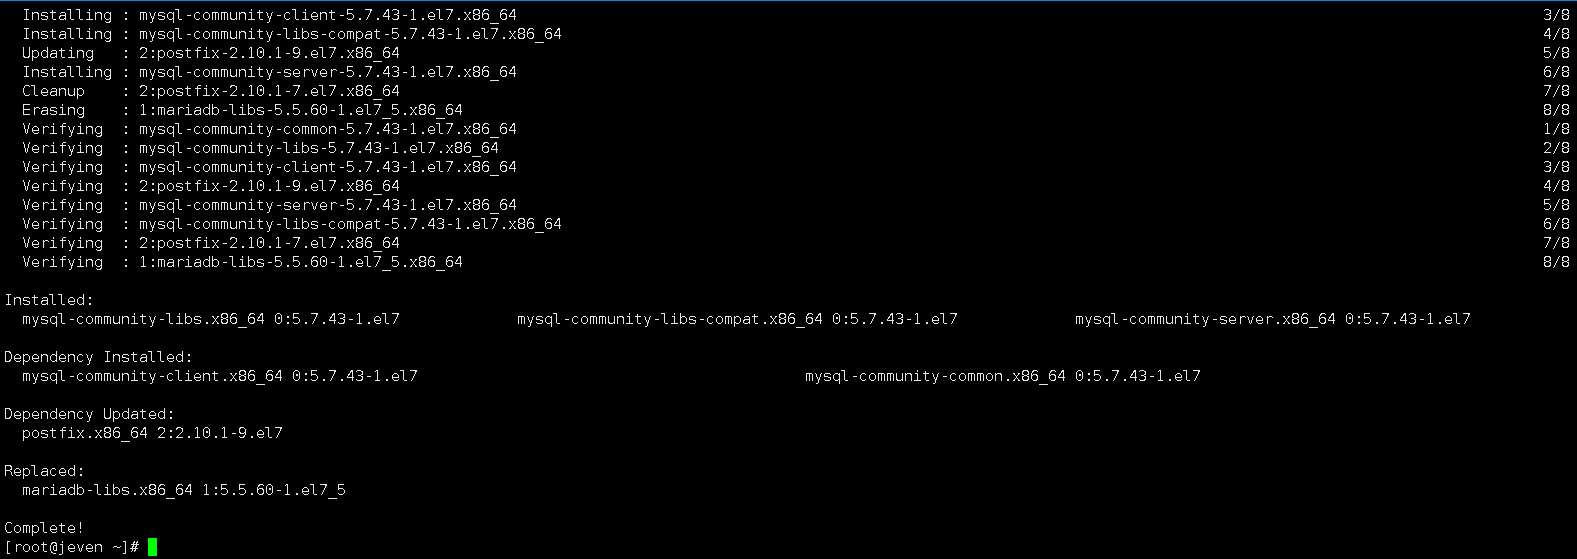
使用yum安装mysql
yum install -y mysql-server
5.4 启动mysql服务
启动mysql服务
systemctl enable --now mysqld
查看mysql服务状态
[root@jeven ~]# systemctl status mysqld
● mysqld.service - MySQL Server
   Loaded: loaded (/usr/lib/systemd/system/mysqld.service; enabled; vendor preset: disabled)
   Active: active (running) since Wed 2023-09-13 23:52:50 CST; 25s ago
     Docs: man:mysqld(8)
           http://dev.mysql.com/doc/refman/en/using-systemd.html
  Process: 27289 ExecStart=/usr/sbin/mysqld --daemonize --pid-file=/var/run/mysqld/mysqld.pid $MYSQLD_OPTS (code=exited, status=0/SUCCESS)
  Process: 27227 ExecStartPre=/usr/bin/mysqld_pre_systemd (code=exited, status=0/SUCCESS)
 Main PID: 27292 (mysqld)
    Tasks: 27
   Memory: 315.7M
   CGroup: /system.slice/mysqld.service
           └─27292 /usr/sbin/mysqld --daemonize --pid-file=/var/run/mysqld/mysqld.pid

Sep 13 23:52:44 jeven systemd[1]: Starting MySQL Server...
Sep 13 23:52:50 jeven systemd[1]: Started MySQL Server.
六、远程连接mysql数据库
6.1 配置mysql初始免密
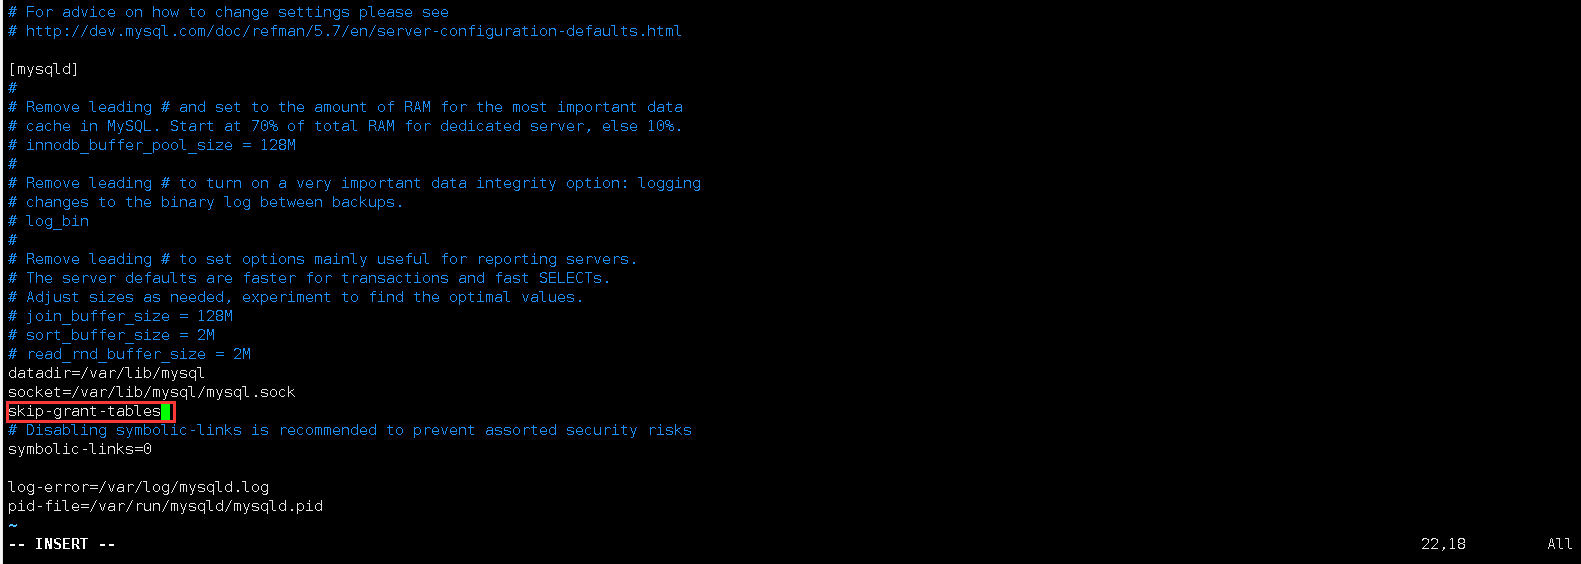
在/etc/my.cnf文件的mysqld 段落下增加 skip-grant-tables 配置项,使mysql初始本地免密登录。
vim /etc/my.cnf
skip-grant-tables
重启mysql服务
systemctl restart mysqld
6.2 本地访问mysql数据库
本地访问数据库
[root@jeven mysql]# mysql
Welcome to the MySQL monitor.  Commands end with ; or \g.
Your MySQL connection id is 2
Server version: 5.7.43 MySQL Community Server (GPL)

Copyright (c) 2000, 2023, Oracle and/or its affiliates.

Oracle is a registered trademark of Oracle Corporation and/or its
affiliates. Other names may be trademarks of their respective
owners.

Type 'help;' or '\h' for help. Type '\c' to clear the current input statement.

mysql>
6.3 新建数据库
新建wordpress数据库
create database wordpress;

6.4 设置本地root密码
设置本地root密码
ALTER USER 'root'@'localhost' IDENTIFIED BY 'new_password';
6.5 创建新用户
创建新用户admin,wordpress连接数据库时使用此账号。
create user "admin"@"%" identified by "admin123";

admin用户授权
grant all on *.* to admin with GRANT OPTION;
flush privileges;

6.6 远程连接mysql数据库
远程连接数据库
[root@jeven mysql]# mysql -h 192.168.3.166 -P3306 -uadmin -padmin123
mysql: [Warning] Using a password on the command line interface can be insecure.
Welcome to the MySQL monitor.  Commands end with ; or \g.
Your MySQL connection id is 3
Server version: 5.7.43 MySQL Community Server (GPL)

Copyright (c) 2000, 2023, Oracle and/or its affiliates.

Oracle is a registered trademark of Oracle Corporation and/or its
affiliates. Other names may be trademarks of their respective
owners.

Type 'help;' or '\h' for help. Type '\c' to clear the current input statement.

mysql>
七、安装wordpress
7.1 下载wordpress软件包
下载wordpress软件包,注意如果安装wordpress最新版本,PHP要单独安装7.4及以上版本。
wget https://cn.wordpress.org/wordpress-4.9.1-zh_CN.tar.gz
7.2 解压WordPress
解压WordPress软件包
tar -xzf wordpress-4.9.1-zh_CN.tar.gz -C /var/www/html/
将wordpress内容复制到网站根目录
cp -a /var/www/html/wordpress/* /var/www/html/
7.3 设置网站目录权限
设置网站目录/var/www/html/目录权限,建议设置属主和属组的方式来保证安全性。
chown -R apache:apache /var/www/html
7.4 重启httpd服务
重启httpd服务
systemctl restart httpd
7.5启动 php-fpm服务
启动php-fpm服务,并设置开机自启。
systemctl enable --now php-fpm.service
检查php-fpm服务状态
[root@jeven ~]# systemctl status php-fpm.service
● php-fpm.service - The PHP FastCGI Process Manager
   Loaded: loaded (/usr/lib/systemd/system/php-fpm.service; enabled; vendor preset: disabled)
   Active: active (running) since Thu 2023-09-14 12:08:26 CST; 34s ago
 Main PID: 28705 (php-fpm)
   Status: "Processes active: 0, idle: 5, Requests: 0, slow: 0, Traffic: 0req/sec"
    Tasks: 6
   Memory: 4.8M
   CGroup: /system.slice/php-fpm.service
           ├─28705 php-fpm: master process (/etc/php-fpm.conf)
           ├─28706 php-fpm: pool www
           ├─28707 php-fpm: pool www
           ├─28708 php-fpm: pool www
           ├─28709 php-fpm: pool www
           └─28710 php-fpm: pool www

Sep 14 12:08:26 jeven systemd[1]: Starting The PHP FastCGI Process Manager...
Sep 14 12:08:26 jeven systemd[1]: Started The PHP FastCGI Process Manager.
八、wordpress初始配置
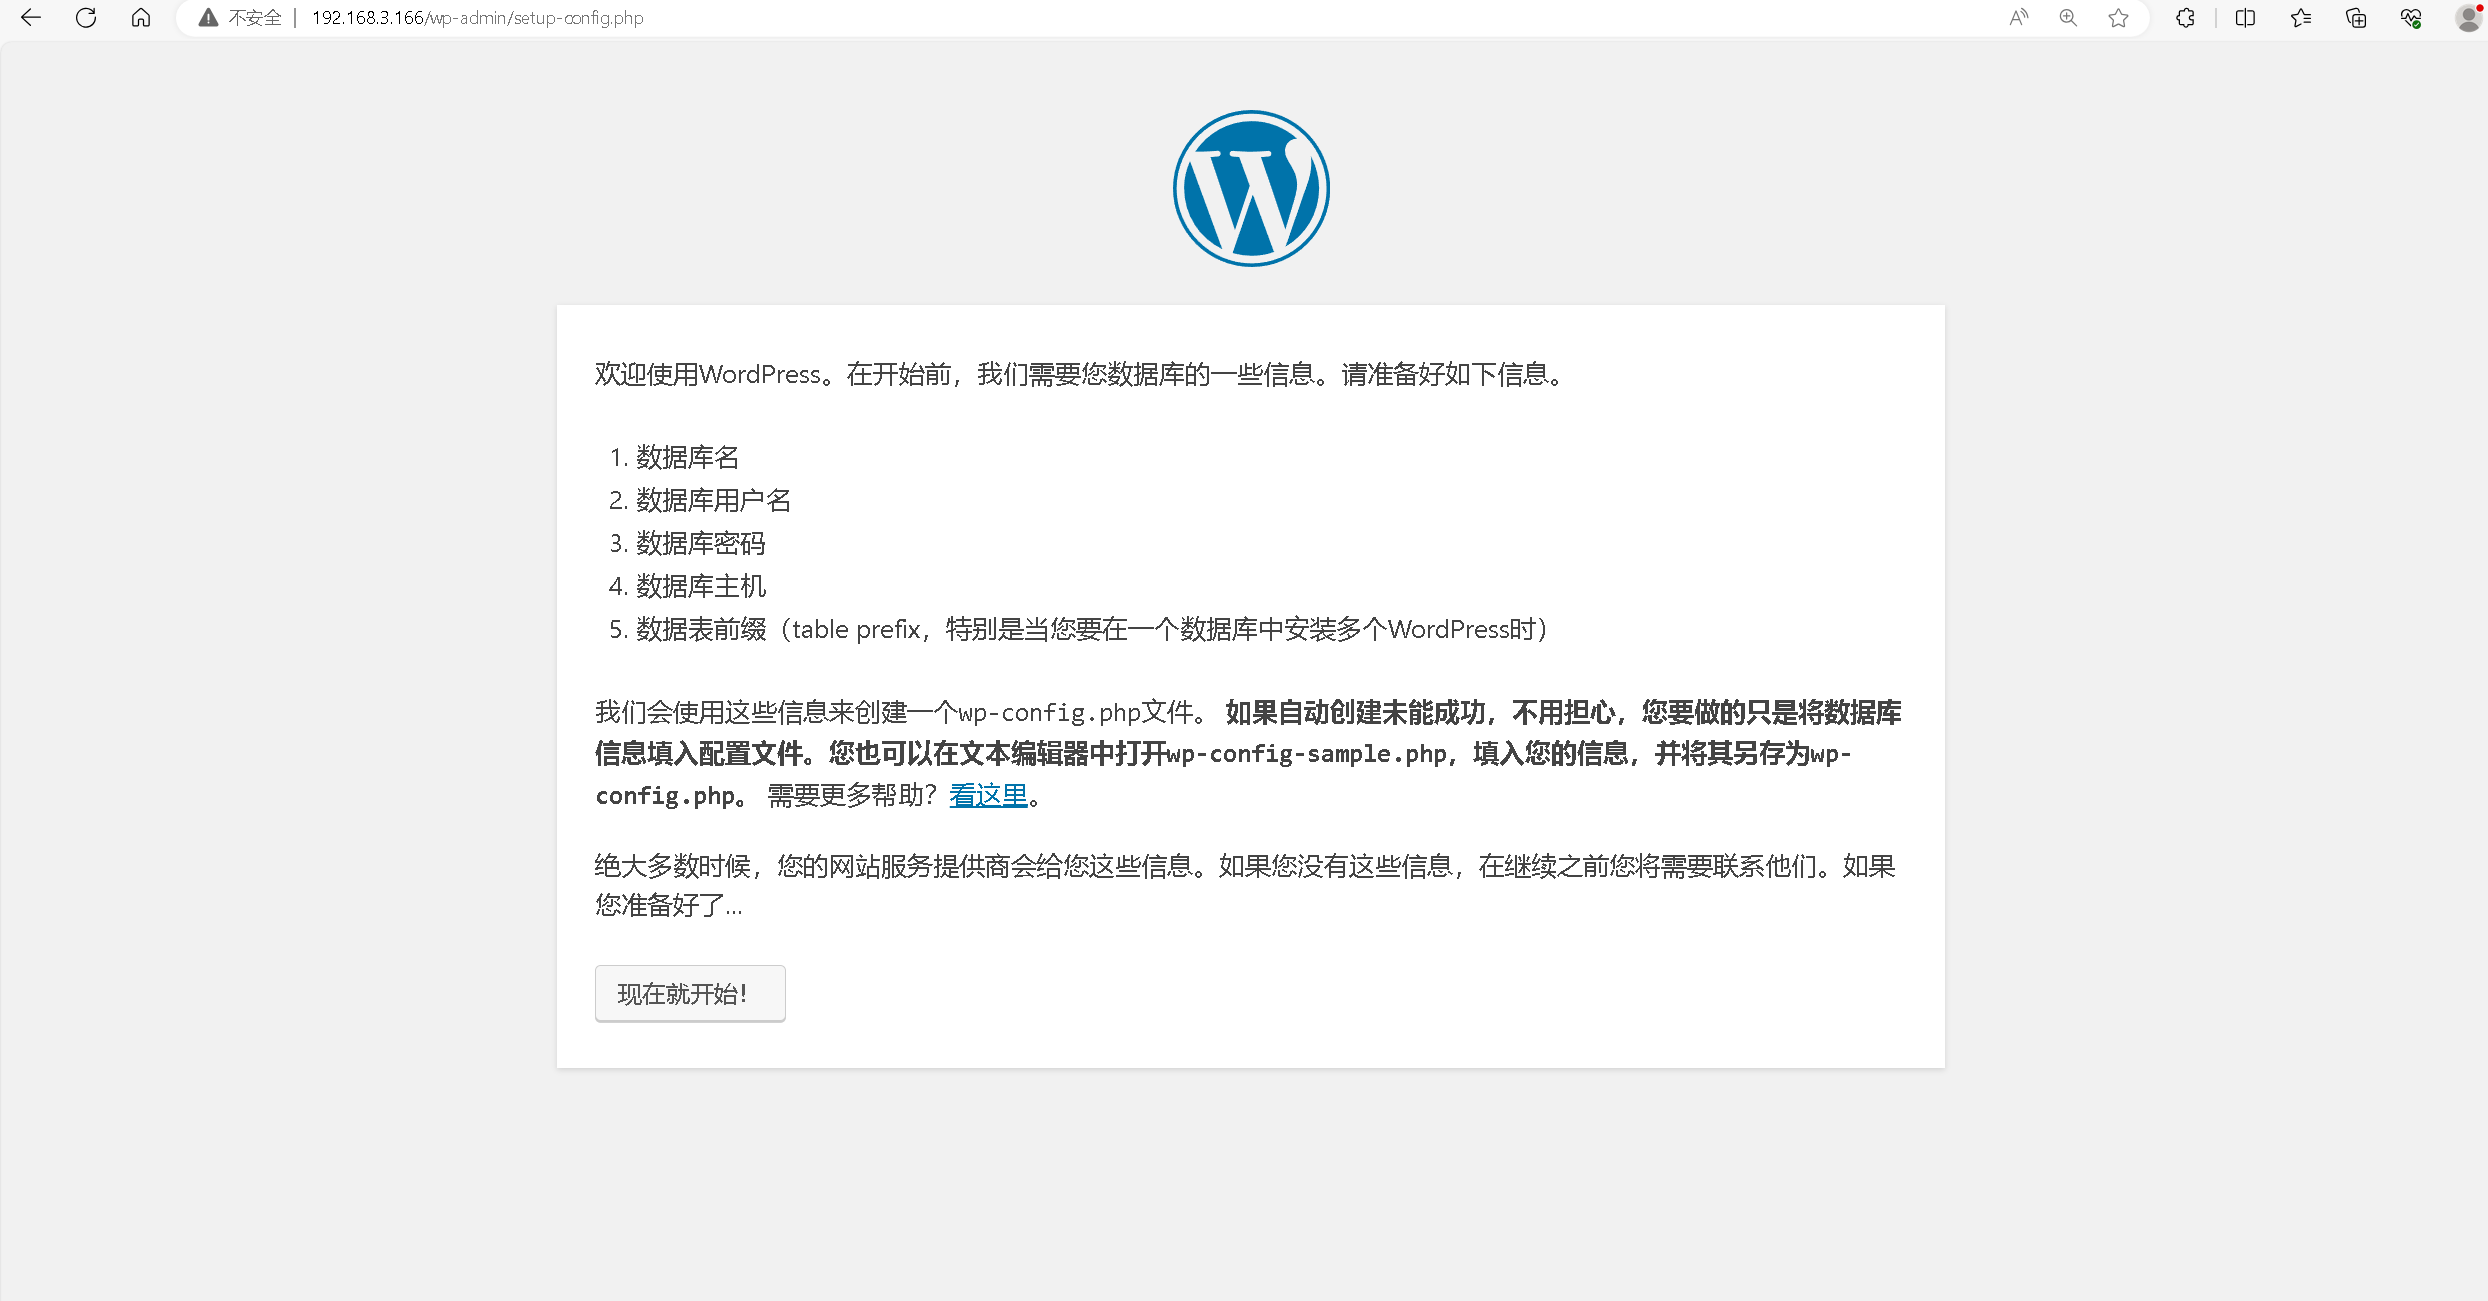
8.1 进入初始配置页面
访问地址:http://192.168.3.166,将IP替换为自己服务器IP地址。
8.2 配置数据库信息
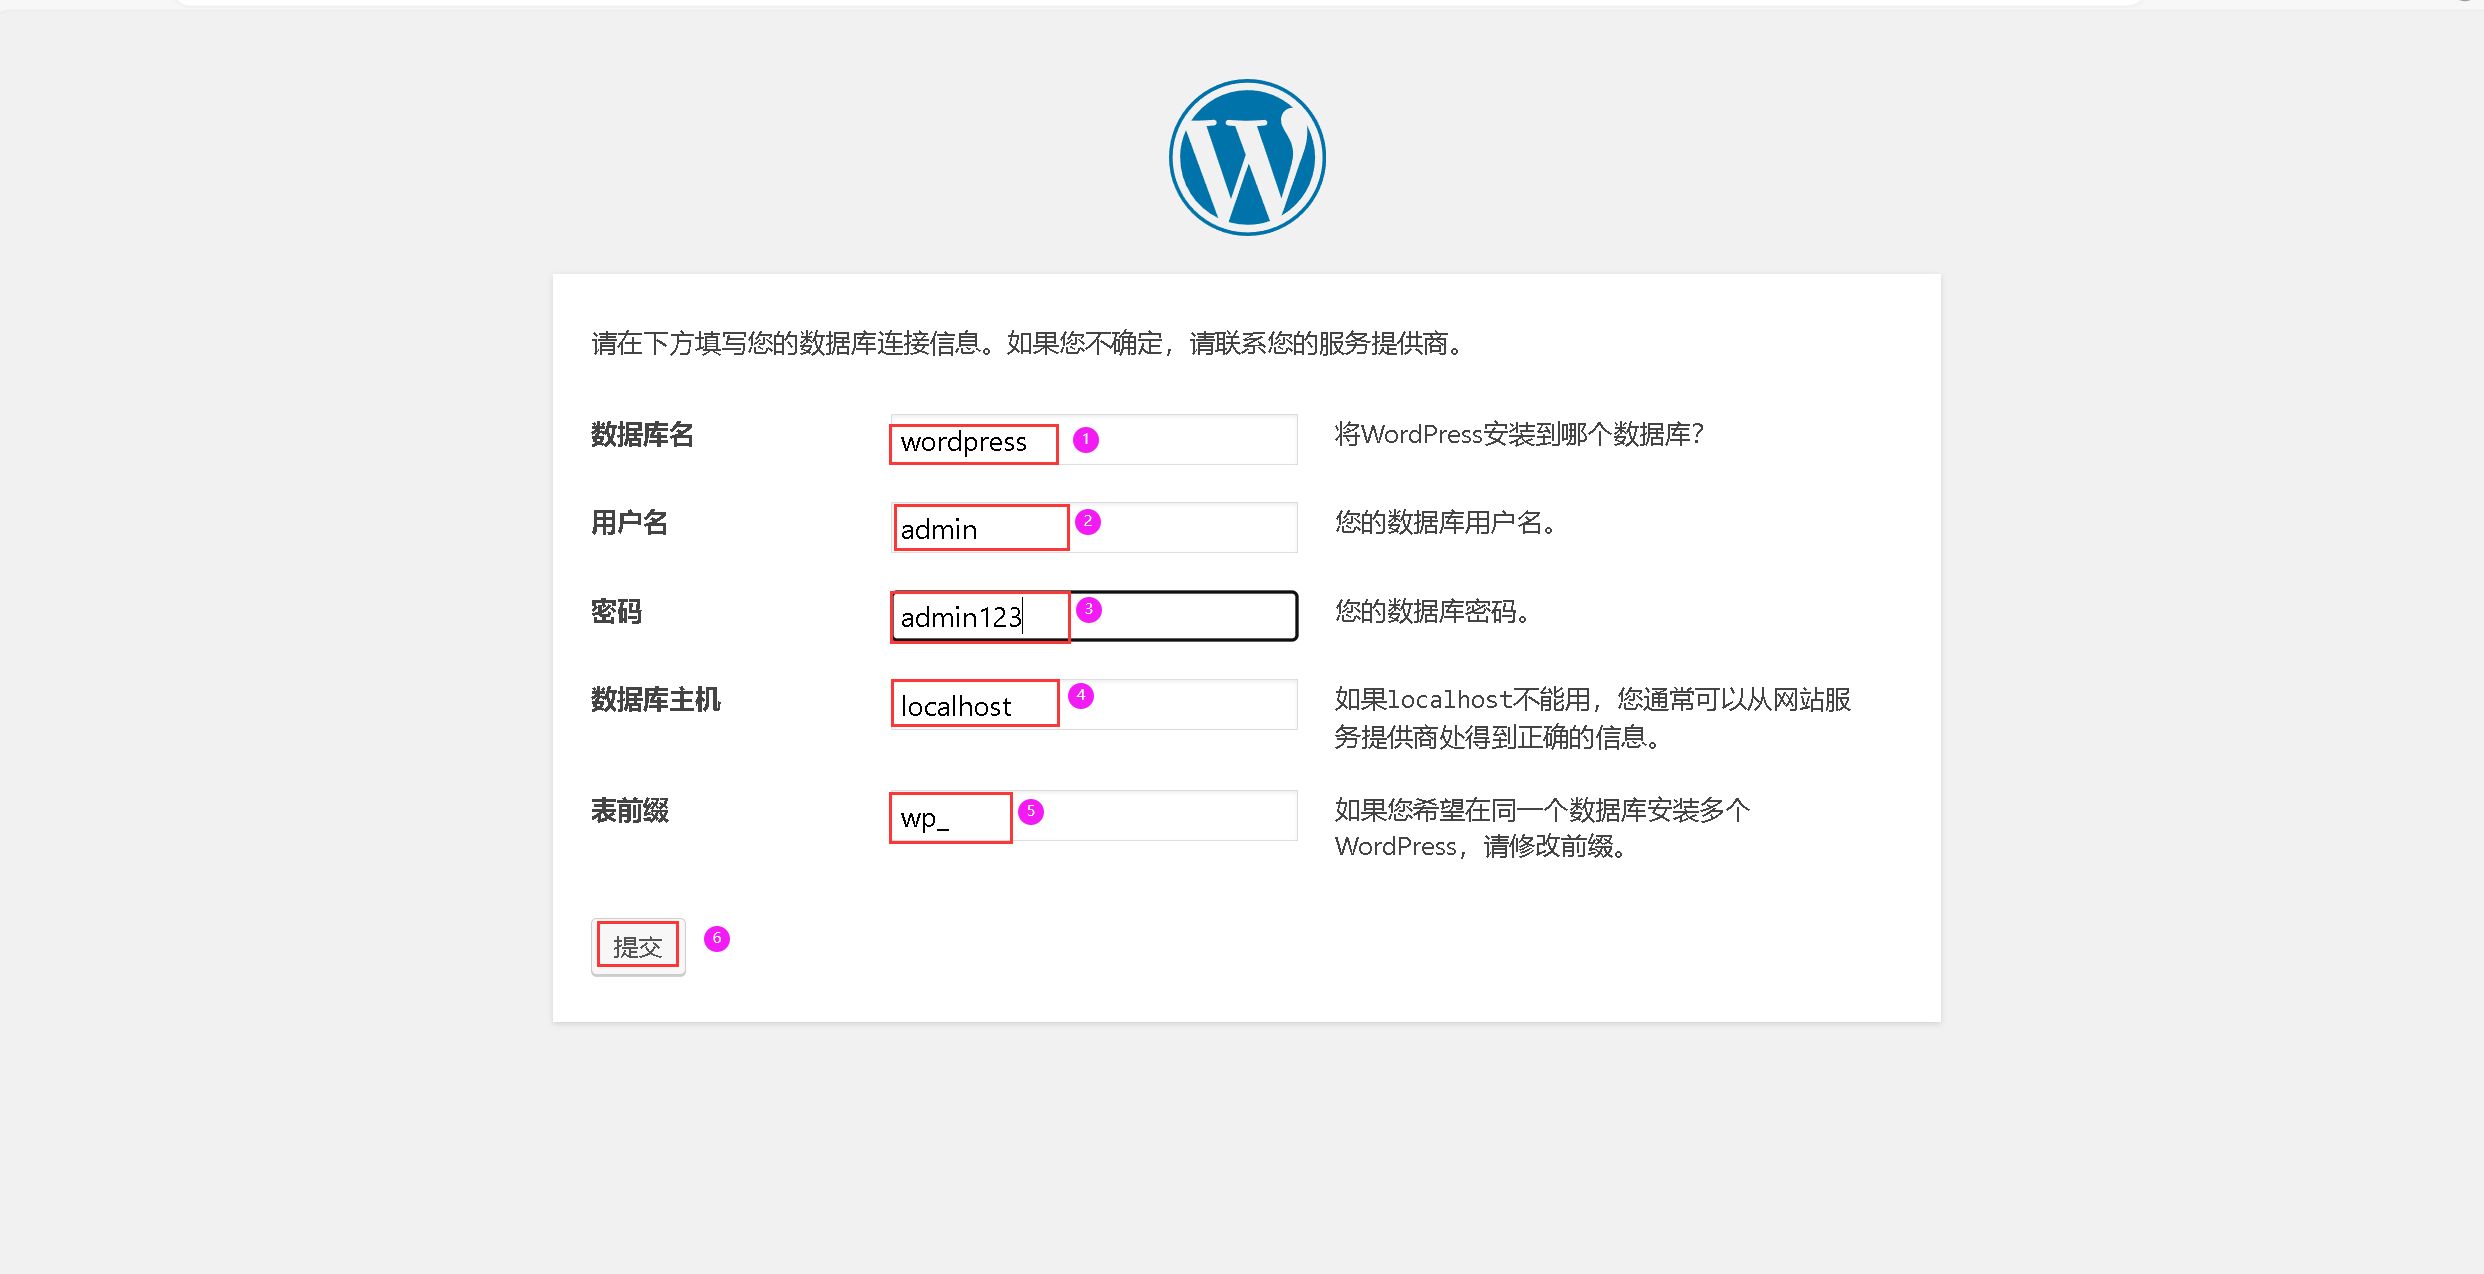
填写以下数据库信息,其中数据库用户和密码为之前自定义设置。
数据库名:wordpress;
用户名:admin;
密码:admin123;
数据库主机:localhost;
表前缀:wp_;
8.3 连接数据库报错解决
当输入信息正确时,有时一直会显示数据库连接错误或者无法写入wp-config.php文件等报错。
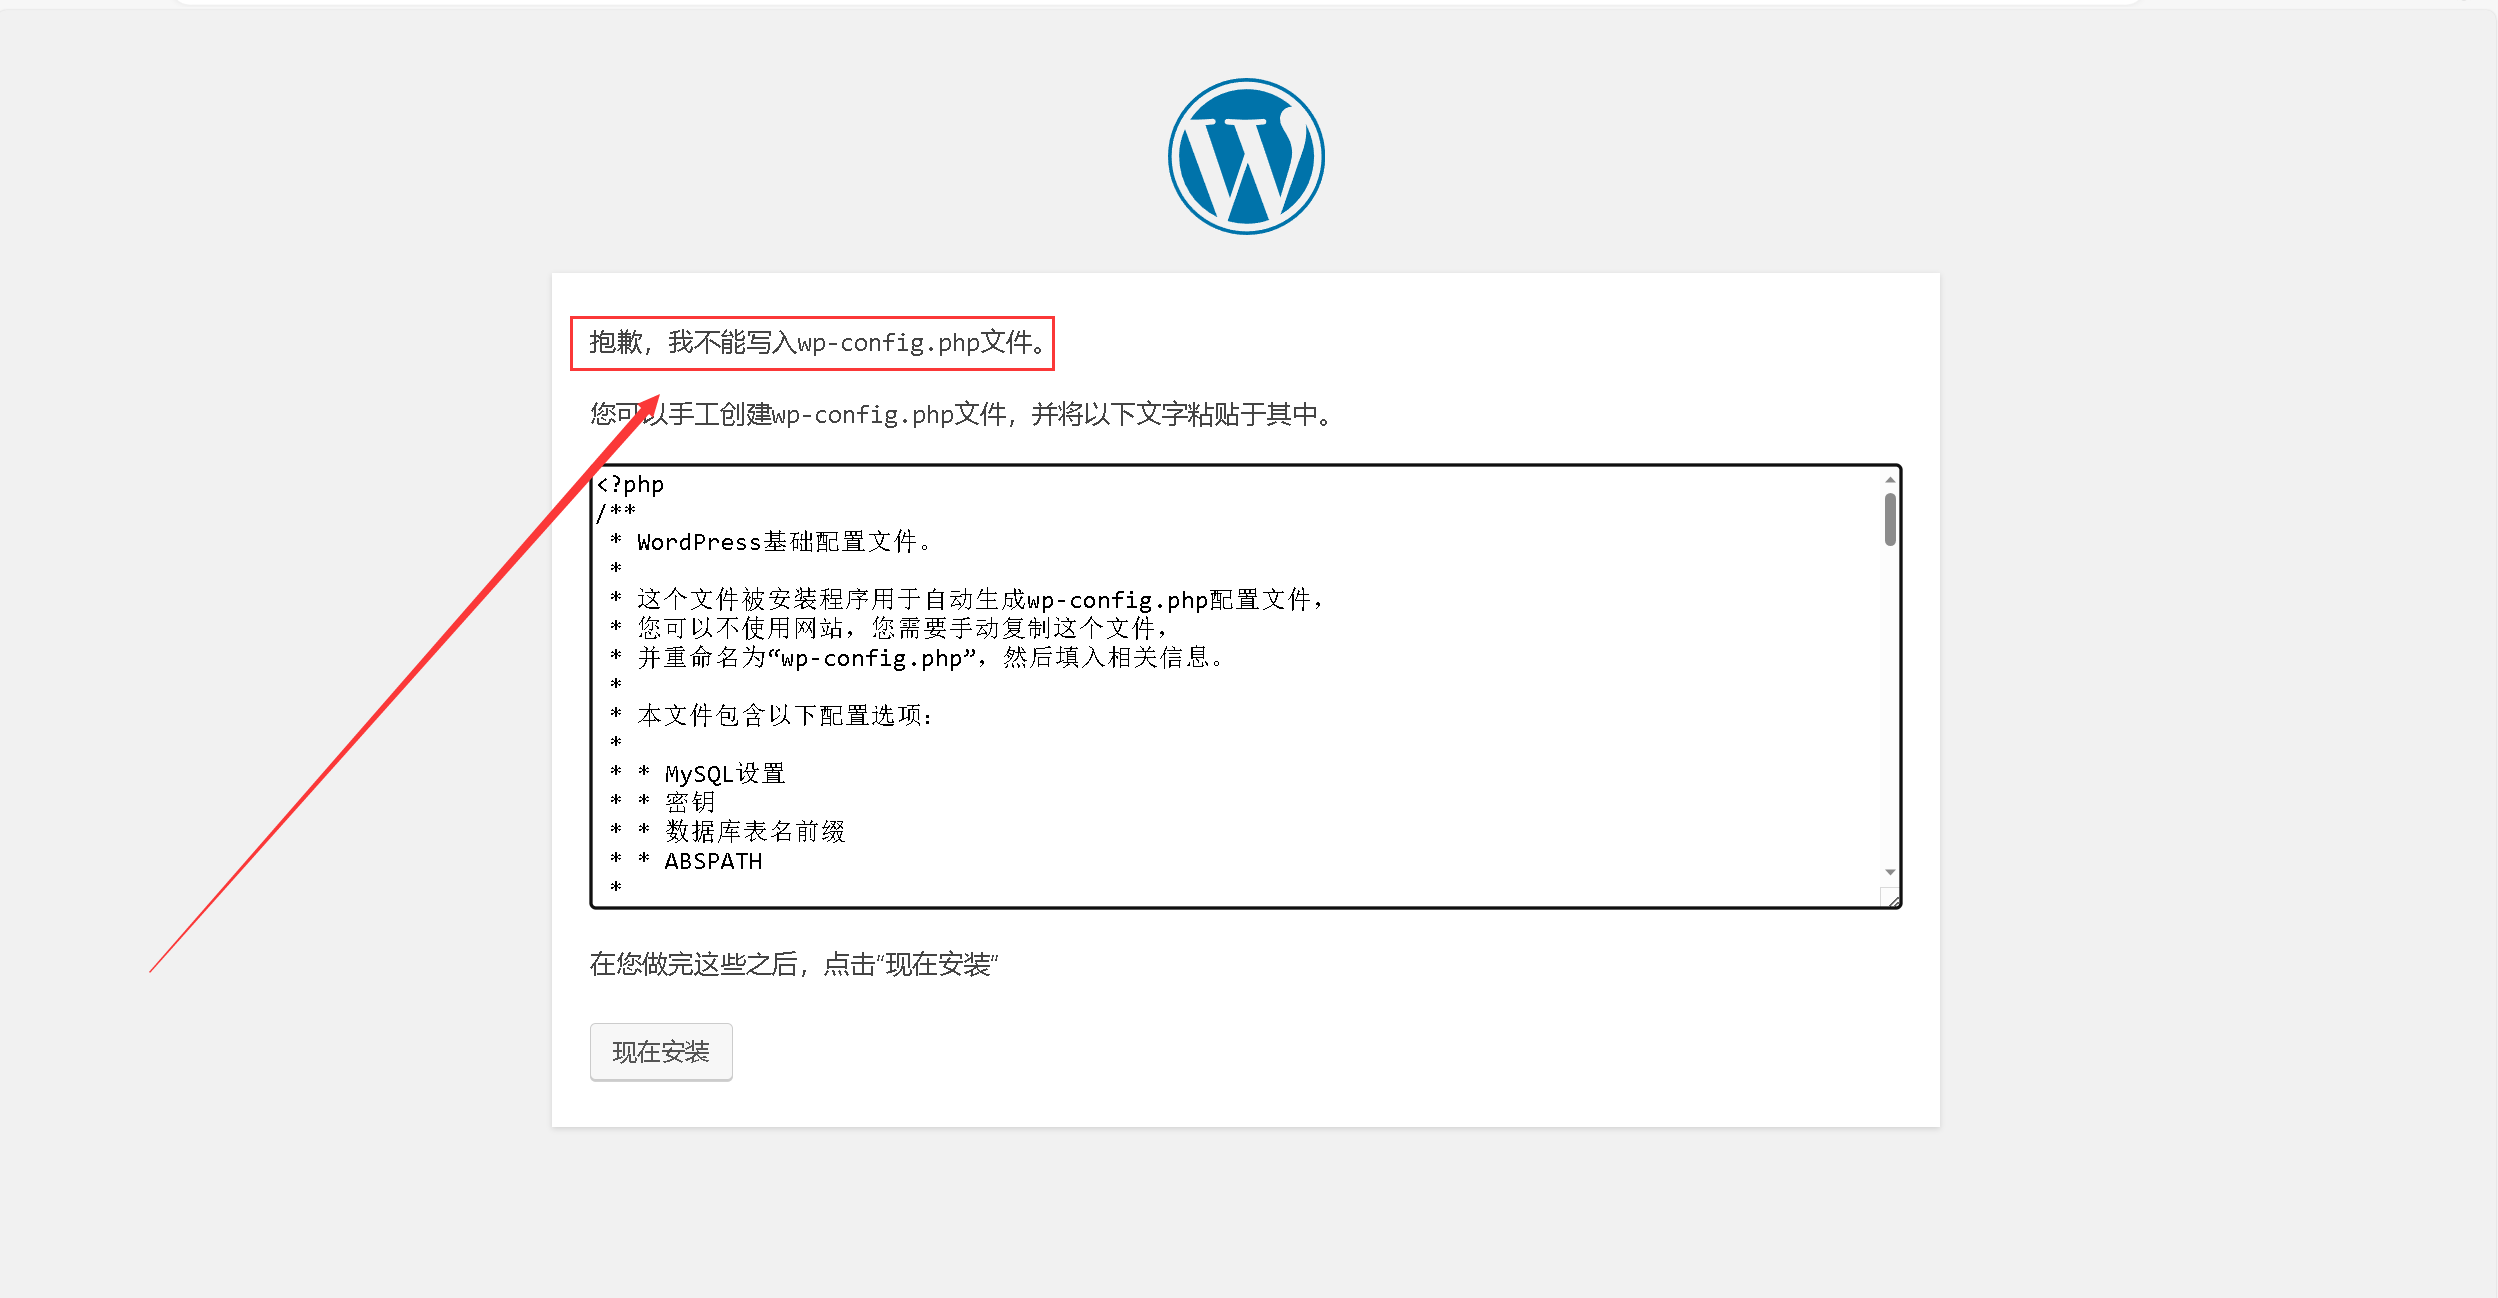
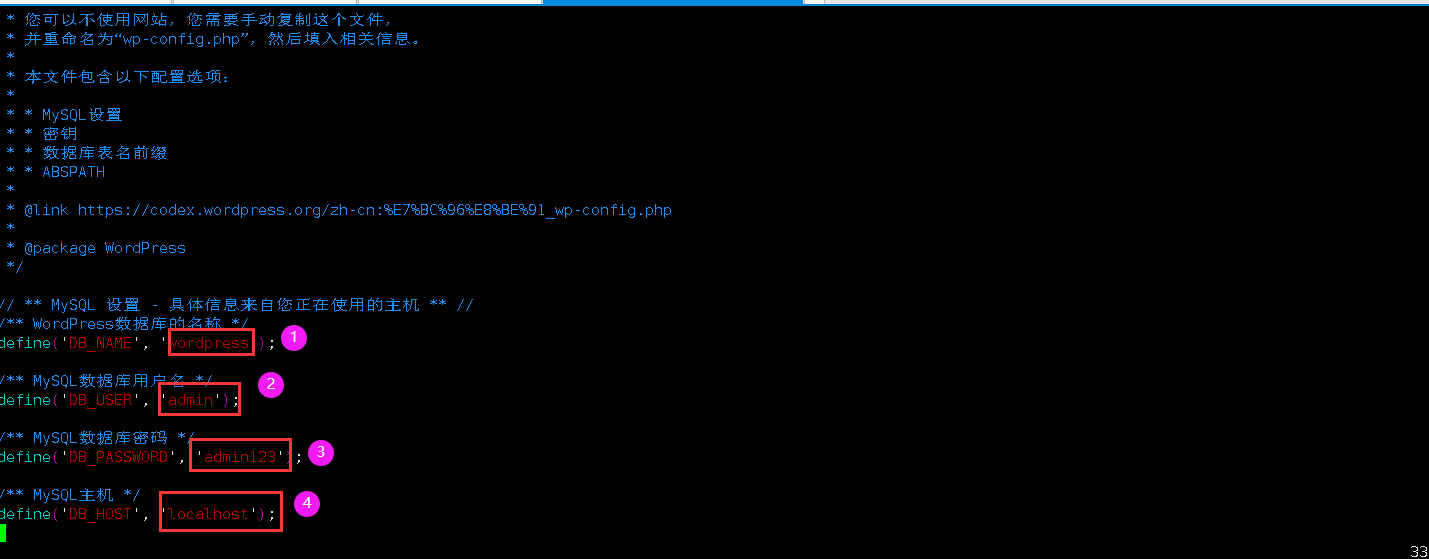
解决方法:1.在网站根目录,复制wp-config-sample.php文件,修改为 wp-config.php。
2.手动填写数据库信息;
3.刷新网页,数据库连接成功。
[root@jeven html]# ls
index.php  license.txt  wordpress        wp-admin            wp-comments-post.php  wp-content   wp-includes        wp-load.php   wp-mail.php      wp-signup.php     xmlrpc.php
info.php   readme.html  wp-activate.php  wp-blog-header.php  wp-config-sample.php  wp-cron.php  wp-links-opml.php  wp-login.php  wp-settings.php  wp-trackback.php
[root@jeven html]# cp wp-config-sample.php wp-config.php
[root@jeven html]# cat wp-config.php
<?php
/**
 * WordPress基础配置文件。
 *
 * 这个文件被安装程序用于自动生成wp-config.php配置文件,
 * 您可以不使用网站,您需要手动复制这个文件,
 * 并重命名为“wp-config.php”,然后填入相关信息。
 *
 * 本文件包含以下配置选项:
 *
 * * MySQL设置
 * * 密钥
 * * 数据库表名前缀
 * * ABSPATH
 *
 * @link https://codex.wordpress.org/zh-cn:%E7%BC%96%E8%BE%91_wp-config.php
 *
 * @package WordPress
 */

// ** MySQL 设置 - 具体信息来自您正在使用的主机 ** //
/** WordPress数据库的名称 */
define('DB_NAME', 'wordpress');

/** MySQL数据库用户名 */
define('DB_USER', 'admin');

/** MySQL数据库密码 */
define('DB_PASSWORD', 'admin123');

/** MySQL主机 */
define('DB_HOST', 'localhost');

/** 创建数据表时默认的文字编码 */
define('DB_CHARSET', 'utf8');

/** 数据库整理类型。如不确定请勿更改 */
define('DB_COLLATE', '');

/**#@+
 * 身份认证密钥与盐。
 *
 * 修改为任意独一无二的字串!
 * 或者直接访问{@link https://api.wordpress.org/secret-key/1.1/salt/
 * WordPress.org密钥生成服务}
 * 任何修改都会导致所有cookies失效,所有用户将必须重新登录。
 *
 * @since 2.6.0
 */
define('AUTH_KEY',         'put your unique phrase here');
define('SECURE_AUTH_KEY',  'put your unique phrase here');
define('LOGGED_IN_KEY',    'put your unique phrase here');
define('NONCE_KEY',        'put your unique phrase here');
define('AUTH_SALT',        'put your unique phrase here');
define('SECURE_AUTH_SALT', 'put your unique phrase here');
define('LOGGED_IN_SALT',   'put your unique phrase here');
define('NONCE_SALT',       'put your unique phrase here');

/**#@-*/

/**
 * WordPress数据表前缀。
 *
 * 如果您有在同一数据库内安装多个WordPress的需求,请为每个WordPress设置
 * 不同的数据表前缀。前缀名只能为数字、字母加下划线。
 */
$table_prefix  = 'wp_';

/**
 * 开发者专用:WordPress调试模式。
 *
 * 将这个值改为true,WordPress将显示所有用于开发的提示。
 * 强烈建议插件开发者在开发环境中启用WP_DEBUG。
 *
 * 要获取其他能用于调试的信息,请访问Codex。
 *
 * @link https://codex.wordpress.org/Debugging_in_WordPress
 */
define('WP_DEBUG', false);

/**
 * zh_CN本地化设置:启用ICP备案号显示
 *
 * 可在设置→常规中修改。
 * 如需禁用,请移除或注释掉本行。
 */
define('WP_ZH_CN_ICP_NUM', true);

/* 好了!请不要再继续编辑。请保存本文件。使用愉快! */

/** WordPress目录的绝对路径。 */
if ( !defined('ABSPATH') )
	define('ABSPATH', dirname(__FILE__) . '/');

/** 设置WordPress变量和包含文件。 */
require_once(ABSPATH . 'wp-settings.php');
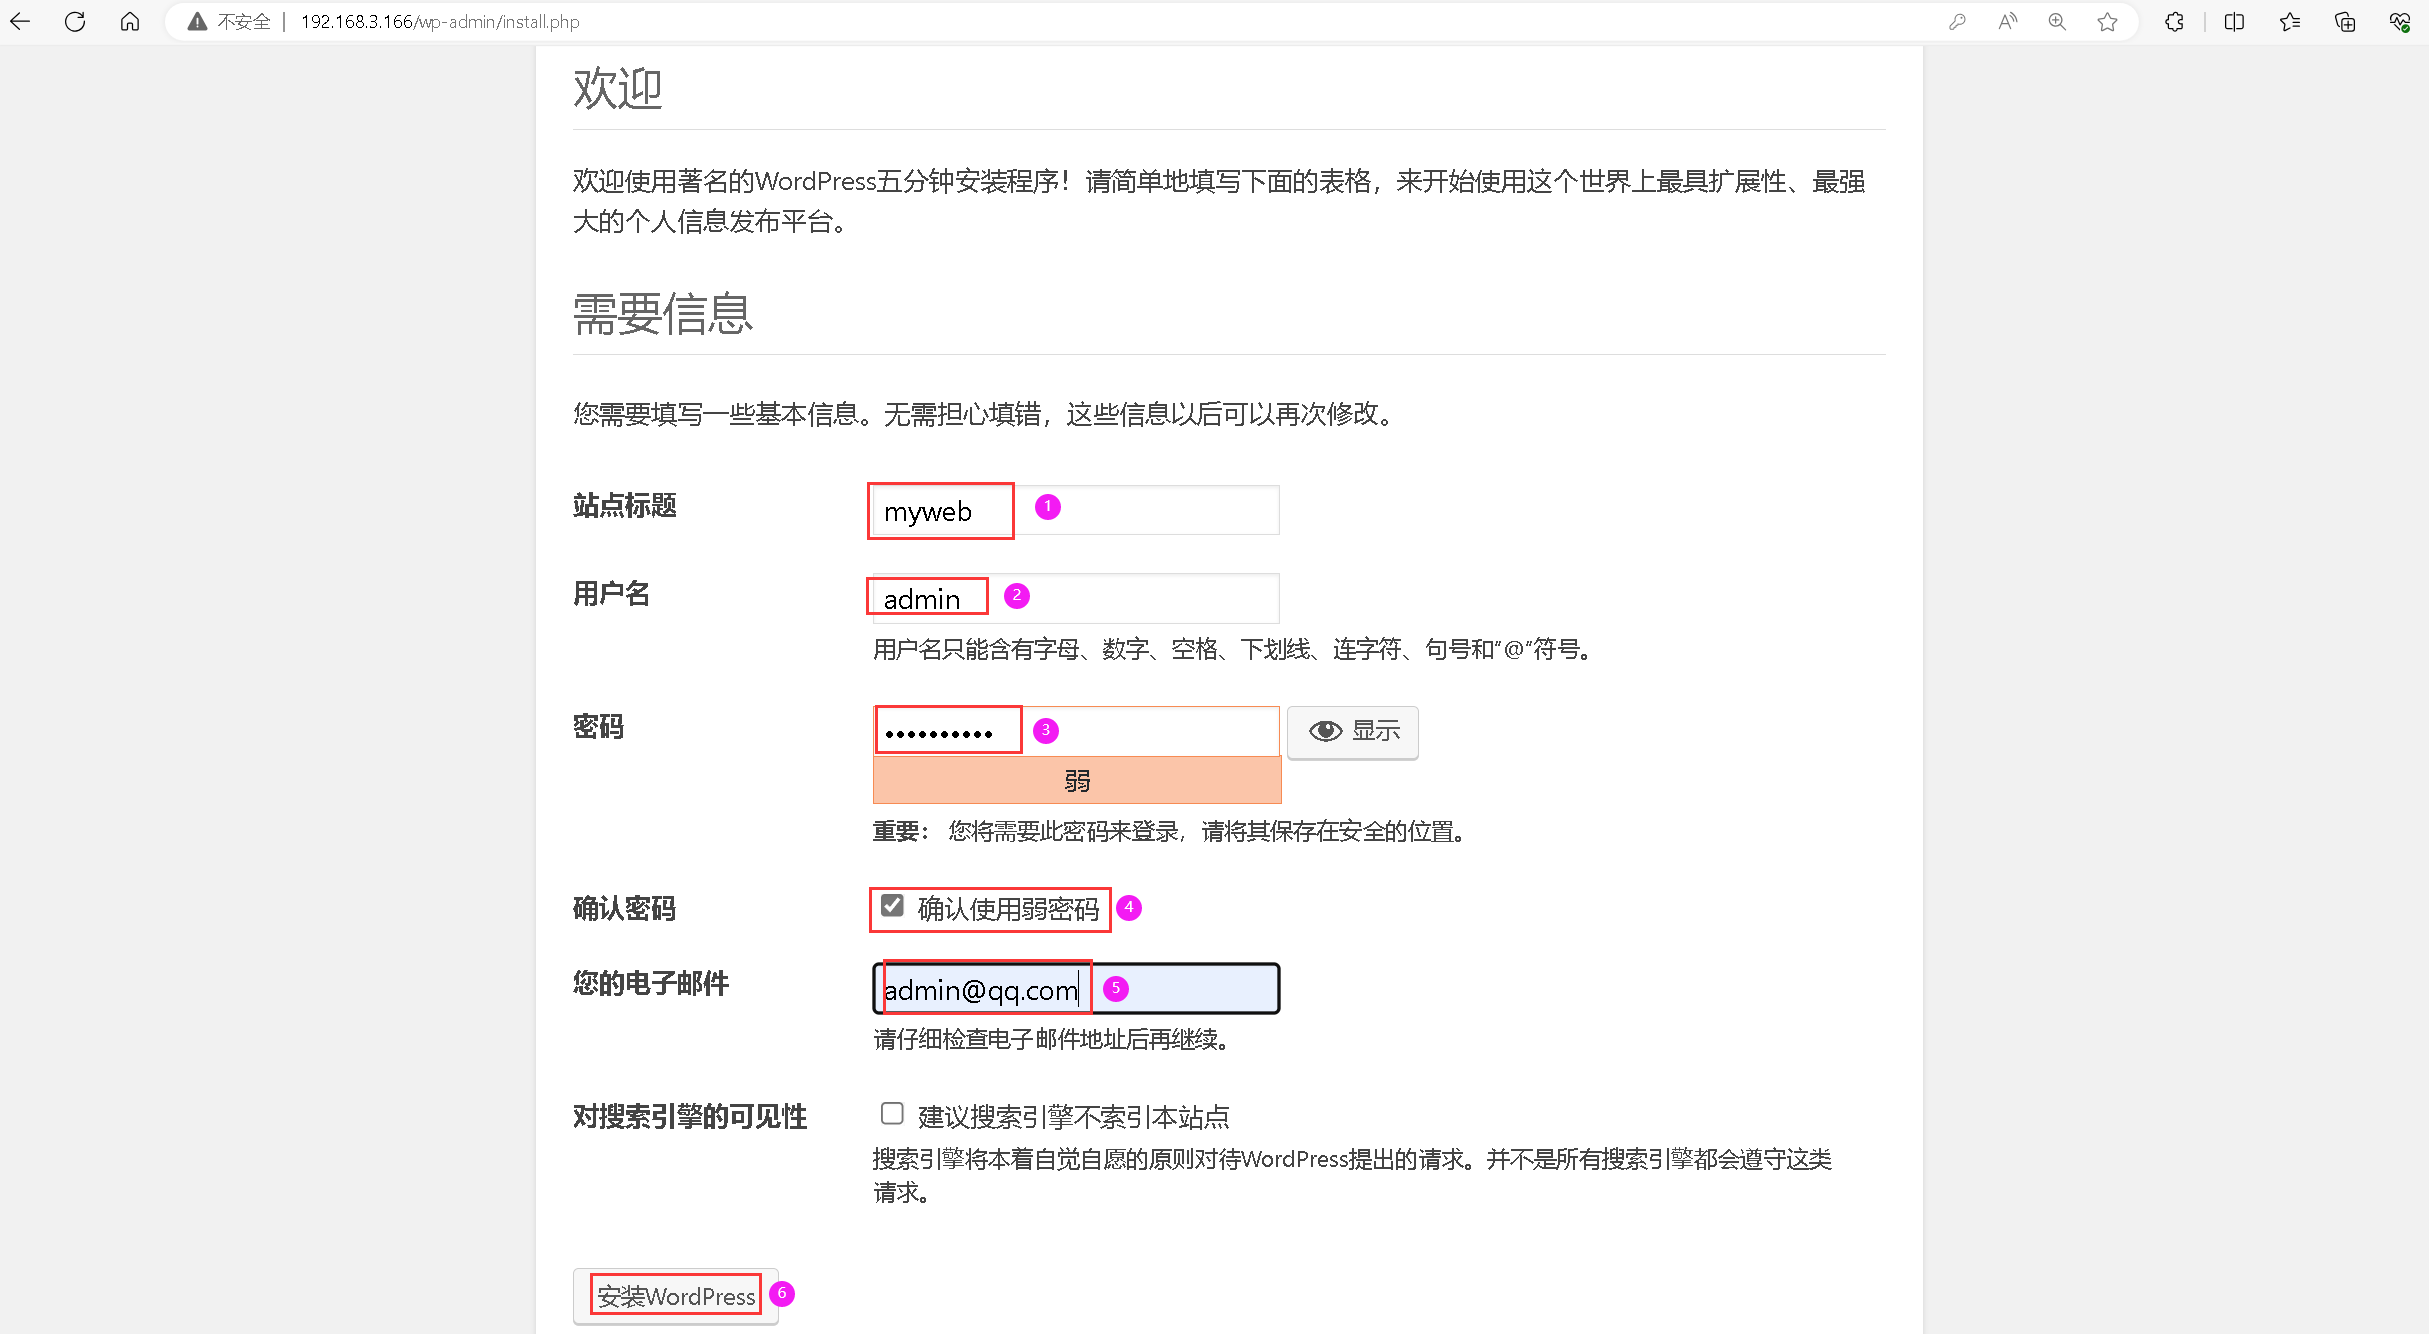
8.4 设置用户名
刷新网页后,进入用户设置页面。

九、访问wordpress网站
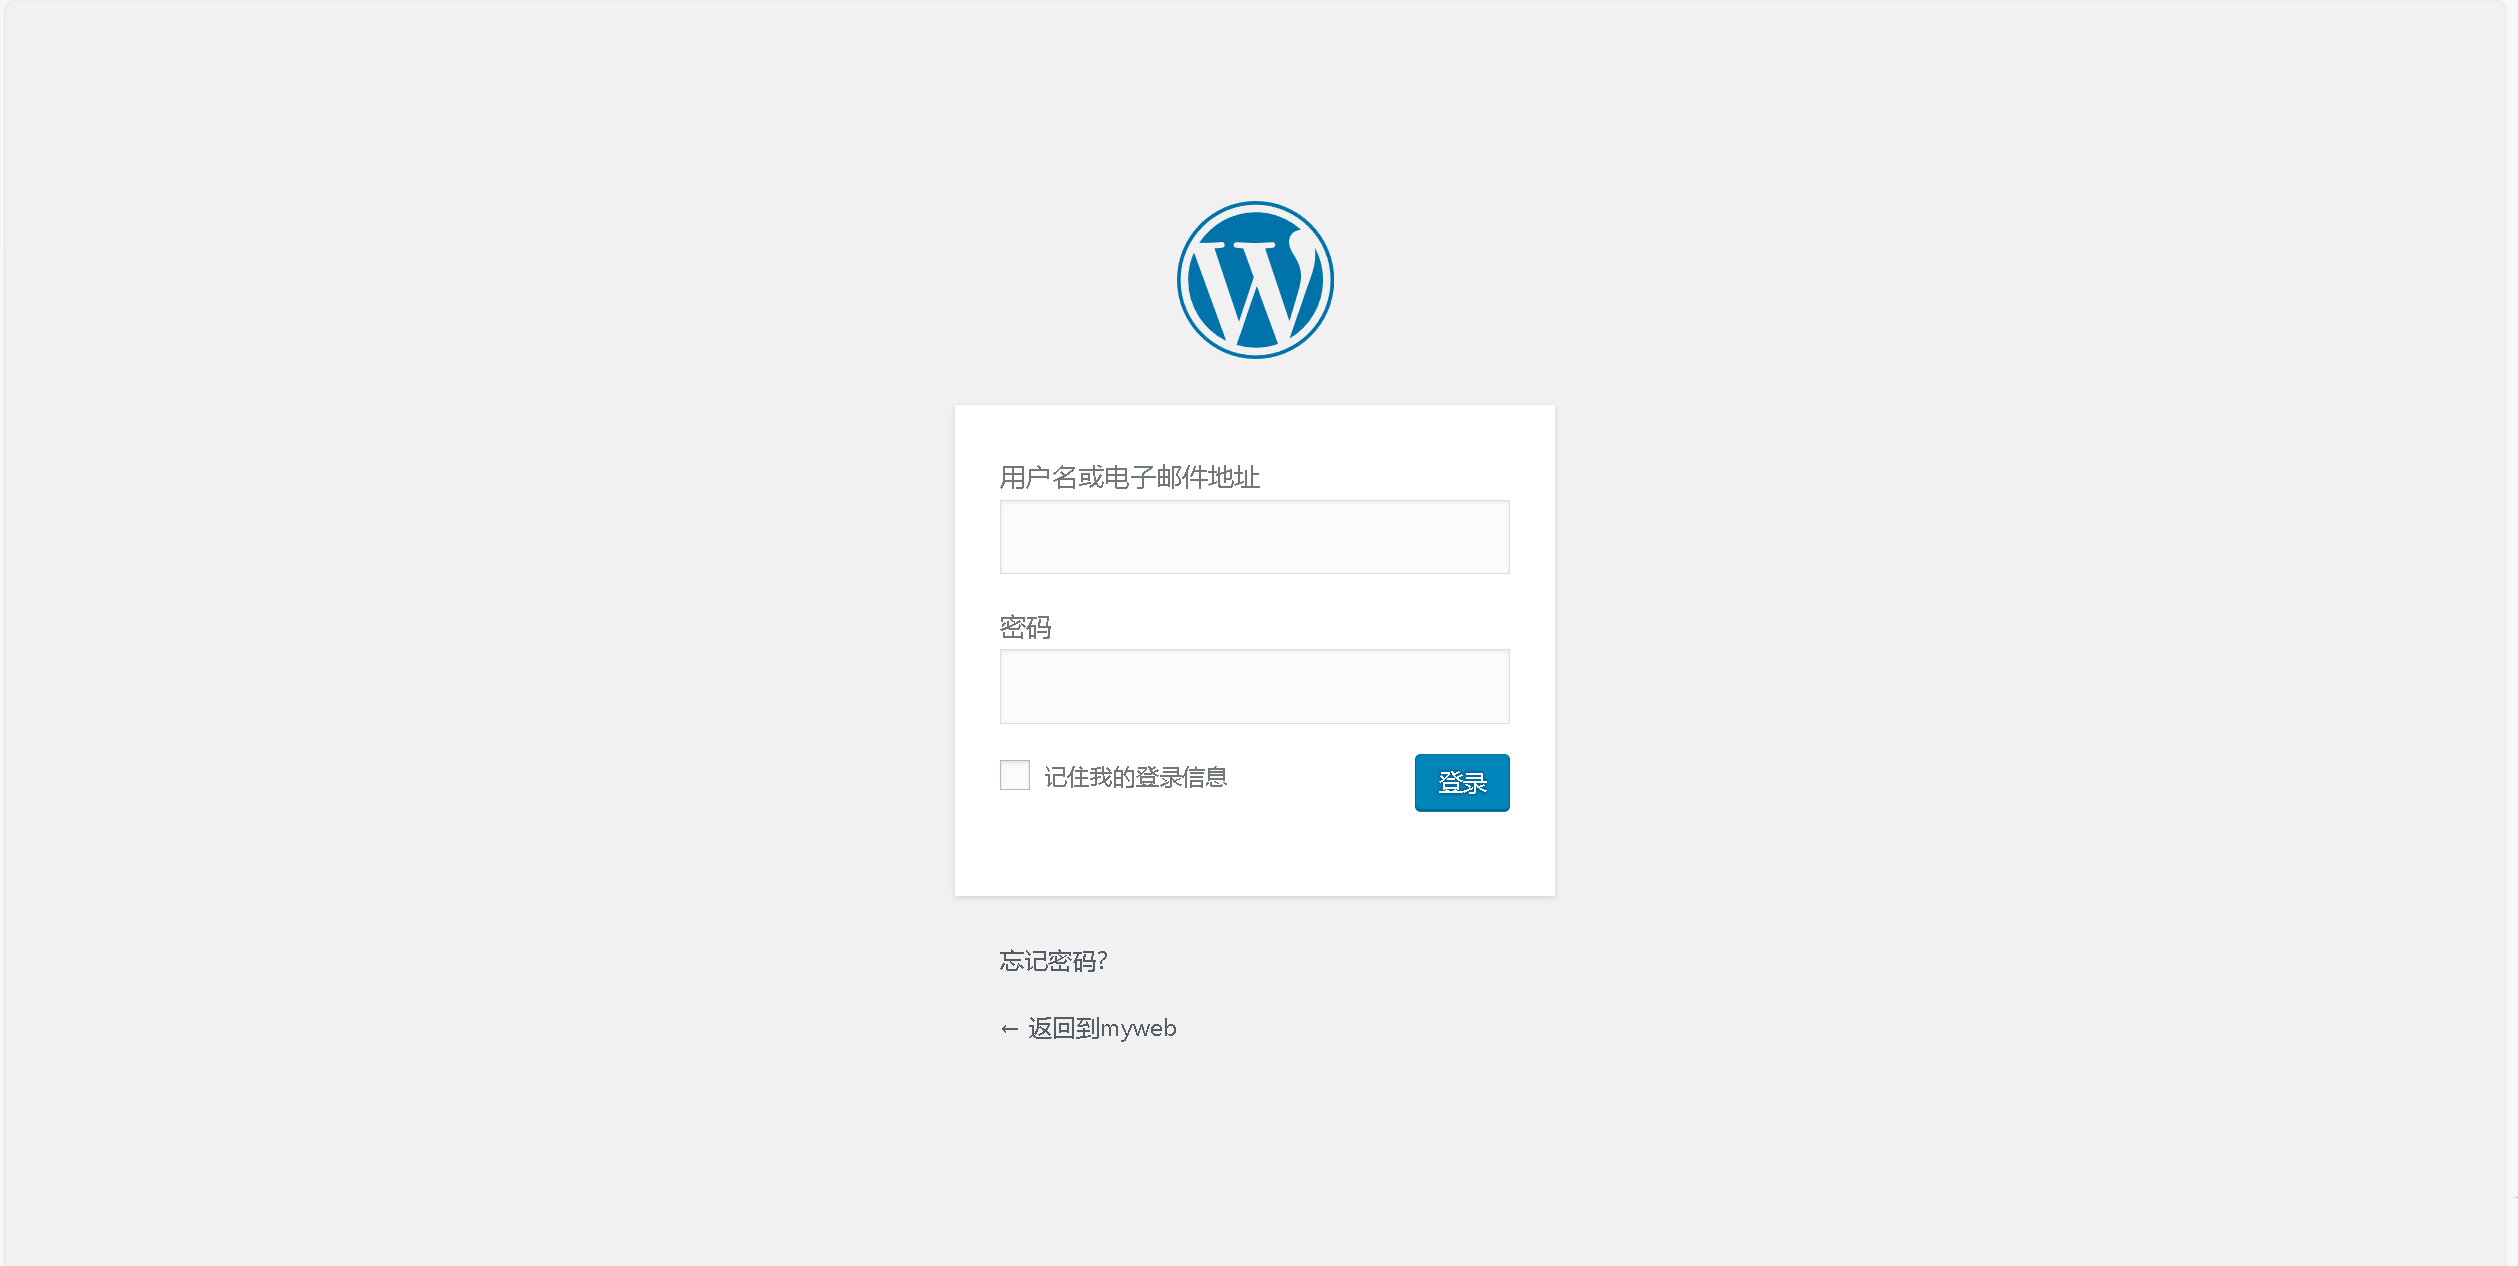
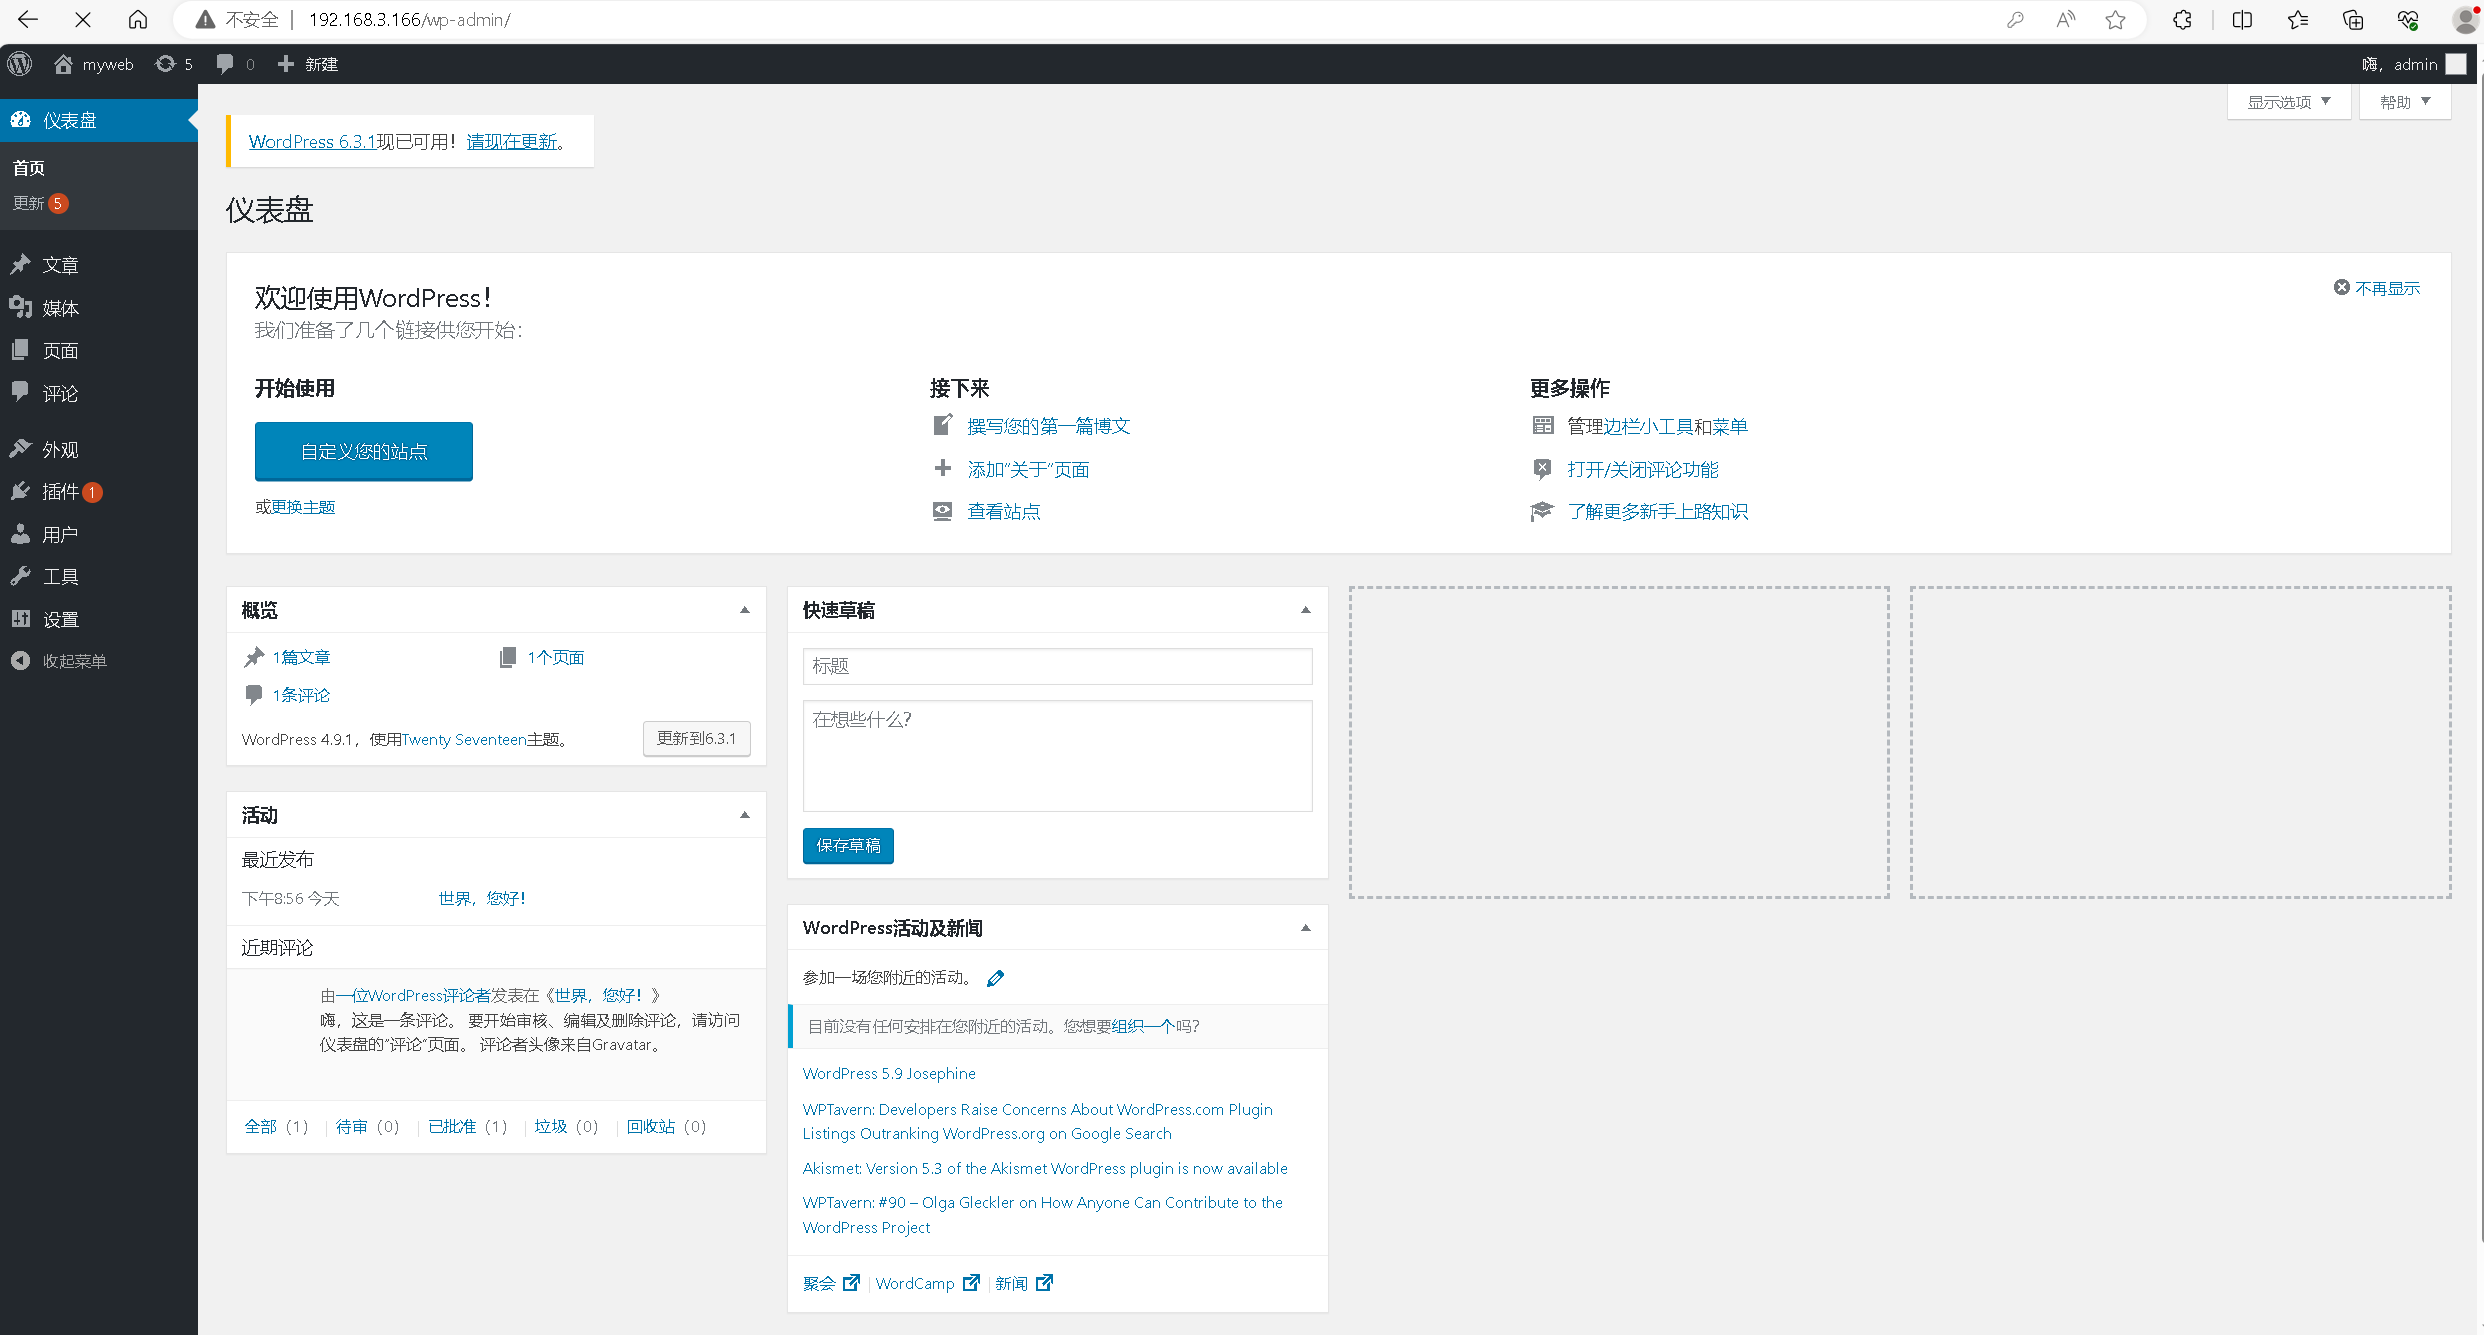
9.1 访问wordpress后台管理
访问地址:http://192.168.3.166/wp-login.php
将IP替换为自己服务器IP地址,输入刚才设置的用户名和密码,进入到wordpress后台管理页面。
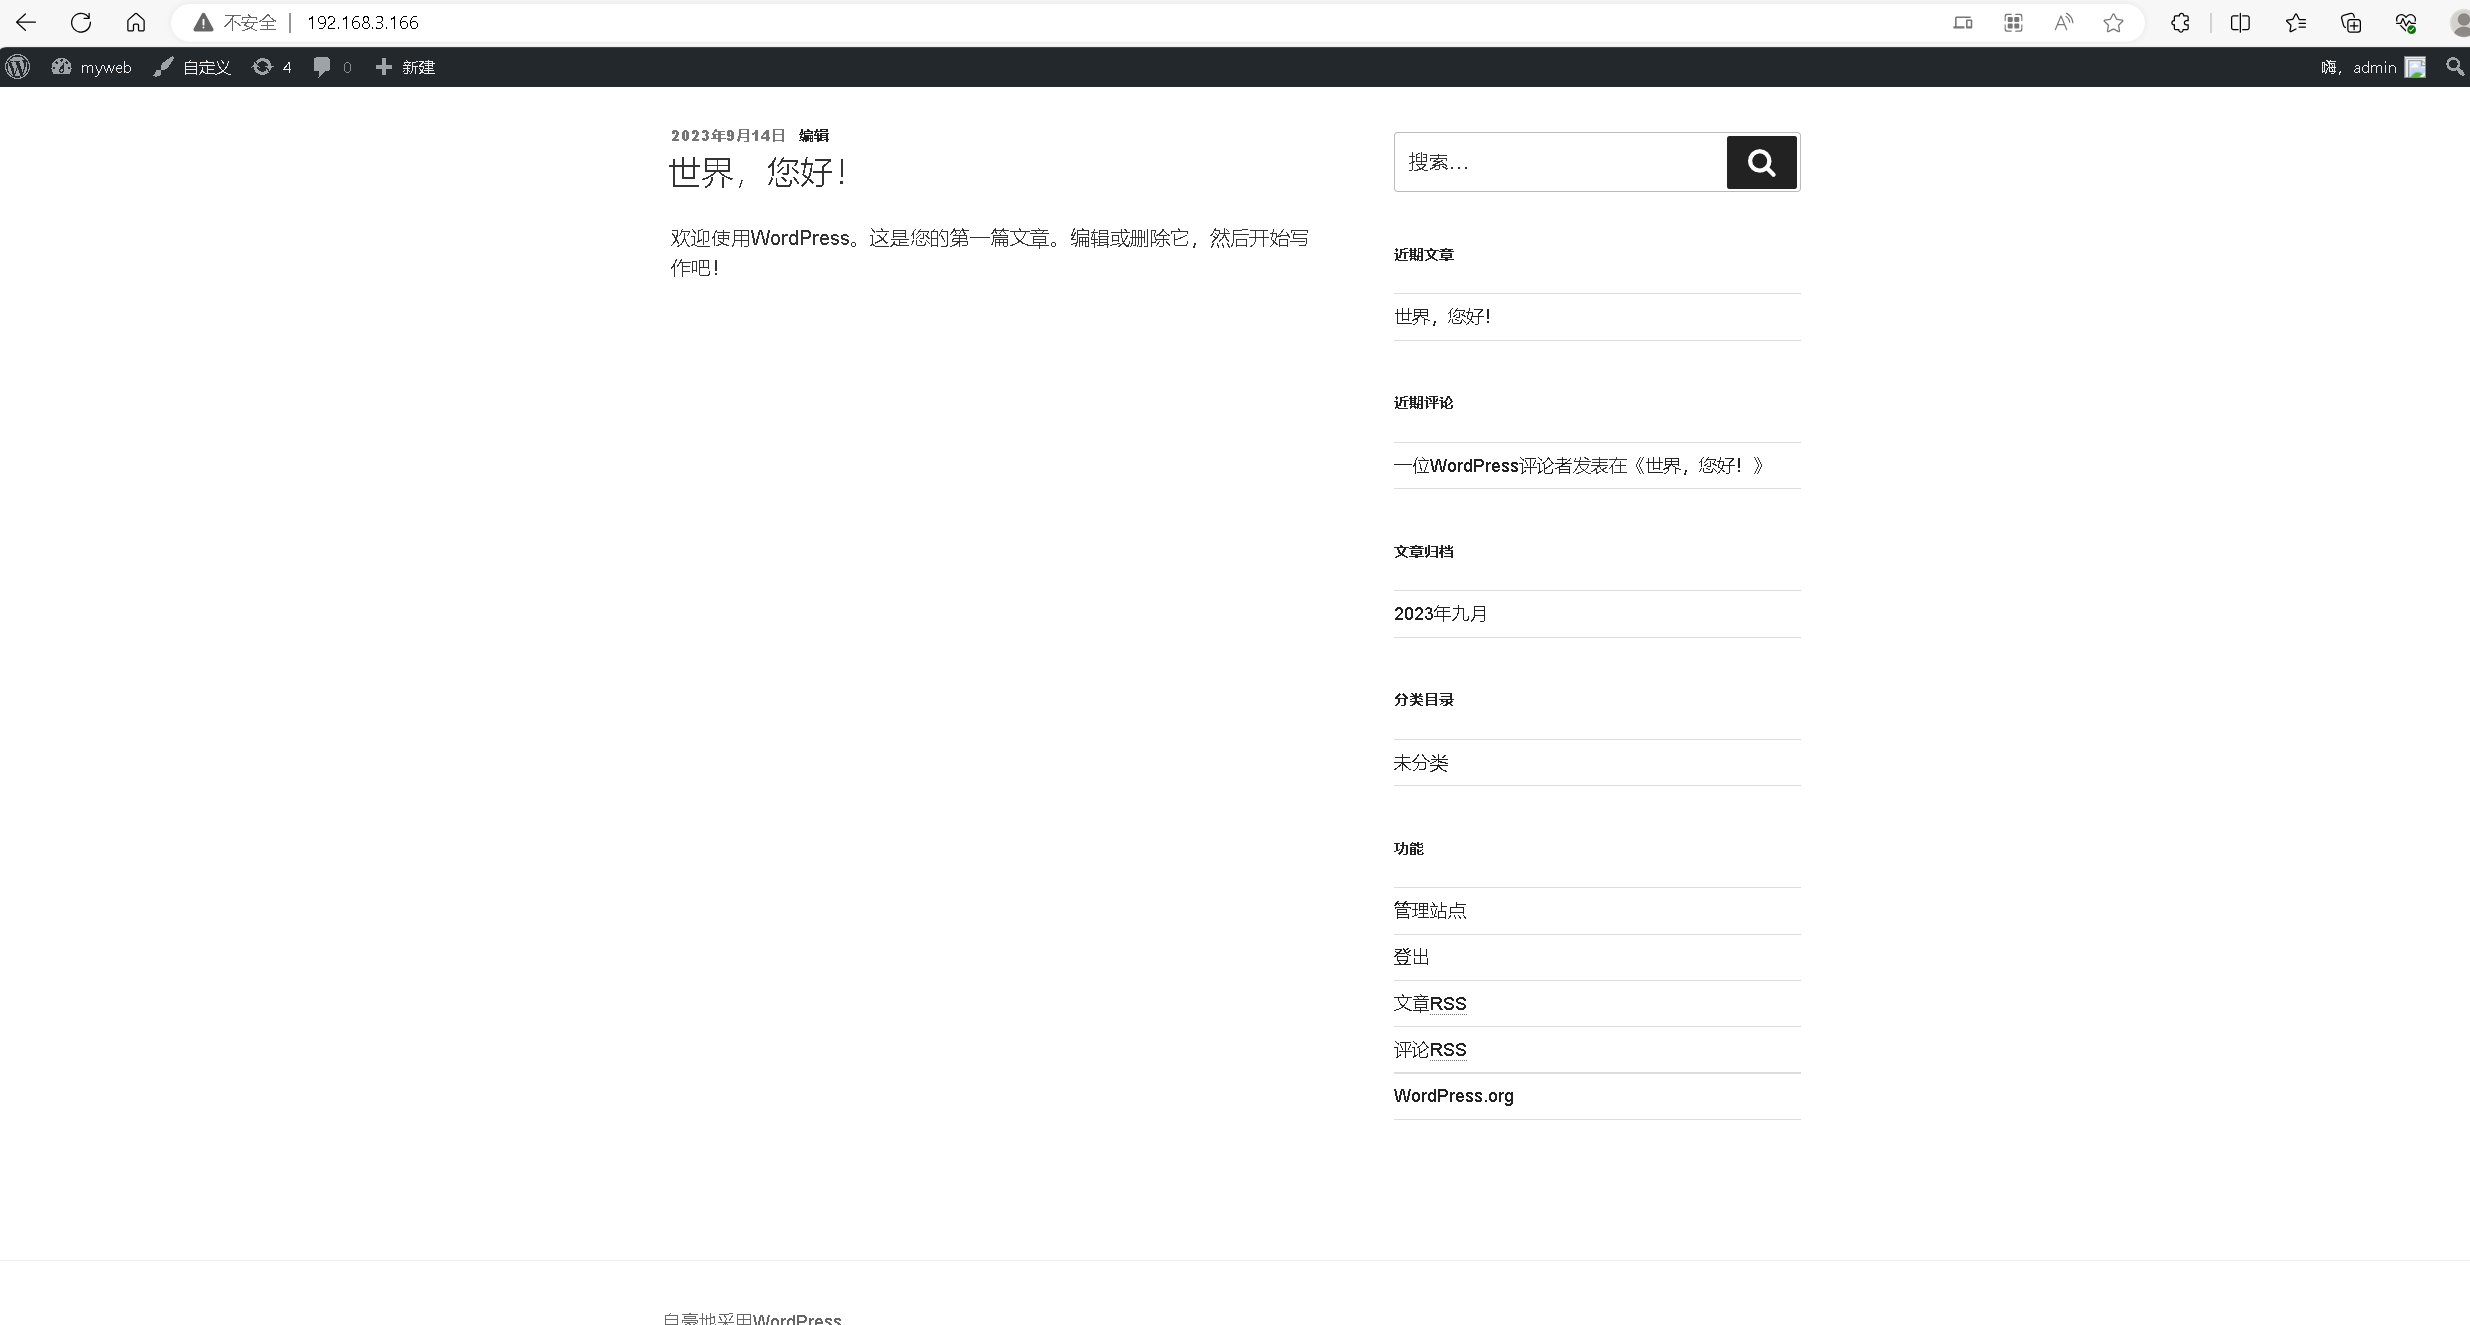
9.2 访问wordpress前台首页
直接访问:http://192.168.3.166,将IP替换为自己服务器IP地址,访问wordpress前台首页。
我正在参与 腾讯云开发者社区数据库专题有奖征文。
- 点赞
- 收藏
- 关注作者


评论(0)