视频动作识别

视频动作识别
实验目标
通过本案例的学习:
- 掌握C3D模型训练和模型推理、I3D模型推理的方法;
注意事项
-
本案例推荐使用TensorFlow-1.13.1,需使用 GPU 运行,请查看《ModelArts JupyterLab 硬件规格使用指南》了解切换硬件规格的方法;
-
如果您是第一次使用 JupyterLab,请查看《ModelArts JupyterLab使用指导》了解使用方法;
-
如果您在使用 JupyterLab 过程中碰到报错,请参考《ModelArts JupyterLab常见问题解决办法》尝试解决问题。
实验步骤
案例内容介绍
视频动作识别是指对一小段视频中的内容进行分析,判断视频中的人物做了哪种动作。视频动作识别与图像领域的图像识别,既有联系又有区别,图像识别是对一张静态图片进行识别,而视频动作识别不仅要考察每张图片的静态内容,还要考察不同图片静态内容之间的时空关系。比如一个人扶着一扇半开的门,仅凭这一张图片无法判断该动作是开门动作还是关门动作。
视频分析领域的研究相比较图像分析领域的研究,发展时间更短,也更有难度。视频分析模型完成的难点首先在于,需要强大的计算资源来完成视频的分析。视频要拆解成为图像进行分析,导致模型的数据量十分庞大。视频内容有很重要的考虑因素是动作的时间顺序,需要将视频转换成的图像通过时间关系联系起来,做出判断,所以模型需要考虑时序因素,加入时间维度之后参数也会大量增加。
得益于PASCAL VOC、ImageNet、MS COCO等数据集的公开,图像领域产生了很多的经典模型,那么在视频分析领域有没有什么经典的模型呢?答案是有的,本案例将为大家介绍视频动作识别领域的经典模型并进行代码实践。
1.准备源代码和数据
这一步准备案例所需的源代码和数据,相关资源已经保存在OBS中,我们通过ModelArts SDK将资源下载到本地,并解压到当前目录下。解压后,当前目录包含data、dataset_subset和其他目录文件,分别是预训练参数文件、数据集和代码文件等。
import os
import moxing as mox
if not os.path.exists('videos'):
    mox.file.copy("obs://ai-course-common-26-bj4-v2/video/video.tar.gz", "./video.tar.gz")
    # 使用tar命令解压资源包
    os.system("tar xf ./video.tar.gz")
    # 使用rm命令删除压缩包
    os.system("rm ./video.tar.gz")
INFO:root:Using MoXing-v1.17.3-

INFO:root:Using OBS-Python-SDK-3.20.7
上一节课我们已经介绍了视频动作识别有HMDB51、UCF-101和Kinetics三个常用的数据集,本案例选用了UCF-101数据集的部分子集作为演示用数据集,接下来,我们播放一段UCF-101中的视频:
video_name = "./data/v_TaiChi_g01_c01.avi"
from IPython.display import clear_output, Image, display, HTML
import time
import cv2
import base64
import numpy as np

def arrayShow(img):
    _,ret = cv2.imencode('.jpg', img)
    return Image(data=ret)

cap = cv2.VideoCapture(video_name)

while True:
    try:
        clear_output(wait=True)
        ret, frame = cap.read()
        if ret:
            tmp = cv2.cvtColor(frame, cv2.COLOR_BGR2RGB)
            img = arrayShow(frame)
            display(img)
            time.sleep(0.05)
        else:
            break
    except KeyboardInterrupt:
        cap.release()
cap.release()

2.视频动作识别模型介绍
在图像领域中,ImageNet作为一个大型图像识别数据集,自2010年开始,使用此数据集训练出的图像算法层出不穷,深度学习模型经历了从AlexNet到VGG-16再到更加复杂的结构,模型的表现也越来越好。在识别千种类别的图片时,错误率表现如下:

在图像识别中表现很好的模型,可以在图像领域的其他任务中继续使用,通过复用模型中部分层的参数,就可以提升模型的训练效果。有了基于ImageNet模型的图像模型,很多模型和任务都有了更好的训练基础,比如说物体检测、实例分割、人脸检测、人脸识别等。
那么训练效果显著的图像模型是否可以用于视频模型的训练呢?答案是yes,有研究证明,在视频领域,如果能够复用图像模型结构,甚至参数,将对视频模型的训练有很大帮助。但是怎样才能复用上图像模型的结构呢?首先需要知道视频分类与图像分类的不同,如果将视频视作是图像的集合,每一个帧将作为一个图像,视频分类任务除了要考虑到图像中的表现,也要考虑图像间的时空关系,才可以对视频动作进行分类。
为了捕获图像间的时空关系,论文I3D介绍了三种旧的视频分类模型,并提出了一种更有效的Two-Stream Inflated 3D ConvNets(简称I3D)的模型,下面将逐一简介这四种模型,更多细节信息请查看原论文。
旧模型一:卷积网络+LSTM
模型使用了训练成熟的图像模型,通过卷积网络,对每一帧图像进行特征提取、池化和预测,最后在模型的末端加一个LSTM层(长短期记忆网络),如下图所示,这样就可以使模型能够考虑时间性结构,将上下文特征联系起来,做出动作判断。这种模型的缺点是只能捕获较大的工作,对小动作的识别效果较差,而且由于视频中的每一帧图像都要经过网络的计算,所以训练时间很长。

旧模型二:3D卷积网络
3D卷积类似于2D卷积,将时序信息加入卷积操作。虽然这是一种看起来更加自然的视频处理方式,但是由于卷积核维度增加,参数的数量也增加了,模型的训练变得更加困难。这种模型没有对图像模型进行复用,而是直接将视频数据传入3D卷积网络进行训练。

旧模型三:Two-Stream 网络
Two-Stream 网络的两个流分别为1张RGB快照和10张计算之后的光流帧画面组成的栈。两个流都通过ImageNet预训练好的图像卷积网络,光流部分可以分为竖直和水平两个通道,所以是普通图片输入的2倍,模型在训练和测试中表现都十分出色。

光流视频 optical flow video
上面讲到了光流,在此对光流做一下介绍。光流是什么呢?名字很专业,感觉很陌生,但实际上这种视觉现象我们每天都在经历,我们坐高铁的时候,可以看到窗外的景物都在快速往后退,开得越快,就感受到外面的景物就是“刷”地一个残影,这种视觉上目标的运动方向和速度就是光流。光流从概念上讲,是对物体运动的观察,通过找到相邻帧之间的相关性来判断帧之间的对应关系,计算出相邻帧画面中物体的运动信息,获取像素运动的瞬时速度。在原始视频中,有运动部分和静止的背景部分,我们通常需要判断的只是视频中运动部分的状态,而光流就是通过计算得到了视频中运动部分的运动信息。
下面是一个经过计算后的原视频及光流视频。
原视频
光流视频

新模型:Two-Stream Inflated 3D ConvNets
新模型采取了以下几点结构改进:
- 拓展2D卷积为3D。直接利用成熟的图像分类模型,只不过将网络中二维$ N × N N × N × N $;
- 用 2D filter 的预训练参数来初始化 3D filter 的参数。上一步已经利用了图像分类模型的网络,这一步的目的是能利用上网络的预训练参数,直接将 2D filter 的参数直接沿着第三个时间维度进行复制N次,最后将所有参数值再除以N;
- 调整感受野的形状和大小。新模型改造了图像分类模型Inception-v1的结构,前两个max-pooling层改成使用$ 1 × 3 × 3 2 × 7 × 7 $的kernel。
- 延续了Two-Stream的基本方法。用双流结构来捕获图片之间的时空关系仍然是有效的。
最后新模型的整体结构如下图所示:

好,到目前为止,我们已经讲解了视频动作识别的经典数据集和经典模型,下面我们通过代码来实践地跑一跑其中的两个模型:C3D模型( 3D卷积网络)以及I3D模型(Two-Stream Inflated 3D ConvNets)。
C3D模型结构
我们已经在前面的“旧模型二:3D卷积网络”中讲解到3D卷积网络是一种看起来比较自然的处理视频的网络,虽然它有效果不够好,计算量也大的特点,但它的结构很简单,可以构造一个很简单的网络就可以实现视频动作识别,如下图所示是3D卷积的示意图:

a)中,一张图片进行了2D卷积, b)中,对视频进行2D卷积,将多个帧视作多个通道, c)中,对视频进行3D卷积,将时序信息加入输入信号中。
ab中,output都是一张二维特征图,所以无论是输入是否有时间信息,输出都是一张二维的特征图,2D卷积失去了时序信息。只有3D卷积在输出时,保留了时序信息。2D和3D池化操作同样有这样的问题。
如下图所示是一种C3D网络的变种:(如需阅读原文描述,请查看I3D论文 2.2 节)

C3D结构,包括8个卷积层,5个最大池化层以及2个全连接层,最后是softmax输出层。
所有的3D卷积核为$ 3 × 3 × 3$ 步长为1,使用SGD,初始学习率为0.003,每150k个迭代,除以2。优化在1.9M个迭代的时候结束,大约13epoch。
数据处理时,视频抽帧定义大小为:$ c × l × h × w c l h w d × k × k d k 128 × 171 $,几乎将UCF-101数据集中的帧调整为一半大小。视频被分为不重复的16帧画面,这些画面将作为模型网络的输入。最后对帧画面的大小进行裁剪,输入的数据为$16 × 112 × 112 $
3.C3D模型训练
接下来,我们将对C3D模型进行训练,训练过程分为:数据预处理以及模型训练。在此次训练中,我们使用的数据集为UCF-101,由于C3D模型的输入是视频的每帧图片,因此我们需要对数据集的视频进行抽帧,也就是将视频转换为图片,然后将图片数据传入模型之中,进行训练。
在本案例中,我们随机抽取了UCF-101数据集的一部分进行训练的演示,感兴趣的同学可以下载完整的UCF-101数据集进行训练。
数据集存储在目录dataset_subset下
如下代码是使用cv2库进行视频文件到图片文件的转换
import cv2
import os
# 视频数据集存储位置
video_path = './dataset_subset/'
# 生成的图像数据集存储位置
save_path = './dataset/'
# 如果文件路径不存在则创建路径
if not os.path.exists(save_path):
    os.mkdir(save_path)
# 获取动作列表
action_list = os.listdir(video_path)
# 遍历所有动作
for action in action_list:
    if action.startswith(".")==False:
        if not os.path.exists(save_path+action):
            os.mkdir(save_path+action)
        video_list = os.listdir(video_path+action)
        # 遍历所有视频
        for video in video_list:
            prefix = video.split('.')[0]
            if not os.path.exists(os.path.join(save_path, action, prefix)):
                os.mkdir(os.path.join(save_path, action, prefix))
            save_name = os.path.join(save_path, action, prefix) + '/'
            video_name = video_path+action+'/'+video
            # 读取视频文件
            # cap为视频的帧
            cap = cv2.VideoCapture(video_name)
            # fps为帧率
            fps = int(cap.get(cv2.CAP_PROP_FRAME_COUNT))
            fps_count = 0
            for i in range(fps):
                ret, frame = cap.read()
                if ret:
                    # 将帧画面写入图片文件中
                    cv2.imwrite(save_name+str(10000+fps_count)+'.jpg',frame)
                    fps_count += 1
此时,视频逐帧转换成的图片数据已经存储起来,为模型训练做准备。
4.模型训练
首先,我们构建模型结构。
C3D模型结构我们之前已经介绍过,这里我们通过keras提供的Conv3D,MaxPool3D,ZeroPadding3D等函数进行模型的搭建。
from keras.layers import Dense,Dropout,Conv3D,Input,MaxPool3D,Flatten,Activation, ZeroPadding3D
from keras.regularizers import l2
from keras.models import Model, Sequential

# 输入数据为 112×112 的图片,16帧, 3通道
input_shape = (112,112,16,3)
# 权重衰减率
weight_decay = 0.005
# 类型数量,我们使用UCF-101 为数据集,所以为101
nb_classes = 101

# 构建模型结构
inputs = Input(input_shape)

x = Conv3D(64,(3,3,3),strides=(1,1,1),padding='same',
           activation='relu',kernel_regularizer=l2(weight_decay))(inputs)
x = MaxPool3D((2,2,1),strides=(2,2,1),padding='same')(x)

x = Conv3D(128,(3,3,3),strides=(1,1,1),padding='same',
           activation='relu',kernel_regularizer=l2(weight_decay))(x)
x = MaxPool3D((2,2,2),strides=(2,2,2),padding='same')(x)

x = Conv3D(128,(3,3,3),strides=(1,1,1),padding='same',
           activation='relu',kernel_regularizer=l2(weight_decay))(x)
x = MaxPool3D((2,2,2),strides=(2,2,2),padding='same')(x)

x = Conv3D(256,(3,3,3),strides=(1,1,1),padding='same',
           activation='relu',kernel_regularizer=l2(weight_decay))(x)
x = MaxPool3D((2,2,2),strides=(2,2,2),padding='same')(x)

x = Conv3D(256, (3, 3, 3), strides=(1, 1, 1), padding='same',
           activation='relu',kernel_regularizer=l2(weight_decay))(x)
x = MaxPool3D((2, 2, 2), strides=(2, 2, 2), padding='same')(x)

x = Flatten()(x)
x = Dense(2048,activation='relu',kernel_regularizer=l2(weight_decay))(x)
x = Dropout(0.5)(x)
x = Dense(2048,activation='relu',kernel_regularizer=l2(weight_decay))(x)
x = Dropout(0.5)(x)
x = Dense(nb_classes,kernel_regularizer=l2(weight_decay))(x)
x = Activation('softmax')(x)

model = Model(inputs, x)
Using TensorFlow backend.

/home/ma-user/anaconda3/envs/TensorFlow-1.13.1/lib/python3.6/site-packages/tensorflow/python/framework/dtypes.py:526: FutureWarning: Passing (type, 1) or '1type' as a synonym of type is deprecated; in a future version of numpy, it will be understood as (type, (1,)) / '(1,)type'.

  _np_qint8 = np.dtype([("qint8", np.int8, 1)])

/home/ma-user/anaconda3/envs/TensorFlow-1.13.1/lib/python3.6/site-packages/tensorflow/python/framework/dtypes.py:527: FutureWarning: Passing (type, 1) or '1type' as a synonym of type is deprecated; in a future version of numpy, it will be understood as (type, (1,)) / '(1,)type'.

  _np_quint8 = np.dtype([("quint8", np.uint8, 1)])

/home/ma-user/anaconda3/envs/TensorFlow-1.13.1/lib/python3.6/site-packages/tensorflow/python/framework/dtypes.py:528: FutureWarning: Passing (type, 1) or '1type' as a synonym of type is deprecated; in a future version of numpy, it will be understood as (type, (1,)) / '(1,)type'.

  _np_qint16 = np.dtype([("qint16", np.int16, 1)])

/home/ma-user/anaconda3/envs/TensorFlow-1.13.1/lib/python3.6/site-packages/tensorflow/python/framework/dtypes.py:529: FutureWarning: Passing (type, 1) or '1type' as a synonym of type is deprecated; in a future version of numpy, it will be understood as (type, (1,)) / '(1,)type'.

  _np_quint16 = np.dtype([("quint16", np.uint16, 1)])

/home/ma-user/anaconda3/envs/TensorFlow-1.13.1/lib/python3.6/site-packages/tensorflow/python/framework/dtypes.py:530: FutureWarning: Passing (type, 1) or '1type' as a synonym of type is deprecated; in a future version of numpy, it will be understood as (type, (1,)) / '(1,)type'.

  _np_qint32 = np.dtype([("qint32", np.int32, 1)])

/home/ma-user/anaconda3/envs/TensorFlow-1.13.1/lib/python3.6/site-packages/tensorflow/python/framework/dtypes.py:535: FutureWarning: Passing (type, 1) or '1type' as a synonym of type is deprecated; in a future version of numpy, it will be understood as (type, (1,)) / '(1,)type'.

  np_resource = np.dtype([("resource", np.ubyte, 1)])

WARNING:tensorflow:From /home/ma-user/anaconda3/envs/TensorFlow-1.13.1/lib/python3.6/site-packages/tensorflow/python/framework/op_def_library.py:263: colocate_with (from tensorflow.python.framework.ops) is deprecated and will be removed in a future version.

Instructions for updating:

Colocations handled automatically by placer.

WARNING:tensorflow:From /home/ma-user/anaconda3/envs/TensorFlow-1.13.1/lib/python3.6/site-packages/keras/backend/tensorflow_backend.py:3445: calling dropout (from tensorflow.python.ops.nn_ops) with keep_prob is deprecated and will be removed in a future version.

Instructions for updating:

Please use `rate` instead of `keep_prob`. Rate should be set to `rate = 1 - keep_prob`.
通过keras提供的summary()方法,打印模型结构。可以看到模型的层构建以及各层的输入输出情况。
model.summary()
此处输出较长,省略
通过keras的input方法可以查看模型的输入形状,shape分别为( batch size, width, height, frames, channels) 。
model.input
<tf.Tensor 'input_1:0' shape=(?, 112, 112, 16, 3) dtype=float32>
可以看到模型的数据处理的维度与图像处理模型有一些差别,多了frames维度,体现出时序关系在视频分析中的影响。
接下来,我们开始将图片文件转为训练需要的数据形式。
# 引用必要的库
from keras.optimizers import SGD,Adam
from keras.utils import np_utils

import numpy as np
import random
import cv2

import matplotlib.pyplot as plt

# 自定义callbacks
from schedules import onetenth_4_8_12
INFO:matplotlib.font_manager:font search path ['/home/ma-user/anaconda3/envs/TensorFlow-1.13.1/lib/python3.6/site-packages/matplotlib/mpl-data/fonts/ttf', '/home/ma-user/anaconda3/envs/TensorFlow-1.13.1/lib/python3.6/site-packages/matplotlib/mpl-data/fonts/afm', '/home/ma-user/anaconda3/envs/TensorFlow-1.13.1/lib/python3.6/site-packages/matplotlib/mpl-data/fonts/pdfcorefonts']

INFO:matplotlib.font_manager:generated new fontManager
参数定义
img_path = save_path  # 图片文件存储位置
results_path = './results'  # 训练结果保存位置
if not os.path.exists(results_path):
    os.mkdir(results_path)
数据集划分,随机抽取4/5 作为训练集,其余为验证集。将文件信息分别存储在train_list和test_list中,为训练做准备。
cates = os.listdir(img_path)
train_list = []
test_list = []
# 遍历所有的动作类型
for cate in cates:
    videos = os.listdir(os.path.join(img_path, cate))
    length = len(videos)//5
    # 训练集大小,随机取视频文件加入训练集
    train= random.sample(videos, length*4)
    train_list.extend(train)
    # 将余下的视频加入测试集
    for video in videos:
        if video not in train:
            test_list.append(video)
print("训练集为:")
print( train_list)
print("共%d 个视频\n"%(len(train_list)))
print("验证集为:")
print(test_list)
print("共%d 个视频"%(len(test_list)))
此处输出较长,省略
接下来开始进行模型的训练。
首先定义数据读取方法。方法process_data中读取一个batch的数据,包含16帧的图片信息的数据,以及数据的标注信息。在读取图片数据时,对图片进行随机裁剪和翻转操作以完成数据增广。
def process_data(img_path, file_list,batch_size=16,train=True):
    batch = np.zeros((batch_size,16,112,112,3),dtype='float32')
    labels = np.zeros(batch_size,dtype='int')
    cate_list = os.listdir(img_path)

    def read_classes():
        path = "./classInd.txt"
        with open(path, "r+") as f:
            lines = f.readlines()
        classes = {}
        for line in lines:
            c_id = line.split()[0]
            c_name = line.split()[1]
            classes[c_name] =c_id
        return classes

    classes_dict = read_classes()

    for file in file_list:
        cate = file.split("_")[1]
        img_list = os.listdir(os.path.join(img_path, cate, file))
        img_list.sort()
        batch_img = []
        for i in range(batch_size):
            path = os.path.join(img_path, cate, file)
            label =  int(classes_dict[cate])-1
            symbol = len(img_list)//16
            if train:
                # 随机进行裁剪
                crop_x = random.randint(0, 15)
                crop_y = random.randint(0, 58)
                # 随机进行翻转
                is_flip = random.randint(0, 1)
                # 以16 帧为单位
                for j in range(16):
                    img = img_list[symbol + j]
                    image = cv2.imread( path + '/' + img)
                    image = cv2.cvtColor(image, cv2.COLOR_BGR2RGB)
                    image = cv2.resize(image, (171, 128))
                    if is_flip == 1:
                        image = cv2.flip(image, 1)
                    batch[i][j][:][:][:] = image[crop_x:crop_x + 112, crop_y:crop_y + 112, :]
                    symbol-=1
                    if symbol<0:
                        break
                labels[i] = label
            else:
                for j in range(16):
                    img = img_list[symbol + j]
                    image = cv2.imread( path + '/' + img)
                    image = cv2.cvtColor(image, cv2.COLOR_BGR2RGB)
                    image = cv2.resize(image, (171, 128))
                    batch[i][j][:][:][:] = image[8:120, 30:142, :]
                    symbol-=1
                    if symbol<0:
                        break
                labels[i] = label
    return batch, labels
batch, labels = process_data(img_path, train_list)

print("每个batch的形状为:%s"%(str(batch.shape)))
print("每个label的形状为:%s"%(str(labels.shape)))
每个batch的形状为:(16, 16, 112, 112, 3)

每个label的形状为:(16,)
定义data generator, 将数据批次传入训练函数中。
def generator_train_batch(train_list, batch_size, num_classes, img_path):
    while True:
        # 读取一个batch的数据
        x_train, x_labels = process_data(img_path, train_list, batch_size=16,train=True)
        x = preprocess(x_train)
        # 形成input要求的数据格式
        y = np_utils.to_categorical(np.array(x_labels), num_classes)
        x = np.transpose(x, (0,2,3,1,4))
        yield x, y
def generator_val_batch(test_list, batch_size, num_classes, img_path):
    while True:
        # 读取一个batch的数据
        y_test,y_labels = process_data(img_path, train_list, batch_size=16,train=False)
        x = preprocess(y_test)
        # 形成input要求的数据格式
        x = np.transpose(x,(0,2,3,1,4))
        y = np_utils.to_categorical(np.array(y_labels), num_classes)
        yield x, y
定义方法preprocess, 对函数的输入数据进行图像的标准化处理。
def preprocess(inputs):
    inputs[..., 0] -= 99.9
    inputs[..., 1] -= 92.1
    inputs[..., 2] -= 82.6
    inputs[..., 0] /= 65.8
    inputs[..., 1] /= 62.3
    inputs[..., 2] /= 60.3
    return inputs
# 训练一个epoch大约需4分钟
# 类别数量
num_classes = 101
# batch大小
batch_size = 4
# epoch数量
epochs = 1
# 学习率大小
lr = 0.005
# 优化器定义
sgd = SGD(lr=lr, momentum=0.9, nesterov=True)
model.compile(loss='categorical_crossentropy', optimizer=sgd, metrics=['accuracy'])
# 开始训练
history = model.fit_generator(generator_train_batch(train_list, batch_size, num_classes,img_path),
                              steps_per_epoch= len(train_list) // batch_size,
                              epochs=epochs,
                              callbacks=[onetenth_4_8_12(lr)],
                              validation_data=generator_val_batch(test_list, batch_size,num_classes,img_path),
                              validation_steps= len(test_list) // batch_size,
                              verbose=1)
# 对训练结果进行保存
model.save_weights(os.path.join(results_path, 'weights_c3d.h5'))
WARNING:tensorflow:From /home/ma-user/anaconda3/envs/TensorFlow-1.13.1/lib/python3.6/site-packages/tensorflow/python/ops/math_ops.py:3066: to_int32 (from tensorflow.python.ops.math_ops) is deprecated and will be removed in a future version.

Instructions for updating:

Use tf.cast instead.


Epoch 1/1

20/20 [==============================] - 442s 22s/step - loss: 28.7099 - acc: 0.9344 - val_loss: 27.7600 - val_acc: 1.0000
5.模型测试
接下来我们将训练之后得到的模型进行测试。随机在UCF-101中选择一个视频文件作为测试数据,然后对视频进行取帧,每16帧画面传入模型进行一次动作预测,并且将动作预测以及预测百分比打印在画面中并进行视频播放。
首先,引入相关的库。
from IPython.display import clear_output, Image, display, HTML
import time
import cv2
import base64
import numpy as np
构建模型结构并且加载权重。
from models import c3d_model
model = c3d_model()
model.load_weights(os.path.join(results_path, 'weights_c3d.h5'), by_name=True)  # 加载刚训练的模型
定义函数arrayshow,进行图片变量的编码格式转换。
def arrayShow(img):
    _,ret = cv2.imencode('.jpg', img)
    return Image(data=ret)
进行视频的预处理以及预测,将预测结果打印到画面中,最后进行播放。
# 加载所有的类别和编号
with open('./ucfTrainTestlist/classInd.txt', 'r') as f:
class_names = f.readlines()
f.close()
# 读取视频文件
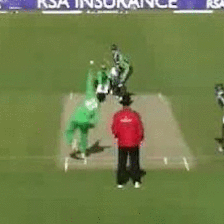
video = './videos/v_Punch_g03_c01.avi'
cap = cv2.VideoCapture(video)
clip = []
# 将视频画面传入模型
while True:
try:
clear_output(wait=True)
ret, frame = cap.read()
if ret:
tmp = cv2.cvtColor(frame, cv2.COLOR_BGR2RGB)
clip.append(cv2.resize(tmp, (171, 128)))
# 每16帧进行一次预测
if len(clip) == 16:
inputs = np.array(clip).astype(np.float32)
inputs = np.expand_dims(inputs, axis=0)
inputs[..., 0] -= 99.9
inputs[..., 1] -= 92.1
inputs[..., 2] -= 82.6
inputs[..., 0] /= 65.8
inputs[..., 1] /= 62.3
inputs[..., 2] /= 60.3
inputs = inputs[:,:,8:120,30:142,:]
inputs = np.transpose(inputs, (0, 2, 3, 1, 4))
# 获得预测结果
pred = model.predict(inputs)
label = np.argmax(pred[0])
# 将预测结果绘制到画面中
cv2.putText(frame, class_names[label].split(' ')[-1].strip(), (20, 20),
cv2.FONT_HERSHEY_SIMPLEX, 0.6,
(0, 0, 255), 1)
cv2.putText(frame, "prob: %.4f" % pred[0][label], (20, 40),
cv2.FONT_HERSHEY_SIMPLEX, 0.6,
(0, 0, 255), 1)
clip.pop(0)
# 播放预测后的视频
lines, columns, _ = frame.shape
frame = cv2.resize(frame, (int(columns), int(lines)))
img = arrayShow(frame)
display(img)
time.sleep(0.02)
else:
break
except:
print(0)
cap.release()

6.I3D 模型
在之前我们简单介绍了I3D模型,I3D官方github库提供了在Kinetics上预训练的模型和预测代码,接下来我们将体验I3D模型如何对视频进行预测。
首先,引入相关的包
import numpy as np
import tensorflow as tf

import i3d
WARNING: The TensorFlow contrib module will not be included in TensorFlow 2.0.

For more information, please see:

  * https://github.com/tensorflow/community/blob/master/rfcs/20180907-contrib-sunset.md

  * https://github.com/tensorflow/addons

If you depend on functionality not listed there, please file an issue.
进行参数的定义
# 输入图片大小
_IMAGE_SIZE = 224
#  视频的帧数
_SAMPLE_VIDEO_FRAMES = 79

# 输入数据包括两部分:RGB和光流
# RGB和光流数据已经经过提前计算
_SAMPLE_PATHS = {
    'rgb': 'data/v_CricketShot_g04_c01_rgb.npy',
    'flow': 'data/v_CricketShot_g04_c01_flow.npy',
}
# 提供了多种可以选择的预训练权重
# 其中,imagenet系列模型从ImageNet的2D权重中拓展而来,其余为视频数据下的预训练权重
_CHECKPOINT_PATHS = {
    'rgb': 'data/checkpoints/rgb_scratch/model.ckpt',
    'flow': 'data/checkpoints/flow_scratch/model.ckpt',
    'rgb_imagenet': 'data/checkpoints/rgb_imagenet/model.ckpt',
    'flow_imagenet': 'data/checkpoints/flow_imagenet/model.ckpt',
}
# 记录类别文件
_LABEL_MAP_PATH = 'data/label_map.txt'
# 类别数量为400
NUM_CLASSES = 400
定义参数:
- imagenet_pretrained :如果为
True,则调用预训练权重,如果为False,则调用ImageNet转成的权重
imagenet_pretrained = True
# 加载动作类型
kinetics_classes = [x.strip() for x in open(_LABEL_MAP_PATH)]
tf.logging.set_verbosity(tf.logging.INFO)
构建RGB部分模型
rgb_input = tf.placeholder(tf.float32, shape=(1, _SAMPLE_VIDEO_FRAMES, _IMAGE_SIZE, _IMAGE_SIZE, 3))

with tf.variable_scope('RGB', reuse=tf.AUTO_REUSE):
    rgb_model = i3d.InceptionI3d(NUM_CLASSES, spatial_squeeze=True, final_endpoint='Logits')
    rgb_logits, _ = rgb_model(rgb_input, is_training=False, dropout_keep_prob=1.0)

rgb_variable_map = {}
for variable in tf.global_variables():
    if variable.name.split('/')[0] == 'RGB':
        rgb_variable_map[variable.name.replace(':0', '')] = variable

rgb_saver = tf.train.Saver(var_list=rgb_variable_map, reshape=True)
构建光流部分模型
flow_input = tf.placeholder(tf.float32,shape=(1, _SAMPLE_VIDEO_FRAMES, _IMAGE_SIZE, _IMAGE_SIZE, 2))

with tf.variable_scope('Flow', reuse=tf.AUTO_REUSE):
    flow_model = i3d.InceptionI3d(NUM_CLASSES, spatial_squeeze=True, final_endpoint='Logits')
    flow_logits, _ = flow_model(flow_input, is_training=False, dropout_keep_prob=1.0)
flow_variable_map = {}
for variable in tf.global_variables():
    if variable.name.split('/')[0] == 'Flow':
        flow_variable_map[variable.name.replace(':0', '')] = variable
flow_saver = tf.train.Saver(var_list=flow_variable_map, reshape=True)
将模型联合,成为完整的I3D模型
model_logits = rgb_logits + flow_logits
model_predictions = tf.nn.softmax(model_logits)
开始模型预测,获得视频动作预测结果。
预测数据为开篇提供的RGB和光流数据:
with tf.Session() as sess:
    feed_dict = {}

    if imagenet_pretrained:
        rgb_saver.restore(sess, _CHECKPOINT_PATHS['rgb_imagenet'])    # 加载rgb流的模型
    else:
        rgb_saver.restore(sess, _CHECKPOINT_PATHS['rgb'])
    tf.logging.info('RGB checkpoint restored')

    if imagenet_pretrained:
        flow_saver.restore(sess, _CHECKPOINT_PATHS['flow_imagenet'])  # 加载flow流的模型
    else:
        flow_saver.restore(sess, _CHECKPOINT_PATHS['flow'])
    tf.logging.info('Flow checkpoint restored')

    start_time = time.time()

    rgb_sample = np.load(_SAMPLE_PATHS['rgb'])    # 加载rgb流的输入数据
    tf.logging.info('RGB data loaded, shape=%s', str(rgb_sample.shape))
    feed_dict[rgb_input] = rgb_sample

    flow_sample = np.load(_SAMPLE_PATHS['flow'])  # 加载flow流的输入数据
    tf.logging.info('Flow data loaded, shape=%s', str(flow_sample.shape))
    feed_dict[flow_input] = flow_sample

    out_logits, out_predictions = sess.run(
        [model_logits, model_predictions],
        feed_dict=feed_dict)

    out_logits = out_logits[0]
    out_predictions = out_predictions[0]
    sorted_indices = np.argsort(out_predictions)[::-1]
    print('Inference time in sec: %.3f' % float(time.time() - start_time))
    print('Norm of logits: %f' % np.linalg.norm(out_logits))

    print('\nTop classes and probabilities')
    for index in sorted_indices[:20]:
        print(out_predictions[index], out_logits[index], kinetics_classes[index])
WARNING:tensorflow:From /home/ma-user/anaconda3/envs/TensorFlow-1.13.1/lib/python3.6/site-packages/tensorflow/python/training/saver.py:1266: checkpoint_exists (from tensorflow.python.training.checkpoint_management) is deprecated and will be removed in a future version.

Instructions for updating:

Use standard file APIs to check for files with this prefix.

INFO:tensorflow:Restoring parameters from data/checkpoints/rgb_imagenet/model.ckpt

INFO:tensorflow:RGB checkpoint restored

INFO:tensorflow:Restoring parameters from data/checkpoints/flow_imagenet/model.ckpt

INFO:tensorflow:Flow checkpoint restored

INFO:tensorflow:RGB data loaded, shape=(1, 79, 224, 224, 3)

INFO:tensorflow:Flow data loaded, shape=(1, 79, 224, 224, 2)


Inference time in sec: 1.511

Norm of logits: 138.468643


Top classes and probabilities

1.0 41.813675 playing cricket

1.497162e-09 21.49398 hurling (sport)

3.8431236e-10 20.13411 catching or throwing baseball

1.549242e-10 19.22559 catching or throwing softball

1.1360187e-10 18.915354 hitting baseball

8.801105e-11 18.660116 playing tennis

2.4415466e-11 17.37787 playing kickball

1.153184e-11 16.627766 playing squash or racquetball

6.1318893e-12 15.996157 shooting goal (soccer)

4.391727e-12 15.662376 hammer throw

2.2134352e-12 14.9772005 golf putting

1.6307096e-12 14.67167 throwing discus

1.5456218e-12 14.618079 javelin throw

7.6690325e-13 13.917259 pumping fist

5.1929587e-13 13.527372 shot put

4.2681337e-13 13.331245 celebrating

2.7205462e-13 12.880901 applauding

1.8357015e-13 12.487494 throwing ball

1.6134511e-13 12.358444 dodgeball

1.1388395e-13 12.010078 tap dancing
作业

- 点赞
- 收藏
- 关注作者
评论(0)