Stable Diffusion文字生成图像

视频操作观看链接:https://www.bilibili.com/video/BV1Hg411i7xR/?zw
点击Run in ModelArts,将会进入到ModelArts CodeLab中,这时需要你登录华为云账号,如果没有账号,则需要注册一个,且要进行实名认证,参考 https://developer.huaweicloud.com/develop/aigallery/article/detail?id=4ce709d6-eb25-4fa4-b214-e2e5d6b7919c 即可完成账号注册和实名认证。
登录之后,等待片刻,即可进入到CodeLab的运行环境
Stable Diffusion文字生成图像 🎨
Stable Diffusion 是由 CompVis、Stability AI 和 LAION 共同开发的一个文本转图像模型,它通过 LAION-5B 子集大量的 512x512 图文模型进行训练,我们只要简单的输入一段文本,Stable Diffusion 就可以迅速将其转换为图像,同样我们也可以置入图片或视频,配合文本对其进行处理。
接下来 我们会展示如何将 Stable Diffusion 与 🤗 Hugging Face 🧨 Diffusers 的库一起使用。
让我们一起动手试验一下吧
Stable Diffusion Pipeline使用方法
本案例可以使用GPU,也可以使用CPU来运行,GPU生成单张图片约20秒,CPU需6分钟
您可以使用如下命令来查询当前机器的GPU是否可用,如果运行结果是一个表格,则表示GPU可用。
!nvidia-smi
Tue Nov 22 16:03:56 2022

+-----------------------------------------------------------------------------+

| NVIDIA-SMI 440.33.01    Driver Version: 440.33.01    CUDA Version: 10.2     |

|-------------------------------+----------------------+----------------------+

| GPU  Name        Persistence-M| Bus-Id        Disp.A | Volatile Uncorr. ECC |

| Fan  Temp  Perf  Pwr:Usage/Cap|         Memory-Usage | GPU-Util  Compute M. |

|===============================+======================+======================|

|   0  Tesla P100-PCIE...  On   | 00000000:00:0D.0 Off |                    0 |

| N/A   34C    P0    26W / 250W |      0MiB / 16280MiB |      0%      Default |

+-------------------------------+----------------------+----------------------+


+-----------------------------------------------------------------------------+

| Processes:                                                       GPU Memory |

|  GPU       PID   Type   Process name                             Usage      |

|=============================================================================|

|  No running processes found                                                 |

+-----------------------------------------------------------------------------+
步骤一:安装需要的运行环境
耗时约1-2分钟
!pip install --upgrade pip
!pip install torch==1.12.1 torchvision==0.13.1 torchaudio==0.12.1
!pip install diffusers==0.2.4
!pip install transformers==4.21.1 scipy==1.7.3 ftfy==6.1.1
!pip install "ipywidgets>=7,<8"
步骤二:下载AI模型预训练权重文件,加载模型
用户可访问Hugging Face Hub获取token,进行下载,下载时间约6分钟左右。
本案例已将其模型转存至华为云OBS中,运行如下代码,下载权重即可。下载耗时约30秒。
import os
import torch
import os.path as osp
import moxing as mox
from diffusers import StableDiffusionPipeline
parent = osp.join(os.getcwd(),'CompVis')
if not os.path.exists(parent):
    mox.file.copy_parallel('obs://modelarts-labs-bj4-v2/case_zoo/StableDiffusion/CompVis',parent)
    if os.path.exists(parent):
        print('Download success')
    else:
        raise Exception('Download Failed')
else:
    print("Model Package already exists!")
INFO:root:Using MoXing-v2.1.0.5d9c87c8-5d9c87c8

INFO:root:Using OBS-Python-SDK-3.20.9.1

/home/ma-user/anaconda3/envs/PyTorch-1.8/lib/python3.7/site-packages/requests/__init__.py:104: RequestsDependencyWarning: urllib3 (1.26.12) or chardet (5.0.0)/charset_normalizer (2.0.12) doesn't match a supported version!

  RequestsDependencyWarning)


Model Package already exists!
加载模型
model_dir = osp.join(osp.join(parent,'stable-diffusion-v1-4'), "diffusers")
os.environ["XDG_CACHE_HOME"] = model_dir
device = 'cuda' if torch.cuda.is_available() else 'cpu'
pipe = StableDiffusionPipeline.from_pretrained(model_dir,
                                               # revision="fp16",
                                               # torch_dtype=torch.float16
                                              ).to(device)
步骤三: 生成单张图像
在GPU上,单张图片生成耗时约20秒
在CPU上,单张图片生成耗时约6分钟,且运行内存需16GB以上
#@title 请在此处填写Prompt,运行,即可生成单张图像
torch.cuda.empty_cache()
prompt = "Close up portrait photo of Megan Fox as part cyborg part human, intimidating stare, Atmospheric, 600mm lens, Sony Alpha α7, epic, dramatic, cinematic lighting, high contrast, 8k, photo realistic, character design --testp --ar 2:3 --upbeta" #@param {type:"string"}
image = pipe(prompt)["sample"][0]
image
0it [00:00, ?it/s]

海报生成和分享
#@title 请在下方title_char栏填写作品名称,author_char栏填写作者姓名,中文不超过6个字,运行,即可生成海报
import os
import moxing as mox
from PIL import Image,ImageDraw,ImageFont,ImageFilter

# 导入海报需要的素材
if not os.path.exists("/home/ma-user/work/material"):
    mox.file.copy_parallel('obs://modelarts-labs-bj4-v2/case_zoo/StableDiffusion/AI_paint_TOM.png',"/home/ma-user/work/material/AI_paint_TOM.png")
    mox.file.copy_parallel('obs://modelarts-labs-bj4-v2/case_zoo/StableDiffusion/方正兰亭准黑_GBK.ttf',"/home/ma-user/work/material/方正兰亭准黑_GBK.ttf")
    if os.path.exists("/home/ma-user/work/material"):
        print('Download success')
    else:
        raise Exception('Download Failed')
else:
    print("Project already exists")

def gen_poster(img,txt1,txt2,path):
    font1 = ImageFont.truetype(zt,30)
    font2 = ImageFont.truetype(zt,25)
    img_draw = ImageDraw.Draw(img)
    img_draw.text((180,860), txt1, font=font1,fill='#961900')
    img_draw.text((130,903), txt2, font=font2, fill='#252b3a')
    img.filter(ImageFilter.BLUR)
    img.save(path)

template_img = "/home/ma-user/work/material/AI_paint_TOM.png"
zt = r"/home/ma-user/work/material/方正兰亭准黑_GBK.ttf"
temp_image = Image.open(template_img)
temp_image.paste(image ,(40,266))

title_char = "CG女神" #@param {type:"string"}
author_char = "魔幻少女" #@param {type:"string"}
savepath = 'AI_paint_output.png' # 海报图片路径
gen_poster(temp_image,title_char,author_char,savepath)
Image.open(savepath) # 显示图片
Project already exists

步骤四:生成多张图像
#@title 请在此处填写Promot,运行,即可生成3*3张图像
from PIL import Image

num_cols = 3  # 图像行数
num_rows = 3  # 图像列数

prompt = "Cygames girl character concept art and illustration by akihiko yoshida , ultimate dressy , amazing detailed face in profile closeup, galaxy in blue hair, Jewelry eyes , wearing a white galaxy dress , Line Array Speaker , Extreme Explosion , Subwoofer , kyoani character face , cute ,pretty girl , dynamic pose, portrait , pixiv daily ranking , pixiv , artstation ,specatcualr details, Volumetric Lighting , Dramatic lighting —ar 9:16 --test --creative --upbeta" #@param {type:"string"}
prompt_list = [prompt] * num_cols


def image_grid(imgs, rows, cols):
    assert len(imgs) == rows * cols

    w, h = imgs[0].size
    grid = Image.new('RGB', size=(cols * w, rows * h))
    grid_w, grid_h = grid.size

    for i, img in enumerate(imgs):
        grid.paste(img, box=(i % cols * w, i // cols * h))
    return grid

all_images = []
for i in range(num_rows):
    images = pipe(prompt_list)["sample"]
    all_images.extend(images)
    for index, img in enumerate(images):
        img.save("img_%s_%s.png" % (str(i), str(index)))

grid = image_grid(all_images, rows=num_rows, cols=num_cols)
grid

from PIL import Image

num_cols = 3  # 图像行数
num_rows = 3  # 图像列数

prompt = "Cygames girl character concept art and illustration by akihiko yoshida , ultimate dressy , amazing detailed face in profile closeup, galaxy in blue hair, Jewelry eyes , wearing a white galaxy dress , Line Array Speaker , Extreme Explosion , Subwoofer , kyoani character face , cute ,pretty girl , dynamic pose, portrait , pixiv daily ranking , pixiv , artstation ,specatcualr details, Volumetric Lighting , Dramatic lighting —ar 9:16 --test --creative --upbeta" #@param {type:"string"}
prompt_list = [prompt] * num_cols


def image_grid(imgs, rows, cols):
    assert len(imgs) == rows * cols

    w, h = imgs[0].size
    grid = Image.new('RGB', size=(cols * w, rows * h))
    grid_w, grid_h = grid.size

    for i, img in enumerate(imgs):
        grid.paste(img, box=(i % cols * w, i // cols * h))
    return grid

all_images = []
for i in range(num_rows):
    torch.cuda.empty_cache()
    images = pipe(prompt_list)["sample"]
    all_images.extend(images)
    for index, img in enumerate(images):
        img.save("img_%s_%s.png" % (str(i), str(index)))

grid = image_grid(all_images, rows=num_rows, cols=num_cols)
grid
#@title 请在此处填写Prompt,运行,即可生成3*3张图像
0it [00:00, ?it/s]


0it [00:00, ?it/s]


0it [00:00, ?it/s]


0it [00:00, ?it/s]


0it [00:00, ?it/s]


0it [00:00, ?it/s]

步骤五:修改prompt提示词
1. 什么是 Prompt?
Prompt 是生成图片的提示词,可以是一个实体,例如猫。也可以是一串富含想象力的文字,例如:『夕阳日落时,天边有巨大的云朵,海面波涛汹涌,风景,胶片感』。不同的 Prompt 对于生成的图像质量影响非常大,所以如果要生成一幅优秀的图画,就要掌握写 Prompt 的一些经验性技巧。
以下是一些优秀图画及相关Promot的示范样例

Cygames女孩角色,概念艺术,银河在蓝色的头发,珠宝眼睛,穿着白色的银河连衣裙,线阵列扬声器,极端爆炸
promot: Cygames girl character concept art and illustration by akihiko yoshida , ultimate dressy , amazing detailed face in profile closeup, galaxy in blue hair, Jewelry eyes , wearing a white galaxy dress , Line Array Speaker , Extreme Explosion , Subwoofer , kyoani character face , cute ,pretty girl , dynamic pose, portrait , pixiv daily ranking , pixiv , artstation ,specatcualr details, Volumetric Lighting , Dramatic lighting —ar 9:16 --test --creative --upbeta

promt:dark style painted, river flowing through forest of cherry blossom trees , under a galaxy filled sky, beautiful, galaxies, deep colors,ultra lighting, Bioelectric Modular Synthesizer, perfect symmetry, cinematic, volumetric lighting, --ar 9:16
2. 如何修改提示词
2.1 Prompt 的设计
如何设计 Prompt,下文大概会通过4个方面来说明:Prompt的描述可以从这四个方面入手:图片的风格,内容主体,详细的描述,再加上画家的风格。
需要注意的是,这里的 Prompt 公式仅仅是个入门级别的参考,是经验的简单总结,在熟悉了 Prompt 的原理之后,可以尽情的发挥脑洞修改 Prompt。
2.2 Prompt 公式
Prompt框架:[图片的风格]+[内容主题]+[细节描述]+[绘画风格或者艺术家风格]
图片的风格按照这个框架,简单构造一个图片风格,比如:可以是一幅美丽的画,或者是一幅美丽的山水画。内容的主体+详细描述主体可以是各种各样的选择。推荐一些可以激发大家灵感的事物,如山水,人物,建筑房屋,动物等等,尽可能细致刻画这些实体事物。如果是简单的输入“大海”两个字,模型不知道我们想要的风景是什么样子的,一段作品的相对准确的描述,比如:梦幻的大海,白沙滩岸边铺满了粉色的玫瑰花,月光轻柔的人洒在海面上,绿色发光的海浪,我们要去尽量用详细的语言,用细节清楚的描述我们幻想的场景。比如:云中的Skyrim风格的山,有一个照明螺栓击中尖端导致雪崩,山区风景。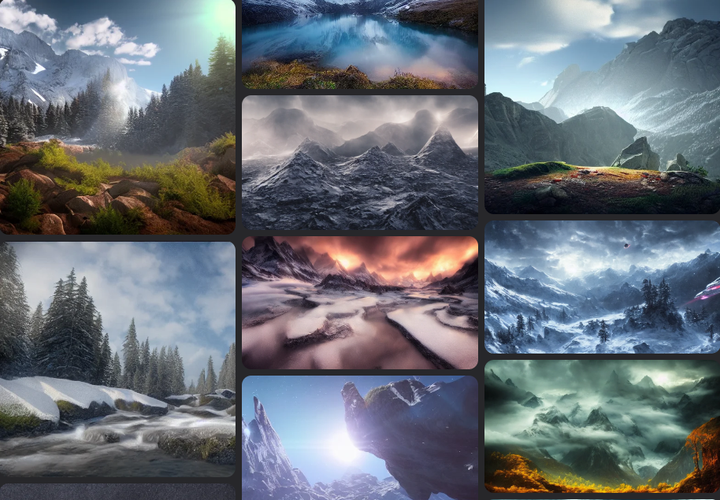 对于详细的描述,我们可以拆分【形容词】+【视角】+【时间】+【颜色】+【其他】形容词可以是梦幻,神秘,浪漫或者写实 ……视角可以是:超广角,俯视和仰视 ……时间:秋天,清晨,黄昏,夜晚 ……颜色可以是 红黄绿蓝橙紫……其他可以包含图片的尺寸,4k,8k ,HD,光效,高细节等Prompt 绘画风格和艺术家风格如果想让生成的图片更加的艺术化、风格化,可以考虑在 Prompt 中添加绘画风格和艺术家。艺术绘画风格可以是一些美术风格:梵高风格,油画,水彩,古风,CG感,动漫,少女,赛博朋克,卡通画,中国画,黄昏等等,艺术家风格包含:现实主义,印象派,野兽派,新艺术,表现主义,立体主义,未来主义等等。
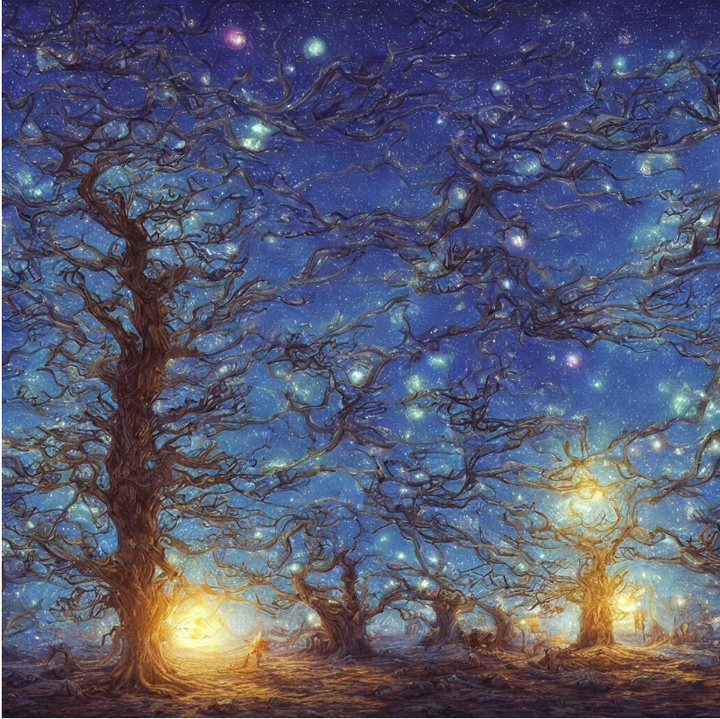
提示词:这是一幅美丽的画作,描绘了夜晚一大片空旷的沙漠沙丘,中间有许多棵神秘的巨大发光的蓝色树,树的蓝色光芒照亮了周围的环境,天空中的星星,由特德·纳史密斯和托马斯·金卡德创作另外还有一些注意事项和常见的问题在使用关键词的时候,也多去使用一些明确的定义,避免使用“不是xxx”这样的描述。“不是xxx”,可选择的范围就太大了,生成出来的结果可能就和你想要的相去甚远。
如果你是个新手,需要一些关于关键词的引导,那你可以去 https://lexica.art/ 这个网站看一看。它收集了很多关键词,并且一步一步、分门别类地为你整理好了。你只需要根据网站给出的步骤,从它的关键词库里选择你想要的效果,然后把这串关键词直接复制到prompt里就好。把“填空题”变成“选择题”,非常方便。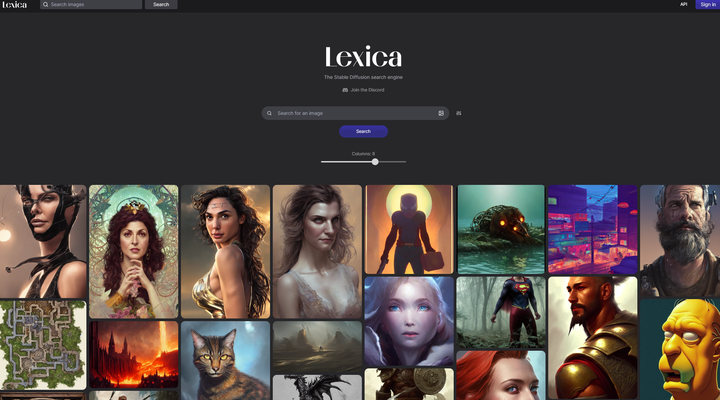 在熟悉了 Prompt 的原理之后,就可以尽情的发挥脑洞修改它的写法,点击链接,快来Happy Prompting吧!
2.5 附录:常见的风格列举
古典主义
洛可可
巴洛克,
印象派,
新古典主义,
写实主义,
浪漫主义,
唯美主义,
表现主义,
现实主义,
魔幻现实主义,
奇幻现实主义,
象征主义,
抽象主义,
超扁平主义
超前卫艺术
中国风格
浮世绘
极简主义
几何风格
数字艺术,
感念艺术
装饰艺术
复古未来主义风格
粉彩朋克风格
史前遗迹风格
波普艺术风格
迷幻风格
赛博朋克风格
未来主义风格
抽象技术风格
新艺术主义
抽象表现主义
北欧文艺复兴
原始主义
立体主义
色域绘画
波普艺术
极简主义
矫饰主义
步骤六: 使用新的提示词生成图片
在掌握了上面提示词Prompt的规则后,我们看下如何使用上面的程序生成自己想要的图片
1.用中文描述提示词,描述的越精准越好
2.使用翻译软件将中文翻译成英文
3.将英文的Prompt替换上面程序prompt= "…"中的内容,位置分别在程序步骤三和步骤四,例如:将上面梵高的图片替换成狗喝咖啡的内容,如:
prompt = “Close-up side view portrait of Cyborg Geisha, rotobic, Machina, super intricate ornaments artwork, by Tooth Wu and wlop, by Alena Aenami, by Alphonse Mucha, by Brian Froud, by Pablo Amaringo, super detailed, large depth of field”
替换成
prompt =“golden retriever puppy sitting at a diner drinking a cup of coffee, looking melancholy, Edward HopperS”
4.再次运行步骤三和步骤四
其他参考资料
prompts搜索引擎
两个Prompts插值
https://replicate.com/andreasjansson/stable-diffusion-animation
生成无缝贴图
用 Stable Diffusion 生成的艺术家风格参考库

- 点赞
- 收藏
- 关注作者
评论(0)