Unity 贝塞尔曲线制作迁徙图

【摘要】
效果图:
实现该效果图所需的知识点:
1.贝塞尔曲线
贝塞尔曲线是图形学中非常重要的参数曲线,在此不做详细介绍,这里我们用到的是二次方公式:
using UnityEngine;using System.Collections.Generic; namespace SK.Framework{ publi...
效果图:

实现该效果图所需的知识点:
1.贝塞尔曲线
贝塞尔曲线是图形学中非常重要的参数曲线,在此不做详细介绍,这里我们用到的是二次方公式:

-
using UnityEngine;
-
using System.Collections.Generic;
-
-
namespace SK.Framework
-
{
-
public static class Vector3Extension
-
{
-
/// <summary>
-
/// 生成贝塞尔曲线
-
/// </summary>
-
/// <param name="self">控制点</param>
-
/// <param name="startPoint">贝塞尔曲线起点</param>
-
/// <param name="endPoint">贝塞尔曲线终点</param>
-
/// <param name="count">贝塞尔曲线点个数</param>
-
/// <returns>组成贝塞尔曲线的点集合</returns>
-
public static Vector3[] GenerateBeizer(this Vector3 self, Vector3 startPoint, Vector3 endPoint, int count)
-
{
-
Vector3[] retValue = new Vector3[count];
-
for (int i = 1; i <= count; i++)
-
{
-
float t = i / (float)count;
-
float u = 1 - t;
-
float tt = Mathf.Pow(t, 2);
-
float uu = Mathf.Pow(u, 2);
-
Vector3 point = uu * startPoint;
-
point += 2 * u * t * self;
-
point += tt * endPoint;
-
retValue[i - 1] = point;
-
}
-
return retValue;
-
}
-
}
-
}
2.LineRenderer光线渲染器
LineRenderer在Unity中应用于线段的渲染,通过设置线段各个点的位置实现线段的绘制。
-
using UnityEngine;
-
using SK.Framework;
-
-
public class Foo : MonoBehaviour
-
{
-
private void Start()
-
{
-
//通过起点(0,0,0)、控制点(0,7,5)、终点(0,0,10)生成贝塞尔曲线各点
-
Vector3[] points = new Vector3(0f, 7f, 5f).GenerateBeizer(Vector3.zero, new Vector3(0f, 0f, 10f), 100);
-
-
gameObject.AddComponent<LineRenderer>()
-
//设置材质
-
.SetMaterial(Resources.Load<Material>("Arrow"))
-
//设置线段点个数
-
.SetPositionCount(points.Length)
-
//设置线段各点
-
.SetLinePositions(points)
-
//设置贴图为平铺模式
-
.SetTextureMode(LineTextureMode.Tile)
-
//设置起始宽度
-
.SetStartWidth(.5f)
-
//设置结束宽度
-
.SetEndWidth(.5f);
-
}
-
}
上述代码中用到对LineRenderer类的拓展函数
-
using UnityEngine;
-
-
namespace SK.Framework
-
{
-
/// <summary>
-
/// 光线渲染器相关拓展
-
/// </summary>
-
public static class LineRenderExtension
-
{
-
/// <summary>
-
/// 设置起始宽度
-
/// </summary>
-
/// <param name="self">光线渲染器</param>
-
/// <param name="width">起始宽度</param>
-
/// <returns>光线渲染器</returns>
-
public static LineRenderer SetStartWidth(this LineRenderer self, float width)
-
{
-
self.startWidth = width;
-
return self;
-
}
-
/// <summary>
-
/// 设置结束宽度
-
/// </summary>
-
/// <param name="self">光线渲染器</param>
-
/// <param name="width">结束宽度</param>
-
/// <returns>光线渲染器</returns>
-
public static LineRenderer SetEndWidth(this LineRenderer self, float width)
-
{
-
self.endWidth = width;
-
return self;
-
}
-
/// <summary>
-
/// 设置起始颜色
-
/// </summary>
-
/// <param name="self">光线渲染器</param>
-
/// <param name="color">起始颜色</param>
-
/// <returns>光线渲染器</returns>
-
public static LineRenderer SetStartColor(this LineRenderer self, Color color)
-
{
-
self.startColor = color;
-
return self;
-
}
-
/// <summary>
-
/// 设置结束颜色
-
/// </summary>
-
/// <param name="self">光线渲染器</param>
-
/// <param name="color">结束颜色</param>
-
/// <returns>光线渲染器</returns>
-
public static LineRenderer SetEndColor(this LineRenderer self, Color color)
-
{
-
self.endColor = color;
-
return self;
-
}
-
/// <summary>
-
/// 设置点个数
-
/// </summary>
-
/// <param name="self">光线渲染器</param>
-
/// <param name="count">点个数</param>
-
/// <returns>光线渲染器</returns>
-
public static LineRenderer SetPositionCount(this LineRenderer self, int count)
-
{
-
self.positionCount = count;
-
return self;
-
}
-
/// <summary>
-
/// 设置点位置
-
/// </summary>
-
/// <param name="self">光线渲染器</param>
-
/// <param name="index">索引</param>
-
/// <param name="position">位置</param>
-
/// <returns>光线渲染器</returns>
-
public static LineRenderer SetLinePosition(this LineRenderer self, int index, Vector3 position)
-
{
-
self.SetPosition(index, position);
-
return self;
-
}
-
/// <summary>
-
/// 设置点位置
-
/// </summary>
-
/// <param name="self">光线渲染器</param>
-
/// <param name="positions">位置数组</param>
-
/// <returns>光线渲染器</returns>
-
public static LineRenderer SetLinePositions(this LineRenderer self, Vector3[] positions)
-
{
-
for (int i = 0; i < positions.Length; i++)
-
{
-
self.SetPosition(i, positions[i]);
-
}
-
return self;
-
}
-
/// <summary>
-
/// 设置是否循环(终点是否连接起点)
-
/// </summary>
-
/// <param name="self">光线渲染器</param>
-
/// <param name="loop">是否循环</param>
-
/// <returns>光线渲染器</returns>
-
public static LineRenderer SetLoop(this LineRenderer self, bool loop)
-
{
-
self.loop = loop;
-
return self;
-
}
-
/// <summary>
-
/// 设置CornerVertices属性
-
/// </summary>
-
/// <param name="self">光线渲染器</param>
-
/// <param name="cornerVertices">conner vertices</param>
-
/// <returns>光线渲染器</returns>
-
public static LineRenderer SetCornerVertices(this LineRenderer self, int cornerVertices)
-
{
-
self.numCornerVertices = cornerVertices;
-
return self;
-
}
-
/// <summary>
-
/// 设置EndCapVertices属性
-
/// </summary>
-
/// <param name="self">光线渲染器</param>
-
/// <param name="endCapVertices">end cap vertices</param>
-
/// <returns>光线渲染器</returns>
-
public static LineRenderer SetEndCapVertices(this LineRenderer self, int endCapVertices)
-
{
-
self.numCapVertices = endCapVertices;
-
return self;
-
}
-
/// <summary>
-
/// 设置Alignment属性
-
/// </summary>
-
/// <param name="self">光线渲染器</param>
-
/// <param name="alignment">alignment</param>
-
/// <returns>光线渲染器</returns>
-
public static LineRenderer SetAlignment(this LineRenderer self, LineAlignment alignment)
-
{
-
self.alignment = alignment;
-
return self;
-
}
-
/// <summary>
-
/// 设置TextureMode
-
/// </summary>
-
/// <param name="self">光线渲染器</param>
-
/// <param name="textureMode">texture mode</param>
-
/// <returns>光线渲染器</returns>
-
public static LineRenderer SetTextureMode(this LineRenderer self, LineTextureMode textureMode)
-
{
-
self.textureMode = textureMode;
-
return self;
-
}
-
/// <summary>
-
/// 设置材质球
-
/// </summary>
-
/// <param name="self">光线渲染器</param>
-
/// <param name="material">材质球</param>
-
/// <returns>光线渲染器</returns>
-
public static LineRenderer SetMaterial(this LineRenderer self, Material material)
-
{
-
self.material = material;
-
return self;
-
}
-
/// <summary>
-
/// 烘焙网格
-
/// </summary>
-
/// <param name="self">光线渲染器</param>
-
/// <param name="mesh">网格</param>
-
/// <returns>光线渲染器</returns>
-
public static LineRenderer BakeMesh(this LineRenderer self, out Mesh mesh)
-
{
-
mesh = new Mesh();
-
self.BakeMesh(mesh);
-
return self;
-
}
-
}
-
}
3.UV滚动
通过UV的滚动Shader实现箭头的移动,资源来源于他人博客:https://blog.csdn.net/u013354943/article/details/105414827/

-
Shader "Custom/Arrow"
-
{
-
Properties
-
{
-
_MainTex ("Texture", 2D) = "white" {}
-
_MSpeed("MoveSpeed", Range(1, 3)) = 2 //移动速度
-
}
-
SubShader
-
{
-
//贴图带透明通道 ,半透明效果设置如下:
-
tags{"Queue" = "Transparent" "RenderType" = "Transparent" "IgnoreProjector" = "True"}
-
LOD 100
-
Blend SrcAlpha OneMinusSrcAlpha //Blend选值为: SrcAlpha 和1-SrcAlpha //也可测试为 DstColor SrcColor //one one
-
-
Pass
-
{
-
Name "Simple"
-
Cull off //双面
-
-
CGPROGRAM
-
#pragma vertex vert
-
#pragma fragment frag
-
// make fog work
-
#pragma multi_compile_fog
-
-
#include "UnityCG.cginc"
-
-
struct appdata
-
{
-
float4 vertex : POSITION;
-
float2 uv : TEXCOORD0;
-
};
-
-
struct v2f
-
{
-
float2 uv : TEXCOORD0;
-
UNITY_FOG_COORDS(1)
-
float4 vertex : SV_POSITION;
-
};
-
-
sampler2D _MainTex;
-
float4 _MainTex_ST;
-
float _MSpeed;
-
v2f vert (appdata v)
-
{
-
v2f o;
-
o.vertex = UnityObjectToClipPos(v.vertex);
-
o.uv = TRANSFORM_TEX(v.uv, _MainTex);
-
UNITY_TRANSFER_FOG(o,o.vertex);
-
return o;
-
}
-
-
half4 frag(v2f i) : SV_Target
-
{
-
float2 uv = float2(i.uv.x - _MSpeed * _Time.y,i.uv.y); //箭头移动的计算
-
// sample the texture
-
fixed4 col = tex2D(_MainTex, uv);
-
// apply fog
-
UNITY_APPLY_FOG(i.fogCoord, col);
-
return col;
-
}
-
ENDCG
-
}
-
}
-
}
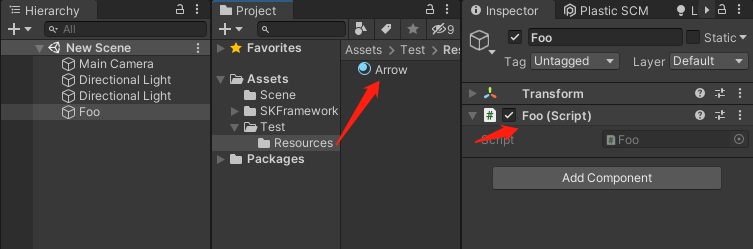
最后通过该Shader创建材质Arrow放于Resources文件夹,创建物体挂载Foo脚本运行即可。
文章来源: coderz.blog.csdn.net,作者:CoderZ1010,版权归原作者所有,如需转载,请联系作者。
原文链接:coderz.blog.csdn.net/article/details/120482944

【版权声明】本文为华为云社区用户转载文章,如果您发现本社区中有涉嫌抄袭的内容,欢迎发送邮件进行举报,并提供相关证据,一经查实,本社区将立刻删除涉嫌侵权内容,举报邮箱:
cloudbbs@huaweicloud.com
- 点赞
- 收藏
- 关注作者
评论(0)