MyBatis第一个入门程序
【摘要】
🍁博客主页:👉不会压弯的小飞侠 ✨欢迎关注:👉点赞👍收藏⭐留言✒ ✨系列专栏:MyBatis ✨如果觉得博主的文章还不错的话,请三连支持一下博主。 🔥欢迎大佬指正,一起 学习!一起加油...

🍁博客主页:👉不会压弯的小飞侠
✨欢迎关注:👉点赞👍收藏⭐留言✒
✨系列专栏:MyBatis
✨如果觉得博主的文章还不错的话,请三连支持一下博主。
🔥欢迎大佬指正,一起 学习!一起加油!

学习文档:MyBatis中文网
🍁环境
- JDK1.8
- Mysql5.7
- maven 3.6.3
- IDEA
🍁第一个MyBatis程序
步骤:
搭建环境–>导入Mybatis–>编写代码–>测试。
🔥搭建环境
- 搭建数据库
- 新建项目
- 新建一个普通maven项目
- 导入maven依赖
🔥搭建数据库
1.创建一个数据库名为mybatis的tb_user表

2.向表中添加数据

🔥导入maven依赖
pom:
- maven依赖代码置于 pom.xml 文件中:
<dependency>
            <groupId>org.mybatis</groupId>
            <artifactId>mybatis</artifactId>
            <version>3.5.6</version>
        </dependency>
- 1
- 2
- 3
- 4
- 5
- 导入MySQL驱动的依赖
<dependency>
            <groupId>mysql</groupId>
            <artifactId>mysql-connector-java</artifactId>
            <version>5.1.47</version>
        </dependency>
- 1
- 2
- 3
- 4
- 5
-单元测试依赖
<dependency>
            <groupId>junit</groupId>
            <artifactId>junit</artifactId>
            <version>4.12</version>
        </dependency>
- 1
- 2
- 3
- 4
- 5
🔥编写mybatis-config.xml的核心配置文件
mybatis-config.xml:
<?xml version="1.0" encoding="UTF-8" ?>
<!DOCTYPE configuration
PUBLIC "-//mybatis.org//DTD Config 3.0//EN"
"http://mybatis.org/dtd/mybatis-3-config.dtd">
<!--configuration core file-->
<configuration>
<environments default="development">
<environment id="development">
<transactionManager type="JDBC"/>
<dataSource type="POOLED">
<property name="driver" value="com.mysql.jdbc.Driver"/>
<property name="url" value="jdbc:mysql://localhost:3306/mybatis?useSSL=false&useUnicode=true&characterEncoding=UTF-8"/>
<property name="username" value="root"/>
<property name="password" value="root"/>
</dataSource>
</environment>
</environments>
<!--加载sql映射文件-->
<mappers>
<mapper resource="com.jkj.UserMapper.xml"/>
</mappers>
</configuration>
- 1
- 2
- 3
- 4
- 5
- 6
- 7
- 8
- 9
- 10
- 11
- 12
- 13
- 14
- 15
- 16
- 17
- 18
- 19
- 20
- 21
- 22
- 23
- 24
🔥 编写Mapper.xml的配置文件
userMapper.xml:
<?xml version="1.0" encoding="UTF-8" ?>
<!DOCTYPE mapper
        PUBLIC "-//mybatis.org//DTD Mapper 3.0//EN"
        "http://mybatis.org/dtd/mybatis-3-mapper.dtd">
<mapper namespace="test">
    <select id="selectAll" resultType="com.jkj.pojo.User">
    select * from tb_user;
  </select>
</mapper>
- 1
- 2
- 3
- 4
- 5
- 6
- 7
- 8
- 9
🔥 编写User实体类代码:
package com.jkj.pojo;

public class User {
    private Integer id;
    private String username;
    private String password;
    private String gender;
    private String addr;

    public User() {
    }

    public User(Integer id, String username, String password, String gender, String addr) {
        this.id = id;
        this.username = username;
        this.password = password;
        this.gender = gender;
        this.addr = addr;
    }

    public Integer getId() {
        return id;
    }

    public void setId(Integer id) {
        this.id = id;
    }

    public String getUsername() {
        return username;
    }

    public void setUsername(String username) {
        this.username = username;
    }

    public String getPassword() {
        return password;
    }

    public void setPassword(String password) {
        this.password = password;
    }

    public String getGender() {
        return gender;
    }

    public void setGender(String gender) {
        this.gender = gender;
    }

    public String getAddr() {
        return addr;
    }

    public void setAddr(String addr) {
        this.addr = addr;
    }

    @Override
    public String toString() {
        return "User{" +
                "id=" + id +
                ", username='" + username + '\'' +
                ", password='" + password + '\'' +
                ", gender='" + gender + '\'' +
                ", addr='" + addr + '\'' +
                '}';
    }
}
- 1
- 2
- 3
- 4
- 5
- 6
- 7
- 8
- 9
- 10
- 11
- 12
- 13
- 14
- 15
- 16
- 17
- 18
- 19
- 20
- 21
- 22
- 23
- 24
- 25
- 26
- 27
- 28
- 29
- 30
- 31
- 32
- 33
- 34
- 35
- 36
- 37
- 38
- 39
- 40
- 41
- 42
- 43
- 44
- 45
- 46
- 47
- 48
- 49
- 50
- 51
- 52
- 53
- 54
- 55
- 56
- 57
- 58
- 59
- 60
- 61
- 62
- 63
- 64
- 65
- 66
- 67
- 68
- 69
- 70
- 71
- 72
🔥编写mybatisTest测试类
MyBatisUtils:
import com.jkj.pojo.User;
import org.apache.ibatis.io.Resources;
import org.apache.ibatis.session.SqlSession;
import org.apache.ibatis.session.SqlSessionFactory;
import org.apache.ibatis.session.SqlSessionFactoryBuilder;
import java.io.IOException;
import java.io.InputStream;
import java.util.List;

public class MybatisTest {
    public static void main(String[] args) throws IOException {
        //1.加载MyBatis的核心配置文件获取sqlSessionFactory
        String resource = "mybatis-config.xml";
        InputStream inputStream = Resources.getResourceAsStream(resource);
        SqlSessionFactory sqlSessionFactory = new SqlSessionFactoryBuilder().build(inputStream);
        //2.获取sqlSession,执行sql
        SqlSession sqlSession = sqlSessionFactory.openSession();
        //3.执行sql
        List<User> users = sqlSession.selectList("test.selectAll");
        System.out.println(users);
        //4.释放资源
        sqlSession.close();
    }
}
- 1
- 2
- 3
- 4
- 5
- 6
- 7
- 8
- 9
- 10
- 11
- 12
- 13
- 14
- 15
- 16
- 17
- 18
- 19
- 20
- 21
- 22
- 23
- 24
- 25
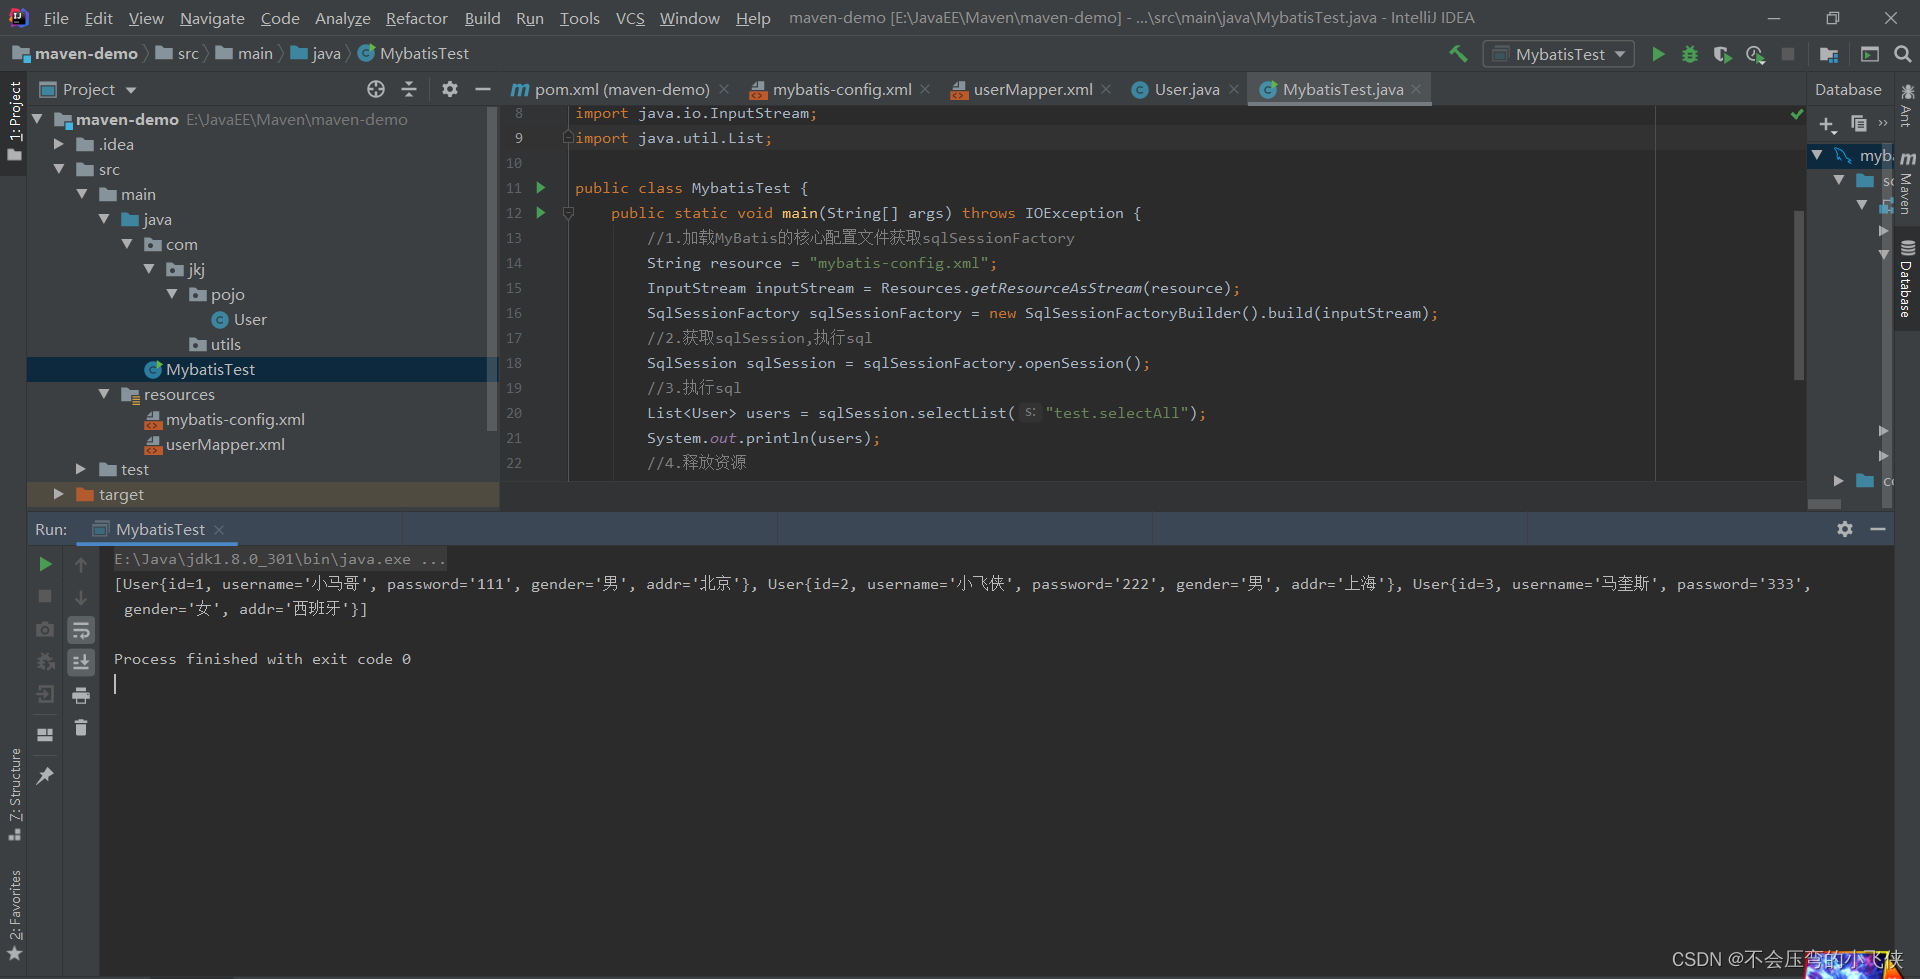
🔥运行截图:
文章来源: blog.csdn.net,作者:不会压弯的小飞侠,版权归原作者所有,如需转载,请联系作者。
原文链接:blog.csdn.net/qq_43514330/article/details/125279278
【版权声明】本文为华为云社区用户转载文章,如果您发现本社区中有涉嫌抄袭的内容,欢迎发送邮件进行举报,并提供相关证据,一经查实,本社区将立刻删除涉嫌侵权内容,举报邮箱:
cloudbbs@huaweicloud.com
- 点赞
- 收藏
- 关注作者


评论(0)