JdbcTemplate的基本使用

【摘要】
文章目录
文章目录
文章目录一、JdbcTemplate的开发步骤1.导入坐标2.创建数据表和实体类3.创建JdbcTemplate对象及操作数据库
二、Spring产生JdbcTempla...
文章目录
一、JdbcTemplate的开发步骤

1.导入坐标
<dependency>
            <groupId>org.springframework</groupId>
            <artifactId>spring-jdbc</artifactId>
            <version>5.2.10.RELEASE</version>
        </dependency>
        <dependency>
            <groupId>org.springframework</groupId>
            <artifactId>spring-tx</artifactId>
            <version>5.2.10.RELEASE</version>
        </dependency>
        <dependency>
- 1
- 2
- 3
- 4
- 5
- 6
- 7
- 8
- 9
- 10
- 11
2.创建数据表和实体类
j_account数据表
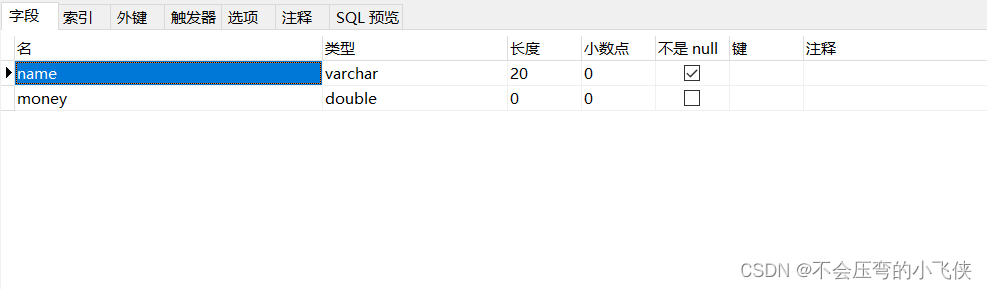
package com.study.domain;

public class Account {
    private String name;
    private double money;

    public Account() {
    }

    public Account(String name, double money) {
        this.name = name;
        this.money = money;
    }

    public String getName() {
        return name;
    }

    public void setName(String name) {
        this.name = name;
    }

    public double getMoney() {
        return money;
    }

    public void setMoney(double money) {
        this.money = money;
    }

    @Override
    public String toString() {
        return "Account{" +
                "name='" + name + '\'' +
                ", money=" + money +
                '}';
    }
}
- 1
- 2
- 3
- 4
- 5
- 6
- 7
- 8
- 9
- 10
- 11
- 12
- 13
- 14
- 15
- 16
- 17
- 18
- 19
- 20
- 21
- 22
- 23
- 24
- 25
- 26
- 27
- 28
- 29
- 30
- 31
- 32
- 33
- 34
- 35
- 36
- 37
- 38
- 39
3.创建JdbcTemplate对象及操作数据库
package com.study.test;
import com.mchange.v2.c3p0.ComboPooledDataSource;
import org.junit.jupiter.api.Test;
import org.springframework.jdbc.core.JdbcTemplate;

import java.beans.PropertyVetoException;

public class JdbcTemplateTest {

   @Test
    public void test() throws PropertyVetoException {
       //创建数据源对象
       ComboPooledDataSource dataSource = new ComboPooledDataSource();
       dataSource.setDriverClass("com.mysql.jdbc.Driver");
       dataSource.setJdbcUrl("jdbc:mysql://localhost:3306/spring");
       dataSource.setUser("root");
       dataSource.setPassword("root");

       JdbcTemplate jdbcTemplate = new JdbcTemplate();
       //设置数据源对象,知道数据库在哪
       jdbcTemplate.setDataSource(dataSource);
       //执行操作需
       int row = jdbcTemplate.update("insert into j_account values(?,?)", "jack", 4500.0);
       System.out.println(row);


   }
}
- 1
- 2
- 3
- 4
- 5
- 6
- 7
- 8
- 9
- 10
- 11
- 12
- 13
- 14
- 15
- 16
- 17
- 18
- 19
- 20
- 21
- 22
- 23
- 24
- 25
- 26
- 27
- 28
- 29
二、Spring产生JdbcTemplate对象
将JdbcTemplate的创建权交给Spring,将数据源DataSource的创建权也交给Spring,在Spring容器内部将数据源DataSource注入到JdbcTemplate模板对象中。
1.配置
<bean id="dataSource" class="com.mchange.v2.c3p0.ComboPooledDataSource">
        <property name="driverClass" value="com.mysql.jdbc.Driver"></property>
        <property name="jdbcUrl" value="jdbc:mysql://localhost:3306/spring"></property>
        <property name="user" value="root"></property>
        <property name="password" value="root"></property>
    </bean>
   <!-- jdbc模板对象-->
    <bean id="jdbcTemplate" class="org.springframework.jdbc.core.JdbcTemplate">
        <property name="dataSource" ref="dataSource"></property>
    </bean>
- 1
- 2
- 3
- 4
- 5
- 6
- 7
- 8
- 9
- 10
2.操作数据库
 @Test
   public void test1() throws PropertyVetoException {
      ApplicationContext app = new ClassPathXmlApplicationContext("applicationContext.xml");
      JdbcTemplate jdbcTemplate = app.getBean(JdbcTemplate.class);
      int row = jdbcTemplate.update("insert into j_account values(?,?)", "jery", 4500.0);
      System.out.println(row);


   }
- 1
- 2
- 3
- 4
- 5
- 6
- 7
- 8
- 9
- 10
三、Spring产生JdbcTemplate对象(抽取jdbc.properties)
1.jdbc.properties
jdbc.driver=com.mysql.jdbc.Driver
jdbc.url=jdbc:mysql://localhost:3306/spring
jdbc.username=root
jdbc.password=root
- 1
- 2
- 3
- 4
- 5
2.加载jdbc.properties
 <!--加载jdbc.properties-->
    <context:property-placeholder location="classpath:jdbc.properties"></context:property-placeholder>
     <!-- 数据源对象-->
    <bean id="dataSource" class="com.mchange.v2.c3p0.ComboPooledDataSource">
        <property name="driverClass" value="${jdbc.driver}"></property>
        <property name="jdbcUrl" value="${jdbc.url}"></property>
        <property name="user" value="${jdbc.username}"></property>
        <property name="password" value="${jdbc.password}"></property>
    </bean>
   <!-- jdbc模板对象-->
    <bean id="jdbcTemplate" class="org.springframework.jdbc.core.JdbcTemplate">
        <property name="dataSource" ref="dataSource"></property>
    </bean>
- 1
- 2
- 3
- 4
- 5
- 6
- 7
- 8
- 9
- 10
- 11
- 12
- 13
四、基本操作
package com.study.test;

import org.junit.Test;
import org.junit.runner.RunWith;
import org.springframework.beans.factory.annotation.Autowired;
import org.springframework.jdbc.core.JdbcTemplate;
import org.springframework.test.context.ContextConfiguration;
import org.springframework.test.context.junit4.SpringJUnit4ClassRunner;

@RunWith(SpringJUnit4ClassRunner.class)
@ContextConfiguration("classpath:applicationContext.xml")
public class JdbcTemplateCRUDTest {
    @Autowired
    private JdbcTemplate jdbcTemplate;
    @Test
    public void test(){
        jdbcTemplate.update("update j_account set money=? where name=?",23456.0,"tom");
    }
     @Test
    public void testDelete(){
        jdbcTemplate.update("delete from j_account  where name=?","tom");
    }
     @Test
    public void testQueryAll(){
        List<Account> query = jdbcTemplate.query("select * from j_account", new BeanPropertyRowMapper<Account>(Account.class));
        System.out.println(query);  //[Account{name='jack', money=4500.0}, Account{name='jery', money=4500.0}]
    }
     @Test
    public void testQueryOne(){
        Account jack = jdbcTemplate.queryForObject("select * from j_account where name=?", new BeanPropertyRowMapper<Account>(Account.class), "jack");
        System.out.println(jack);  //Account{name='jack', money=4500.0}
    }
    @Test
    public void testQueryCount(){
        Long account = jdbcTemplate.queryForObject("select count(*) from j_account ", Long.class);
        System.out.println(account);  //2

    }
}
- 1
- 2
- 3
- 4
- 5
- 6
- 7
- 8
- 9
- 10
- 11
- 12
- 13
- 14
- 15
- 16
- 17
- 18
- 19
- 20
- 21
- 22
- 23
- 24
- 25
- 26
- 27
- 28
- 29
- 30
- 31
- 32
- 33
- 34
- 35
- 36
- 37
- 38
- 39
- 40
文章来源: blog.csdn.net,作者:不会压弯的小飞侠,版权归原作者所有,如需转载,请联系作者。
原文链接:blog.csdn.net/qq_43514330/article/details/125542885

【版权声明】本文为华为云社区用户转载文章,如果您发现本社区中有涉嫌抄袭的内容,欢迎发送邮件进行举报,并提供相关证据,一经查实,本社区将立刻删除涉嫌侵权内容,举报邮箱:
cloudbbs@huaweicloud.com
- 点赞
- 收藏
- 关注作者
评论(0)