SpringBoot整合第三方技术(Junit-Mybatis-Mybatis Plus-Druid)


🍁博客主页:👉不会压弯的小飞侠
✨欢迎关注:👉点赞👍收藏⭐留言✒
✨系列专栏:👉SpringBoot专栏(每日更新)
🔥SpringBoot快速入门(IDEA联网版): 👉点击查看
🔥SpringBoot - 无需idea联网的springboot项目:👉点击查看
🔥SpringBoot入门案例-阿里云版和纯手工版:👉点击查看
🔥SpringBoot-基础配置和属性配置详解:👉点击查看
🔥SpringBoot-yaml语法规则和读取数据:👉点击查看
✨如果觉得博主的文章还不错的话,请三连支持一下博主。
🔥欢迎大佬指正,一起学习!一起加油!

准备工作
1.创建数据表
创建一个tbl_book表

2.IDEA配置MySQL数据库连接
🔥详细步骤操作👉 点击直接查看
准备工作完成后,正式进入SpringBoot整合第三方技术的学习。
⭐⭐⭐注意:
创建SpringBoot项目时使用的是阿里云版,详细教程在springboot专栏:👉SpringBoot专栏
一、整合Juint
1.新建项目
- File
- Project Structure
- Spring Initializr
- 更改Initializr Service URL 为:https://start.aliyun.com

2.选择环境
注意:java version与自己配置的jdk版本保持一致

3.加入所需的支持
⭐⭐⭐注意:什么也不勾选。
4.编辑pom.xml
去掉这两行代码。
<relativePath/> <!-- lookup parent from repository -->
- 1
<name>springboot_03_junit</name>
	<description>Demo project for Spring Boot</description>
- 1
- 2
5.模拟dao层
BookDao:
- 1
package com.jkj.dao;
public interface BookDao {
    public void save();
}
- 1
- 2
- 3
- 4
BookDaoImpl:
- 1
package com.jkj.dao.impl;

import com.jkj.dao.BookDao;
import org.springframework.stereotype.Repository;

@Repository
public class BookDaoImpl implements BookDao {
    @Override
    public void save() {
        System.out.println("BookDao is Running...");
    }
}
- 1
- 2
- 3
- 4
- 5
- 6
- 7
- 8
- 9
- 10
- 11
- 12
- 13
6.测试dao层
package com.jkj;

import com.jkj.dao.BookDao;
import org.junit.jupiter.api.Test;
import org.springframework.beans.factory.annotation.Autowired;
import org.springframework.boot.test.context.SpringBootTest;

@SpringBootTest
class Springboot03JunitApplicationTests {
	//注入你要测试的对象
	@Autowired
	private BookDao bookDao;

	@Test
	void contextLoads() {
		//执行要测试对象对应的方法
		bookDao.save();
	}

}

- 1
- 2
- 3
- 4
- 5
- 6
- 7
- 8
- 9
- 10
- 11
- 12
- 13
- 14
- 15
- 16
- 17
- 18
- 19
- 20
- 21

7.@SpringBootTest解释
作用:设置Junit加载的springboot启动类
属性:classes:设置springboot启动类
⭐⭐⭐注意:如果测试类不在启动包中,则需要设置属性classes
@SpringBootTest(classes = Springboot03JunitApplication.class)
- 1
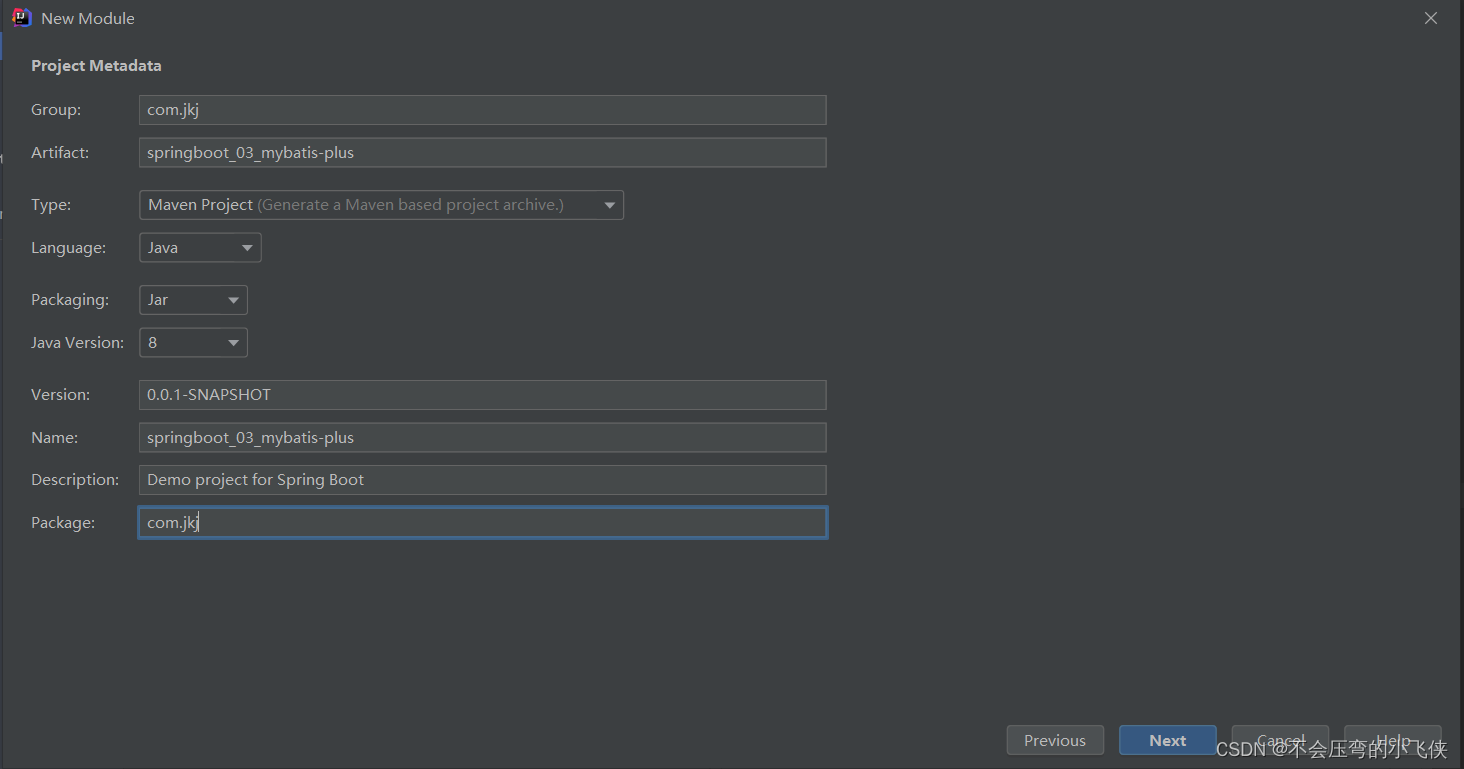
二、整合MyBatis
1.新建项目
- File
- Project Structure
- Spring Initializr
- 更改Initializr Service URL 为:https://start.aliyun.com
2.选择环境
3.加入所需的支持
选择:
- 关系型数据库
- MyBatis Framework
- MySQL Driver
4.yml配置相关信息
#配置相关信息
spring:
  datasource:
    driver-class-name=com: com.mysql.cj.jdbc.Driver
    url: jdbc:mysql://localhost:3306/springboot?serverTimezone=UTC
    username: root
    password: root
- 1
- 2
- 3
- 4
- 5
- 6
- 7
5.创建实体类
package com.jkj.domain;

public class Book {
    private int id;
    private String type;
    private String name;
    private String description;

    public int getId() {
        return id;
    }

    public void setId(int id) {
        this.id = id;
    }

    public String getType() {
        return type;
    }

    public void setType(String type) {
        this.type = type;
    }

    public String getName() {
        return name;
    }

    public void setName(String name) {
        this.name = name;
    }

    public String getDescription() {
        return description;
    }

    public void setDescription(String description) {
        this.description = description;
    }

    @Override
    public String toString() {
        return "Book{" +
                "id=" + id +
                ", type='" + type + '\'' +
                ", name='" + name + '\'' +
                ", description='" + description + '\'' +
                '}';
    }
}
- 1
- 2
- 3
- 4
- 5
- 6
- 7
- 8
- 9
- 10
- 11
- 12
- 13
- 14
- 15
- 16
- 17
- 18
- 19
- 20
- 21
- 22
- 23
- 24
- 25
- 26
- 27
- 28
- 29
- 30
- 31
- 32
- 33
- 34
- 35
- 36
- 37
- 38
- 39
- 40
- 41
- 42
- 43
- 44
- 45
- 46
- 47
- 48
- 49
- 50
- 51
6.模拟dao层
package com.jkj.dao;

import com.jkj.domain.Book;
import org.apache.ibatis.annotations.Mapper;
import org.apache.ibatis.annotations.Select;

@Mapper
public interface BookDao {
    @Select("select * from tbl_book where id=#{id}")
    public Book getById(int id);

}
- 1
- 2
- 3
- 4
- 5
- 6
- 7
- 8
- 9
- 10
- 11
- 12
- 13
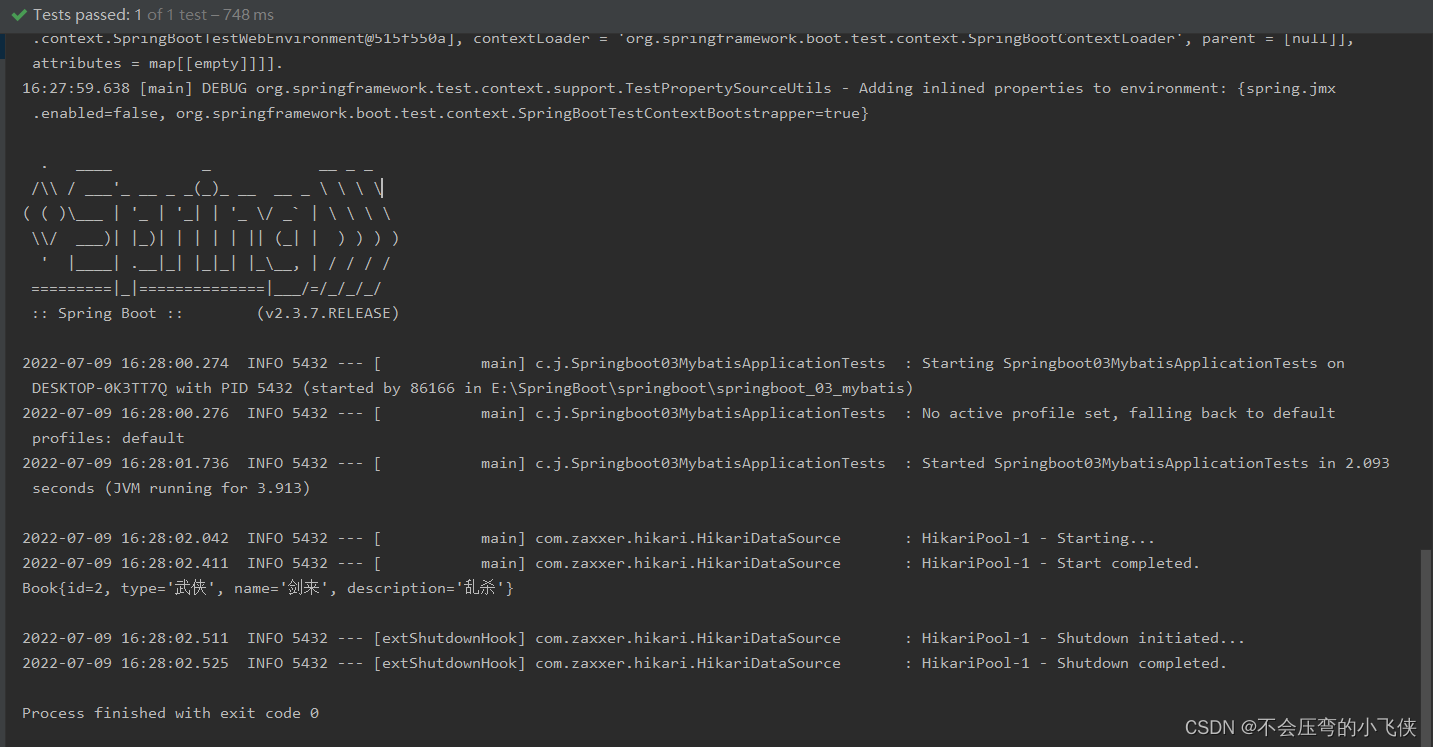
7.测试
package com.jkj;

import com.jkj.dao.BookDao;
import org.junit.jupiter.api.Test;
import org.springframework.beans.factory.annotation.Autowired;
import org.springframework.boot.test.context.SpringBootTest;

@SpringBootTest
class Springboot03MybatisApplicationTests {
    @Autowired
    private BookDao bookDao;

    @Test
    void contextLoads() {
        System.out.println(bookDao.getById(2));
    }

}
- 1
- 2
- 3
- 4
- 5
- 6
- 7
- 8
- 9
- 10
- 11
- 12
- 13
- 14
- 15
- 16
- 17
- 18
- 19
⭐⭐⭐注意:
如果报时区问题解决方案:
- 添加serverTimezone的设定
url: jdbc:mysql://localhost:3306/springboot?serverTimezone=UTC
- 1
- 驱动类过时更换为:
driver-class-name=com: com.mysql.cj.jdbc.Driver
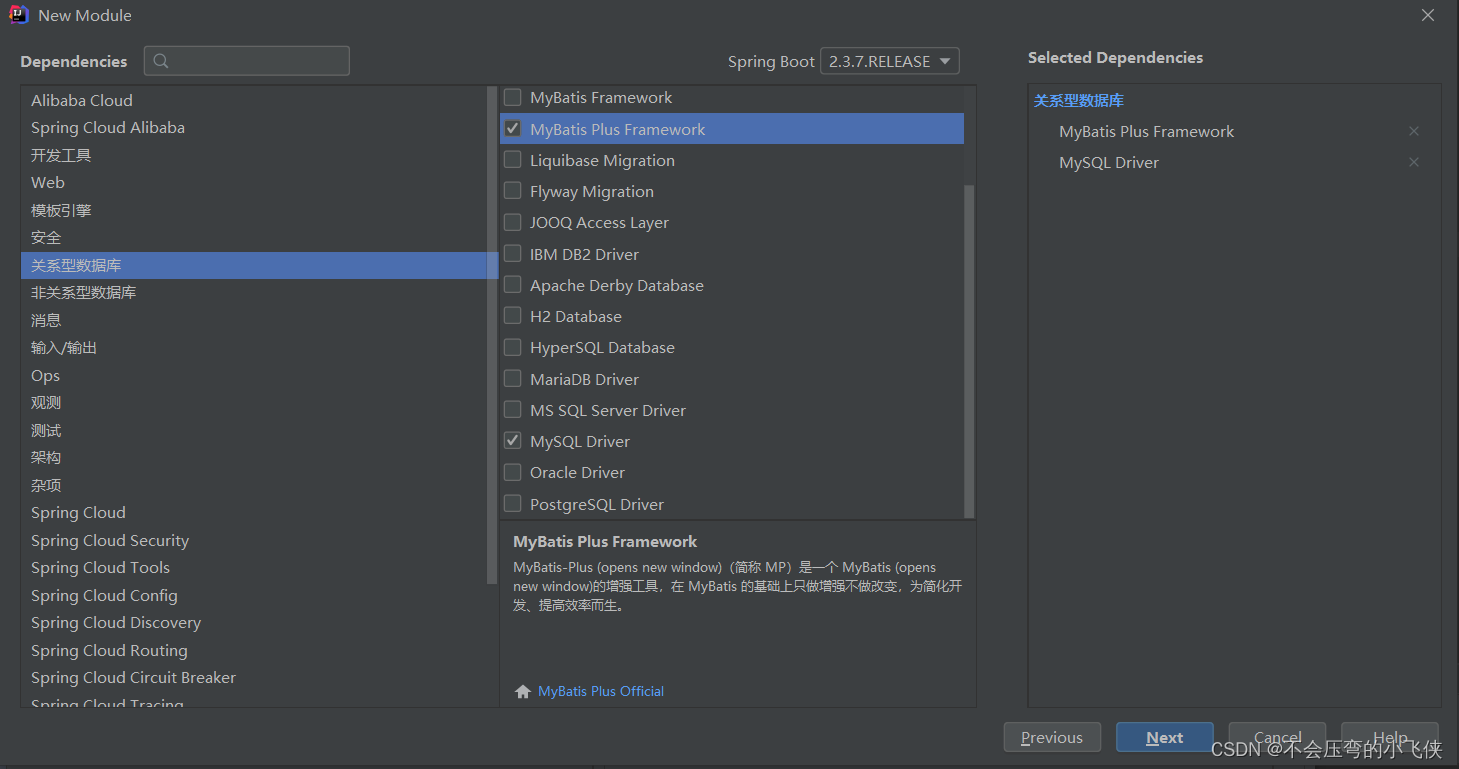
三、整合MyBatis-plus
1.新建项目
- File
- Project Structure
- Spring Initializr
- 更改Initializr Service URL 为:https://start.aliyun.com
2.选择环境
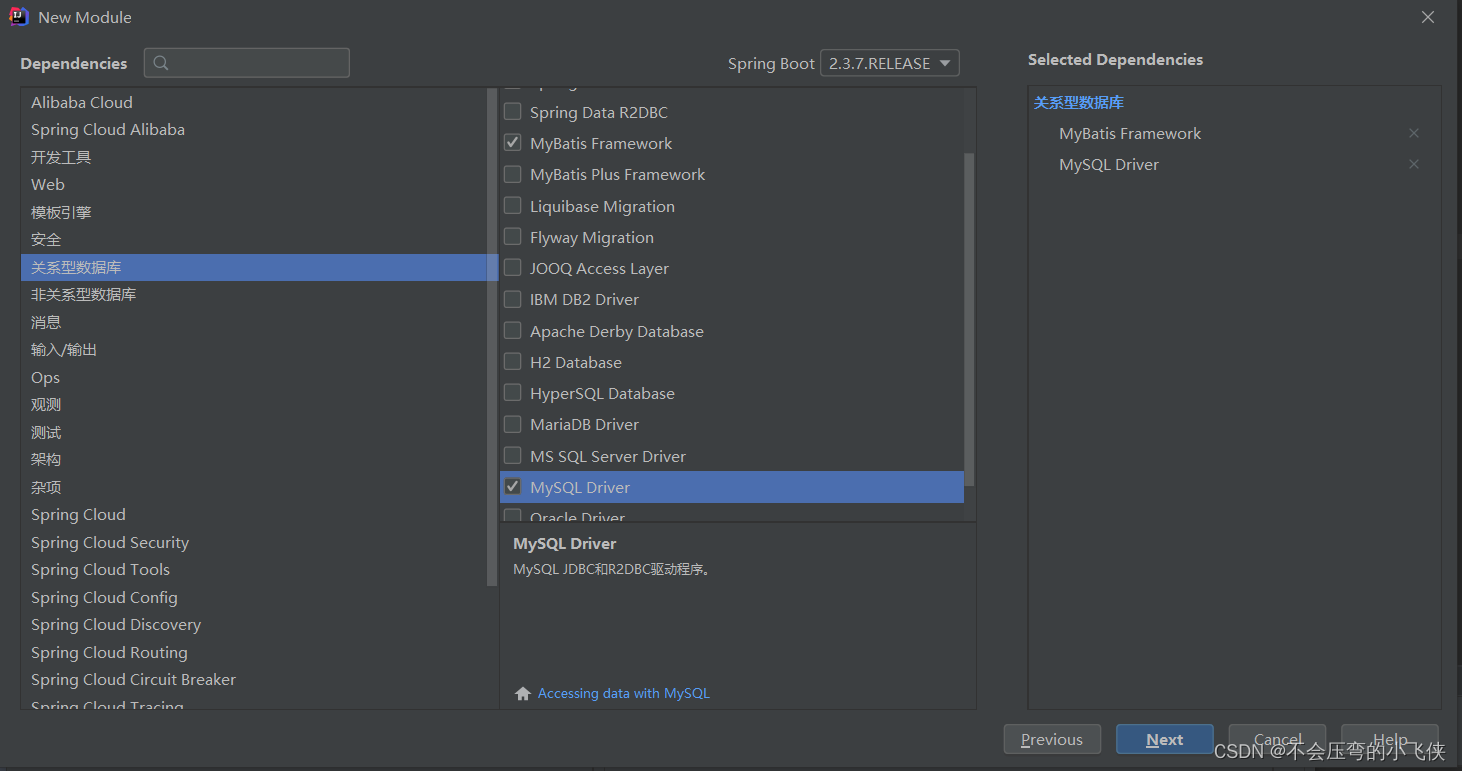
3.加入所需的支持
选择:
- 关系型数据库
- MyBatis Plus Framework
- MySQL Driver
4.yml配置相关信息
#配置相关信息
spring:
  datasource:
    driver-class-name=com: com.mysql.cj.jdbc.Driver
    url: jdbc:mysql://localhost:3306/springboot?serverTimezone=UTC
    username: root
    password: root
- 1
- 2
- 3
- 4
- 5
- 6
- 7
5.创建实体类
package com.jkj.domain;

public class Book {
    private int id;
    private String type;
    private String name;
    private String description;

    public int getId() {
        return id;
    }

    public void setId(int id) {
        this.id = id;
    }

    public String getType() {
        return type;
    }

    public void setType(String type) {
        this.type = type;
    }

    public String getName() {
        return name;
    }

    public void setName(String name) {
        this.name = name;
    }

    public String getDescription() {
        return description;
    }

    public void setDescription(String description) {
        this.description = description;
    }

    @Override
    public String toString() {
        return "Book{" +
                "id=" + id +
                ", type='" + type + '\'' +
                ", name='" + name + '\'' +
                ", description='" + description + '\'' +
                '}';
    }
}
- 1
- 2
- 3
- 4
- 5
- 6
- 7
- 8
- 9
- 10
- 11
- 12
- 13
- 14
- 15
- 16
- 17
- 18
- 19
- 20
- 21
- 22
- 23
- 24
- 25
- 26
- 27
- 28
- 29
- 30
- 31
- 32
- 33
- 34
- 35
- 36
- 37
- 38
- 39
- 40
- 41
- 42
- 43
- 44
- 45
- 46
- 47
- 48
- 49
- 50
- 51
6.模拟dao层继承BaseMapper
package com.jkj.dao;

import com.baomidou.mybatisplus.core.mapper.BaseMapper;
import com.jkj.domain.Book;
import org.apache.ibatis.annotations.Mapper;
import org.apache.ibatis.annotations.Select;

@Mapper
public interface BookDao extends BaseMapper<Book> {

}

}
- 1
- 2
- 3
- 4
- 5
- 6
- 7
- 8
- 9
- 10
- 11
- 12
- 13
- 14
7.测试类
package com.jkj;

import com.jkj.dao.BookDao;
import org.junit.jupiter.api.Test;
import org.springframework.beans.factory.annotation.Autowired;
import org.springframework.boot.test.context.SpringBootTest;

@SpringBootTest
class Springboot03MybatisPlusApplicationTests {
    @Autowired
    private BookDao bookDao;

    @Test
    void contextLoads() {
        System.out.println(bookDao.selectById(2));
    }
}
- 1
- 2
- 3
- 4
- 5
- 6
- 7
- 8
- 9
- 10
- 11
- 12
- 13
- 14
- 15
- 16
- 17
- 18
⭐⭐⭐注意:
此时会报错:Table ‘springboot.book’ doesn’t exist
需要在yml中设置MP配置相关信息。
mybatis-plus:
  global-config:
    db-config:
      table-prefix: tbl_
- 1
- 2
- 3
- 4
添加后重新测试即可。
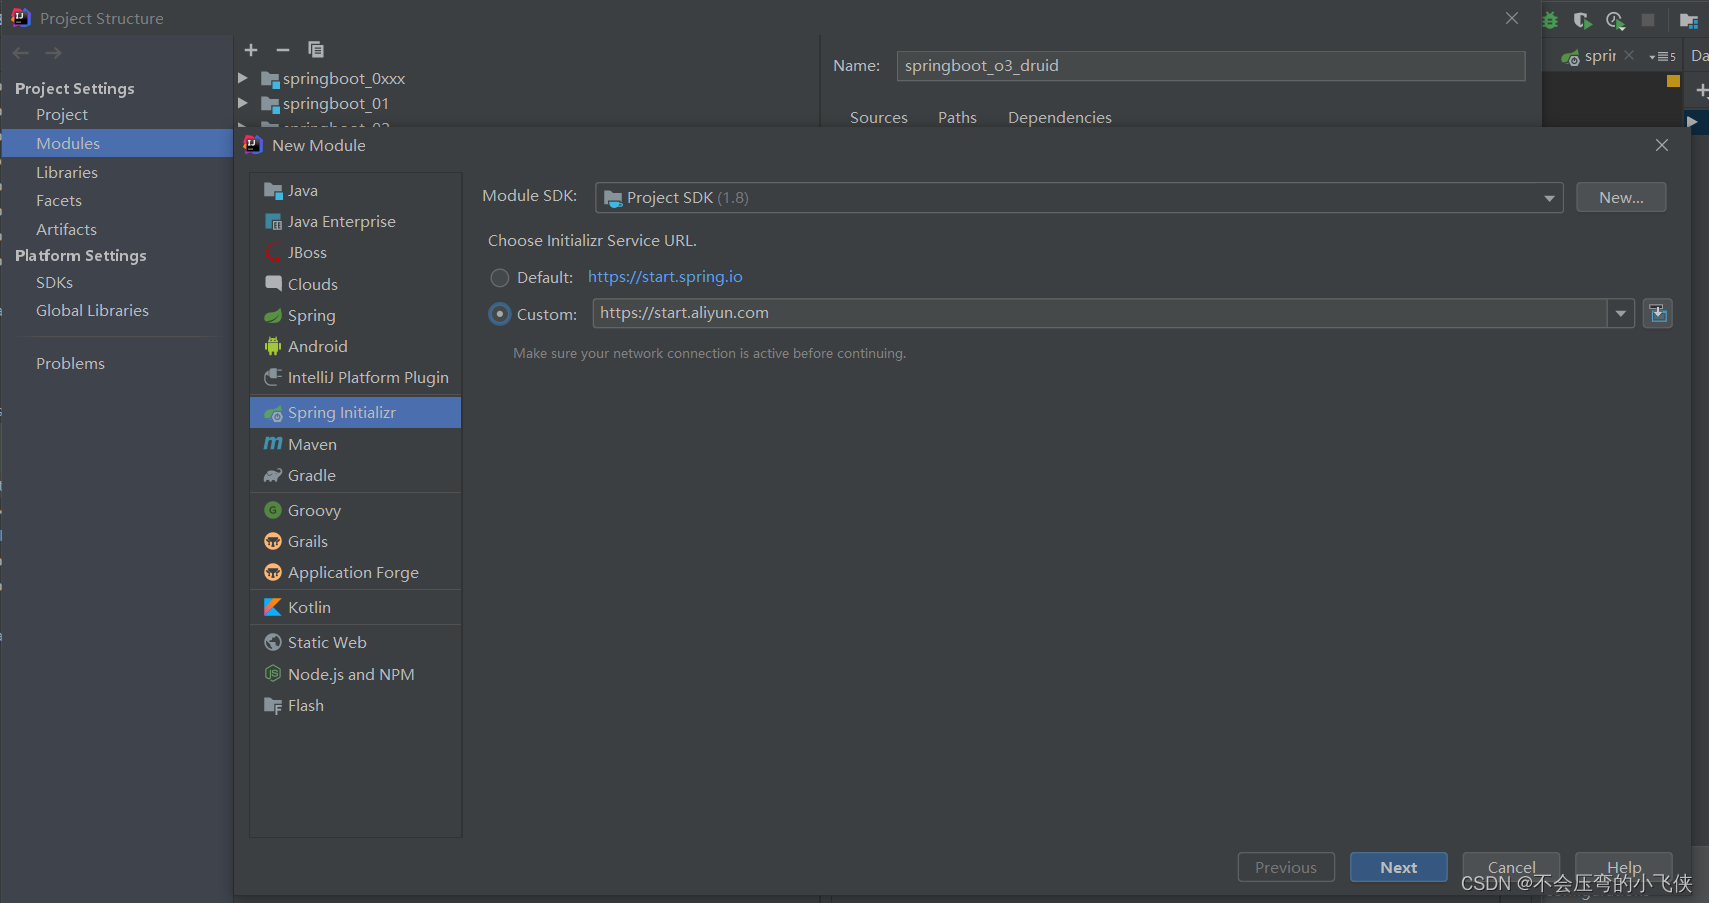
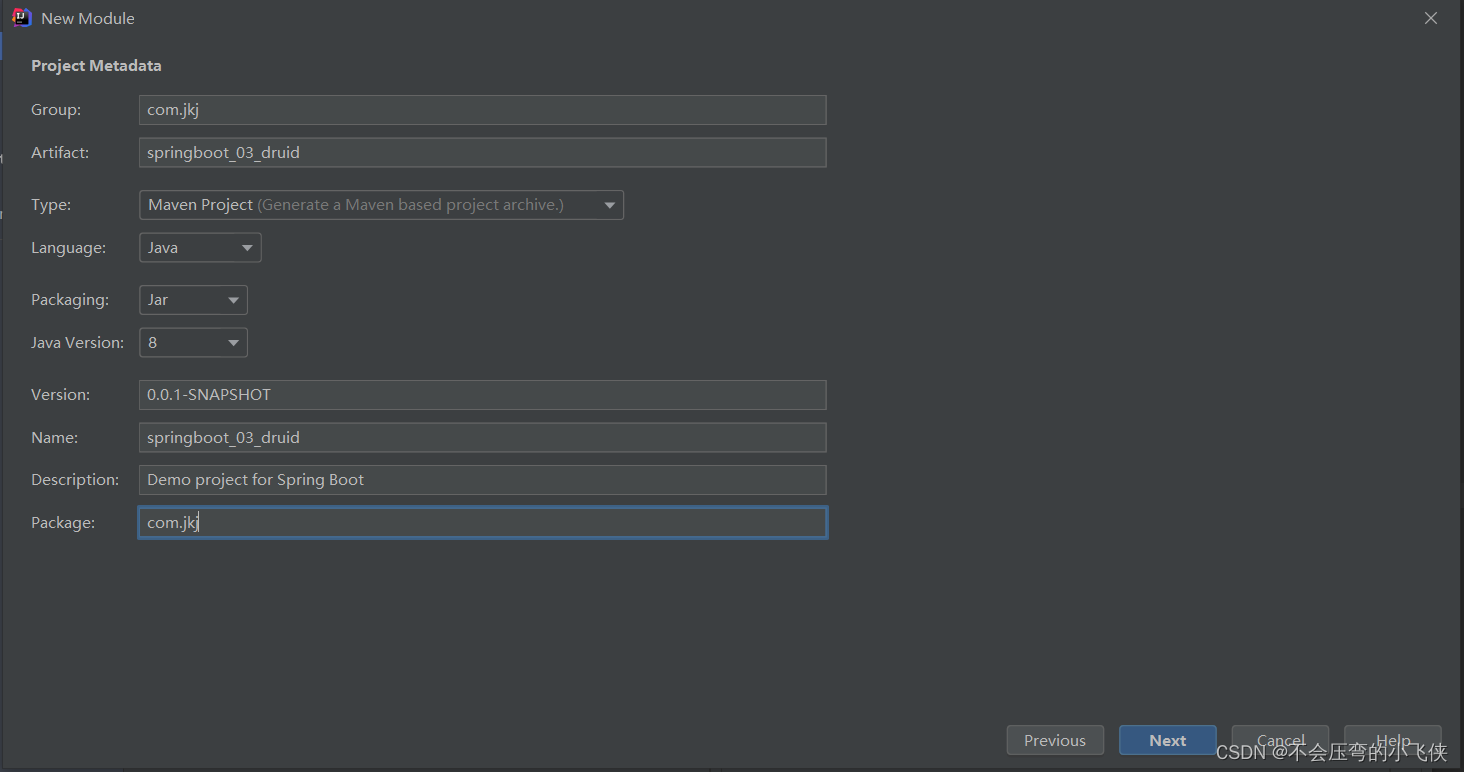
四、整合Druid
1.新建项目
- File
- Project Structure
- Spring Initializr
- 更改Initializr Service URL 为:https://start.aliyun.com
2.选择环境
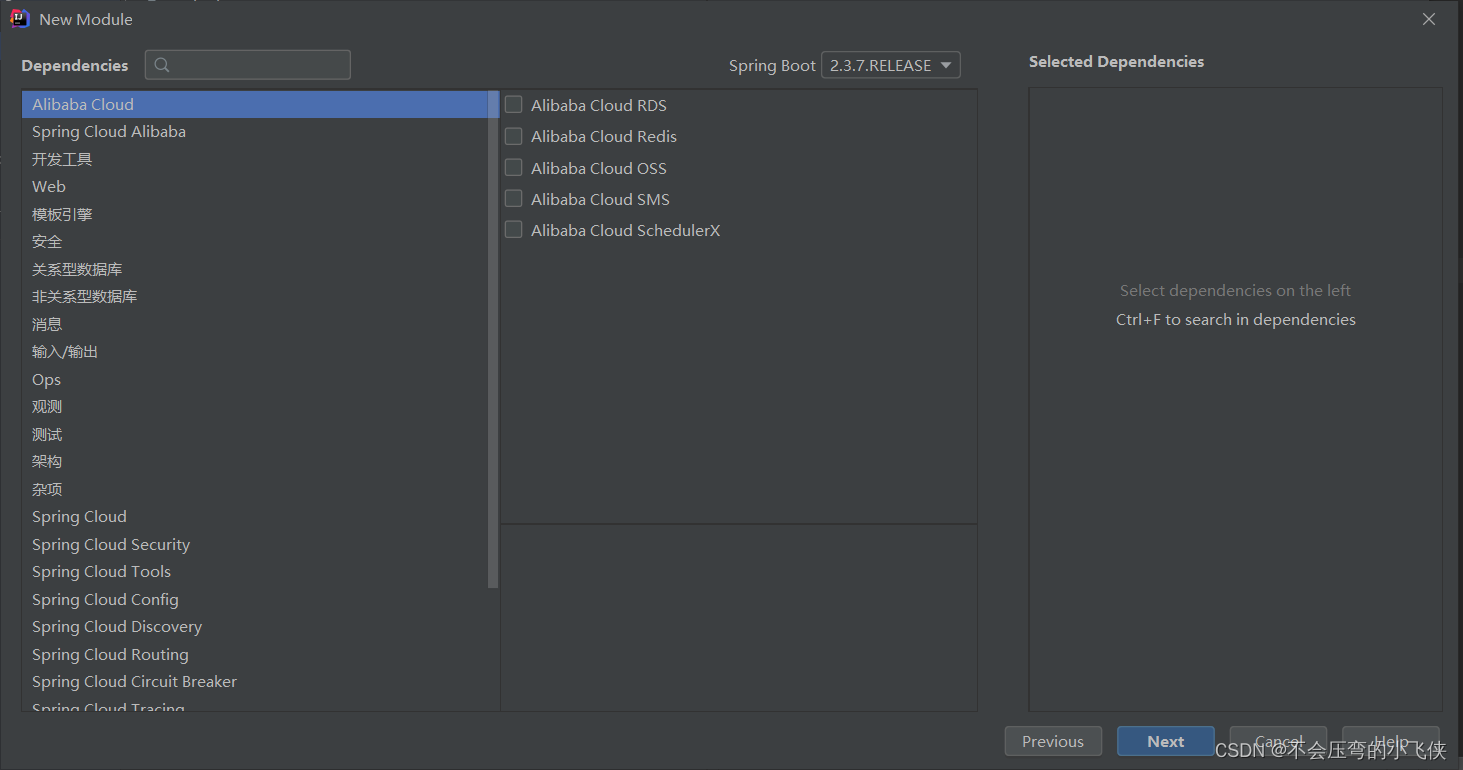
3.加入所需的支持
不选

4.导入druid所需依赖
可以在这个网站搜索依赖直接点击跳转复制即可👉Maven Rrepository

<dependency>
            <groupId>com.alibaba</groupId>
            <artifactId>druid</artifactId>
            <version>1.2.11</version>
        </dependency>
- 1
- 2
- 3
- 4
- 5
5.yml配置相关信息
两种方式:
- 1
#配置相关信息
spring:
  datasource:
    driver-class-name=com: com.mysql.cj.jdbc.Driver
    url: jdbc:mysql://localhost:3306/springboot?serverTimezone=UTC
    username: root
    password: root
    type: com.alibaba.druid.pool.DruidDataSource


#spring:
#  datasource:
#    druid:
#      driver-class-name=com: com.mysql.cj.jdbc.Driver
#      url: jdbc:mysql://localhost:3306/springboot?serverTimezone=UTC
#      username: root
#      password: root
- 1
- 2
- 3
- 4
- 5
- 6
- 7
- 8
- 9
- 10
- 11
- 12
- 13
- 14
- 15
- 16
- 17
6.创建实体类
package com.jkj.domain;

public class Book {
    private int id;
    private String type;
    private String name;
    private String description;

    public int getId() {
        return id;
    }

    public void setId(int id) {
        this.id = id;
    }

    public String getType() {
        return type;
    }

    public void setType(String type) {
        this.type = type;
    }

    public String getName() {
        return name;
    }

    public void setName(String name) {
        this.name = name;
    }

    public String getDescription() {
        return description;
    }

    public void setDescription(String description) {
        this.description = description;
    }

    @Override
    public String toString() {
        return "Book{" +
                "id=" + id +
                ", type='" + type + '\'' +
                ", name='" + name + '\'' +
                ", description='" + description + '\'' +
                '}';
    }
}
- 1
- 2
- 3
- 4
- 5
- 6
- 7
- 8
- 9
- 10
- 11
- 12
- 13
- 14
- 15
- 16
- 17
- 18
- 19
- 20
- 21
- 22
- 23
- 24
- 25
- 26
- 27
- 28
- 29
- 30
- 31
- 32
- 33
- 34
- 35
- 36
- 37
- 38
- 39
- 40
- 41
- 42
- 43
- 44
- 45
- 46
- 47
- 48
- 49
- 50
- 51
7.模拟dao层
package com.jkj.dao;

import com.jkj.domain.Book;
import org.apache.ibatis.annotations.Mapper;
import org.apache.ibatis.annotations.Select;

@Mapper
public interface BookDao {
    @Select("select * from tbl_book where id=#{id}")
    public Book getById(int id);

}
- 1
- 2
- 3
- 4
- 5
- 6
- 7
- 8
- 9
- 10
- 11
- 12
- 13
- 14
8.测试类
package com.jkj;

import com.jkj.dao.BookDao;
import org.junit.jupiter.api.Test;
import org.springframework.beans.factory.annotation.Autowired;
import org.springframework.boot.test.context.SpringBootTest;

@SpringBootTest
class SpringbootO3DruidApplicationTests {
    @Autowired
    private BookDao bookDao;

    @Test
    void contextLoads() {
        System.out.println(bookDao.getById(3));
    }

}
- 1
- 2
- 3
- 4
- 5
- 6
- 7
- 8
- 9
- 10
- 11
- 12
- 13
- 14
- 15
- 16
- 17
- 18

🍁 完美撒花

文章来源: blog.csdn.net,作者:不会压弯的小飞侠,版权归原作者所有,如需转载,请联系作者。
原文链接:blog.csdn.net/qq_43514330/article/details/125697138

- 点赞
- 收藏
- 关注作者
评论(0)