nginx 的使用配置
【摘要】 nginx 的使用配置
nginx 的使用配置
前提:centos 7.
安装先决条件:
sudo yum install -y yum-utils
设置yum存储库,先创建一下内容的文件:/etc/yum.repos.d/nginx.repo
[nginx-stable]
name=nginx stable repo
baseurl=http://nginx.org/packages/centos/$releasever/$basearch/
gpgcheck=1
enabled=1
gpgkey=https://nginx.org/keys/nginx_signing.key
module_hotfixes=true

[nginx-mainline]
name=nginx mainline repo
baseurl=http://nginx.org/packages/mainline/centos/$releasever/$basearch/
gpgcheck=1
enabled=0
gpgkey=https://nginx.org/keys/nginx_signing.key
module_hotfixes=true
默认情况下,使用稳定 nginx 包的存储库。如果要使用主线 nginx 包,请运行以下命令:
yum-config-manager --enable nginx-mainline
运行如下命令安装nginx:
sudo yum install -y nginx
设置开机启动:
systemctl enable nginx
启动nginx:
systemctl start nginx
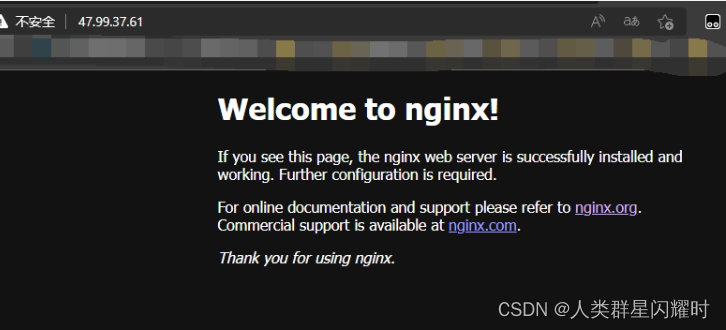
此时,就可以在浏览器通过ip访问了:http://你的ip,界面如下:

nginx安装完成后,切换到/etc/nginx/conf.d目录,修改default.conf文件内容,如下所示:
server {
    listen       80;
    server_name  localhost;
    location / {
        proxy_redirect              off;
        proxy_set_header            Host $host;
        proxy_set_header            X-real-ip $remote_addr;
        proxy_set_header            X-Forwarded-For $proxy_add_x_forwarded_for;
      	proxy_pass                 http://127.0.0.1:8083;
    }
    error_page   500 502 503 504  /50x.html;
    location = /50x.html {
        root   /usr/share/nginx/html;
    }
}
具体根据需要更改配置。也可以在 /etc/nginx/conf.d 目录下新建自己的自定义nginxconf文件,进行配置。
保存后,执行如下命令,重新加载配置:
nginx -s reload
完成之后。可以编写shell脚本,实现一键发布。
编写类似如下脚本。
# !/bin/bash
# 进入到存放代码拉取的文件夹
cd /usr/local/webservice/dotnet/resource/ICMPService
# 拉取
git pull
# build
dotnet build
# 发布
dotnet publish -o /usr/local/webservice/dotnet/publish/ICMPService
# 重启supervis
supervisorctl restart ICMPService
存放到root根目录即可。
使用时本地推送最新代码,远端 执行 ./build.sh 即可。
supervisor一个作为守护线程,用于维护应用程序的生命周期的,nginx则是作为反向代理使用,配置shell可以做到高效部署,非常的方便
问题:
如果出现如下图的问题:

有可能的是因为SeLinux的限制,执行如下命令之后,再刷新页面:
setenforce 0
如果仍然没有用,因为上面的设置只是临时生效的。
可以通过修改/etc/selinux/config 文件,将SELINUX=enforcing改为SELINUX=disabled,然后重启,即可永久生效。
【声明】本内容来自华为云开发者社区博主,不代表华为云及华为云开发者社区的观点和立场。转载时必须标注文章的来源(华为云社区)、文章链接、文章作者等基本信息,否则作者和本社区有权追究责任。如果您发现本社区中有涉嫌抄袭的内容,欢迎发送邮件进行举报,并提供相关证据,一经查实,本社区将立刻删除涉嫌侵权内容,举报邮箱:
cloudbbs@huaweicloud.com
- 点赞
- 收藏
- 关注作者


评论(0)