3h精通OpenCV(八)-形状检测
【摘要】 0、准备工作右击新建的项目,选择Python File,新建一个Python文件,然后在开头import cv2导入cv2库,import numpy并且重命名为np。import cv2import numpy as np我们还要知道在OpenCV中,坐标轴的方向是x轴向右,y轴向下,坐标原点在左上角,比如下面这张长为640像素,宽为480像素的图片。OK,下面开始本节的学习吧。 1、实...
| 0、准备工作 |
|---|
右击新建的项目,选择Python File,新建一个Python文件,然后在开头import cv2导入cv2库,import numpy并且重命名为np。
import cv2
import numpy as np

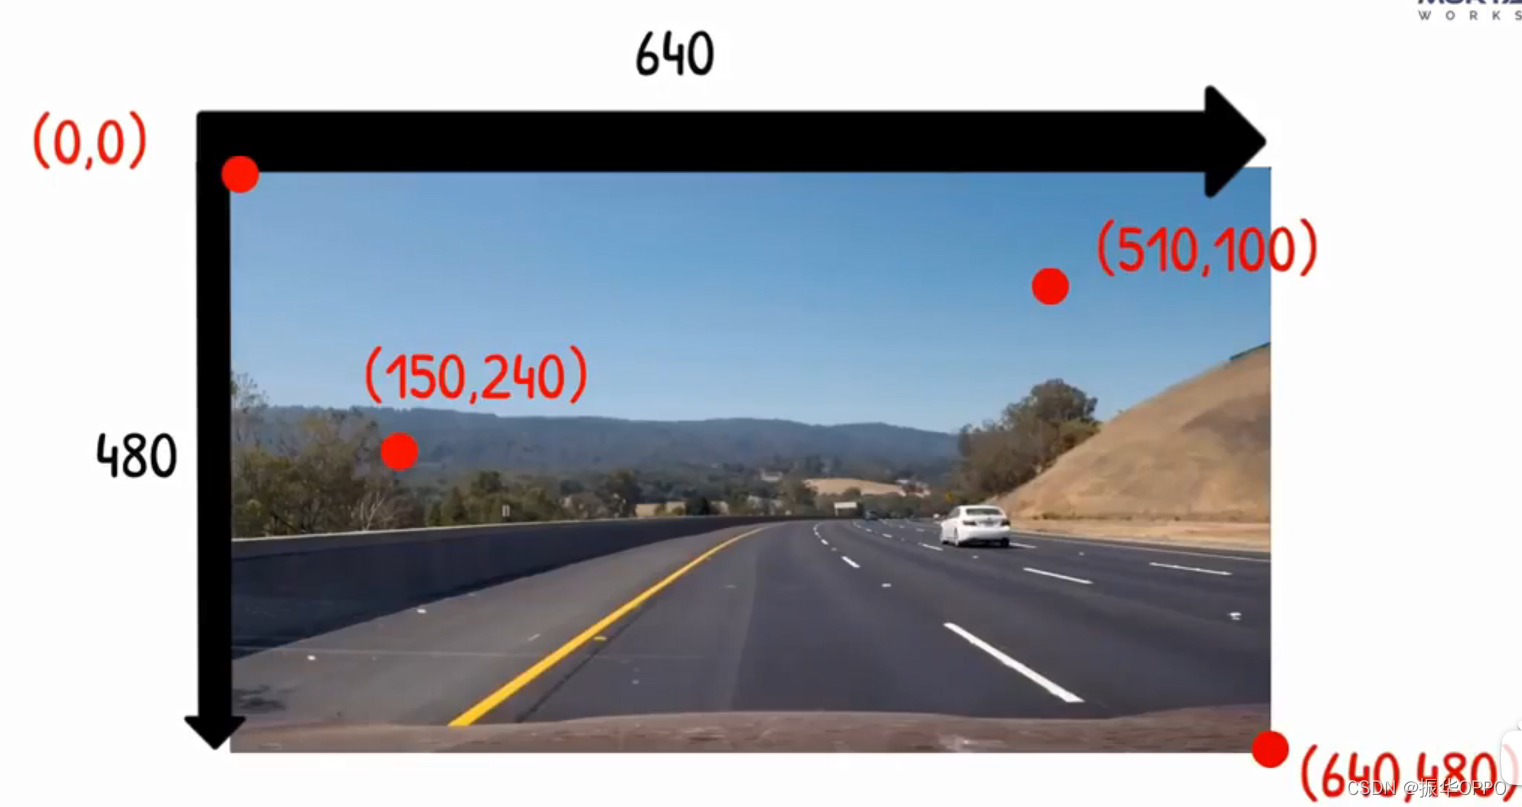
我们还要知道在OpenCV中,坐标轴的方向是x轴向右,y轴向下,坐标原点在左上角,比如下面这张长为640像素,宽为480像素的图片。OK,下面开始本节的学习吧。

| 1、实现源码 |
|---|
先将原图像转为灰度图像,再对它进行高斯平滑,去除噪声,得到光滑的背景图像,然后进行边缘检测,再对提取的形状进行判别,分别框起来并且打上标签。
def stackImages(scale,imgArray):
    rows = len(imgArray)
    cols = len(imgArray[0])
    rowsAvailable = isinstance(imgArray[0], list)
    width = imgArray[0][0].shape[1]
    height = imgArray[0][0].shape[0]
    if rowsAvailable:
        for x in range ( 0, rows):
            for y in range(0, cols):
                if imgArray[x][y].shape[:2] == imgArray[0][0].shape [:2]:
                    imgArray[x][y] = cv2.resize(imgArray[x][y], (0, 0), None, scale, scale)
                else:
                    imgArray[x][y] = cv2.resize(imgArray[x][y], (imgArray[0][0].shape[1], imgArray[0][0].shape[0]), None, scale, scale)
                if len(imgArray[x][y].shape) == 2: imgArray[x][y]= cv2.cvtColor( imgArray[x][y], cv2.COLOR_GRAY2BGR)
        imageBlank = np.zeros((height, width, 3), np.uint8)
        hor = [imageBlank]*rows
        hor_con = [imageBlank]*rows
        for x in range(0, rows):
            hor[x] = np.hstack(imgArray[x])
        ver = np.vstack(hor)
    else:
        for x in range(0, rows):
            if imgArray[x].shape[:2] == imgArray[0].shape[:2]:
                imgArray[x] = cv2.resize(imgArray[x], (0, 0), None, scale, scale)
            else:
                imgArray[x] = cv2.resize(imgArray[x], (imgArray[0].shape[1], imgArray[0].shape[0]), None,scale, scale)
            if len(imgArray[x].shape) == 2: imgArray[x] = cv2.cvtColor(imgArray[x], cv2.COLOR_GRAY2BGR)
        hor= np.hstack(imgArray)
        ver = hor
    return ver
def getContours(img):
    contours,hierarchy=cv2.findContours(img,cv2.RETR_EXTERNAL,cv2.CHAIN_APPROX_NONE)
    for cnt in contours:
        area=cv2.contourArea(cnt)
        print(area)
        cv2.drawContours(imgContour,cnt,-1,(255,0,0),3)
        if area>500:
            cv2.drawContours(imgContour,cnt,-1,(255,0,0),3)
            peri=cv2.arcLength(cnt,True)
            #print(peri)
            approx=cv2.approxPolyDP(cnt,0.02*peri,True)
            print(len(approx))
            objCor=len(approx)
            x,y,w,h=cv2.boundingRect(approx)

            if objCor==3:objectType="Tri"
            elif objCor==4:
                aspRatio=w/float(h)
                if aspRatio>0.98 and aspRatio<1.03: objectType="Square"
                else:objectType="Rectangle"
            elif objCor>4:
                objectType="Circle"
            else:objectType="None"
            cv2.rectangle(imgContour,(x,y),(x+w,y+h),(0,255,0),2)
            cv2.putText(imgContour,objectType,(x+(w//2)-10,y+(h//2)-10),cv2.FONT_HERSHEY_SIMPLEX,0.7,
                        (0,255,255),2)
path='Resources/shapes.png'
img=cv2.imread(path)
img=cv2.resize(img,(400,400))
imgContour=img.copy()

imgGray=cv2.cvtColor(img,cv2.COLOR_BGR2GRAY)
imgBlur=cv2.GaussianBlur(imgGray,(7,7),1)
imgCanny=cv2.Canny(imgBlur,50,50)
getContours(imgCanny)

imgBlank=np.zeros_like(img)
imgStack=stackImages(0.8,([img,imgGray,imgBlur],[imgCanny,imgContour,imgBlank]))

cv2.imshow("imgStack",imgStack)
cv2.waitKey(0)
| 2、运行效果 |
|---|

【声明】本内容来自华为云开发者社区博主,不代表华为云及华为云开发者社区的观点和立场。转载时必须标注文章的来源(华为云社区)、文章链接、文章作者等基本信息,否则作者和本社区有权追究责任。如果您发现本社区中有涉嫌抄袭的内容,欢迎发送邮件进行举报,并提供相关证据,一经查实,本社区将立刻删除涉嫌侵权内容,举报邮箱:
cloudbbs@huaweicloud.com
- 点赞
- 收藏
- 关注作者


评论(0)