如何把SAP Kyma和SAP Cloud for Customer连接起来
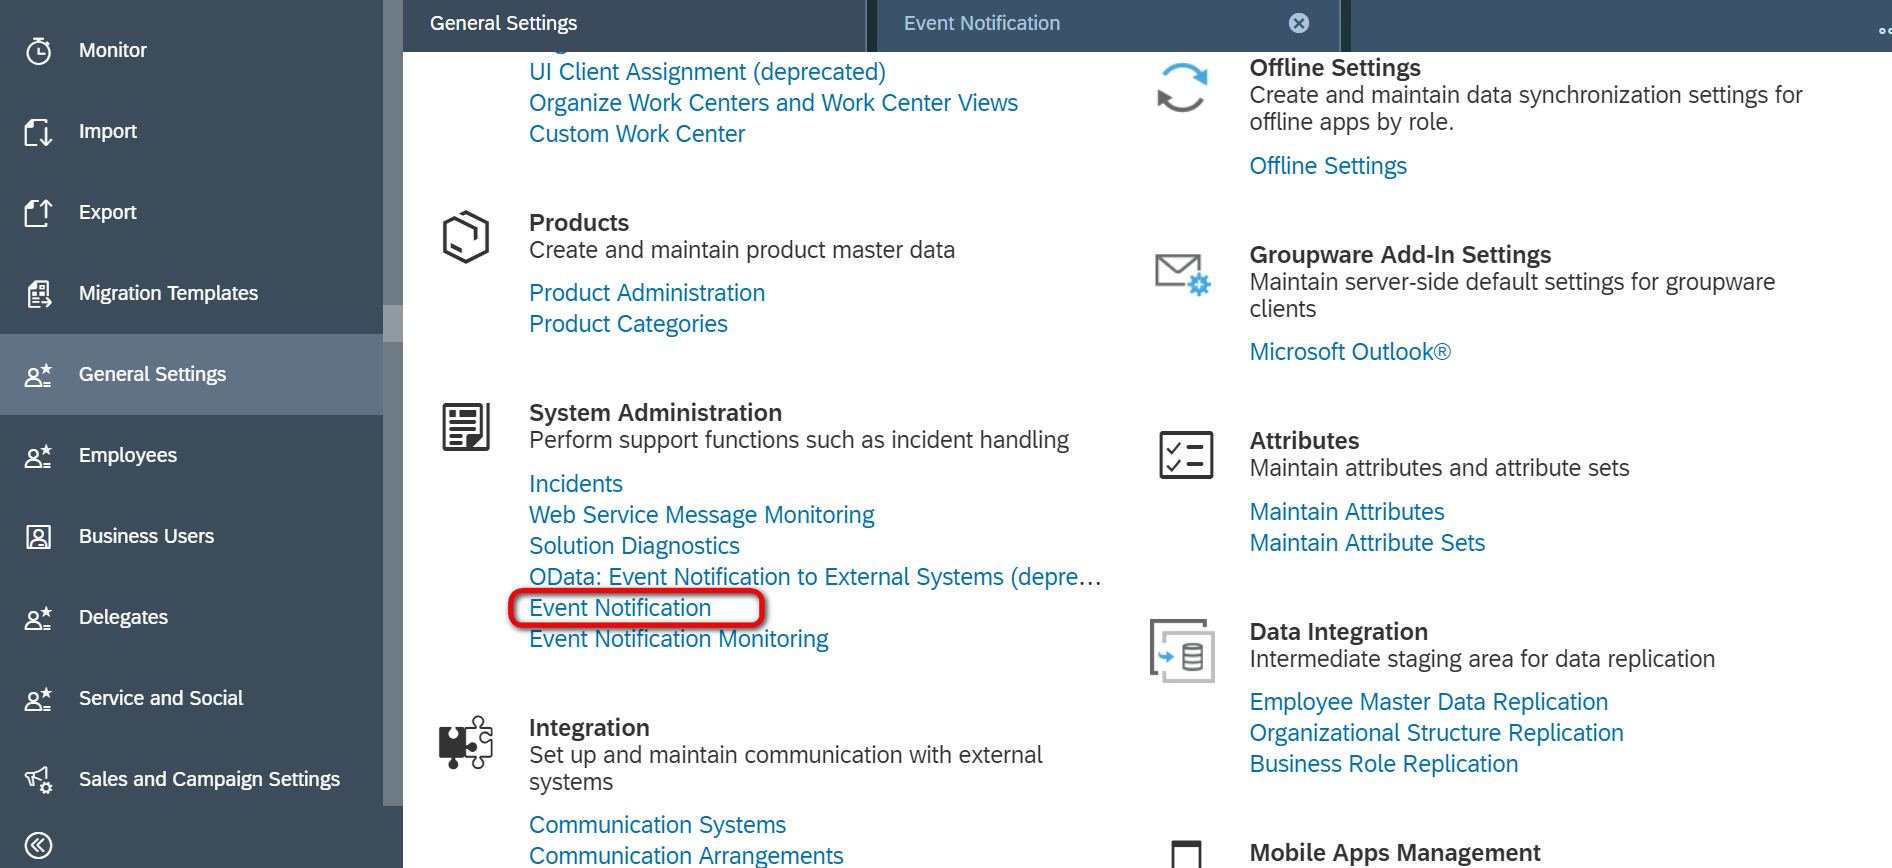
首先进入SAP Cloud for Customer的Administration的工作中心,打开General Settings视图,进入Event Notification配置UI:
![](https://user-images.githubusercontent.com/5669954/63076715-bb37a180-bf68-11e9-9847-239907b28d5e.png)
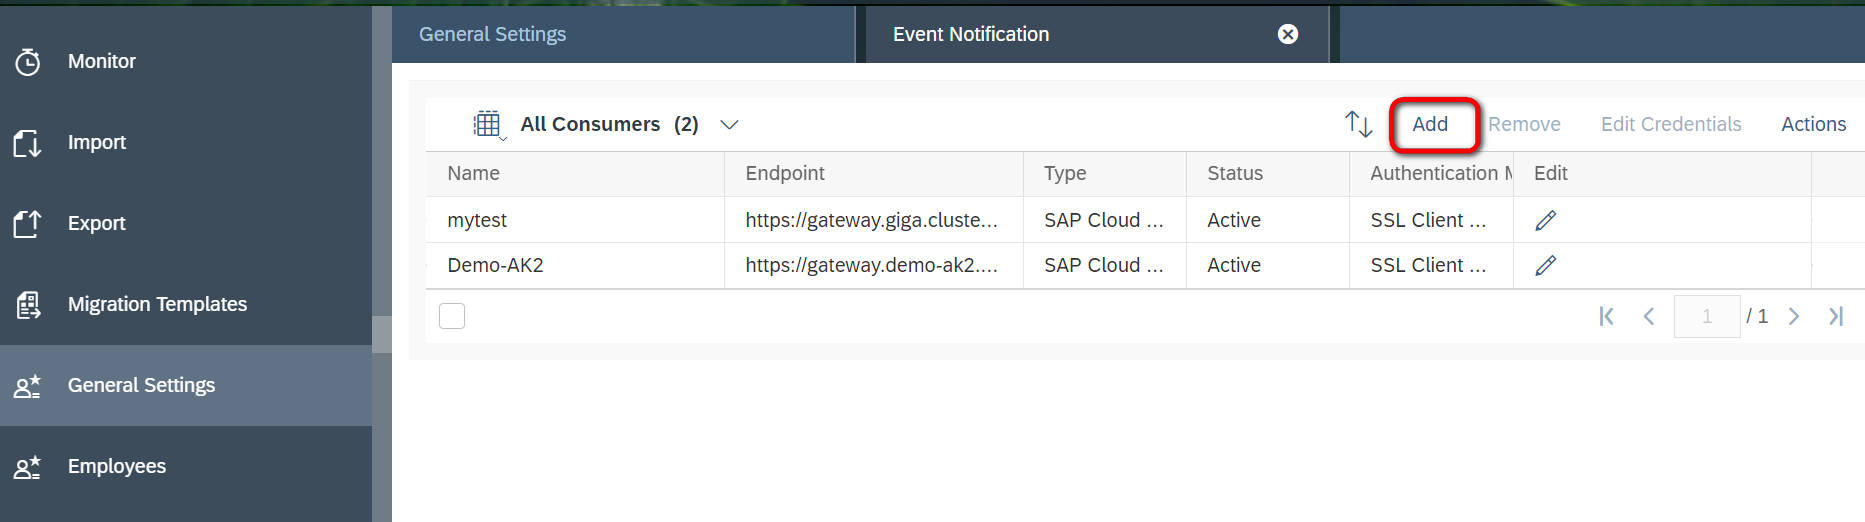
新建一个C4C OData事件和API的消费者:
![](https://user-images.githubusercontent.com/5669954/63076718-bb37a180-bf68-11e9-89ad-13b415ea83ab.png)
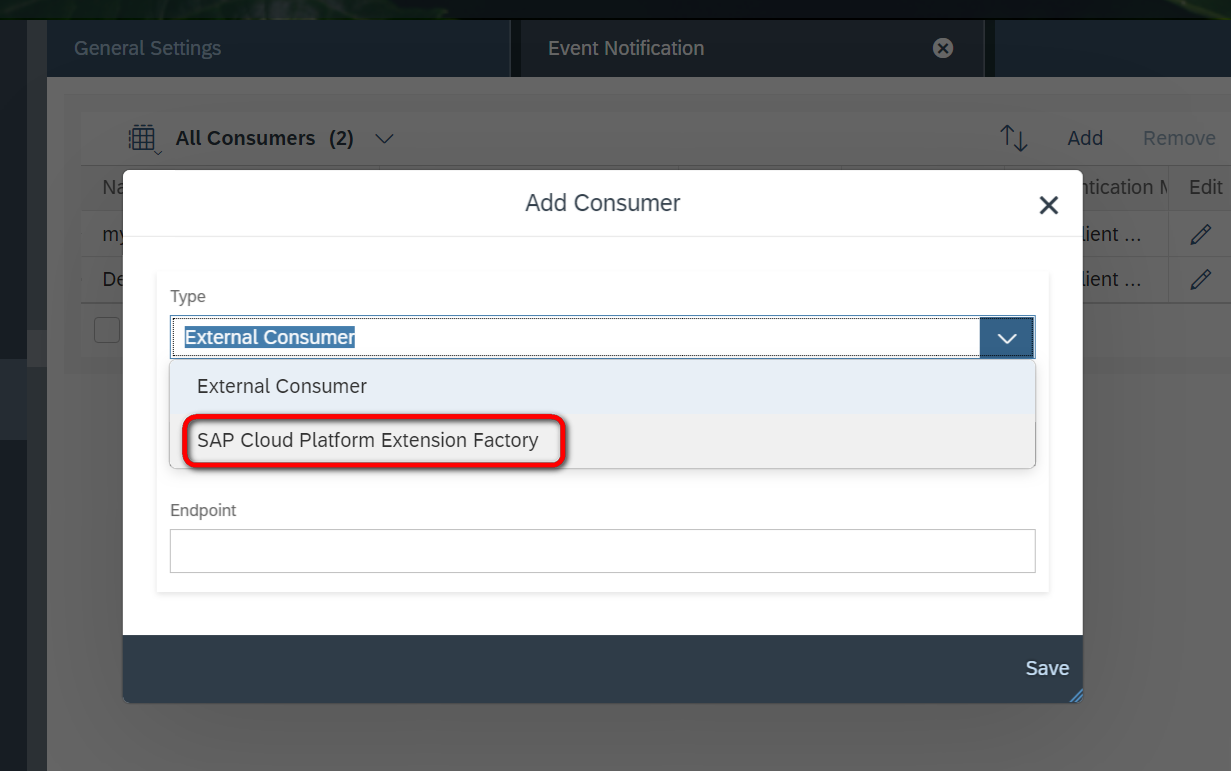
类型选择SAP Cloud Platform Extension Factory,即Kyma:
![](https://user-images.githubusercontent.com/5669954/63076701-b672ed80-bf68-11e9-98b1-f0f5277de6fb.png)
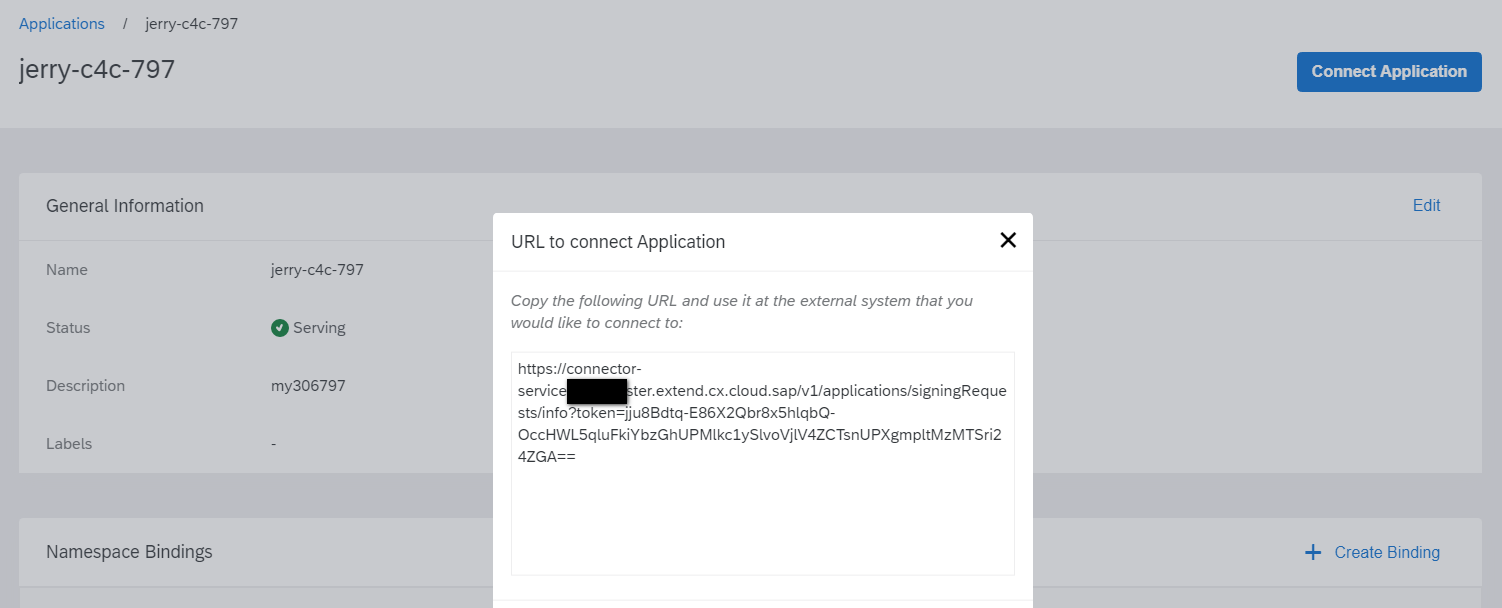
这个Remote Environment URL从哪里来呢?就是SAP Kyma应用里的Application Connector对应的url:
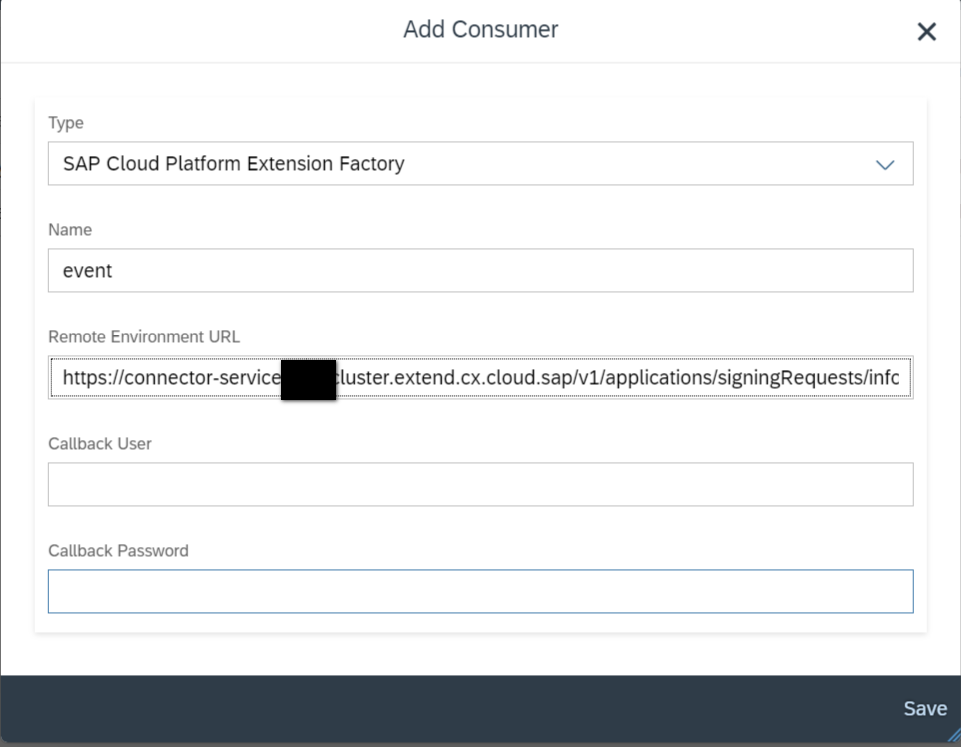
![](https://user-images.githubusercontent.com/5669954/63076704-b7a41a80-bf68-11e9-8b13-768ec22bb372.png)
即这个url:
![](https://user-images.githubusercontent.com/5669954/63076705-b7a41a80-bf68-11e9-98a8-d52086a35e6b.png)
维护了回调用户名和密码之后,再添加Subscription,即您希望将Cloud for Customer系统里的哪些BO事件,发布给Kyma:
![](https://user-images.githubusercontent.com/5669954/63076706-b83cb100-bf68-11e9-8f32-560a70ce2ed6.png)
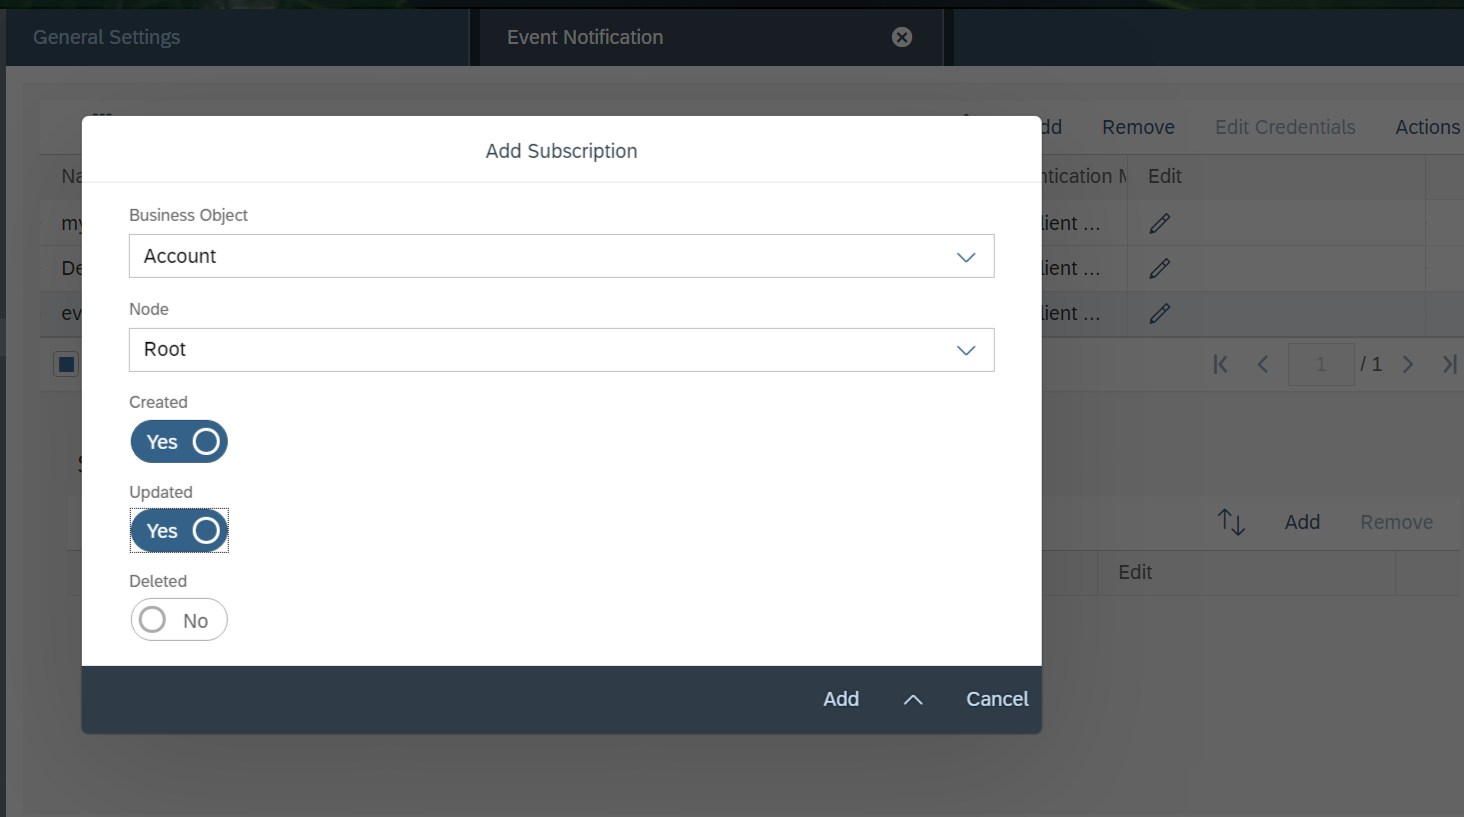
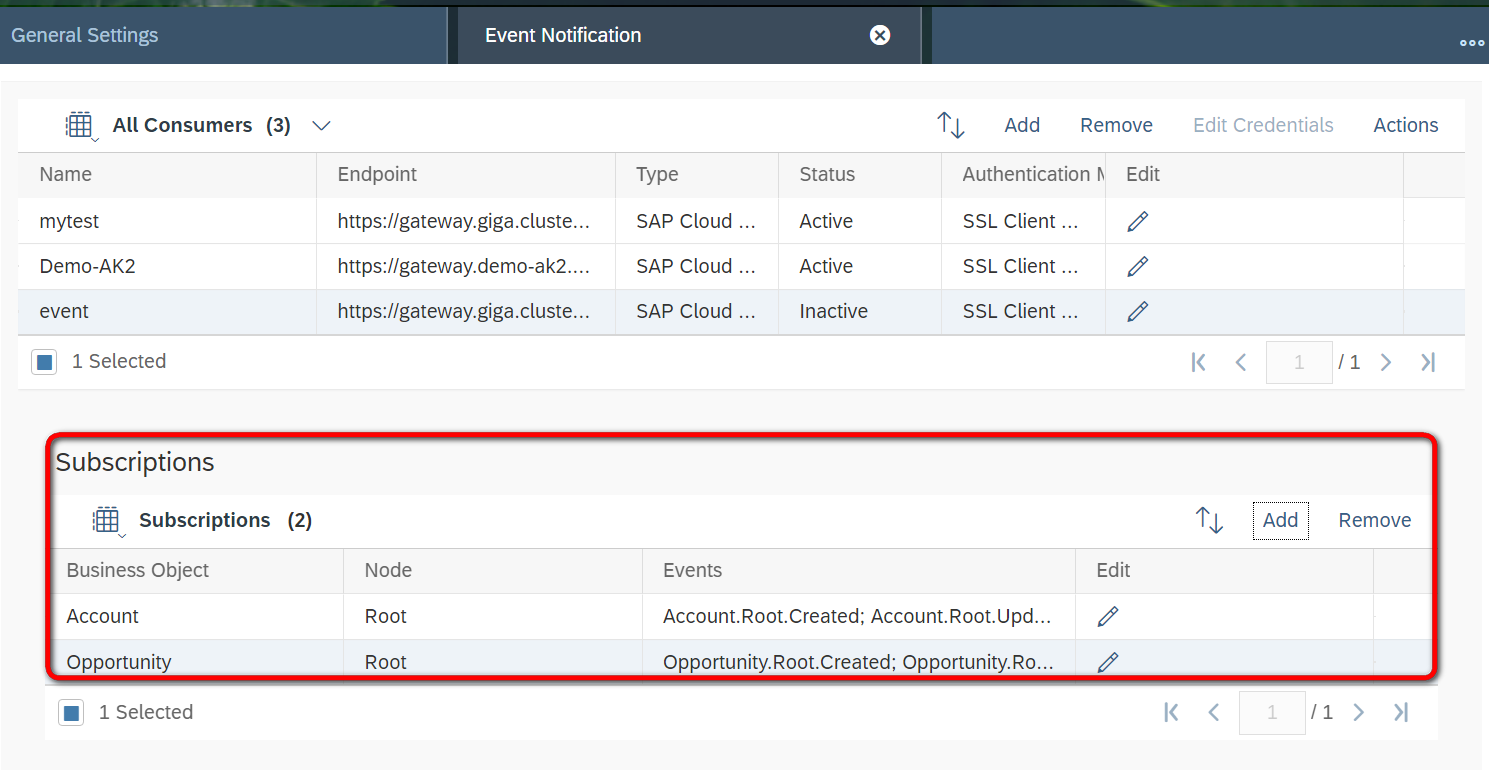
我选择了Account和Opportunity这两个BO的创建和更新事件,发布给Kyma:
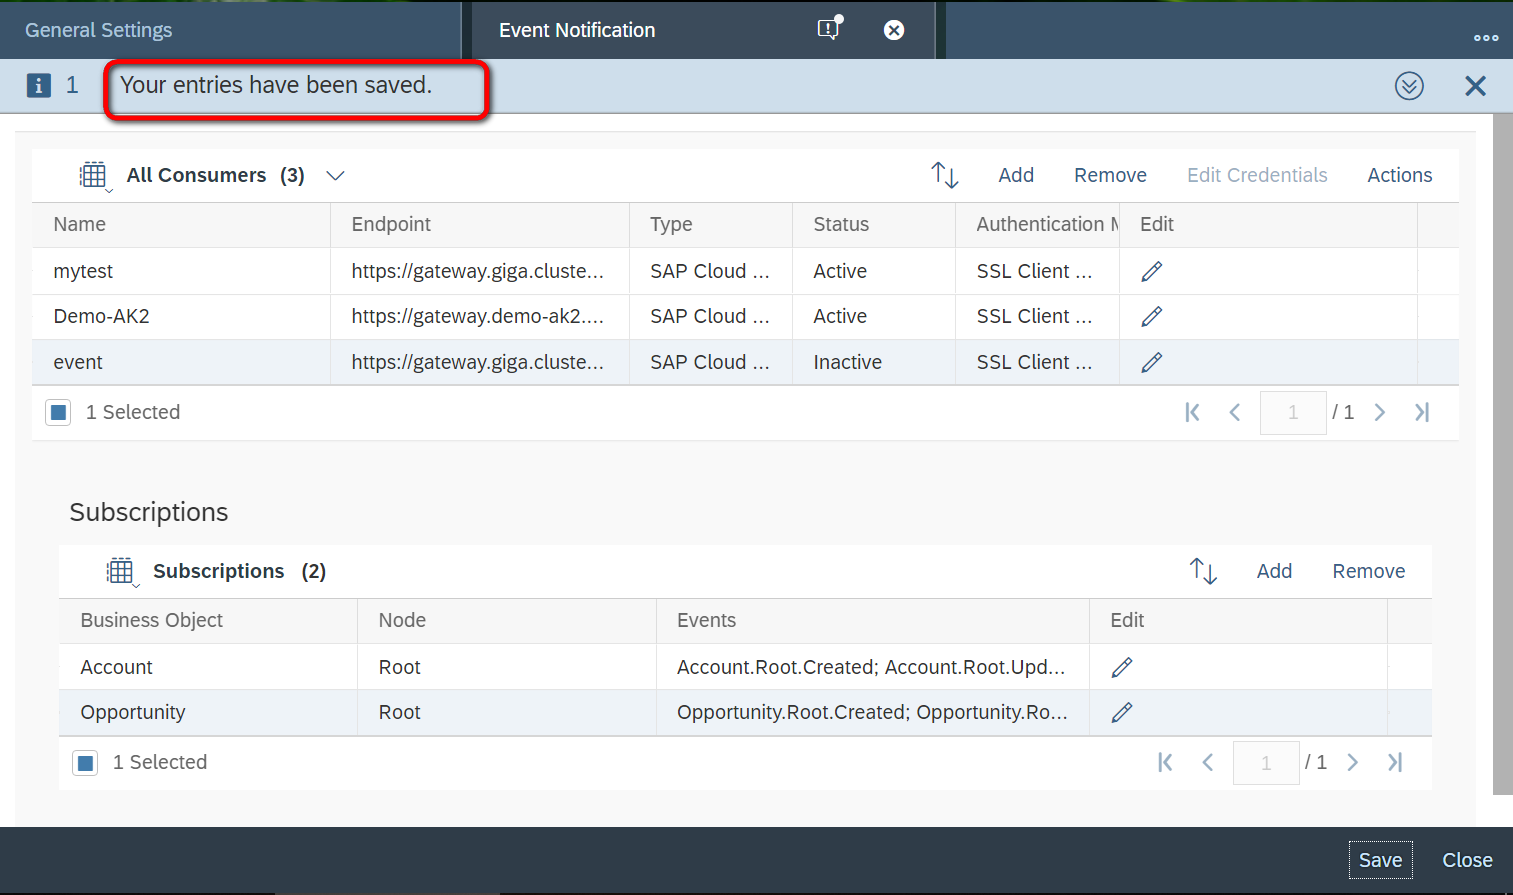
![](https://user-images.githubusercontent.com/5669954/63076707-b83cb100-bf68-11e9-8b58-ce9e0dd7d315.png)
成功保存:
![](https://user-images.githubusercontent.com/5669954/63076708-b8d54780-bf68-11e9-80d9-d319c2fd15af.png)
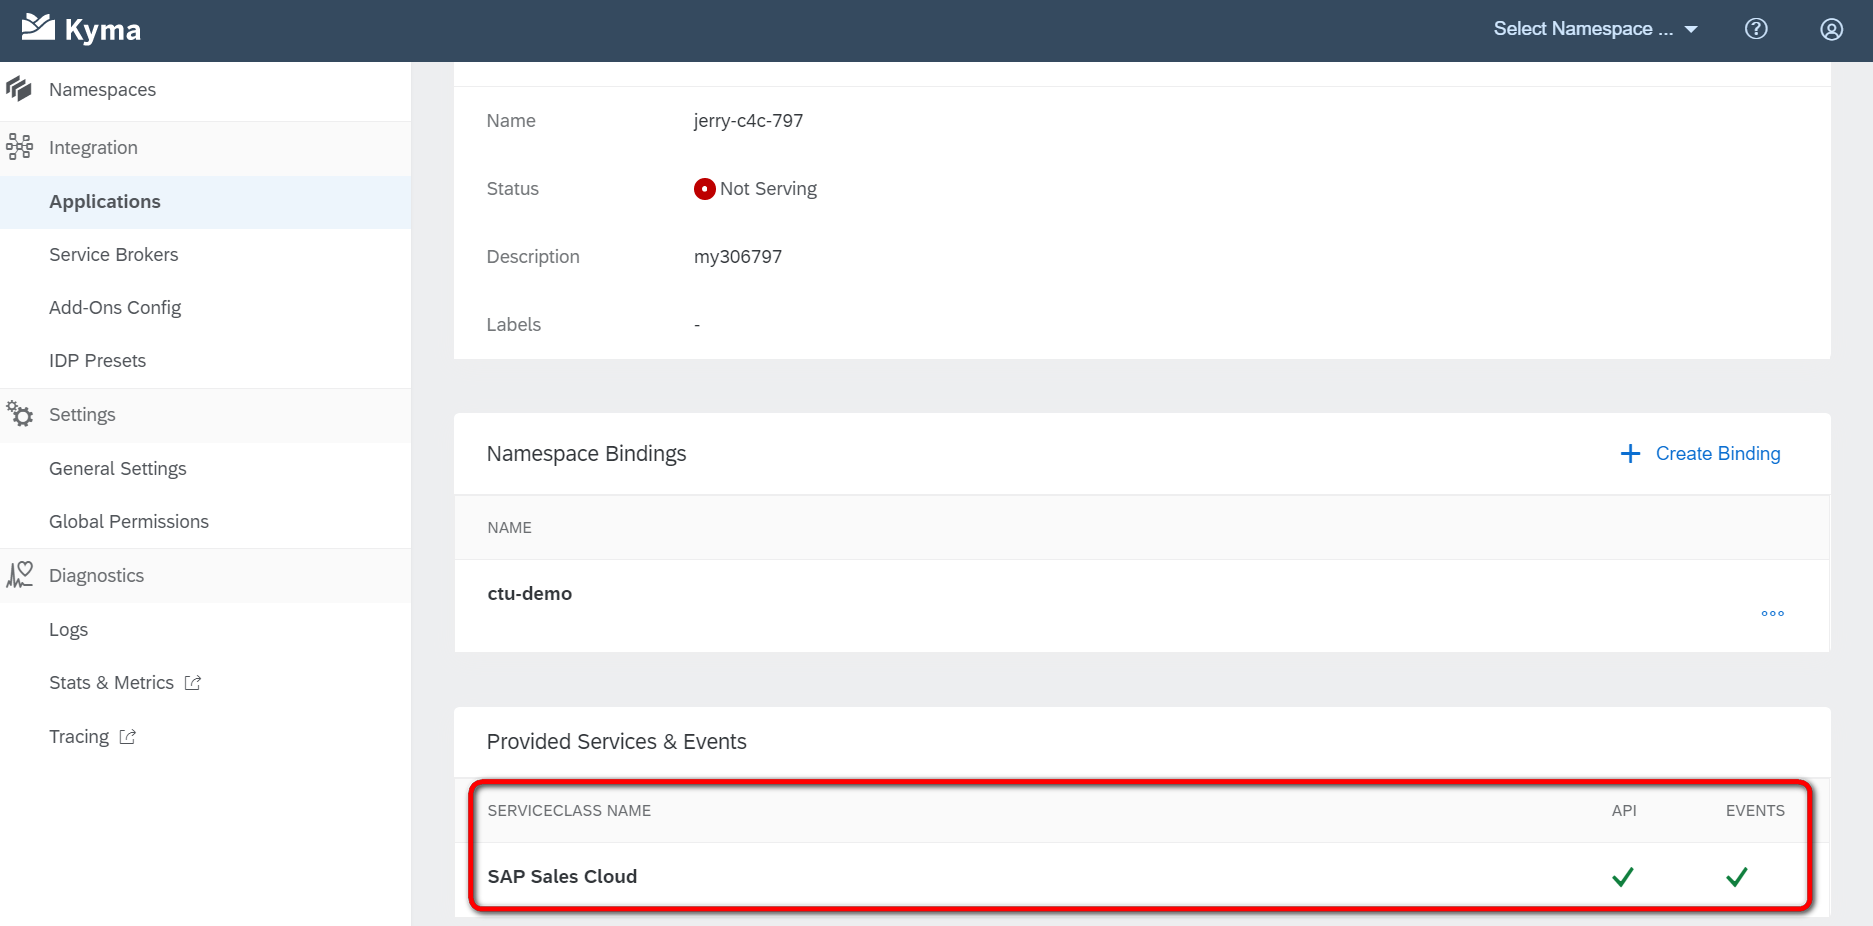
回到Kyma的应用界面,在Provided Services & Events界面下,能看到Cloud for Customer发布过来的API和事件了:
![](https://user-images.githubusercontent.com/5669954/63076709-b8d54780-bf68-11e9-8805-2c23ebda132e.png)
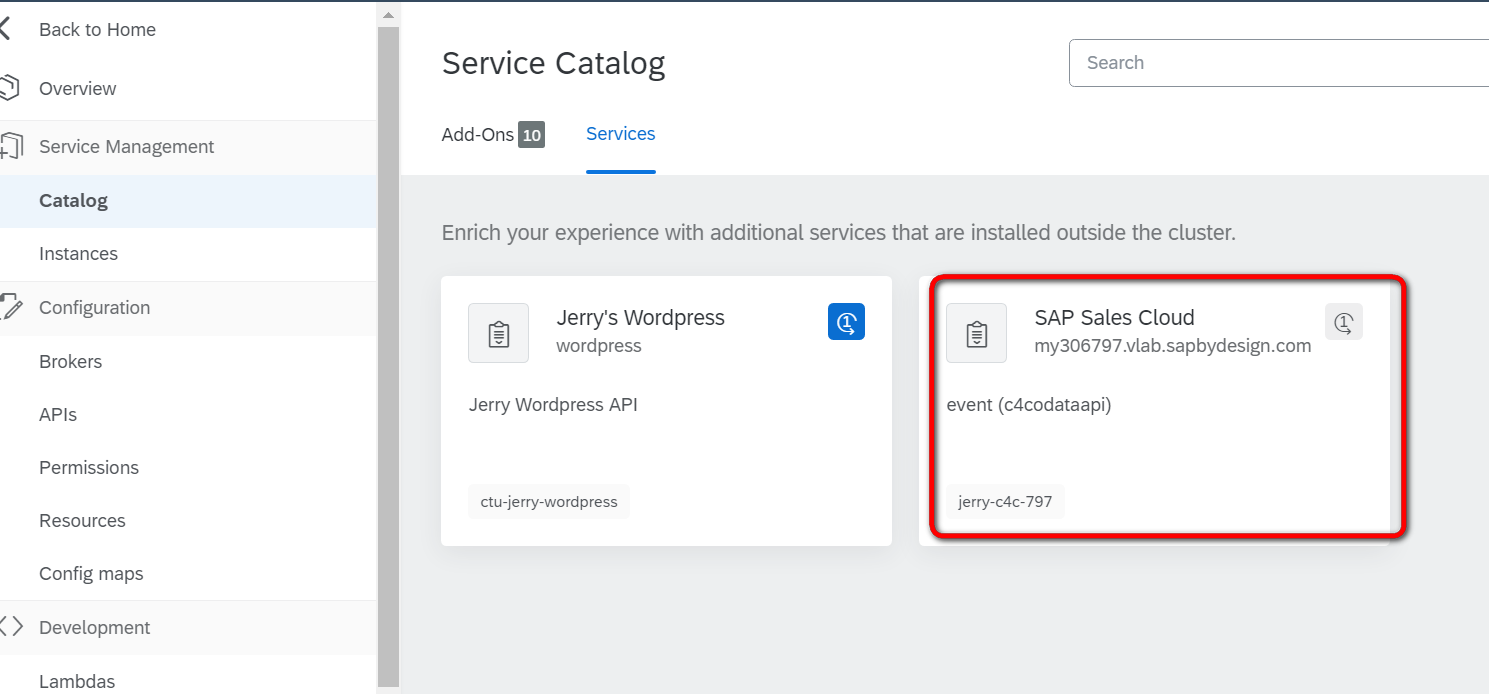
进入Kyma Service Management的Catalog界面下,找到从Cloud for Customer系统导入进来的服务,
![](https://user-images.githubusercontent.com/5669954/63076710-b96dde00-bf68-11e9-9d43-6008e3350df0.png)
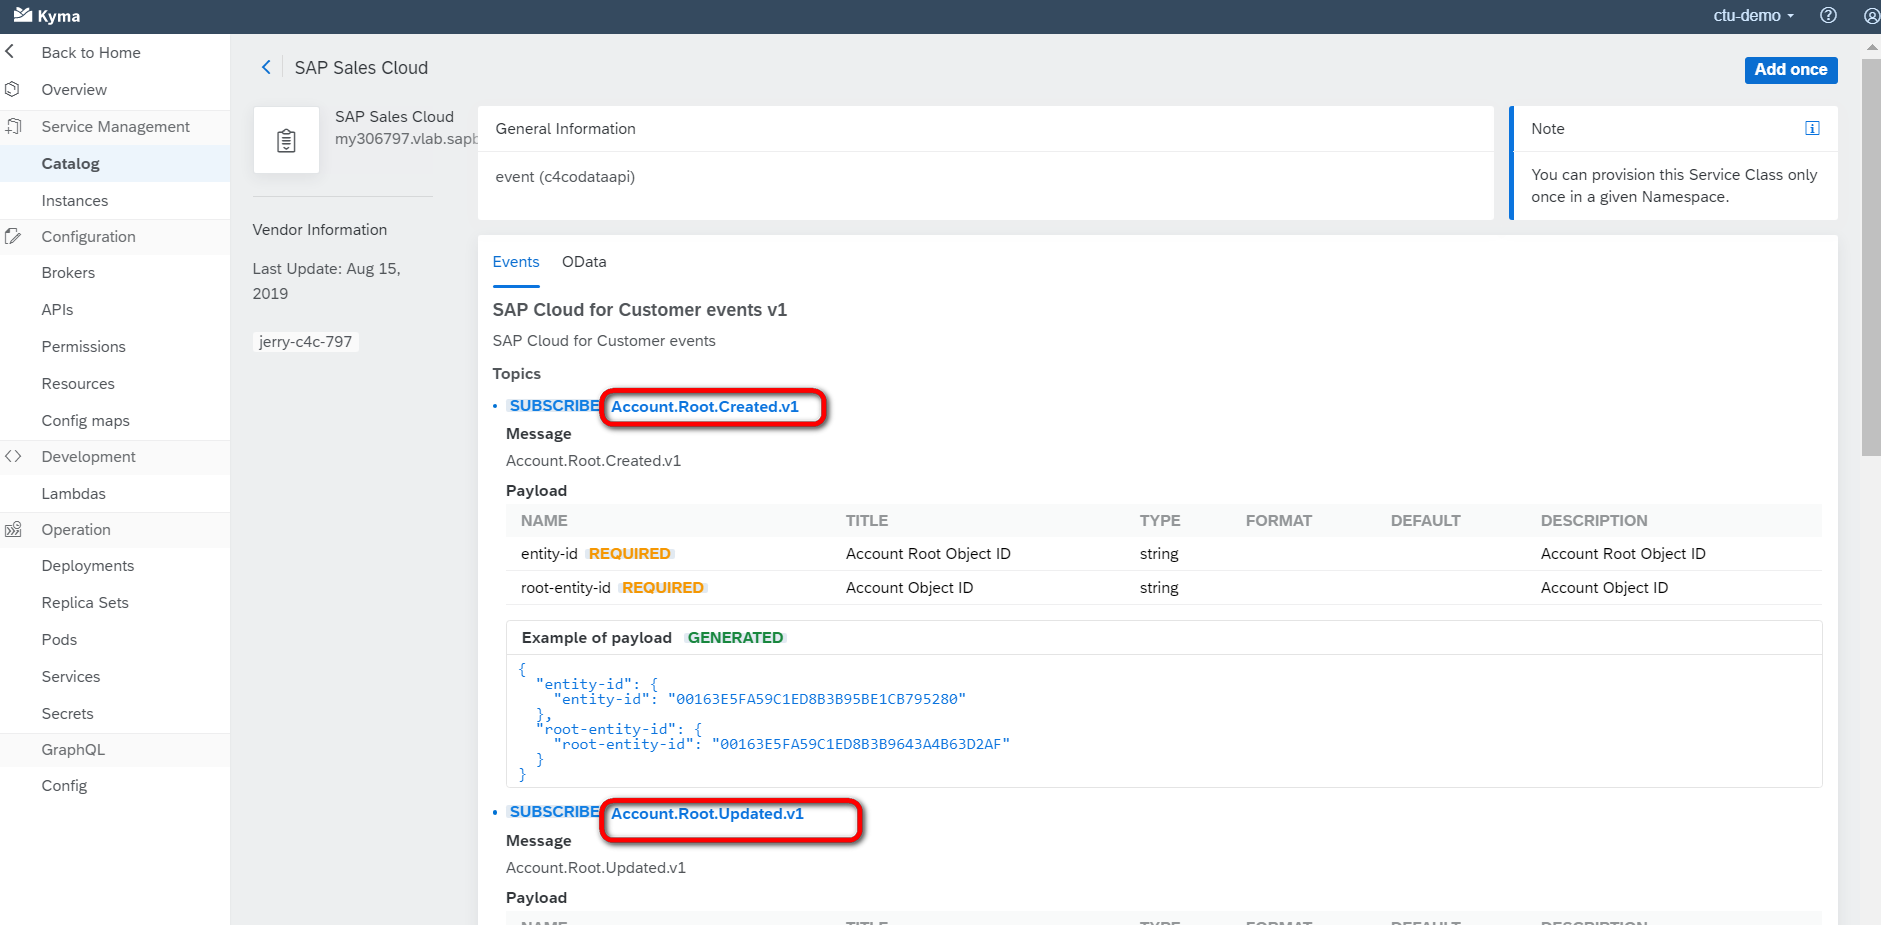
进入服务明细,能观察到Cloud for Customer系统发布的BO事件,
![](https://user-images.githubusercontent.com/5669954/63076713-ba067480-bf68-11e9-988b-094593ee3e9c.png)
以及该C4C系统所有支持的OData API:
![](https://user-images.githubusercontent.com/5669954/63076714-ba067480-bf68-11e9-83aa-ecc88d47d1c8.png)
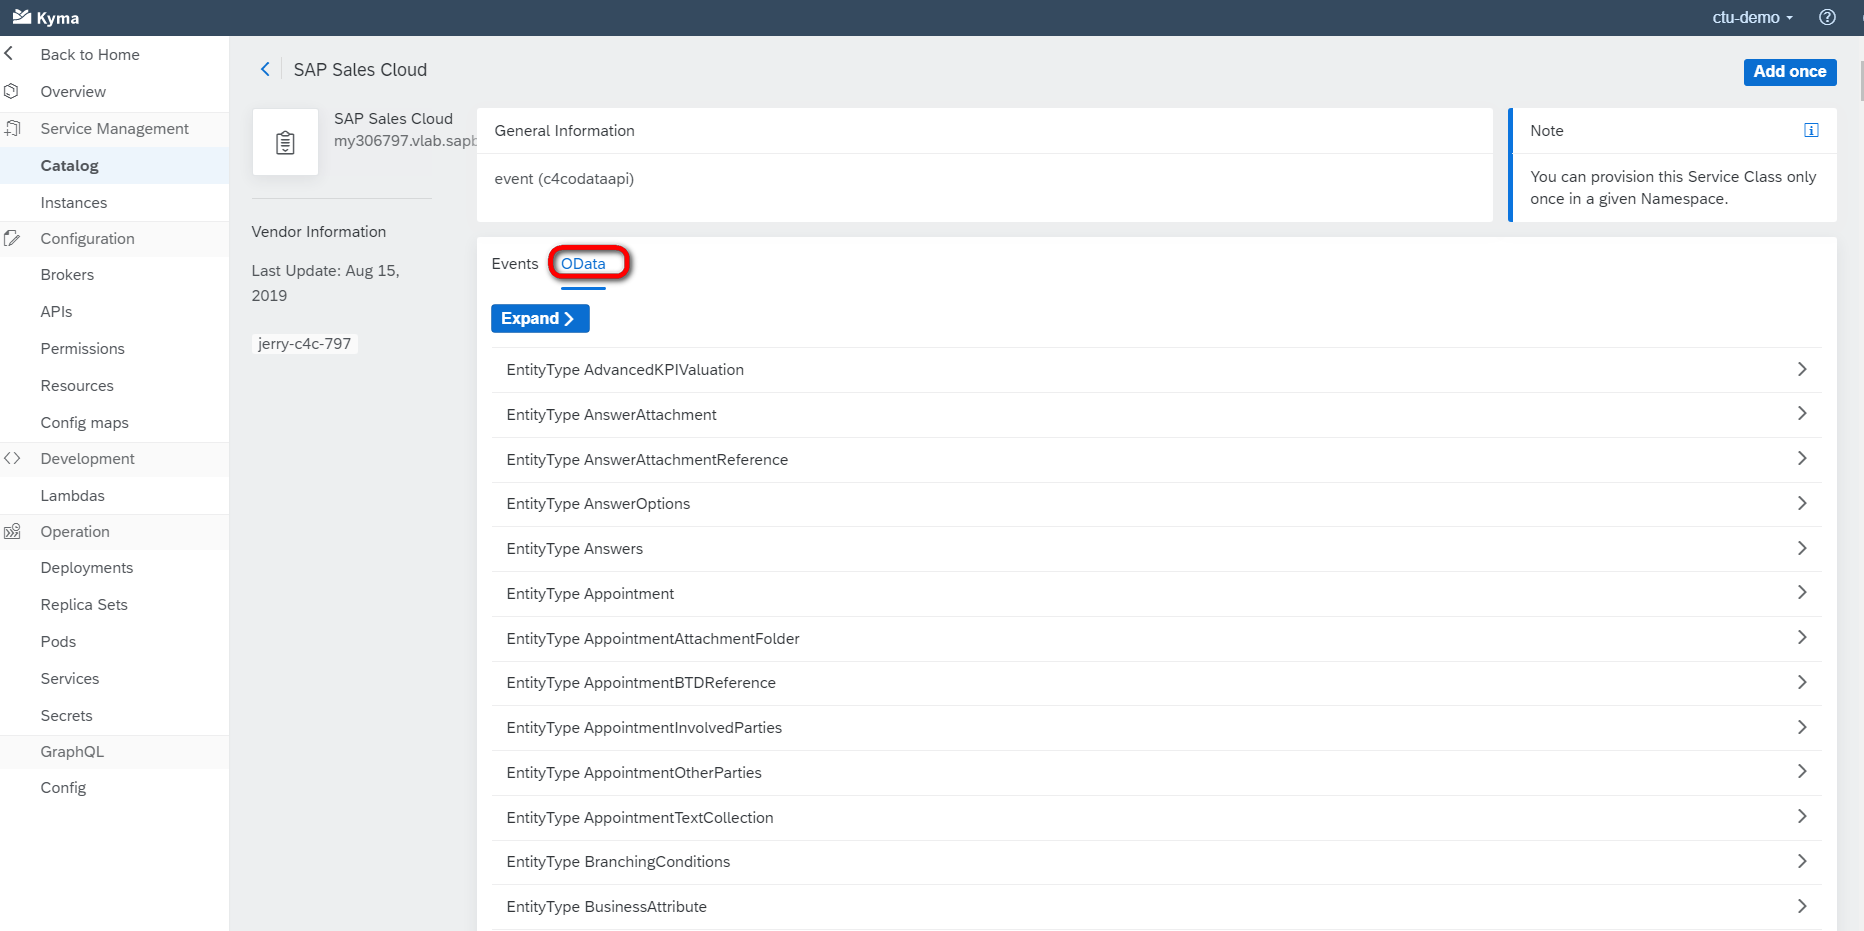
接下来,我们就可以基于这些API和事件进行Lambda Function的开发了。
首先点击Entitlements下面的Service Assignments,查看是否有SAP Leonardo Machine Learning Foundation这个服务:
![](https://user-images.githubusercontent.com/5669954/63402361-adbd6400-c40d-11e9-824f-04019e7561d2.png)
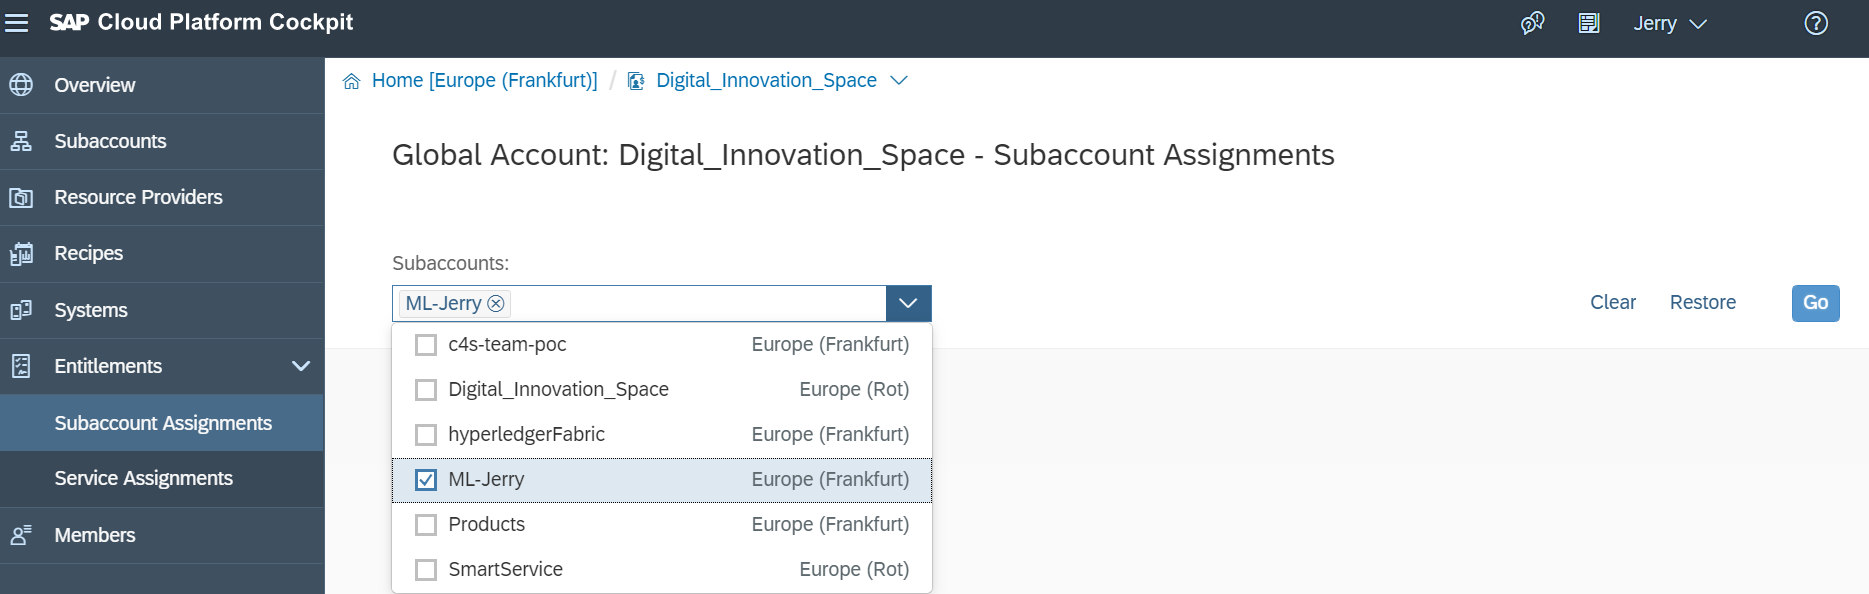
点击SubAccount assignments,选择要分配的sub account:
![](https://user-images.githubusercontent.com/5669954/63402356-abf3a080-c40d-11e9-909e-fcc192929d53.png)
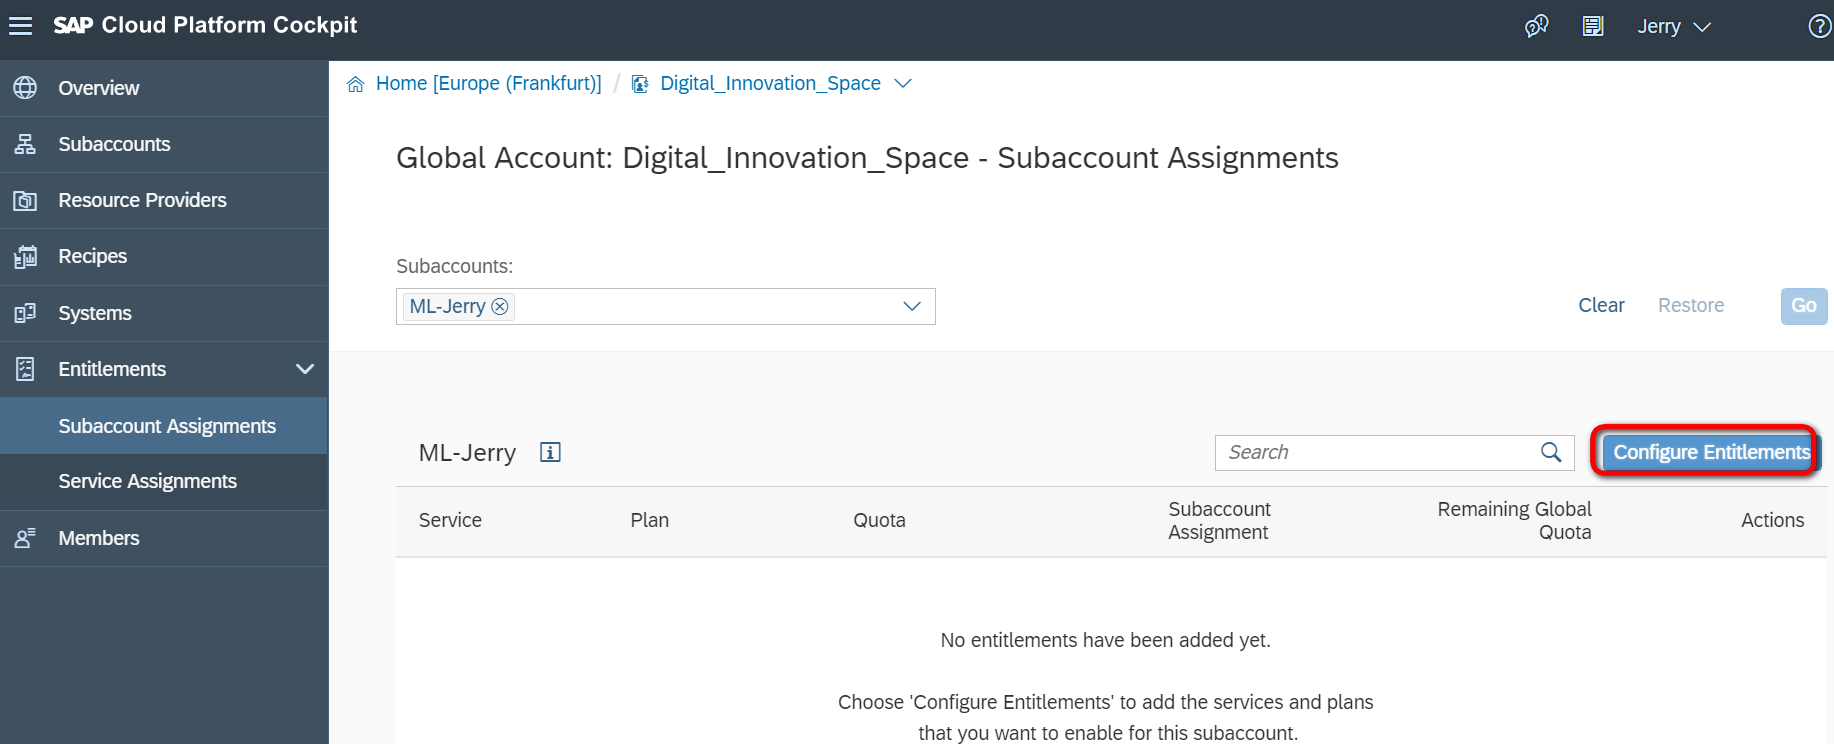
点击Configure Entitlements:
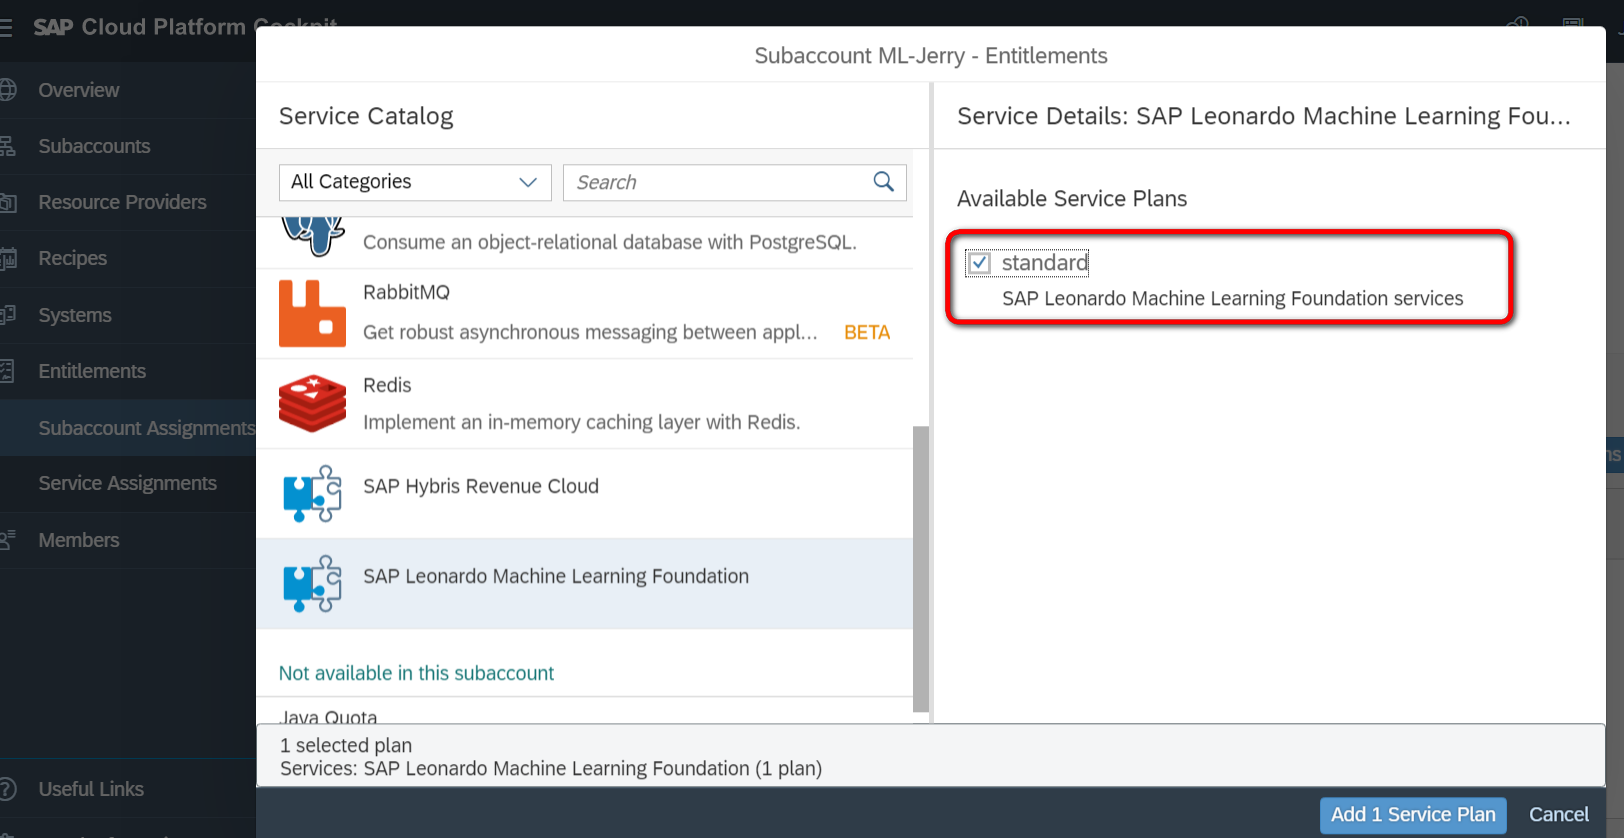
![](https://user-images.githubusercontent.com/5669954/63402357-ac8c3700-c40d-11e9-8983-9da91cc3ca54.png)
Add 1 Service Plan:
![](https://user-images.githubusercontent.com/5669954/63402358-ac8c3700-c40d-11e9-8e14-e7adee60eb91.png)
保存:
![](https://user-images.githubusercontent.com/5669954/63402360-ad24cd80-c40d-11e9-9be1-e6d9efe1eb6e.png)
- 点赞
- 收藏
- 关注作者
评论(0)