初识OCR,Tesseract的安装与使用

【摘要】
1、安装 Tesseract
Ubuntu
sudo apt-get install tesseract-ocr
1
mac
brew install tesseract
1
win10
下载...
1、安装 Tesseract
Ubuntu
sudo apt-get install tesseract-ocr
- 1
mac
brew install tesseract
- 1
win10
下载地址:
tesseract下载地址:https://digi.bib.uni-mannheim.de/tesseract/
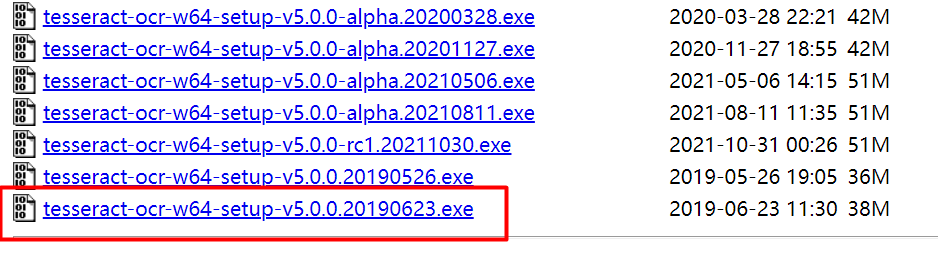
下载最新的,下载后双击安装。安装完成后配置环境变量。
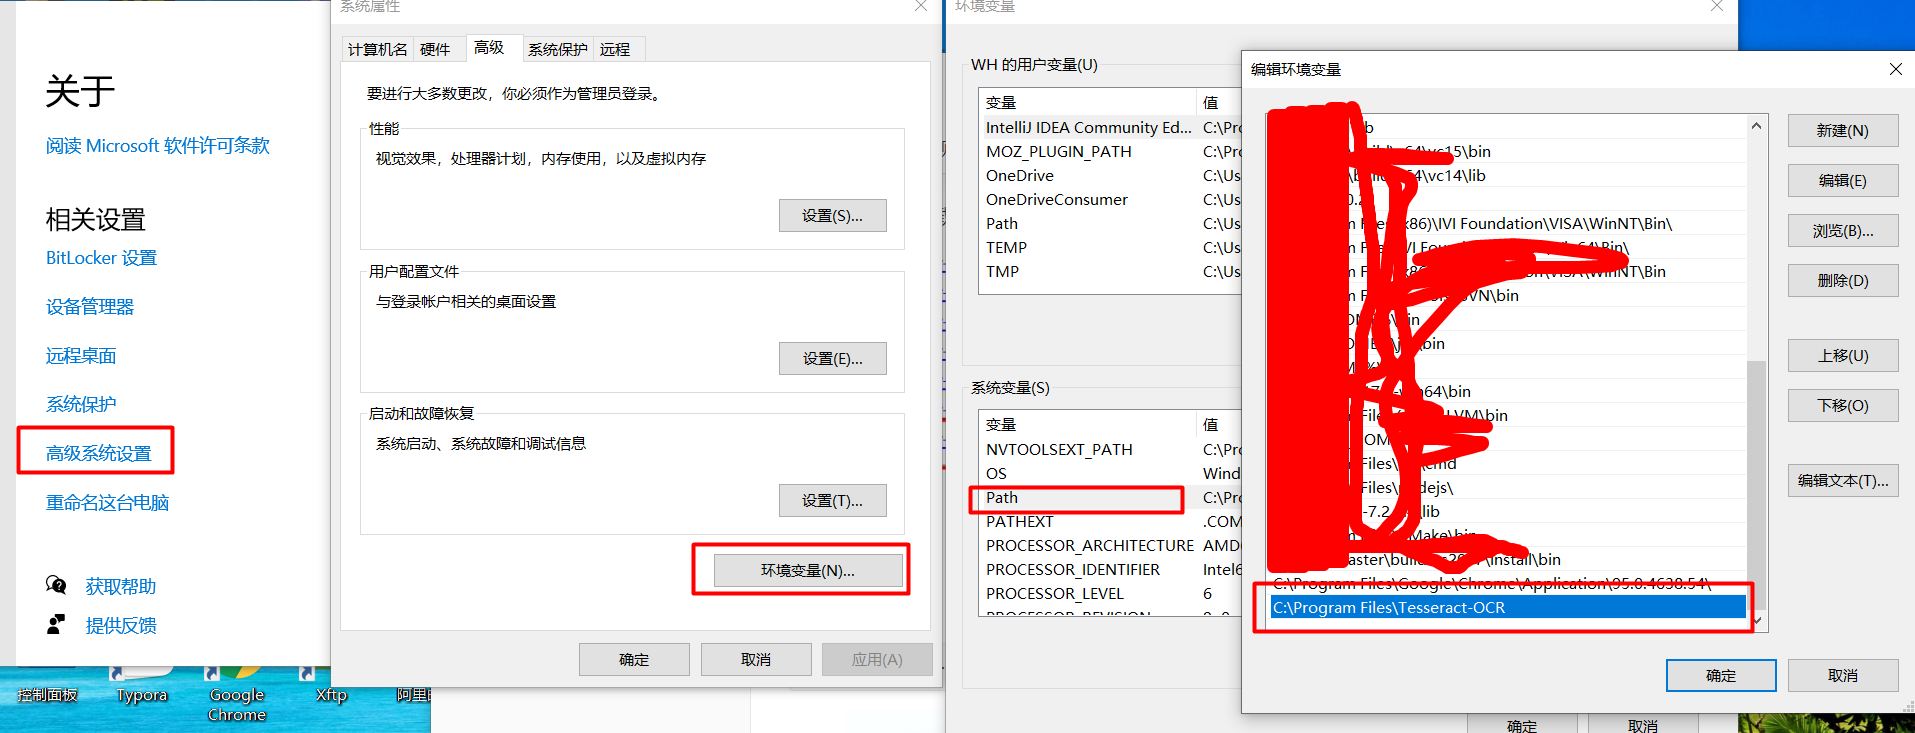
右键“此电脑”,选择“属性“->高级系统设置->环境变量->Path,双击Path,然后将tesseract的安装路径添加到Path中。
验证:
$ tesseract -v
- 1

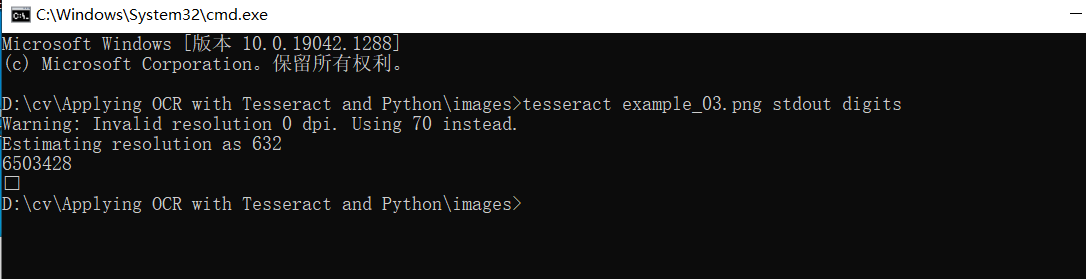
测试:
$ tesseract example_03.png stdout digits
- 1
python调用
安装python版的tesseract
pip install pytesseract
- 1
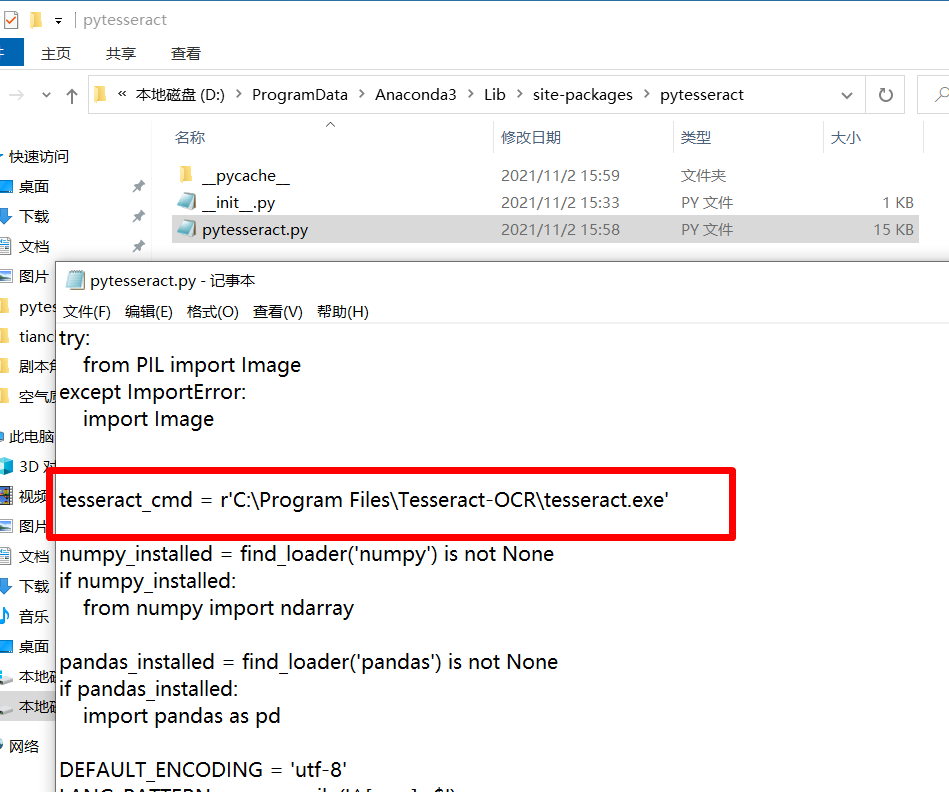
安装完成后,还需要给pytesseract配置tesseract的环境变量。打开pytesseract的安装位置,我的是D:\ProgramData\Anaconda3\Lib\site-packages\pytesseract\pytesseract.py,将tesseract.exe的完整路径赋值给tesseract_cmd,如下图
然后测试
python代码:
# import the necessary packages
from PIL import Image
import pytesseract
import argparse
import cv2
import os
# construct the argument parse and parse the arguments
ap = argparse.ArgumentParser()
ap.add_argument("-i", "--image", required=True,
	help="path to input image to be OCR'd")
ap.add_argument("-p", "--preprocess", type=str, default="thresh",
	help="type of preprocessing to be done")
args = vars(ap.parse_args())
# load the example image and convert it to grayscale
image = cv2.imread(args["image"])
gray = cv2.cvtColor(image, cv2.COLOR_BGR2GRAY)
# check to see if we should apply thresholding to preprocess the
# image
if args["preprocess"] == "thresh":
	gray = cv2.threshold(gray, 0, 255,
		cv2.THRESH_BINARY | cv2.THRESH_OTSU)[1]
# make a check to see if median blurring should be done to remove
# noise
elif args["preprocess"] == "blur":
	gray = cv2.medianBlur(gray, 3)
# write the grayscale image to disk as a temporary file so we can
# apply OCR to it
filename = "{}.png".format(os.getpid())
cv2.imwrite(filename, gray)
# load the image as a PIL/Pillow image, apply OCR, and then delete
# the temporary file
text = pytesseract.image_to_string(Image.open(filename))
os.remove(filename)
print(text)
# show the output images
cv2.imshow("Image", image)
cv2.imshow("Output", gray)
cv2.waitKey(0)
- 1
- 2
- 3
- 4
- 5
- 6
- 7
- 8
- 9
- 10
- 11
- 12
- 13
- 14
- 15
- 16
- 17
- 18
- 19
- 20
- 21
- 22
- 23
- 24
- 25
- 26
- 27
- 28
- 29
- 30
- 31
- 32
- 33
- 34
- 35
- 36
- 37
- 38
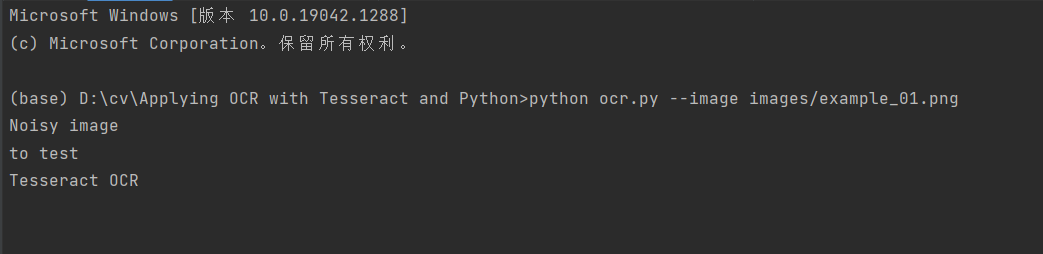
执行命令:
python ocr.py --image images/example_01.png
- 1
原图与二值化后的图:
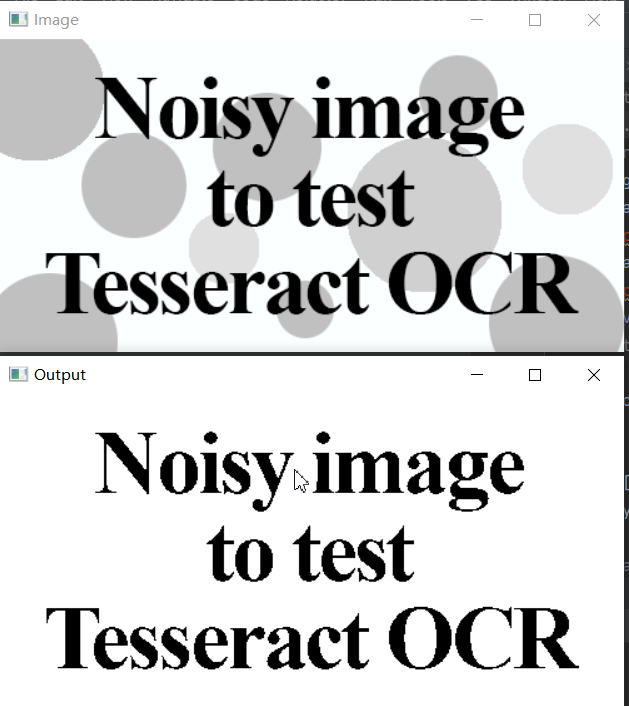
输出结果:
代码:
https://download.csdn.net/download/hhhhhhhhhhwwwwwwwwww/36672457
文章来源: wanghao.blog.csdn.net,作者:AI浩,版权归原作者所有,如需转载,请联系作者。
原文链接:wanghao.blog.csdn.net/article/details/121200619

【版权声明】本文为华为云社区用户转载文章,如果您发现本社区中有涉嫌抄袭的内容,欢迎发送邮件进行举报,并提供相关证据,一经查实,本社区将立刻删除涉嫌侵权内容,举报邮箱:
cloudbbs@huaweicloud.com
- 点赞
- 收藏
- 关注作者
评论(0)