python是很容易上手的编程语言,但是有些时候使用python编写的程序并不能保证其运行速度(例如:while 和 for),这个时候我们就需要借助c++等为我们的代码提速。下面是我使用pybind11调用c++的Eigen库的简单介绍:
第一步:准备系统和IDE:
- Windows 10
- vs2015 (用于调试c++代码)
- vscode (调试python代码)
第二步:python虚拟环境:
1.创建虚拟python虚拟环境: 在vscode的terminal中执行
2.下载 Eigen : 将Eigen解压到当前目录命名为 eigen-3.3.8
3.在vscode的terminal中激活虚拟环境:
| 1 |
./env/Scripts/Activate.ps1
|
4.安装pybind11:
安装numpy==1.19.3(使用1.19.4可能会有问题) :
| 1 |
pip install numpy==1.19.3
|
第三步:使用vs2015编写cpp_python.cpp, 并保证没有bug
| 1 2 3 4 5 6 7 |
#include <Eigen/Dense>
using namespace std
using namespace Eigen
MatrixXd add_mat(MatrixXd A_mat, MatrixXd B_mat)
{
return A_mat + B_mat;
}
|
第四步:使用pybind11为cpp_python.cpp添加python接口
| 1 2 3 4 5 6 7 8 9 10 11 12 13 14 15 16 17 18 19 20 21 22 |
// cpp_python.cpp : 此文件包含 "main" 函数。程序执行将在此处开始并结束。
//
#include <pybind11/pybind11.h>
#include <pybind11/eigen.h>
#include<pybind11/numpy.h>
#include<fstream>
#include<iostream>
#include <Eigen/Dense>
using namespace std;
using namespace Eigen;
MatrixXd add_mat(MatrixXd A_mat, MatrixXd B_mat)
{
return A_mat + B_mat;
}
namespace py = pybind11;
PYBIND11_MODULE(add_mat_moudle, m)
{
m.doc() = "Matrix add";//解释说明
m.def("mat_add_py"/*在pyhon中使用的函数名*/, &add_mat);
}
|
第五步:设置setup.py用来编译c++代码
| 1 2 3 4 5 6 7 8 9 10 11 |
from setuptools import setup
from setuptools import Extension
add_mat_module = Extension(name='add_mat_moudle', # 模块名称
sources=['cpp_python.cpp'], # 源码
include_dirs=[r'.\eigen-3.3.8',
r'.\env\Scripts', # 依赖的第三方库的头文件
r'.\env\Lib\site-packages\pybind11\include']
)
setup(ext_modules=[add_mat_module])
|
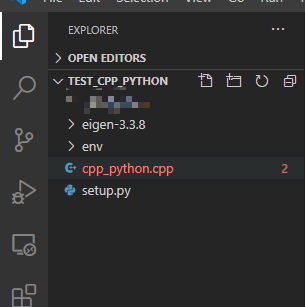
第六步:编译测试
这是我当前的工作目录

注意:我的cpp_python.cpp和setup.py是在同一个文件夹下。
| 1 |
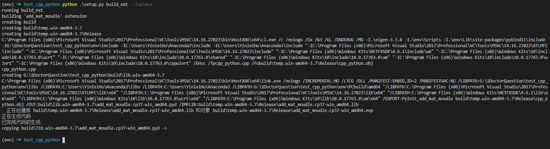
执行: "python .\setup.py build_ext --inplace"就会得下面的结果,生成.pyd文件表明我们已经编译成功。
|
运行测试:
到此这篇关于python3 通过 pybind11 使用Eigen加速代码的步骤详解的文章就介绍到这了,更多相关python3 pybind1
文章来源: blog.csdn.net,作者:网奇,版权归原作者所有,如需转载,请联系作者。
原文链接:blog.csdn.net/jacke121/article/details/110930673
【版权声明】本文为华为云社区用户转载文章,如果您发现本社区中有涉嫌抄袭的内容,欢迎发送邮件进行举报,并提供相关证据,一经查实,本社区将立刻删除涉嫌侵权内容,举报邮箱:
cloudbbs@huaweicloud.com


评论(0)