React生命周期
ReactJS 的核心思想是组件化,即按功能封装成一个一个的组件,各个组件维护自己的状态和 UI,当状态发生变化时,会自定重新渲染整个组件,多个组件一起协作共同构成了 ReactJS 应用。
为了能够更好的创建和使用组件,我们首先要了解组件的生命周期。
生命周期节点
- Mounting :挂载阶段
- Updating :运行时阶段
- Unmounting :卸载阶段
- Error Handling :错误处理
1 组件的生命周期
创建阶段、实例化阶段、更新阶段、销毁阶段。
下面对各个阶段分别进行介绍。
1.1加载阶段 mounting

- 该阶段主要发生在创建组件类的时候,即调用
React.createClass时触发 - 这个阶段只会触发一个
getDefaultProps方法,该方法会返回一个对象并缓存。然后与父组件指定的props对象合并,最后赋值给this.props作为该组件的默认属性。
1.2 实例化阶段
该阶段主要发生在实例化组件类的时候,也就是该组件类被调用的时候触发。
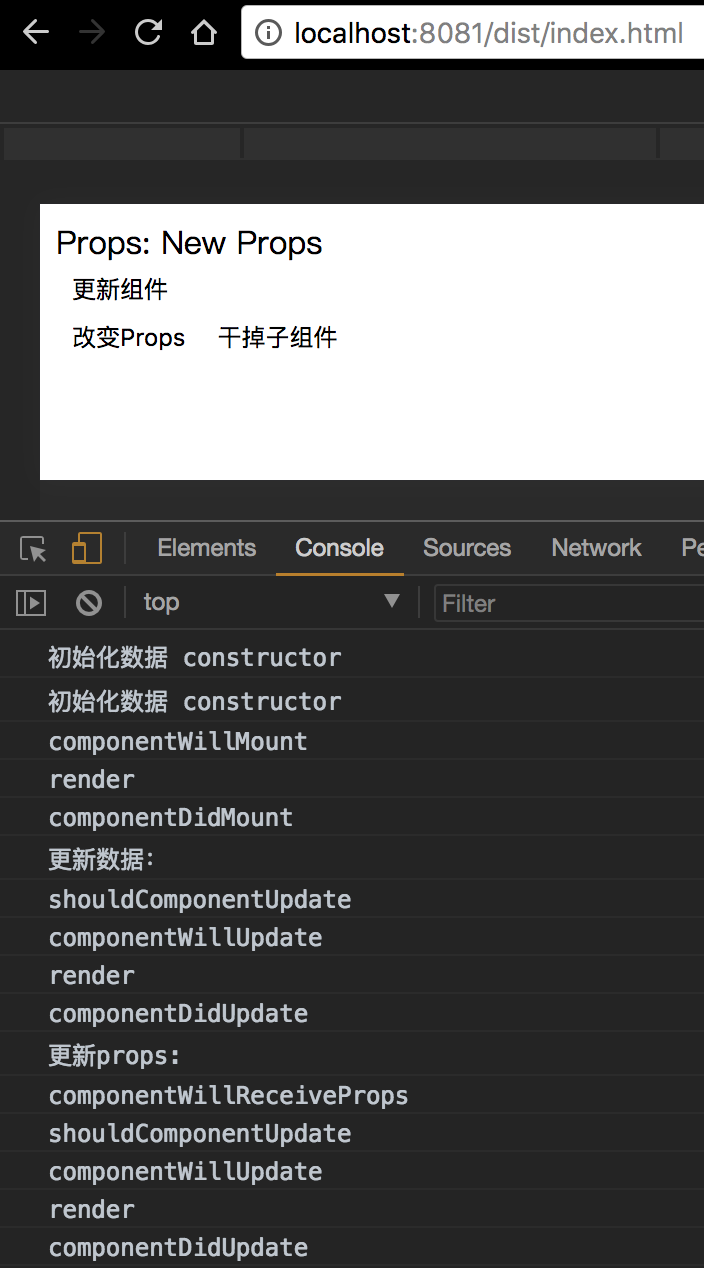
这个阶段会触发一系列的流程,按执行顺序如下
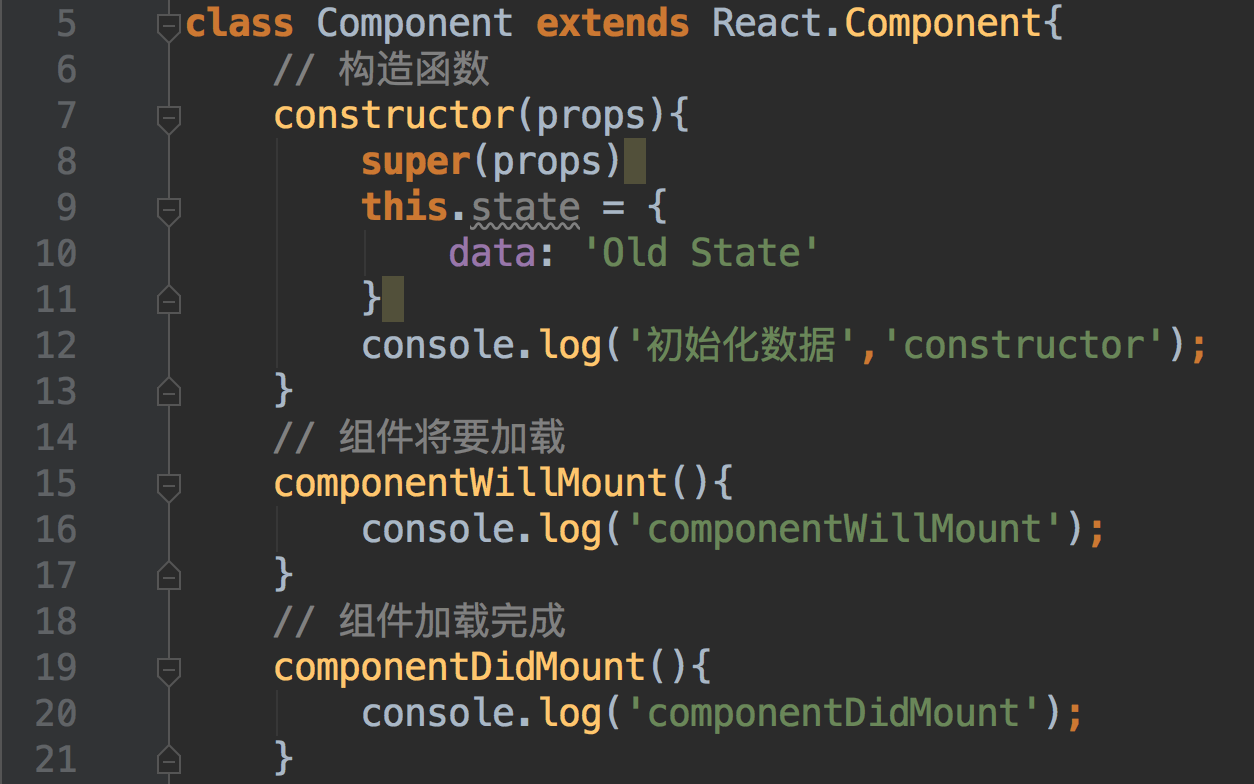
(1)getInitialState:初始化组件的 state 的值。其返回值会赋值给组件的 this.state 属性。
(2)componentWillMount:根据业务逻辑来对 state 进行相应的操作。
(3)render:根据 state 的值,生成页面需要的虚拟 DOM 结构,并返回该结构。
(4)componentDidMount:对根据虚拟 DOM 结构而生的真实 DOM 进行相应的处理。组件内部可以通过 ReactDOM.findDOMNode(this) 来获取当前组件的节点,然后就可以像 Web 开发中那样操作里面的 DOM 元素了。
1.3 更新阶段

这主要发生在用户操作之后或者父组件有更新的时候,此时会根据用户的操作行为进行相应得页面结构的调整。这个阶段也会触发一系列的流程,按执行顺序如下:
(1)componentWillReceiveProps:当组件接收到新的 props 时,会触发该函数。在改函数中,通常可以调用 this.setState 方法来完成对 state 的修改。
(2)shouldComponentUpdate:该方法用来拦截新的 props 或 state,然后根据事先设定好的判断逻辑,做出最后要不要更新组件的决定。
(3)componentWillUpdate:当上面的方法拦截返回 true 的时候,就可以在该方法中做一些更新之前的操作。
(4)render:根据一系列的 diff 算法,生成需要更新的虚拟 DOM 数据。(注意:在 render 中最好只做数据和模板的组合,不应进行 state 等逻辑的修改,这样组件结构更加清晰)
(5)componentDidUpdate:该方法在组件的更新已经同步到 DOM 中去后触发,我们常在该方法中做一 DOM 操作。

1.4 销毁阶段

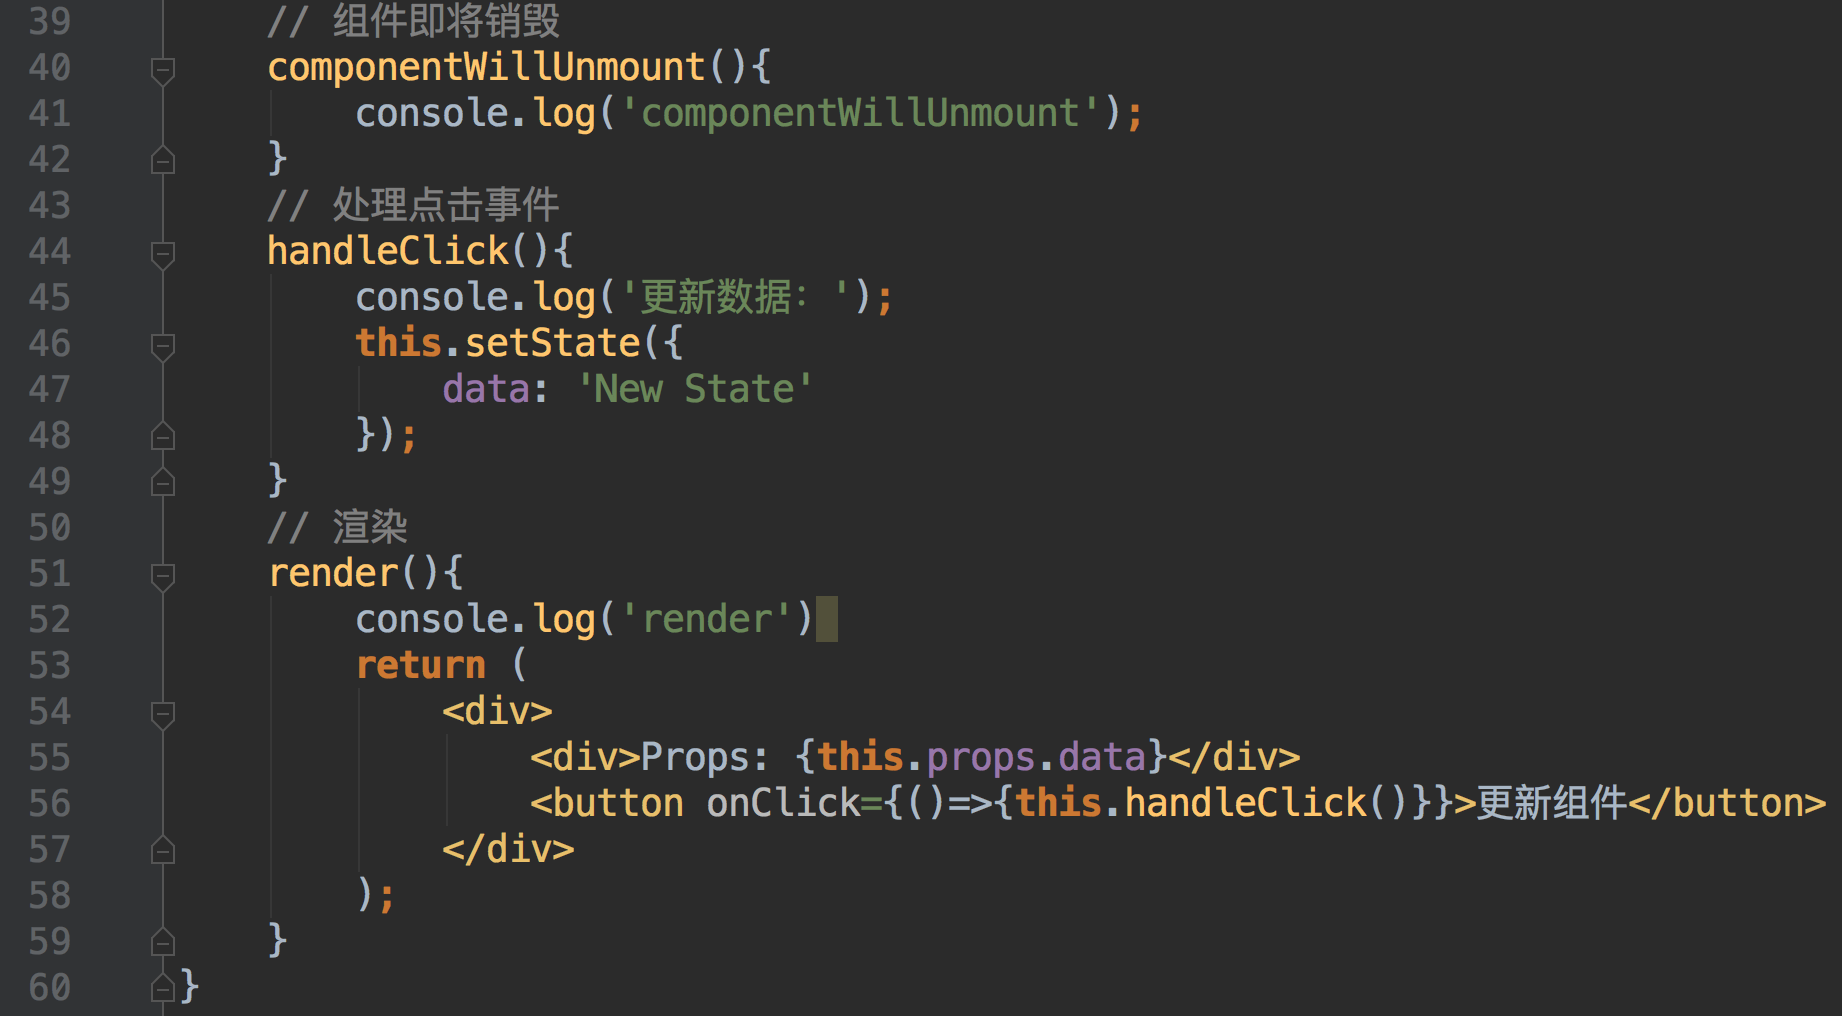
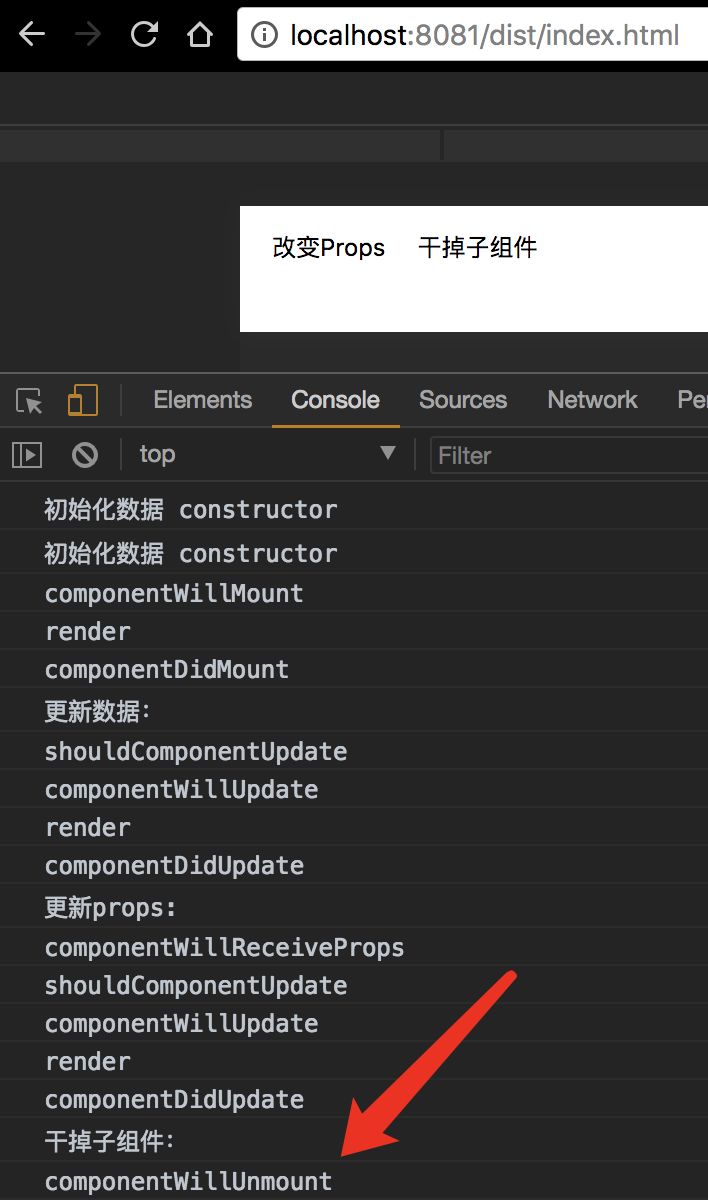
这个阶段只会触发一个叫 componentWillUnmount 的方法。
当组件需要从 DOM 中移除的时候,我们通常会做一些取消事件绑定、移除虚拟 DOM 中对应的组件数据结构、销毁一些无效的定时器等工作。这些事情都可以在这个方法中处理。

import React from 'react';
import ReactDOM from 'react-dom';

class Component extends React.Component{ // 构造函数 constructor(props){ super(props) this.state = { data: 'Old State' } console.log('初始化数据','constructor'); } // 组件将要加载 componentWillMount(){ console.log('componentWillMount'); } // 组件加载完成 componentDidMount(){ console.log('componentDidMount'); } // 将要接收父组件传来的props componentWillReceiveProps(){ console.log('componentWillReceiveProps'); } // 子组件是不是应该更新 shouldComponentUpdate(){ console.log('shouldComponentUpdate'); return true; } // 组件将要更新 componentWillUpdate(){ console.log('componentWillUpdate'); } // 组件更新完成 componentDidUpdate(){ console.log('componentDidUpdate'); } // 组件即将销毁 componentWillUnmount(){ console.log('componentWillUnmount'); } // 处理点击事件 handleClick(){ console.log('更新数据:'); this.setState({ data: 'New State' }); } // 渲染 render(){ console.log('render') return ( <div> <div>Props: {this.props.data}</div> <button onClick={()=>{this.handleClick()}}>更新组件</button> </div> ); }
}

class App extends React.Component{ // 构造函数 constructor(props){ super(props) this.state = { data: 'Old Props', hasChild: true } console.log('初始化数据','constructor'); } onPropsChange(){ console.log('更新props:'); this.setState({ data: 'New Props' }); } onDestoryChild(){ console.log('干掉子组件:'); this.setState({ hasChild: false }); } render(){ return ( <div> { this.state.hasChild ? <Component data={this.state.data}/> : null } <button onClick={()=>{this.onPropsChange()}}>改变Props</button> <button onClick={()=>{this.onDestoryChild()}}>干掉子组件</button> </div> ); }
}

ReactDOM.render( <App/>, document.getElementById('app')
);
- 1
- 2
- 3
- 4
- 5
- 6
- 7
- 8
- 9
- 10
- 11
- 12
- 13
- 14
- 15
- 16
- 17
- 18
- 19
- 20
- 21
- 22
- 23
- 24
- 25
- 26
- 27
- 28
- 29
- 30
- 31
- 32
- 33
- 34
- 35
- 36
- 37
- 38
- 39
- 40
- 41
- 42
- 43
- 44
- 45
- 46
- 47
- 48
- 49
- 50
- 51
- 52
- 53
- 54
- 55
- 56
- 57
- 58
- 59
- 60
- 61
- 62
- 63
- 64
- 65
- 66
- 67
- 68
- 69
- 70
- 71
- 72
- 73
- 74
- 75
- 76
- 77
- 78
- 79
- 80
- 81
- 82
- 83
- 84
- 85
- 86
- 87
- 88
- 89
- 90
- 91
- 92
- 93
- 94
- 95
- 96
- 97
- 98
- 99
文章来源: javaedge.blog.csdn.net,作者:JavaEdge.,版权归原作者所有,如需转载,请联系作者。
原文链接:javaedge.blog.csdn.net/article/details/114323440
- 点赞
- 收藏
- 关注作者


评论(0)