3D Photography Inpainting | 环境搭建——效果测试【CVPR 2020】
🎉 声明: 作为全网 AI 领域 干货最多的博主之一,❤️ 不负光阴不负卿 ❤️

声明:本博文只做了该代码的测试教程,敬请查阅;
📔 基础信息
- 3D Photography using Context-aware Layered Depth Inpainting
- https://github.com/vt-vl-lab/3d-photo-inpainting
- 另外一篇2D转换3D的博文
requirements.txt
pytorch==1.4.0
torchvision==0.5.0

opencv-python==4.2.0.32
vispy==0.6.4
moviepy==1.0.2
transforms3d==0.3.1
networkx==2.3
cynetworkx
scikit-image
📕 环境搭建
服务器:ubuntu 18.04 Quadro RTX 5000 16G CUDA版本 V10.0.130
conda create -n torch14 python=3.6.6

conda activate torch14

conda install pytorch==1.4.0 torchvision==0.5.0 cudatoolkit=10.0 -c pytorch

pip install opencv-python

pip install  vispy

pip install moviepy

pip install transforms3d

pip install networkx==2.3

pip install scikit-image
📗 代码效果
Paper proposed a method for converting a single RGB-D input image into a 3D photo…
直观结果: 图片转换为 mp4 video ,一项神奇的技术…
📘 项目结构
📙 测试 【版本一》2020】
各位小伙伴,我这个博文是上年测试的,当时的确很轻松就测试成功,运行得到输出
2020 年份,测试过程如下
一:把你想要测试的 图片 (默认 jpg 格式)放到 项目目录的 image 下即可;
二:运行如下测试命令(可以在 argument.yml 中 修改 参数配置):
python main.py --config argument.yml
三:查看运行效果
测试图片生成得到:
zoom-in(拉近)、dolly-zoom-in(滑动放大)、swing(摆动)、circle(盘旋) 四种 mp4 格式的 video;
生成示例:
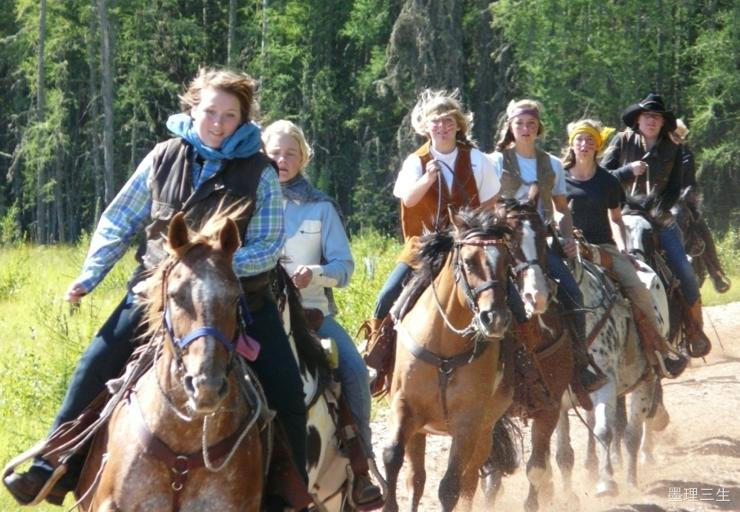
- 原图:

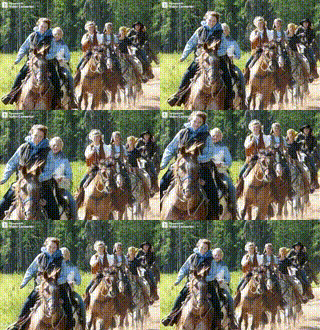
- 效果如下(mp4 动画 转了 gif ,水印没有去掉哈):

📙 测试 【版本二》2021】
会有这个版本的尝试测试,是因为作者 2021年6月份,代码仓库做了较大更新
各位小伙伴,我这个博文是上年测试的,当时的确很轻松就测试成功,运行得到输出
2021 年份,测试过程如下, 目前遇到的 bug 依旧没有彻底解决
下载模型
很多小伙伴服务器,模型下载缓慢,可以 copy 链接去浏览器下载
chmod 755 download.sh

./download.sh
观察 download.sh 脚本,就是下载模型,然后辅助到对应路径
#!/bin/sh
fb_status=$(wget --spider -S https://filebox.ece.vt.edu/ 2>&1 | grep  "HTTP/1.1 200 OK")

mkdir checkpoints

echo "downloading from filebox ..."
wget https://filebox.ece.vt.edu/~jbhuang/project/3DPhoto/model/color-model.pth
wget https://filebox.ece.vt.edu/~jbhuang/project/3DPhoto/model/depth-model.pth
wget https://filebox.ece.vt.edu/~jbhuang/project/3DPhoto/model/edge-model.pth
wget https://filebox.ece.vt.edu/~jbhuang/project/3DPhoto/model/model.pt

mv color-model.pth checkpoints/.
mv depth-model.pth checkpoints/.
mv edge-model.pth checkpoints/.
mv model.pt MiDaS/.

## 比如,下面这些就是 后来,作者又更新 补充的

echo "cloning from BoostingMonocularDepth ..."
git clone https://github.com/compphoto/BoostingMonocularDepth.git
mkdir -p BoostingMonocularDepth/pix2pix/checkpoints/mergemodel/

echo "downloading mergenet weights ..."
wget https://filebox.ece.vt.edu/~jbhuang/project/3DPhoto/model/latest_net_G.pth
mv latest_net_G.pth BoostingMonocularDepth/pix2pix/checkpoints/mergemodel/
wget https://github.com/intel-isl/MiDaS/releases/download/v2/model-f46da743.pt
mv model-f46da743.pt BoostingMonocularDepth/midas/model.pt
此时,download.sh 脚本运行之后,项目结构如下
tree 3d-photo-inpainting/
3d-photo-inpainting/
├── argument.yml
├── bilateral_filtering.py
├── BoostingMonocularDepth
│   ├── Boostmonoculardepth.ipynb
│   ├── dataset_prepare
│   │   ├── create_crops.m
│   │   ├── generatecrops.m
│   │   ├── ibims1_prepare.m
│   │   ├── ibims1_selected.mat
│   │   ├── mergenet_dataset_prepare.md
│   │   └── midas
│   │       ├── models
│   │       │   ├── base_model.py
│   │       │   ├── blocks.py
│   │       │   ├── midas_net.py
│   │       │   └── transforms.py
│   │       ├── run.py
│   │       └── utils.py
│   ├── demo.py
│   ├── evaluation
│   │   ├── D3R.m
│   │   ├── evaluatedataset.m
│   │   ├── extractD3Rpoints.m
│   │   ├── index2index.m
│   │   └── ord.m
│   ├── figures
│   │   ├── explanation.png
│   │   ├── lunch_edited.png
│   │   ├── lunch_orig.png
│   │   ├── lunch_rgb.jpg
│   │   ├── merge.png
│   │   ├── observation.png
│   │   ├── overview.png
│   │   ├── patchexpand.gif
│   │   ├── patchmerge.gif
│   │   ├── patchselection.gif
│   │   ├── ressearch.png
│   │   ├── sample2_leres.jpg
│   │   ├── sample2_midas.png
│   │   └── video_thumbnail.jpg
│   ├── inputs
│   │   └── moon.jpg
│   ├── lib
│   │   ├── __init__.py
│   │   ├── multi_depth_model_woauxi.py
│   │   ├── net_tools.py
│   │   ├── network_auxi.py
│   │   ├── __pycache__
│   │   │   ├── __init__.cpython-36.pyc
│   │   │   ├── multi_depth_model_woauxi.cpython-36.pyc
│   │   │   ├── net_tools.cpython-36.pyc
│   │   │   ├── network_auxi.cpython-36.pyc
│   │   │   ├── Resnet.cpython-36.pyc
│   │   │   └── Resnext_torch.cpython-36.pyc
│   │   ├── Resnet.py
│   │   ├── Resnext_torch.py
│   │   ├── spvcnn_classsification.py
│   │   ├── spvcnn_utils.py
│   │   └── test_utils.py
│   ├── LICENSE
│   ├── midas
│   │   ├── model.pt
│   │   ├── models
│   │   │   ├── base_model.py
│   │   │   ├── blocks.py
│   │   │   ├── midas_net.py
│   │   │   ├── __pycache__
│   │   │   │   ├── base_model.cpython-36.pyc
│   │   │   │   ├── blocks.cpython-36.pyc
│   │   │   │   ├── midas_net.cpython-36.pyc
│   │   │   │   └── transforms.cpython-36.pyc
│   │   │   └── transforms.py
│   │   ├── __pycache__
│   │   │   └── utils.cpython-36.pyc
│   │   └── utils.py
│   ├── outputs
│   │   └── moon.png
│   ├── pix2pix
│   │   ├── checkpoints
│   │   │   ├── mergemodel
│   │   │   │   └── latest_net_G.pth
│   │   │   └── void
│   │   │       └── test_opt.txt
│   │   ├── data
│   │   │   ├── base_dataset.py
│   │   │   ├── depthmerge_dataset.py
│   │   │   ├── image_folder.py
│   │   │   ├── __init__.py
│   │   │   └── __pycache__
│   │   │       ├── base_dataset.cpython-36.pyc
│   │   │       ├── depthmerge_dataset.cpython-36.pyc
│   │   │       ├── image_folder.cpython-36.pyc
│   │   │       └── __init__.cpython-36.pyc
│   │   ├── models
│   │   │   ├── base_model_hg.py
│   │   │   ├── base_model.py
│   │   │   ├── __init__.py
│   │   │   ├── networks.py
│   │   │   ├── pix2pix4depth_model.py
│   │   │   └── __pycache__
│   │   │       ├── base_model.cpython-36.pyc
│   │   │       ├── __init__.cpython-36.pyc
│   │   │       ├── networks.cpython-36.pyc
│   │   │       └── pix2pix4depth_model.cpython-36.pyc
│   │   ├── options
│   │   │   ├── base_options.py
│   │   │   ├── __init__.py
│   │   │   ├── __pycache__
│   │   │   │   ├── base_options.cpython-36.pyc
│   │   │   │   ├── __init__.cpython-36.pyc
│   │   │   │   └── test_options.cpython-36.pyc
│   │   │   ├── test_options.py
│   │   │   └── train_options.py
│   │   ├── test.py
│   │   ├── train.py
│   │   └── util
│   │       ├── get_data.py
│   │       ├── guidedfilter.py
│   │       ├── html.py
│   │       ├── image_pool.py
│   │       ├── __init__.py
│   │       ├── __pycache__
│   │       │   ├── guidedfilter.cpython-36.pyc
│   │       │   ├── __init__.cpython-36.pyc
│   │       │   └── util.cpython-36.pyc
│   │       ├── util.py
│   │       └── visualizer.py
│   ├── __pycache__
│   │   └── utils.cpython-36.pyc
│   ├── README.md
│   ├── requirements.txt
│   ├── run.py
│   ├── structuredrl
│   │   └── models
│   │       ├── DepthNet.py
│   │       ├── networks.py
│   │       ├── resnet.py
│   │       └── syncbn
│   │           ├── LICENSE
│   │           ├── make_ext.sh
│   │           ├── modules
│   │           │   ├── functional
│   │           │   │   ├── __init__.py
│   │           │   │   ├── _syncbn
│   │           │   │   │   ├── build.py
│   │           │   │   │   ├── _ext
│   │           │   │   │   │   ├── __init__.py
│   │           │   │   │   │   └── syncbn
│   │           │   │   │   │       └── __init__.py
│   │           │   │   │   ├── __init__.py
│   │           │   │   │   └── src
│   │           │   │   │       ├── common.h
│   │           │   │   │       ├── syncbn.cpp
│   │           │   │   │       ├── syncbn.cu
│   │           │   │   │       ├── syncbn.cu.h
│   │           │   │   │       ├── syncbn.cu.o
│   │           │   │   │       └── syncbn.h
│   │           │   │   └── syncbn.py
│   │           │   ├── __init__.py
│   │           │   └── nn
│   │           │       ├── __init__.py
│   │           │       └── syncbn.py
│   │           ├── README.md
│   │           ├── requirements.txt
│   │           └── test.py
│   └── utils.py
├── boostmonodepth_utils.py
├── checkpoints
│   ├── color-model.pth
│   ├── depth-model.pth
│   └── edge-model.pth
├── depth
│   ├── moon.npy
│   └── moon.png
├── DOCUMENTATION.md
├── download.sh
├── image
│   └── moon.jpg
├── LICENSE
├── main.py
├── mesh
├── mesh.py
├── mesh_tools.py
├── MiDaS
│   ├── MiDaS_utils.py
│   ├── model.pt
│   ├── monodepth_net.py
│   ├── __pycache__
│   │   ├── MiDaS_utils.cpython-36.pyc
│   │   ├── monodepth_net.cpython-36.pyc
│   │   └── run.cpython-36.pyc
│   └── run.py
├── model-f46da743.pt
├── networks.py
├── __pycache__
│   ├── bilateral_filtering.cpython-36.pyc
│   ├── boostmonodepth_utils.cpython-36.pyc
│   ├── mesh.cpython-36.pyc
│   ├── mesh_tools.cpython-36.pyc
│   ├── networks.cpython-36.pyc
│   └── utils.cpython-36.pyc
├── pyproject.toml
├── README.md
├── requirements.txt
├── utils.py
└── video
    ├── moon_circle.mp4
    ├── moon_dolly-zoom-in.mp4
    ├── moon_swing.mp4
    └── moon_zoom-in.mp4

45 directories, 165 files
可能遇到的报错总结如下
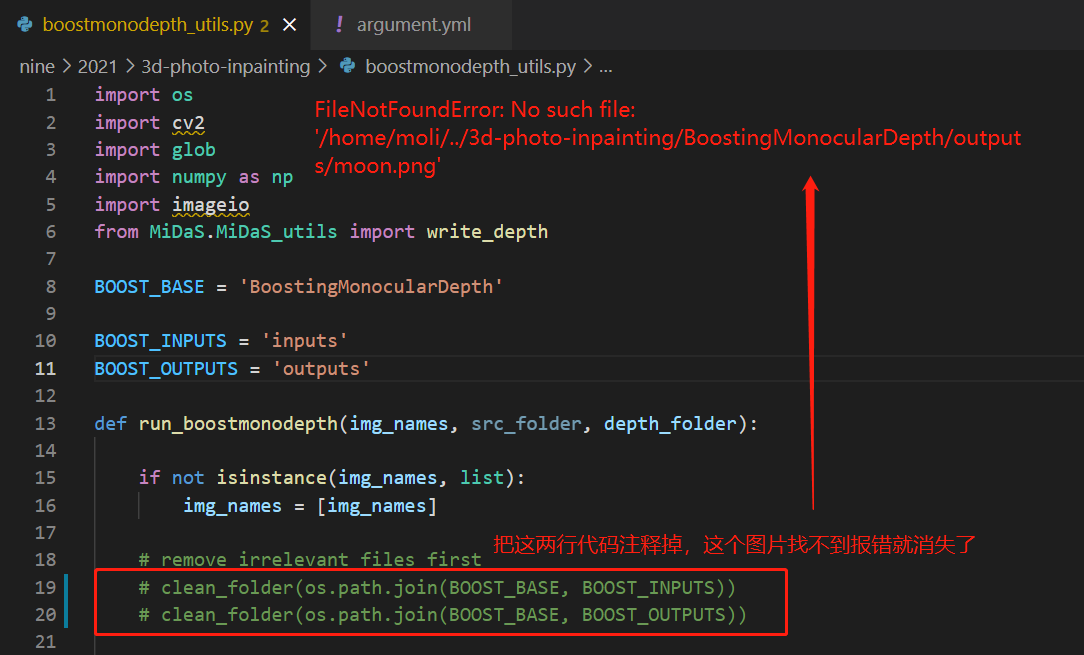
1 FileNotFoundError: No such file: '…/outputs/moon.png
第一次运行测试遇到的报错
python main.py --config argument.yml
running on device 0
  0%|                                                                                                                                                                                                                            | 0/1 [00:00<?, ?it/s]Current Source ==>  moon
Running depth extraction at 1638526409.2872481
BoostingMonocularDepth/inputs/*.png
BoostingMonocularDepth/inputs/*.jpg
device: cuda
Namespace(Final=True, R0=False, R20=False, colorize_results=False, data_dir='inputs/', depthNet=0, max_res=inf, net_receptive_field_size=None, output_dir='outputs', output_resolution=1, pix2pixsize=1024, savepatchs=0, savewholeest=0)

...
...

Traceback (most recent call last):
 ...
  File "/home/moli/anaconda3/envs/torch14/lib/python3.6/site-packages/imageio/core/request.py", line 260, in _parse_uri
    raise FileNotFoundError("No such file: '%s'" % fn)
FileNotFoundError: No such file: '/home/moli/project/projectBy/nine/2021/3d-photo-inpainting/BoostingMonocularDepth/outputs/moon.png'
解决方法如下
cp image/moon.jpg BoostingMonocularDepth/outputs/moon.png
- 并且把如下代码,两行清空目录的操作注释掉

2 RuntimeError: CUDA out of memory
RuntimeError: CUDA out of memory. Tried to allocate 1.17 GiB (GPU 0; 15.75 GiB total capacity; 2.56 GiB already allocated; 286.31 MiB free; 2.59 GiB reserved in total by PyTorch)
  0%|                                                                                                                                                                                                                            | 0/1 [00:22<?, ?it/s]
Traceback (most recent call last):
  File "main.py", line 76, in <module>
    vis_photos, vis_depths = sparse_bilateral_filtering(depth.copy(), image.copy(), config, num_iter=config['sparse_iter'], spdb=False)
  File "/home/moli/project/projectBy/nine/2021/3d-photo-inpainting/bilateral_filtering.py", line 31, in sparse_bilateral_filtering
    vis_image[u_over > 0] = np.array([0, 0, 0])
IndexError: boolean index did not match indexed array along dimension 2; dimension is 3 but corresponding boolean dimension is 5
这个问题、经验证,纯粹是 GPU 当时被其他用户占用;
第 0 块 显卡,闲置时,重新运行,该错误就消失了
3 [“Error 65544: b’X11: The DISPLAY environment variable is missing’”]
接下来,继续运行,遇到这个报错
这个报错,网上查了一些解决方法,于我并不适用,盲猜是因为我的服务器不具备、显示器、无法显示
Start Running 3D_Photo ...
Loading edge model at 1638849812.6169176
Loading depth model at 1638849815.373448
Loading rgb model at 1638849816.3655758
Writing depth ply (and basically doing everything) at 1638849817.4631581
Writing mesh file mesh/moon.ply ...
Making video at 1638850000.3338194
fov: 53.13010235415598
  0%|                                                                                                                                                                                                                            | 0/1 [04:18<?, ?it/s]
Traceback (most recent call last):
  File "main.py", line 141, in <module>
    mean_loc_depth=mean_loc_depth)
  File "/home/moli/project/projectBy/nine/2021/3d-photo-inpainting/mesh.py", line 2203, in output_3d_photo
    proj='perspective')
  File "/home/moli/project/projectBy/nine/2021/3d-photo-inpainting/mesh.py", line 2134, in __init__
    self.canvas = scene.SceneCanvas(bgcolor=bgcolor, size=(canvas_size*factor, canvas_size*factor))

...
...

OSError: Could
not init glfw:
["Error 65544: b'X11: The DISPLAY environment variable is missing'"]
报错 github 上的讨论: https://github.com/openai/mujoco-py/issues/578

2021-12- 07 重新更新的本部分内容,如果有小伙伴,参考到这里,并且顺利解决的话,欢迎 告知我一下哇
📜 可能遇到的报错总结
-
AttributeError: 'Graph' object has no attribute 'node' -
分析: 原因是 没有 安装 networkx 或者 安装的版本 不匹配
正确安装即可:
pip install networkx==2.3
📙 博文此次运行代码+模型分享
有需要此次源码的小伙伴,搜索关注本博客同名公号,公号后台,回复
20200105即可自动获取本博文此次博客对应的运行代码+模型分享
这份代码对应 ## 📙 测试 【版本一》2020】,当时的确运行成功
20200105
祝科研顺利,天天开心

📙 博主 AI 领域八大干货专栏、诚不我欺
- 🍊 计算机视觉: Yolo专栏、一文读懂
- 🍊 计算机视觉:图像风格转换–论文–代码测试
- 🍊 计算机视觉:图像修复-代码环境搭建-知识总结
- 🍊 计算机视觉:超分重建-代码环境搭建-知识总结
- 🍊 深度学习:环境搭建,一文读懂
- 🍊 深度学习:趣学深度学习
- 🍊 落地部署应用:模型部署之转换-加速-封装
- 🍊 CV 和 语音数据集:数据集整理
📙 预祝各位 前途似锦、可摘星辰
🎉 作为全网 AI 领域 干货最多的博主之一,❤️ 不负光阴不负卿 ❤️ ❤️ 过去的一年、大家都经历了太多太多、祝你披荆斩棘、未来可期
-
📆 最近更新:2022年1月23日
-
🍊 点赞 👍 收藏 ⭐留言 📝 都是博主坚持写作、更新高质量博文的最大动力!
-
🍊 当前博主的主要创作领域如下、全网统一ID: 墨理学AI

- 点赞
- 收藏
- 关注作者


评论(0)