【仗剑天涯】从0到1构建可视化大屏-员工管理下
表格CRUD实现(45min)
首先我们修改一下layout第二行:(使用router-link替换原来的span,为方便后续拓展更多的子菜单,渲染为列表)
<!-- 第二行 -->
        <div class="d-flex jc-between px-2">
            <div class="d-flex aside-width">
                <div class="react-left ml-4 react-l-s">
                    <span class="react-left"></span>
                    <!-- <span class="text">部门管理</span> -->
                    <router-link to="/dept" class="text" tag="li">
                      <a style="color:#d3d6dd">部门管理</a>
                    </router-link>
                </div>
                <div class="react-left ml-3">
                    <!-- <span class="text">员工管理</span> -->
                    <router-link to="/user" class="text" tag="li">
                      <a style="color:#d3d6dd">员工管理</a>
                    </router-link>
                </div>
            </div>
            <div class="d-flex aside-width">
                <div class="react-right bg-color-blue mr-3">
                    <!-- <span class="text fw-b"></span> -->
                    <router-link to="/admin" class="text fw-b" tag="li">
                      <a style="color:#d3d6dd">系统设置</a>
                    </router-link>
                </div>
                <div class="react-right mr-4 react-l-s">
                    <span class="react-after"></span>
                    <span class="text">{{ dateYear }} {{ dateWeek }} {{ dateDay }}</span>
                </div>
            </div>
        </div>
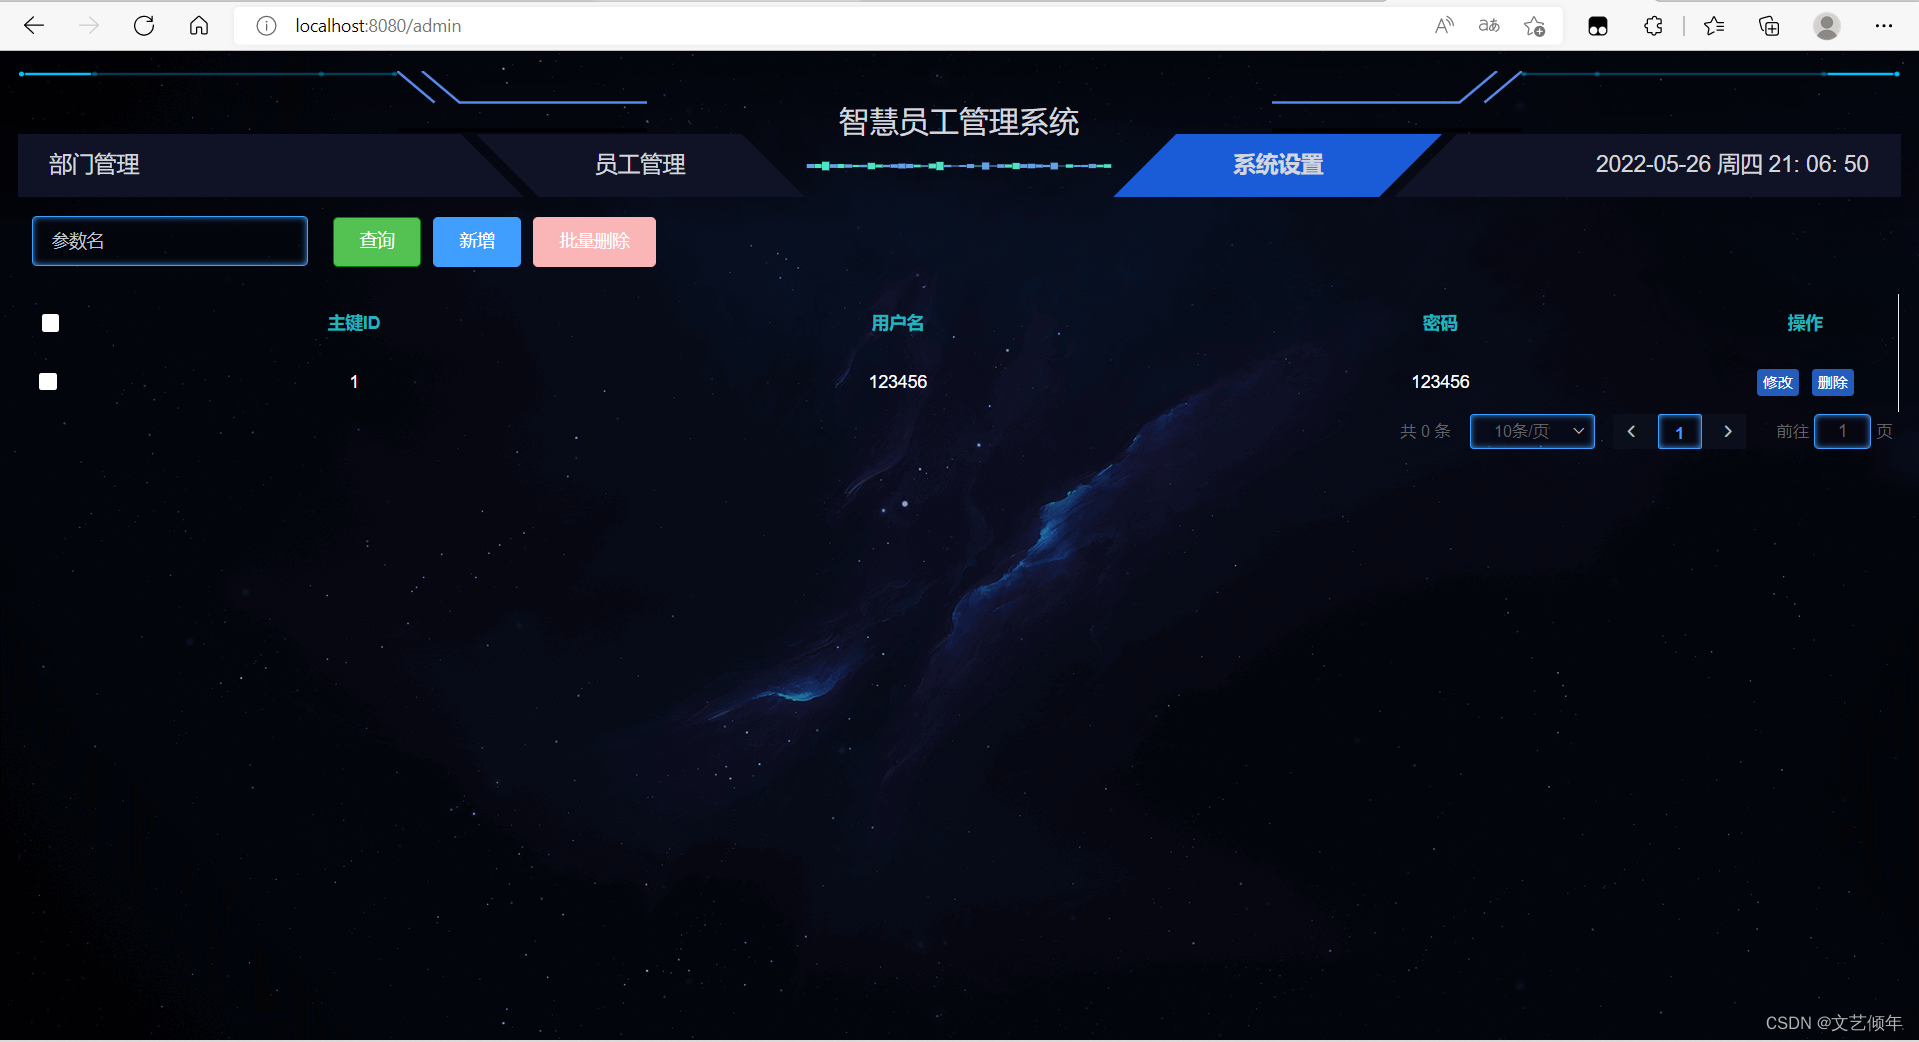
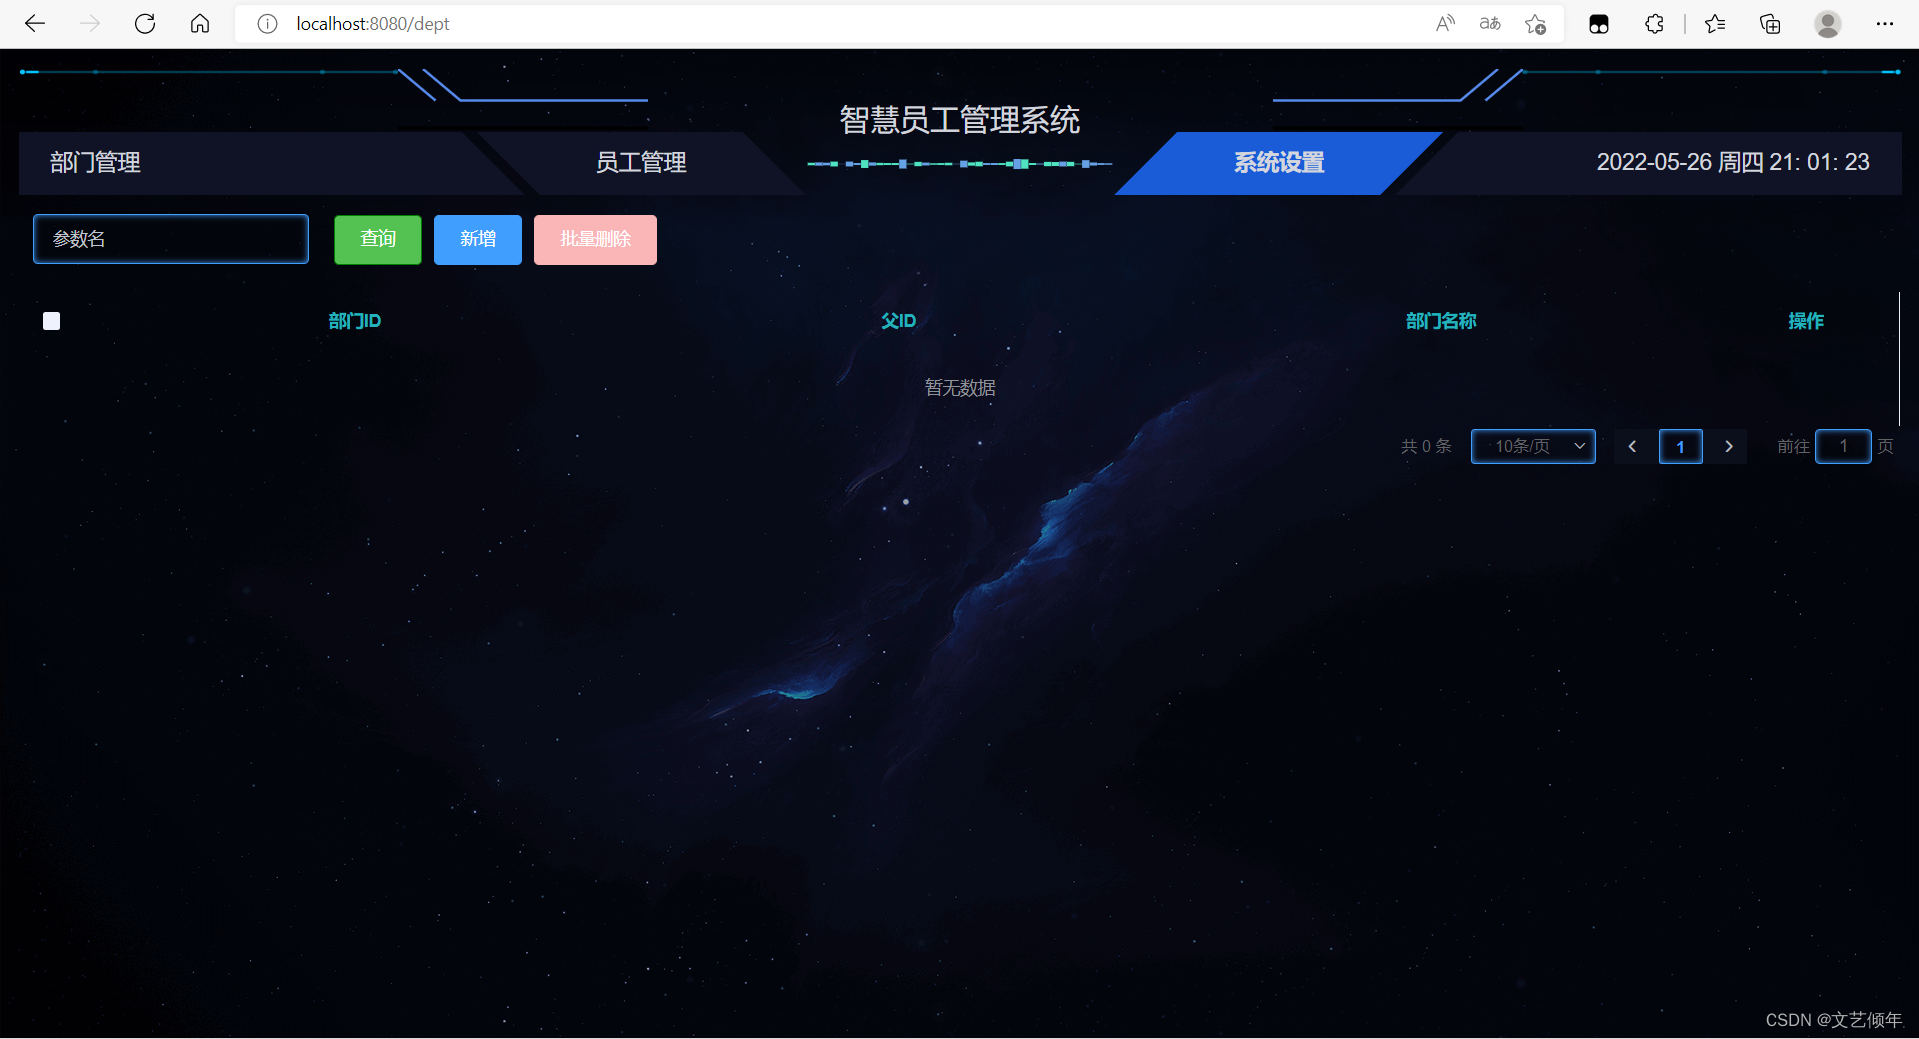
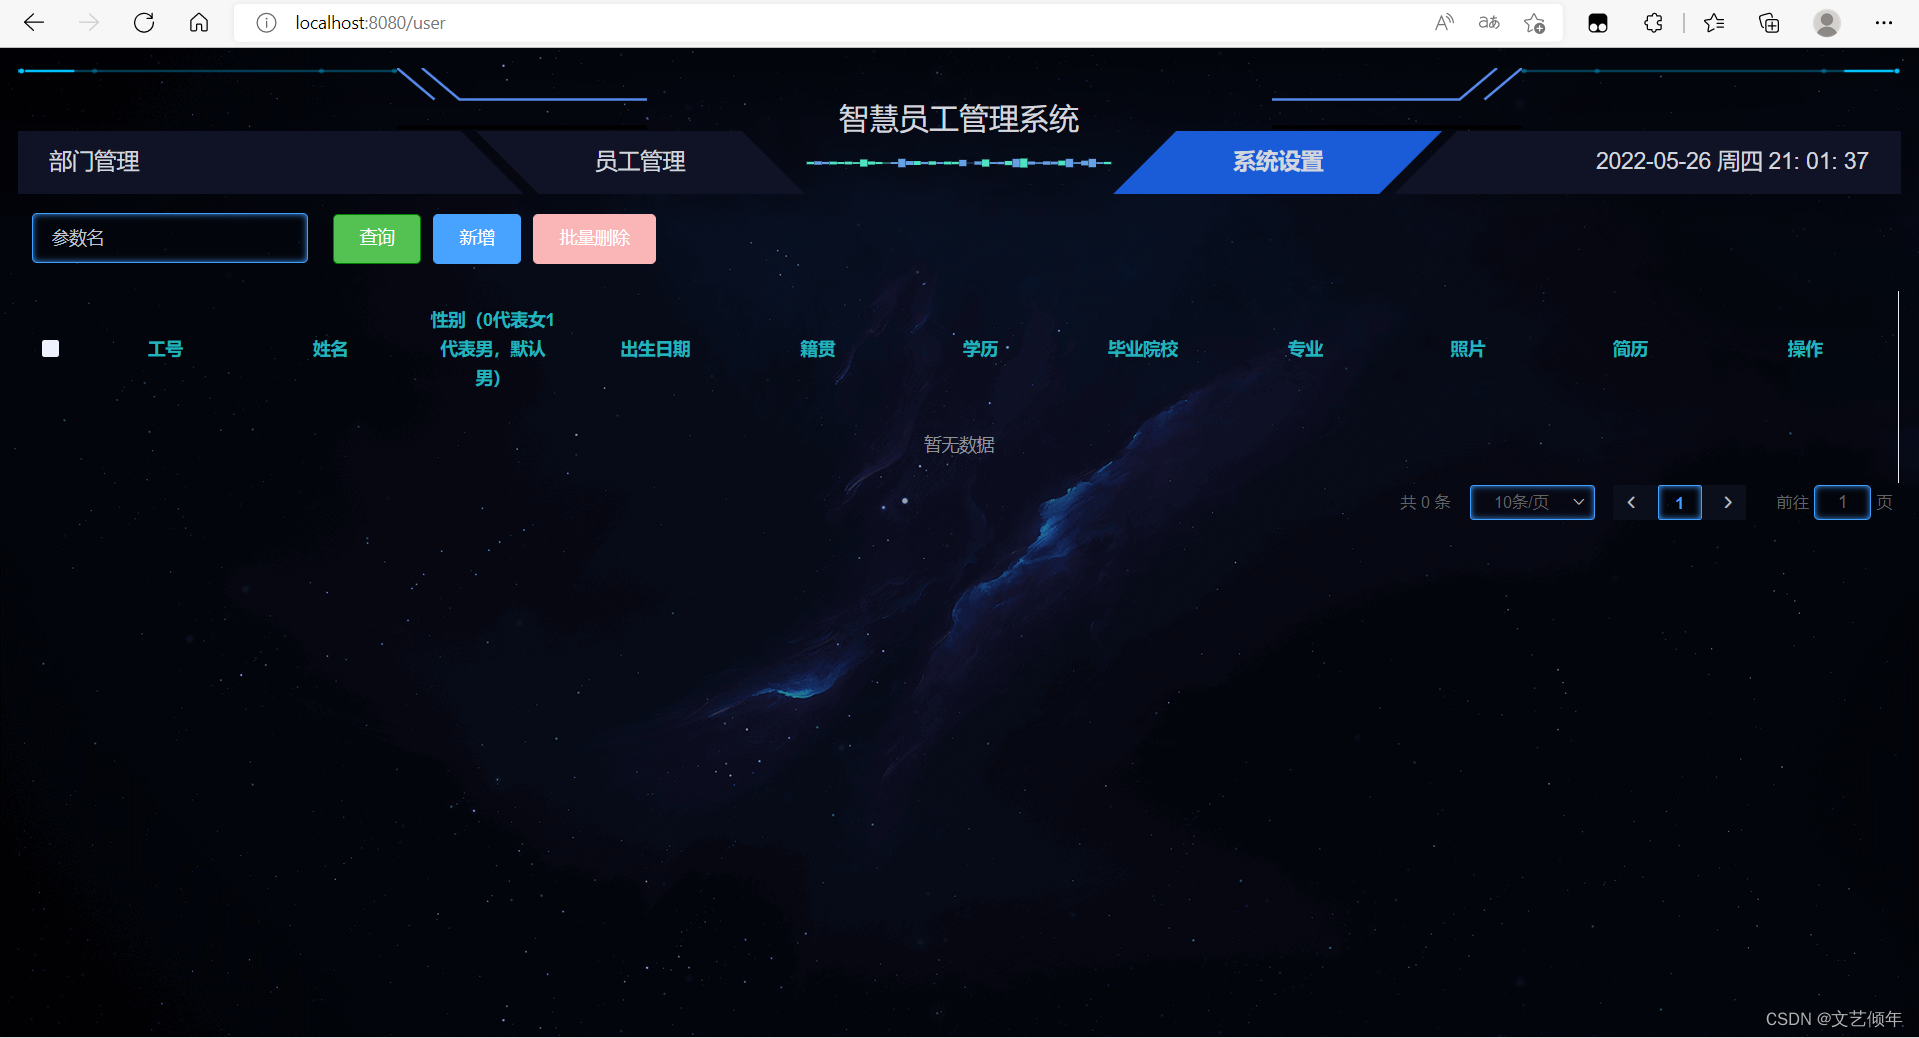
当我们点击新增按钮,发现弹窗上面被遮罩层挡住了:
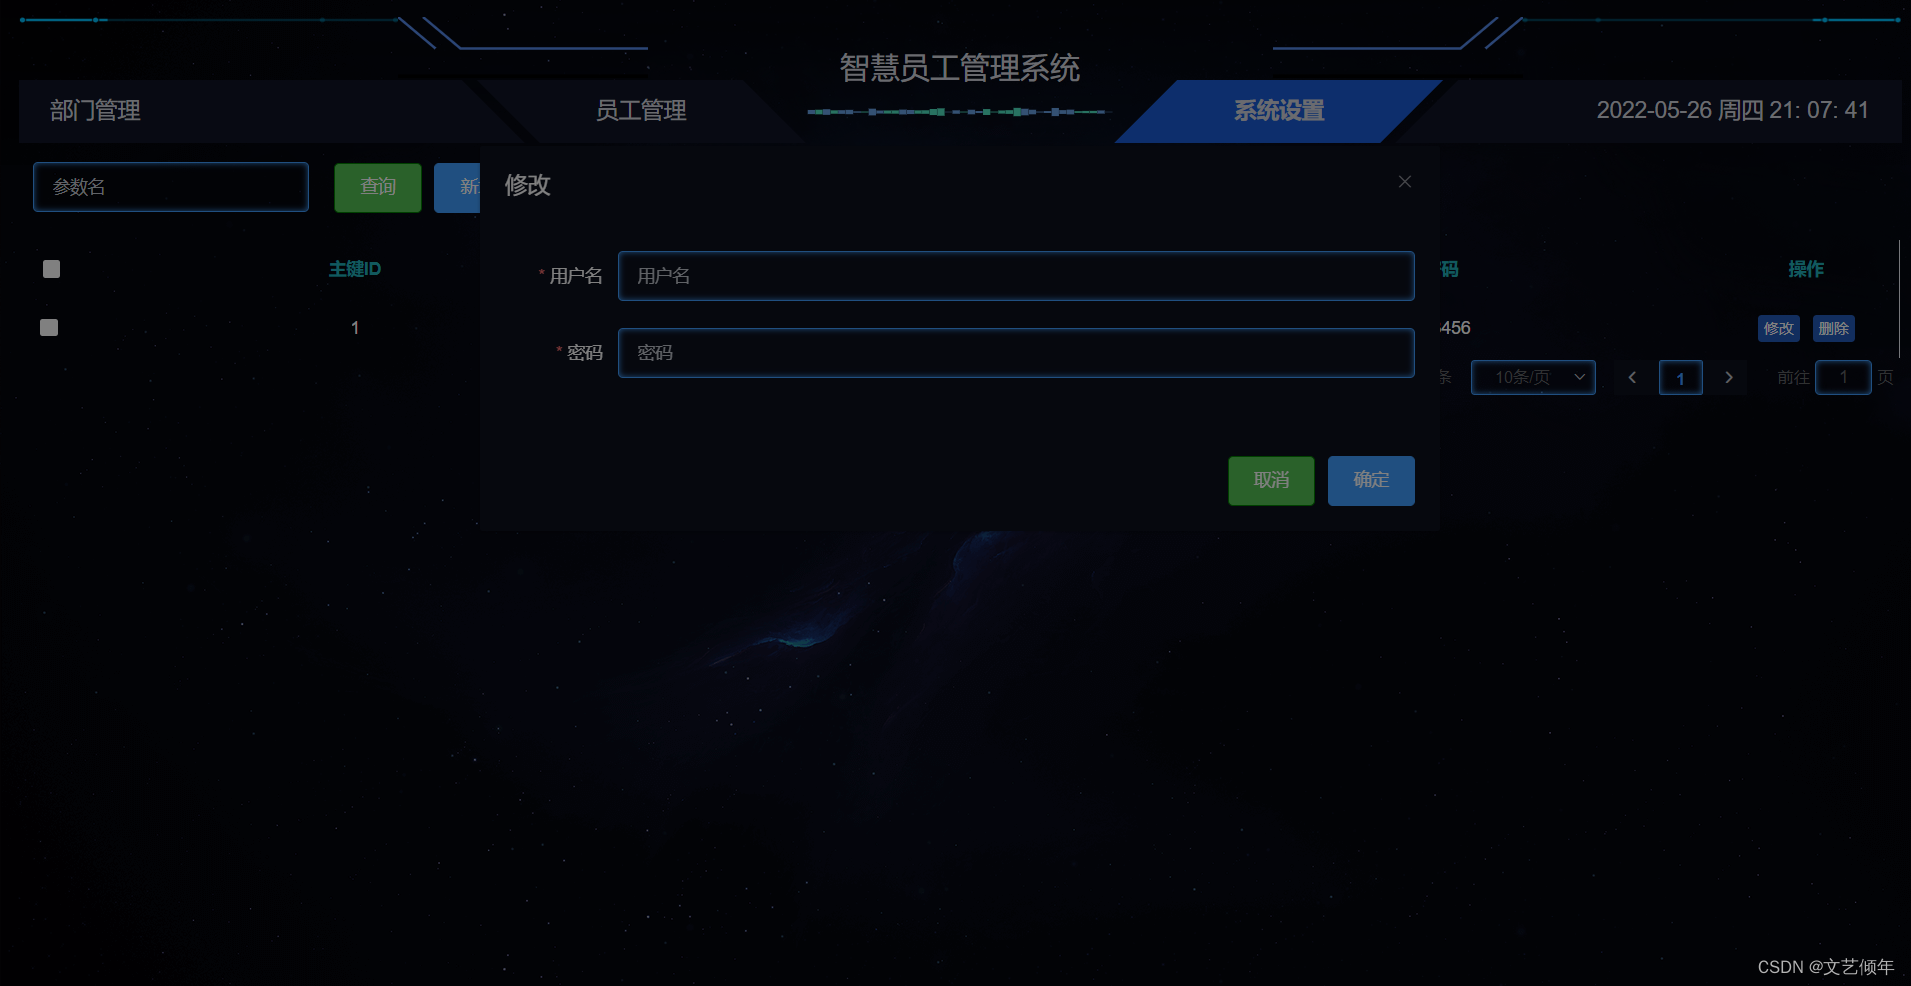
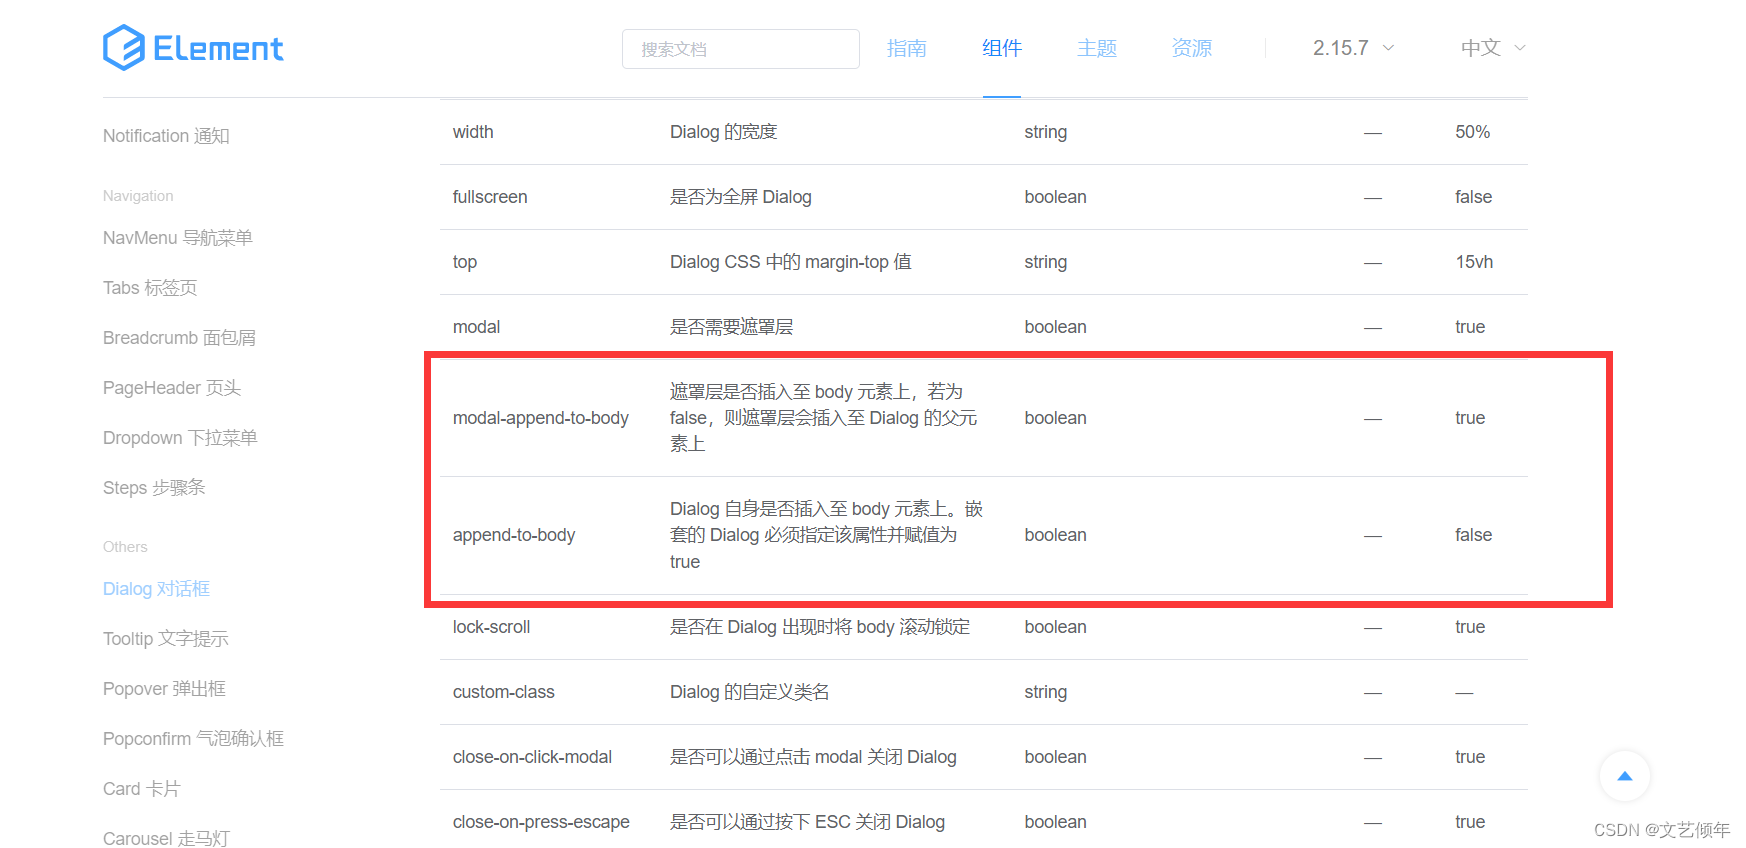
遇到问题不要慌,我们只需给el-dialog设置:modal-append-to-body="false",使遮罩层插入至 Dialog 的父元素上。
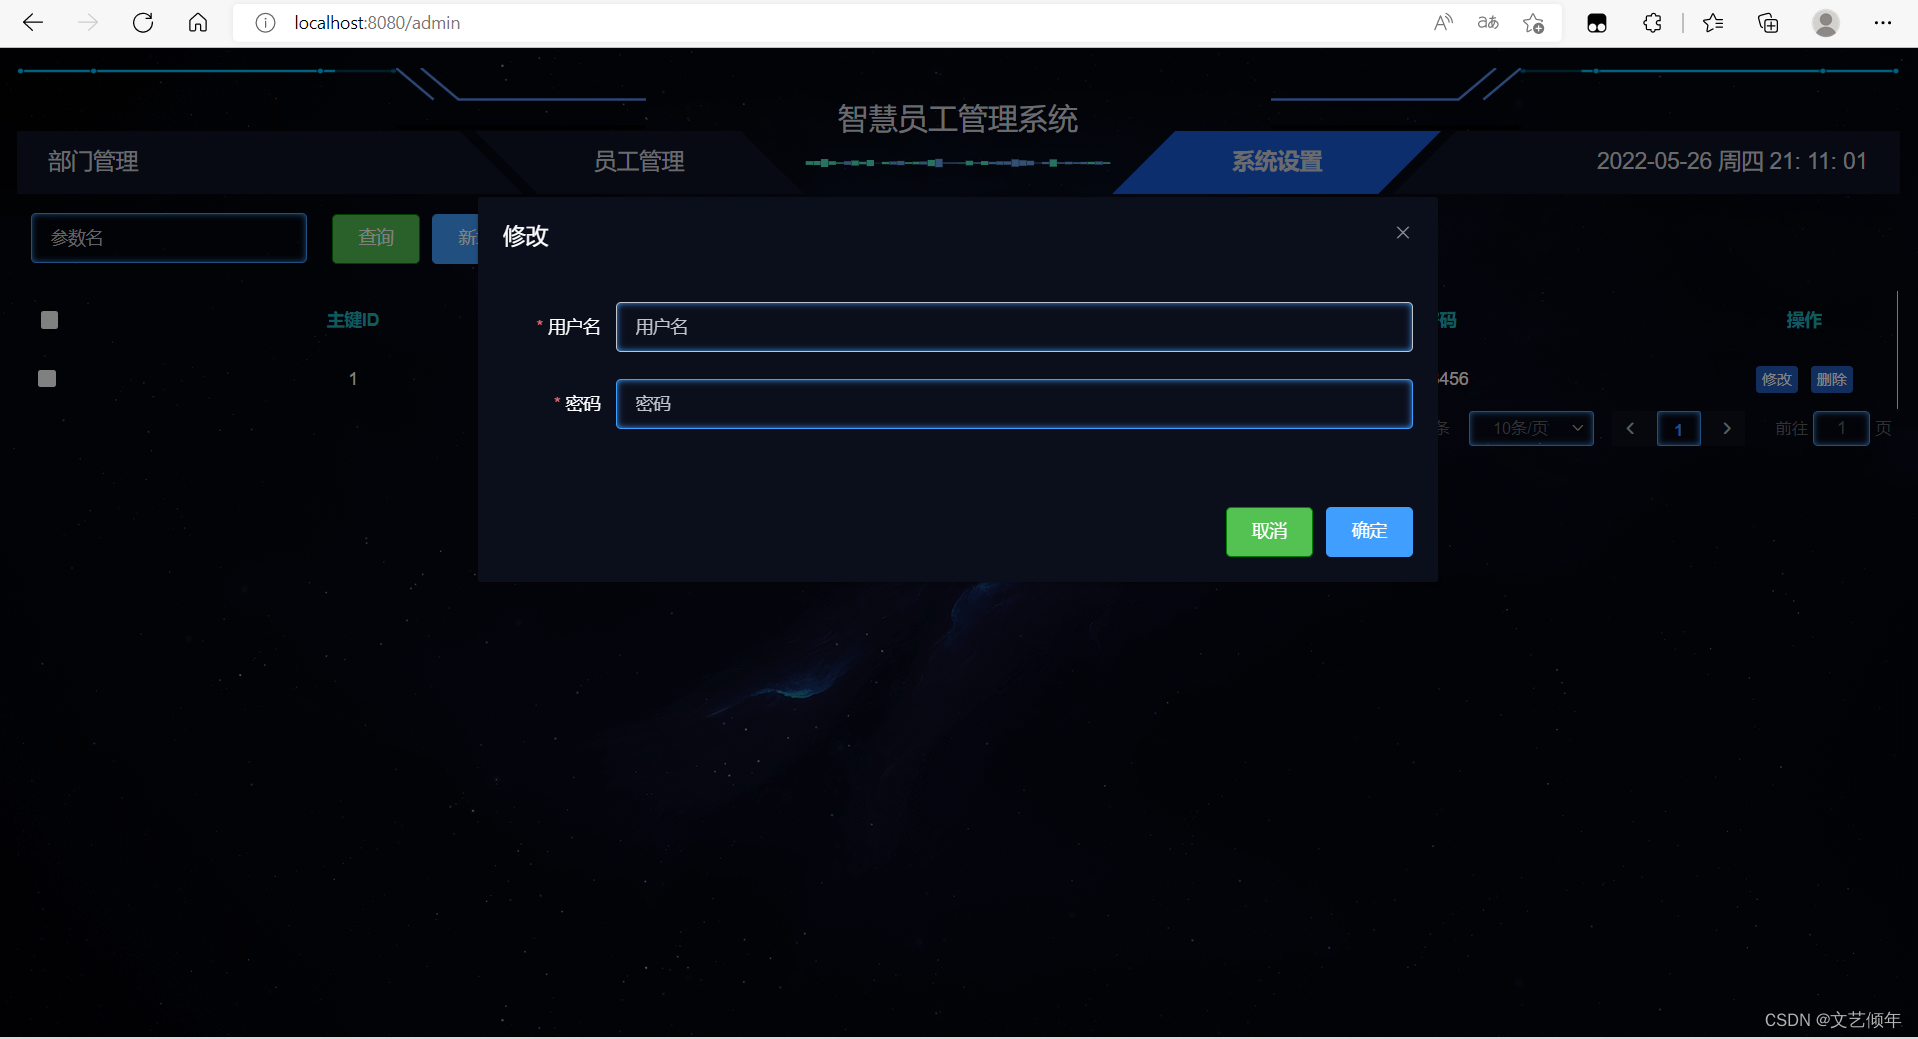
解决成功,当然大家也可以给position:fixed的父元素设置一个z-index,并且要比遮盖层的大,或者让el-dialog父元素不使用fixed定位。不过小航还是推荐大家使用第一种方法。
后端完善条件查询,根据用户名查询:
AdminServiceImpl
@Override
    public PageUtils queryPage(Map<String, Object> params) {
        QueryWrapper<AdminEntity> queryWrapper = new QueryWrapper<>();
        String key = (String) params.get("key");
        if(!StringUtils.isEmpty(key)) {
            queryWrapper.like("username", key);
        }
        IPage<AdminEntity> page = this.page(
                new Query<AdminEntity>().getPage(params),
                queryWrapper
        );

        return new PageUtils(page);
    }
测试前端:
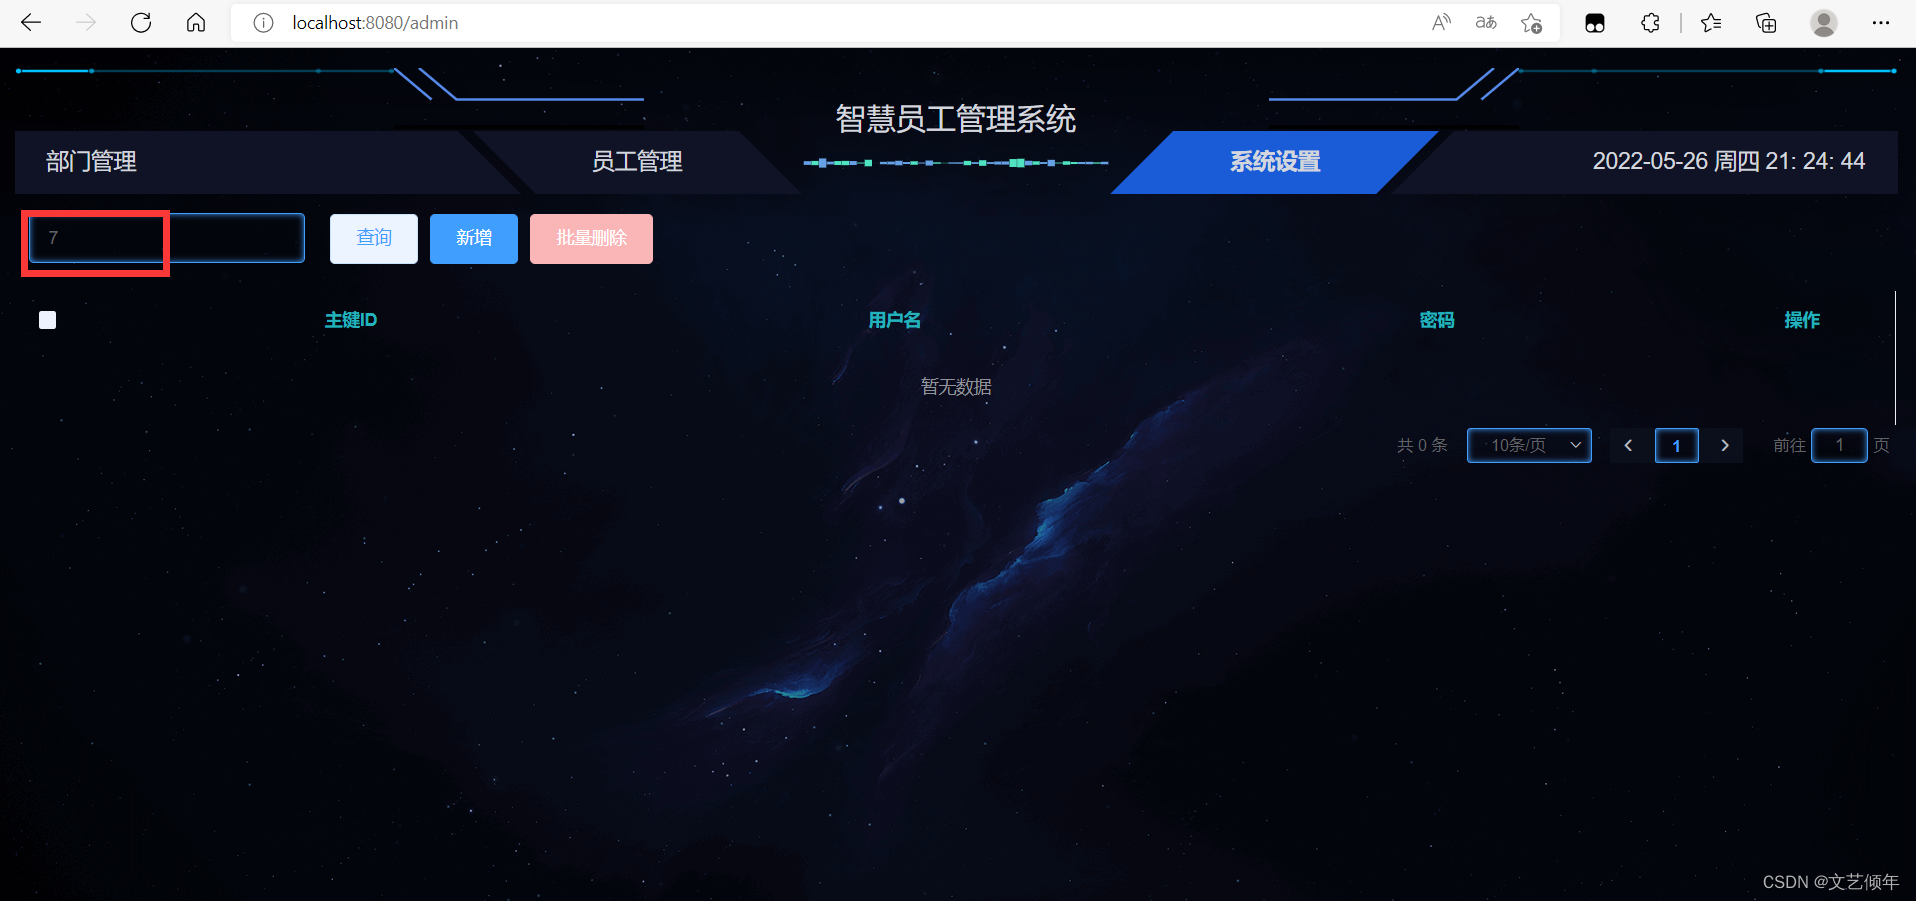
于是我们又迎来了一个bug:
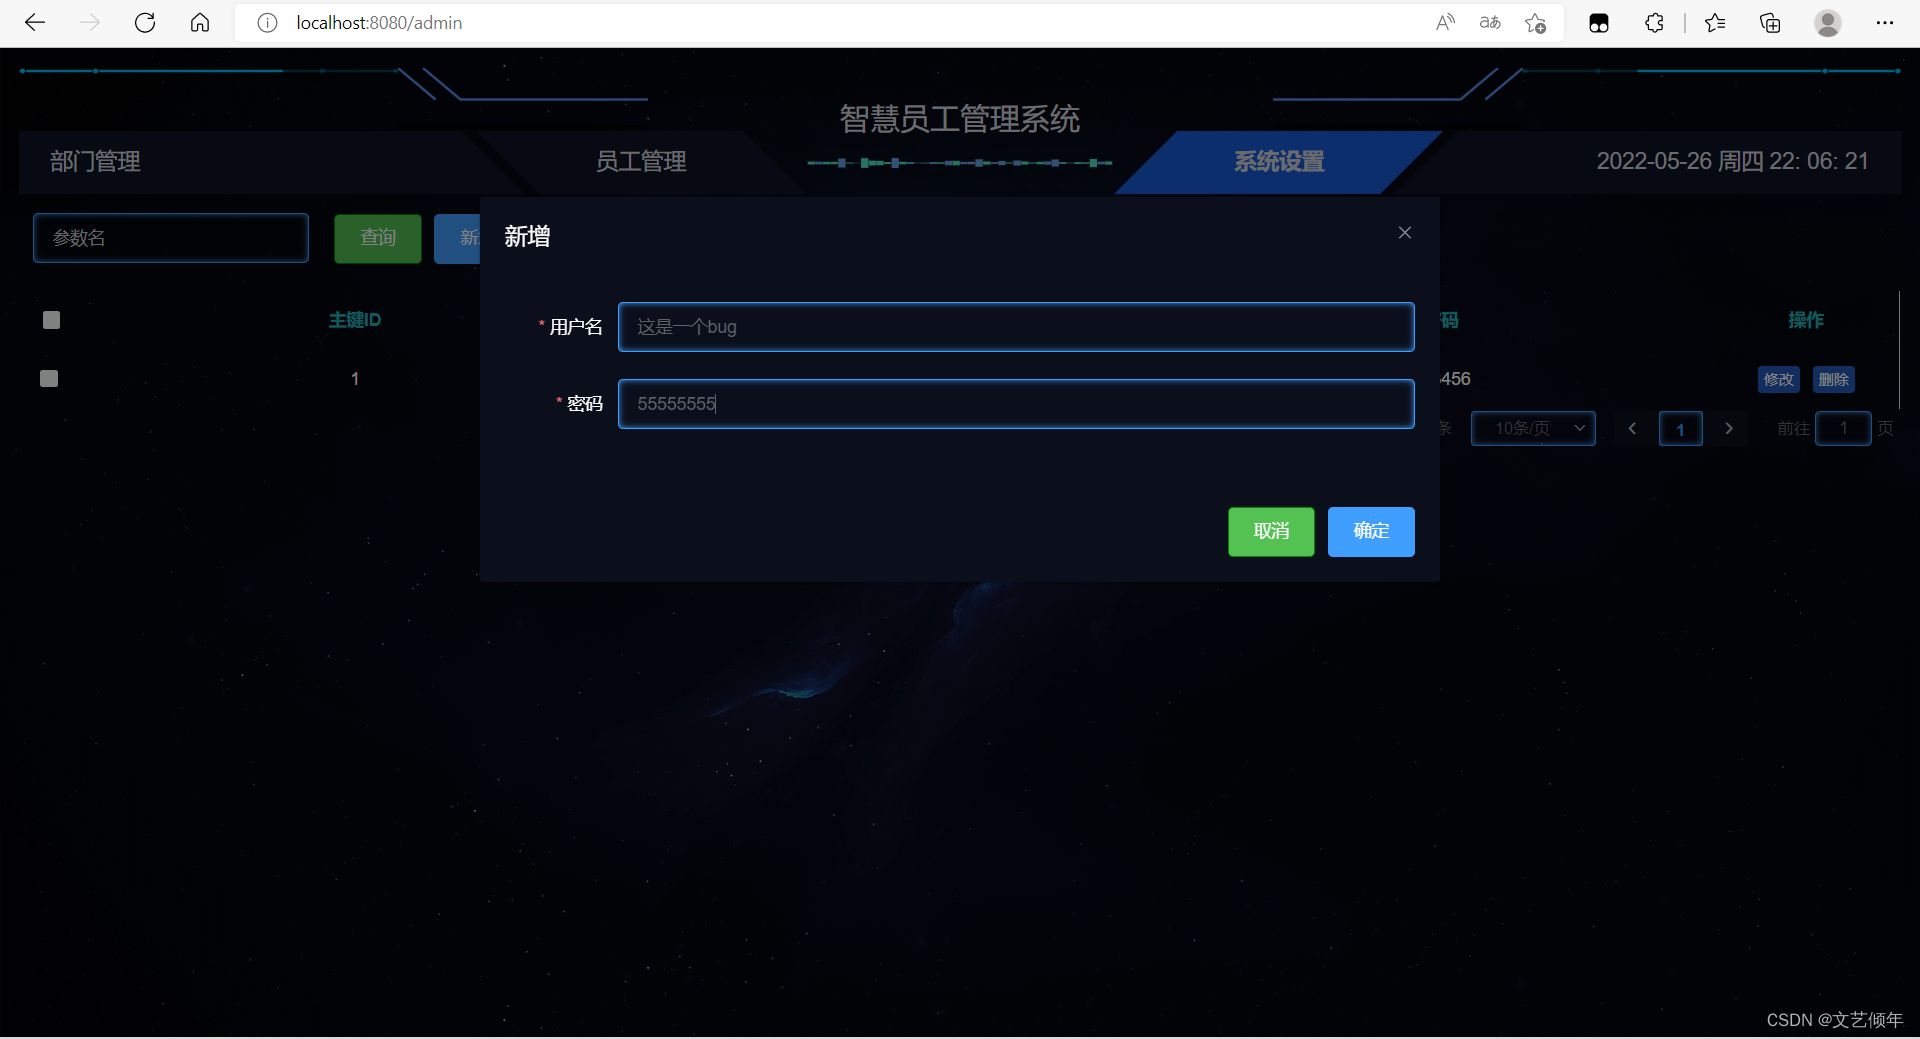
咦,发现点击没反应,这是为啥嘞,我们打开F12,查看报错
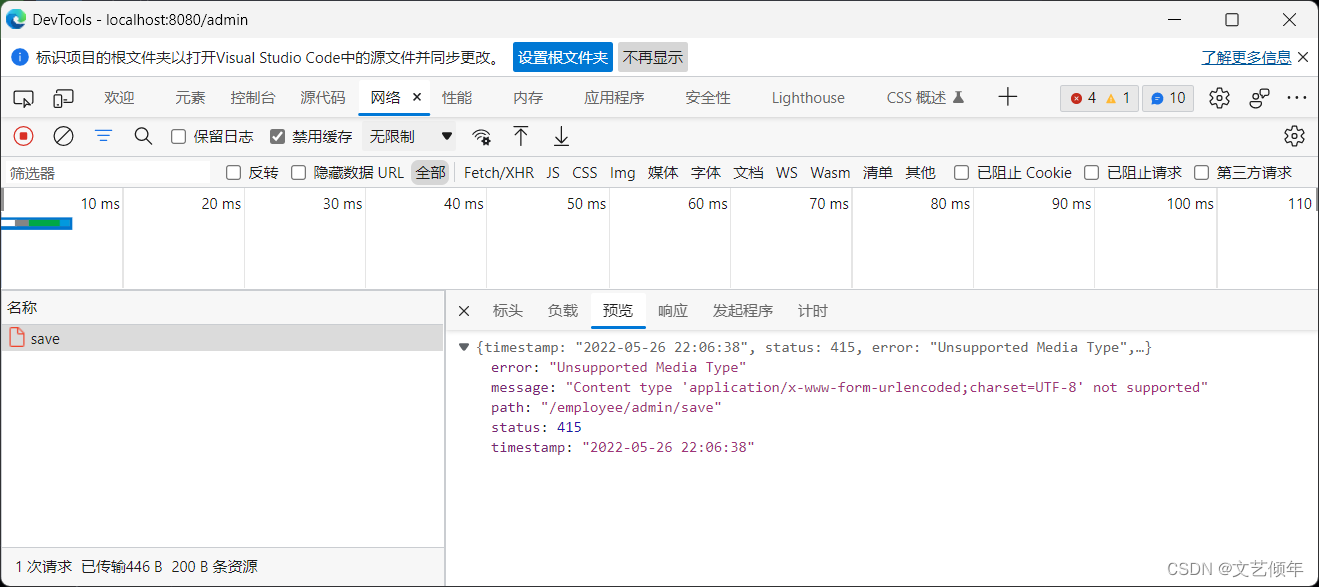
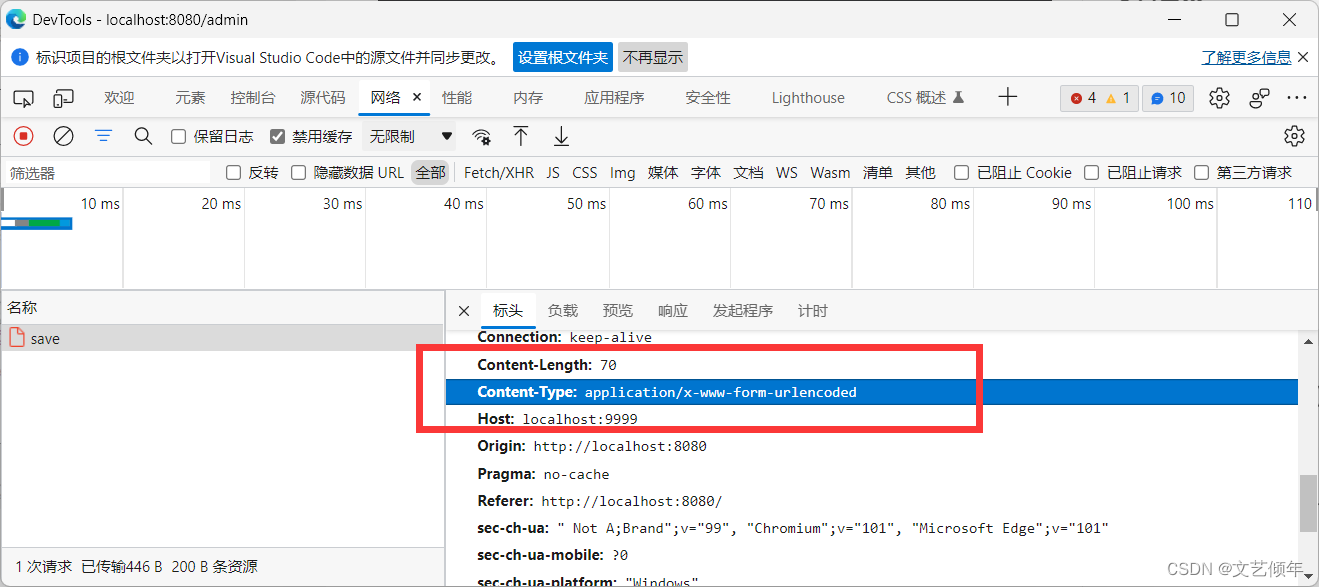
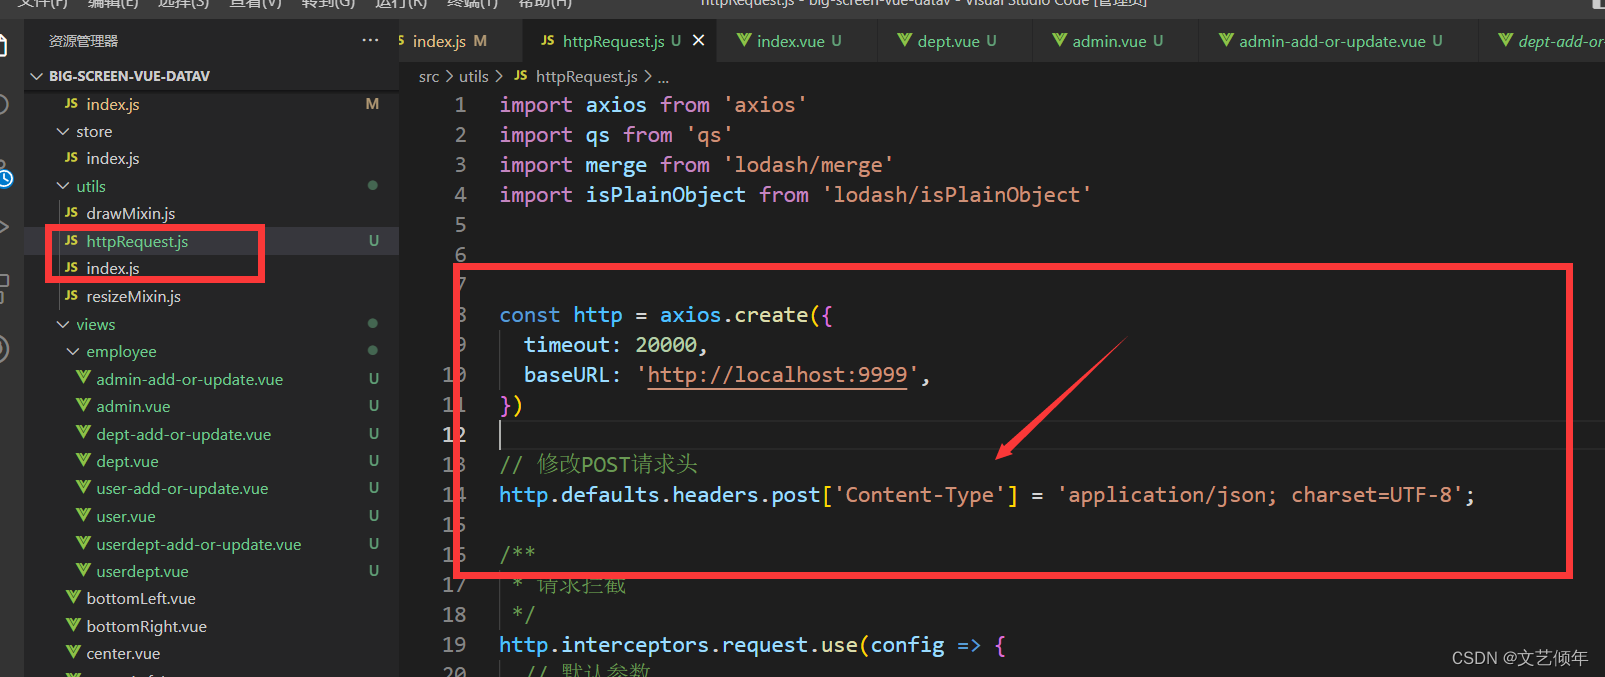
我们细心一看,原来是请求头不对,应该是application/json才对,知道问题就好办了,设置一下
// 修改POST请求头
http.defaults.headers.post['Content-Type'] = 'application/json; charset=UTF-8';
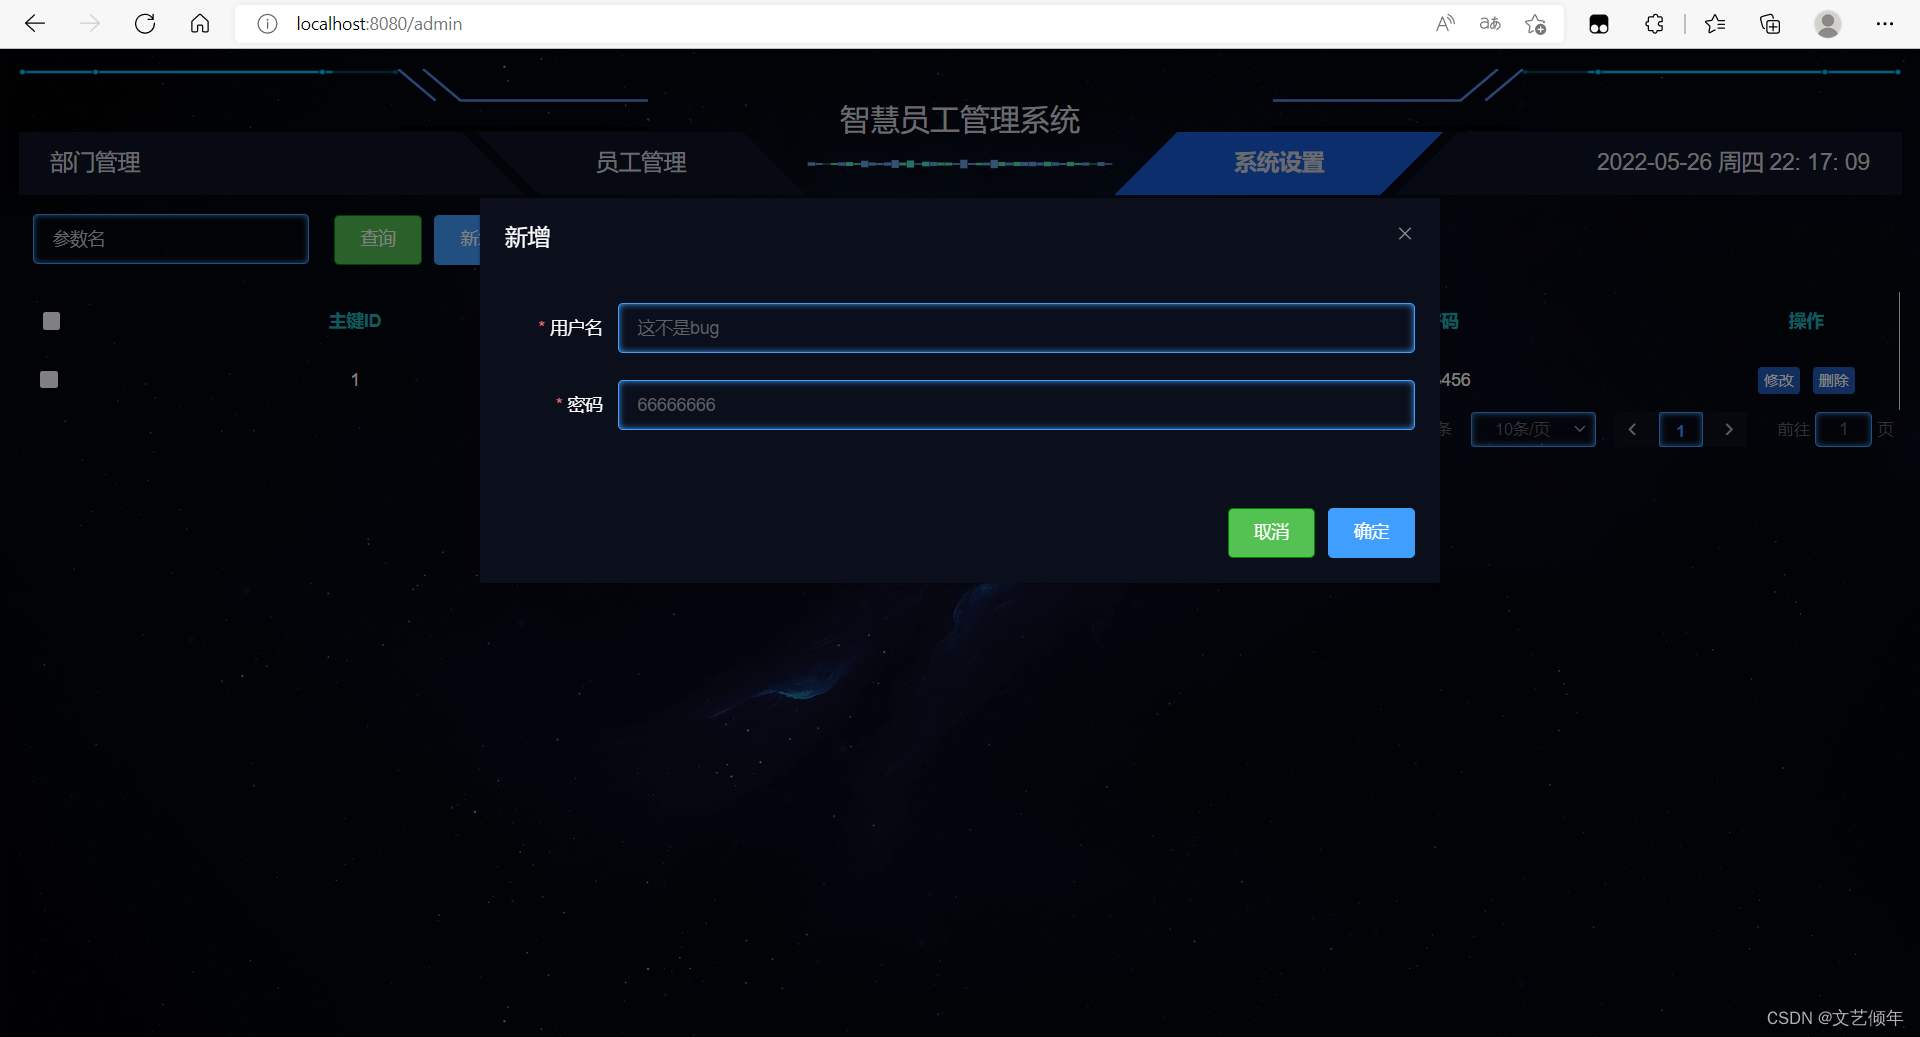
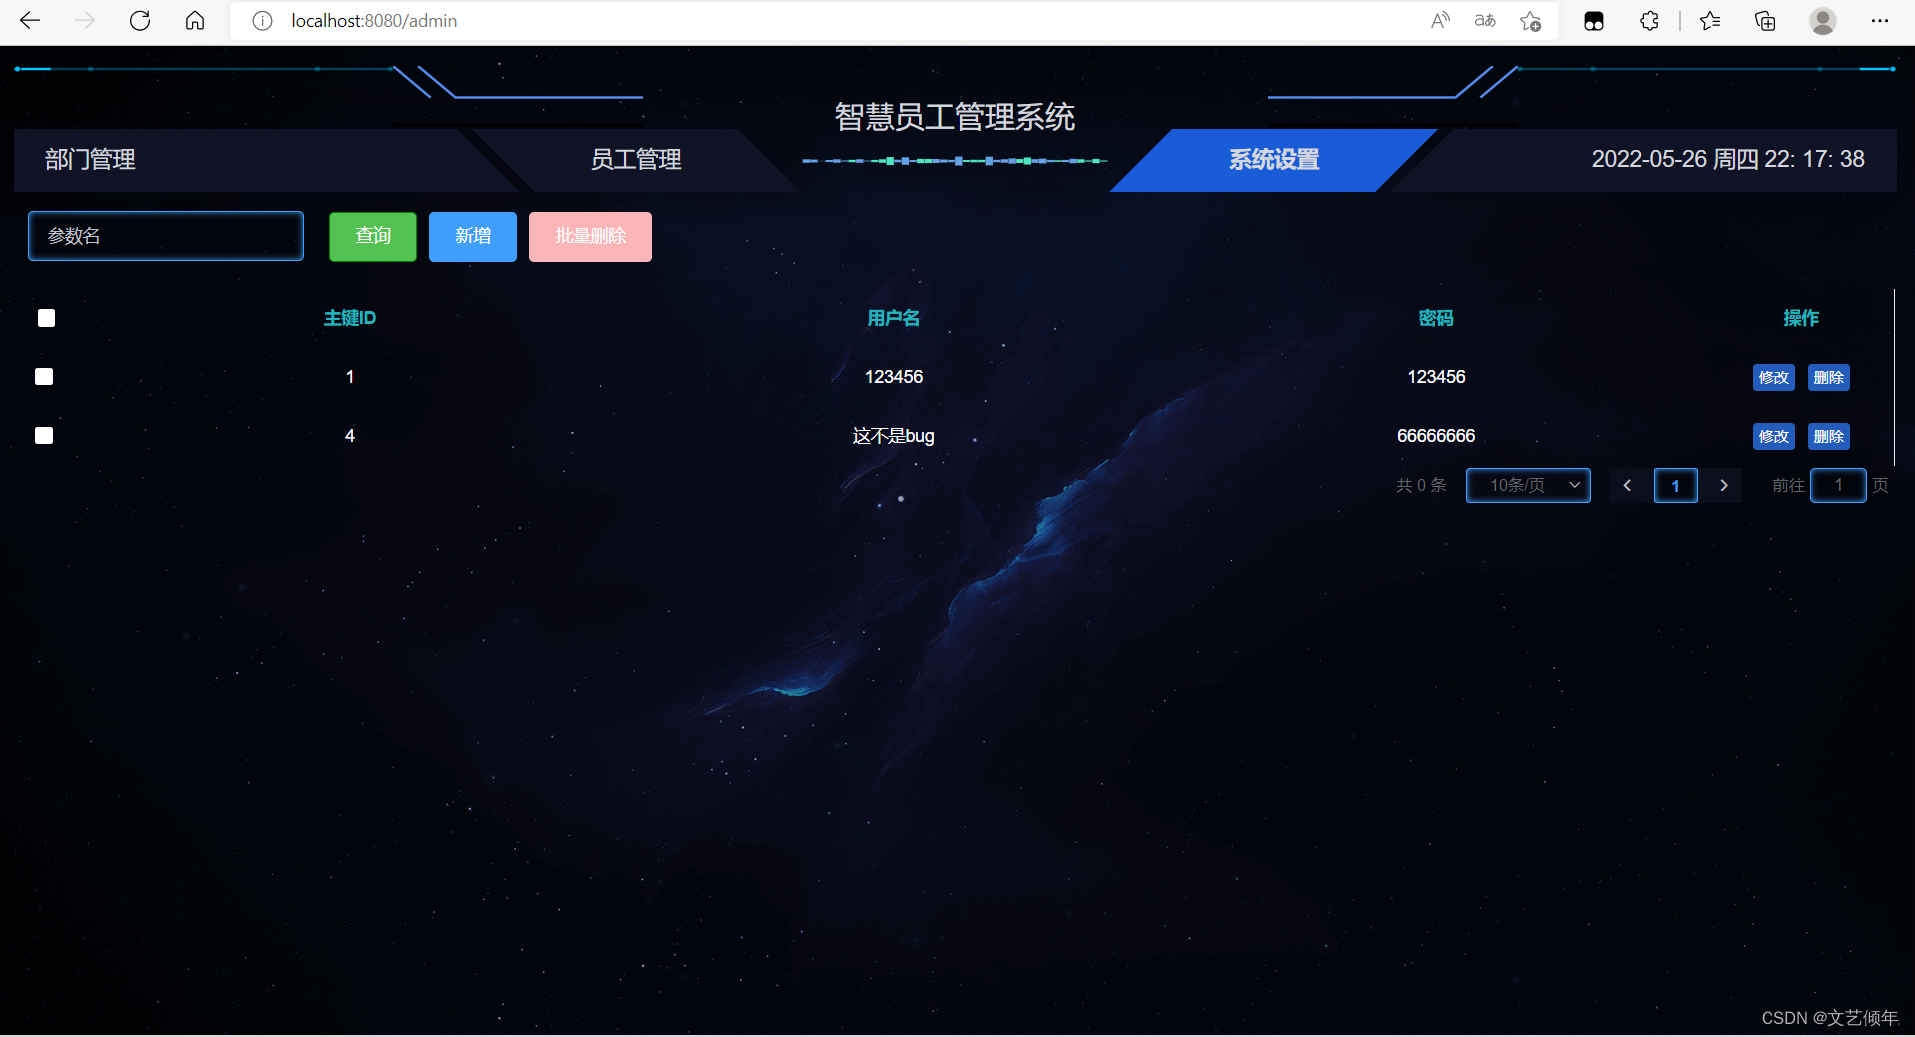
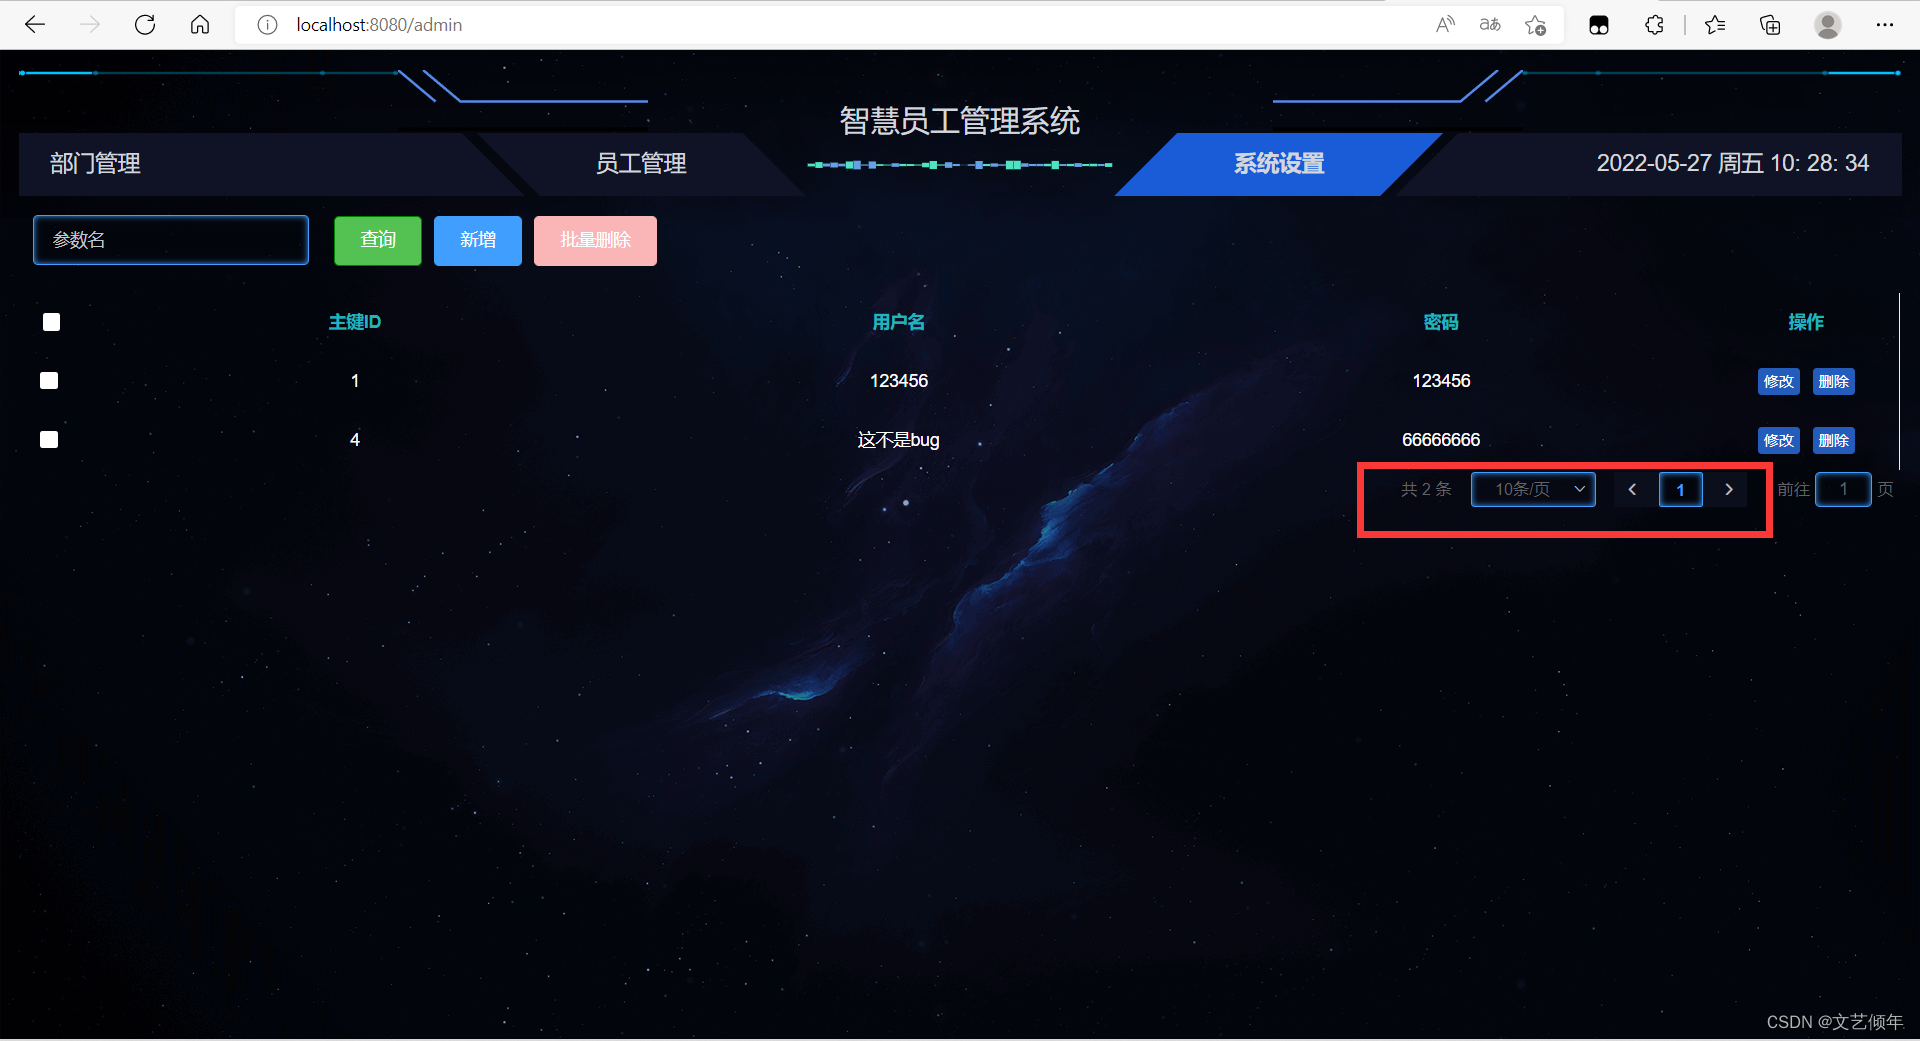
细心的小伙伴们应该发现,右下角没有总页数,这是因为我们Mybatis-Plus配置分页插件
我们打开Mybatis-plus官网:
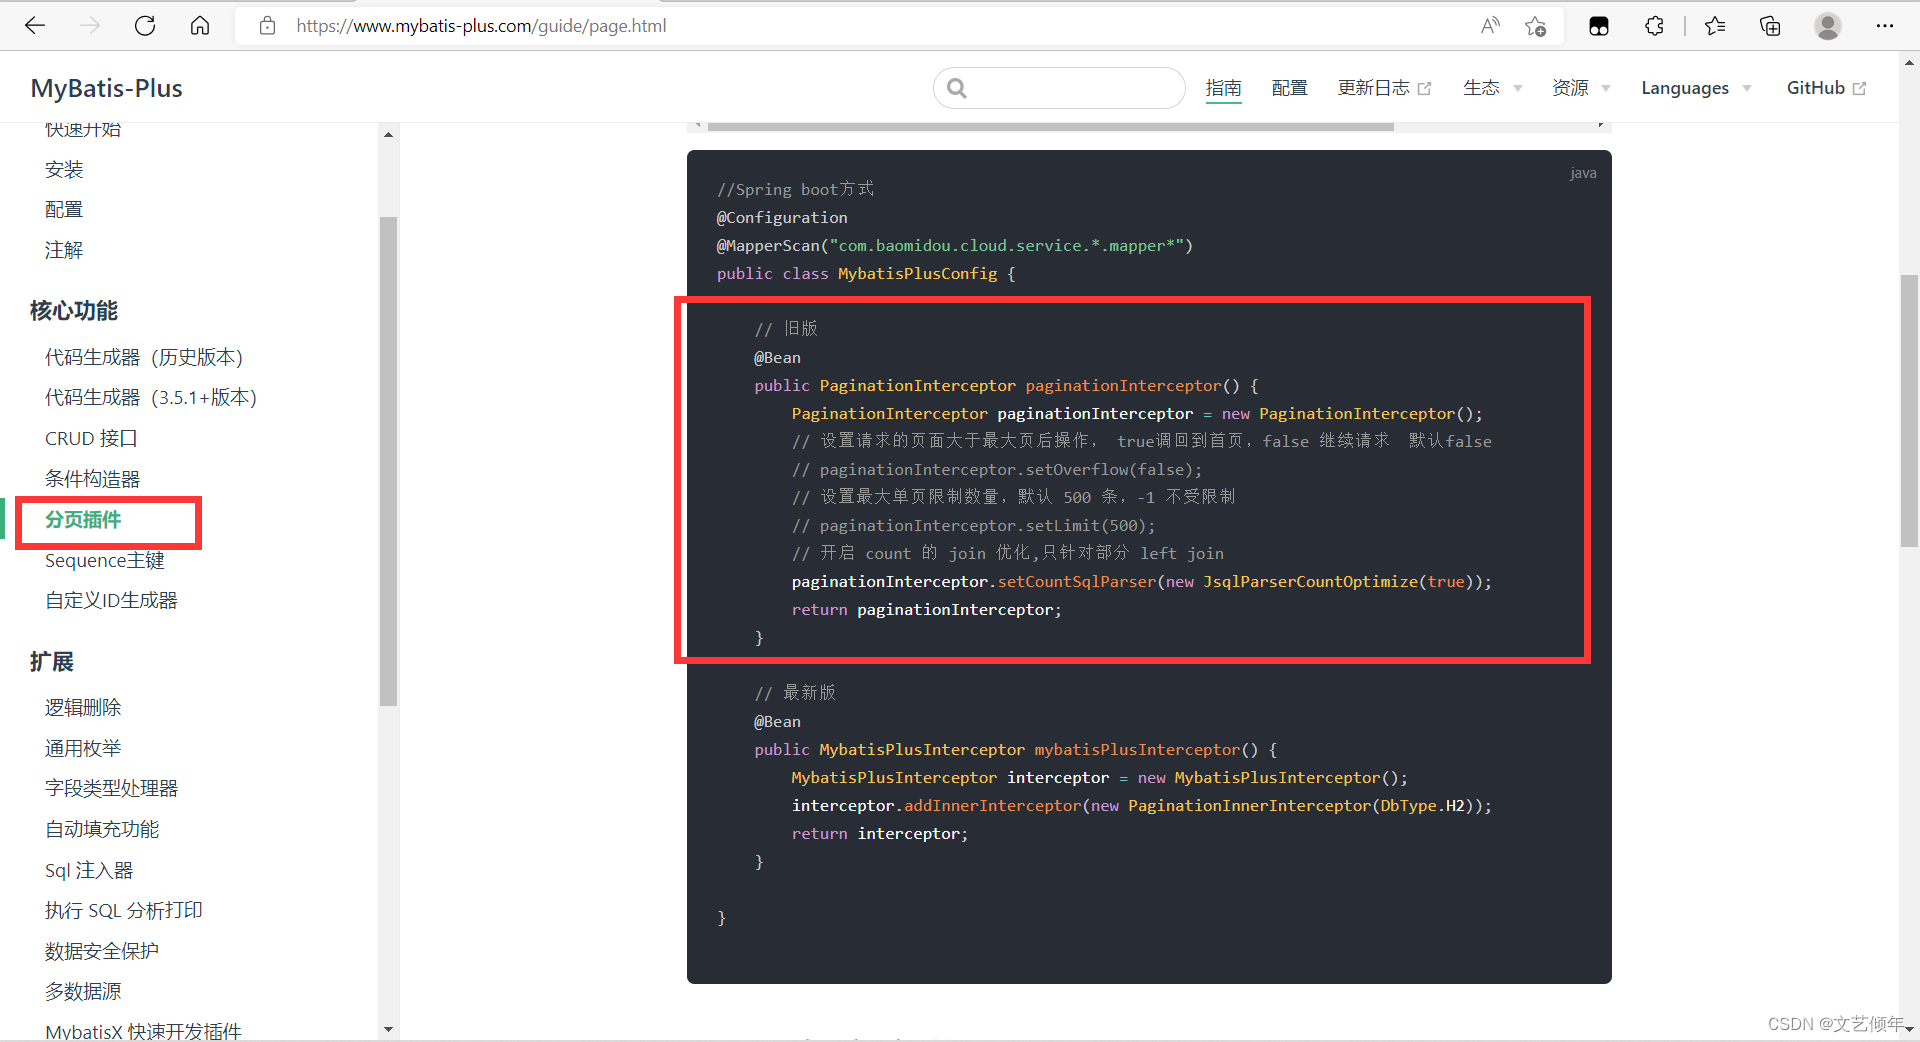
这里我们采用注解的方式,Mybatis-plus我们使用的是旧版本:
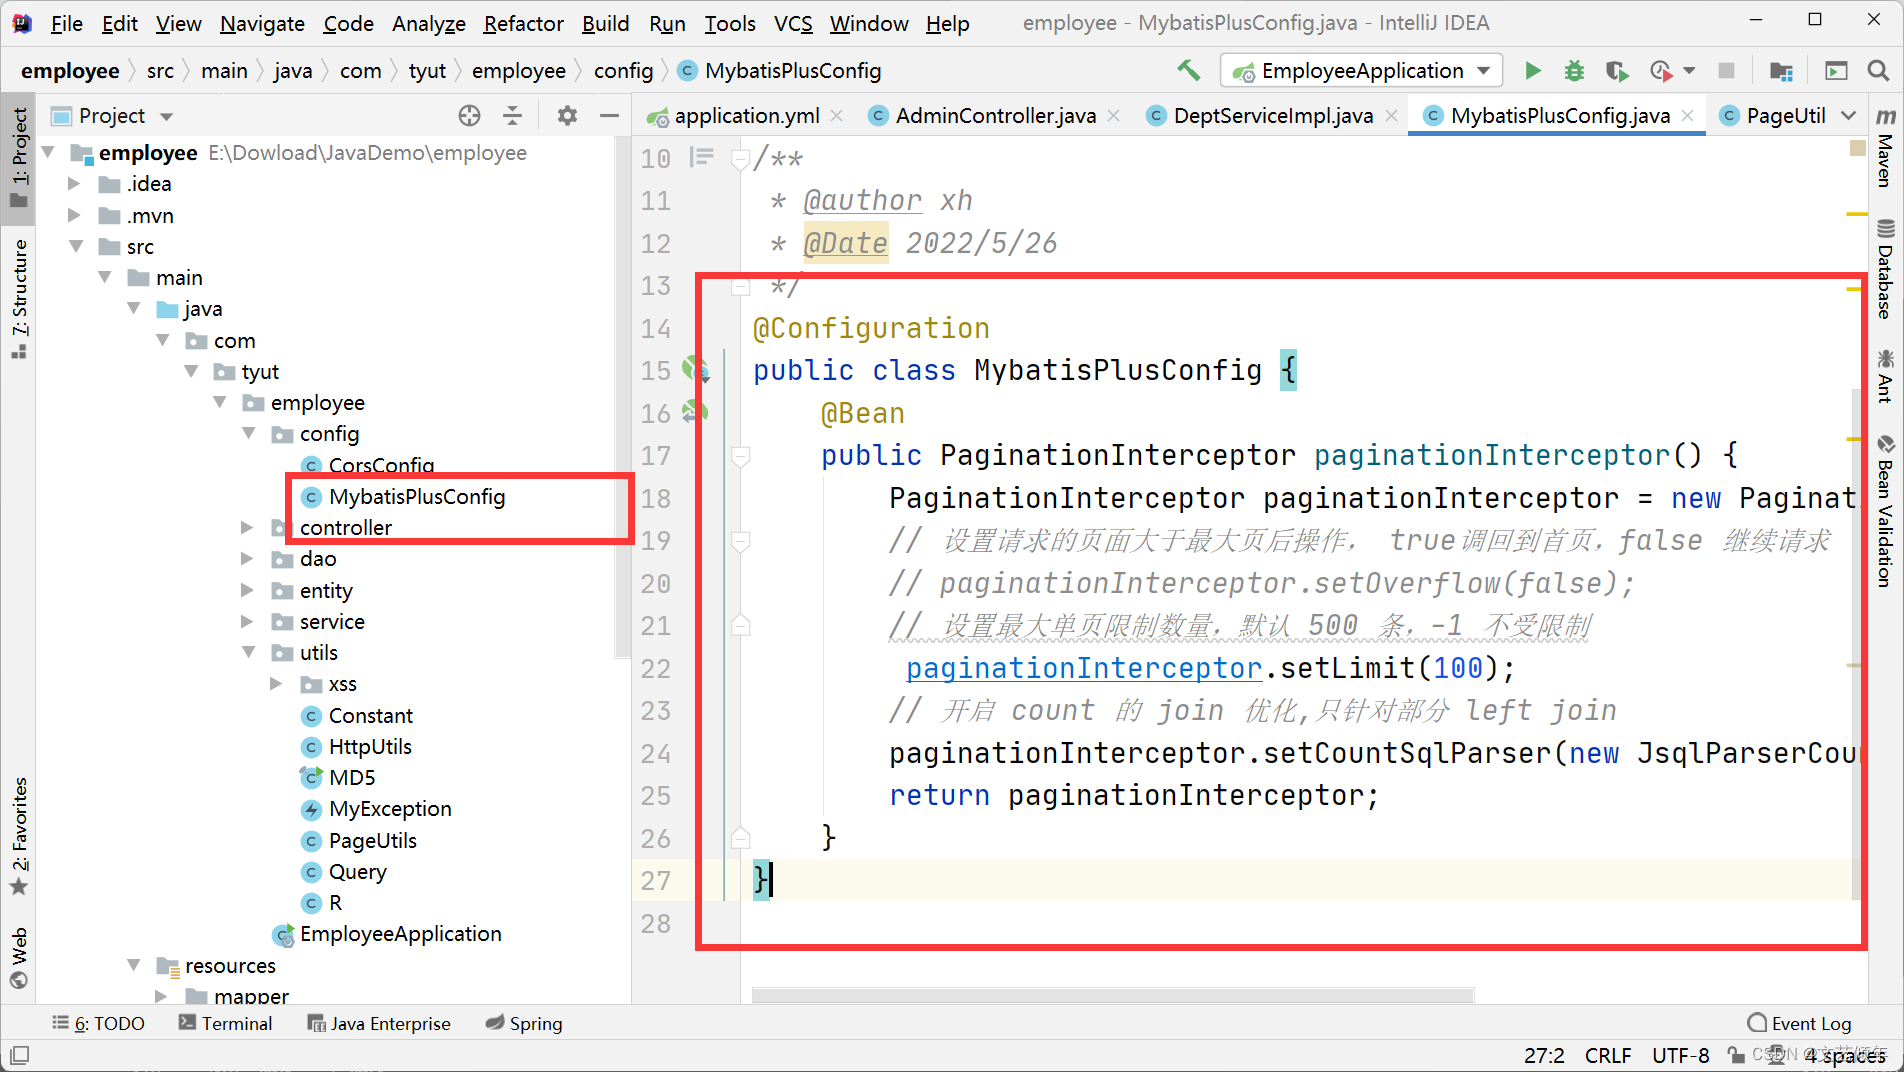
限制单页数量为100,防止恶意请求。
再次测试:
小作业:完善一下员工管理
需要用到的素材:https://img-blog.csdnimg.cn/67c592ab8e10478982a404f82610e321.png

- 数据库测试

- 优化显示

<el-table-column
        prop="sex"
        header-align="center"
        align="center"
        label="性别(0代表女1代表男,默认男)">
        <template  slot-scope="scope">
            <el-tag >{{scope.row.sex == 0 ? '女' : '男'}}</el-tag>
        </template>
      </el-table-column>

<el-table-column
        prop="photo"
        header-align="center"
        align="center"
        label="照片">
        <!-- 图片的显示 -->
          <template   slot-scope="scope">
              <img :src="scope.row.photo"  min-width="70" height="70" />
          </template>
      </el-table-column>
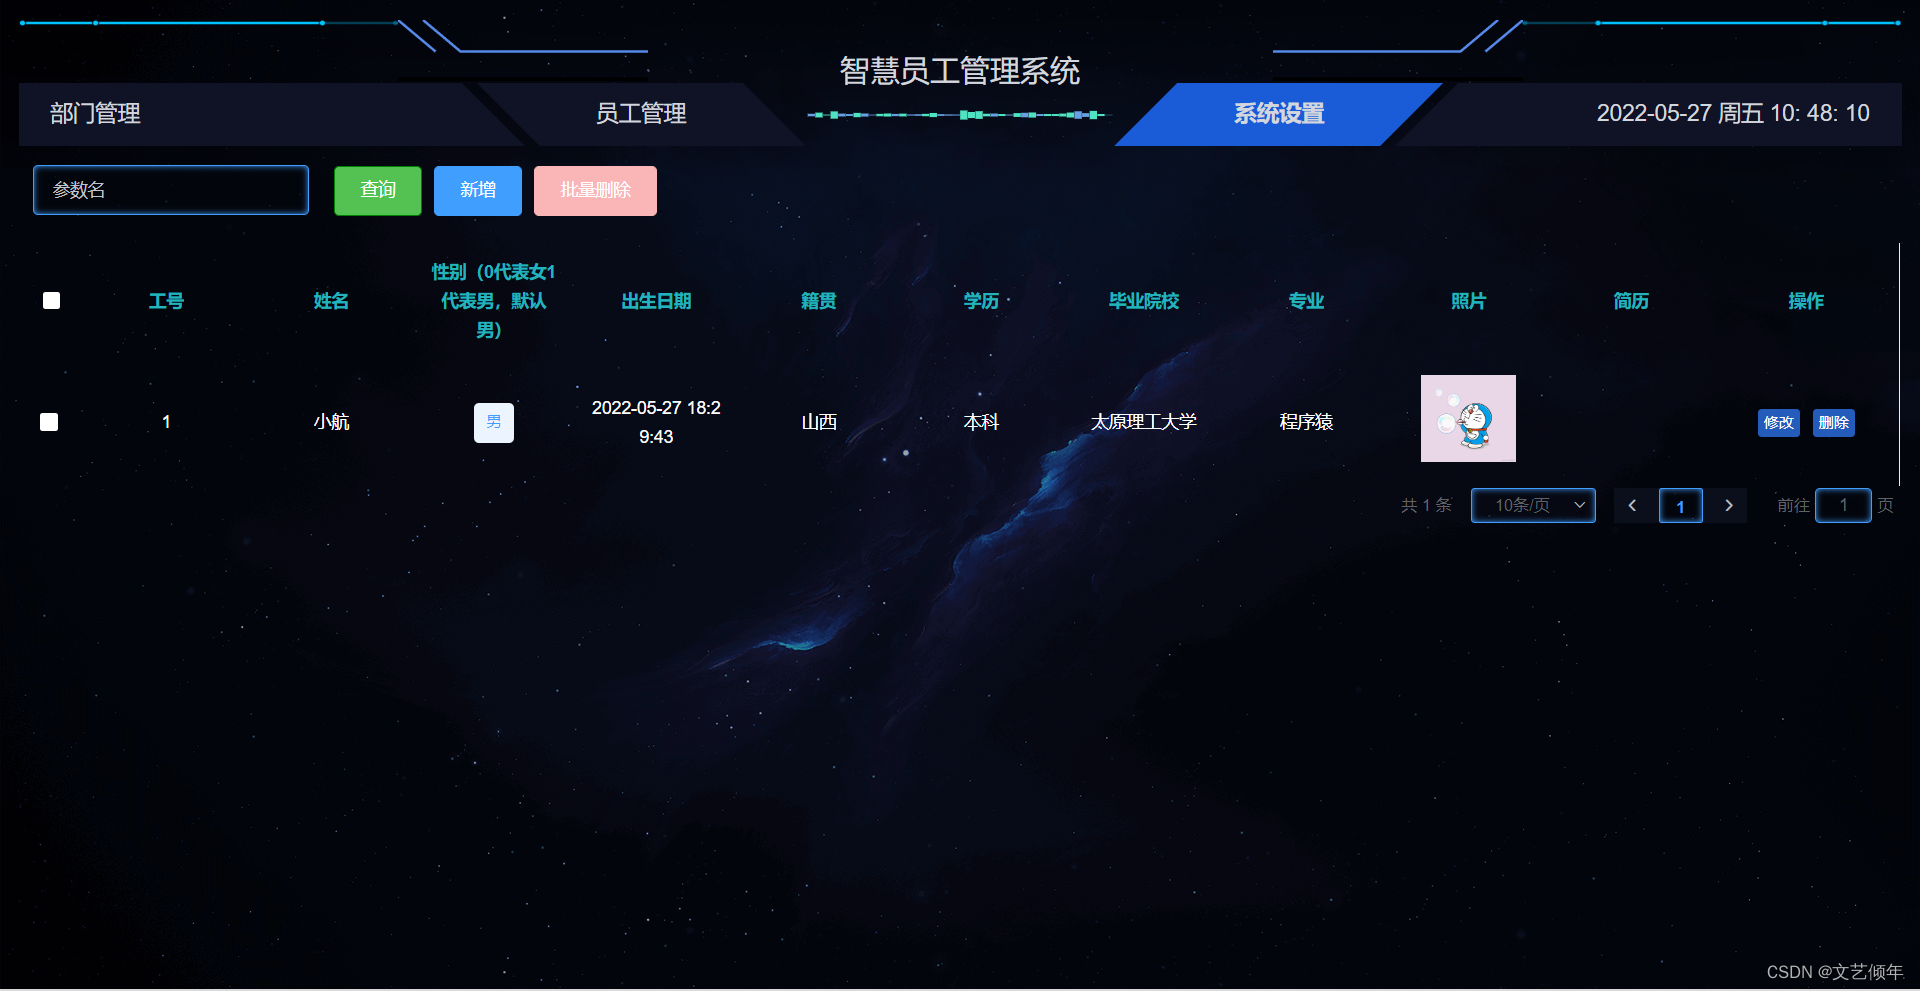
3. 图片点击预览
3.1 使用el-image标签
<el-table-column
        prop="photo"
        header-align="center"
        align="center"
        label="照片">
        <!-- 图片的显示 -->
          <template slot-scope="scope">
            <el-image
              class="my-img"
              style="width: 70px; height: 70px"
              ref="myImg"
              :src="scope.row.photo"
              :preview-src-list="srcList"
              @click="handlePriveImg(scope.row)"
            >
            </el-image>
          </template>
      </el-table-column>
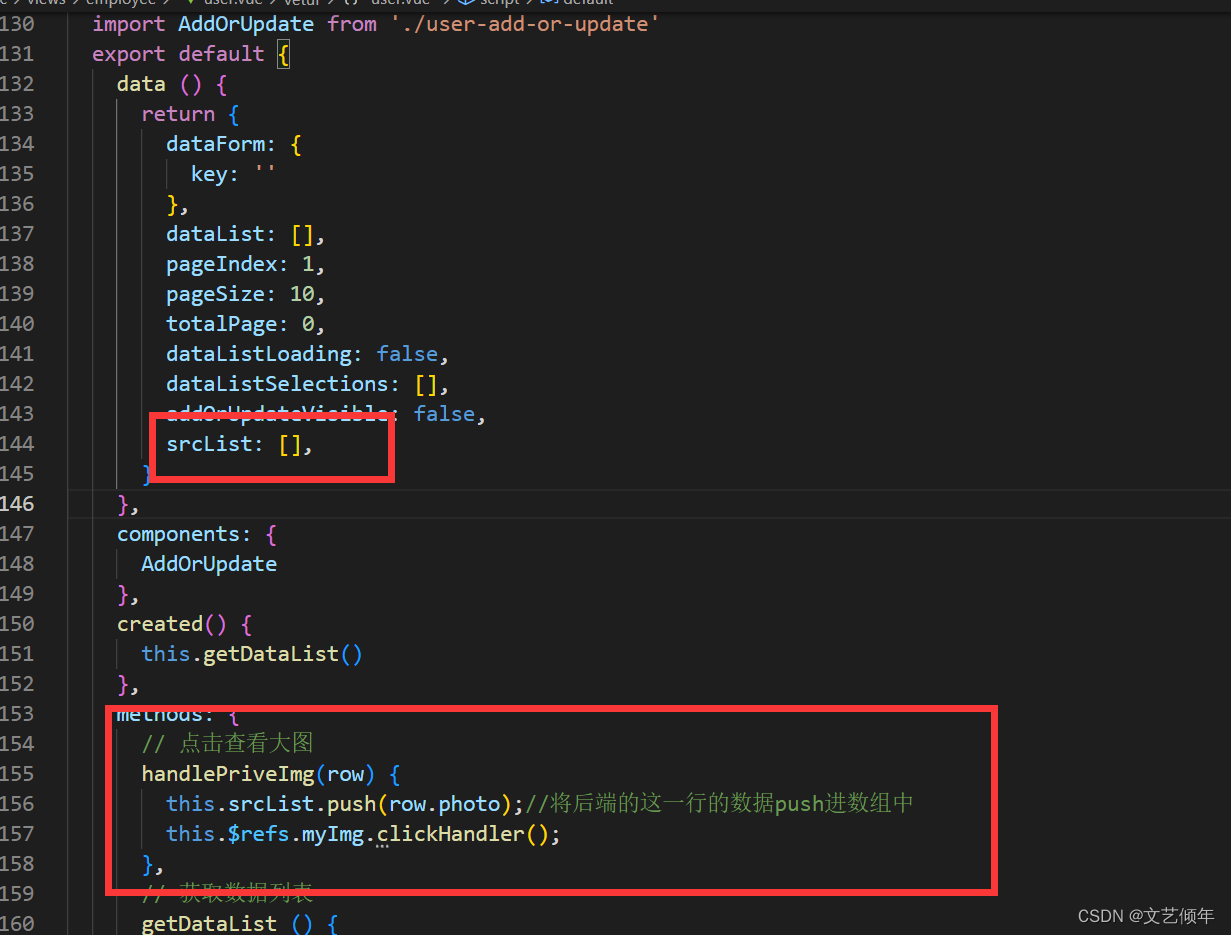
3.2 设置srcList数组,图片预览方法
3.3 添加样式
/*使鼠标悬浮在图片上时出现手的形状 */
.my-img:hover{
  cursor:pointer;
}
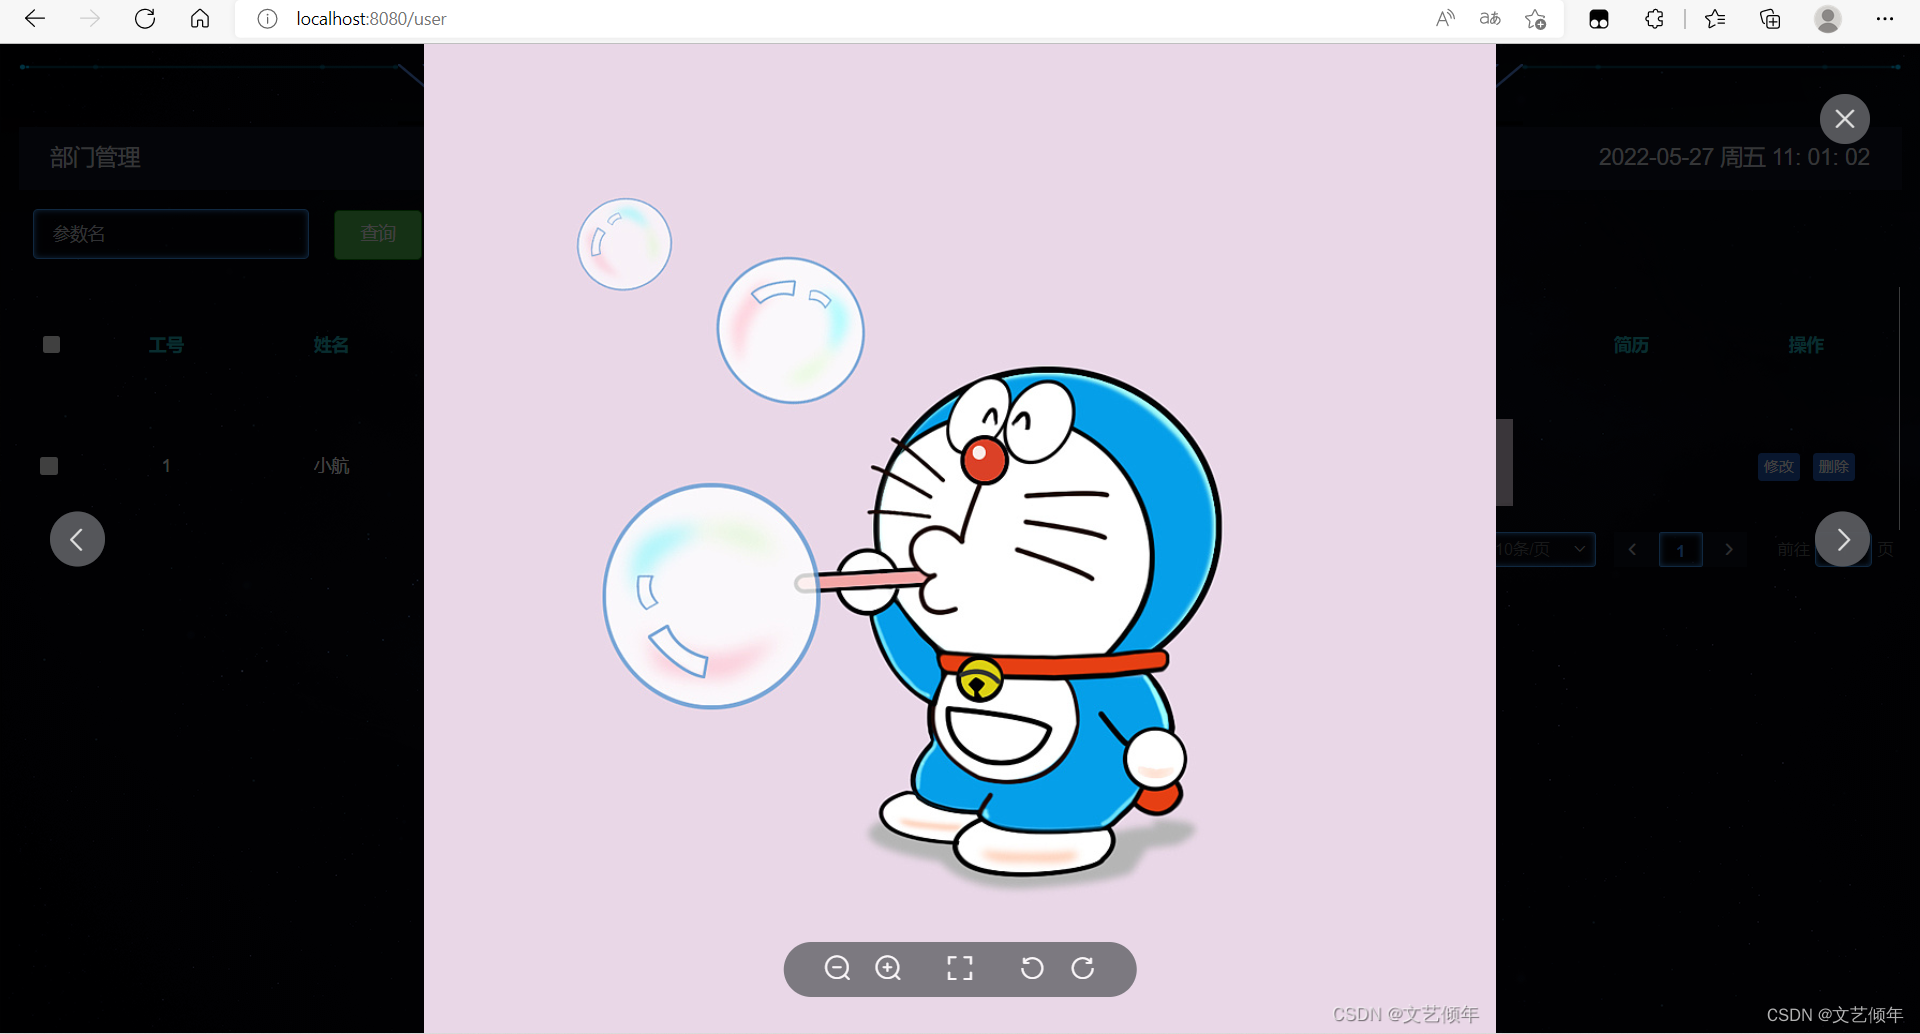
3.4 测试效果
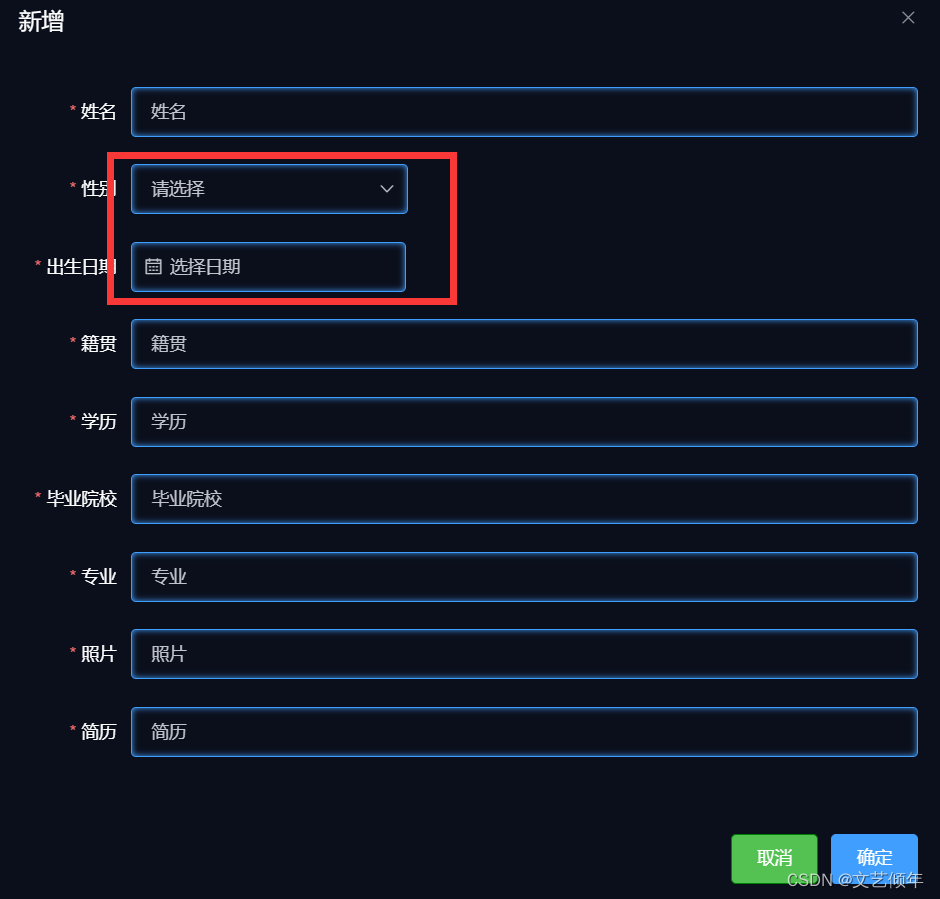
完善添加功能 + 图片裁剪功能:
// Select 选择器
<el-form-item label="性别" prop="sex">
        <el-select v-model="dataForm.sex" placeholder="请选择">
          <el-option v-for="item in options" :key="item.value" :label="item.label" :value="item.value">
          </el-option>
        </el-select>
      </el-form-item>
// 时间选择器
 <el-form-item label="出生日期" prop="birthday">
        <el-date-picker v-model="dataForm.birthday" type="date" placeholder="选择日期">
        </el-date-picker>
      </el-form-item>
安装vue-cropper
yarn add vue-cropper

import VueCropper from 'vue-cropper'
Vue.use(VueCropper)
自定义上传组件 ImageCropper
为了方便抒写路径,这里我们引入@别名,代替繁琐的…/…/
修改vue.config.js
const path = require('path')
const resolve = dir => {
  return path.join(__dirname, dir)
}
module.exports = {
  publicPath: './',
  chainWebpack: config => {
    config.resolve.alias
    .set("@", resolve("src"))
    .set("assets", resolve("src/assets"))
    .set("components", resolve("src/components"))
    .set("base", resolve("baseConfig"))
    .set("public", resolve("public"));
  },
}
1.上传按钮组件 index.vue
<template>
    <div>
        <div style="width: 100%">
            <el-upload :show-file-list="false" action :before-upload="beforeUpload" :http-request="handleChange">
                <img v-if="imageUrl" :src="imageUrl" class="avatar" />
                <el-button v-else size="small" type="primary">点击上传</el-button>
            </el-upload>
        </div>
        <!-- modal -->
        <cropper-modal ref="CropperModal" :imgType="imgType" @cropper-no="handleCropperClose" @cropper-ok="handleCropperSuccess"></cropper-modal>
    </div>
</template>
<script>
import CropperModal from './CropperModal'
export default {
  name: 'ImageCropper',
  components: {
    CropperModal
  },
  props: {
    //图片裁切配置
    options: {
      type: Object,
      default: function() {
        return {
          autoCrop: true, //是否默认生成截图框
          autoCropWidth: 180, //默认生成截图框宽度
          autoCropHeight: 180, //默认生成截图框高度
          fixedBox: false, //是否固定截图框大小 不允许改变
          previewsCircle: true, //预览图是否是原圆形
          title: '修改头像'
        }
      }
    },
    // 上传图片的大小,单位M
    imgSize: {
      type: Number,
      default: 2
    },
    //图片存储在oss上的上级目录名
    imgType: {
      type: String,
      default: ''
    },
    // 图片地址
    imageUrl: {
      type: String,
      default: ''
    }
  },
  data() {
    return {
      loading: false,
      isStopRun: false
    }
  },

  methods: {
    //从本地选择文件
    handleChange(info) {
      if (this.isStopRun) {
        return
      }
      this.loading = true
      const { options } = this
      console.log(info)
      this.getBase64(info.file, imageUrl => {
        const target = Object.assign({}, options, {
          img: imageUrl
        })
        this.$refs.CropperModal.edit(target)
      })
    },
    // 上传之前 格式与大小校验
    beforeUpload(file) {
      this.isStopRun = false
      var fileType = file.type
      if (fileType.indexOf('image') < 0) {
        this.$message.warning('请上传图片')
        this.isStopRun = true
        return false
      }
      const isJpgOrPng =
        file.type === 'image/jpeg' ||
        file.type === 'image/png' ||
        file.type === 'image/jpg'
      if (!isJpgOrPng) {
        this.$message.error('你上传图片格式不正确!')
        this.isStopRun = true
      }
      const isLtSize = file.size < this.imgSize * 1024 * 1024
      if (!isLtSize) {
        this.$message.error('图片大小不能超过' + this.imgSize + 'MB!')
        this.isStopRun = true
      }
      return isJpgOrPng && isLtSize
    },
    //获取服务器返回的地址
    handleCropperSuccess(data) {
      //将返回的数据回显
      this.loading = false
      this.$emit('crop-upload-success', data)
    },
    // 取消上传
    handleCropperClose() {
      this.loading = false
      this.$emit('crop-upload-close')
    },
    getBase64(img, callback) {
      const reader = new FileReader()
      reader.addEventListener('load', () => callback(reader.result))
      reader.readAsDataURL(img)
    }
  }
}
</script>

<style lang="scss" scoped>
::v-deep.avatar {
  width: 108px;
  height: 108px;
  display: block;
}
</style>
2.模态框 CropperModal.vue
<template>
    <el-dialog :visible.sync="visible" :title="options.title" :close-on-click-modal="false" width="800"
        @close="cancelHandel" append-to-body>
        <el-row>
            <el-col :xs="24" :md="12" :style="{ height: '350px' }">
                <vue-cropper ref="cropper" :img="options.img" :info="true" :autoCrop="options.autoCrop"
                    :autoCropWidth="options.autoCropWidth" :autoCropHeight="options.autoCropHeight"
                    :fixedBox="options.fixedBox" @realTime="realTime">
                </vue-cropper>
            </el-col>
            <el-col :xs="24" :md="12" :style="{ height: '350px' }">
                <div :class="options.previewsCircle ? 'avatar-upload-preview' : 'avatar-upload-preview_range'">
                    <img :src="previews.url" :style="previews.img" />
                </div>
            </el-col>
        </el-row>
        <template slot="footer">
            <el-button size="mini" @click="cancelHandel">取消</el-button>
            <el-button size="mini" type="primary" :loading="confirmLoading" @click="okHandel">保存</el-button>
        </template>
    </el-dialog>
</template>
<script>
import { UpPic } from './index'
export default {
    name: 'CropperModal',
    props: {
        //图片存储在oss上的上级目录名
        imgType: {
            type: String,
            default: ''
        }
    },
    data() {
        return {
            visible: false,
            img: null,
            confirmLoading: false,

            options: {
                img: '', //裁剪图片的地址
                autoCrop: true, //是否默认生成截图框
                autoCropWidth: 180, //默认生成截图框宽度
                autoCropHeight: 180, //默认生成截图框高度
                fixedBox: true, //是否固定截图框大小 不允许改变
                previewsCircle: true, //预览图是否是原圆形
                title: '修改头像'
            },
            previews: {},
            url: {
                upload: '/sys/common/saveToImgByStr'
            },
            centerDialogVisible: false
        }
    },

    methods: {
        edit(record) {
            const { options } = this
            this.visible = true
            this.options = Object.assign({}, options, record)
        },
        /**
         * 取消截图
         */
        cancelHandel() {
            this.confirmLoading = false
            this.visible = false
            this.$emit('cropper-no')
            this.centerDialogVisible = true
        },
        /**
         * 确认截图
         */
        okHandel() {
            const that = this
            that.confirmLoading = true
            // 获取截图的base64 数据
            this.$refs.cropper.getCropData(data => {
                UpPic({
                    img_type: this.imgType,
                    img_byte: data
                })
                    .then(res => {
                        that.$emit('cropper-ok', res)
                    })
                    .catch(err => {
                        that.$message.error(err)
                    })
                    .finally(() => {
                        that.cancelHandel()
                    })
            })
            this.centerDialogVisible = true
        },
        //移动框的事件
        realTime(data) {
            this.previews = data
        }
    }
}
</script>

<style lang="scss" scoped>
.avatar-upload-preview_range,
.avatar-upload-preview {
    position: absolute;
    top: 50%;
    transform: translate(50%, -50%);
    width: 180px;
    height: 180px;
    border-radius: 50%;
    box-shadow: 0 0 4px #ccc;
    overflow: hidden;

    img {
        background-color: red;
        height: 100%;
    }
}

.avatar-upload-preview_range {
    border-radius: 0;
}
</style>
3.ajax网络接口 index.js
import request from '@/utils/httpRequest'

const Api = {
    UpPic: '/getImage',
}

/**
 * 上传图片
 * @returns {*}
 */
export function UpPic() {
    return request({
        baseURL: 'https://www.fastmock.site/mock/f6273fce31c98c4d64fd82d91784712f/api',
        url: Api.UpPic,
        method: 'get',
    })
}
4.使用组件
<template>
  <el-dialog :title="!dataForm.id ? '新增' : '修改'" :close-on-click-modal="false" :visible.sync="visible"
    append-to-body>
    <el-form :model="dataForm" :rules="dataRule" ref="dataForm" @keyup.enter.native="dataFormSubmit()"
      label-width="80px">
      <el-form-item label="姓名" prop="name">
        <el-input v-model="dataForm.name" placeholder="姓名"></el-input>
      </el-form-item>
      <el-form-item label="性别" prop="sex">
        <el-select v-model="dataForm.sex" placeholder="请选择">
          <el-option v-for="item in options" :key="item.value" :label="item.label" :value="item.value">
          </el-option>
        </el-select>
      </el-form-item>
      <el-form-item label="出生日期" prop="birthday">
        <el-date-picker v-model="dataForm.birthday" type="date" placeholder="选择日期">
        </el-date-picker>
      </el-form-item>
      <el-form-item label="籍贯" prop="birth">
        <el-input v-model="dataForm.birth" placeholder="籍贯"></el-input>
      </el-form-item>
      <el-form-item label="学历" prop="education">
        <el-input v-model="dataForm.education" placeholder="学历"></el-input>
      </el-form-item>
      <el-form-item label="毕业院校" prop="school">
        <el-input v-model="dataForm.school" placeholder="毕业院校"></el-input>
      </el-form-item>
      <el-form-item label="专业" prop="major">
        <el-input v-model="dataForm.major" placeholder="专业"></el-input>
      </el-form-item>
      <el-form-item label="照片" prop="photo">
        <image-cropper :options="cropperOptions" :imgSize="3" :imgType="imgType" :imageUrl="dataForm.photo"
          @crop-upload-close="cropClose" @crop-upload-success="cropSuccess" />
      </el-form-item>
      <el-form-item label="简历" prop="resume">
        <el-input v-model="dataForm.resume" placeholder="简历"></el-input>
      </el-form-item>
    </el-form>
    <span slot="footer" class="dialog-footer">
      <el-button @click="visible = false">取消</el-button>
      <el-button type="primary" @click="dataFormSubmit()">确定</el-button>
    </span>
  </el-dialog>
</template>

<script>
import ImageCropper from '@/components/ImageCropper/index.vue'
export default {
  components: { ImageCropper },
  data() {
    return {
      visible: false,
      dataForm: {
        id: 0,
        name: '',
        sex: '',
        birthday: '',
        birth: '',
        education: '',
        school: '',
        major: '',
        photo: '',  //上传图片所得到的地址
        resume: ''
      },
      options: [{
        value: '1',
        label: '男'
      }, {
        value: '0',
        label: '女'
      }],
      dataRule: {
        name: [
          { required: true, message: '姓名不能为空', trigger: 'blur' }
        ],
        sex: [
          { required: true, message: '性别(0代表女1代表男,默认男)不能为空', trigger: 'blur' }
        ],
        birthday: [
          { required: true, message: '出生日期不能为空', trigger: 'blur' }
        ],
        birth: [
          { required: true, message: '籍贯不能为空', trigger: 'blur' }
        ],
        education: [
          { required: true, message: '学历不能为空', trigger: 'blur' }
        ],
        school: [
          { required: true, message: '毕业院校不能为空', trigger: 'blur' }
        ],
        major: [
          { required: true, message: '专业不能为空', trigger: 'blur' }
        ],
        photo: [
          { required: true, message: '照片不能为空', trigger: 'blur' }
        ],
        resume: [
          { required: true, message: '简历不能为空', trigger: 'blur' }
        ]
      },
      cropperOptions: {
        autoCrop: true, //是否默认生成截图框
        autoCropWidth: 200, //默认生成截图框宽度
        autoCropHeight: 200, //默认生成截图框高度
        fixedBox: false, //是否固定截图框大小 不允许改变
        previewsCircle: false, //预览图是否是圆形
        title: '上传图片' //模态框上显示的标题
      },
      imgType: 'testUp', //图片存储在oss上的上级目录名
    }
  },
  methods: {
    //上传操作结束
    cropClose() {
      console.log('上传操作结束')
    },
    //上传图片成功
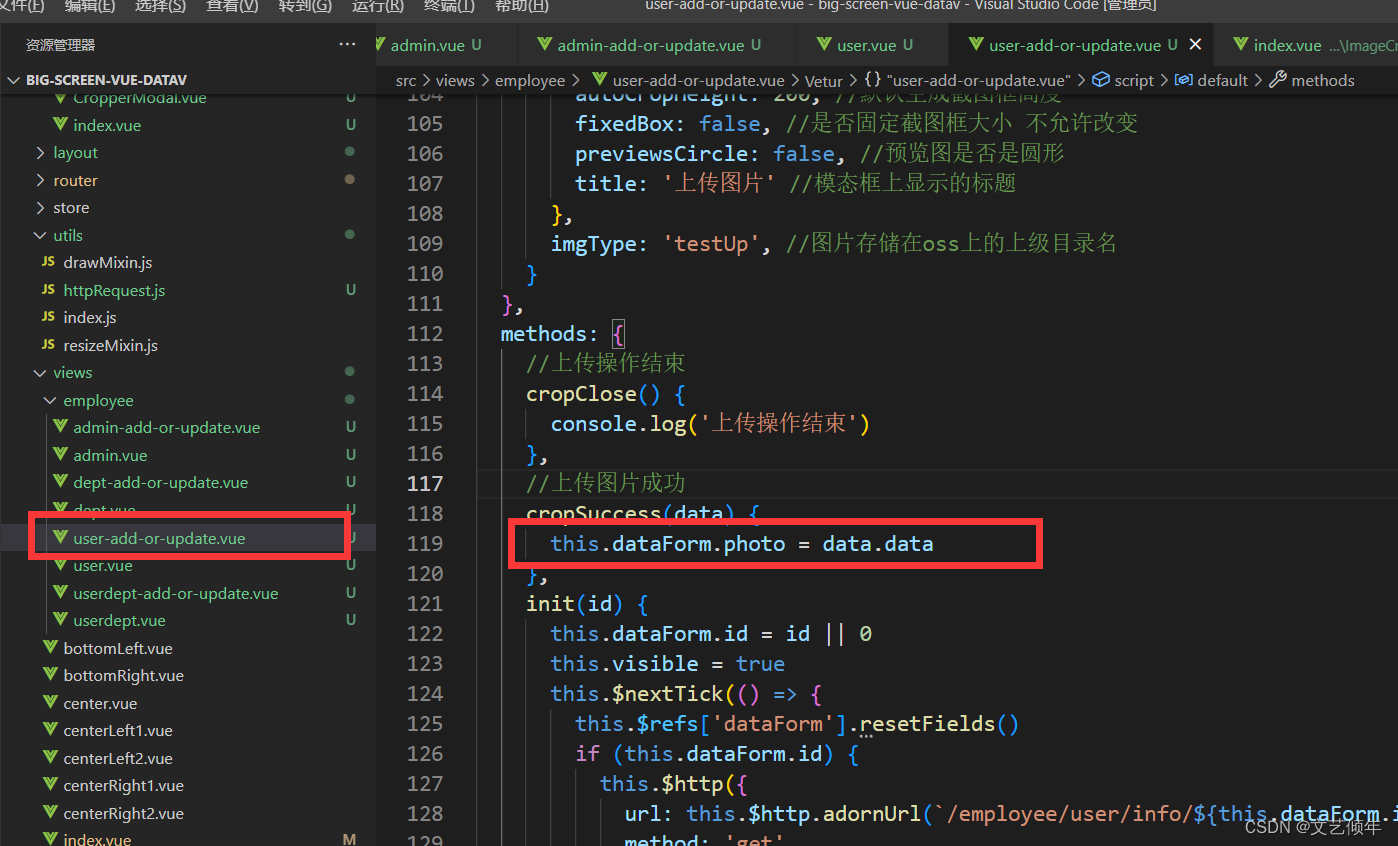
    cropSuccess(data) {
      this.dataForm.photo = data.data.avatar
      console.log(this.dataForm.photo)
    },
    init(id) {
      this.dataForm.id = id || 0
      this.visible = true
      this.$nextTick(() => {
        this.$refs['dataForm'].resetFields()
        if (this.dataForm.id) {
          this.$http({
            url: this.$http.adornUrl(`/employee/user/info/${this.dataForm.id}`),
            method: 'get',
            params: this.$http.adornParams()
          }).then(({ data }) => {
            if (data && data.code === 200) {
              this.dataForm.name = data.user.name
              this.dataForm.sex = data.user.sex
              this.dataForm.birthday = data.user.birthday
              this.dataForm.birth = data.user.birth
              this.dataForm.education = data.user.education
              this.dataForm.school = data.user.school
              this.dataForm.major = data.user.major
              this.dataForm.photo = data.user.photo
              this.dataForm.resume = data.user.resume
            }
          })
        }
      })
    },
    // 表单提交
    dataFormSubmit() {
      this.$refs['dataForm'].validate((valid) => {
        if (valid) {
          this.$http({
            url: this.$http.adornUrl(`/employee/user/${!this.dataForm.id ? 'save' : 'update'}`),
            method: 'post',
            data: this.$http.adornData({
              'id': this.dataForm.id || undefined,
              'name': this.dataForm.name,
              'sex': this.dataForm.sex,
              'birthday': this.dataForm.birthday,
              'birth': this.dataForm.birth,
              'education': this.dataForm.education,
              'school': this.dataForm.school,
              'major': this.dataForm.major,
              'photo': this.dataForm.photo,
              'resume': this.dataForm.resume
            })
          }).then(({ data }) => {
            if (data && data.code === 200) {
              this.$message({
                message: '操作成功',
                type: 'success',
                duration: 1500,
                onClose: () => {
                  this.visible = false
                  this.$emit('refreshDataList')
                }
              })
            } else {
              this.$message.error(data.msg)
            }
          })
        }
      })
    }
  }
}
</script>
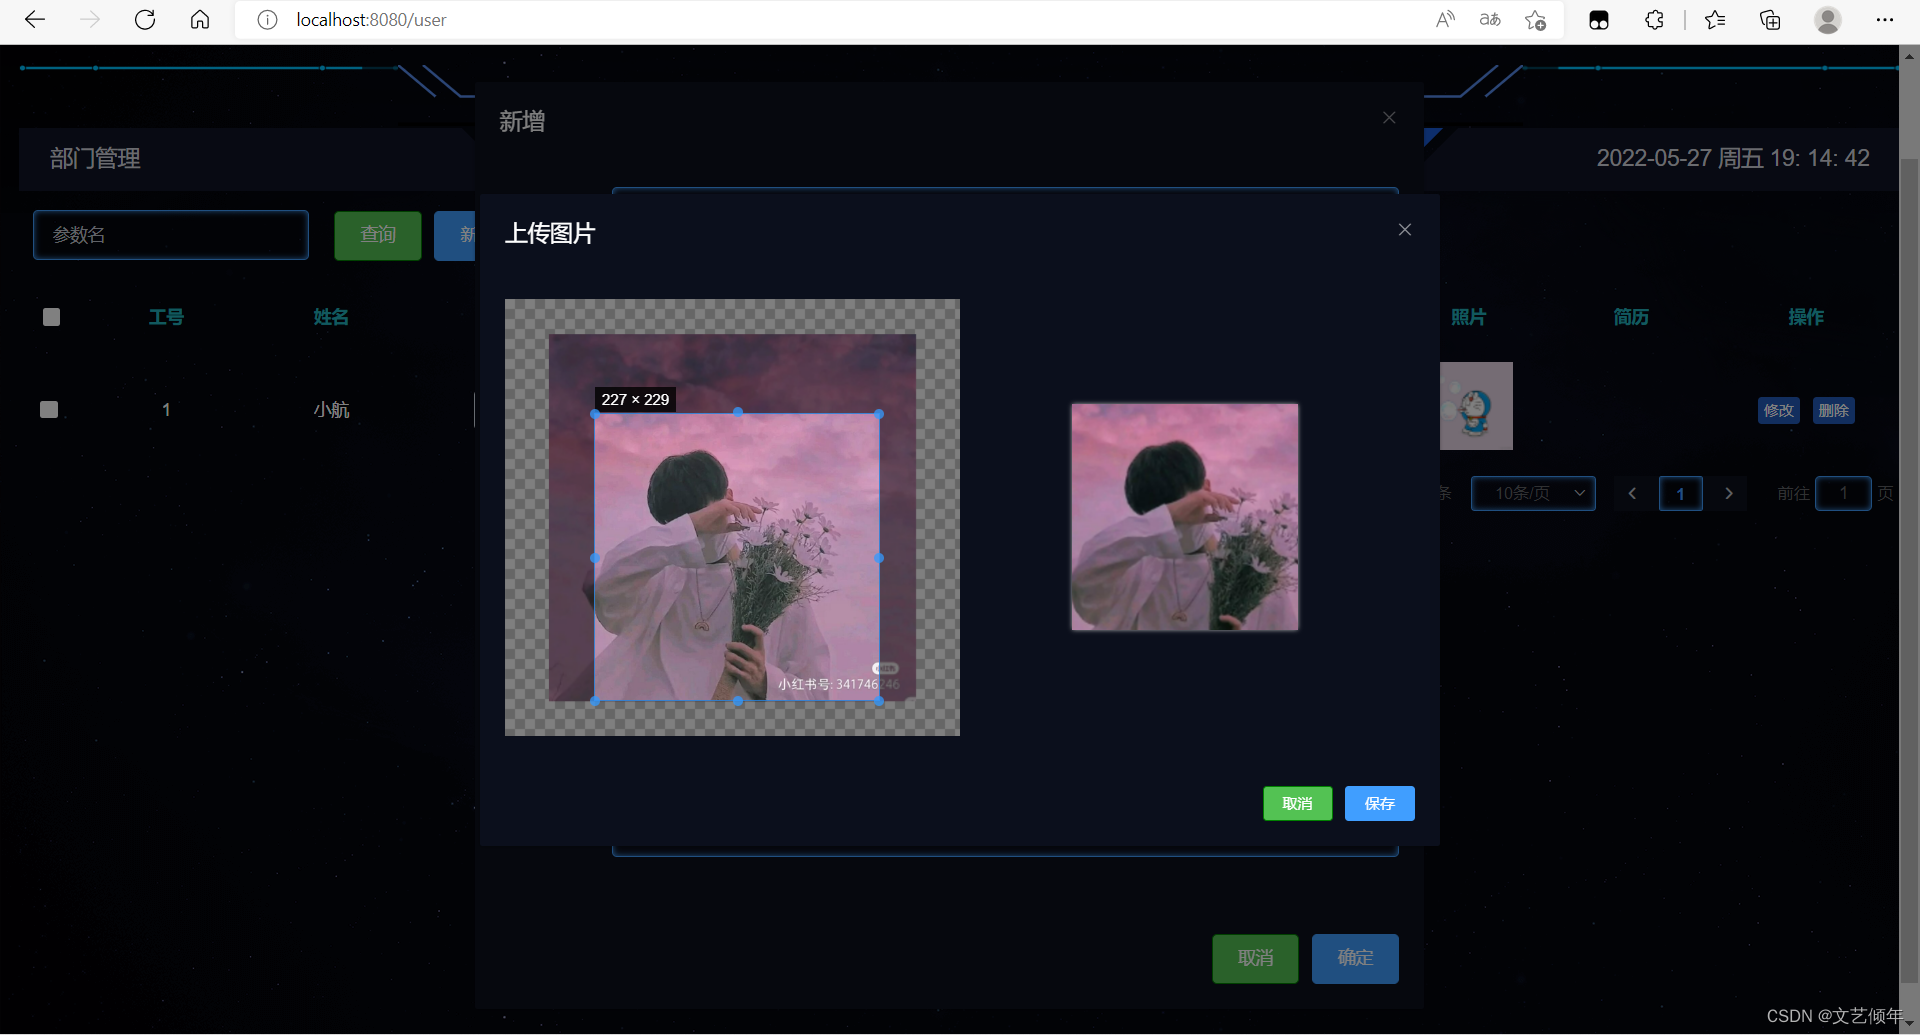
这里由于是多层弹框,有多层遮罩层,所以我们 el-dialog 添加属性:append-to-body
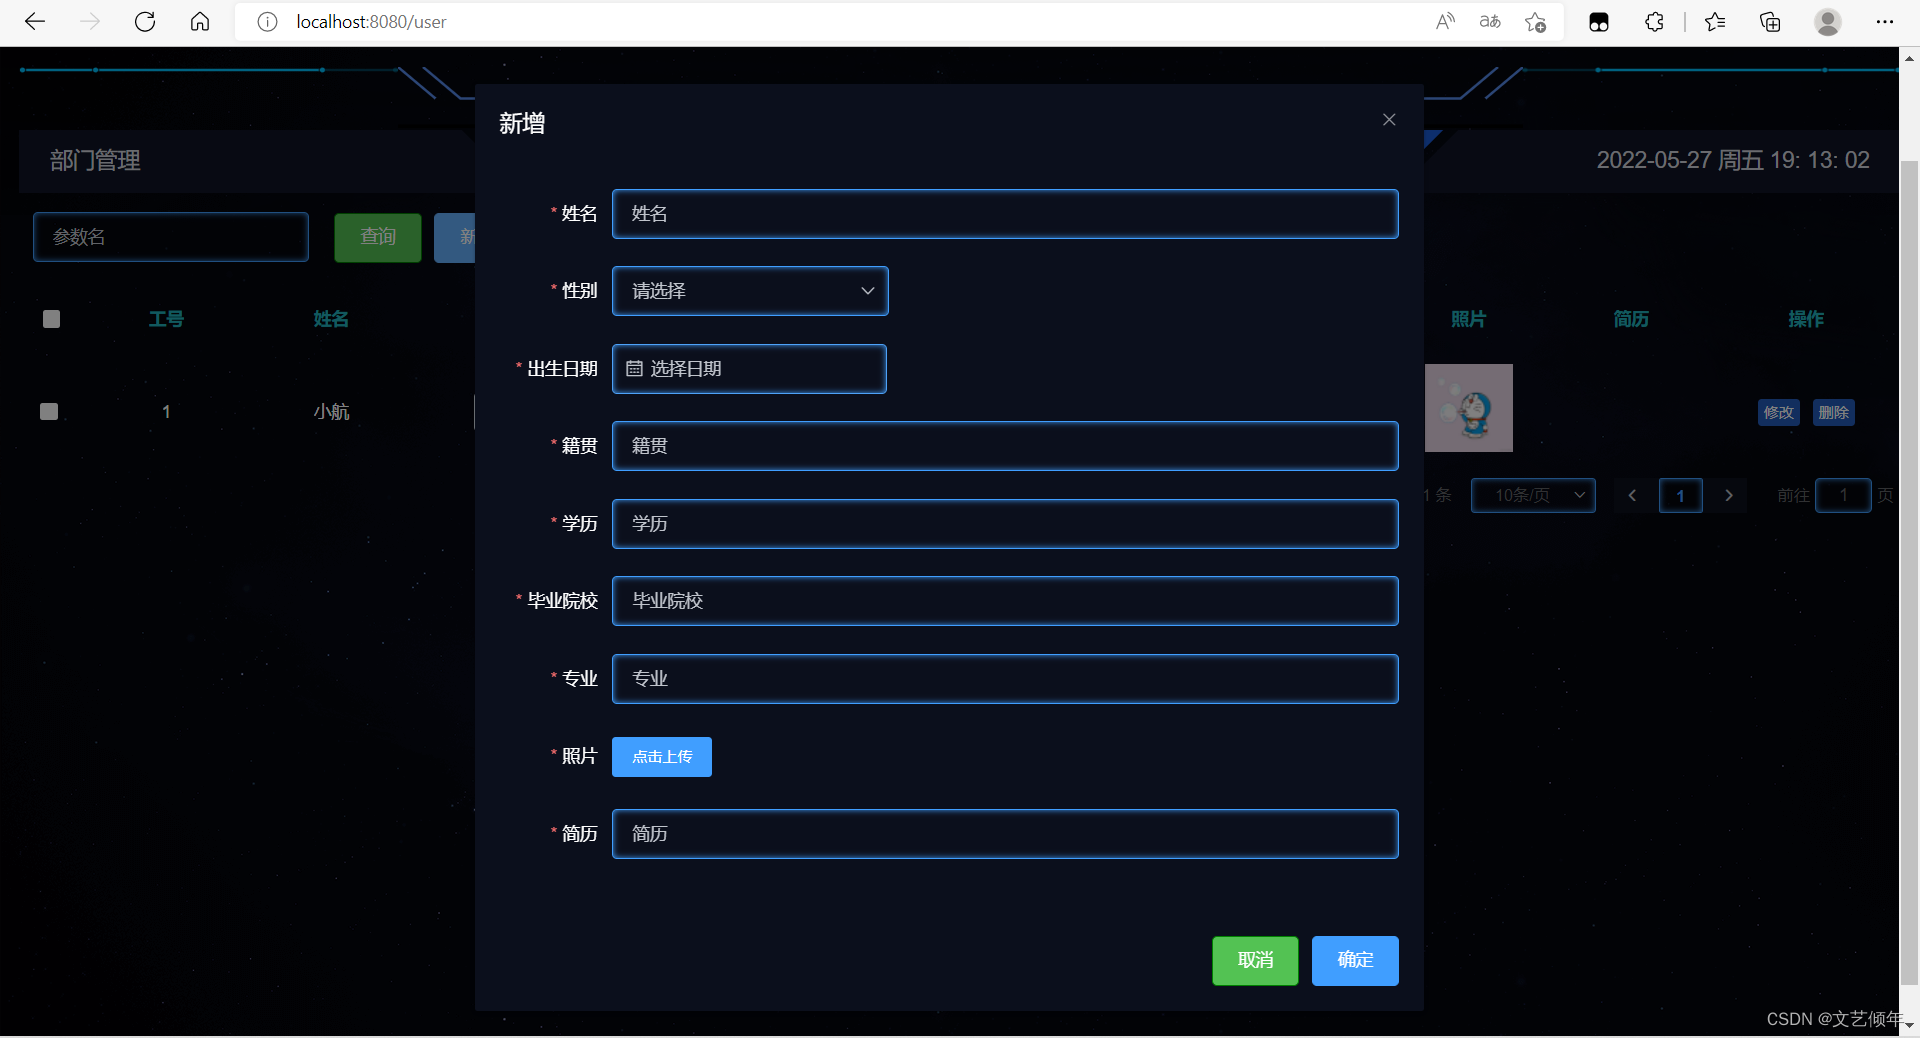
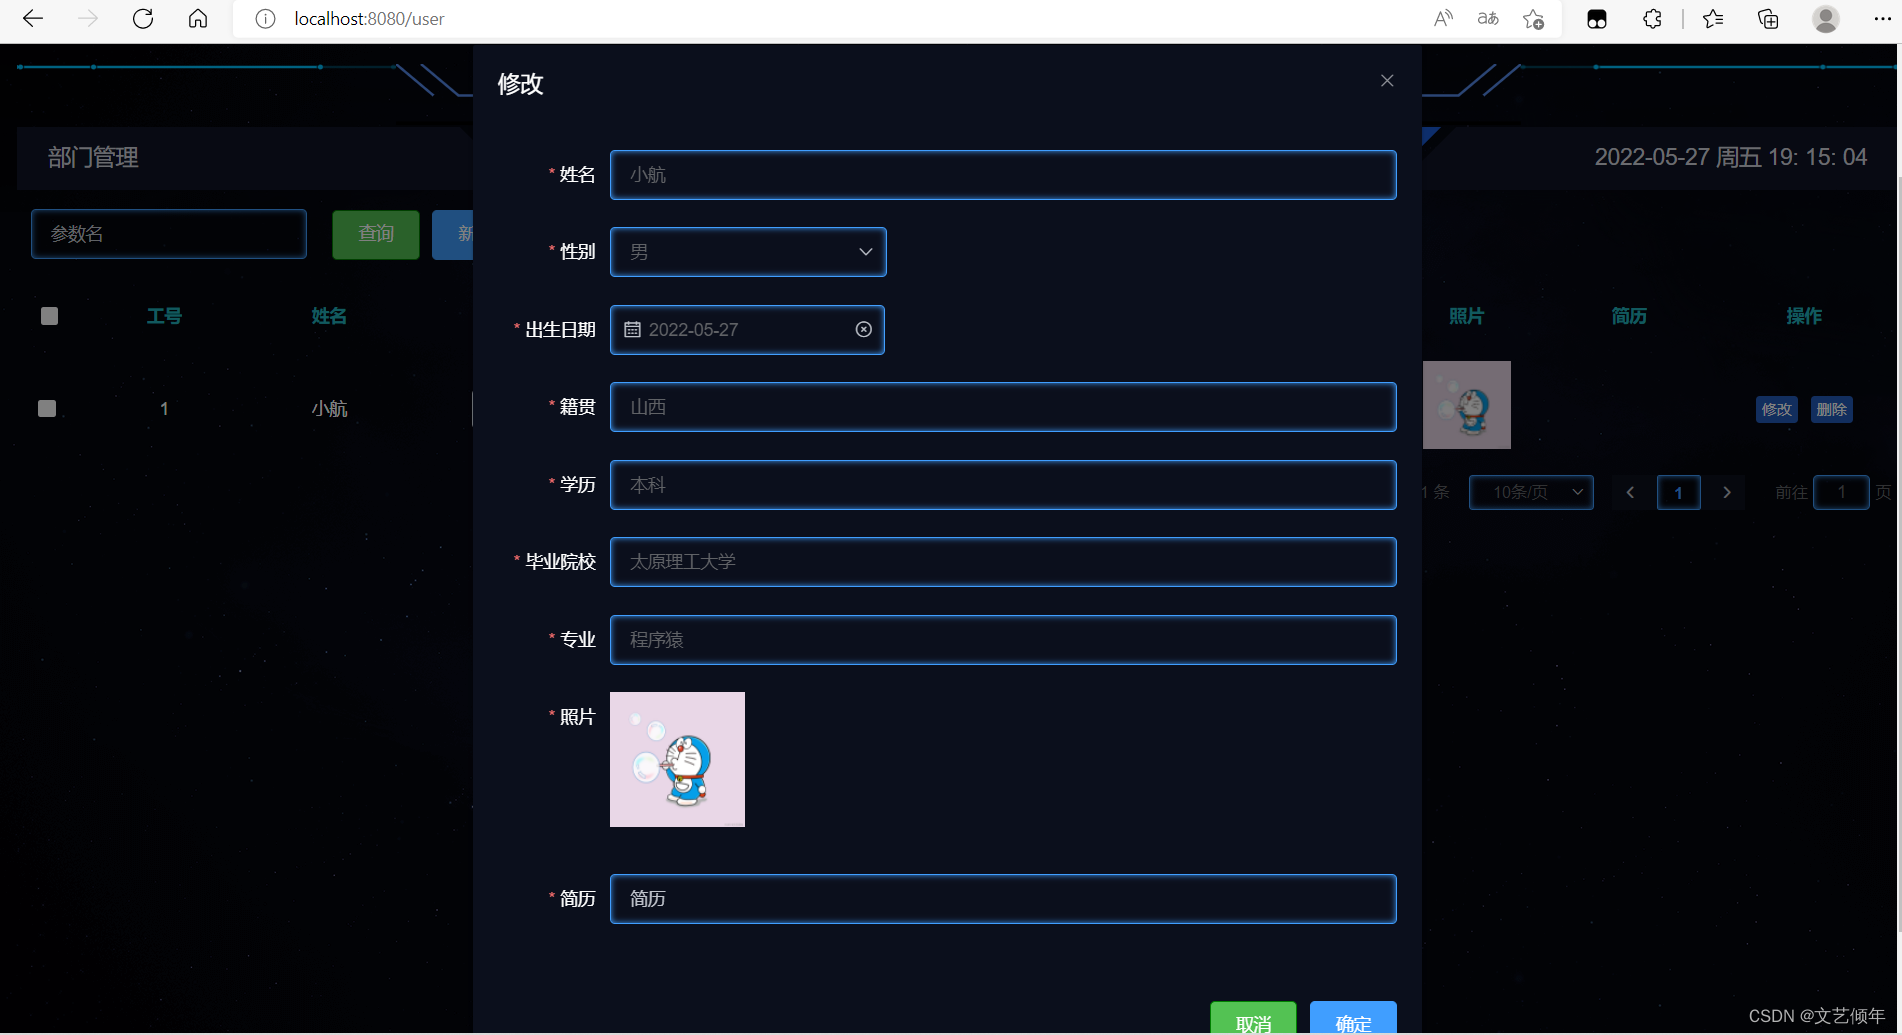
效果:
实现文件上传、下载(50min)
这里我们直接给代码(小航这里采用的是读取配置文件的方式):
1.设置配置文件
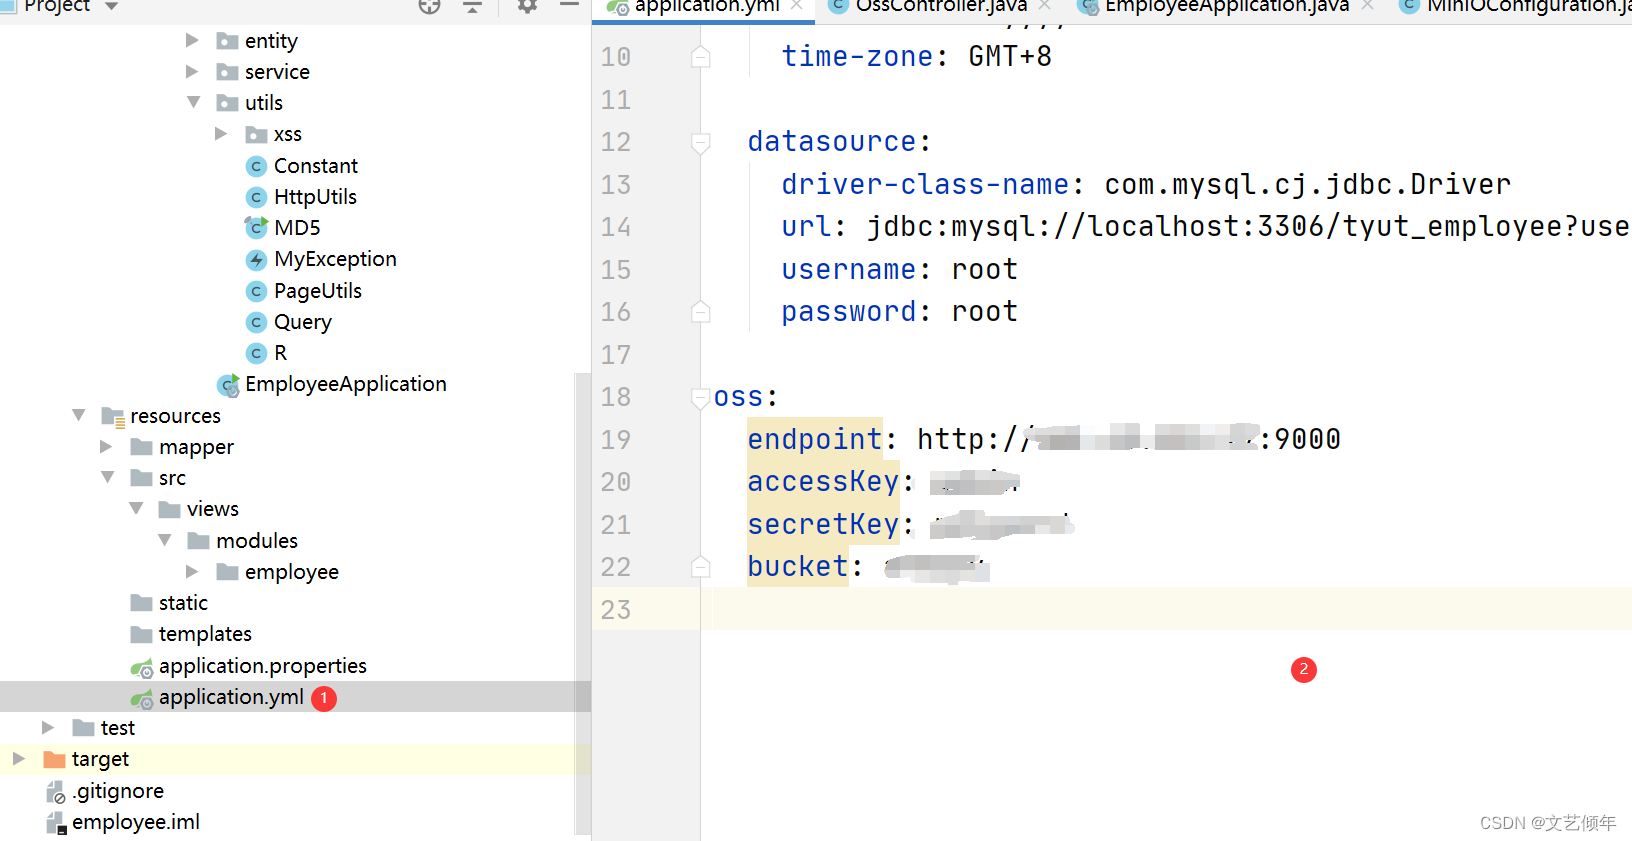
oss:
  endpoint:
  accessKey:
  secretKey:
  bucket:
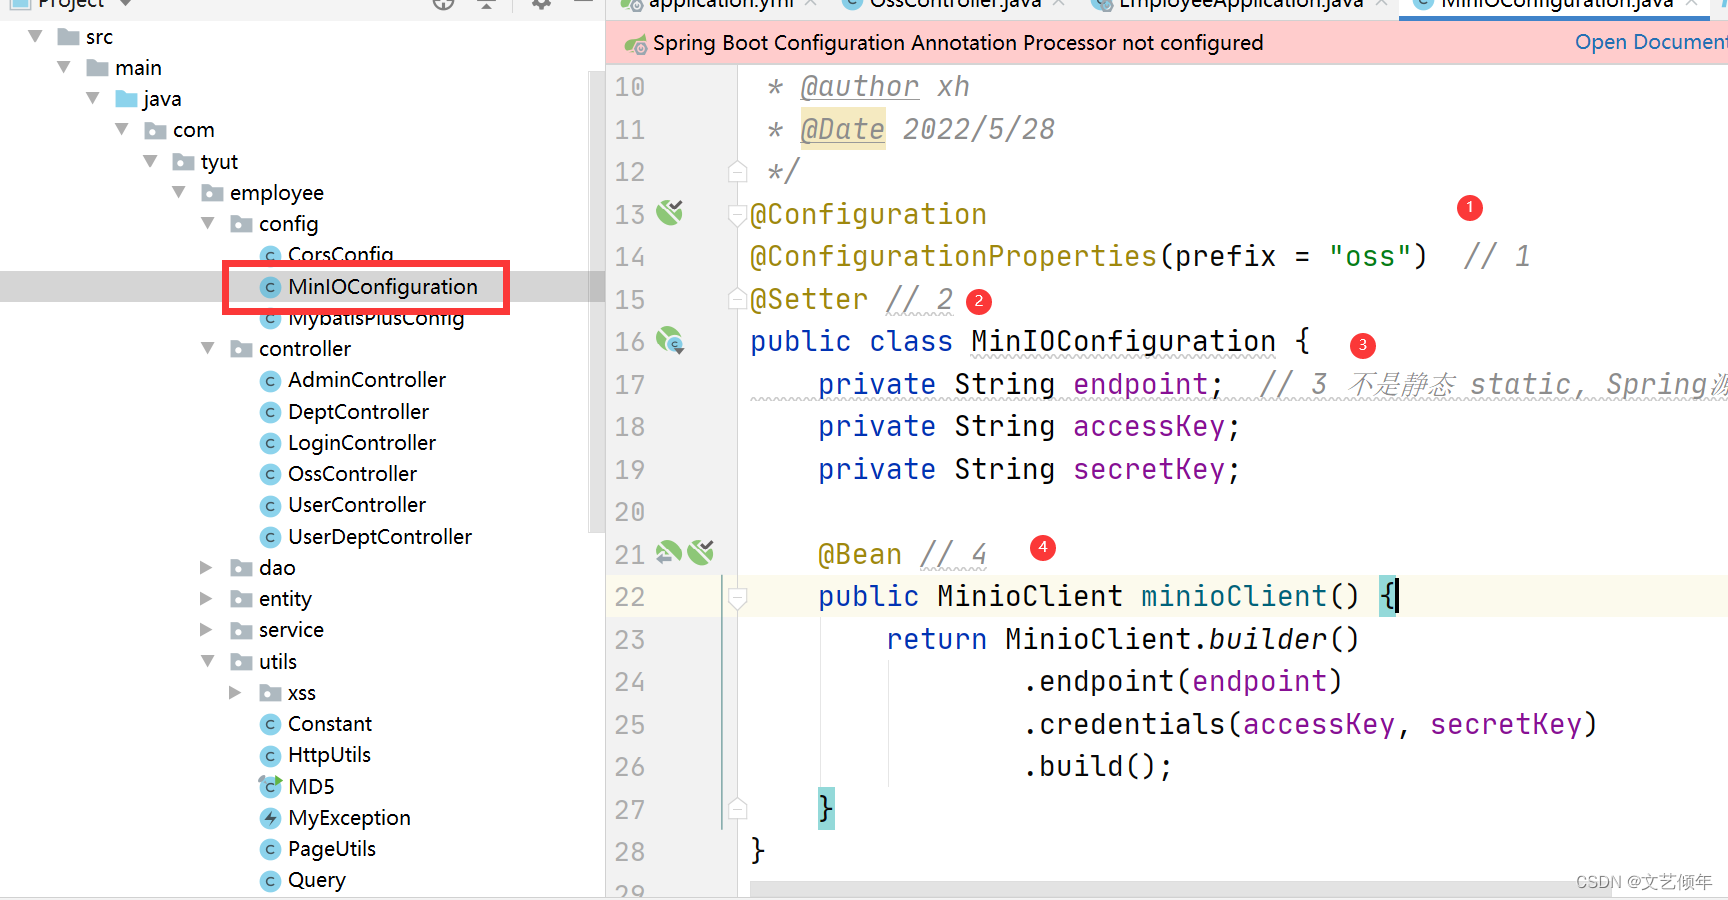
2.MinIOConfiguration(使用@ConfigurationProperties注解(松散绑定))
@Configuration
@ConfigurationProperties(prefix = "oss")  // 1
@Setter // 2
public class MinIOConfiguration {
    private String endpoint;  // 3 不是静态 static, Spring源码过滤掉了
    private String accessKey;
    private String secretKey;

    @Bean // 4
    public MinioClient minioClient() {
        return MinioClient.builder()
                .endpoint(endpoint)
                .credentials(accessKey, secretKey)
                .build();
    }
3.OssController
package com.tyut.employee.controller;

import io.minio.MinioClient;
import io.minio.PutObjectArgs;

import lombok.extern.slf4j.Slf4j;
import org.springframework.beans.factory.annotation.Autowired;

import org.springframework.beans.factory.annotation.Value;
import org.springframework.web.bind.annotation.PostMapping;

import org.springframework.web.bind.annotation.RequestParam;
import org.springframework.web.bind.annotation.RestController;
import org.springframework.web.multipart.MultipartFile;

import java.util.UUID;

/**
 * @author xh
 * @Date 2022/5/28
 */
@RestController
public class OssController {
    @Autowired
    MinioClient minioClient;

    @Value("${oss.bucket}")
    String bucket;
    @Value("${oss.endpoint}")
    String endpoint;

    @PostMapping("/upload")
    public String upload(@RequestParam("file") MultipartFile file) {
        // 上传
        String path = UUID.randomUUID().toString(); // 文件名,使用 UUID 随机
        try {
            minioClient.putObject(PutObjectArgs.builder()
                    .bucket(bucket) // 存储桶
                    .object(path) // 文件名
                    .stream(file.getInputStream(), file.getSize(), -1) // 文件内容
                    .contentType(file.getContentType()) // 文件类型
                    .build());
        } catch (Exception e) {
            e.printStackTrace();
        }
        // 拼接路径
        return String.format("%s/%s/%s", endpoint, bucket, path);
    }
}
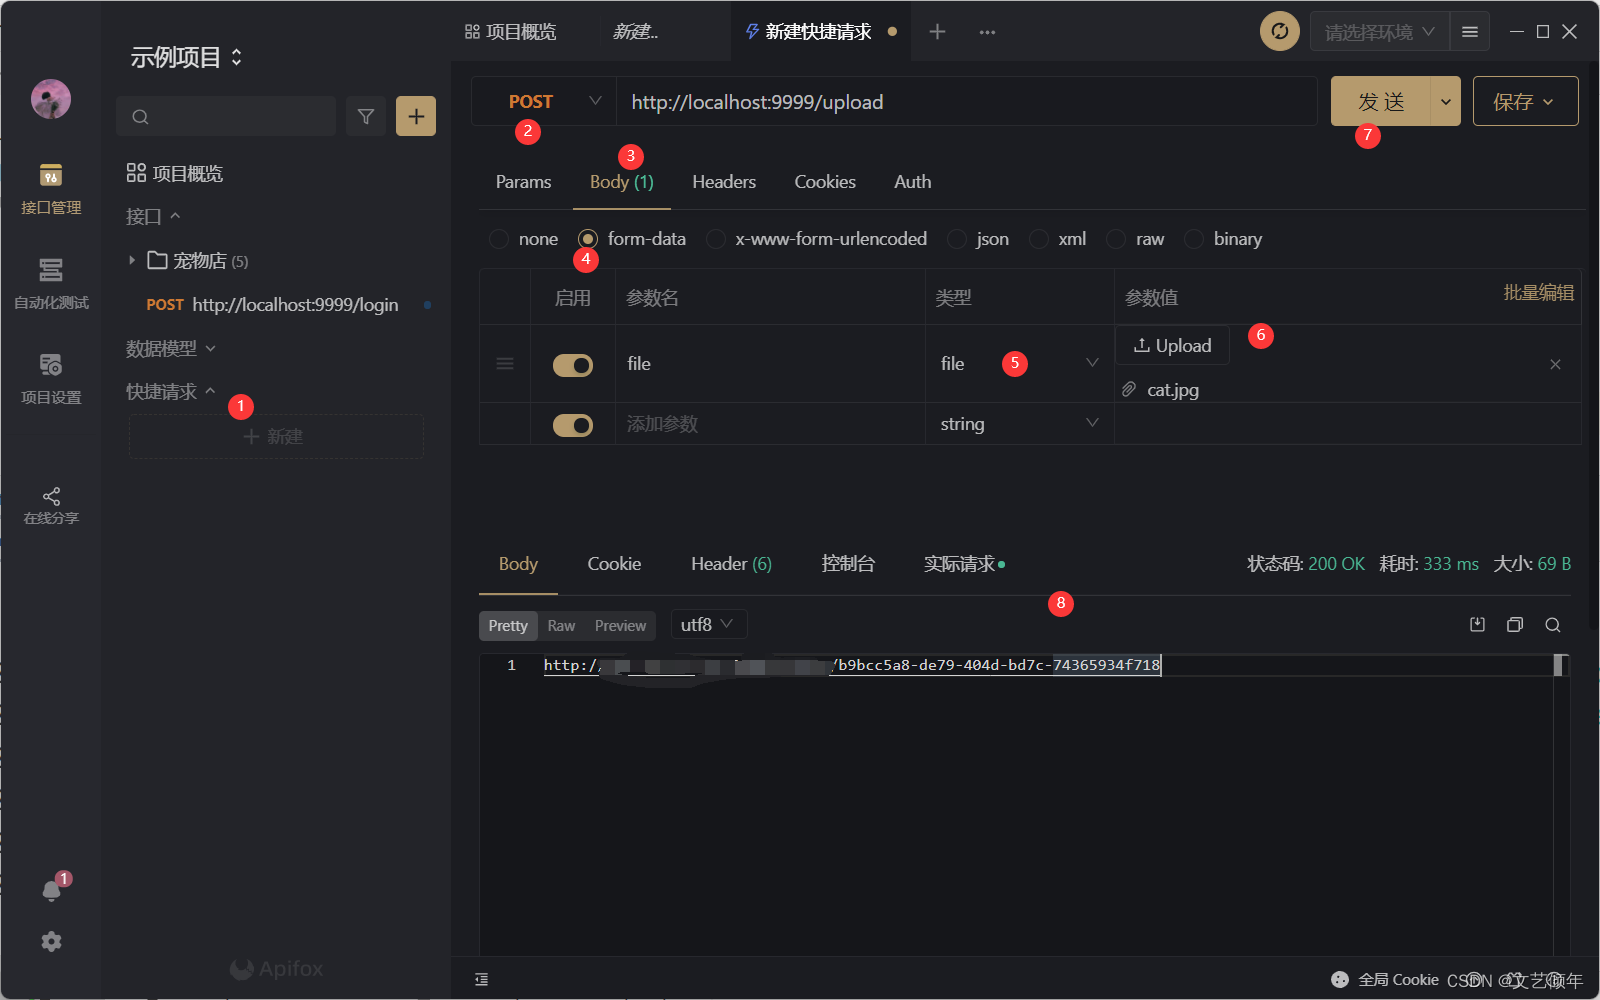
4.使用ApiFox测试
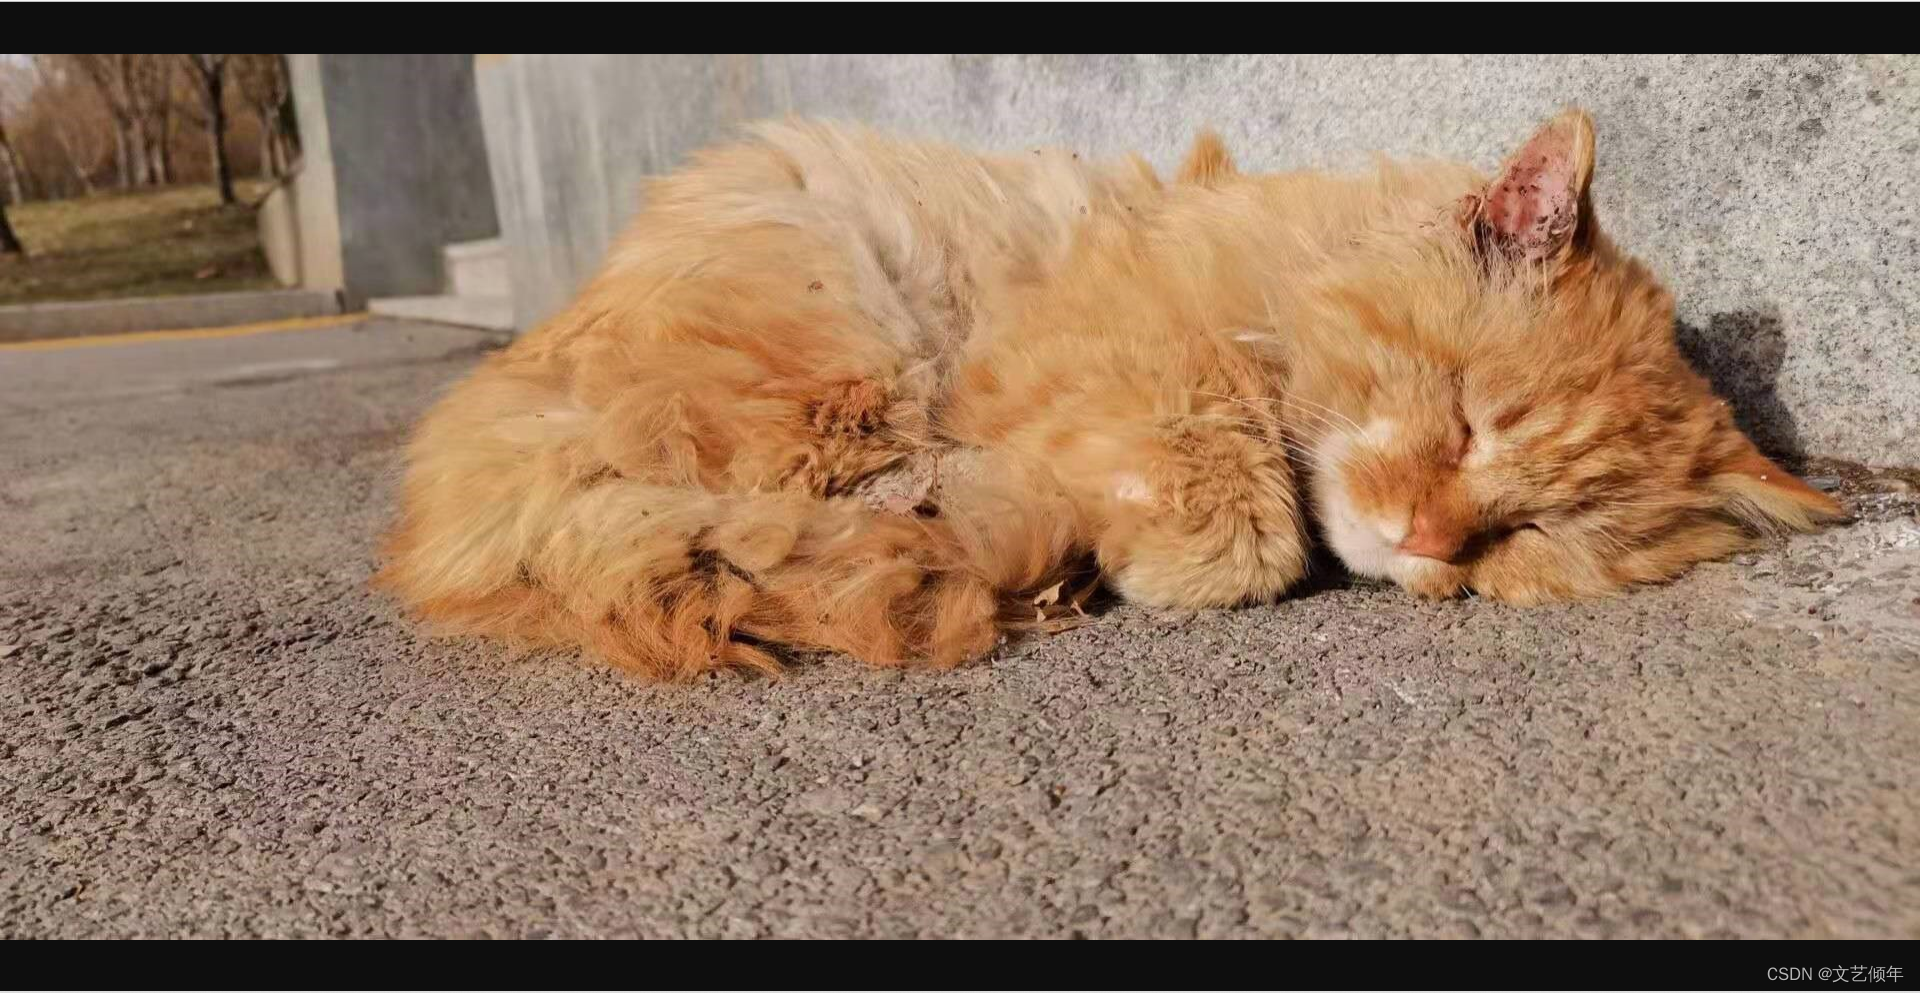
5.查看图片(是偷偷睡觉的小橘猫)
对接前端:(这里遇到了一堆堆bug,耽搁了时间)
确认截图后我们对base64解码,传到后端
// 获取截图的base64 数据
            this.$refs.cropper.getCropData(imgData => {
                let formData = new FormData()
                formData.append('file', this.base64toFile(imgData))
                this.$http({
                    url: this.$http.adornUrl(`/upload`),
                    method: 'post',
                    data: formData,
                    headers: {
                        'Content-Type': 'multipart/form-data'
                    },
                })
                    .then(res => {
                        that.$emit('cropper-ok', res)
                    })
                    .catch(err => {
                        that.$message.error(err)
                    })
                    .finally(() => {
                        that.cancelHandel()
                    })
            })


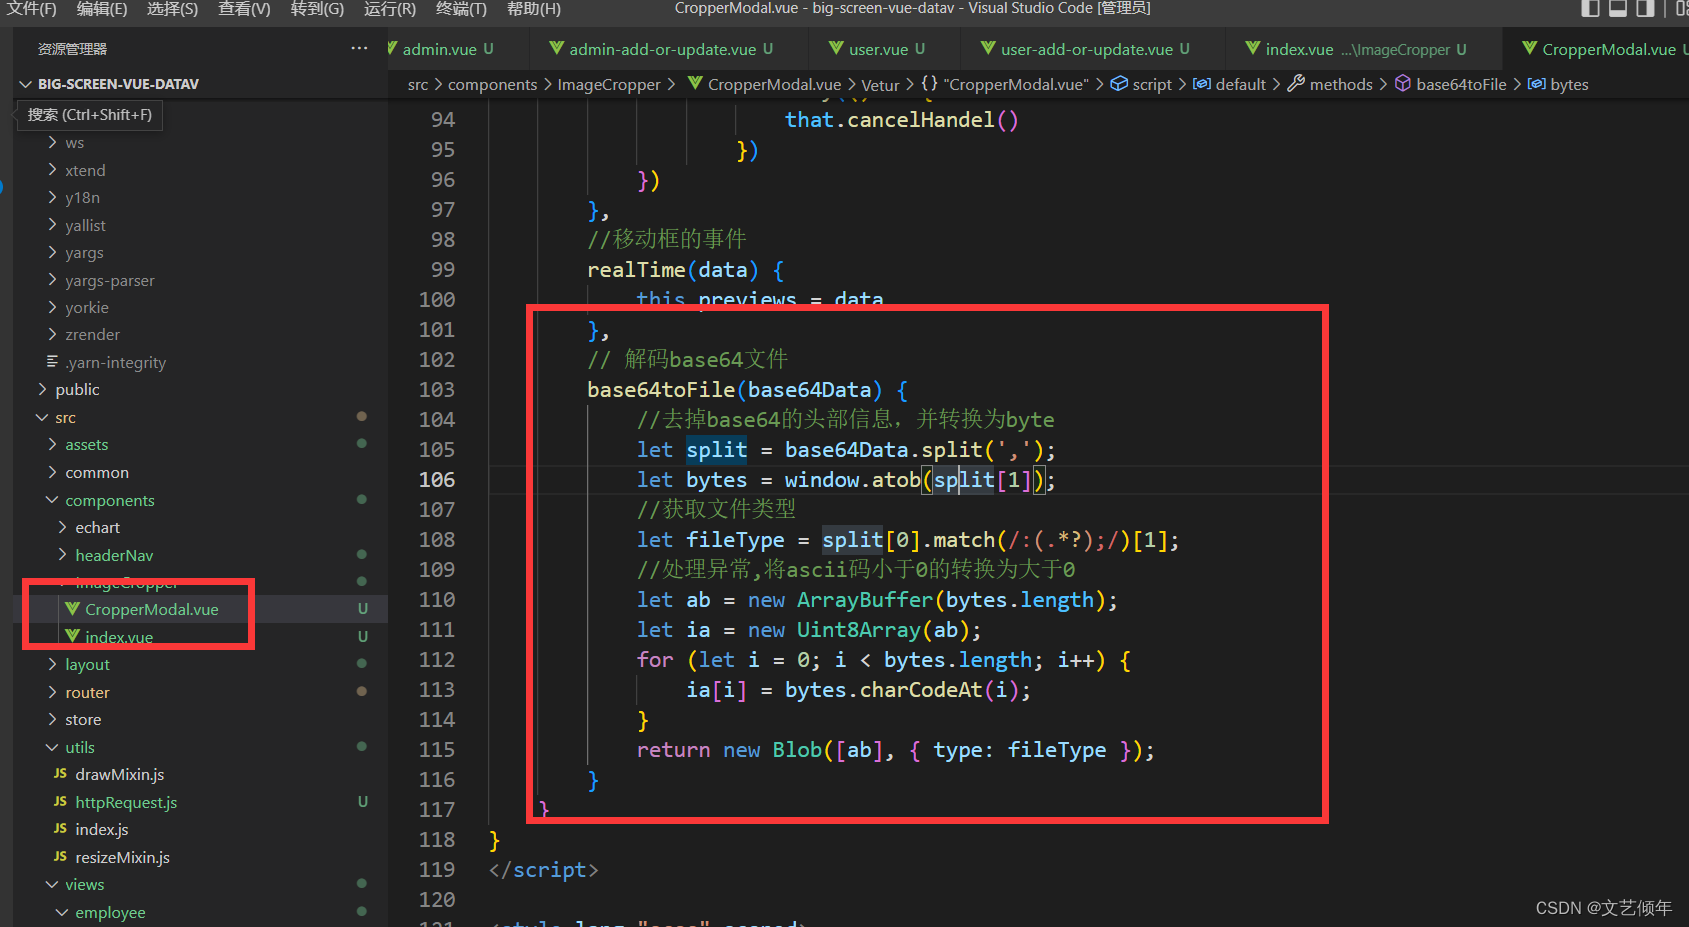
// 解码base64文件
        base64toFile(base64Data) {
            //去掉base64的头部信息,并转换为byte
            let split = base64Data.split(',');
            let bytes = window.atob(split[1]);
            //获取文件类型
            let fileType = split[0].match(/:(.*?);/)[1];
            //处理异常,将ascii码小于0的转换为大于0
            let ab = new ArrayBuffer(bytes.length);
            let ia = new Uint8Array(ab);
            for (let i = 0; i < bytes.length; i++) {
                ia[i] = bytes.charCodeAt(i);
            }
            return new Blob([ab], { type: fileType });
        }
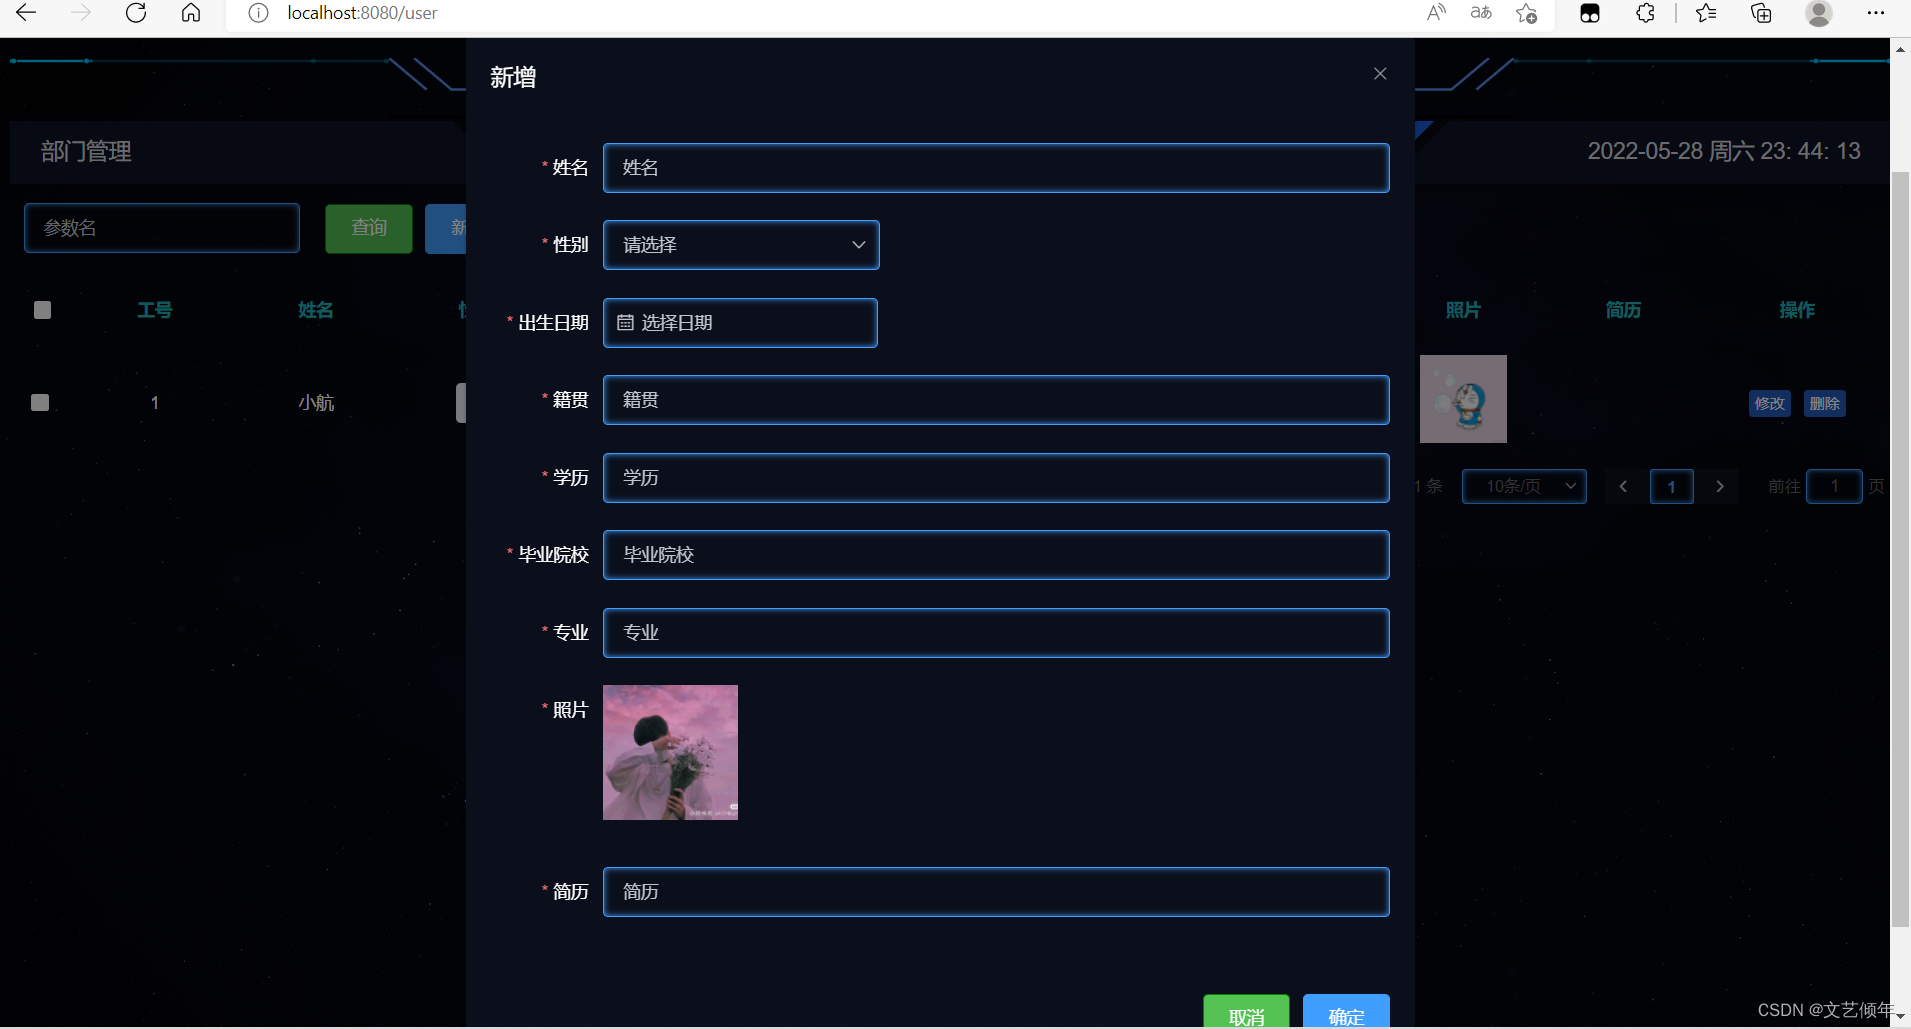
测试:
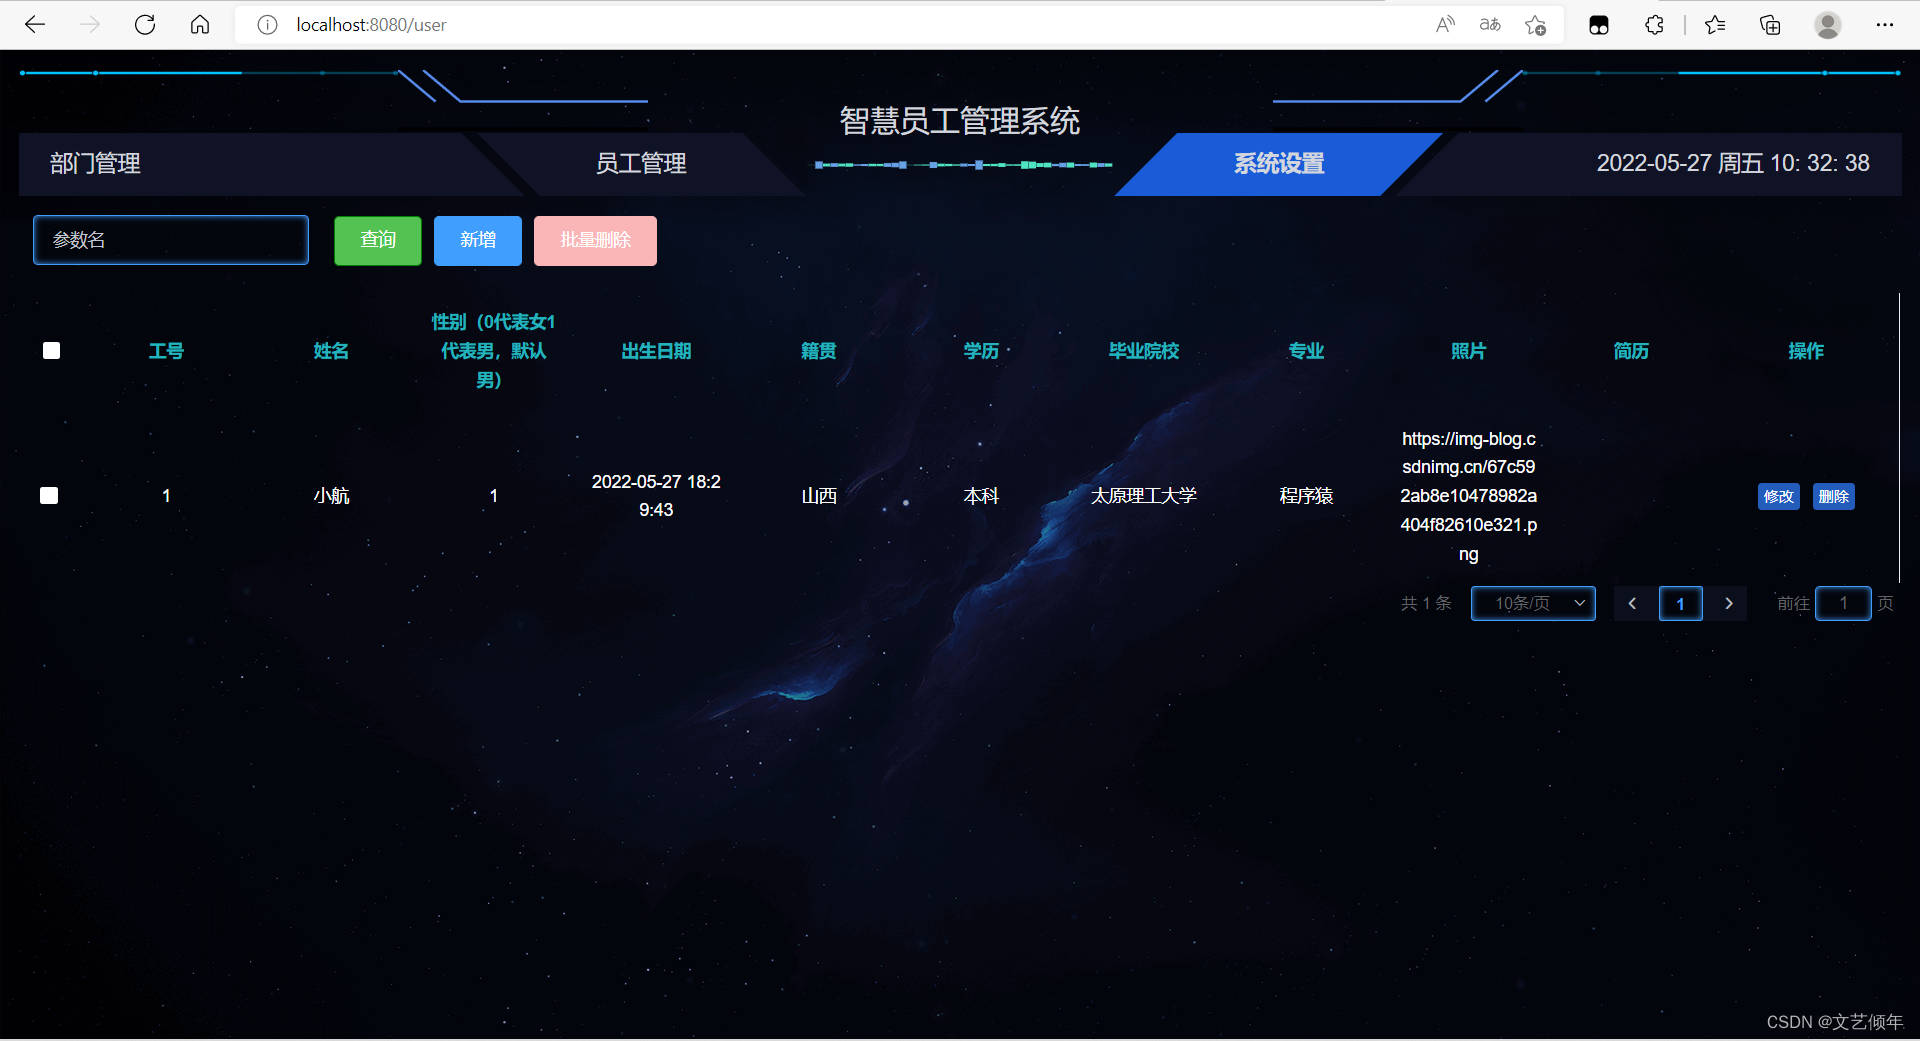
上传成功!
- 点赞
- 收藏
- 关注作者


评论(0)