Vue.js学习笔记 03、Vue样式篇

@[toc]
前言
本篇博客是在学习技术胖-Vue3.x从零开始学-第一季 基础语法篇过程中记录整理的笔记,若文章中出现相关问题,请指出!
- 当前该链接失效了,有需要的小伙伴可以去b站或者技术胖官网去找相应的视频与笔记。
所有博客文件目录索引:博客目录索引(持续更新)
一、基础样式绑定
1.1、基础样式绑定(v-bind:class)
方式:通过使用v-bind:class来进行绑定data中指定的样式!
<head>
  ...
  <style>
    .red {
      color: red;
    }

    .green {
      color: green;
    }

    .background {
      background-color: orange;
    }
  </style>
</head>


<body>
  <div id="app"></div>
</body>

<script src="https://unpkg.com/vue@next"></script>
<script>
  const vm = Vue.createApp({
    data() {
      return {
        classString: 'red',
      }
    },
    //通过v-bind:class来绑定样式,之后也可以进行快速修改
    template: `
        <h2 v-bind:class="classString">JSPang.com</h2>
        <h2 :class="classString">JSPang.com</h2>
    `
  }).mount("#app");
</script>

1.2、对象与数组形式控制样式
对象形式控制
// classObject为一个对象
// red、background指的是css中style标签里写的class样式(.red .background),值为true代表绑定,值为false代表不绑定这个样式
classObject:{red:true,background:true}
示例:
<head>
  ....
  <style>
    .red {
      color: red;
    }

    .green {
      color: green;
    }

    .background {
      background-color: orange;
    }
  </style>
</head>


<body>
  <div id="app"></div>
</body>

<script src="https://unpkg.com/vue@next"></script>
<script>
  const vm = Vue.createApp({
    data() {
      return {
        classString: 'red',
        //red、background样式设置为true表示需要选中
        classObject: { red: true, background: true }
      }
    },
    template: `
        <h2 :class="classObject">JSPang.com</h2>
    `
  }).mount("#app");
</script>
效果:可以看到通过对象形式绑定样式生效了,之后我们通过根组件来讲data对象中的指定对象里的背景样式设置为false,直接将页面上的指定class样式移除了。

数组绑定方式
//使用数组形式,其中使用字符串来指定对应的class样式,并且可以夹带对象的形式来设置!
classArray: ['green', 'background', { 'red': true }],
示例:
<head>
  ...
  <style>
    .red {
      color: red !important;
    }

    .green {
      color: green;
    }

    .background {
      background-color: orange;
    }
  </style>
</head>


<body>
  <div id="app"></div>
</body>

<script src="https://unpkg.com/vue@next"></script>
<script>
  const vm = Vue.createApp({
    data() {
      return {
        classString: 'red',
        //数组中的为指定样式,也可夹带对象形式表示样式
        classArray: ['green', 'background', { 'red': true }],
      }
    },
    template: `
        <h2 :class="classArray">JSPang.com</h2>
    `
  }).mount("#app");
</script>

说明:对于数组中的样式以及对象中设置为true的样式全部添加到标签中!
二、进阶使用
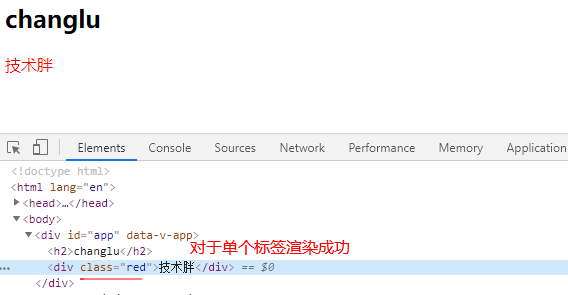
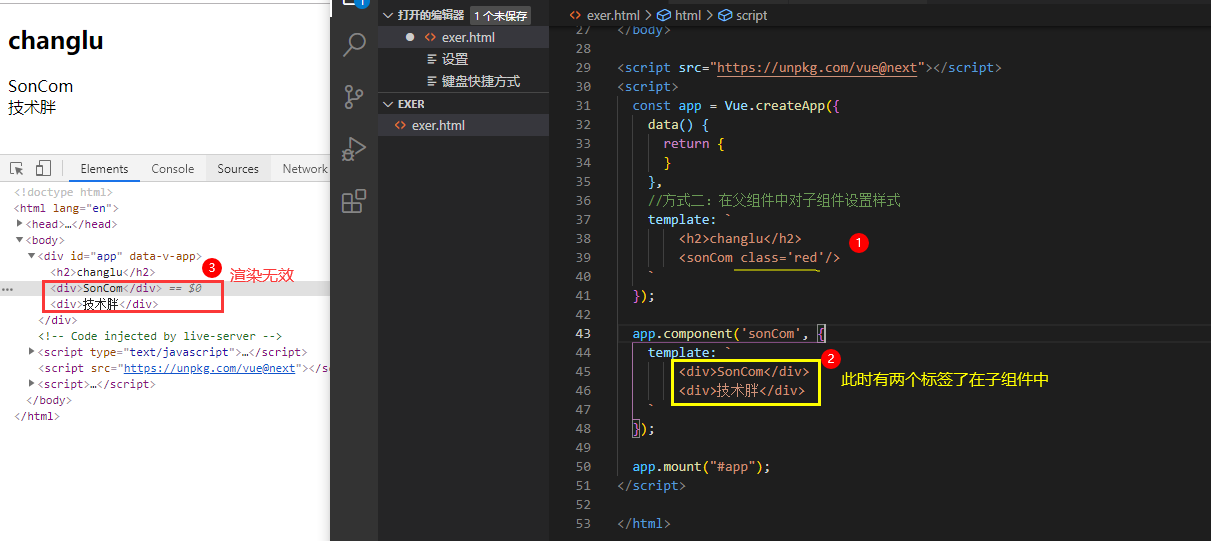
进阶一:子组件的样式绑定
为子组件(仅有单个标签)设置样式,两种形式设置样式都有效
Vue中子组件样式的绑定:通过行内样式方式。
子父组件:
- 父组件:
createApp()中的{}里的template就是父组件。 - 子组件:使用vue实例调用的
component(标签名,{})中的{}里的template就是子组件。
下面是两种为子组件绑定样式方式:只针对于子组件中有一个标签才会生效
<style>
    .red {
        color: red !important;
    }

    .green {
        color: green;
    }

    .background {
        background-color: orange;
    }
</style>

<body>
  <div id="app"></div>
</body>

<script src="https://unpkg.com/vue@next"></script>
<script>
  const app = Vue.createApp({
    data() {
      return {
      }
    },
    //方式二:直接在父组件中对子组件设置样式
    template: `
        <h2>changlu</h2>
        <sonCom class='red'/>
    `
  });

  app.component('sonCom', {
    //方式一(直接在子组件中写):<div class='red'>SonCom</div>
    template: `
        <div>SonCom</div>
    `
  });

  app.mount("#app");
</script>
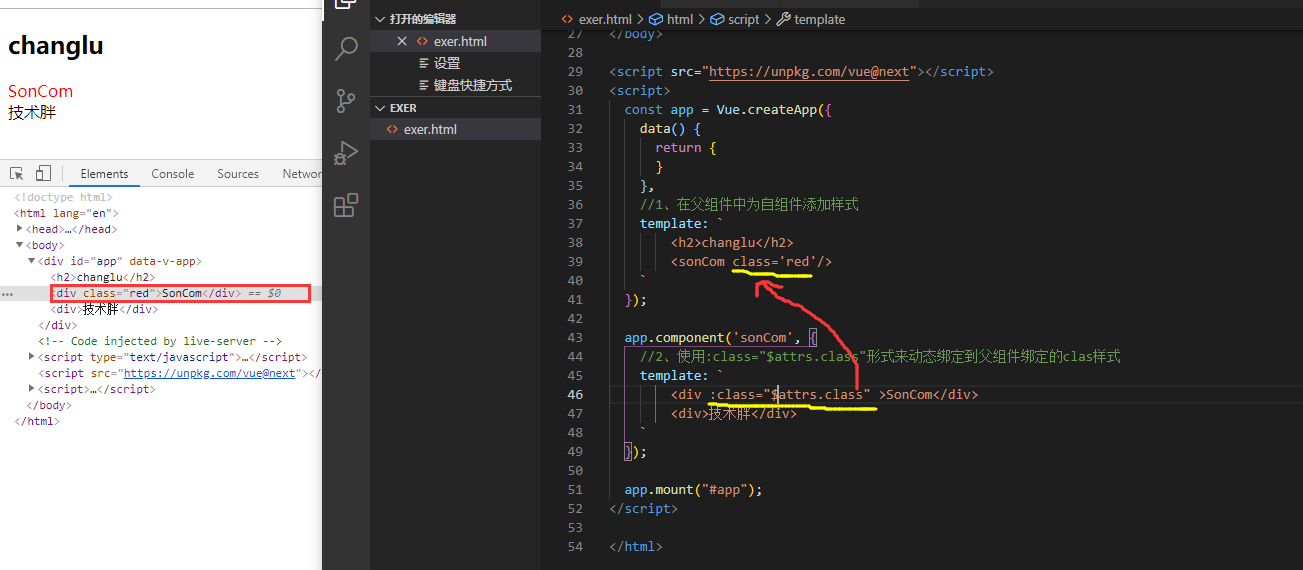
注意点:对于子组件中有两个标签的无法同时渲染!!!
解决方案
方案一:写在一个标签中
template: `
    <div>
        <div>SonCom</div>
        <div>技术胖</div>
    </div>
`
方案二:使用:class="$attrs.class"来接收到外部父组件引用子组件设置的标签
进阶二:行内样式编写(普通字符串形式与对象形式,推荐对象形式)
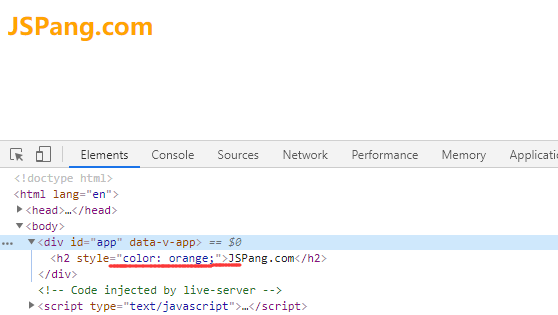
原始的css行内样式写法:<h2 style="color:orange;">JSPang.com</h2>
vue也提供了两种行内样式的绑定:
①字符串形式
<body>
  <div id="app"></div>
</body>

<script src="https://unpkg.com/vue@next"></script>
<script>
  const app = Vue.createApp({
    data() {
      return {
        //1、添加行内样式(字符串形式)
        styleString: 'color:orange;'
      }
    },
    //2、在标签中使用:style来动态绑定data对象中的styleString行内样式
    //:style="styleString"  => v-bind:style="styleString" 绑定指定data对象中的styleString属性值到标签里的style属性里
    template: `
        <h2 :style="styleString">JSPang.com</h2>
    `
  });

  app.mount("#app");
</script>
②对象形式
<body>
  <div id="app"></div>
</body>

<script src="https://unpkg.com/vue@next"></script>
<script>
  const app = Vue.createApp({
    data() {
      return {
        //对象形式:最后转为   color: 'red';background: 'yellow' 放置到 style标签里
        styleObject: {
          color: 'red',
          background: 'yellow'
        }
      }
    },
    //对象写法就是键值对都传入到style标签中
    template: `
        <h2 :style="styleObject">JSPang.com</h2>
    `
  });

  app.mount("#app");
</script>

三、transition标签使用(vue自带标签)
3.1、基本使用(配合过渡或动画使用以及设置别名)
使用方式:
<style>
    /** 入场效果  from指的是起始,to为终止  active指的是行为 **/
    .v-enter-from{}
    .v-enter-to{}
    .v-enter-active{}
    /** 出场效果 **/
    .v-leave-from{}
    .v-leave-to{}
    .v-leave-active{}
</style>

//1、使用transition标签包裹
template: `
	<transition>
		<div>hello,world</div>
	</transition>
`
当你使用transiation标签时,默认就会与v-enter-xxx或v-leave-xxx去匹配。
-
若是我们有多个组件需要使用入场出场过渡效果,就需要在transition标签中设置name,对应的css样式需要使用name值来开头否则就会失效,如下:
-
<style>
    /** 此时若是想匹配下面的标签则将v替换为cl **/
    .cl-enter-from{}
    .cl-enter-to{}
    .cl-enter-active{}
    /** 出场效果 **/
    .cl-leave-from{}
    .cl-leave-to{}
    .cl-leave-active{}
</style>

//1、对transition设置name名称
template: `
	<transition name="cl">
		<div>hello,world</div>
	</transition>
`
配合transition(过渡)
<style>
/* 进入动画 */
.v-enter-from {
opacity: 0;
}
.v-enter-active {
transition: opacity 2s ease;
}
.v-enter-to {
opacity: 1;
}
/* 离开动画 */
.v-leave-from {
opacity: 1;
}
.v-leave-active {
transition: opacity 2s ease;
}
.v-leave-to {
opacity: 0;
}
</style>
<body>
<div id="app"></div>
<script src="https://unpkg.com/vue@next"></script>
<script>
Vue.createApp({
data() {
return {
show: true
}
},
methods: {
bindclick() {
this.show = this.show ? false : true;
}
},
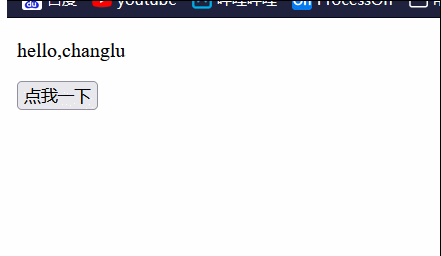
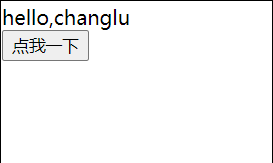
template: `
<transition>
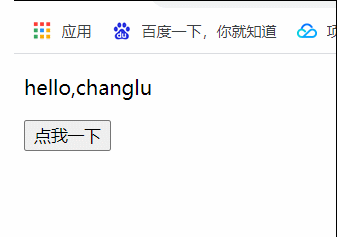
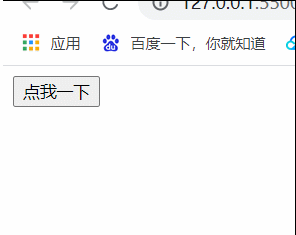
<p v-if="show">hello,changlu</p>
</transition>
<button @click="bindclick">点我一下</button>
`
}).mount("#app");
</script>
</body>
配合动画
<style>
/* 设置动画 */
@keyframes shake {
0% {
background-color: red;
}
50% {
background-color: blue;
}
100% {
background-color: yellow;
}
}
/* 样式执行指定的动画 */
.cl-enter-active {
animation: shake 2s;
}
.cl-leave-active {
animation: shake 2s;
}
</style>
<body>
<div id="app"></div>
<script src="https://unpkg.com/vue@next"></script>
<script>
Vue.createApp({
data() {
return {
show: true
}
},
methods: {
bindclick() {
this.show = this.show ? false : true;
}
},
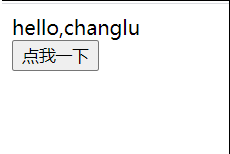
/* 设置了别名 */
template: `
<div>
<transition name="cl">
<p v-if="show">hello,changlu</p>
</transition>
</div>
<button @click="bindclick">点我一下</button>
`
}).mount("#app");
</script>
</body>
3.2、自定义样式名
使用方式:配合第三方库使用
直接在transition标签中设置自定义样式名,左边名称指的是对应的进入或离开动作
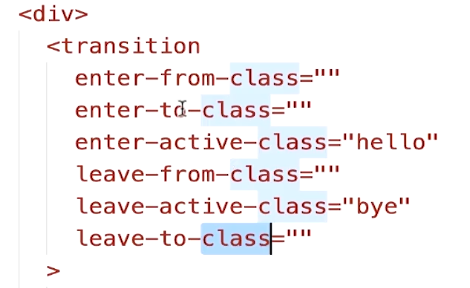
<style>
	<!-- 配合使用 -->
    .hello{
		xxx
    }
    .bye{
        xxx
    }
</style>
示例:配合animate.css来使用
<link href="https://cdn.bootcdn.net/ajax/libs/animate.css/4.1.1/animate.compat.css" rel="stylesheet">
<body>
    <div id="app"></div>

    <script src="https://unpkg.com/vue@3.1.5/dist/vue.global.js"></script>
    <script>
        Vue.createApp({
            data() {
                return {
                    show: true
                }
            },
            methods: {
                bindclick() {
                    this.show = this.show ? false : true;
                }
            },
            template: `
                <div>
                    <transition
                        enter-active-class="animated bounceOutLeft"
                        leave-active-class="animated bounceOutRight"
                    >
                        <p v-if="show">hello,changlu</p>
                    </transition>
                </div>
                <button @click="bindclick">点我一下</button>
            `
        }).mount("#app");
    </script>
</body>
3.3、过渡与动画同时使用时如何控制时间?(借助type属性)
过渡与动画同时使用时如何控制?
- 通过在
transition标签中设置属性达到控制时间的操作。
<!-- 1、设置type属性 -->
<!-- 由transition属性设定的时间决定 -->
<transition type="transition"></transition>
<!-- 由animation属性设定的时间决定 -->
<transition type="animation"></transition>
<!-- 2、设置:duration,进行分配进入与离开时间,这里设置进入1000ms,离开3000ms -->
<transition :duration="{enter: 1000,leave: 3000}"></transition>
3.4、vue中使用js来实现动画(借助钩子函数)
vue中通过实现钩子函数(会按照生命周期来自动执行)来达到实现动画的效果,钩子函数如下:
<!-- 一般使用js来实现动画时为了不让对应css动画或过渡效果,可以使用:css="false"来禁用 -->
<transition :css="false"
            @before-enter="bindBeforeEnter"
            @enter="bindEnter"
            @after-enter="bindAfterEnter"
            @before-leave="bindBeforeLeave"
            @leave="bindLeave"
            @leave-after="bindLeaveAfter" >
</transition>
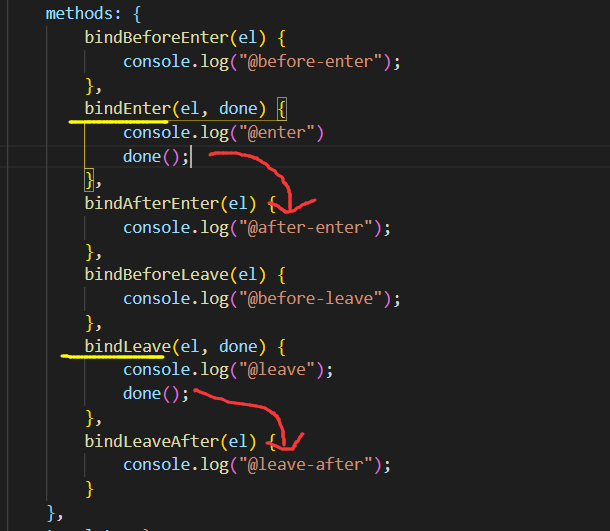
说明:其中enter、leave可以传递两个参数比其他多传一个done函数,只有执行了该函数后,后面的钩子函数才会执行。
示例:
<body>
<div id="app"></div>
<script src="https://unpkg.com/vue@3.1.5/dist/vue.global.js"></script>
<script>
Vue.createApp({
data() {
return {
show: true
}
},
methods: {
bindclick() {
this.show = this.show ? false : true;
},
// el为指定dom元素
hanleBeforeEnter(el) {
el.style.color = 'red';
},
handleEnterActive(el, done) {
const animation = setInterval(() => {
const color = el.style.color;
if (color == 'red') {
el.style.color = 'blue'
} else {
el.style.color = 'red';
}
}, 1000);
// 结束定时
setTimeout(() => {
clearInterval(animation);
done();
}, 2000);
},
//@after-enter函数需要在@enter函数中调用done()才会执行
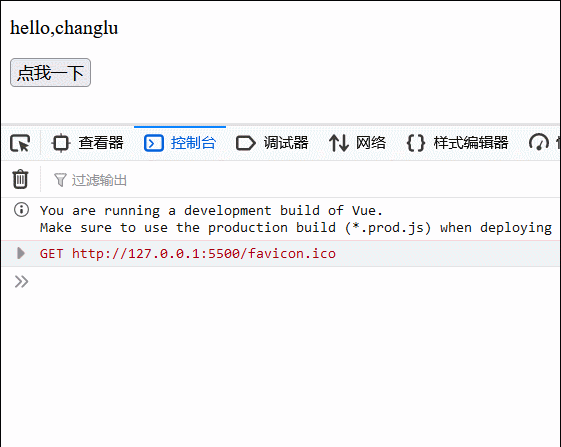
handleEnterActiveEnd() {
console.log('结束');
}
},
template: `
<div>
<transition :css="false"
@before-enter="hanleBeforeEnter"
@enter="handleEnterActive"
@after-enter="handleEnterActiveEnd"
>
<p v-if="show">hello,changlu</p>
</transition>
</div>
<button @click="bindclick">点我一下</button>
`
}).mount("#app");
</script>
</body>
四、元素或组件切换动画(mode与appear属性)
简而言之就是在切换显示元素或者组件时,进入或离开都有对应的动画效果!!!
4.1、回顾切换元素与组件(引言)
想要实现切换元素效果如下:
①切换元素(静态)
<script src="https://unpkg.com/vue@3.1.5/dist/vue.global.js"></script>
<script>
Vue.createApp({
data() {
return {
show: true
}
},
methods: {
bindclick() {
this.show = this.show ? false : true;
}
},
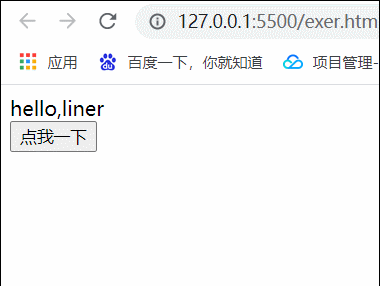
template: `
<div v-if="show" >hello,changlu</div>
<div v-else="show" >hello,liner</div>
<button @click="bindclick">点我一下</button>
`
}).mount("#app");
</script>
②切换组件(动态)
<body>
    <div id="app"></div>

    <script src="https://unpkg.com/vue@3.1.5/dist/vue.global.js"></script>
    <script>
        // 两个全局组件
        const com1 = {
            template: `
                <div>hello,changlu</div>
            `
        };

        const com2 = {
            template: `
                <div>hello,liner</div>
            `
        };

        Vue.createApp({
            data() {
                return {
                    showCom: "com1"
                }
            },
            // 拿取组件
            components: { com1, com2 },
            methods: {
                bindclick() {
                    if (this.showCom == "com1") {
                        this.showCom = "com2";
                    } else {
                        this.showCom = "com1";
                    }
                }
            },
            template: `
                    <component :is="showCom"></component>
                <button @click="bindclick">点我一下</button>
            `
        }).mount("#app");
    </script>
</body>
上面两种方式都能够实现切换效果!!!
4.2、实现切换动画(transiction标签)
两个核心点:位置在transication
- mode属性:in-out、out-in
- appear关键字
写法:
<transition mode="out-in" appear>
    <div v-if="show" >hello,changlu</div>
    <div v-else="show" >hello,liner</div>
</transition>
动画效果写的方式依旧是上面章节介绍的如:
.v-enter-from,
.v-leave-to {
    opacity: 0;
}

.v-enter-to,
.v-leave-from {
    opacity: 1;
}

.v-enter-active {
    transition: opacity 3s ease;
}
切换动画指的就是元素在进行切换时的动画,一个元素隐藏对应着leave,一个元素显示对应着enter,这样的话就很清晰了。
mode属性
mode属性有两个值,第一个是in-out也就是先显示出来,显示结束后再隐藏;第二个out-in,第一个效果返过来而已。
in-out、out-in效果如下:
appear关键字
之前我们定义好动画效果,但是初始加载页面时是不会有任何效果的,那么怎么让加载页面第一次访问有动画效果就可以使用appear属性啦!
五、状态动画(定时器实现)
状态动画效果:通过使用定时器+双向绑定我们能够实现状态动画
源码:
<body>
<div id="app"></div>
<script src="https://unpkg.com/vue@3.1.5/dist/vue.global.js"></script>
<script>
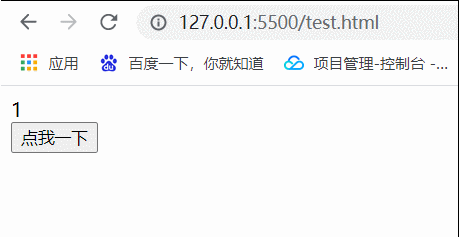
Vue.createApp({
data() {
return {
num: 1
}
},
methods: {
bindclick() {
if (this.num < 10) {
const timeInterval = setInterval(() => {
if (this.num == 9) {
clearInterval(timeInterval);
}
this.num++;
}, 100);
}
}
},
template: `
<div>{{num}}</div>
<button @click="bindclick">点我一下</button>
`
}).mount("#app");
</script>
</body>

- 点赞
- 收藏
- 关注作者
评论(0)