使用Spring Boot开发一个属于自己的web Api接口返回JSON数据
【摘要】 Spring Boot环境搭建官网:https://spring.io/projects/spring-bootGitHub地址:https://github.com/spring-projects/spring-boot官方文档演示https://spring.io/guides/gs/spring-boot相关软件以及环境:JDK1.8+Maven3.5+IDEA编辑器PostMan接...
Spring Boot环境搭建
- 官网:https://spring.io/projects/spring-boot
- GitHub地址:https://github.com/spring-projects/spring-boot
- 官方文档演示https://spring.io/guides/gs/spring-boot
相关软件以及环境:
- JDK1.8+
- Maven3.5+
- IDEA编辑器
- PostMan接口测试神器
Spring Boot的搭建有两种较快的方式:
- Maven依赖创建
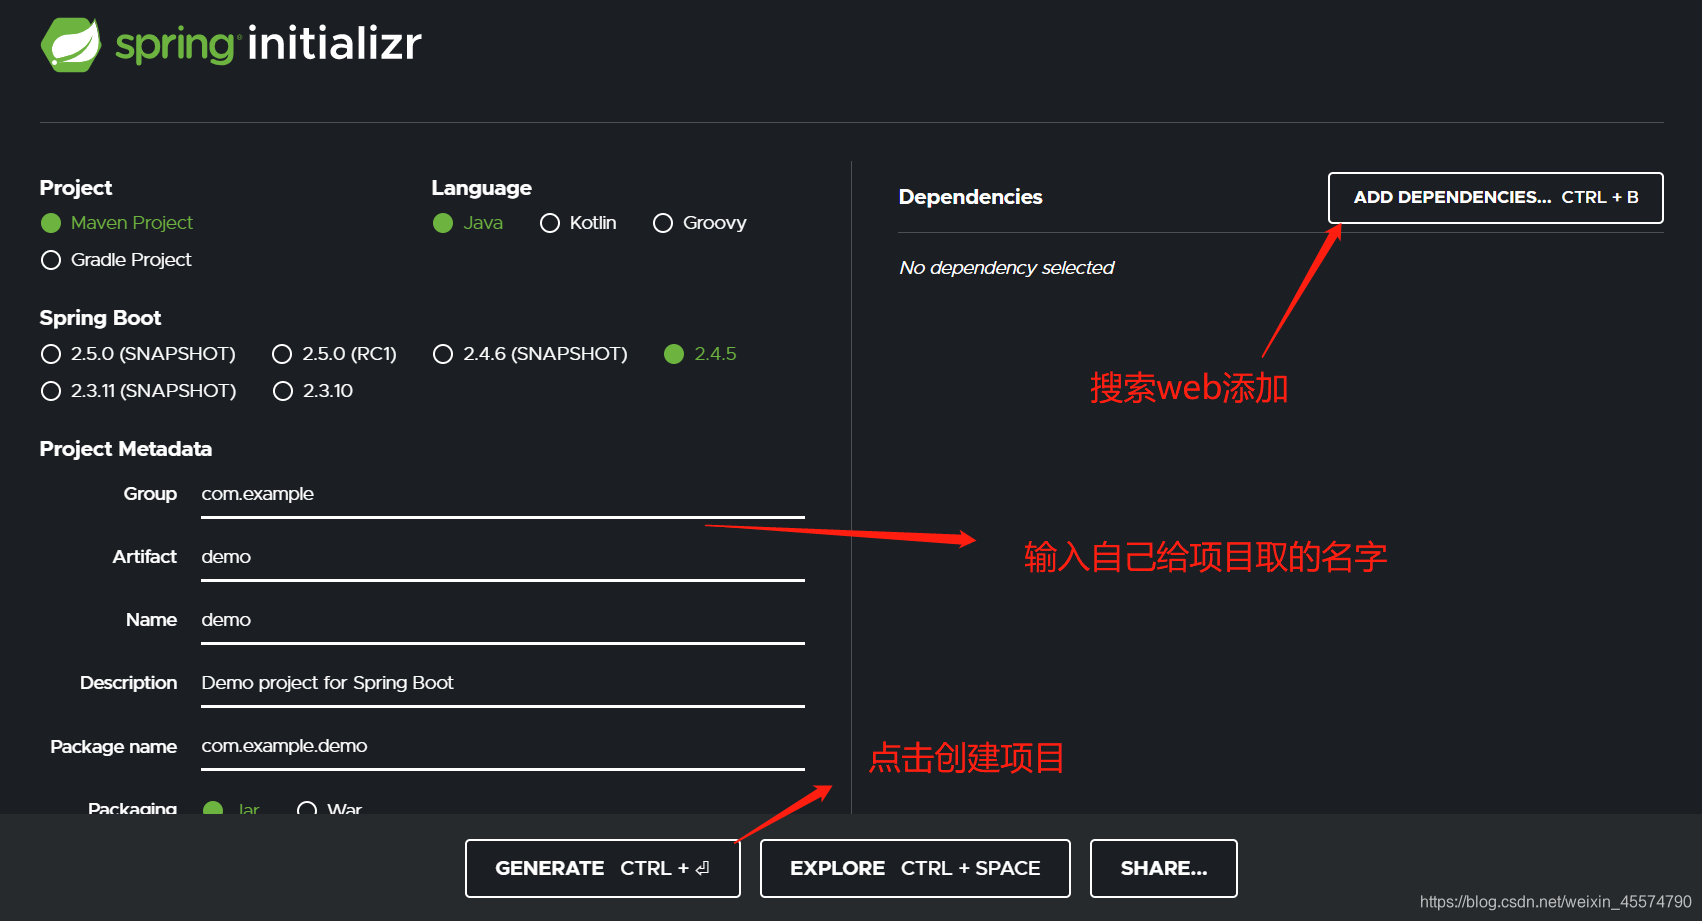
- 官网快捷在线创建https://start.spring.io/ (推荐)
第一种方式使用IDEA创建一个Maven工程即可,需要导入的依赖如下:
<parent>
		<groupId>org.springframework.boot</groupId>
		<artifactId>spring-boot-starter-parent</artifactId>
		<version>2.2.2.RELEASE</version>
		<relativePath/> <!-- lookup parent from repository -->
</parent>


<dependencies>
		<dependency>
			<groupId>org.springframework.boot</groupId>
			<artifactId>spring-boot-starter-web</artifactId>
		</dependency>
  <!--starter快速聚合很多的脚手架-->
		<dependency>
			<groupId>org.springframework.boot</groupId>
			<artifactId>spring-boot-starter-test</artifactId>
			<scope>test</scope>
			<exclusions>
				<exclusion>
					<groupId>org.junit.vintage</groupId>
					<artifactId>junit-vintage-engine</artifactId>
				</exclusion>
			</exclusions>
		</dependency>
	</dependencies>

	<build>
		<plugins>
			<plugin>
				<groupId>org.springframework.boot</groupId>
				<artifactId>spring-boot-maven-plugin</artifactId>
			</plugin>
		</plugins>
	</build>
第二种在线创建方式,访问https://start.spring.io/ 之后会生成一个ZIP的包,解压使用IDEA导入即可

成功导入后可以看到生成的目录结构,以及主类(DemoApplication.class),这个类的作用是扫描所有的字类,并启动我们的Sprint Boot 应用程序:
import org.springframework.boot.SpringApplication;
import org.springframework.boot.autoconfigure.SpringBootApplication;

@SpringBootApplication
public class DemoApplication {

	public static void main(String[] args) {
		//这个类要放在最外层才可以扫描子包的东西
		SpringApplication.run(DemoApplication.class, args);
	}

}
创建第一个Web接口,返回JSON数据
我们在搭建好的Maven项目里面新建一个包,创建java文件
相关参数:
- @RestController
作用:用于标记这个类是一个控制器,返回JSON数据的时候使用,如果使用这个注解,则接口返回数据会被序列化为JSON
@RequestMapping
作用:路由映射,用于类上做1级路径;用于某个方法上做子路径
代码如下
package net.test.demo.controller;

import net.xdclass.demo.config.WXConfig;
import net.xdclass.demo.utils.JsonData;

import org.springframework.web.bind.annotation.GetMapping;
import org.springframework.web.bind.annotation.RequestMapping;
import org.springframework.web.bind.annotation.RestController;

import java.util.HashMap;
import java.util.Map;

//测试配置问文件
@RestController
@RequestMapping("api/v1/test")
public class TestController {
    @GetMapping("testJson")
    public Object testJson(){
        Map<Integer,String> map=new HashMap<>();
        map.put(1,"第一个接口测试");
        map.put(2,"test");
        map.put(3,"test");

        return map;
    }
}
运行DemoApplication.class启动应用程序,成功启动会显示如下内容:

Spring Boot的默认端口访问为8080,当然这个也可也在相关的配置文件进行修改,访问测试可以使用浏览器输入localhost:8080/api/v1/test/testJson,在日常工作中,JSON格式的数据也是后端跟前端交互使用最多的一种数据格式,也可也使用接口测试软件PostMan,测试结果如下,可以成功返回Json数据

到这里,一个基于Spring Boot搭建的后端Web接口搭建完成。
【声明】本内容来自华为云开发者社区博主,不代表华为云及华为云开发者社区的观点和立场。转载时必须标注文章的来源(华为云社区)、文章链接、文章作者等基本信息,否则作者和本社区有权追究责任。如果您发现本社区中有涉嫌抄袭的内容,欢迎发送邮件进行举报,并提供相关证据,一经查实,本社区将立刻删除涉嫌侵权内容,举报邮箱:
cloudbbs@huaweicloud.com
- 点赞
- 收藏
- 关注作者


评论(0)