OpenCV计算机图像处理 —— 凸性缺陷 + 点多边形测试 + 形状匹配 + 轮廓分层与cv.findContours()
OpenCV计算机图像处理 —— 凸性缺陷 + 点多边形测试 + 形状匹配 + 轮廓分层与cv.findContours()
1. 凸性缺陷
一般来说凸曲线都是凸出或平坦的曲线,如果在内部凸出了(凹进去了)我们就称其为凸性缺陷,OpenCV提供了一个方法cv.convexityDefects()
这个函数返回一个数组,其中每行包含这些值-【起点,终点,最远点,到最远点的近似距离】,我们可以用图像把它形象化,我们画一条连接起点和终点的线,然后在最远处画一个圆
import cv2 as cv
import numpy as np

img = cv.imread(r'E:\image\test14.png')
img_gray = cv.cvtColor(img, cv.COLOR_BGR2GRAY)
ret, thresh = cv.threshold(img_gray, 127, 255, 0)
contours, hierarchy = cv.findContours(thresh, 2, 1)
cnt = contours[0]
hull = cv.convexHull(cnt, returnPoints=False)
defects = cv.convexityDefects(cnt, hull)
for i in range(defects.shape[0]):
    s, e, f, d = defects[i, 0]
    start = tuple(cnt[s][0])
    end = tuple(cnt[e][0])
    far = tuple(cnt[f][0])
    cv.line(img, start, end, [0, 255, 0], 2)
    cv.circle(img, far, 5, [0, 0, 255], -1)
cv.imshow('img', img)
cv.waitKey(0)
cv.destroyAllWindows()

在以前轮廓的内容中我们提到了了一个函数cv.convexHull(),当这个函数的属性returnPoints = False时,我们就可以找到凸性缺陷
代码解释:又到了激动人心的解析代码的时间啦!第4-5行即是老生常谈的读取图片并转化为灰度图,第6行通过threshold()函数设置阈值,第7行通过findContours()方法找到轮廓,将第一个轮廓拿出来后用convexHull()函数检查轮廓的凸度缺陷,然后使用convexityDefects()函数得到这些凸度缺陷对应点的相关信息,包括起点终点等
2. 点多边形测试
点多边形测试中涉及了一个新的函数:cv.pointPolygonTest(),顾名思义它是一个测试函数,第一个参数是轮廓,第二个参数就是我们的测试点了,第三个参数指的是measureDist,如果其取值为True,这个函数会找到有符号的距离,反之它只会反映出这个点是在轮廓线内部、上面还是外部(分别返回1、-1和0)
import cv2 as cv
import numpy as np
img = cv.imread(r'E:\image\test12.png')
img_gray = cv.cvtColor(img, cv.COLOR_BGR2GRAY)
ret, thresh = cv.threshold(img_gray, 127, 255, 0)
contours, hierarchy = cv.findContours(thresh, 2, 1)
cnt = contours[0]
img02 = cv.drawContours(img, [cnt], 0, (0, 0,255), 3)
dist = cv.pointPolygonTest(cnt, (20, 20), True)
dist2 = cv.pointPolygonTest(cnt, (192.5, 156), True)
print("point:(20,20) = " + str(dist))
print("point:(192.5,156) = " + str(dist2))
cv.imshow('test', img02)
cv.waitKey(0)
cv.destroyWindow()

3. 形状匹配
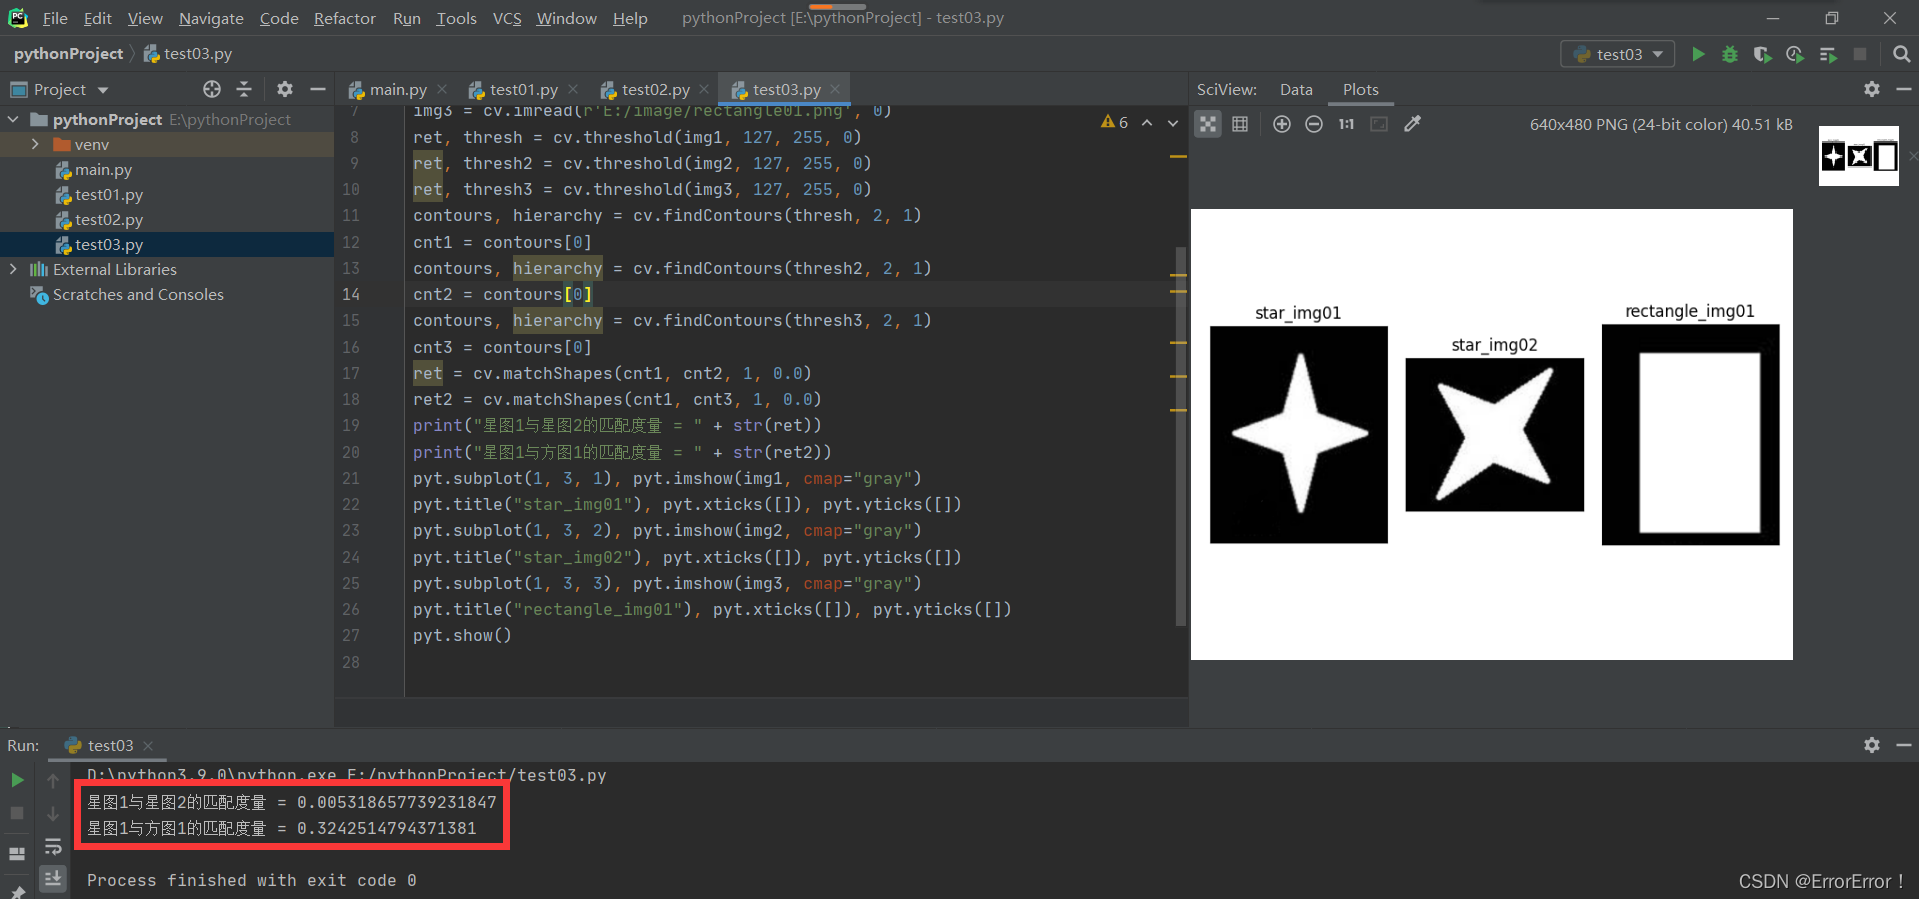
OpenCV中的形状匹配与一个函数有关:cv.matchShapes(),这个函数使我们能够比较两个形状(或两个轮廓),并返回一个显示相似性的度量,这个值越低说明匹配越好,在实质上它是根据矩值计算出来的
值得注意的是,即使是图像旋转也不会对结果产生很大的影响
import cv2 as cv
import numpy as np
from matplotlib import pyplot as pyt

img1 = cv.imread(r'E:/image/star01.png', 0)
img2 = cv.imread(r'E:/image/star02.png', 0)
img3 = cv.imread(r'E:/image/rectangle01.png', 0)
ret, thresh = cv.threshold(img1, 127, 255, 0)
ret, thresh2 = cv.threshold(img2, 127, 255, 0)
ret, thresh3 = cv.threshold(img3, 127, 255, 0)
contours, hierarchy = cv.findContours(thresh, 2, 1)
cnt1 = contours[0]
contours, hierarchy = cv.findContours(thresh2, 2, 1)
cnt2 = contours[0]
contours, hierarchy = cv.findContours(thresh3, 2, 1)
cnt3 = contours[0]
ret = cv.matchShapes(cnt1, cnt2, 1, 0.0)
ret2 = cv.matchShapes(cnt1, cnt3, 1, 0.0)
print("星图1与星图2的匹配度量 = " + str(ret))
print("星图1与方图1的匹配度量 = " + str(ret2))
pyt.subplot(1, 3, 1), pyt.imshow(img1, cmap="gray")
pyt.title("star_img01"), pyt.xticks([]), pyt.yticks([])
pyt.subplot(1, 3, 2), pyt.imshow(img2, cmap="gray")
pyt.title("star_img02"), pyt.xticks([]), pyt.yticks([])
pyt.subplot(1, 3, 3), pyt.imshow(img3, cmap="gray")
pyt.title("rectangle_img01"), pyt.xticks([]), pyt.yticks([])
pyt.show()

4. 轮廓分层与cv.findContours()
4.1 轮廓分层与cv.findcontours()的关系
在前面的文章我们聊了怎么使用cv.findcontours()函数找到轮廓,并且提到了它的第三个参数轮廓检索模式,对于这个参数我们通常使用cv.RETR_LIST或cv.RETR_TREE就能得到很好的效果,而且对应这个函数的三个输出我们也很有必要了解一下,它的输出包括三个数组,包括图像(image)、轮廓(contours)和hierarchy,它其实就是我们在这一节要聊的”轮廓层次结构”
在某些情况下,某些形状位于其他形状中,就像嵌套的图形一样,在这种情况下,我们把外部的称为父类,把内部的称为子类,这样,图像中的轮廓就有了一定的相互关系。我们可以指定一个轮廓是如何相互连接的,比如,它是另一个轮廓的子轮廓,还是父轮廓等等。这种关系的表示称为层次结构
所以每个轮廓都有它自己的信息关于它是什么层次,谁是它的孩子,谁是它的父母等等,OpenCV将它表示为一个包含四个值的数组: [Next, Previous, First_Child, Parent],这就是我们在findcontours()函数中得到的第三个参数
4.2 轮廓检索模式(四种参数)
RETR_LIST
这是四个标志中最简单的一个,它只是检索所有的轮廓,但不创建任何亲子关系,在这个规则下,父轮廓和子轮廓是平等的,他们只是轮廓,并且都属于同一层级,如果我们在开发中没有使用任何层次结构特性,它就是我们最佳的选择
RETR_EXTERNAL
如果使用此标志,它只返回极端外部标志,所有孩子的轮廓都被留下了,更形象地来说,根据这项规则,每个家庭只有长子得到关注,它不关心家庭的其他成员,所以当我们只关心外部轮廓时可以使用它
RETR_CCOMP
此标志检索所有轮廓并将其排列为2级层次结构,物体的外部轮廓(即物体的边界)放在层次结构-1中,对象内部孔洞的轮廓(如果有)放在层次结构-2中,如果其中有任何对象,则其轮廓仅在层次结构1中重新放置,以及它在层级2中的漏洞等等
RETR_TREE
它就是最完美的一个家伙了,它检索所有的轮廓并创建一个完整的家族层次结构列表,当我们需要检索所有轮廓时会使用它
接下来通过代码看看吧,实践永远是最好的老师
import cv2 as cv
import numpy as np
from matplotlib import pyplot as pyt

img = cv.imread(r'E:/image/the_first.png')
img_gray = cv.cvtColor(img, cv.COLOR_BGR2GRAY)
ret, thresh = cv.threshold(img_gray, 127, 255, 0)
contours, hierarchy = cv.findContours(thresh, cv.RETR_LIST, cv.CHAIN_APPROX_NONE)
cnt = contours[0]
contours, hierarchy = cv.findContours(thresh, cv.RETR_EXTERNAL, cv.CHAIN_APPROX_NONE)
cnt2 = contours[0]
contours, hierarchy = cv.findContours(thresh, cv.RETR_CCOMP, cv.CHAIN_APPROX_NONE)
cnt3 = contours[0]
contours, hierarchy = cv.findContours(thresh, cv.RETR_TREE, cv.CHAIN_APPROX_NONE)
cnt4 = contours[0]
img1 = cv.drawContours(thresh, [cnt], 0, (255, 0, 0), 2)
img2 = cv.drawContours(thresh, [cnt2], 0, (0, 255, 0), 2)
img3 = cv.drawContours(thresh, [cnt3], 0, (0, 0, 255), 2)
img4 = cv.drawContours(thresh, [cnt4], 0, (0, 0, 0), 2)
pyt.subplot(2, 2, 1), pyt.imshow(img1, cmap="gray")
pyt.title("RETR_LIST"), pyt.xticks([]), pyt.yticks([])
pyt.subplot(2, 2, 2), pyt.imshow(img2, cmap="gray")
pyt.title("RETR_EXTERNAL"), pyt.xticks([]), pyt.yticks([])
pyt.subplot(2, 2, 3), pyt.imshow(img3, cmap="gray")
pyt.title("RETR_CCOMP"), pyt.xticks([]), pyt.yticks([])
pyt.subplot(2, 2, 4), pyt.imshow(img3, cmap="gray")
pyt.title("RETR_TREE"), pyt.xticks([]), pyt.yticks([])
pyt.show()
(注:文章内容参考OpenCV4.1中文官方文档)
如果文章对您有所帮助,记得一键三连支持一下哦
- 点赞
- 收藏
- 关注作者


评论(0)