【愚公系列】《微信小程序与云开发从入门到实践》057-迷你商城小程序的开发(分类模块开发)

【摘要】 标题详情作者简介愚公搬代码头衔华为云特约编辑,华为云云享专家,华为开发者专家,华为产品云测专家,CSDN博客专家,CSDN商业化专家,阿里云专家博主,阿里云签约作者,腾讯云优秀博主,腾讯云内容共创官,掘金优秀博主,亚马逊技领云博主,51CTO博客专家等。近期荣誉2022年度博客之星TOP2,2023年度博客之星TOP2,2022年华为云十佳博主,2023年华为云十佳博主,2024年华为云十佳...
| 标题 | 详情 |
|---|---|
| 作者简介 | 愚公搬代码 |
| 头衔 | 华为云特约编辑,华为云云享专家,华为开发者专家,华为产品云测专家,CSDN博客专家,CSDN商业化专家,阿里云专家博主,阿里云签约作者,腾讯云优秀博主,腾讯云内容共创官,掘金优秀博主,亚马逊技领云博主,51CTO博客专家等。 |
| 近期荣誉 | 2022年度博客之星TOP2,2023年度博客之星TOP2,2022年华为云十佳博主,2023年华为云十佳博主,2024年华为云十佳博主等。 |
| 博客内容 | .NET、Java、Python、Go、Node、前端、IOS、Android、鸿蒙、Linux、物联网、网络安全、大数据、人工智能、U3D游戏、小程序等相关领域知识。 |
| 欢迎 | 👍点赞、✍评论、⭐收藏 |
🚀前言
随着移动互联网的快速发展,越来越多的企业开始将目光投向小程序这一新兴的商业模式。作为一种轻量级的应用形式,微信小程序以其便捷的使用体验和广泛的用户基础,成为了商家数字化转型的重要工具。在众多小程序中,迷你商城小程序因其能够为消费者提供高效的购物体验而备受青睐。
在迷你商城小程序的开发过程中,分类模块的设计与实现尤为关键。一个清晰、结构合理的分类系统不仅能够帮助用户更快地找到所需商品,还能提升用户的购买体验,进而推动销售业绩的增长。本文将深入探讨迷你商城小程序的分类模块开发,包括设计思路、技术实现以及最佳实践,旨在为开发者提供实用的指导和参考。
🚀一、分类模块开发
🔎1.二级联动列表组件的开发
🦋1.1 文件结构
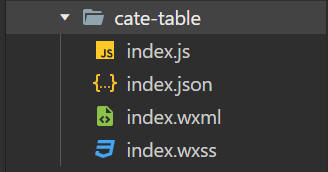
🦋1.2 index.wxml
这是组件的视图部分,主要用来渲染二级联动的分类列表。
<!--components/cate-table/index.wxml-->
<view class="container">
    <view class="left">
        <view class="left-item {{selectedIndex == index ? 'selected' : ''}}" wx:for="{{items}}" wx:key="index" data-index="{{index}}" bindtap="tapLeftItem">
            <view class="tip" wx:if="{{selectedIndex == index }}"></view>
            <text>{{item.name}}</text>
        </view>
    </view>
    <view class="right">
        <view class="right-bg">
            <view class="right-title">{{items[selectedIndex].name}}</view>
            <view class="right-content">
                <view class="right-item" wx:for="{{items[selectedIndex].cates}}" wx:key="index" data-index="{{index}}" bindtap="tapItem">
                    <view class="right-item-content">{{item.title}}</view>
                </view>
            </view>
        </view>
    </view>
</view>
🦋1.3 index.wxss
这是组件的样式部分,参考附件中的样式表。
/* components/cate-table/index.wxss */
.container {
    display: flex;
    flex-direction: row;
}

.left {
    background-color: #f7f7f7;
    width: 100px;
}

.left-item {
    width: 100%;
    text-align: center;
    padding-top: 10px;
    padding-bottom: 10px;
    margin: 0px;
    font-size: 14px;
    color: gray;
}

.selected {
    color: black;
    background-color: white;
}

.tip {
    background-color: #d53a27;
    width: 5px;
    height: 15px;
    margin-top: 1px;
    position: absolute;
}

.right {
    margin: 10px;
    width: calc(100% - 20px - 100px);
}

.right-bg {
    background-color: white;
    box-shadow: 0 4px 8px 0 #d1d1d1;
    border-radius: 8px;
    overflow: hidden;
}

.right-title {
    margin: 15px;
    font-size: 14px;
    color: #111111;
}

.right-content {
    display: flex;
    flex-direction: row;
    flex-wrap: wrap;
}

.right-item {
    width: 50%;
}

.right-item-content {
    text-align: center;
    height: 120px;
    line-height: 120px;
    background-color: #d1d1d1;
    margin: 5px;
    border-radius: 5px;
}
🦋1.4 index.js
这是组件的逻辑部分,提供数据和处理交互事件。
// components/cate-table/index.js
Component({
    properties: {
        items:{
            type:Array,
            value:[]
        },
        index:{
            type:Number,
            value:0
        }
    },
    lifetimes:{
        attached:function() {
            this.setData({
                selectedIndex:this.data.index
            });
        }
    },
    data: {
        selectedIndex:0
    },
    methods: {
        // 用户交互处理
        tapLeftItem:function(event) {
            let index = Number(event.currentTarget.dataset.index);
            this.setData({
                selectedIndex:index
            });
            this.triggerEvent("tapLeftItem",{index:index, item:this.data.items[index]});
        },
        tapItem:function(event) {
            let index = Number(event.currentTarget.dataset.index);
            this.triggerEvent("tapItem",{item:this.data.items[this.data.selectedIndex].cates[index]});
        }
    }
})
🦋1.5 数据结构说明
组件用于渲染的数据结构如下表所示:
| 属性 | 说明 |
|---|---|
name |
分类名称 |
cates |
包含的二级分类项 |
🦋1.6 交互说明
- 左侧列表展示一级分类,右侧列表展示对应的二级分类。
- 点击左侧分类时,右侧二级分类会根据左侧选择的一级分类更新。
- 点击右侧二级分类时,会触发事件
tapItem,传递对应的二级分类信息。
🔎2.分类数据服务开发
🦋2.1 云函数 getVirtualCategory
文件路径:cloudfunctions/getVirtualCategory/index.js
创建一个云函数 getVirtualCategory,用于模拟获取虚拟分类数据。
// 云函数入口文件
const cloud = require('wx-server-sdk')

cloud.init({
  env: 'env-2gw7thaa52b12132' // 填写您的云环境ID
})

// 云函数入口函数
exports.main = async (event, context) => {
    return [
        {name:"热门分类",cates:[{cid:'0', title:'图书'}]},
        {name:"精品推荐",cates:[{cid:'0', title:'图书'},{cid:'1', title:'家电'},{cid:'2',title:'食品'},{cid:'6',title:'百货'}]},
        {name:"教育图书",cates:[{cid:'0', title:'图书'}]},
        {name:"运动衣着",cates:[]},
        {name:"最近上新",cates:[]},
        {name:"爆品折扣",cates:[]},
        {name:"家用电器",cates:[]},
        {name:"汽车生活",cates:[]},
        {name:"数码办公",cates:[]},
        {name:"内衣配饰",cates:[]},
        {name:"生鲜水果",cates:[]},
        {name:"美妆护肤",cates:[]},
    ]
}
🦋2.2 页面 category 配置
文件路径:pages/category/category.json
在该文件中进行简单的组件配置,指定使用 cate-table 和 search-bar。
{
  "usingComponents": {
    "search-bar":"../../components/search-bar/index",
    "cate-table":"../../components/cate-table/index"
  },
  "navigationStyle": "custom"
}
🦋2.3 页面 category.wxml
这是页面的框架结构,包含了搜索框和分类表格组件。
<!--pages/category/category.wxml-->
<view class="container">
    <view class="header">
        <search-bar class="search-bar" title="口袋商城" placeholder="精选好物 打折优惠" bindsearchBtnTap="toSearch"></search-bar>
    </view>
    <view class="content">
       <cate-table items="{{categorys}}" bindtapItem="toCategoryList"></cate-table>
    </view>
</view>
🦋2.4 页面 category.wxss
这是页面的样式文件,定义了页面的布局和样式。
/* pages/category/category.wxss */
.container {
    padding-bottom: 49px;
    overflow: hidden;
}

.header {
    width: 100%;
    height: 100px;
    background-image: linear-gradient(to bottom, #e53f41, #e68465);
    overflow: hidden;
    position: fixed;
    z-index: 100;
}

.content {
    margin-top: 100px;
}
🦋2.5 页面 category.js
在该文件中,通过调用云函数获取分类数据,并将数据渲染到页面。
// pages/category/category.js
const server = require('../../utils/server/server').server;
Page({
    onShow: function () {
        this.getTabBar().setData({selectedIndex:1});
    },
    data:{
        categorys:[]
    },
    onLoad:function() {
        this.getCategorys();
    },
    toSearch:function(event) {
        let key = event.detail;
        if (key.length == 0) {
            wx.showToast({
              title: '请输入搜索内容',
              icon:'none'
            });
            return;
        }
        console.log(`搜索-${event.detail}`);
        wx.navigateTo({
            url: `/pages/search/search?key=${key}`,
          })
        this.selectComponent('.search-bar').clear();
    },
    toCategoryList:function(event) {
        console.log(event.detail.item);
        wx.navigateTo({
            url: `/pages/search/search?key=${event.detail.item.title}`,
          })
    },
    getCategorys:function() {
        server.getVirtualCategory(res=>{
            this.setData({
                categorys:res
            });
        });
    }
})
🦋2.6 服务器端代码 server.js
在 server.js 文件中新增一个方法 getVirtualCategory,用于调用云函数 getVirtualCategory 获取数据。
// utils/server/server.js
const server = {
    getVirtualCategory:function(callback) {
        wx.cloud.callFunction({
            name:"getVirtualCategory",
        }).then(res=>{
            callback(res.result);
        }).catch(error=>{
            wx.showToast({
              title: `获取虚拟分类失败`,
              icon:"none"
            })
            console.log(error);
        });
    },
};

module.exports = { server };
🦋2.7 小程序端逻辑总结
- 云函数
getVirtualCategory:用于返回模拟的虚拟分类数据。 - 页面
category.js:调用云函数获取分类数据,并通过cate-table组件渲染到页面上。 - 页面
category.wxml和category.wxss:定义了页面布局,包含了一个固定在顶部的搜索框和下面的分类表格组件。 getVirtualCategory方法:封装了调用云函数的逻辑,并在获取数据后更新页面的categorys数据。
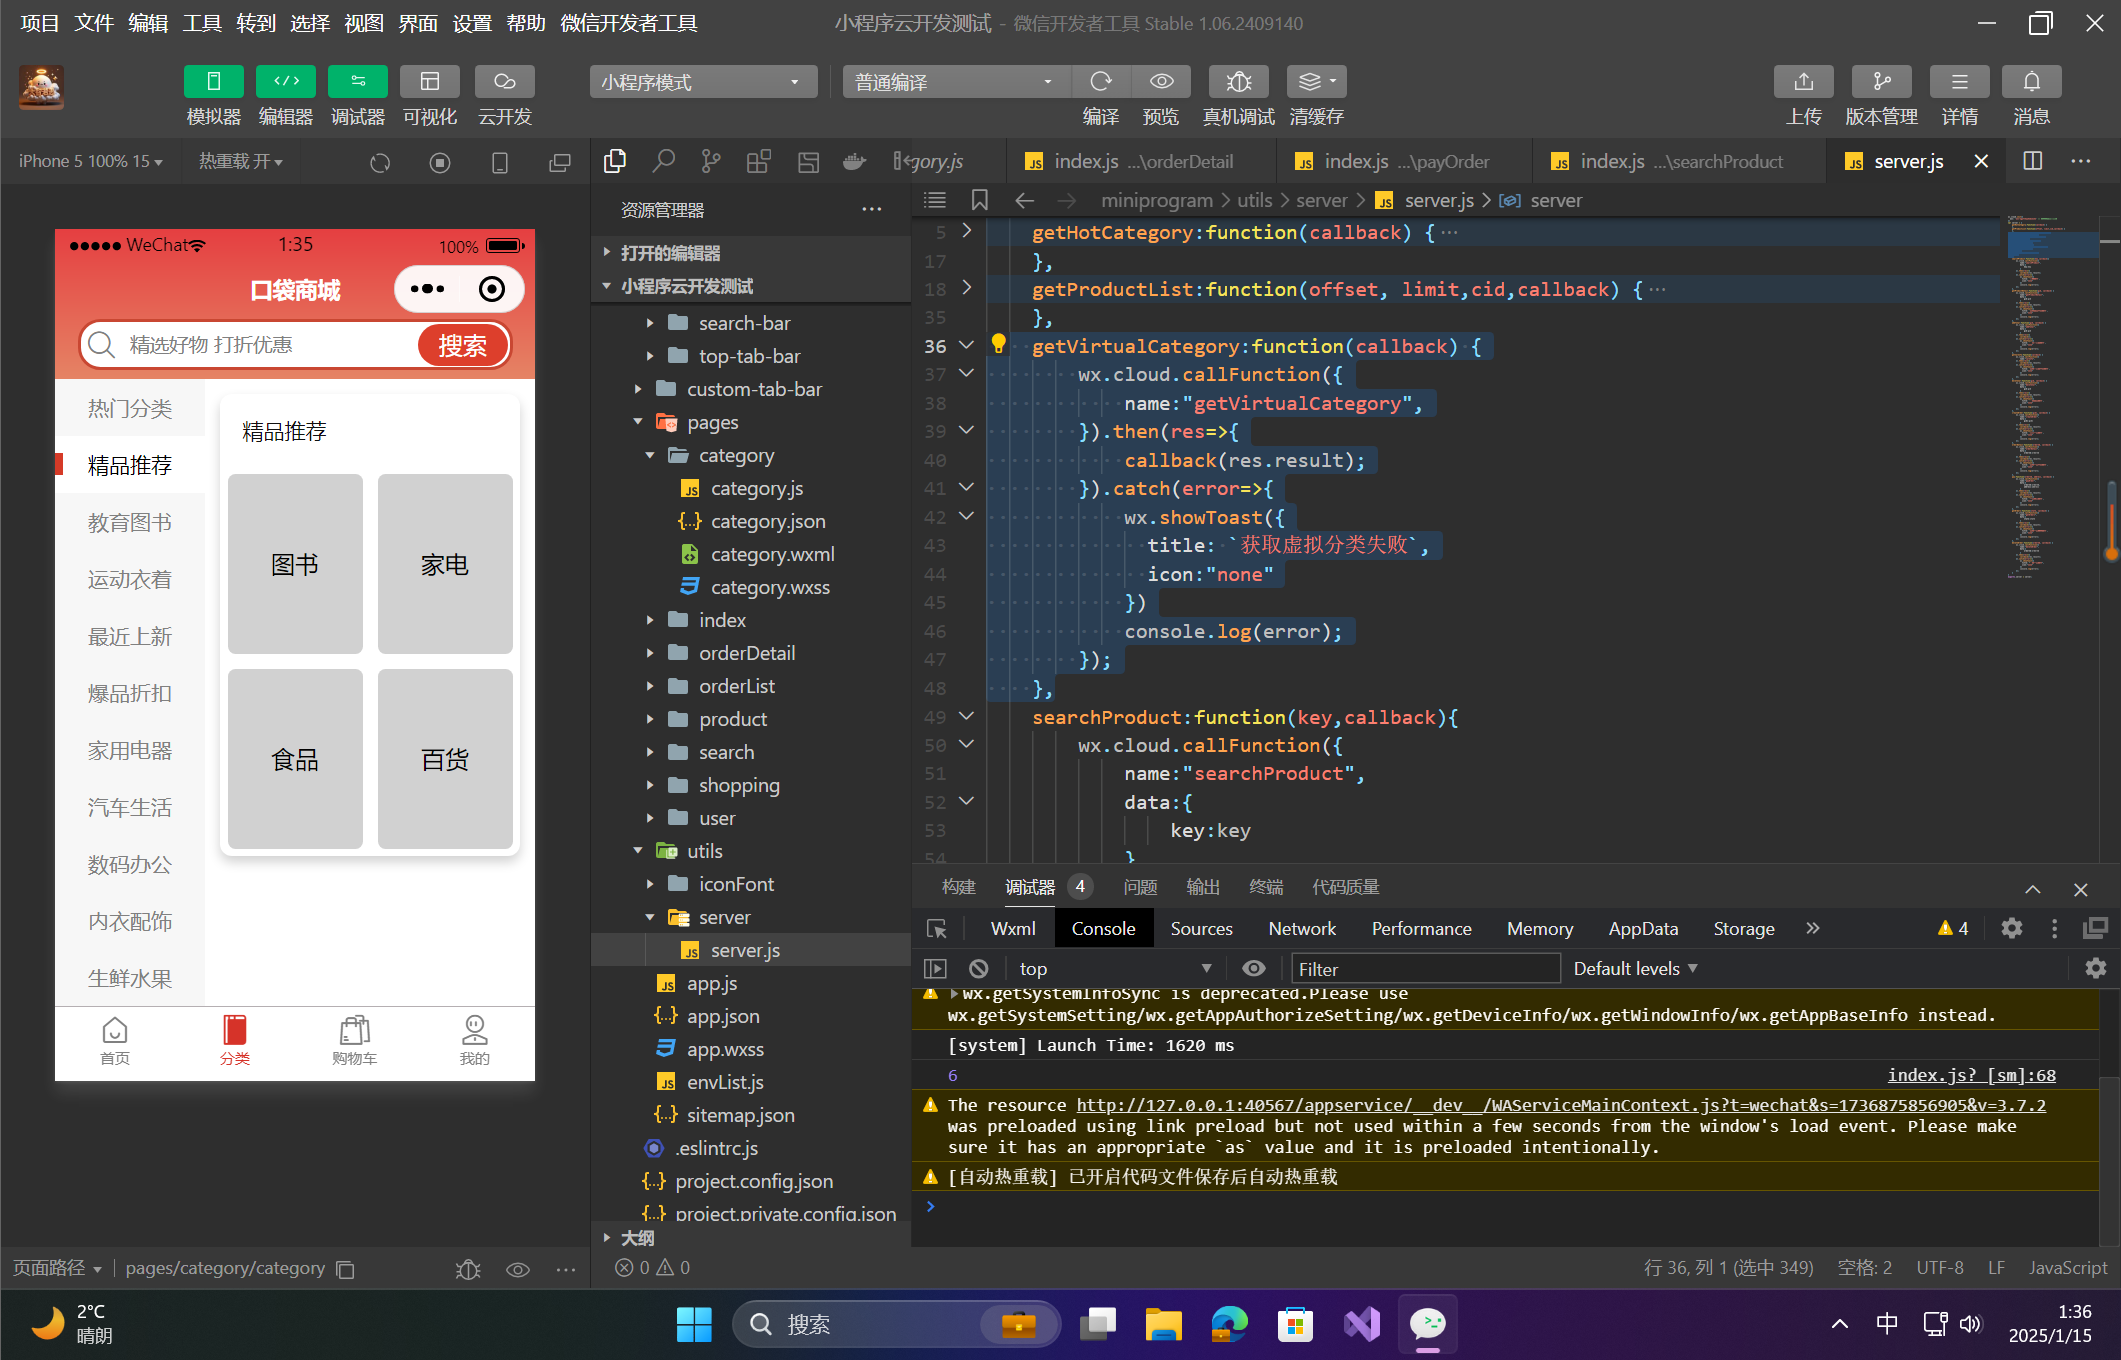
🦋2.8 运行效果
- 在小程序页面上,顶部会显示一个搜索框,用户可以输入搜索内容。
- 在页面下方,
cate-table组件会展示虚拟分类数据。左侧是一级分类,右侧是对应的二级分类。 - 用户点击一级分类时,右侧的二级分类会切换,点击二级分类时,控制台会输出点击的分类信息。

【声明】本内容来自华为云开发者社区博主,不代表华为云及华为云开发者社区的观点和立场。转载时必须标注文章的来源(华为云社区)、文章链接、文章作者等基本信息,否则作者和本社区有权追究责任。如果您发现本社区中有涉嫌抄袭的内容,欢迎发送邮件进行举报,并提供相关证据,一经查实,本社区将立刻删除涉嫌侵权内容,举报邮箱:
cloudbbs@huaweicloud.com
- 点赞
- 收藏
- 关注作者
评论(0)