【愚公系列】《AIGC辅助软件开发》016-AI辅助前端编程:利用ChatGPT在前端开发中快速生成Vue组件
🏆 作者简介,愚公搬代码
🏆《头衔》:华为云特约编辑,华为云云享专家,华为开发者专家,华为产品云测专家,CSDN博客专家,CSDN商业化专家,阿里云专家博主,阿里云签约作者,腾讯云优秀博主,腾讯云内容共创官,掘金优秀博主,亚马逊技领云博主,51CTO博客专家等。
🏆《近期荣誉》:2022年度博客之星TOP2,2023年度博客之星TOP2,2022年华为云十佳博主,2023年华为云十佳博主等。
🏆《博客内容》:.NET、Java、Python、Go、Node、前端、IOS、Android、鸿蒙、Linux、物联网、网络安全、大数据、人工智能、U3D游戏、小程序等相关领域知识。
🏆🎉欢迎 👍点赞✍评论⭐收藏
🚀前言
在前端开发的快速迭代时代,开发者们面临着越来越大的压力,需要在短时间内交付高质量的代码。随着人工智能技术的不断进步,AI 逐渐成为我们工作中的重要伙伴。尤其是像 ChatGPT 这样的智能工具,能够帮助我们在编程过程中提高效率,降低重复性工作。
本文将探讨如何利用 ChatGPT 来快速生成 Vue 组件。我们将分享具体的操作步骤与实际案例,展示如何通过 AI 辅助,简化开发流程,提升代码质量。无论你是 Vue 的新手,还是经验丰富的开发者,相信这篇文章都能为你提供实用的技巧和灵感,助你在前端开发中如虎添翼。让我们一起开启这场 AI 驱动的编程之旅吧!
🚀一、利用ChatGPT在前端开发中快速生成Vue组件
ChatGPT应用在前端开发中的意义在于提高开发效率、促进学习和知识获取、提供设计和架构建议,以及提供辅助和团队协作支持。它可以为开发人员提供智能化的辅助和指导使他们更加高效、准确地完成前端开发工作,并在不断学习和进步的过程中提升技能水平。
🔎1.模态框组件
请以前端专家的角色,给出一个Vue 版本的模态框组件。
以下是一个Vue 3版本的模态框组件的示例。这个组件具备基本的模态框功能,包括显示和隐藏模态框、点击遮罩层关闭、支持插槽内容等。
### Vue 3 版本的模态框组件
```vue
<template>
<div v-if="visible" class="modal-overlay" @click="handleOverlayClick">
<div class="modal-content" @click.stop>
<header class="modal-header">
<slot name="header">
<h3>{{ title }}</h3>
</slot>
<button class="close-button" @click="closeModal">×</button>
</header>
<section class="modal-body">
<slot></slot>
</section>
<footer class="modal-footer">
<slot name="footer">
<button class="modal-button" @click="closeModal">Close</button>
</slot>
</footer>
</div>
</div>
</template>
<script>
export default {
name: "Modal",
props: {
title: {
type: String,
default: "Modal Title",
},
modelValue: {
type: Boolean,
default: false,
},
},
computed: {
visible() {
return this.modelValue;
},
},
methods: {
closeModal() {
this.$emit("update:modelValue", false);
},
handleOverlayClick() {
this.closeModal();
},
},
};
</script>
<style scoped>
.modal-overlay {
position: fixed;
top: 0;
left: 0;
right: 0;
bottom: 0;
background: rgba(0, 0, 0, 0.5);
display: flex;
align-items: center;
justify-content: center;
z-index: 1000;
}
.modal-content {
background: white;
border-radius: 8px;
width: 400px;
max-width: 100%;
padding: 20px;
box-shadow: 0 2px 10px rgba(0, 0, 0, 0.1);
position: relative;
}
.modal-header {
display: flex;
justify-content: space-between;
align-items: center;
border-bottom: 1px solid #e5e5e5;
padding-bottom: 10px;
margin-bottom: 20px;
}
.modal-body {
margin-bottom: 20px;
}
.modal-footer {
display: flex;
justify-content: flex-end;
}
.close-button {
background: transparent;
border: none;
font-size: 1.5rem;
cursor: pointer;
line-height: 1;
}
.modal-button {
background-color: #007bff;
color: white;
padding: 8px 16px;
border: none;
border-radius: 4px;
cursor: pointer;
}
.modal-button:hover {
background-color: #0056b3;
}
</style>
```vue
### 使用示例
```vue
<template>
<div>
<button @click="showModal">Open Modal</button>
<Modal v-model:modelValue="isModalVisible" title="My Modal Title">
<template v-slot:header>
<h3>Custom Header</h3>
</template>
<p>This is the body content of the modal.</p>
<template v-slot:footer>
<button @click="isModalVisible = false">Close Modal</button>
</template>
</Modal>
</div>
</template>
<script>
import Modal from './components/Modal.vue'; // 假设Modal组件放在components文件夹下
export default {
components: {
Modal,
},
data() {
return {
isModalVisible: false,
};
},
methods: {
showModal() {
this.isModalVisible = true;
},
},
};
</script>
```vue
### 组件说明:
1. **Props**:
- `title`: 用于设置模态框的标题。
- `modelValue`: 用于控制模态框的显示和隐藏。
2. **插槽**:
- `header`: 自定义模态框的头部内容。
- `default`: 模态框的主体内容。
- `footer`: 自定义模态框的底部内容。
3. **事件**:
- `update:modelValue`: 用于同步外部的状态与内部模态框的显示状态。
4. **方法**:
- `closeModal`: 用于关闭模态框,并触发 `update:modelValue` 事件。
- `handleOverlayClick`: 用于点击遮罩层时关闭模态框。
### 使用说明:
你可以将 `Modal` 组件集成到你的Vue项目中,通过 `v-model:modelValue` 绑定来控制模态框的显示与隐藏。同时,你可以使用插槽来自定义模态框的标题、主体和底部内容,满足不同的需求。
这个组件的设计简单易用,并且可以在大多数前端场景中使用。如果你需要扩展其功能,可以进一步添加动画效果、表单验证等高级特性。
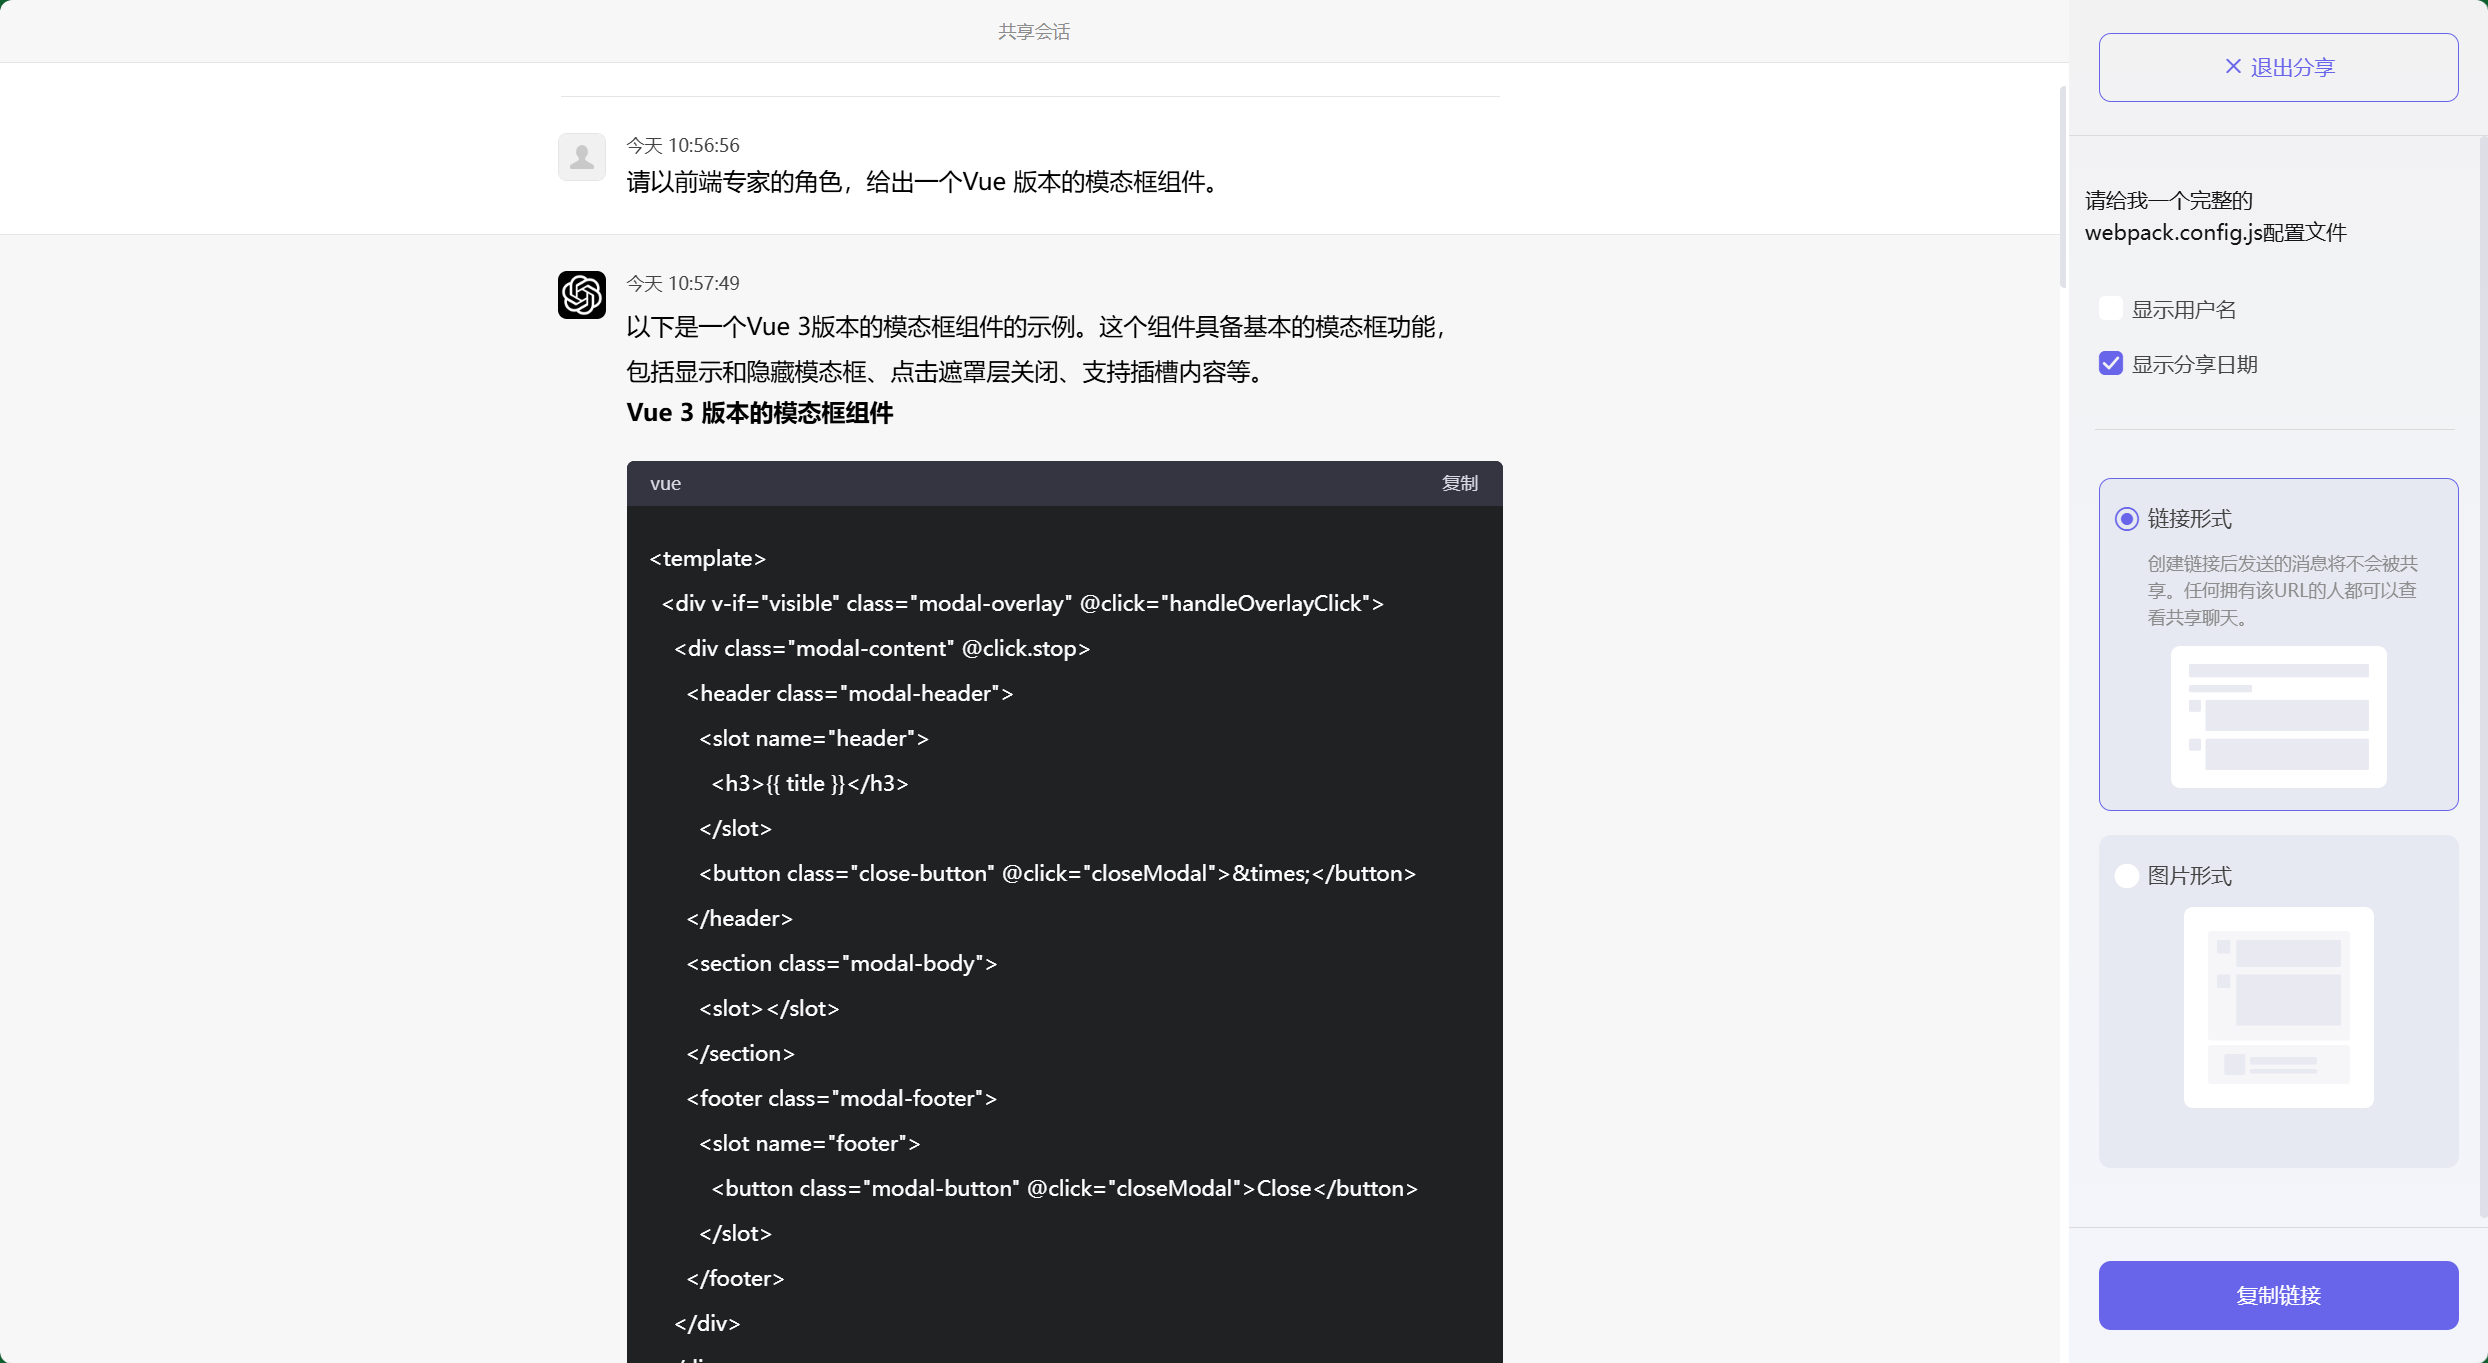
把组件代码直接复制到VS Code项目中即可直接运行,但是当前代码还不完善,我们可以进一步通过 ChatGPT 进行优化。
请在 Vue 版本的模态框组件中加人确定提交和取消提交逻辑。
在Vue模态框组件中添加“确定提交”和“取消提交”逻辑,可以通过在组件中加入两个按钮(“确定”和“取消”),并分别触发相应的事件。以下是更新后的代码示例:
### 更新后的 Vue 3 版本的模态框组件
```vue
<template>
<div v-if="visible" class="modal-overlay" @click="handleOverlayClick">
<div class="modal-content" @click.stop>
<header class="modal-header">
<slot name="header">
<h3>{{ title }}</h3>
</slot>
<button class="close-button" @click="cancelSubmit">×</button>
</header>
<section class="modal-body">
<slot></slot>
</section>
<footer class="modal-footer">
<button class="modal-button" @click="cancelSubmit">取消</button>
<button class="modal-button submit-button" @click="confirmSubmit">确定</button>
</footer>
</div>
</div>
</template>
<script>
export default {
name: "Modal",
props: {
title: {
type: String,
default: "Modal Title",
},
modelValue: {
type: Boolean,
default: false,
},
},
computed: {
visible() {
return this.modelValue;
},
},
methods: {
closeModal() {
this.$emit("update:modelValue", false);
},
confirmSubmit() {
this.$emit("confirm");
this.closeModal();
},
cancelSubmit() {
this.$emit("cancel");
this.closeModal();
},
handleOverlayClick() {
this.cancelSubmit();
},
},
};
</script>
<style scoped>
.modal-overlay {
position: fixed;
top: 0;
left: 0;
right: 0;
bottom: 0;
background: rgba(0, 0, 0, 0.5);
display: flex;
align-items: center;
justify-content: center;
z-index: 1000;
}
.modal-content {
background: white;
border-radius: 8px;
width: 400px;
max-width: 100%;
padding: 20px;
box-shadow: 0 2px 10px rgba(0, 0, 0, 0.1);
position: relative;
}
.modal-header {
display: flex;
justify-content: space-between;
align-items: center;
border-bottom: 1px solid #e5e5e5;
padding-bottom: 10px;
margin-bottom: 20px;
}
.modal-body {
margin-bottom: 20px;
}
.modal-footer {
display: flex;
justify-content: flex-end;
}
.close-button {
background: transparent;
border: none;
font-size: 1.5rem;
cursor: pointer;
line-height: 1;
}
.modal-button {
background-color: #007bff;
color: white;
padding: 8px 16px;
border: none;
border-radius: 4px;
cursor: pointer;
margin-left: 10px;
}
.modal-button:hover {
background-color: #0056b3;
}
.submit-button {
background-color: #28a745;
}
.submit-button:hover {
background-color: #218838;
}
</style>
```vue
### 使用示例
```vue
<template>
<div>
<button @click="showModal">Open Modal</button>
<Modal
v-model:modelValue="isModalVisible"
title="Confirm Your Action"
@confirm="handleConfirm"
@cancel="handleCancel"
>
<p>Are you sure you want to proceed?</p>
</Modal>
</div>
</template>
<script>
import Modal from './components/Modal.vue'; // 假设Modal组件放在components文件夹下
export default {
components: {
Modal,
},
data() {
return {
isModalVisible: false,
};
},
methods: {
showModal() {
this.isModalVisible = true;
},
handleConfirm() {
console.log('Confirmed');
// 在此处理确定逻辑
},
handleCancel() {
console.log('Cancelled');
// 在此处理取消逻辑
},
},
};
</script>
```vue
### 更新后的组件说明:
1. **`@confirm`**:
- 当用户点击“确定”按钮时触发,父组件可以监听这个事件以处理确认逻辑。
2. **`@cancel`**:
- 当用户点击“取消”按钮或点击模态框外部时触发,父组件可以监听这个事件以处理取消逻辑。
3. **按钮**:
- “取消”按钮会触发 `cancelSubmit` 方法。
- “确定”按钮会触发 `confirmSubmit` 方法。
通过这种方式,你可以在父组件中方便地处理确定和取消事件,并根据用户的选择执行相应的逻辑。
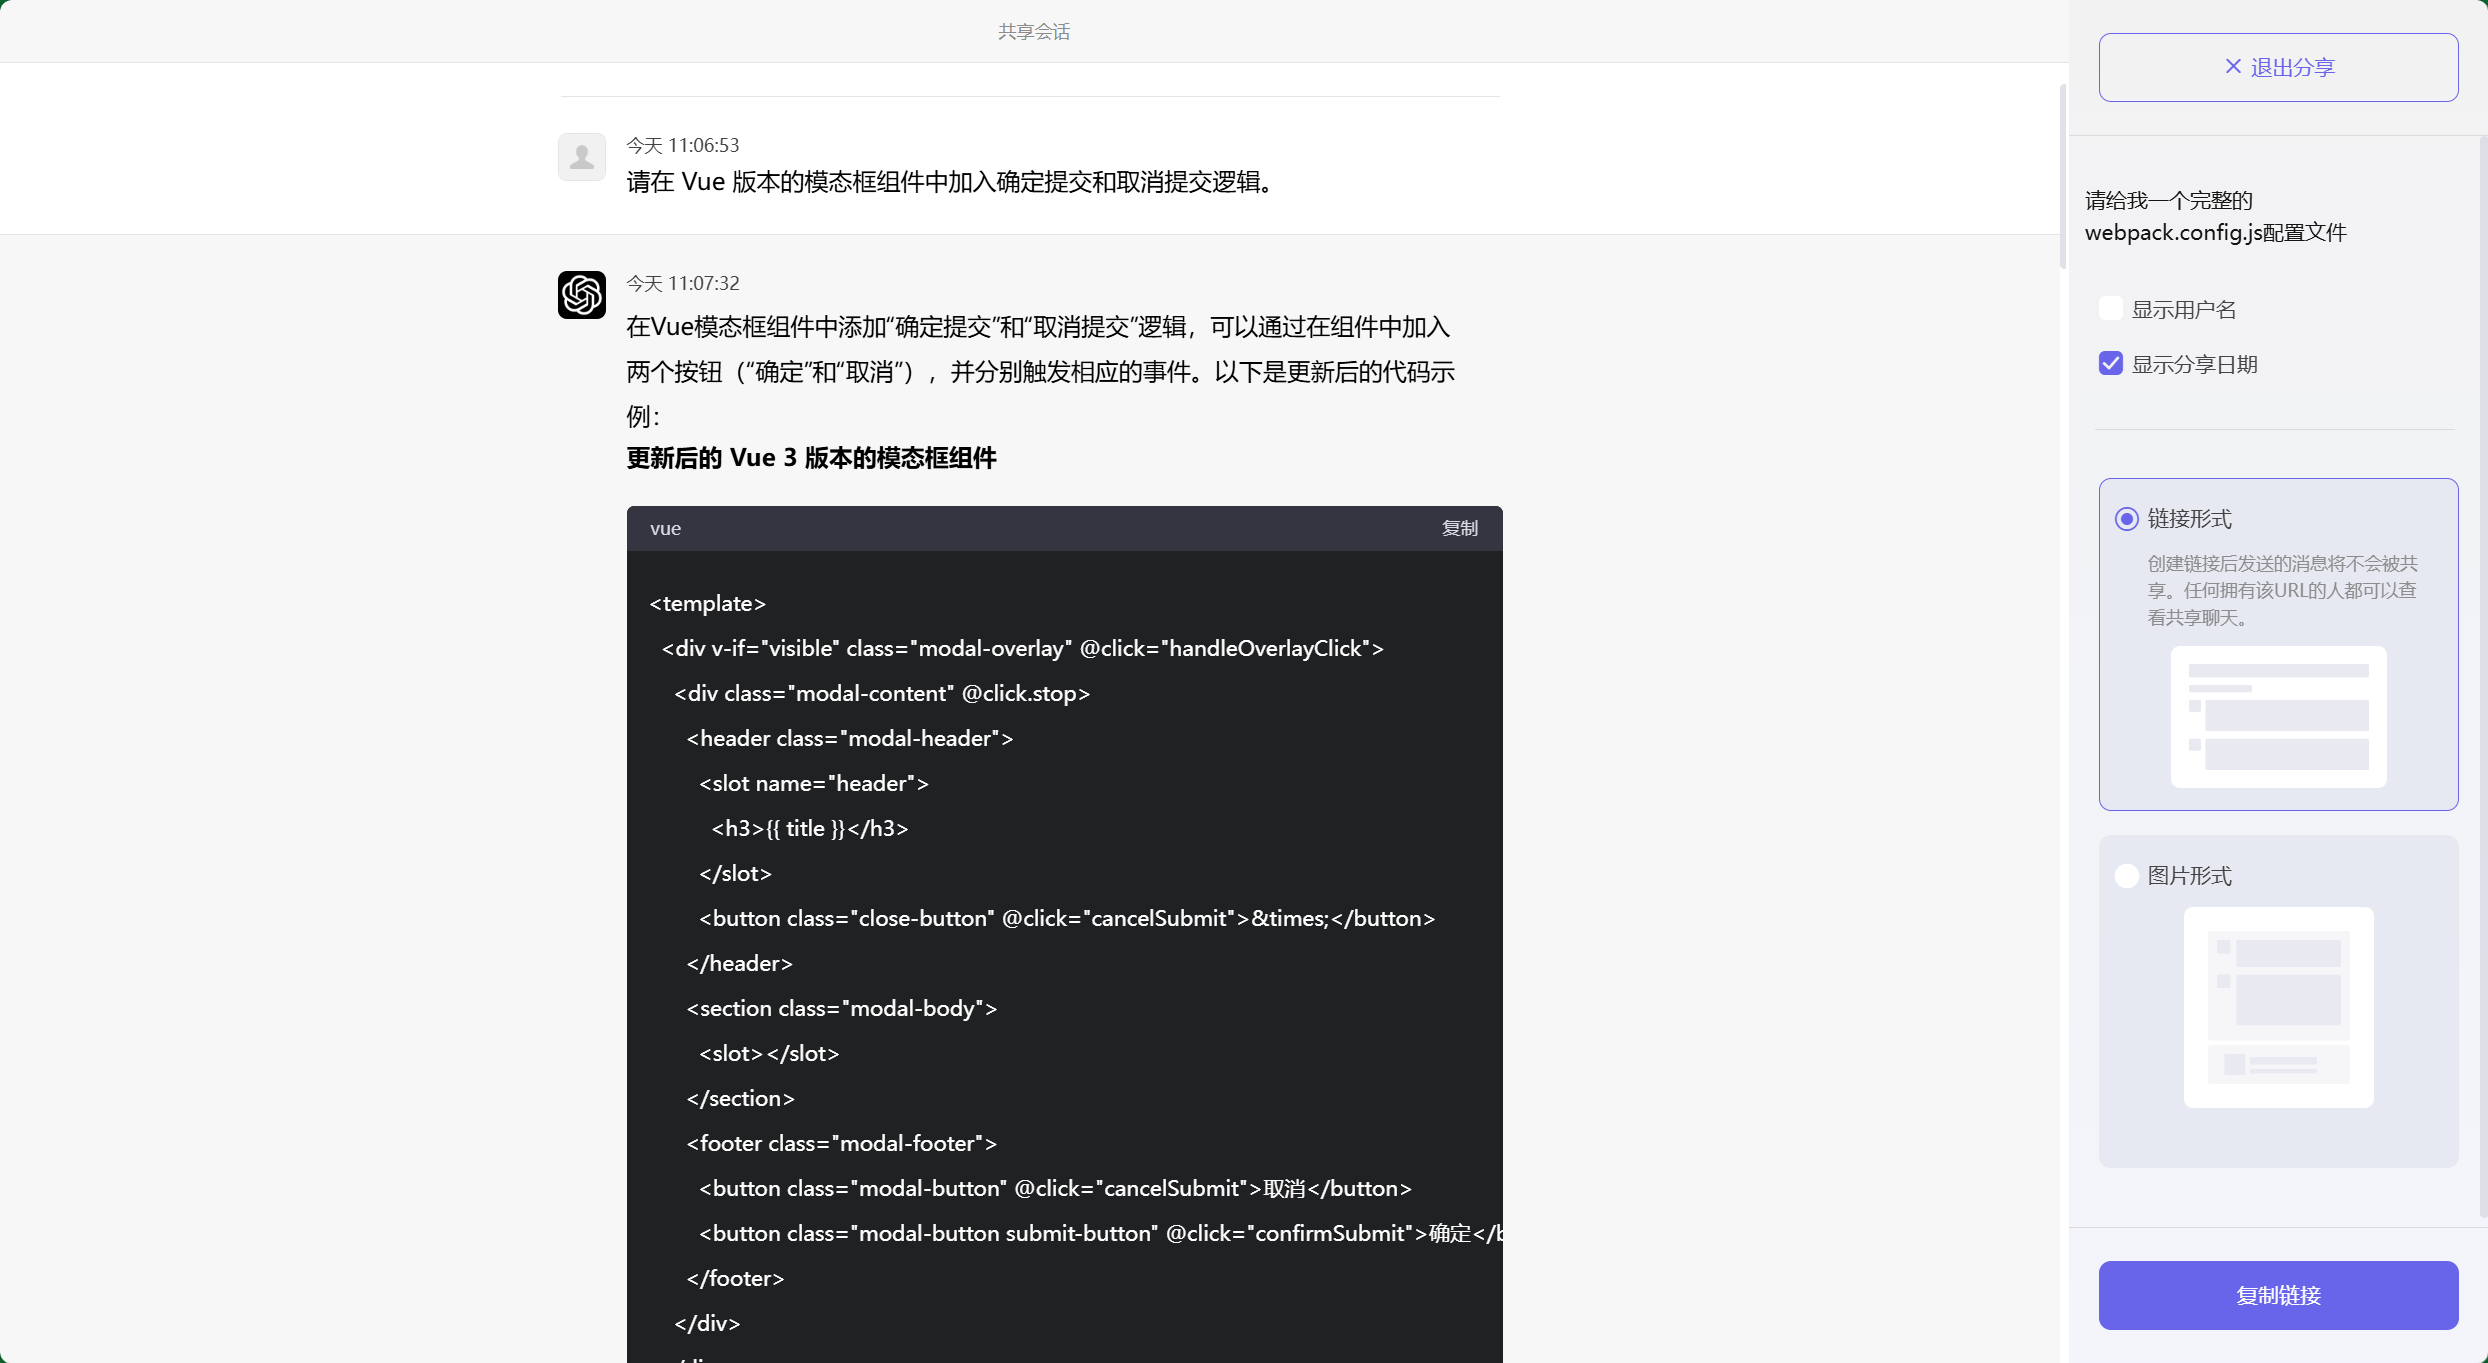
显然,ChatGPT根据我们的要求优化了代码,此时还可以进一步优化。
请在确认提交的逻辑中加入请求后端接口的代码,取消提交则关闭模态框。
为了在“确认提交”的逻辑中加入请求后端接口的代码,你可以使用 `axios`(或 `fetch`)来发送 HTTP 请求。在提交时,模态框会向后端发送数据,而取消提交则直接关闭模态框。

以下是更新后的示例代码,其中包含了 `axios` 请求后端接口的逻辑:

### 更新后的 Vue 3 模态框组件使用示例

```vue
<template>
  <div>
    <button @click="showModal">Open Modal</button>
    <Modal
      v-model:modelValue="isModalVisible"
      title="Confirm Your Action"
      @confirm="handleConfirm"
      @cancel="handleCancel"
    >
      <p>Are you sure you want to proceed?</p>
    </Modal>
  </div>
</template>

<script>
import axios from 'axios'; // 引入axios
import Modal from './components/Modal.vue';

export default {
  components: {
    Modal,
  },
  data() {
    return {
      isModalVisible: false,
    };
  },
  methods: {
    showModal() {
      this.isModalVisible = true;
    },
    async handleConfirm() {
      try {
        // 向后端发送请求
        const response = await axios.post('/api/submit', {
          data: 'your payload data',
        });

        console.log('Request successful:', response.data);
        // 根据后端的响应进行处理
        // 例如:显示成功消息、关闭模态框等
        this.isModalVisible = false;
      } catch (error) {
        console.error('Request failed:', error);
        // 处理错误情况,显示错误信息
      }
    },
    handleCancel() {
      // 取消逻辑:仅关闭模态框
      this.isModalVisible = false;
    },
  },
};
</script>
```vue

### 模态框组件逻辑说明:

- **`handleConfirm()`**:
  - 通过 `axios` 向后端发送一个 `POST` 请求。当请求成功时,将会收到后端的响应数据,可以在这里进行处理(例如关闭模态框或显示成功提示)。
  - 如果请求失败,会捕获错误并在控制台中打印出来,你也可以添加更多的错误处理逻辑,比如显示错误提示。

- **`handleCancel()`**:
  - 当用户点击“取消”时,只关闭模态框,不执行任何请求。

### 后端接口请求说明:

1. **`axios.post('/api/submit', { data: 'your payload data' })`**:
   - `'/api/submit'` 是后端的 API 接口路径,假设这是一个 `POST` 请求。
   - `{ data: 'your payload data' }` 是传递给后端的数据,可以根据你的实际需求调整数据结构。

2. **错误处理**:
   - `try...catch` 块确保请求错误时不会影响应用,并且能够捕捉异常进行处理。

你可以根据需要扩展此逻辑,处理不同的响应数据或状态(如加载动画、表单验证等)。
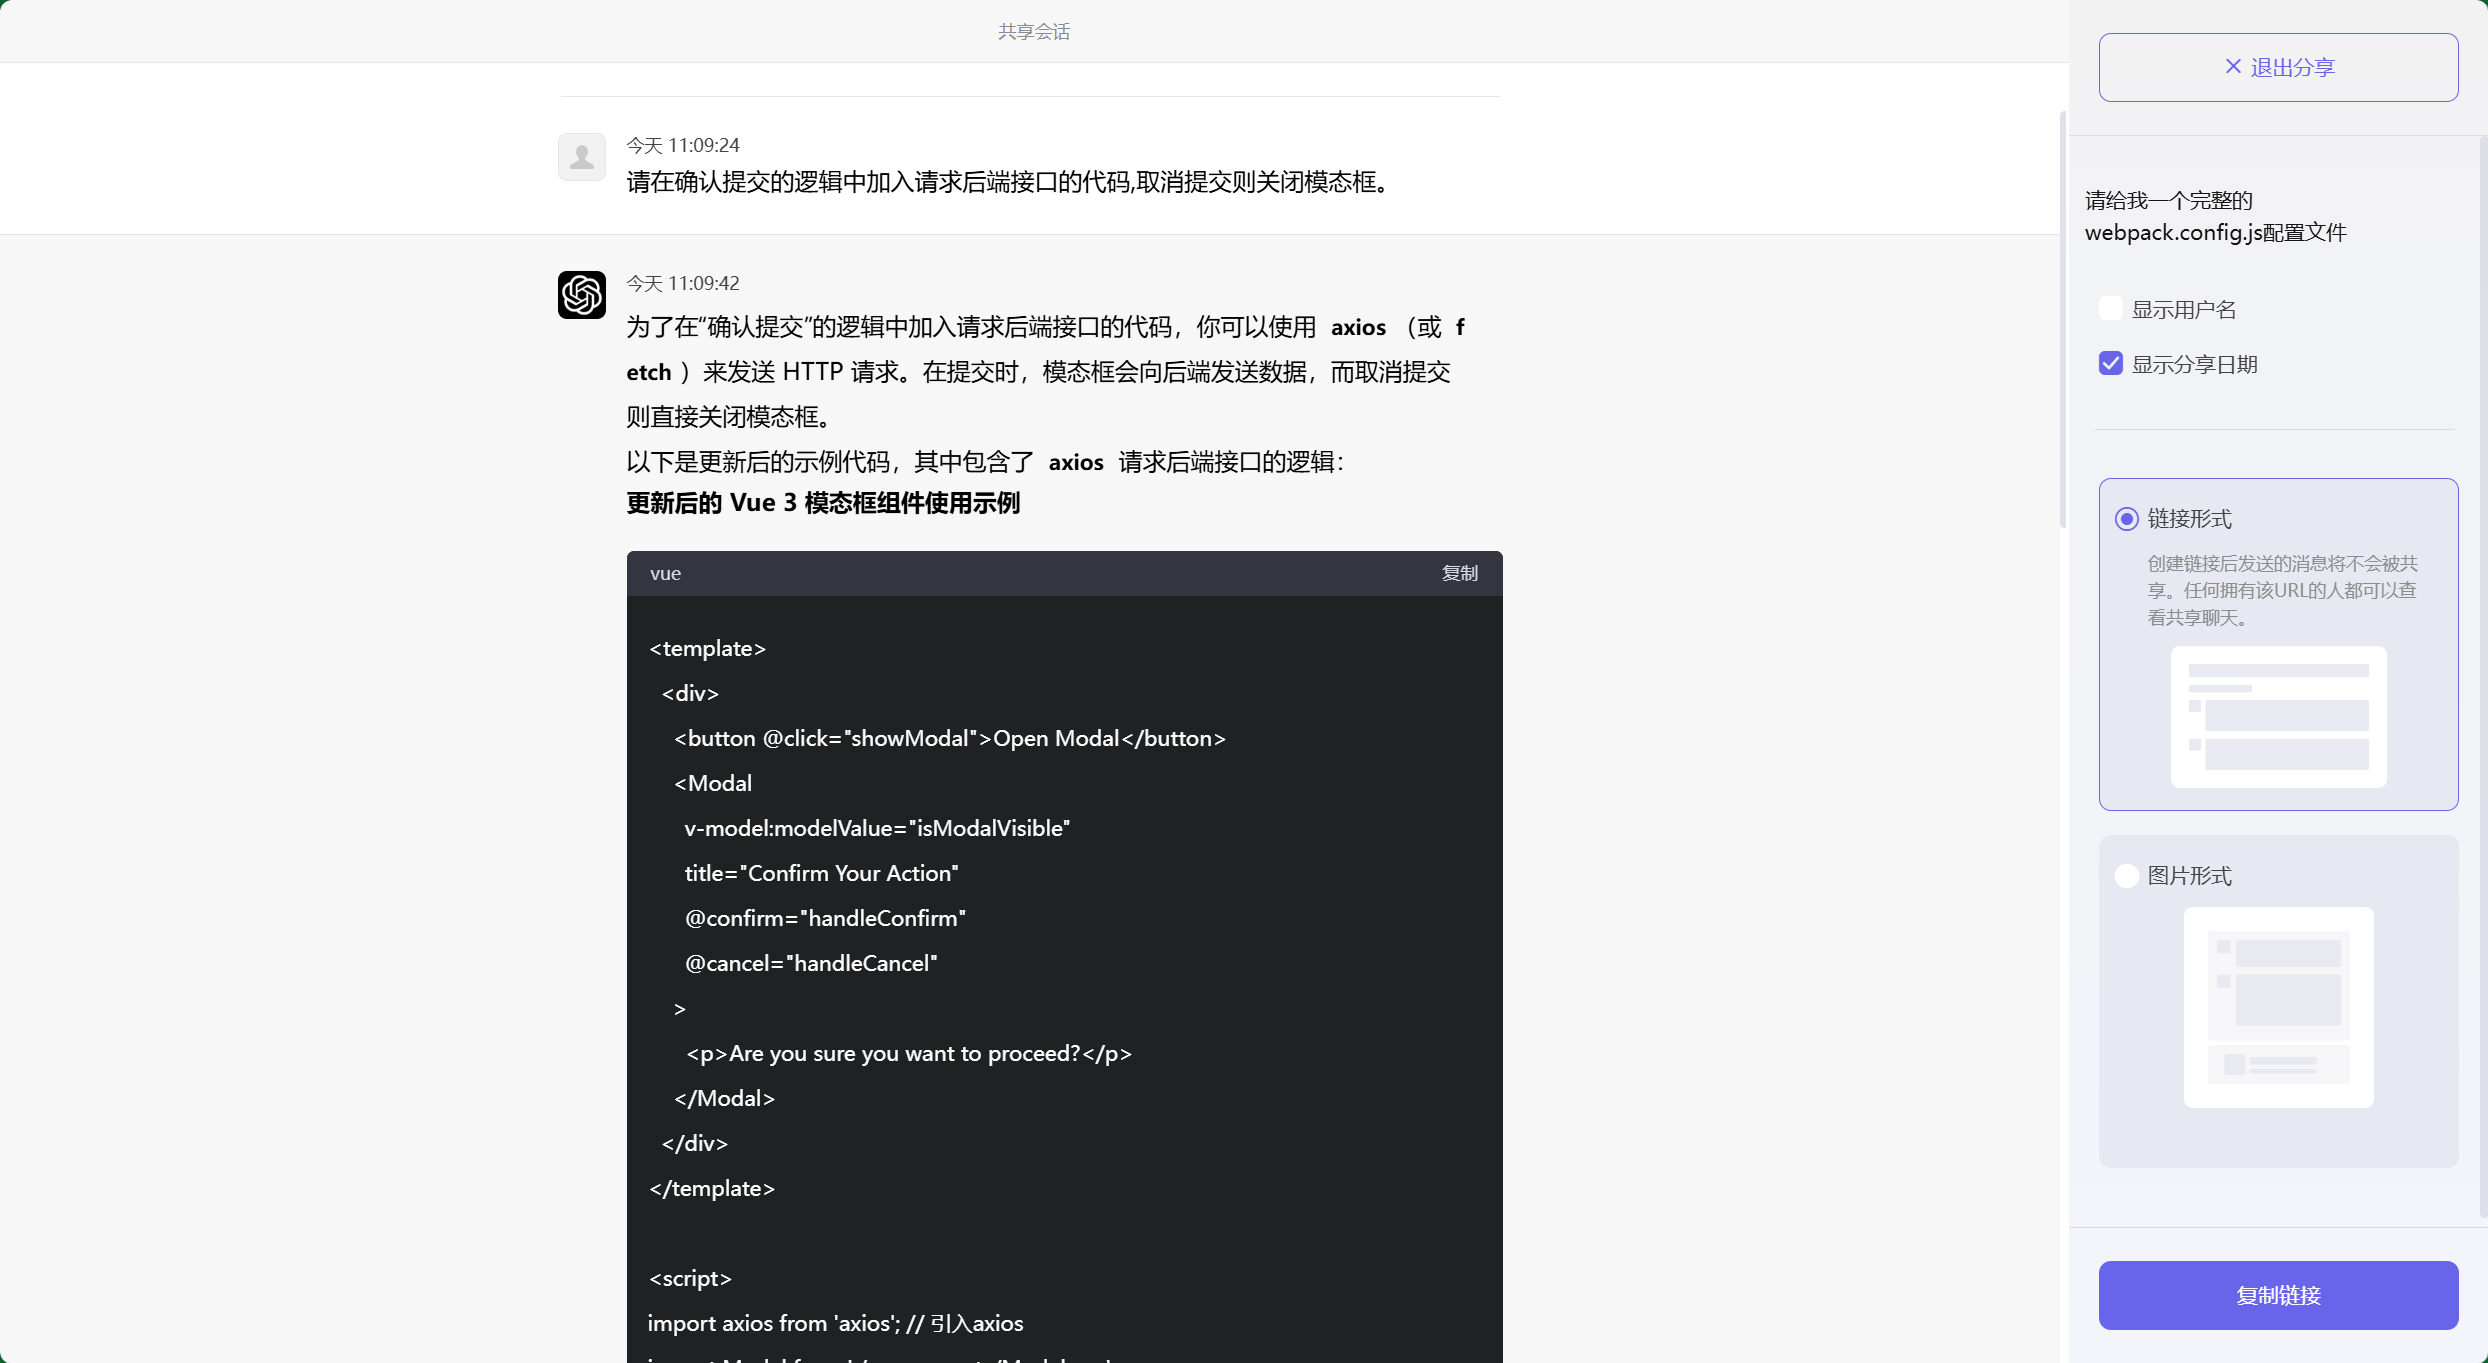
可以看到 ChatGPT实现了我们的要求,可以再继续让它进行优化。
请把标题、内容部分设置为可以支持动态传值自定义。
为了使模态框的标题和内容部分可以支持动态传值自定义,我们可以通过 `props` 传递标题和内容。以下是更新后的代码示例:
### 更新后的 Vue 3 模态框组件
```vue
<template>
<div v-if="visible" class="modal-overlay" @click="handleOverlayClick">
<div class="modal-content" @click.stop>
<header class="modal-header">
<slot name="header">
<h3>{{ title }}</h3>
</slot>
<button class="close-button" @click="cancelSubmit">×</button>
</header>
<section class="modal-body">
<slot>
<p>{{ content }}</p>
</slot>
</section>
<footer class="modal-footer">
<button class="modal-button" @click="cancelSubmit">取消</button>
<button class="modal-button submit-button" @click="confirmSubmit">确定</button>
</footer>
</div>
</div>
</template>
<script>
export default {
name: "Modal",
props: {
title: {
type: String,
default: "Modal Title",
},
content: {
type: String,
default: "This is the modal content.",
},
modelValue: {
type: Boolean,
default: false,
},
},
computed: {
visible() {
return this.modelValue;
},
},
methods: {
closeModal() {
this.$emit("update:modelValue", false);
},
confirmSubmit() {
this.$emit("confirm");
this.closeModal();
},
cancelSubmit() {
this.$emit("cancel");
this.closeModal();
},
handleOverlayClick() {
this.cancelSubmit();
},
},
};
</script>
<style scoped>
.modal-overlay {
position: fixed;
top: 0;
left: 0;
right: 0;
bottom: 0;
background: rgba(0, 0, 0, 0.5);
display: flex;
align-items: center;
justify-content: center;
z-index: 1000;
}
.modal-content {
background: white;
border-radius: 8px;
width: 400px;
max-width: 100%;
padding: 20px;
box-shadow: 0 2px 10px rgba(0, 0, 0, 0.1);
position: relative;
}
.modal-header {
display: flex;
justify-content: space-between;
align-items: center;
border-bottom: 1px solid #e5e5e5;
padding-bottom: 10px;
margin-bottom: 20px;
}
.modal-body {
margin-bottom: 20px;
}
.modal-footer {
display: flex;
justify-content: flex-end;
}
.close-button {
background: transparent;
border: none;
font-size: 1.5rem;
cursor: pointer;
line-height: 1;
}
.modal-button {
background-color: #007bff;
color: white;
padding: 8px 16px;
border: none;
border-radius: 4px;
cursor: pointer;
margin-left: 10px;
}
.modal-button:hover {
background-color: #0056b3;
}
.submit-button {
background-color: #28a745;
}
.submit-button:hover {
background-color: #218838;
}
</style>
```vue
### 使用示例
```vue
<template>
<div>
<button @click="showModal">Open Modal</button>
<Modal
v-model:modelValue="isModalVisible"
:title="modalTitle"
:content="modalContent"
@confirm="handleConfirm"
@cancel="handleCancel"
/>
</div>
</template>
<script>
import axios from 'axios'; // 引入axios
import Modal from './components/Modal.vue';
export default {
components: {
Modal,
},
data() {
return {
isModalVisible: false,
modalTitle: "Confirm Your Action", // 动态传入的标题
modalContent: "Are you sure you want to proceed?", // 动态传入的内容
};
},
methods: {
showModal() {
this.isModalVisible = true;
},
async handleConfirm() {
try {
// 向后端发送请求
const response = await axios.post('/api/submit', {
data: 'your payload data',
});
console.log('Request successful:', response.data);
// 根据后端的响应进行处理
this.isModalVisible = false;
} catch (error) {
console.error('Request failed:', error);
}
},
handleCancel() {
this.isModalVisible = false;
},
},
};
</script>
```vue
### 说明:
1. **`title` 和 `content`**:
- 通过 `props` 接收动态传递的标题和内容。在使用时,父组件可以直接通过 `:title` 和 `:content` 传递自定义的值。
2. **默认插槽和 `props` 结合**:
- 模态框的内容部分支持默认插槽,你可以传递自定义内容,也可以使用 `props` 中的 `content` 来动态设置内容。
3. **使用方式**:
- 在父组件中,通过 `modalTitle` 和 `modalContent` 动态设置模态框的标题和内容。
- 这种方式使得模态框更加灵活,可以适用于不同的场景需求。
你可以根据需要进一步定制和扩展此组件。
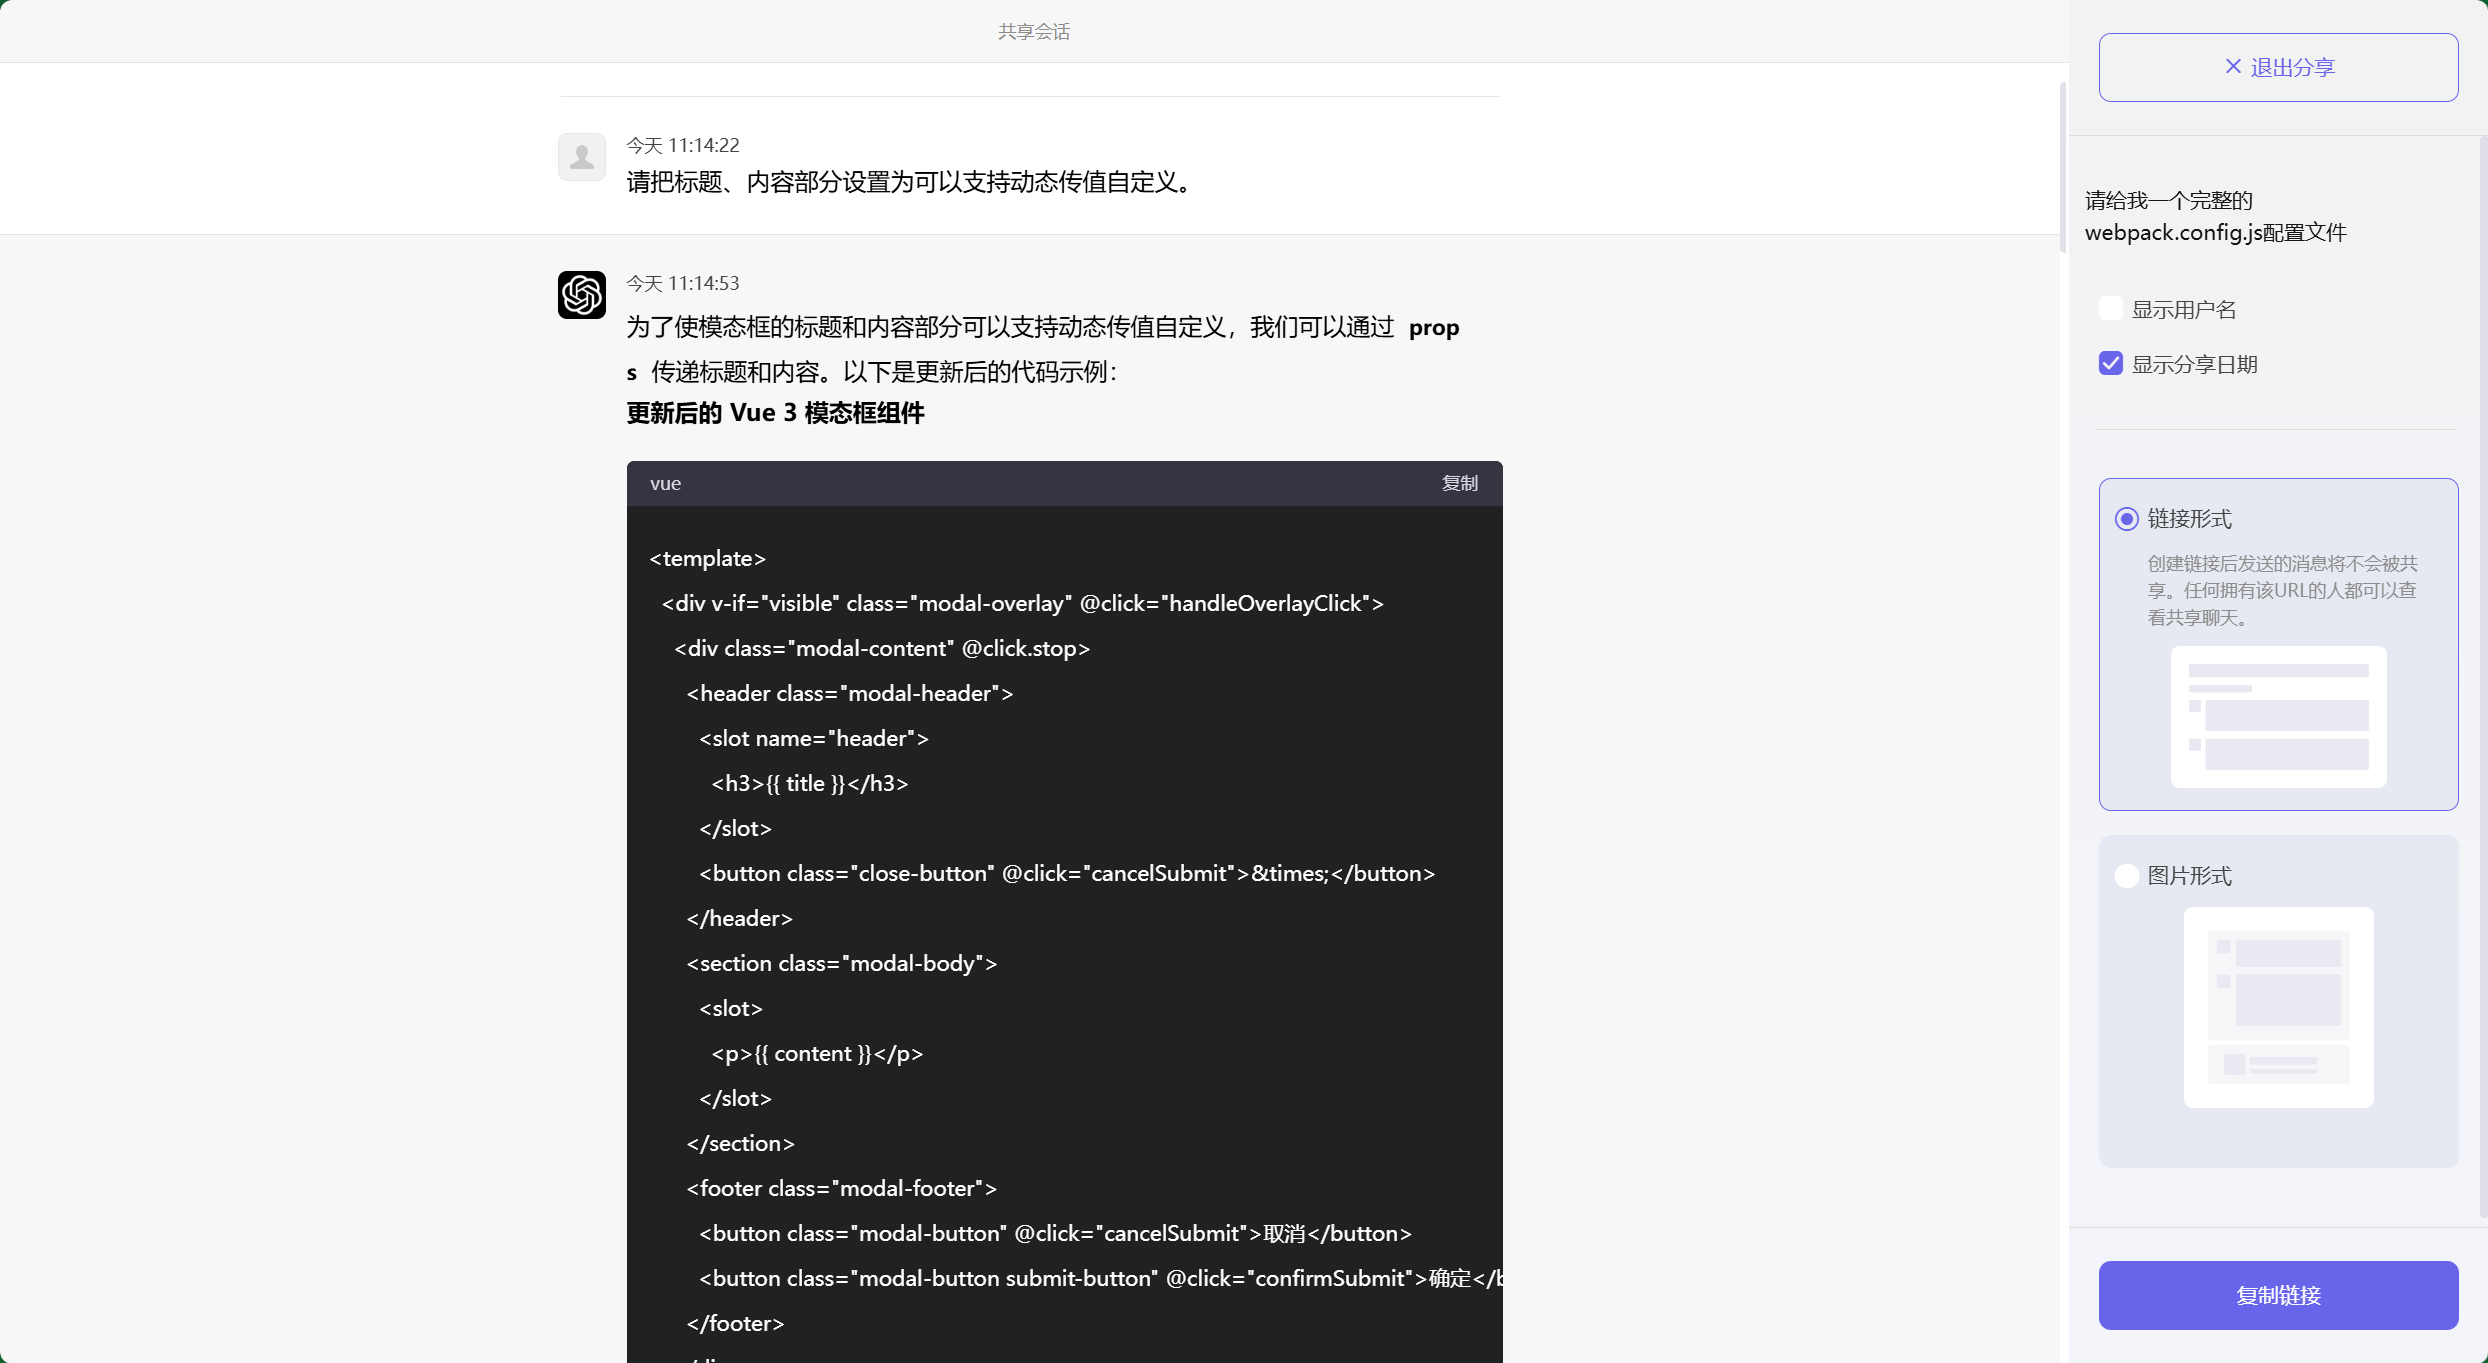
通过与ChatGPT进行对话,开发人员可以快速获取代码片段、生成组件结构等,并获得针对具体问题的解答和建议,从而减少工作量。
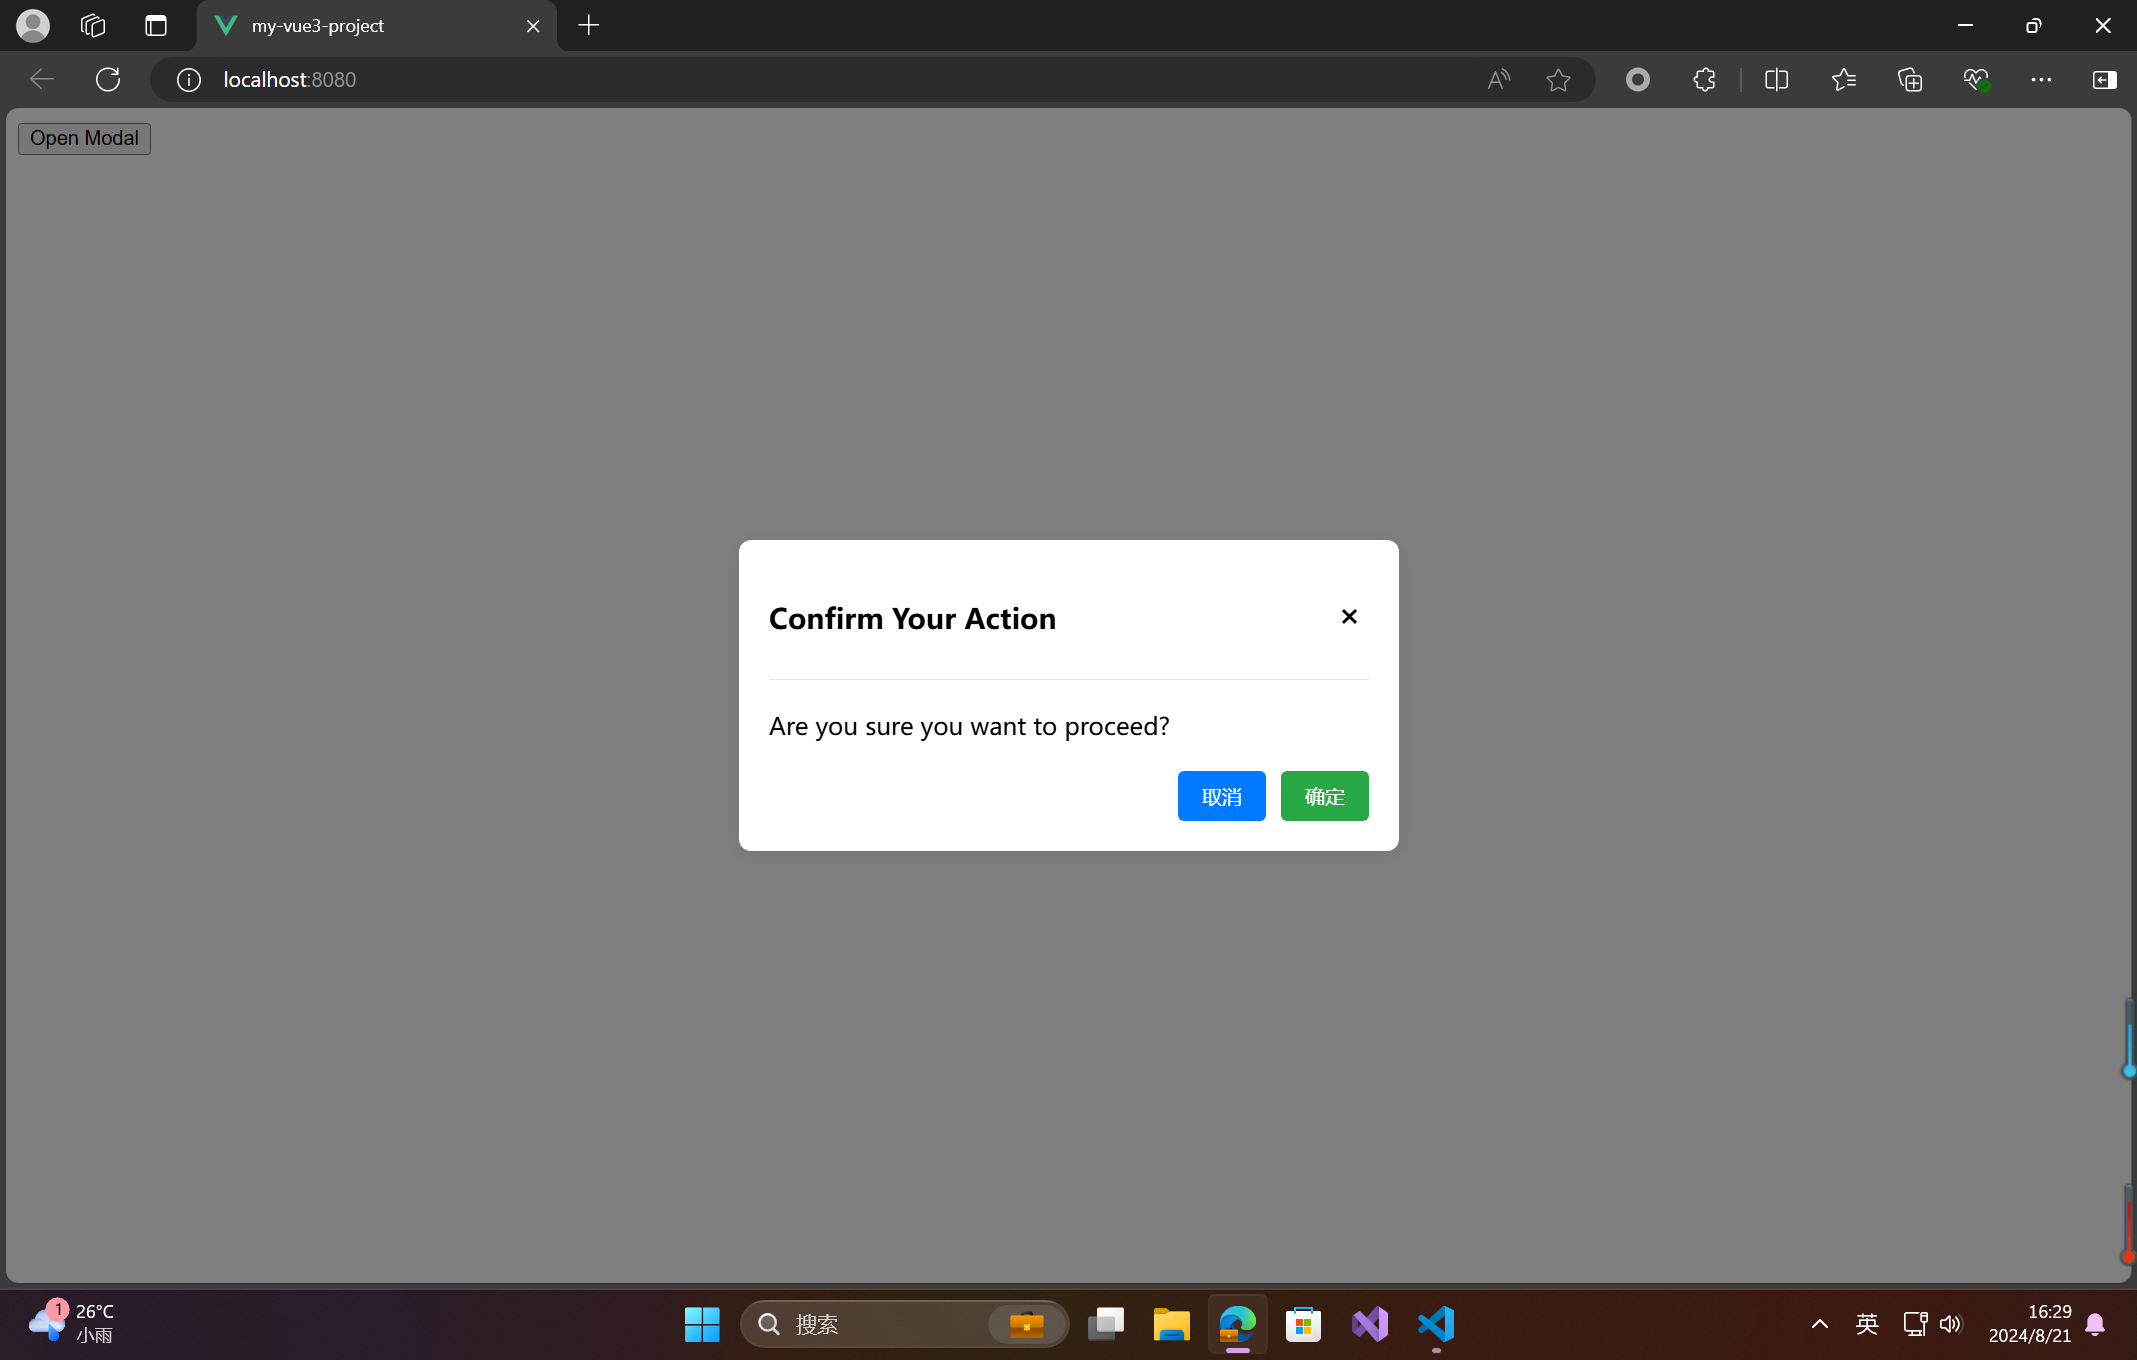
最终效果:
- 点赞
- 收藏
- 关注作者


评论(0)