【愚公系列】2023年11月 GDI+绘图专题 Font
🏆 作者简介,愚公搬代码
🏆《头衔》:华为云特约编辑,华为云云享专家,华为开发者专家,华为产品云测专家,CSDN博客专家,阿里云专家博主,腾讯云优秀博主,掘金优秀博主,51CTO博客专家等。
🏆《近期荣誉》:2022年CSDN博客之星TOP2,2022年华为云十佳博主等。
🏆《博客内容》:.NET、Java、Python、Go、Node、前端、IOS、Android、鸿蒙、Linux、物联网、网络安全、大数据、人工智能、U3D游戏、小程序等相关领域知识。
🏆🎉欢迎 👍点赞✍评论⭐收藏
🚀前言
在WinForm中,Font是用于控件中显示文本的字体。它是一个封装了字体族、字号、字体样式的类。
Font类提供了以下属性:
- FontFamily:字体族名称;
- Size:字体大小;
- Style:字体样式(粗体、斜体等);
- Unit:字体大小单位。
Font类还有一些方法,其中最常用的是ToString()方法,用于将Font对象转换为字符串表示。
在WinForm中,可以通过设置控件的Font属性来改变其字体,例如:
label1.Font = new Font("Microsoft Sans Serif", 12, FontStyle.Bold);
这将把label1控件的字体设为“Microsoft Sans Serif”字体,大小为12,粗体。
🚀一、font
🔎1.FontStyle
FontStyle是WinForms中用于定义文本字体风格的枚举。它允许您指定字体的样式,例如粗体、斜体、下划线等。以下是FontStyle的一些常用成员以及一个示例:
FontStyle的常用成员:
Regular:普通字体,没有额外样式。Bold:粗体。Italic:斜体。Underline:下划线。Strikeout:删除线。
示例代码:
using System;
using System.Drawing;
using System.Windows.Forms;

public class FontStyleExample : Form
{
    public FontStyleExample()
    {
        Text = "FontStyle Example";
        Size = new Size(400, 200);
        Paint += new PaintEventHandler(OnPaint);
    }

    private void OnPaint(object sender, PaintEventArgs e)
    {
        Graphics g = e.Graphics;

        // 创建一个字体对象,指定字体名称、字号和风格
        Font regularFont = new Font("Arial", 14, FontStyle.Regular);
        Font boldFont = new Font("Arial", 14, FontStyle.Bold);
        Font italicFont = new Font("Arial", 14, FontStyle.Italic);
        Font underlineFont = new Font("Arial", 14, FontStyle.Underline);
        Font strikeoutFont = new Font("Arial", 14, FontStyle.Strikeout);

        // 绘制不同风格的文本
        g.DrawString("Regular Font", regularFont, Brushes.Black, 50, 50);
        g.DrawString("Bold Font", boldFont, Brushes.Black, 50, 70);
        g.DrawString("Italic Font", italicFont, Brushes.Black, 50, 90);
        g.DrawString("Underline Font", underlineFont, Brushes.Black, 50, 110);
        g.DrawString("Strikeout Font", strikeoutFont, Brushes.Black, 50, 130);

        // 释放资源
        regularFont.Dispose();
        boldFont.Dispose();
        italicFont.Dispose();
        underlineFont.Dispose();
        strikeoutFont.Dispose();
    }

    public static void Main()
    {
        Application.Run(new FontStyleExample());
    }
}

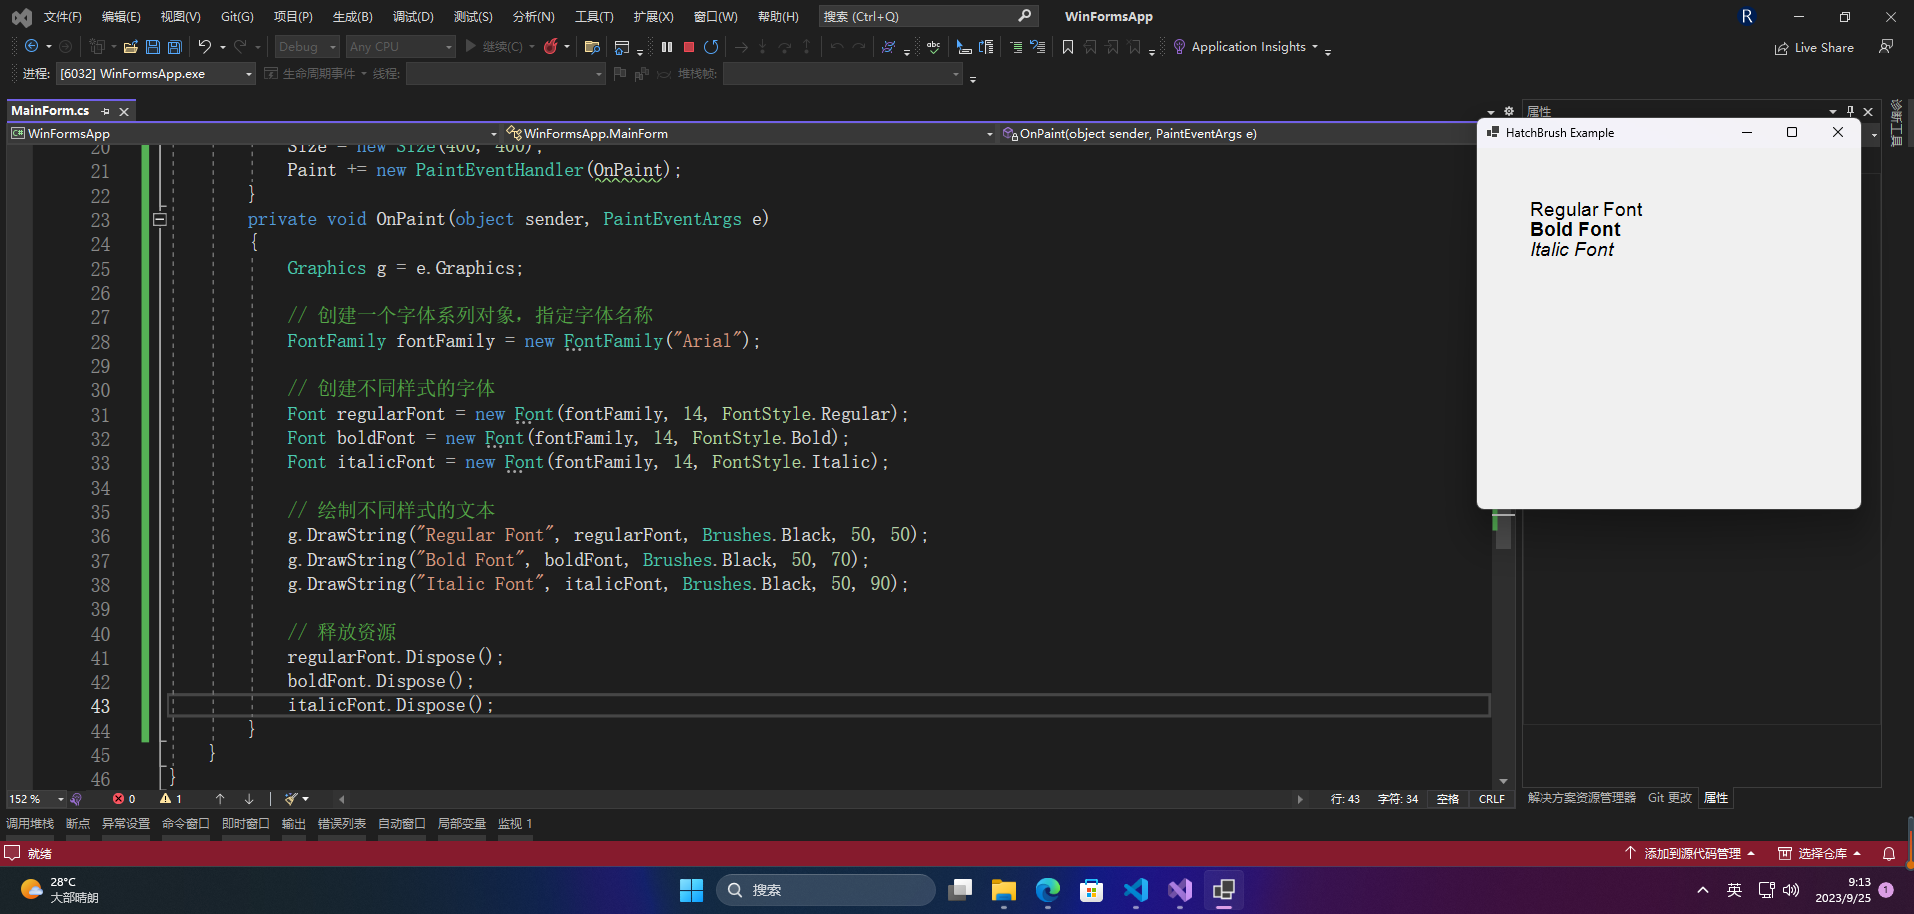
上面的示例创建了一个窗体,并在窗体上绘制了使用不同字体风格的文本。您可以根据需要选择适合您应用程序的字体风格,以创建不同的文本效果。 Font和FontStyle通常用于控制文本的外观。
🔎2.FontFamily
FontFamily是WinForms中用于表示字体系列的类。它允许您选择在应用程序中使用的字体系列,从而控制文本的外观。字体系列通常包括多种字体,如常规、粗体、斜体等。以下是FontFamily的简要介绍和一个示例:
FontFamily的主要属性和构造函数:
Name:获取字体系列的名称。GenericSansSerif、GenericSerif、GenericMonospace等静态属性:表示常见的字体系列,例如无衬线字体、衬线字体、等宽字体等。
示例代码:
using System;
using System.Drawing;
using System.Windows.Forms;

public class FontFamilyExample : Form
{
    public FontFamilyExample()
    {
        Text = "FontFamily Example";
        Size = new Size(400, 200);
        Paint += new PaintEventHandler(OnPaint);
    }

    private void OnPaint(object sender, PaintEventArgs e)
    {
        Graphics g = e.Graphics;

        // 创建一个字体系列对象,指定字体名称
        FontFamily fontFamily = new FontFamily("Arial");

        // 创建不同样式的字体
        Font regularFont = new Font(fontFamily, 14, FontStyle.Regular);
        Font boldFont = new Font(fontFamily, 14, FontStyle.Bold);
        Font italicFont = new Font(fontFamily, 14, FontStyle.Italic);

        // 绘制不同样式的文本
        g.DrawString("Regular Font", regularFont, Brushes.Black, 50, 50);
        g.DrawString("Bold Font", boldFont, Brushes.Black, 50, 70);
        g.DrawString("Italic Font", italicFont, Brushes.Black, 50, 90);

        // 释放资源
        regularFont.Dispose();
        boldFont.Dispose();
        italicFont.Dispose();
    }

    public static void Main()
    {
        Application.Run(new FontFamilyExample());
    }
}

上面的示例创建了一个窗体,并在窗体上绘制了使用不同字体样式的文本,所有字体都来自"Arial"字体系列。您可以根据需要选择不同的字体系列,以创建应用程序中所需的文本外观。 FontFamily通常用于指定文本所使用的字体。
🔎3.GraphicsUnit
在WinForms中,GraphicsUnit是一个枚举类型,用于指定测量文本和图形的单位。GraphicsUnit允许您在不同的度量单位之间进行转换,以确保在不同的设备和分辨率下绘制的文本和图形保持一致。以下是GraphicsUnit的主要成员以及一个示例:
GraphicsUnit的主要成员:
Display:表示以屏幕的像素为单位的度量。Document:表示以打印文档的1/300英寸为单位的度量。Inch:表示以英寸为单位的度量。Millimeter:表示以毫米为单位的度量。Pixel:表示以像素为单位的度量。Point:表示以点为单位的度量。
示例代码:
using System;
using System.Drawing;
using System.Drawing.Drawing2D;
using System.Windows.Forms;

public class GraphicsUnitExample : Form
{
    public GraphicsUnitExample()
    {
        Text = "GraphicsUnit Example";
        Size = new Size(400, 200);
        Paint += new PaintEventHandler(OnPaint);
    }

    private void OnPaint(object sender, PaintEventArgs e)
    {
        Graphics g = e.Graphics;

        // 创建一个字体对象,指定字体名称、字号和单位
        Font font = new Font("Arial", 24, GraphicsUnit.Point);

        // 创建一个矩形,指定单位为英寸
        RectangleF rectInches = new RectangleF(1, 1, 2, 1);
        g.DrawString("2 Inches", font, Brushes.Black, rectInches);

        // 将矩形的单位转换为毫米
        rectInches = ConvertUnits(rectInches, GraphicsUnit.Inch, GraphicsUnit.Millimeter);
        g.DrawString("50.8 mm", font, Brushes.Black, rectInches);

        // 释放资源
        font.Dispose();
    }

    // 将矩形的单位从sourceUnit转换为destinationUnit
    private RectangleF ConvertUnits(RectangleF rect, GraphicsUnit sourceUnit, GraphicsUnit destinationUnit)
    {
        rect.X = (float)GraphicsUnitConverter.Convert(rect.X, sourceUnit, destinationUnit);
        rect.Y = (float)GraphicsUnitConverter.Convert(rect.Y, sourceUnit, destinationUnit);
        rect.Width = (float)GraphicsUnitConverter.Convert(rect.Width, sourceUnit, destinationUnit);
        rect.Height = (float)GraphicsUnitConverter.Convert(rect.Height, sourceUnit, destinationUnit);
        return rect;
    }

    public static void Main()
    {
        Application.Run(new GraphicsUnitExample());
    }
}

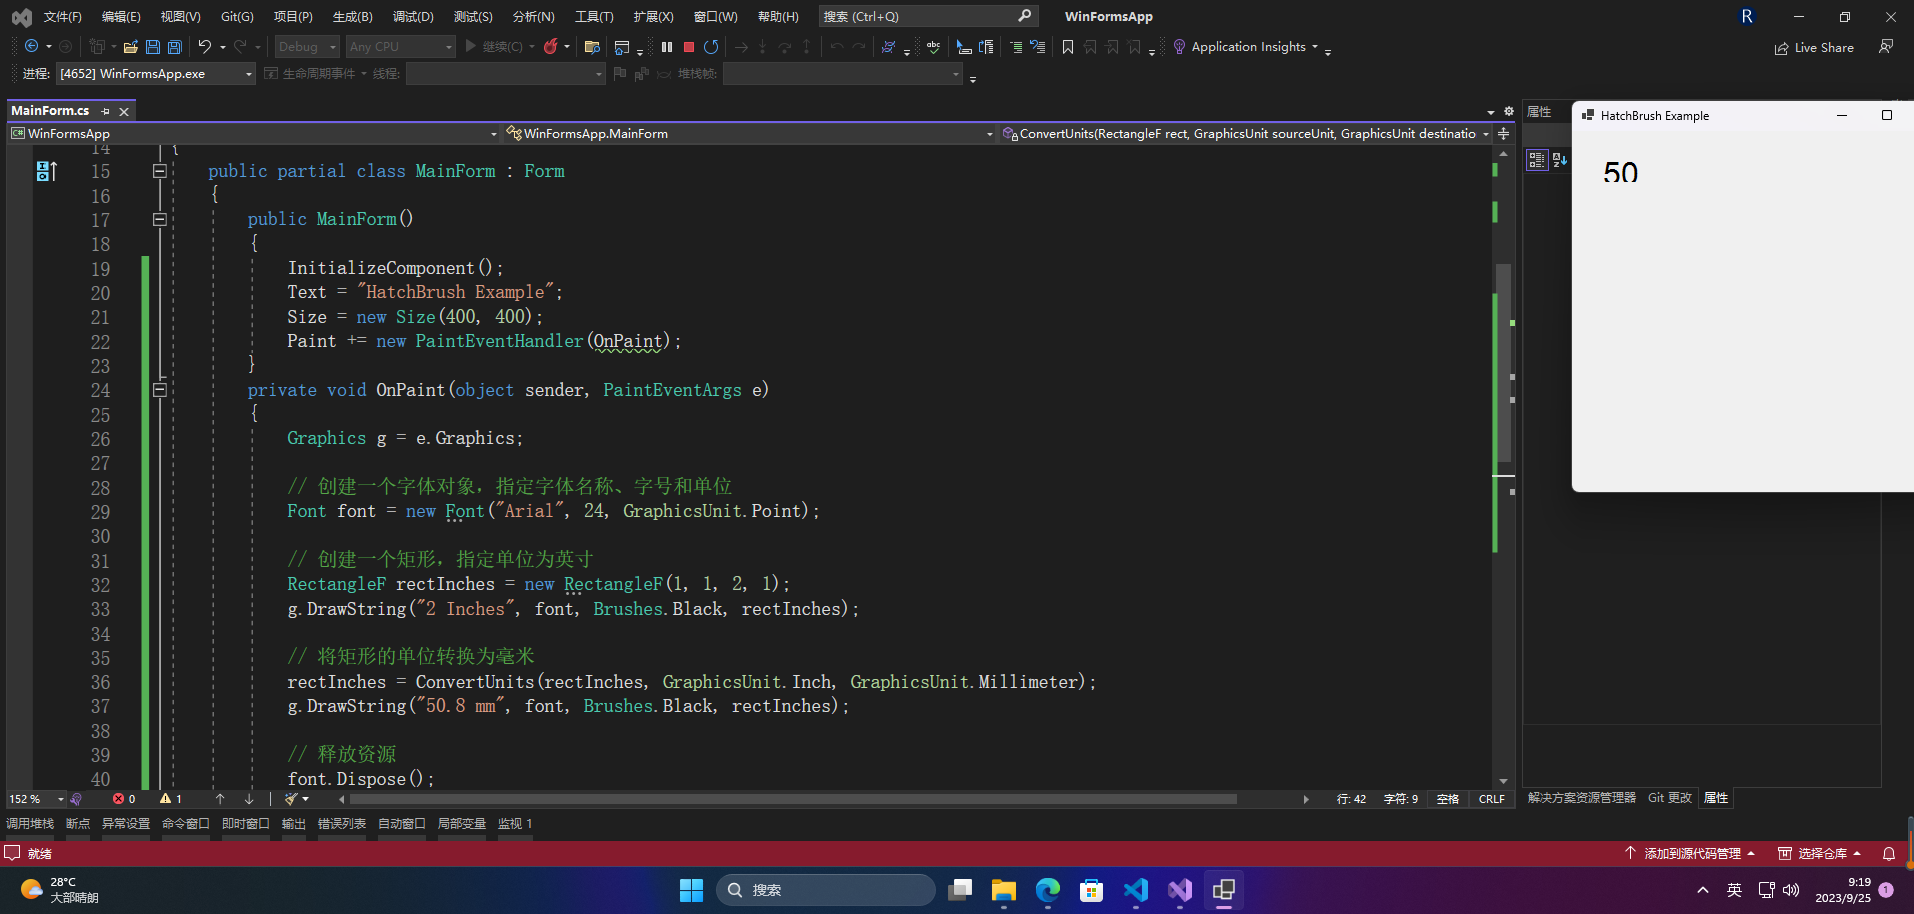
上面的示例创建了一个窗体,并在窗体上绘制了两个矩形,分别使用不同的单位来指定它们的大小。第一个矩形使用英寸作为单位,第二个矩形使用毫米作为单位。通过使用GraphicsUnit和ConvertUnits方法,您可以在不同单位之间进行转换,以确保文本和图形在不同环境下显示一致。
🚀感谢:给读者的一封信
亲爱的读者,
我在这篇文章中投入了大量的心血和时间,希望为您提供有价值的内容。这篇文章包含了深入的研究和个人经验,我相信这些信息对您非常有帮助。
如果您觉得这篇文章对您有所帮助,我诚恳地请求您考虑赞赏1元钱的支持。这个金额不会对您的财务状况造成负担,但它会对我继续创作高质量的内容产生积极的影响。
我之所以写这篇文章,是因为我热爱分享有用的知识和见解。您的支持将帮助我继续这个使命,也鼓励我花更多的时间和精力创作更多有价值的内容。
如果您愿意支持我的创作,请扫描下面二维码,您的支持将不胜感激。同时,如果您有任何反馈或建议,也欢迎与我分享。

再次感谢您的阅读和支持!
最诚挚的问候, “愚公搬代码”
- 点赞
- 收藏
- 关注作者


评论(0)