红帽redhat配置
基本的流程就是:
1.删除redhat7.0系统自带的yum软件包;
2.自行下载所需要的软件包;
3.根据依赖项安装;
4.新建repo配置文件。
1、查看自带的yum软件包
输入
rpm -qa | grep yum

[root@localhost network-scripts]# rpm -qa | grep yum
yum-rhn-plugin-2.0.1-6.el7.noarch
yum-metadata-parser-1.1.4-10.el7.x86_64
yum-langpacks-0.4.2-7.el7.noarch
yum-3.4.3-150.el7.noarch
yum-utils-1.1.31-40.el7.noarch
这下面列出来的软件包,要记住一下,后面要根据其来搜索rpm包来安装新版本。比如”yum-utils”、”yum-langpacks”等等。
2、卸载这些安装包
rpm -qa | grep yum | xargs rpm -e --nodeps

3、进入以下任意一个网站下载对应的rpm包
阿里云网络源地址:https://mirrors.aliyun.com/centos/7/os/x86_64/Packages/
网易163网络源地址:http://mirrors.163.com/
CentOS网络源地址:http://centos.ustc.edu.cn/centos/
下载完后上传到服务器分别安装
安装时出现报错
[root@localhost /]# rpm -ivh yum-*
警告:yum-3.4.3-168.el7.centos.noarch.rpm: 头V3 RSA/SHA256 Signature, 密钥 ID f4a80eb5: NOKEY
错误:依赖检测失败:
        rpm >= 0:4.11.3-22 被 yum-3.4.3-168.el7.centos.noarch 需要
        yum-plugin-fastestmirror 被 yum-3.4.3-168.el7.centos.noarch 需要
另外再回去找安装包下载下来:
wget http://mirrors.163.com/centos/7/os/x86_64/Packages/rpm-4.11.3-32.el7.x86_64.rpm
wget http://mirrors.163.com/centos/7/os/x86_64/Packages/python-urlgrabber-3.10-8.el7.noarch.rpm
输入指令更新rpm:
[root@localhost /]# rpm -ivh yum-plugin-fastestmirror-1.1.31-54.el7_8.noarch.rpm --nodeps
警告:yum-plugin-fastestmirror-1.1.31-54.el7_8.noarch.rpm: 头V3 RSA/SHA256 Signature, 密钥 ID f4a80eb5: NOKEY
准备中...                          ################################# [100%]
正在升级/安装...
   1:yum-plugin-fastestmirror-1.1.31-5################################# [100%]
[root@localhost /]# rpm -ivh yum-3.4.3-168.el7.centos.noarch.rpm  --nodeps
警告:yum-3.4.3-168.el7.centos.noarch.rpm: 头V3 RSA/SHA256 Signature, 密钥 ID f4a80eb5: NOKEY
准备中...                          ################################# [100%]
正在升级/安装...
   1:yum-3.4.3-168.el7.centos         ################################# [100%]
再次运行。
rpm -ivh yum-*
[root@localhost /]# rpm -Uvh rpm-4.11.3-45.el7.x86_64.rpm
警告:rpm-4.11.3-45.el7.x86_64.rpm: 头V3 RSA/SHA256 Signature, 密钥 ID f4a80eb5: NOKEY
错误:依赖检测失败:
        rpm = 4.11.3-21.el7 被 (已安裝) rpm-libs-4.11.3-21.el7.x86_64 需要
        rpm = 4.11.3-21.el7 被 (已安裝) rpm-python-4.11.3-21.el7.x86_64 需要
[root@localhost /]# rpm -Uvh rpm-4.11.3-45.el7.x86_64.rpm --nodeps
警告:rpm-4.11.3-45.el7.x86_64.rpm: 头V3 RSA/SHA256 Signature, 密钥 ID f4a80eb5: NOKEY
准备中...                          ################################# [100%]
正在升级/安装...
   1:rpm-4.11.3-45.el7                ################################# [ 50%]
正在清理/删除...
   2:rpm-4.11.3-21.el7                ################################# [100%]
[root@localhost /]# rpm -ivh yum-*
警告:yum-3.4.3-168.el7.centos.noarch.rpm: 头V3 RSA/SHA256 Signature, 密钥 ID f4a80eb5: NOKEY
准备中...                          ################################# [100%]
        软件包 yum-plugin-fastestmirror-1.1.31-54.el7_8.noarch 已经安装
        软件包 yum-3.4.3-168.el7.centos.noarch 已经安装
2.2.2 redhat跳过验证
vi /etc/yum/pluginconf.d/subscription-manager.conf

[main]
enabled=0 #将1改成0
2.3 挂载redhat7.3
挂载redhat 7.3
mkdir redhat73
mount -o loop /mnt/rhel-server-7.3-x86_64-dvd.iso /mnt/redhat73/
[root@localhost mnt]# mkdir redhat73
[root@localhost mnt]# mount /mnt/rhel-server-7.3-x86_64-dvd.iso /mnt/r
redhat73/                       rhel-server-7.3-x86_64-dvd.iso
[root@localhost mnt]# mount -o loop /mnt/rhel-server-7.3-x86_64-dvd.iso /mnt/redhat73/
mount: /dev/loop0 写保护,将以只读方式挂载
[root@localhost mnt]#
进入下面目录
cd /etc/yum.repos.d
 vi redhat.repo
输入下面内容到
[redhat73]

name=redhat73

baseurl=file:///mnt/redhat73/
enabled=1
gpgcheck=0
保存好后退出,执行下面命令
yum clean all
yum makecache
yum repolist
2.5 辅助机安装配置
2.5.1 x2openEuler安装
x2openEuler下载地址:https://www.openeuler.org/zh/migration/download/
版本依赖下载:https://repo.oepkgs.net/openEuler/rpm/openEuler-20.03-LTS-SP1/contrib/x2openEuler/noarch/Packages/
下载好后上传到辅助机,分别安装
yum install -y x2openEuler-*
关闭防火墙和selinux
systemctl stop firewalld
set selinux 0
2.5.1 x2openEuler启动
打开目录并启动x2openEuler
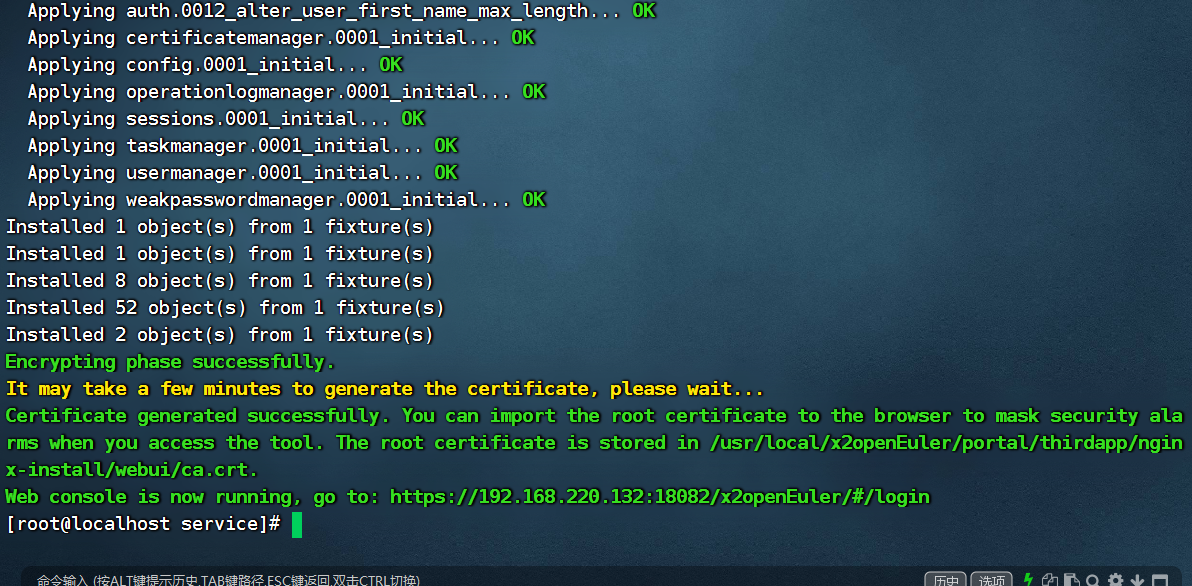
[root@localhost x2openEuler-upgrade]# cd /usr/local/x2openEuler/portal/service
[root@localhost service]# bash service_start.sh
Start Nginx service and Gunicorn service
Ip address list:
sequence_number         ip_address              device
[1]                     192.168.220.132         ens33
Enter the sequence number of listed ip as web server ip(default: 1):
Set the web server IP address 192.168.220.132
Please enter HTTPS port(default: 18082):
The HTTPS port 18082 is valid.  Set the HTTPS port to 18082 (y/n default: y):
Set the HTTPS port 18082
Please enter gunicorn port(default: 18080):
The GUNICORN port 18080 is valid.  Set the GUNICORN port to 18080 (y/n default: y):
2.5.2 辅助机挂载Bclinux for Euler 21.10
安装httpd并启动httpd
yum install -y httpd
systemctl start httpd
systemctl stop firewalld
[root@localhost ~]# yum install -y httpd
已加载插件:fastestmirror, langpacks
Determining fastest mirrors
 * base: mirrors.nju.edu.cn
 * extras: mirrors.nju.edu.cn
 * updates: mirrors.163.com
base                                                                                | 3.6 kB  00:00:00
extras                                                                              | 2.9 kB  00:00:00
updates                                                                             | 2.9 kB  00:00:00
(1/4): base/7/x86_64/group_gz                                                       | 153 kB  00:00:00
(2/4): extras/7/x86_64/primary_db                                                   | 249 kB  00:00:00
(3/4): base/7/x86_64/primary_db                                                     | 6.1 MB  00:00:00
(4/4): updates/7/x86_64/primary_db                                                  |  20 MB  00:00:26
正在解决依赖关系
--> 正在检查事务
---> 软件包 httpd.x86_64.0.2.4.6-98.el7.centos.6 将被 安装
--> 正在处理依赖关系 httpd-tools = 2.4.6-98.el7.centos.6,它被软件包 httpd-2.4.6-98.el7.centos.6.x86_64 需要
--> 正在处理依赖关系 /etc/mime.types,它被软件包 httpd-2.4.6-98.el7.centos.6.x86_64 需要
--> 正在处理依赖关系 libaprutil-1.so.0()(64bit),它被软件包 httpd-2.4.6-98.el7.centos.6.x86_64 需要
--> 正在处理依赖关系 libapr-1.so.0()(64bit),它被软件包 httpd-2.4.6-98.el7.centos.6.x86_64 需要
--> 正在检查事务
---> 软件包 apr.x86_64.0.1.4.8-7.el7 将被 安装
---> 软件包 apr-util.x86_64.0.1.5.2-6.el7 将被 安装
---> 软件包 httpd-tools.x86_64.0.2.4.6-98.el7.centos.6 将被 安装
---> 软件包 mailcap.noarch.0.2.1.41-2.el7 将被 安装
--> 解决依赖关系完成

依赖关系解决

===========================================================================================================
 Package                 架构               版本                                 源                   大小
===========================================================================================================
正在安装:
 httpd                   x86_64             2.4.6-98.el7.centos.6                updates             2.7 M
为依赖而安装:
 apr                     x86_64             1.4.8-7.el7                          base                104 k
 apr-util                x86_64             1.5.2-6.el7                          base                 92 k
 httpd-tools             x86_64             2.4.6-98.el7.centos.6                updates              94 k
 mailcap                 noarch             2.1.41-2.el7                         base                 31 k

事务概要
===========================================================================================================
安装  1 软件包 (+4 依赖软件包)

总下载量:3.0 M
安装大小:10 M
Downloading packages:
警告:/var/cache/yum/x86_64/7/base/packages/apr-1.4.8-7.el7.x86_64.rpm: 头V3 RSA/SHA256 Signature, 密钥 ID f4a80eb5: NOKEY
apr-1.4.8-7.el7.x86_64.rpm 的公钥尚未安装
(1/5): apr-1.4.8-7.el7.x86_64.rpm                                                   | 104 kB  00:00:00
(2/5): apr-util-1.5.2-6.el7.x86_64.rpm                                              |  92 kB  00:00:00
(3/5): mailcap-2.1.41-2.el7.noarch.rpm                                              |  31 kB  00:00:00
httpd-tools-2.4.6-98.el7.centos.6.x86_64.rpm 的公钥尚未安装
(4/5): httpd-tools-2.4.6-98.el7.centos.6.x86_64.rpm                                 |  94 kB  00:00:00
(5/5): httpd-2.4.6-98.el7.centos.6.x86_64.rpm                                       | 2.7 MB  00:00:00
-----------------------------------------------------------------------------------------------------------
总计                                                                       7.6 MB/s | 3.0 MB  00:00:00
从 file:///etc/pki/rpm-gpg/RPM-GPG-KEY-CentOS-7 检索密钥
导入 GPG key 0xF4A80EB5:
 用户ID     : "CentOS-7 Key (CentOS 7 Official Signing Key) <security@centos.org>"
 指纹       : 6341 ab27 53d7 8a78 a7c2 7bb1 24c6 a8a7 f4a8 0eb5
 软件包     : centos-release-7-6.1810.2.el7.centos.x86_64 (@anaconda)
 来自       : /etc/pki/rpm-gpg/RPM-GPG-KEY-CentOS-7
Running transaction check
Running transaction test
Transaction test succeeded
Running transaction
  正在安装    : apr-1.4.8-7.el7.x86_64                                                                 1/5
  正在安装    : apr-util-1.5.2-6.el7.x86_64                                                            2/5
  正在安装    : httpd-tools-2.4.6-98.el7.centos.6.x86_64                                               3/5
  正在安装    : mailcap-2.1.41-2.el7.noarch                                                            4/5
  正在安装    : httpd-2.4.6-98.el7.centos.6.x86_64                                                     5/5
  验证中      : httpd-tools-2.4.6-98.el7.centos.6.x86_64                                               1/5
  验证中      : mailcap-2.1.41-2.el7.noarch                                                            2/5
  验证中      : apr-1.4.8-7.el7.x86_64                                                                 3/5
  验证中      : httpd-2.4.6-98.el7.centos.6.x86_64                                                     4/5
  验证中      : apr-util-1.5.2-6.el7.x86_64                                                            5/5

已安装:
  httpd.x86_64 0:2.4.6-98.el7.centos.6

作为依赖被安装:
  apr.x86_64 0:1.4.8-7.el7       apr-util.x86_64 0:1.5.2-6.el7  httpd-tools.x86_64 0:2.4.6-98.el7.centos.6
  mailcap.noarch 0:2.1.41-2.el7

完毕!
[root@localhost ~]# systemctl start httpd
#启动httpd后,打开下面目录,新建euler2110
cd /var/www/html
mkdir bceuler2110
# 将bclinux for Euler 21.10上传到/mnt下面
将镜像挂载到/var/www/html/bceuler2110
mount -o loop /mnt/BCLinux-for-Euler-21.10-everything-x86_64.iso /var/www/html/bceuler2110/
[root@localhost html]# mount -o loop /mnt/BCLinux-for-Euler-21.10-everything-x86_64.iso /var/www/html/bceuler2110/
mount: /dev/loop0 写保护,将以只读方式挂载
输入下面命令
yum clean all
yum makecache
3. 操作系统升级
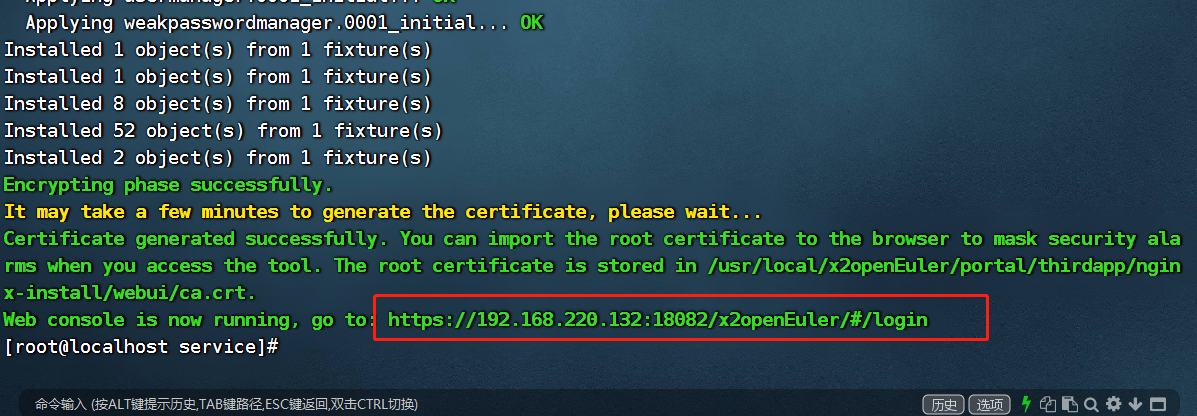
在x2openEuler启动成功后,打开启动的web端
https://192.168.220.132:18082/x2openEuler/#/login
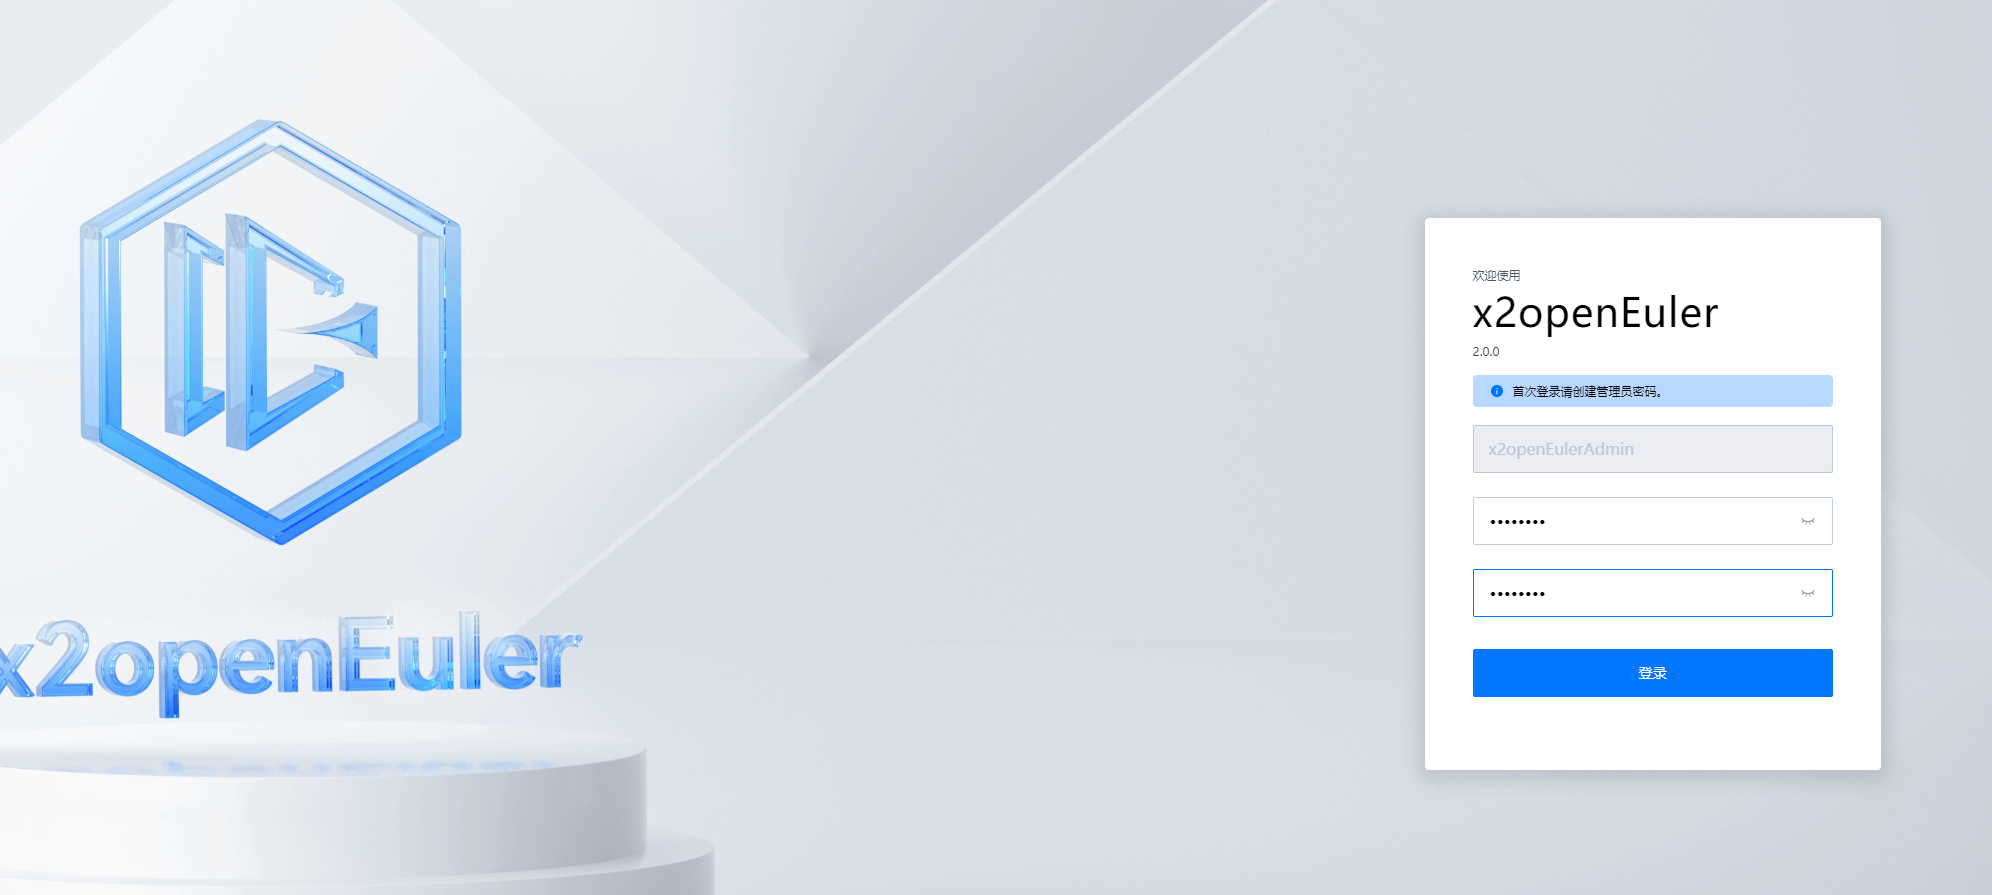
设置初始密码
登录
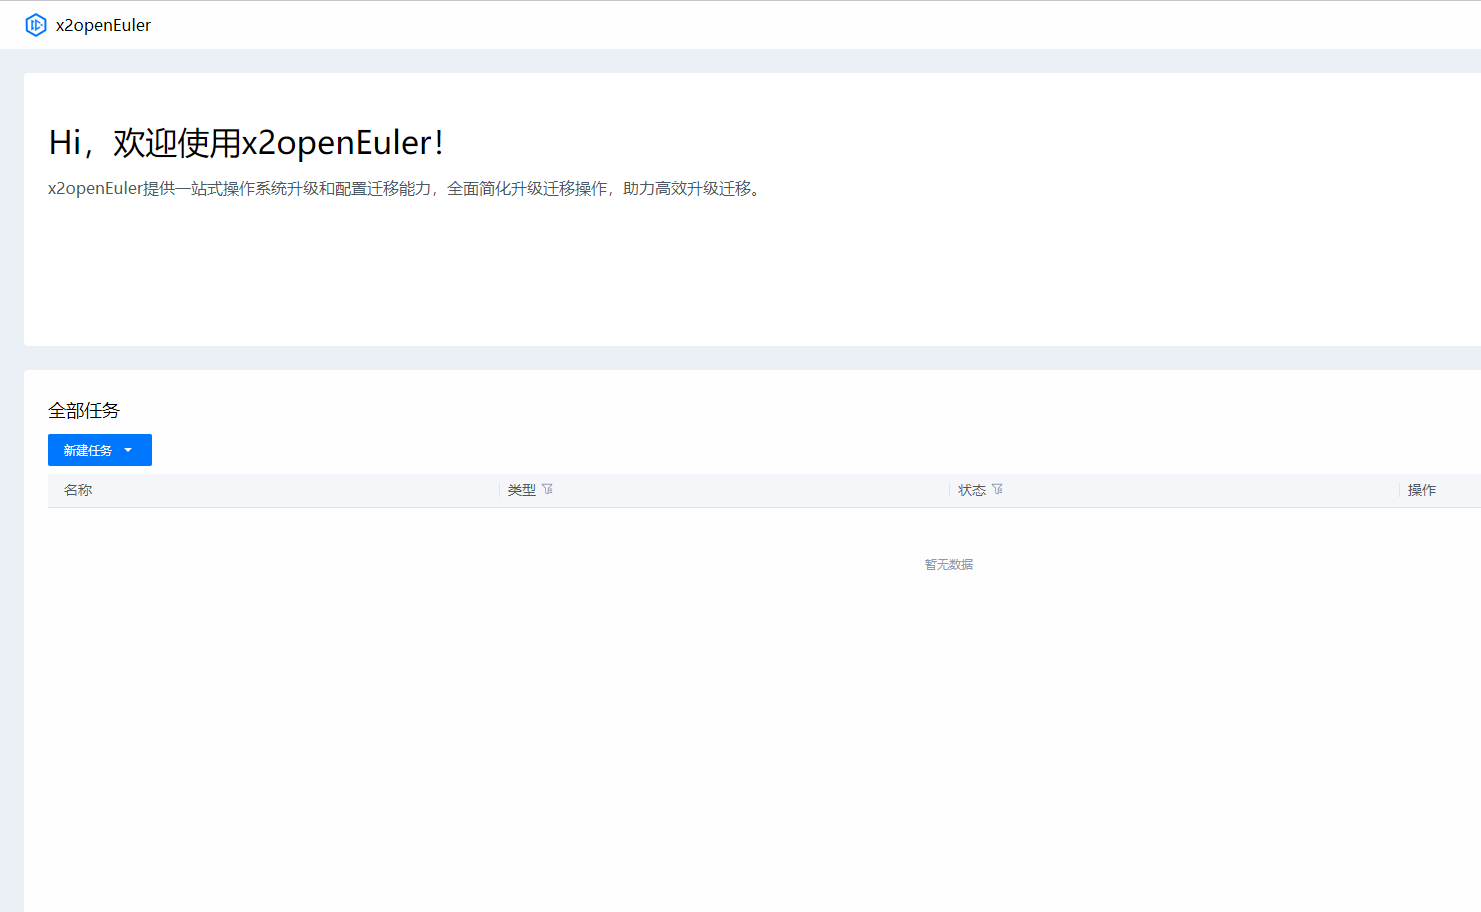
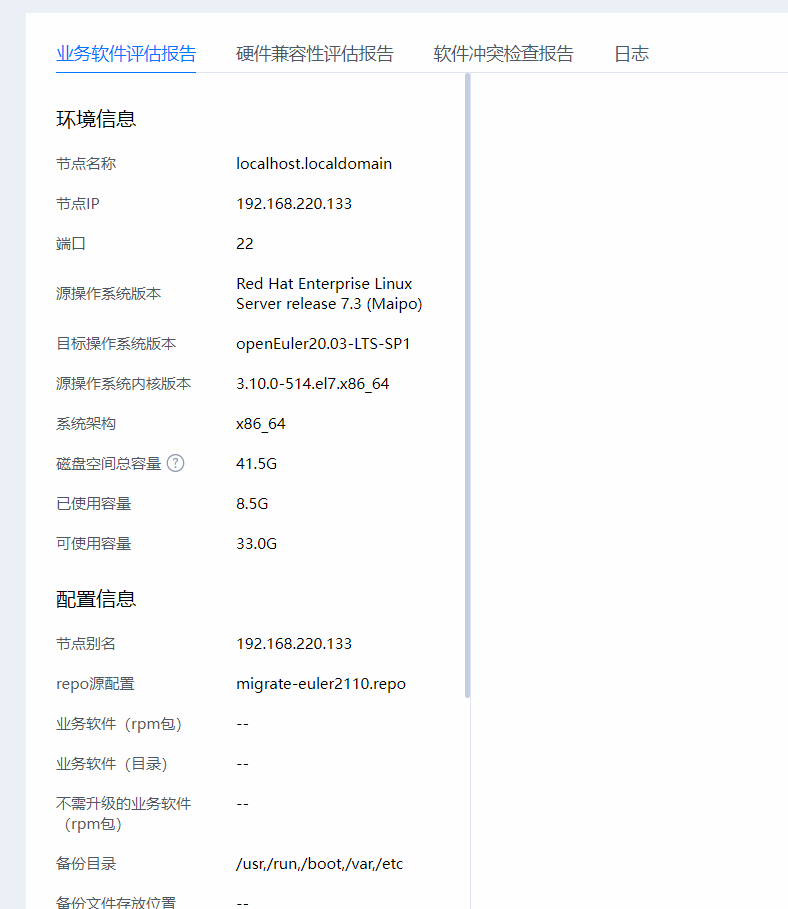
新建任务–系统升级
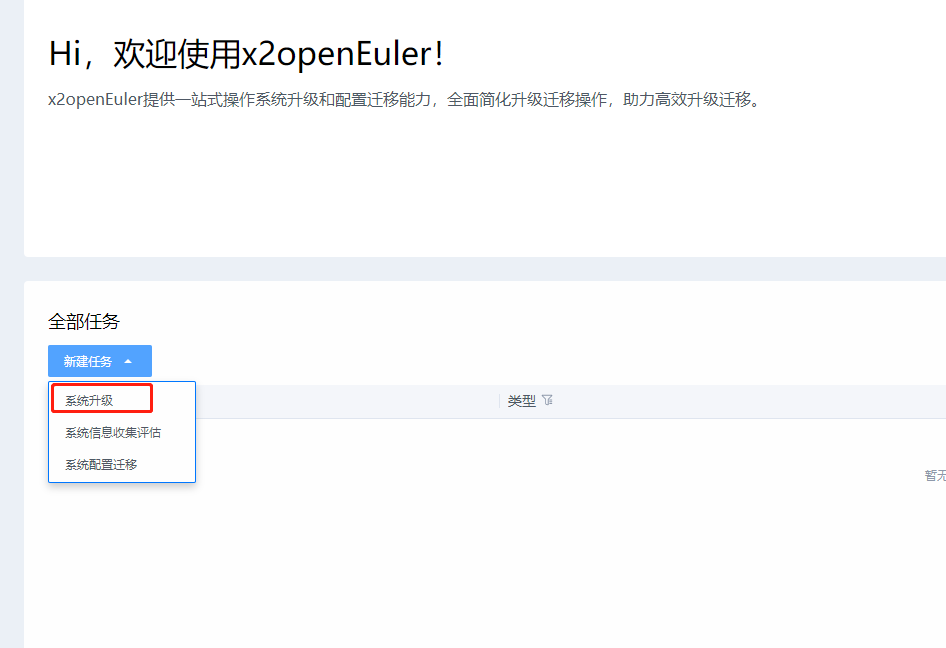
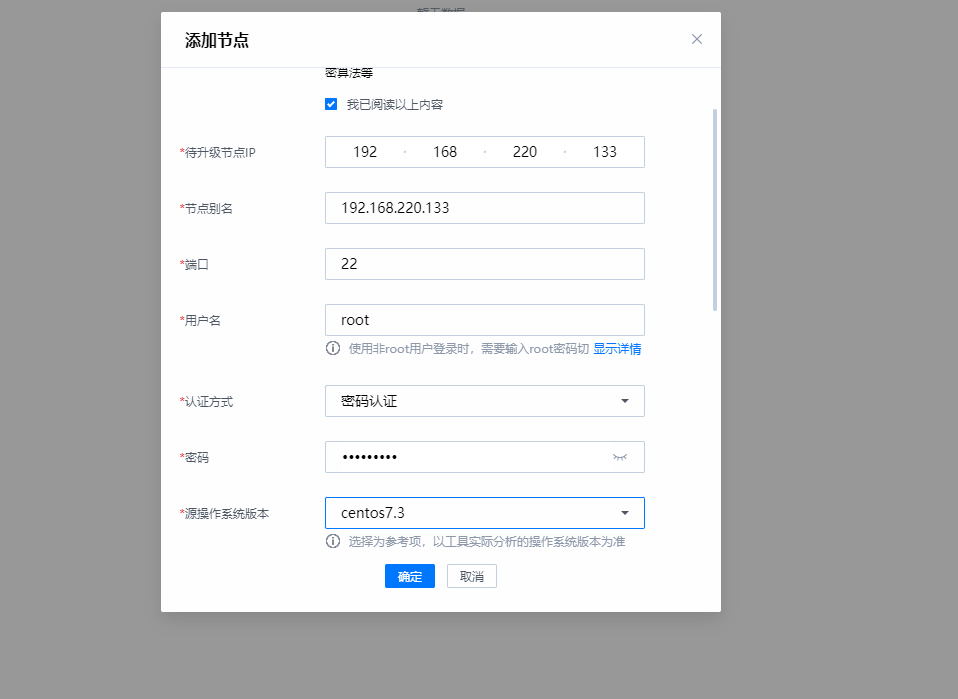
按照要求填写信息
源操作系统版本选择对应的centos即可
repo源选择新建
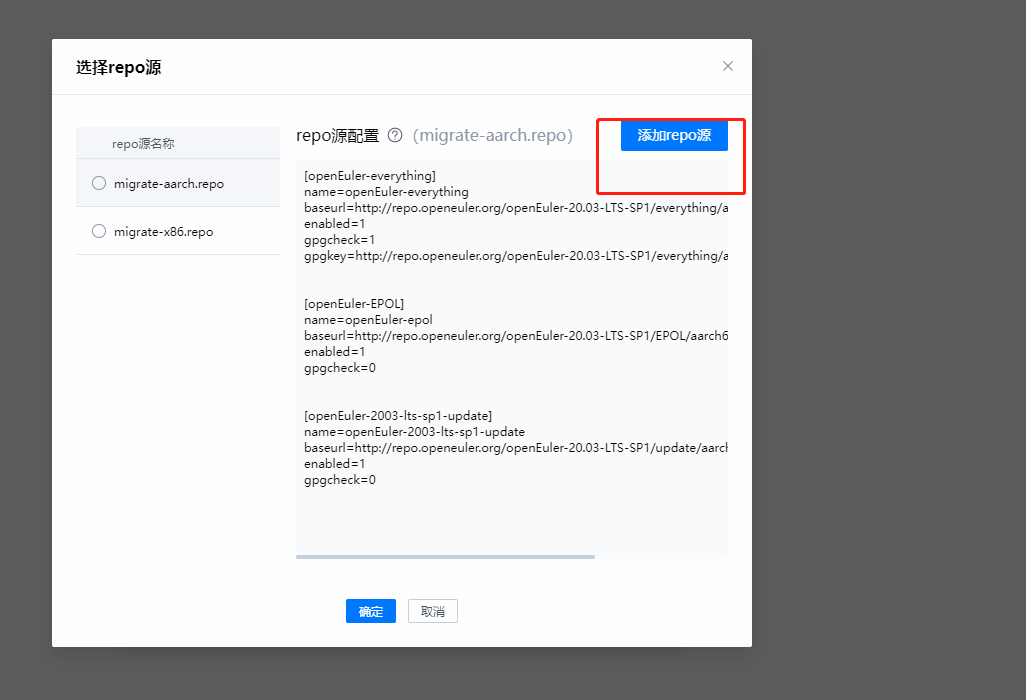
输入下面内容
[local]

name=local

baseurl=http://192.168.220.132/bceuler2110/
enabled=1
gpgcheck=0
配置完成后点击确认
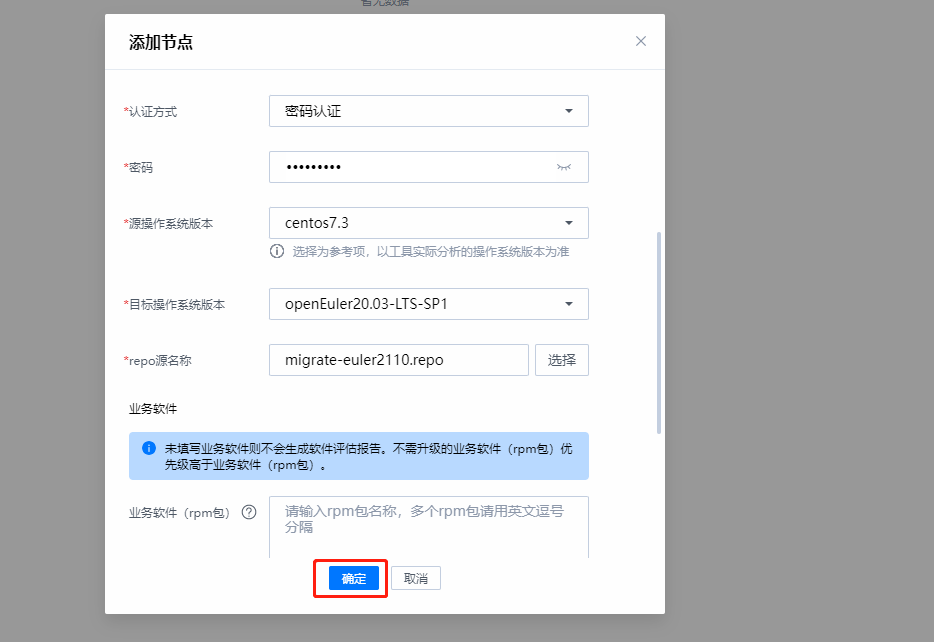
点击确认进行连通性测试
- 点赞
- 收藏
- 关注作者


评论(0)