【ModelArts Course7-1】Custom Image to Train & Deploy from Github

ModelArts - Using Custom Image to Train and Deploy a Model from Github
This article explains how to use an open source algorithm from Github to develop on the Huawei Cloud ModelArts platform on the cloud,the following is a mind map of the main steps of the development process
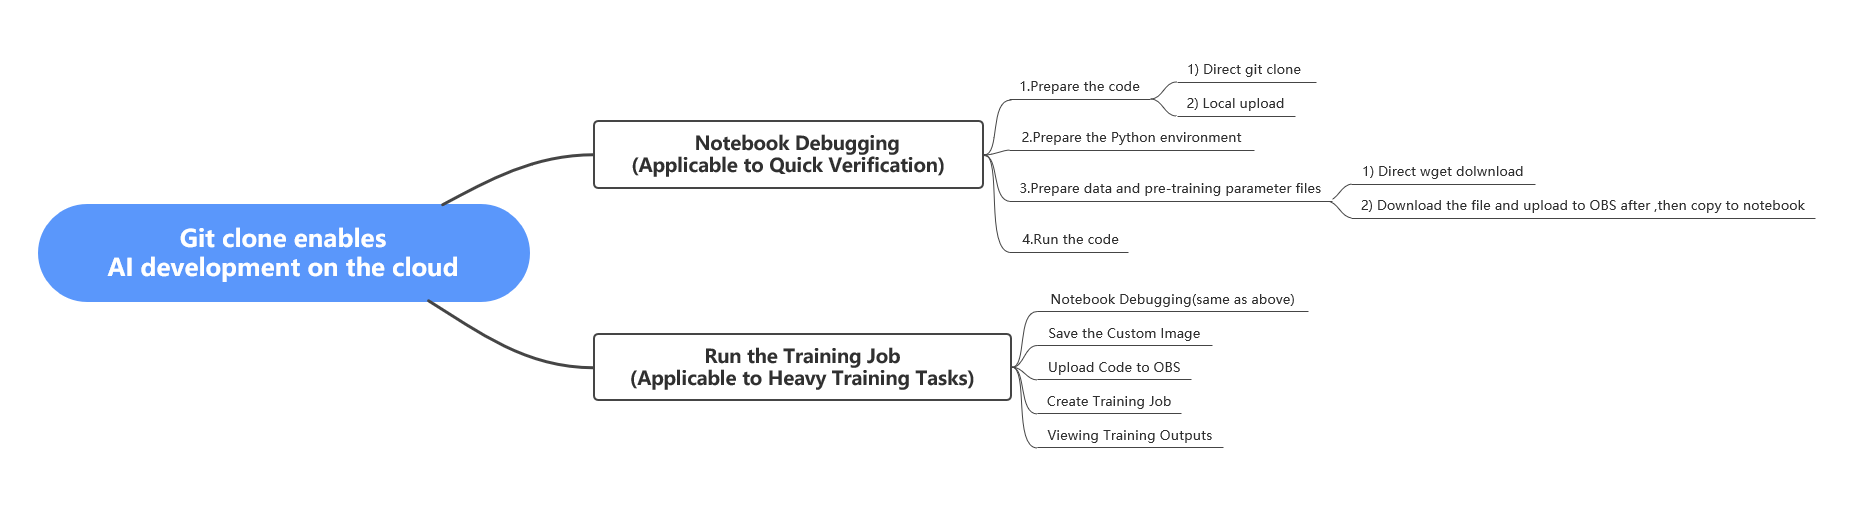
Part 1: Create Training Job Using Custom Image
The following will explain detail for per step in operation steps.
1. Prepare the Python Environment
click This link to enter the ModelArts management console, click DevEnviron -> Notebook to enter the notebook list page, then click Create in the upper left corner of the page, create a notebook, and set parameter, as shown below.
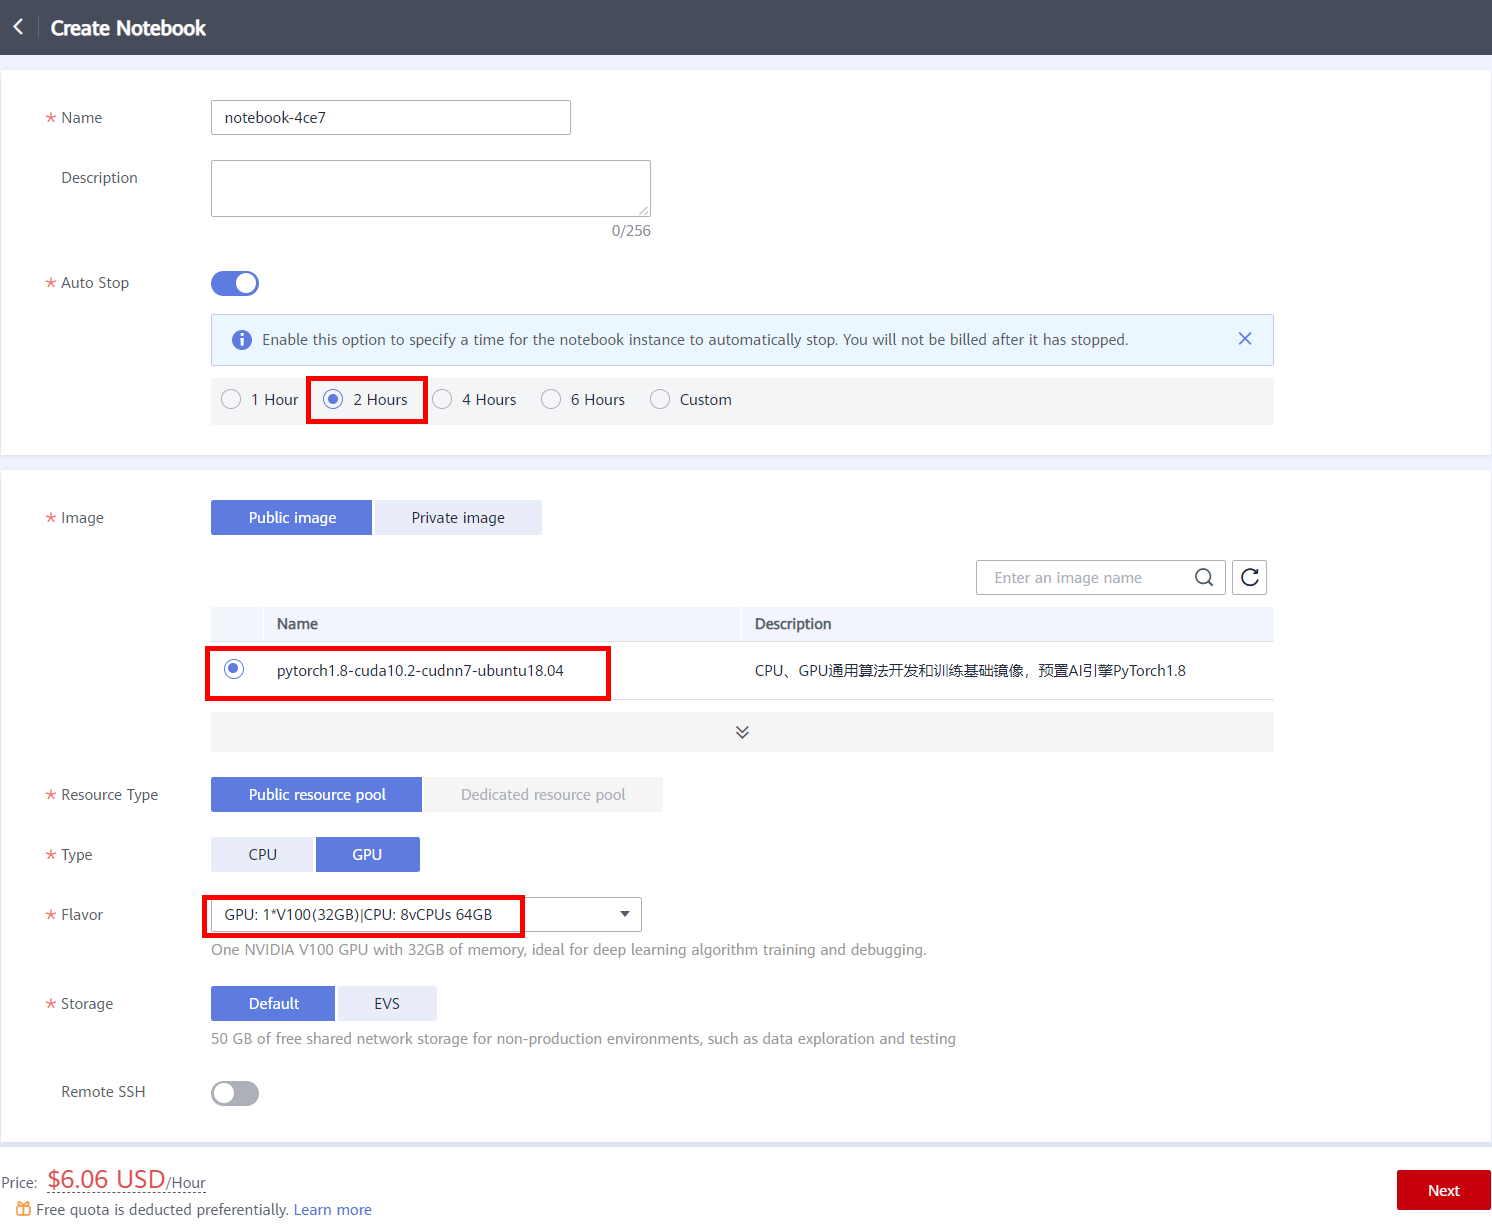
After configuring the parameters, click Next, confirming the product specifications, and then click Submit to complete the creation of the notebook.
Return to the notebook list page, after the status of the new Notebook changes to Running, click Operation -> Open to access the notebook.
On the Notebook page,click Launcher -> Terminal, as shown below.
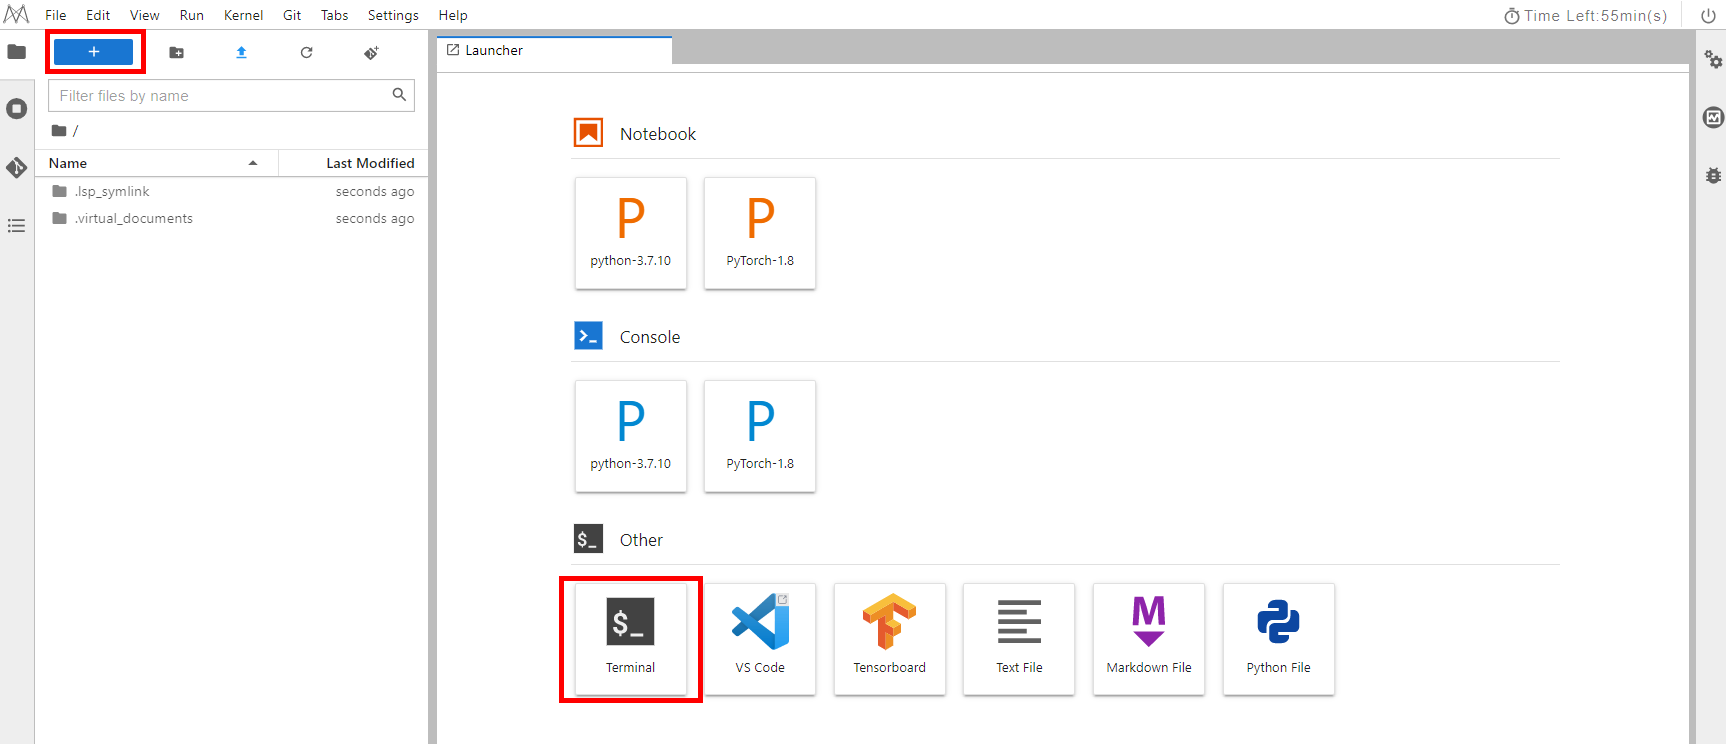
You can run the command conda info -e to view the information about the installed Python environment.
Click this link CodeHub -DINO. The following uses the open-source algorithm as an example to demonstrate how to quickly run it on Huawei Cloud Notebook. For more information about the algorithm, please refer to README.md.
-
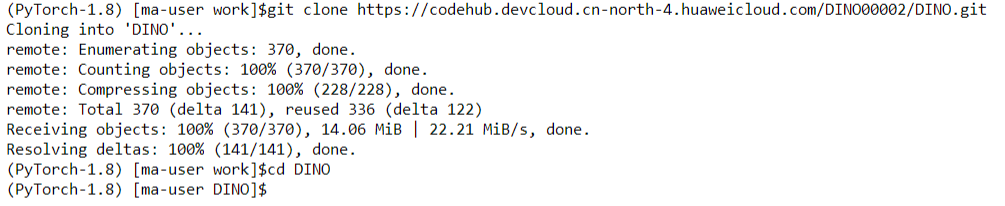
Run the following command in the terminal to clone repository:
git clone https://codehub.devcloud.cn-north-4.huaweicloud.com/DINO00002/DINO.git
cd DINO
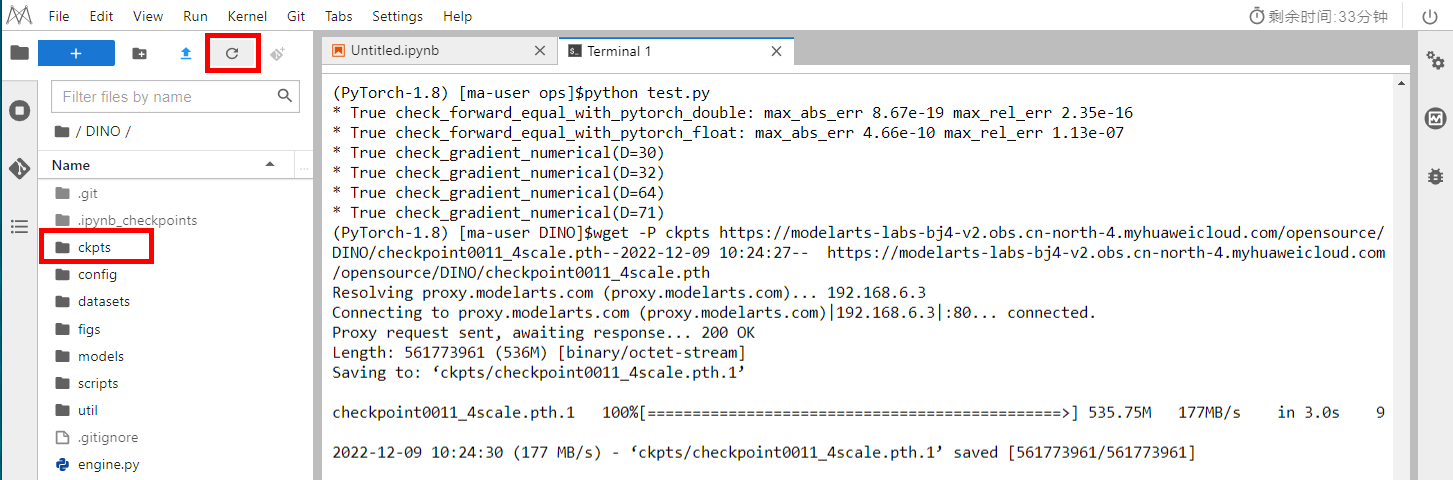
As shown above, code cloning is complete. Click the refresh button on the top left of the task bar to view the code.
-
View Pytorch Version
pip list | grep torch -
Installing Other Required Packages
pip install -r requirements.txt -
Compiling the CUDA Operator
cd models/dino/ops
python setup.py build install
# Unit test (should check all numerical gradient as True)
python test.py
cd ../../..  # Back to the code home directory

2. Prepare Data and Pre-Training Parameter files
-
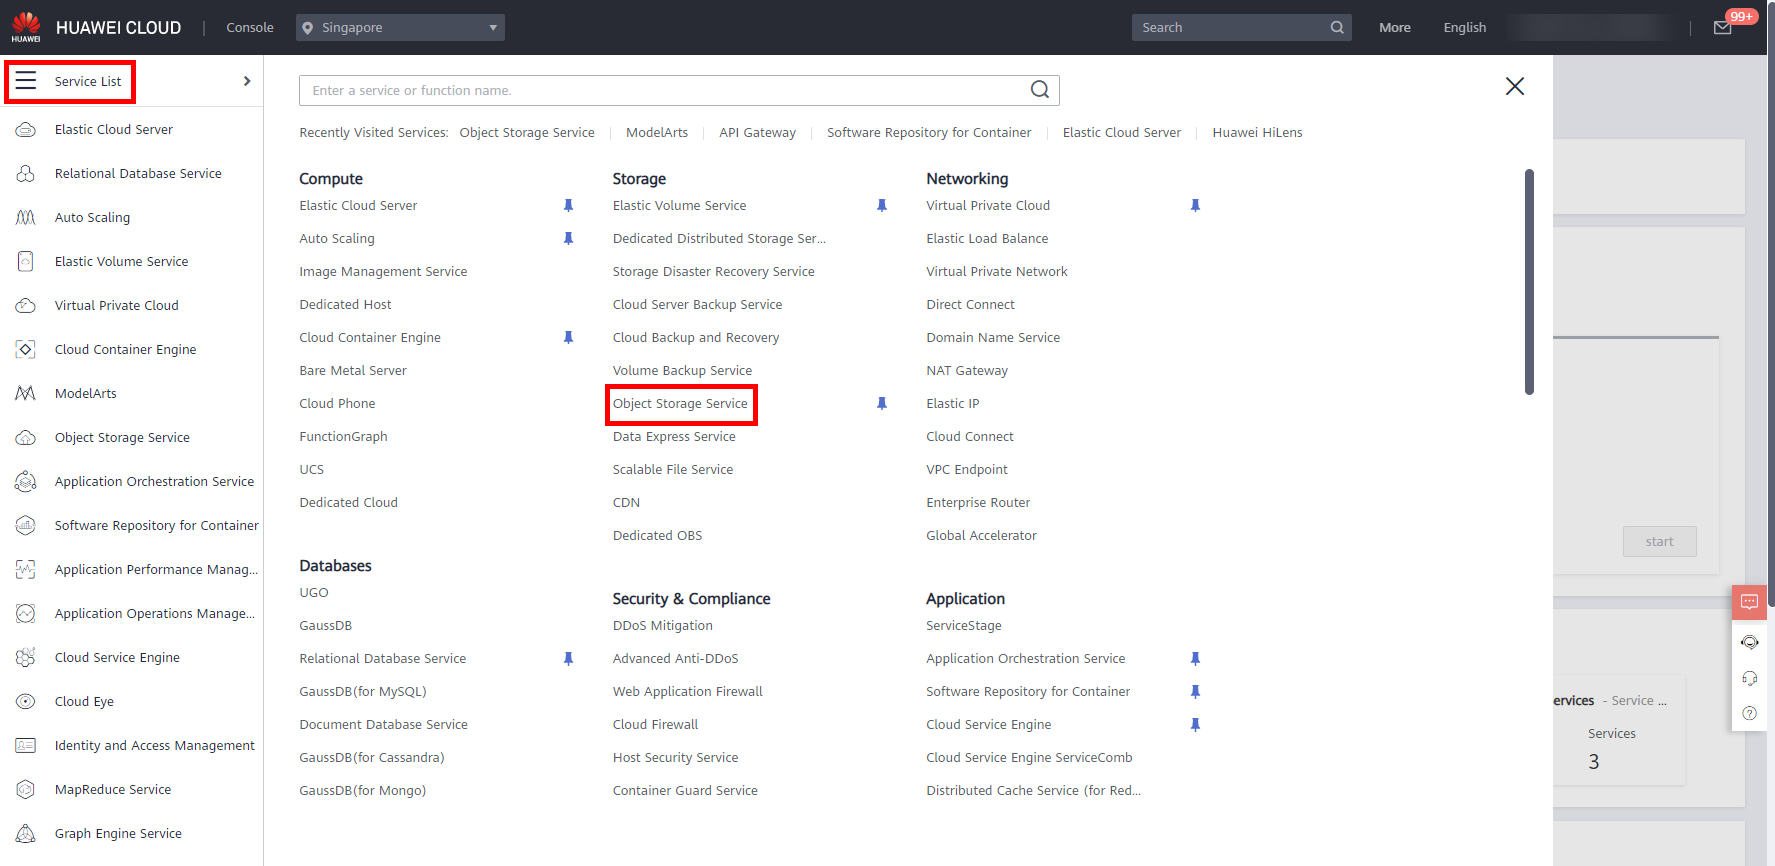
Back to the Huawei Cloud Modelarts management console, move the cursor to the left sidebar, and in the pop-up menu bar,click Service List -> Storage -> Object Storage Service, as shown below.
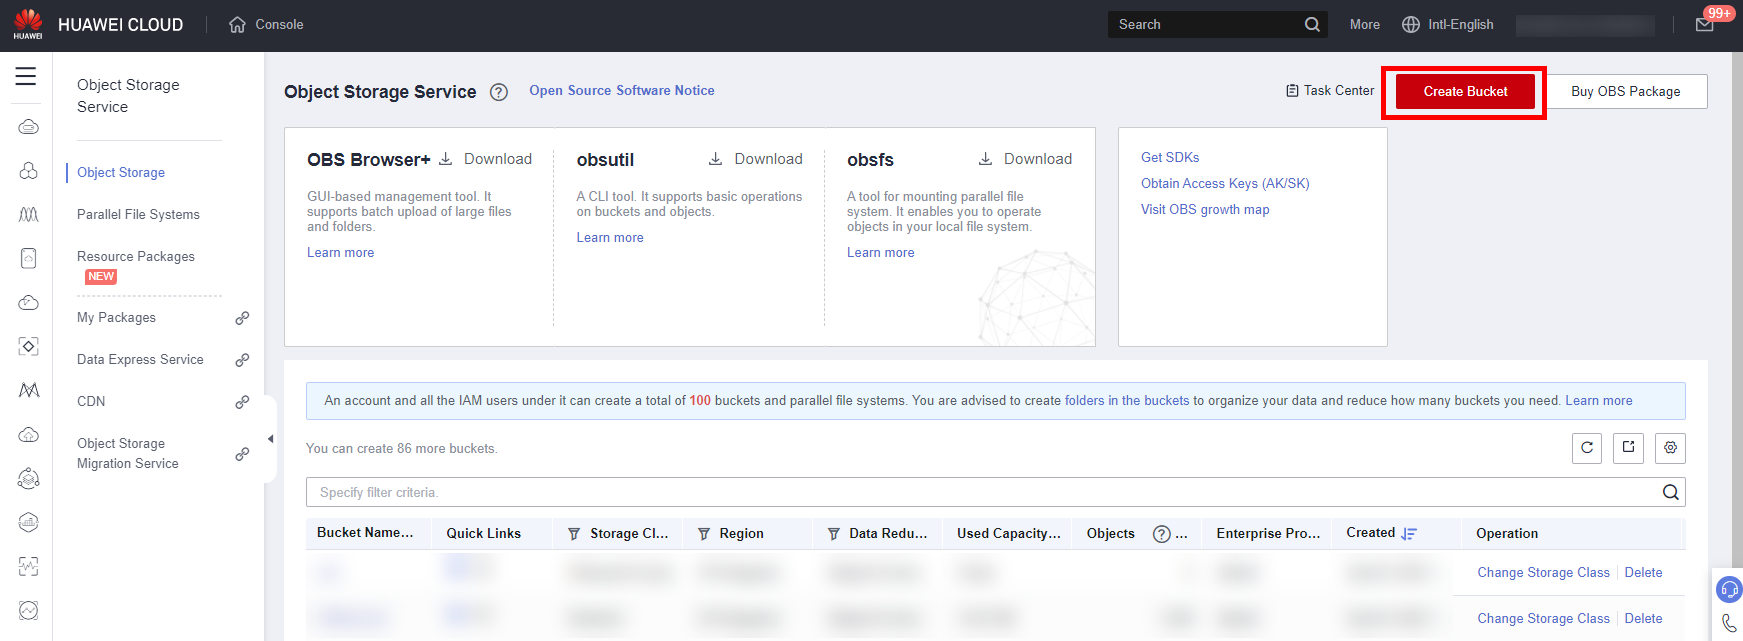
Click Create Bucket, The Create Bucket Page is displayed.
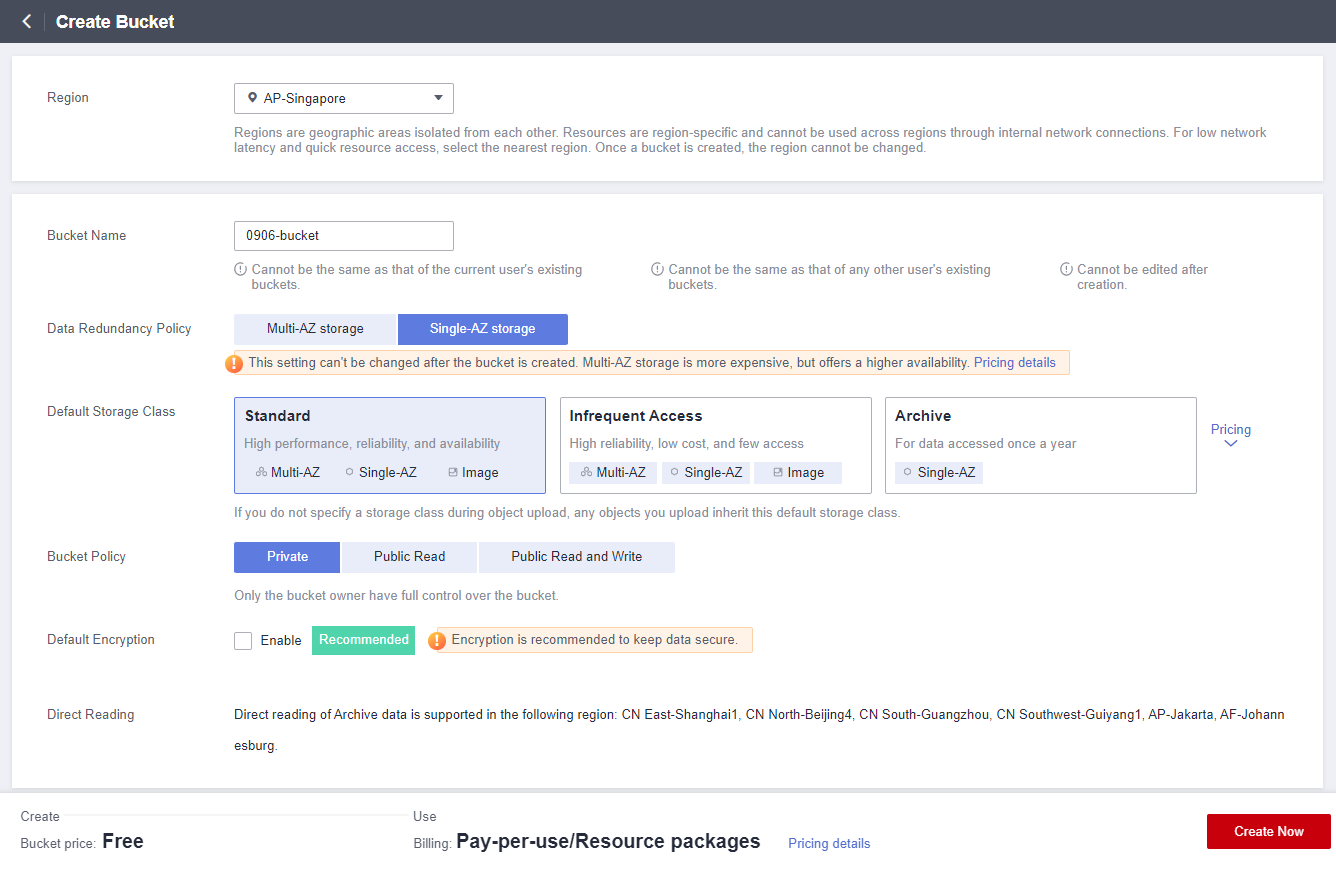
Now let’s start creating the OBS bucket, with the following parameters:
● Region: AP-Singapore
● Bucket Name: user-defined, which will be used in subsequent steps.
● Data Redundancy Policy: Single-AZ storage
● Default Storage Class: Standard
● Bucket Policy: Private
● Default Encryption: Keep DefaultClick Create Now -> OK to complete the creation of the Bucket.
-
We will use a subset of the COCO 2017. The micro-dataset includes train (100), val (100), and annotation files.
COCO2017_subset100/
  ├── train2017/
  ├── val2017/
  └── annotations/
  	├── instances_train2017.json
  	└── instances_val2017.json
It is stored in Public Read OBS bucket, the path is
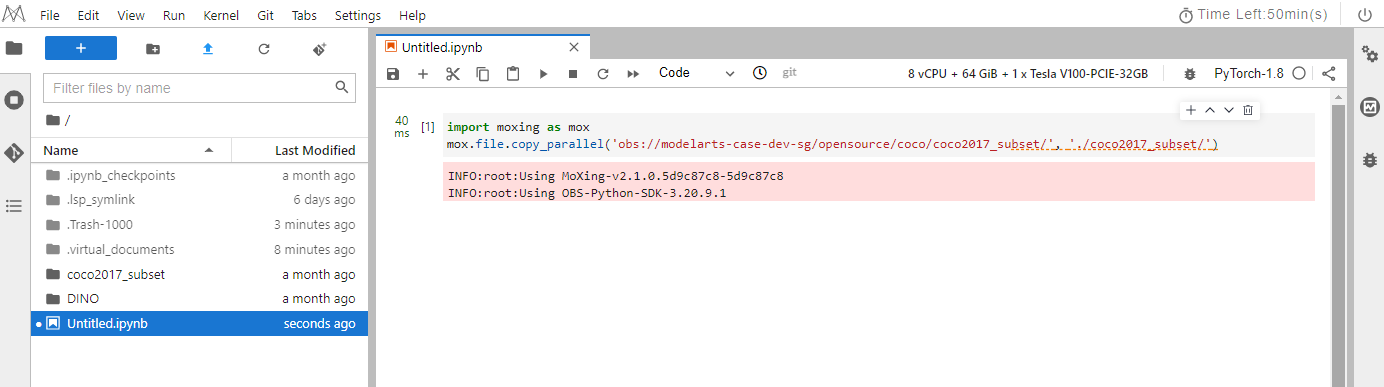
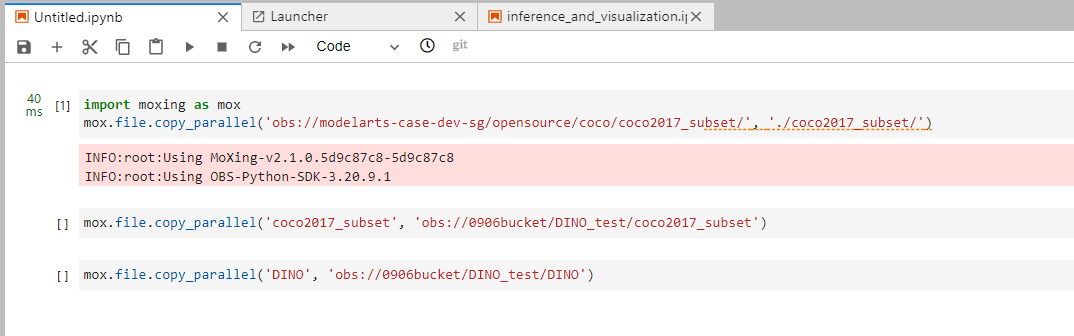
obs://modelarts-case-dev-sg/opensource/coco/coco2017_subset/.Back to the Notebook page, create an ipynb file, copy and complete the following code into cell and run it. After the execution is complete, click Refresh above task bar to view the imported dataset,as shown below.
import moxing as mox
mox.file.copy_parallel(${obs_path},${notebook_path})
NOTICE:
● ${obs_path} indicates the location of OBS Public Read dataset.
● ${notebook_path} indicates the dataset storage path(./coco2017_subset) in the notebook, which is at the same level as the DINO directory. -
Open the terminal and run the following command to download the DINO model
checkpoint0011_4scale.pth. After the download is complete, click the refresh button on the left to view theckptsfolder for storing the downloaded checkpoint.wget -P ckpts https://sandbox-expriment-files.obs.cn-north-1.myhuaweicloud.com:443/20221228/checkpoint0011_4scale.pth
3. Evaluate the Pre-Training Model
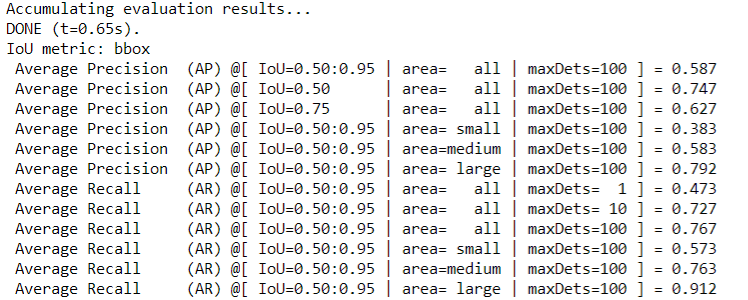
Running the following command to evaluate the pre-training model. You can expect the final AP of about 49.
bash scripts/DINO_eval.sh /path/to/your/COCODIR /path/to/your/checkpoint
NOTICE:
/path/to/your/COCODIR is the storage path of the dataset in the Notebook.
/path/to/your/checkpoint is the path for storing the model in the Notebook.
As shown below:

The following figure shows the running result.
4. Save the Image
In 1 Prepare the Python Environment, create a notebook instance using a built-in system image, install custom dependencies on the instance, and save the running instance as a container image.
In the saved image, the installed dependency package is retained, but the data stored in home/ma-user/work for persistent storage will not be stored. In remote development through VS Code, the plug-ins installed on the server are retained in the saved image.
-
Back to the ModelArts management console and choose DevEnviron -> Notebook in the navigation pane on the left to switch to notebook of the new version.
-
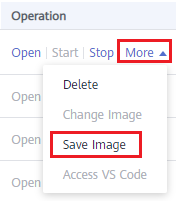
In the notebook list, select the target notebook instance and choose Save Image from the More drop-down list in the Operation column. The Save Image dialog box is displayed.
-
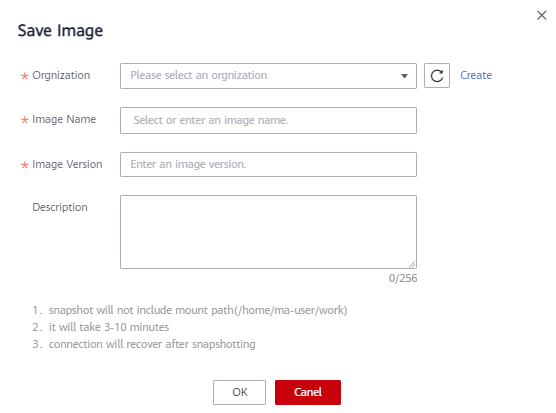
In the Save Image dialog box, configure parameters. Click OK to save the image.
Choose an organization from the Organization drop-down list. If no organization is available, click Create on the right to create one. Users in an organization can share all images in the organization. For details about how to create an organization, refer to Creating an Organization.
-
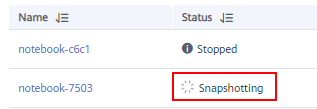
The image will be saved as a snapshot, and it will take about 5 minutes. During this period of time, do not perform any operations on the instance. (You can still perform operations on the accessed JupyterLab page and local IDE.)
NOTICE:
The time required for saving an image as a snapshot will be counted in the instance running duration. If the instance running duration expires before the snapshot is saved, saving the image will fail.
-
After the image is saved, the instance status changes to Running. View the image on the Image Management page.
-
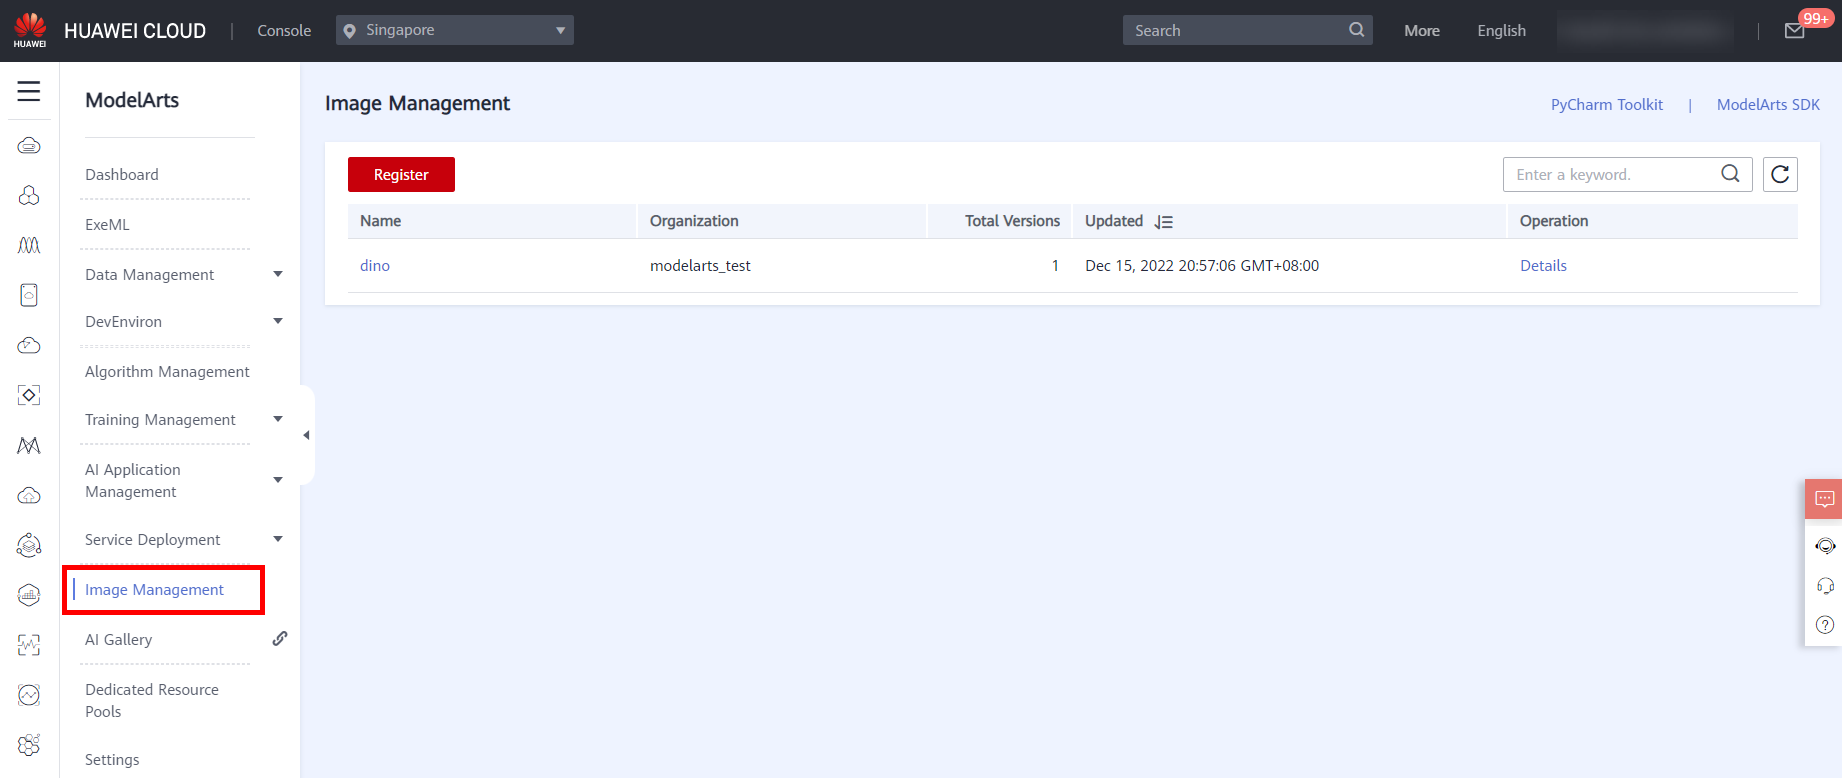
Click the name of the image to view its details including the image version/ID, status, resource type, image size, and SWR address.
-
Choose Image Management in the navigation pane on the left to view the image list and details, as shown in the following figure.
5. Upload Dataset and Training Code
Back to the Notebook page, enter the following code in the created ipynb file to upload the dataset: coco2017_subset to the OBS bucket.
mox.file.copy_parallel('coco2017_subset', 'obs://${your bucket_name}/coco2017_subset')
NOTICE:
● ${your bucket_name} indicates the OBS bucket name created in Step 1.
Insert a cell below, enter the following code to upload the code to the OBS bucket.
mox.file.copy_parallel("./DINO/","obs://${your bucket_name}/DINO")
6. Create Training Job
-
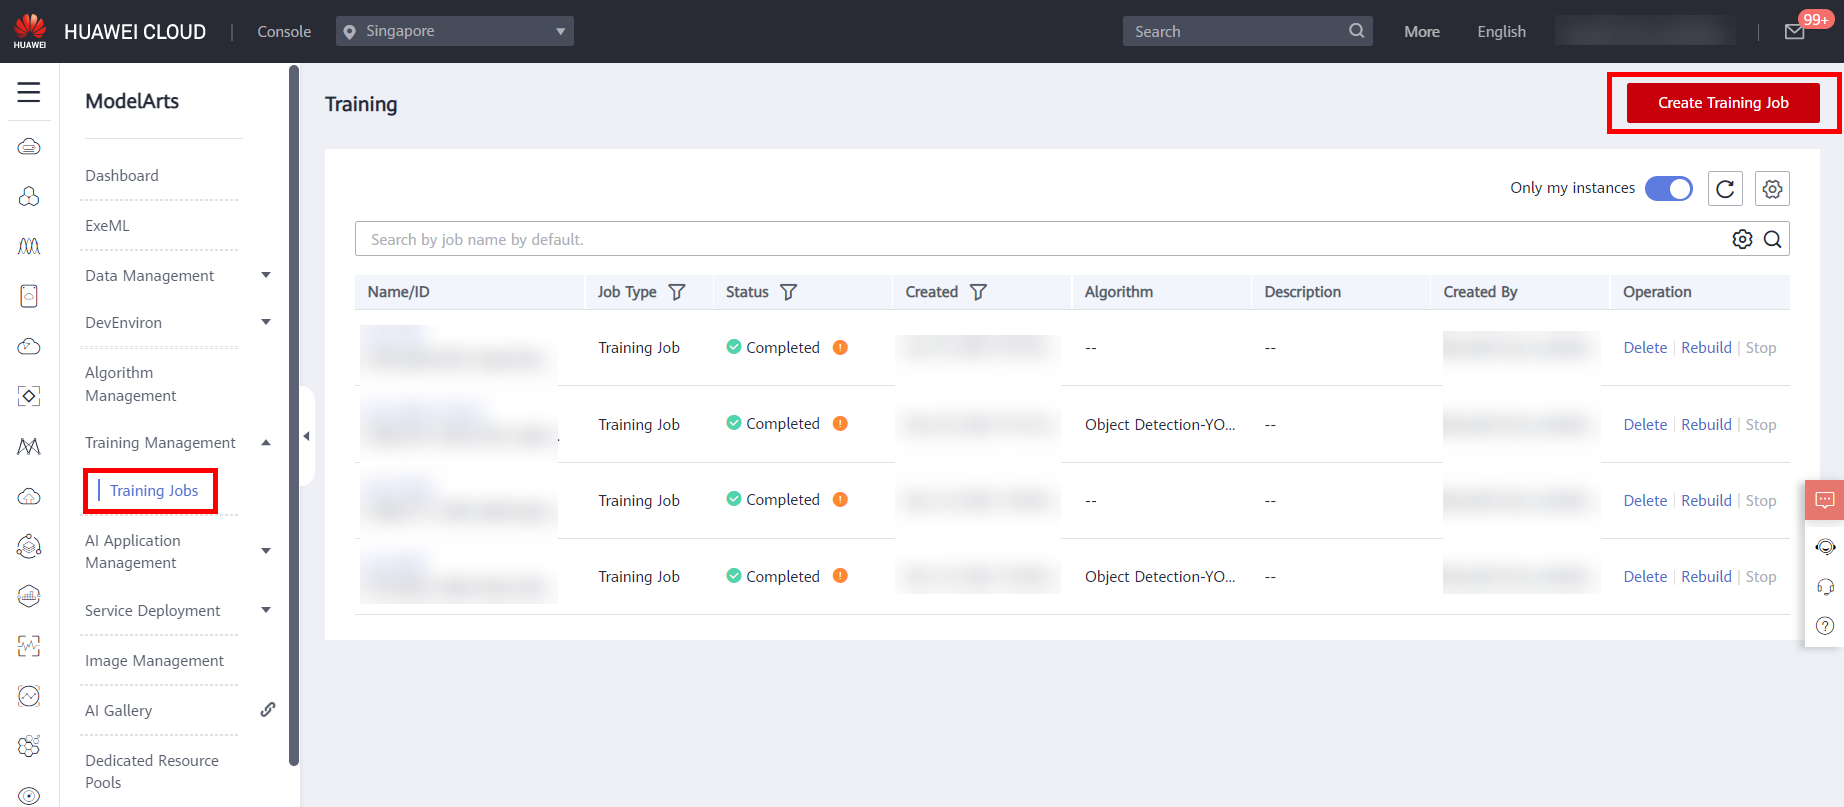
Choose Training Management -> Training Jobs from the menu bar on the left to enter the training job list page, and click Create Training Job in the upper right corner,as shown below.
-
Parameter Configuration
● Created By: Custom algorithms
● Boot Mode: Custom images
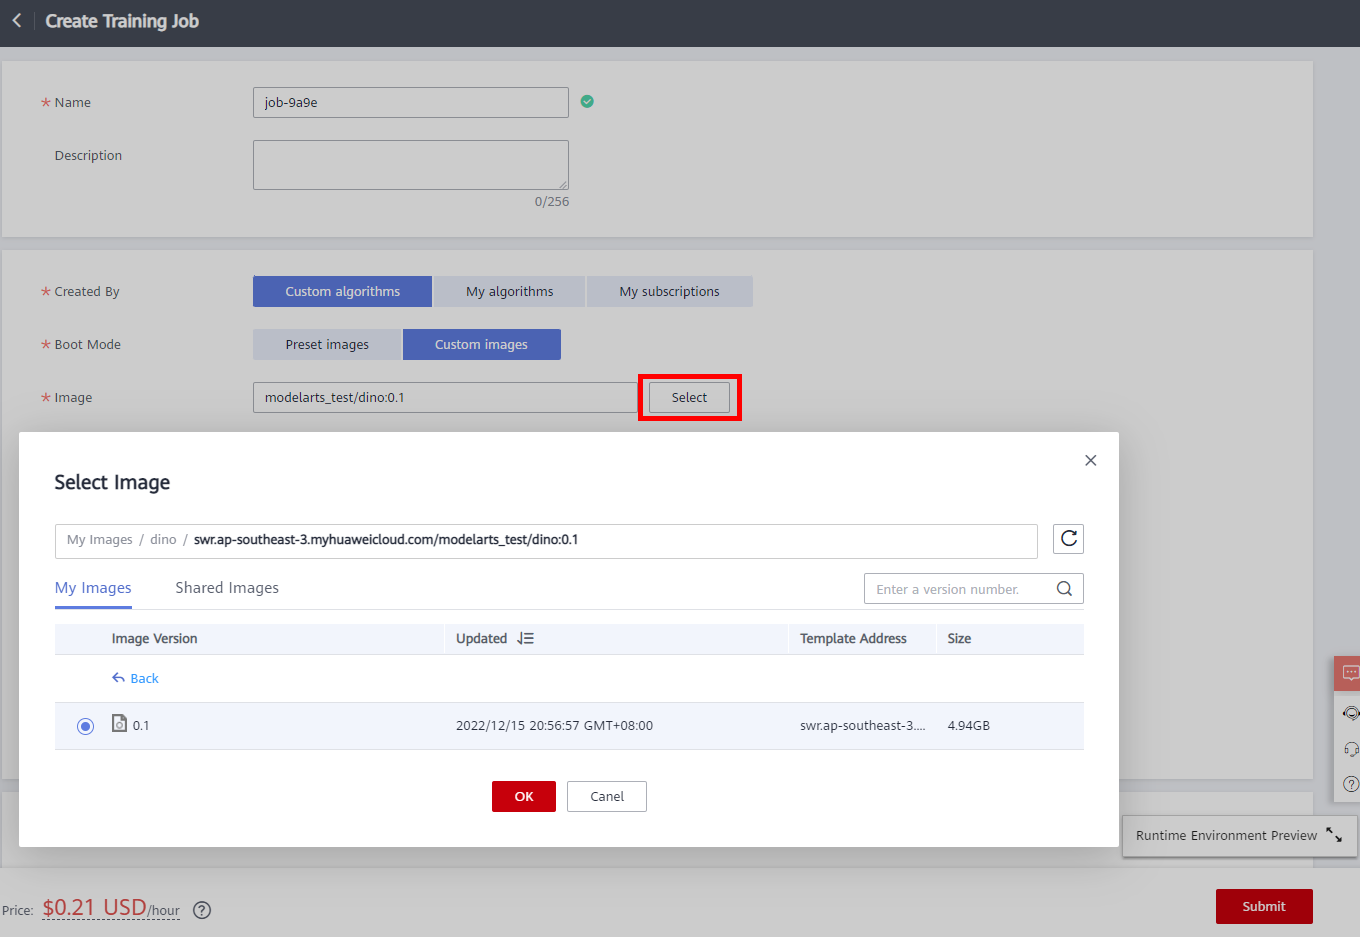
● Image: click Select, In the Select Image dialog box, click your Image Name created, choose Image Version, and then click OK.
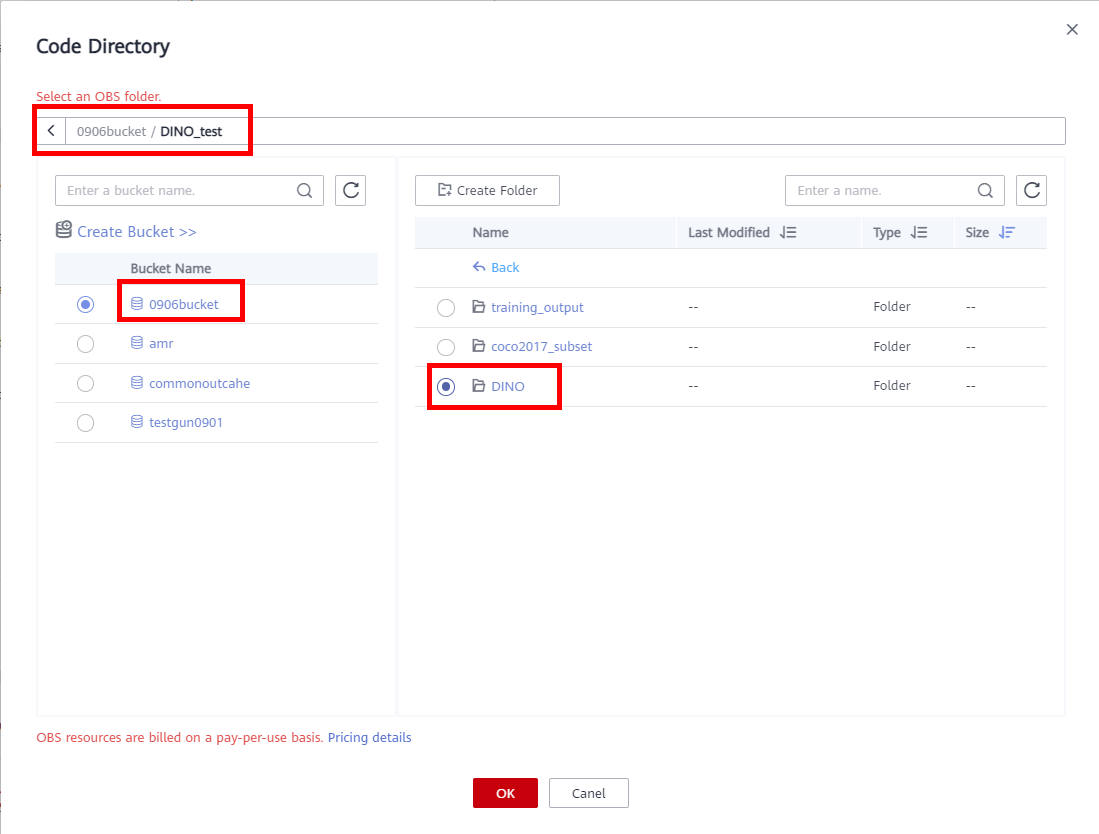
● Code Directory: click Select on the right, select the path:
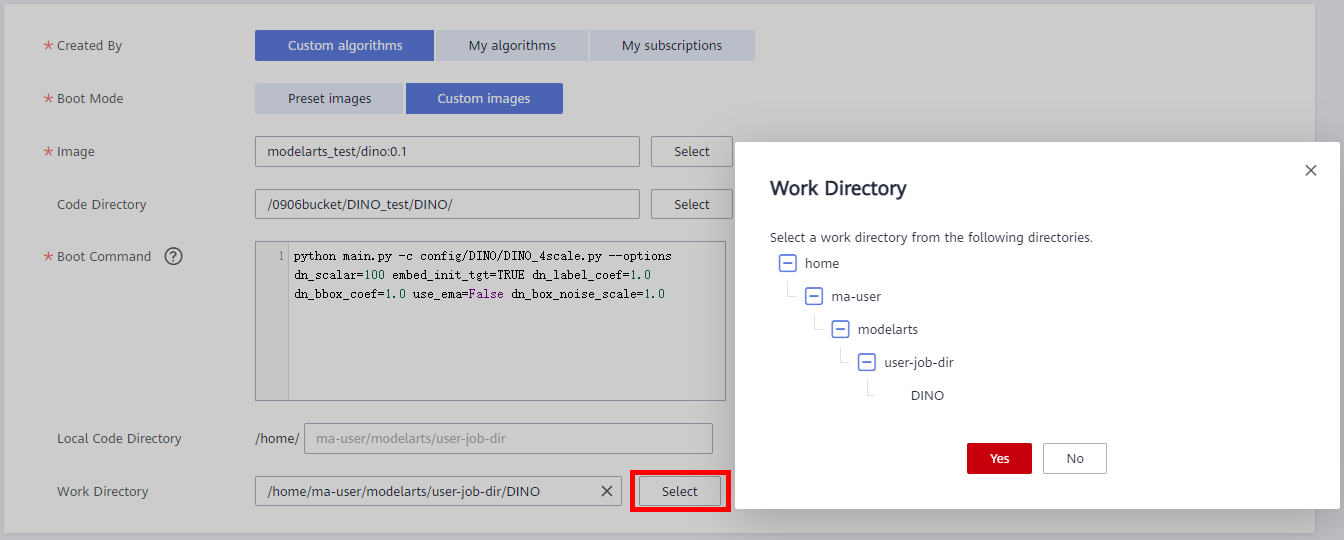
DINOof the code to be uploaded to OBS, and then click OK.● Boot Command: Command for booting an image. The boot command will be automatically executed after the code directory is downloaded. If the training startup script is a .py file, train.py for example, the boot command can be python train.py. If the training startup script is a .sh file, main.sh for example, the boot command can be bash main.sh. Semicolons (;) and ampersands (&&) can be used to combine multiple boot commands, but line breaks are not supported.
python main.py -c config/DINO/DINO_4scale.py --options dn_scalar=100 embed_init_tgt=TRUE dn_label_coef=1.0 dn_bbox_coef=1.0 use_ema=False dn_box_noise_scale=1.0● Local Code Directory: Default
● Work Directory: click Select -> Yes
● Input: Select data for training. It will be downloaded to the training container. Then, parameters will be parsed to obtain the data path.
click Add Training Input,setting input name: coco_path, click Data path, choose the path of dataset:
coco2017_subsetin OBS, and obtained from Hyperparameters.● Output: Select an OBS path for storing the training output. An empty directory is recommended.
click Add Training Input,setting output name: output_dir, click Data path -> Create Folder to create a new folder:
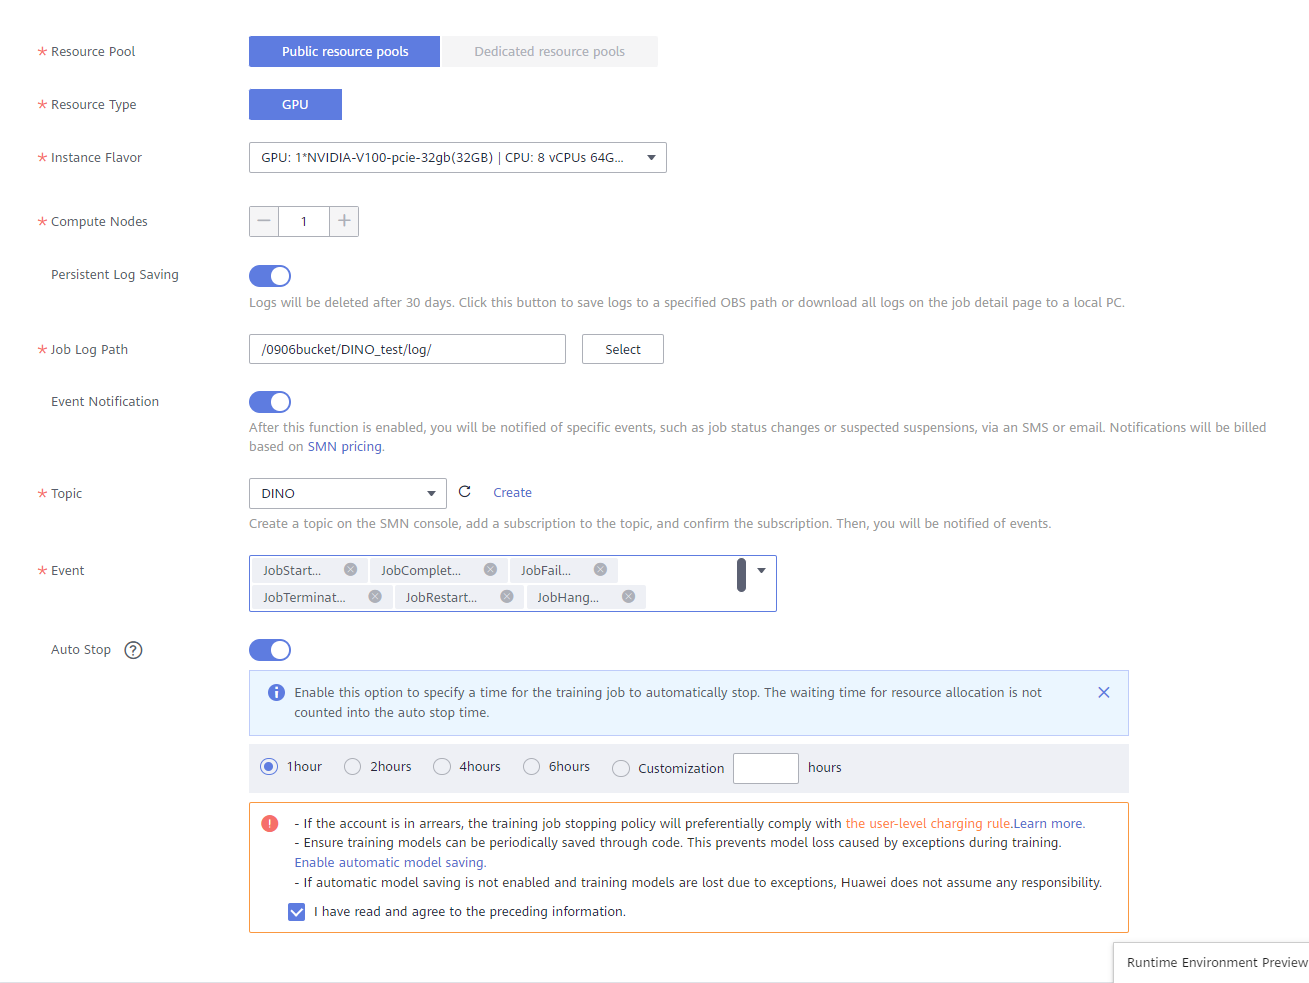
training_outputfor storing training output data in OBS, and obtained from Hyperparameters.● Resource Pool: Public resource pools
● Resource Type: GPU
● Instance Flavor: GPU: 1*NVIDIA-V100-pcie-32gb(32GB) | CPU: 8 vCPUs 64GB 780GB
● Compute Nodes: 1
● Persistent Log Saving: Optional
- Job Log Path: select an empty OBS path for storing training logs. Ensure that you have read and write permissions to the selected OBS directory.
● Event Notification: Optional. Whether to subscribe to event notifications. After this function is enabled, you will be notified of specific events, such as job status changes or suspected suspensions, via an SMS or email. If you enable this function, configure the following parameters as required:
- Topic: topic of event notifications. You can create a topic on the SMN console.
- Event: type of the event to subscribe to. Options: JobStarted, JobCompleted, JobFailed, JobTerminated, and JobHanged.
● Auto Stop: Enable; 1 hour; check the agreement. After this parameter is enabled and the auto stop time is set, a training job automatically stops at the specified time.
Retain Default for other parameters.
-
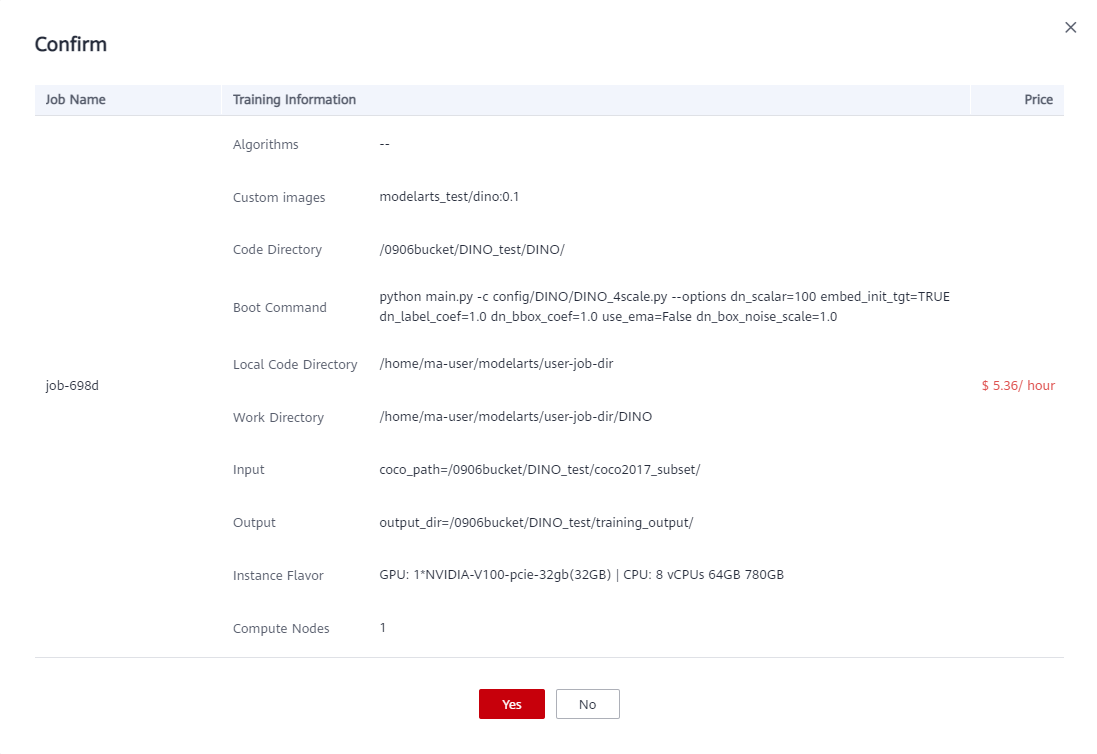
After the parameters are set, click Submit, confirm the training information, and click OK.
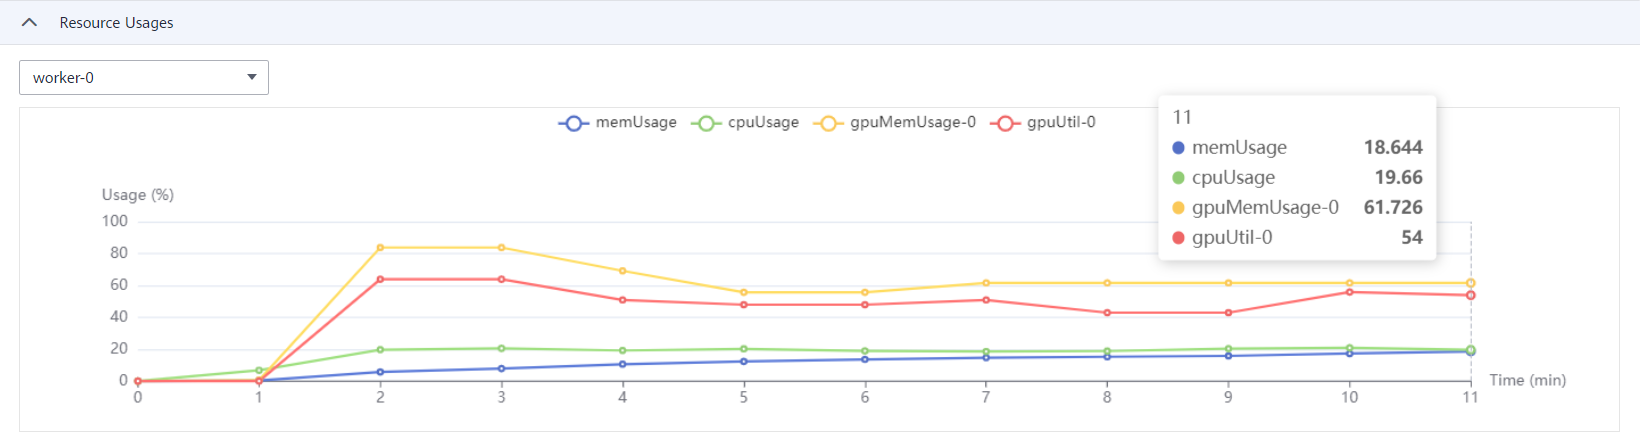
A training job generally runs for a period of time. To view the real-time status and basic information of a training job, switch to the training job list.
- In the training job list, Status of the newly created training job is Pending.
- When the status of a training job changes to Completed, the training job is complete, and the generated model is stored in the corresponding training output path.
- If the status is Failed or Abnormal, click the job name to go to the job details page and view logs for troubleshooting. For detail, see Training Job Details.
-
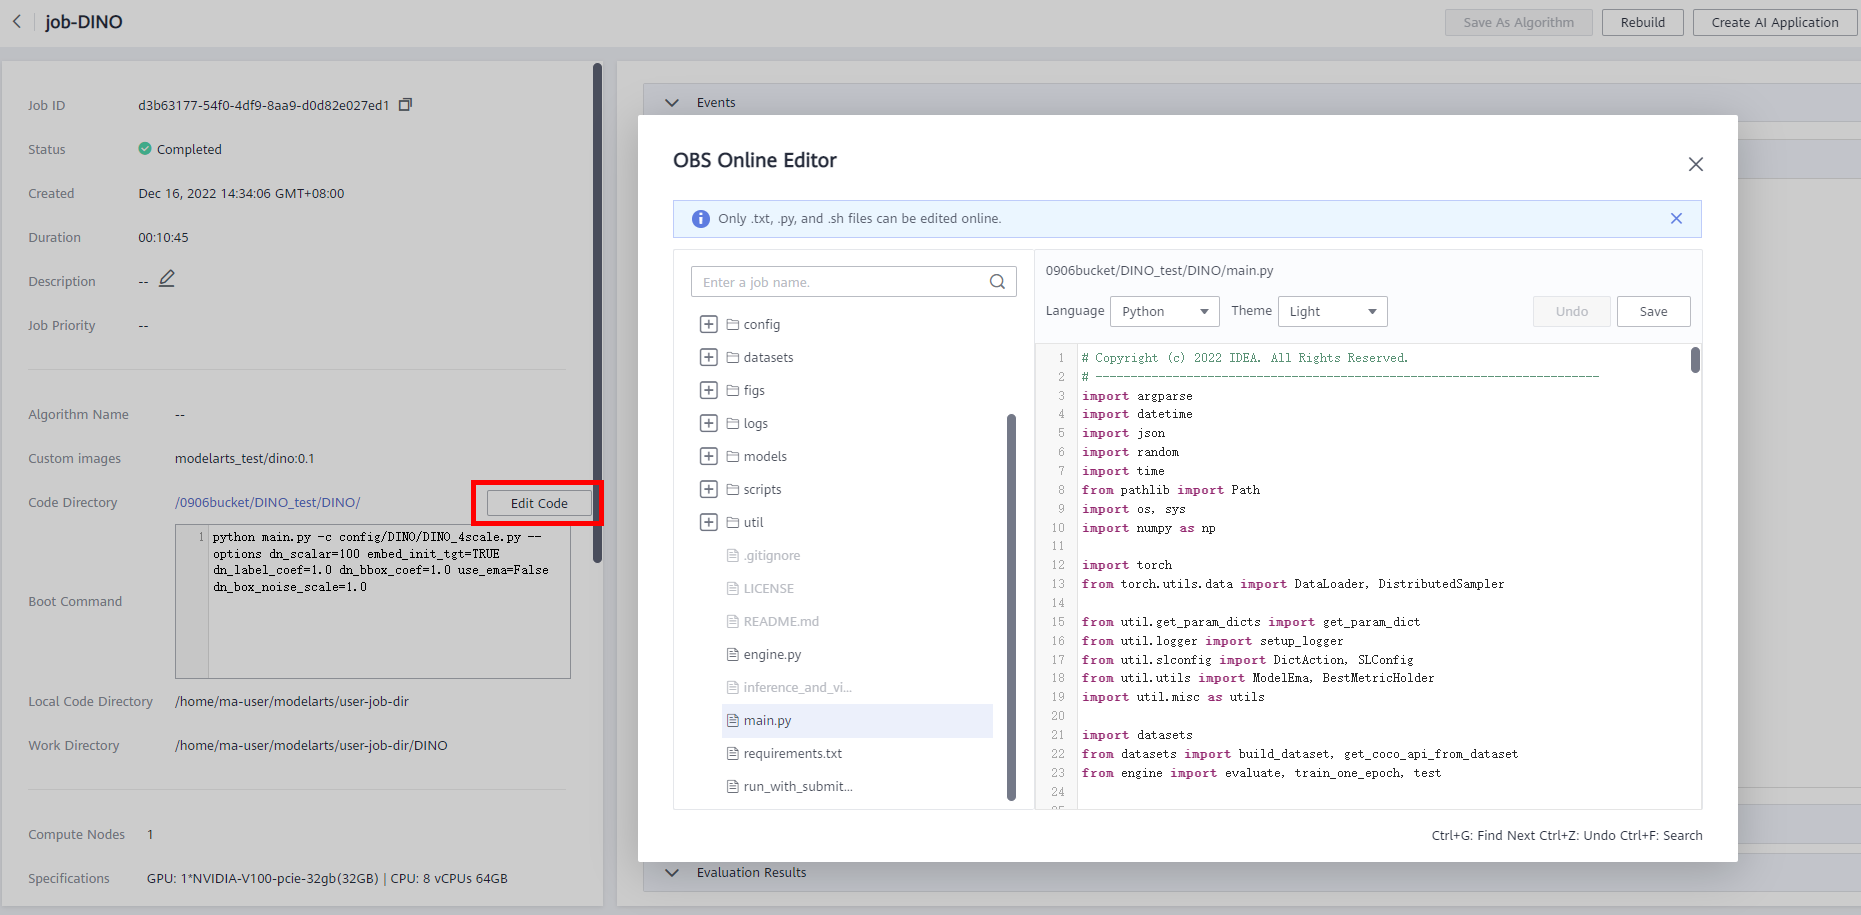
After the training task is complete, you can edit the code online in the directory. After the code is saved,you can train the model again, as shown below.


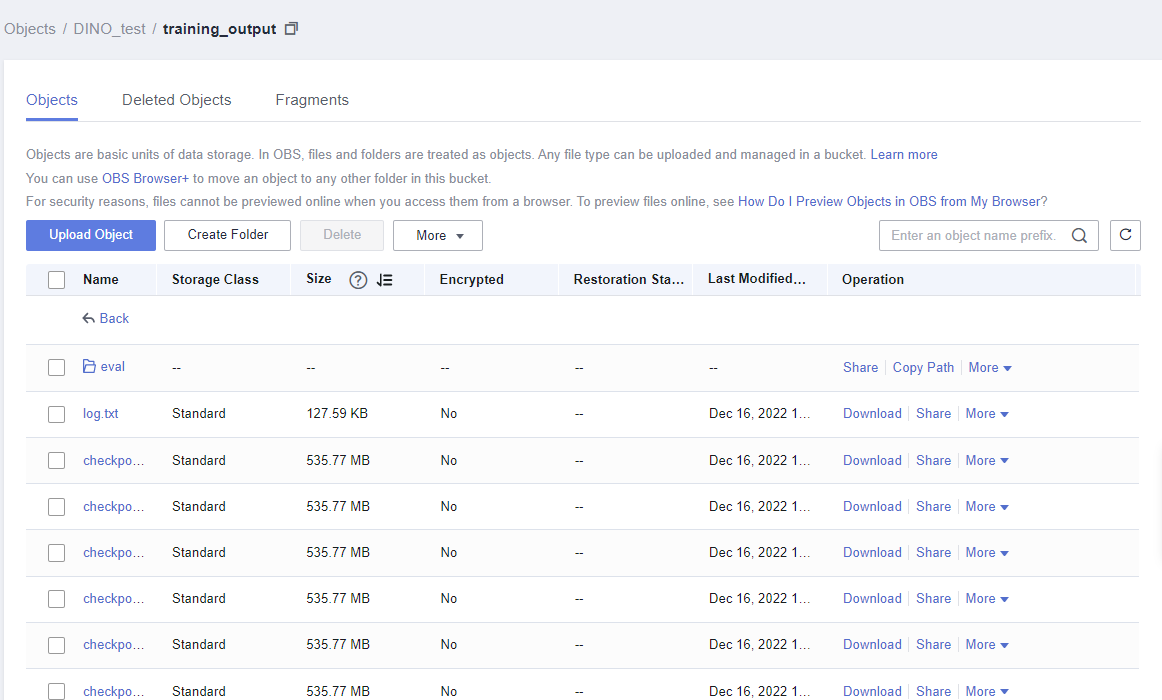
7. Training Output
After the training task is complete, you can view the training result in the configured OBS training output path.

- 点赞
- 收藏
- 关注作者
评论(0)