基于Spring Boot框架的员工管理系统的设计与实现四(开源项目——实现增删改查功能整体流程超详细)

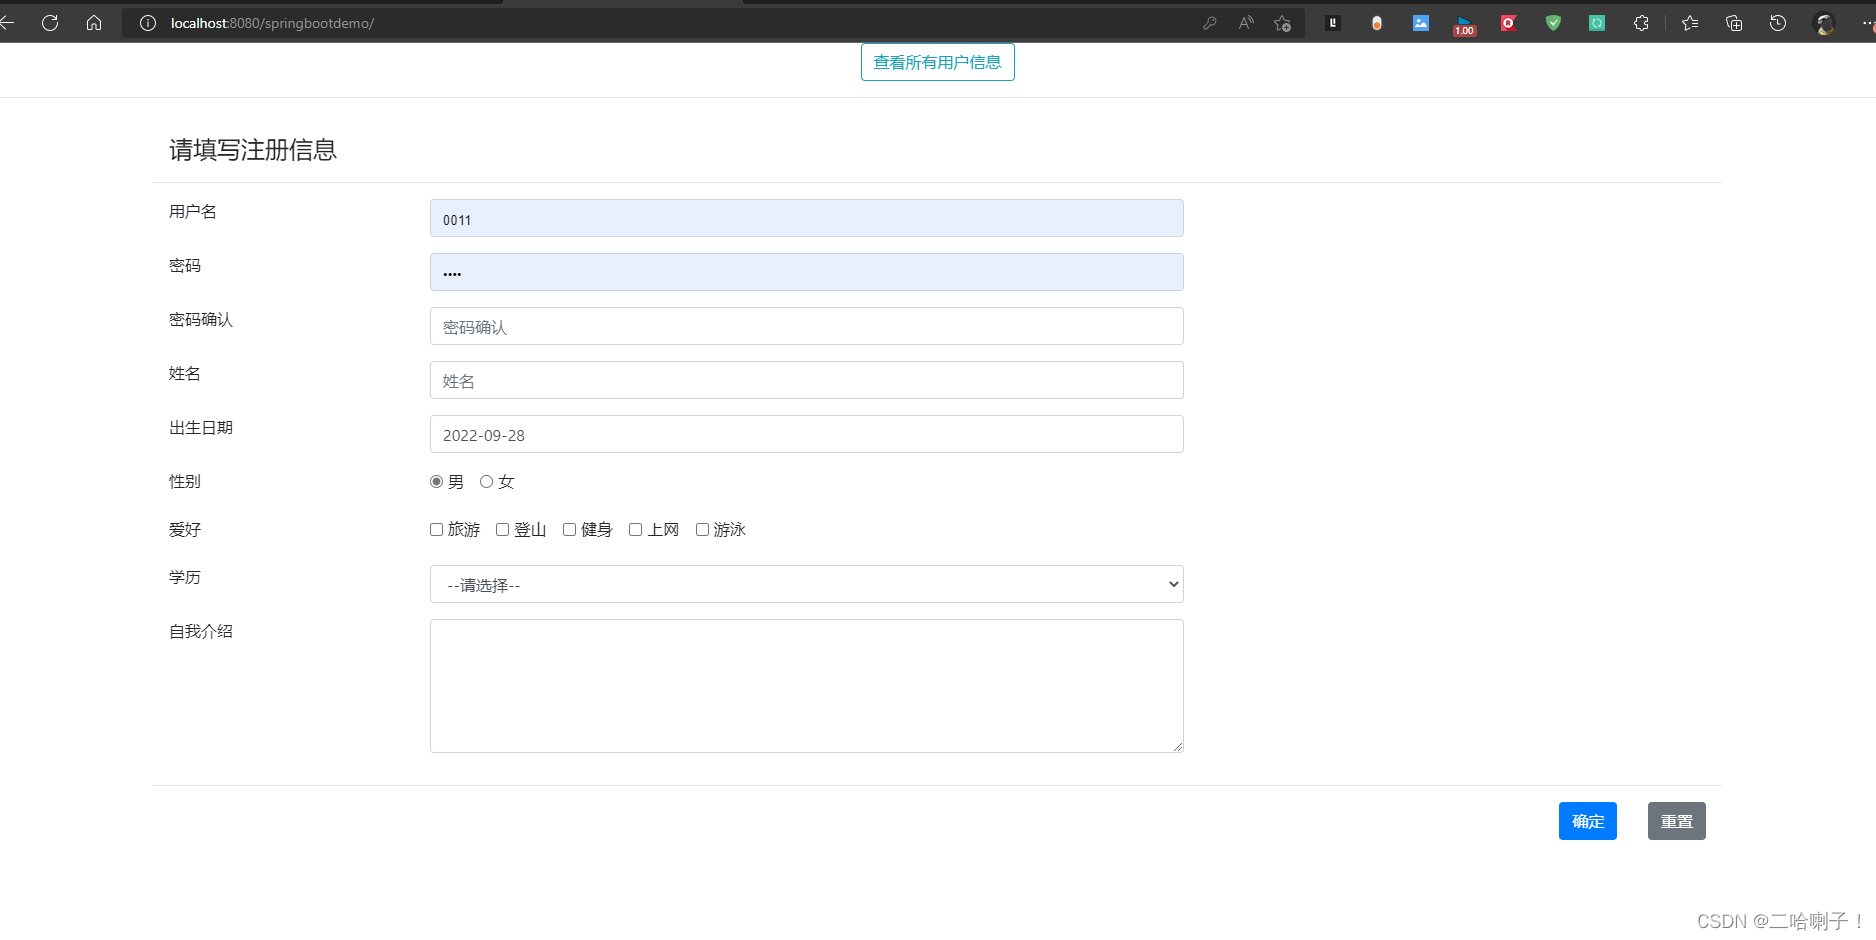
1、注册页面的完善(增)
接下来我们把注册功能完善下,因为用户注册后不可能去看数据库,我们要有个显示页面,显示注册成功还是失败,而且在注册时我们是默认他是注册成功的,实际情况下注册的用户名是一不一样? 注册完后还有个返回首页,注册成功后要有个登录功能
1、我们先写注册失败的代码,在UserAction里面:
 public String addUser(User user, Map<String,String> m) {
          int f = userService.addUser(user);
          if (f == 0) {
              m.put("result","yes");
              m.put("msg","注册成功");
          }else if(f==1){
              m.put("result","no");
              m.put("msg","注册失败,用户名重复");
          }else {
              m.put("result","no");
              m.put("msg", "注册失败,数据库错误");
          }
          return "login";
      }
我们之前写得 f==0,f在userService里来的,userService这有个addUser方法
之前addUser只是返回0,现在我们让他返回1或2
2、我们回到UserService:
UserService已经有一个addUser接口了,他具体的实现在UserServiceImpl内
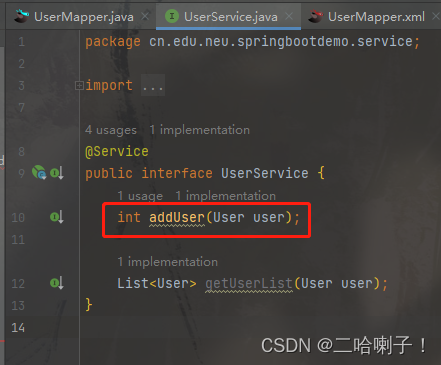
我们就去看UserServiceImpl,在这里面我们要加一些其他的方法
比如先看注册失败,用户名重复,这个错误
在里面加个try catch语句,如果有错误就用catch语句捕获这个Exception异常并打印
3、我们先判断这个数据库有没有这个用户,对数据库进行一个查询操作
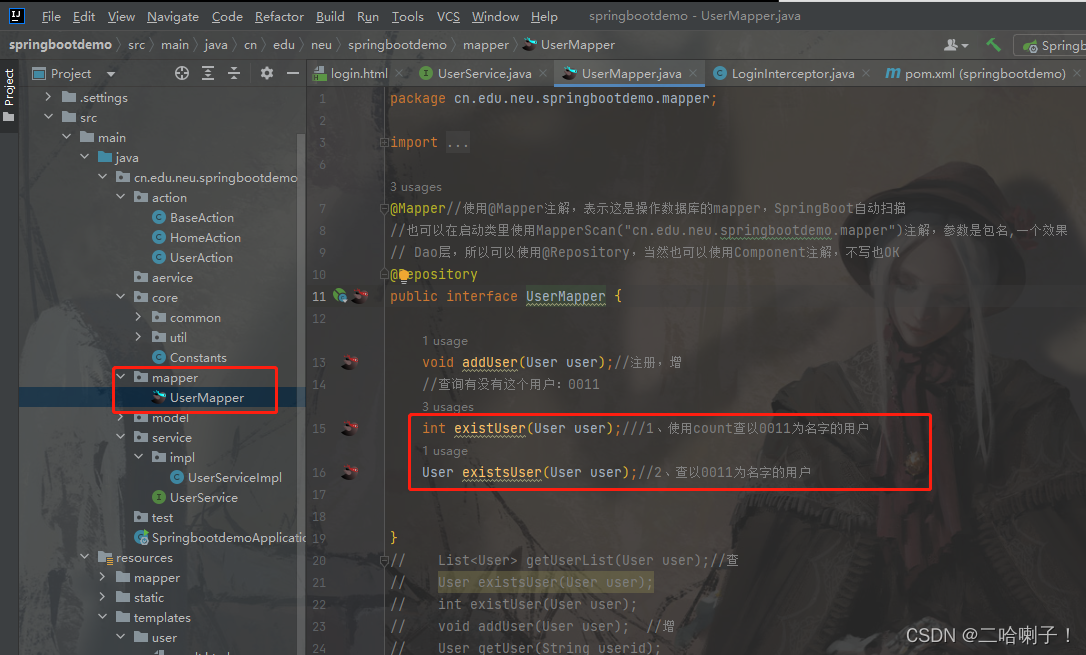
在mapper包下的UserMapper接口中加入下面代码
 //查询有没有这个用户:0011
    int existUser(User user);///1、使用count查以0011为名字的用户
    User existsUser(User user);//2、查以0011为名字的用户
接下来去UserMapper.xml里面写数据库查询操作语句
先写第一个:使用count查以0011为名字的用户
    <select id="existUser" parameterType="User" resultType="int">
        select count(*) from demo_users where username = #{username}
    </select>
     <!--第一个:使用count查以0011为名字的用户,上面的username是变量-->
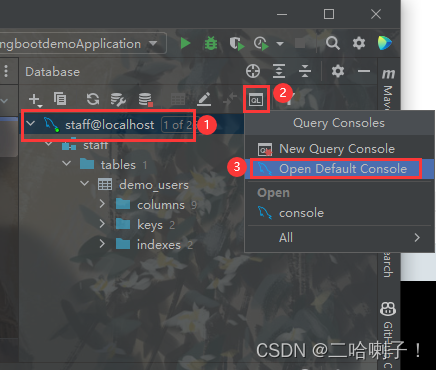
但是查询语句对不对呢?这时候可以打开idea内显示图形化页面,然后把查询语句复制进去验证
值得注意的是:select count(*) from demo_users where username = #{username}中的#{username}是个变量
比如说我们查询以0011为名字的:select count(*) from demo_users where username = '0011'
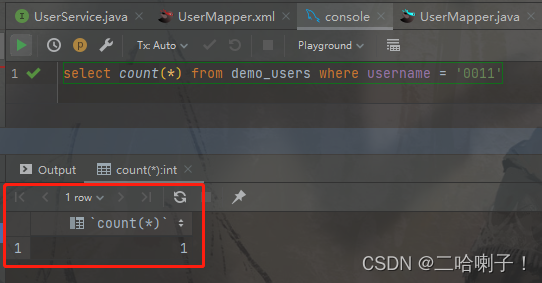
count这里返回1,说明有一个用户的名字是0011
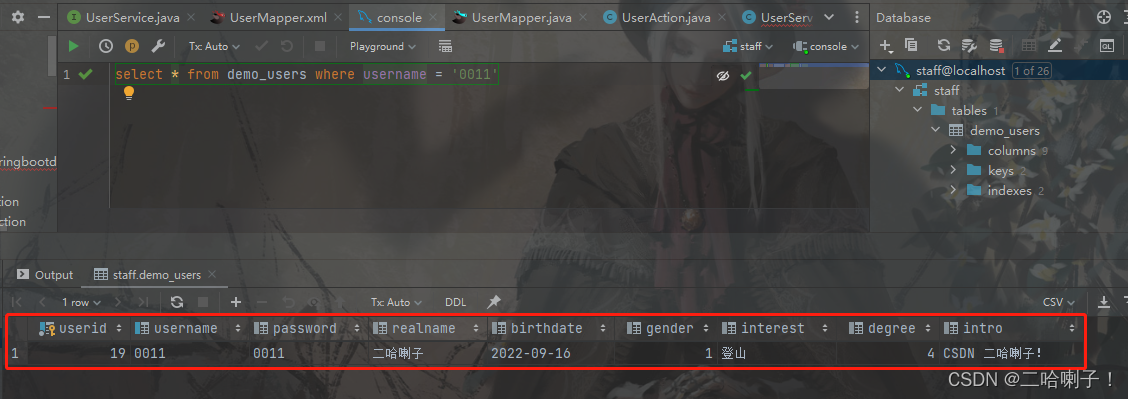
当然count也可以不做统计,把以0011做名字的用户返回回来:select * from demo_users where username = '0011'
下面接着写第二个:查以0011为名字的用户
    <select id="existsUser" parameterType="User" resultType="User">
        select userid,username from demo_users where username=#{username} and password=#{password}
    </select>
    <!--第二个:查以0011为名字的用户,username和password是变量,
    在图形化页面中的查询语句是:select userid,username from demo_users where username='0011' and password='0011'
    -->
4、现在我们就可以在UserServiceImpl 里面写 try catch语句了,当然前面写得默认注册成功就要删掉了
@Service
public class UserServiceImpl implements UserService {
    @Autowired
    private UserMapper mapper;
    @Override
    public int addUser(User user) {
      //  默认执行成功
      //  mapper.addUser(user);
      //  return 0;
        try{
            //如果你的数据库没有这个用户返回0,否则返回1
            if(mapper.existUser(user)==0){
                return 0;  //用户不存在,可以注册
            }else{
                return 1;  //用户存在,不可注册
            }
        }catch (Exception e){
            e.printStackTrace();
            return 2; //如果报错返回2
        }
    }

    @Override
    public List<User> getUserList(User user) {
        return null;
    }
}
5、现在注册功能就写得差不多了,但是在UserAction中我们写的是返回login页面,我们应该让他返回到 result结果页面
我是复制的home.html,再粘贴到user文件夹下,重命名为:result.html
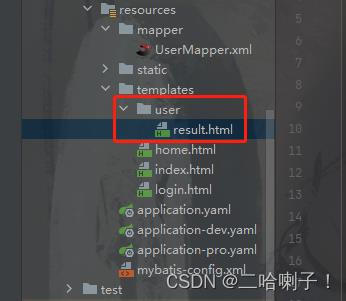
所以在UserAction最后一行返回login改成:return "user/result";
把 result.html里面的代码改成:
<!DOCTYPE html>
<html xmlns:th="http://www.thymeleaf.org">
<head>
	<title>Insert title here</title>
	<meta charset="UTF-8">
	<meta name="viewport" content="width=device-width, initial-scale=1, shrink-to-fit=no">
	<title>Hello, Bootstrap Table!</title>
	<!-- 最新 Bootstrap4 核心 CSS 文件 -->
	<link rel="stylesheet" href="https://cdn.staticfile.org/twitter-bootstrap/4.4.1/css/bootstrap.min.css">

	<!-- jQuery文件。务必在bootstrap.min.js 之前引入 -->
	<script src="https://cdn.staticfile.org/jquery/3.4.1/jquery.min.js"></script>
	<!-- bootstrap.bundle.min.js 用于弹窗、提示、下拉菜单,包含了 popper.min.js -->
	<script src="https://cdn.staticfile.org/popper.js/1.16.0/umd/popper.min.js"></script>
	<!-- 最新的 Bootstrap4 核心 JavaScript 文件 -->
	<script src="https://cdn.staticfile.org/twitter-bootstrap/4.4.1/js/bootstrap.min.js"></script>
	<!-- DaterangePicker -->
	<link rel="stylesheet" type="text/css" media="all" th:href="@{/daterangepicker/daterangepicker.css}"/>
	<!-- BootStrapValidator -->
	<link rel="stylesheet"
		  href="https://cdn.bootcss.com/jquery.bootstrapvalidator/0.5.3/css/bootstrapValidator.min.css">
	<script type="text/javascript"
			src="https://cdn.bootcss.com/jquery.bootstrapvalidator/0.5.3/js/bootstrapValidator.min.js"></script>
	<script th:src="@{/js/functions.js}"></script>

</head>
<body style="margin: 200px">
<div class="container-fluid">
	<div class="row">
		<div class="m-auto">
			<p class = "text-success" th:if="${result=='yes'}"><span th:text="${msg}"></span></p>
			<p class = "text-danger" th:if="${result=='no'}"><span th:text="${msg}"></span></p>
		</div>
	</div>
</div>
</body>
</html>
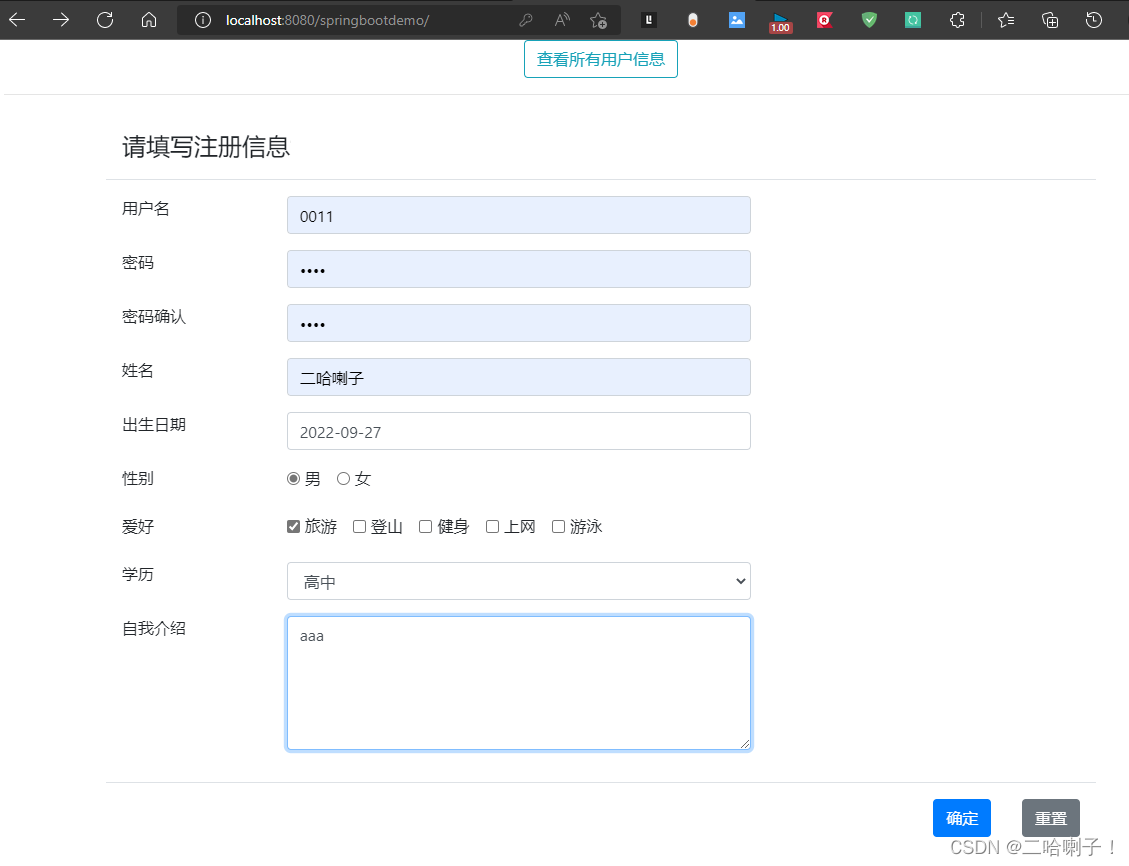
这时候我们再重新运行下,再注册一个数据库里有的名字
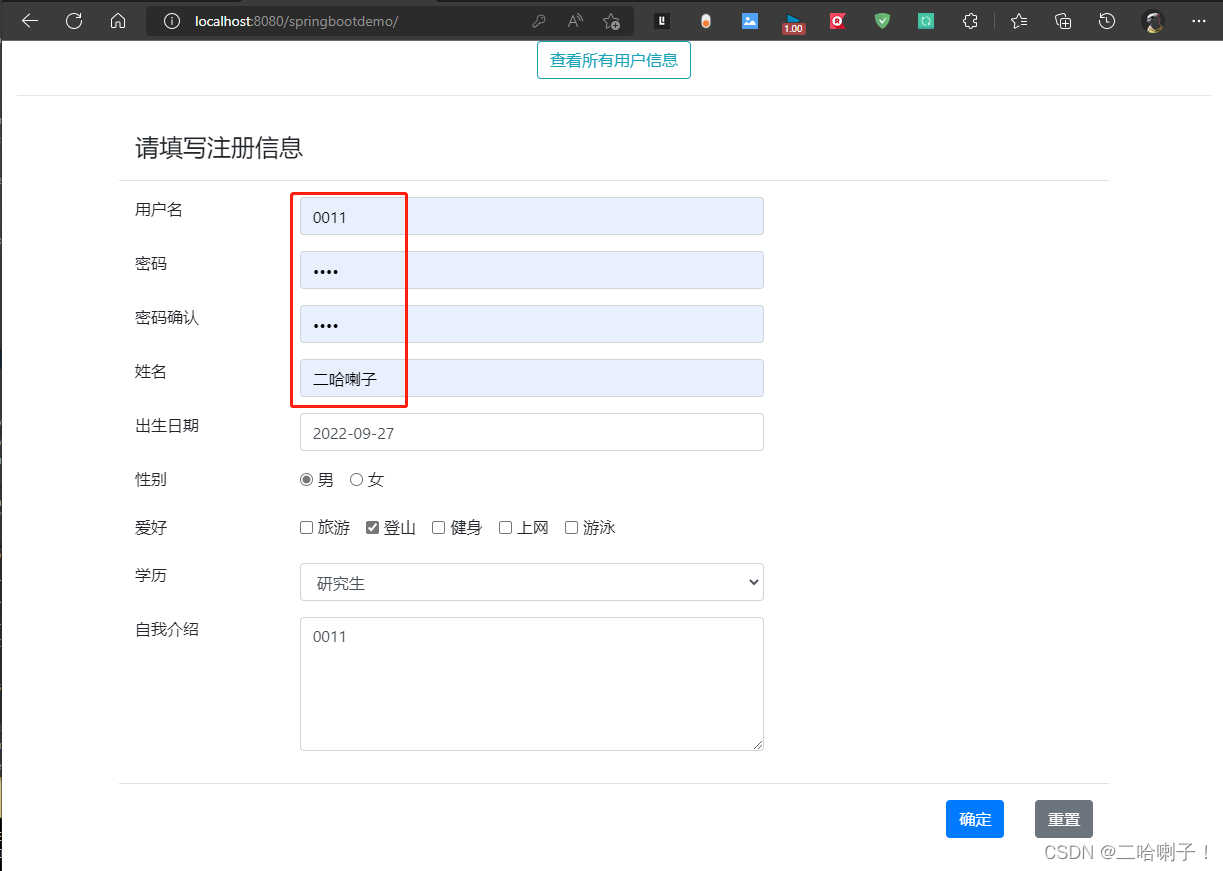
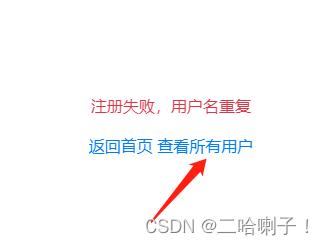
点击确定后:
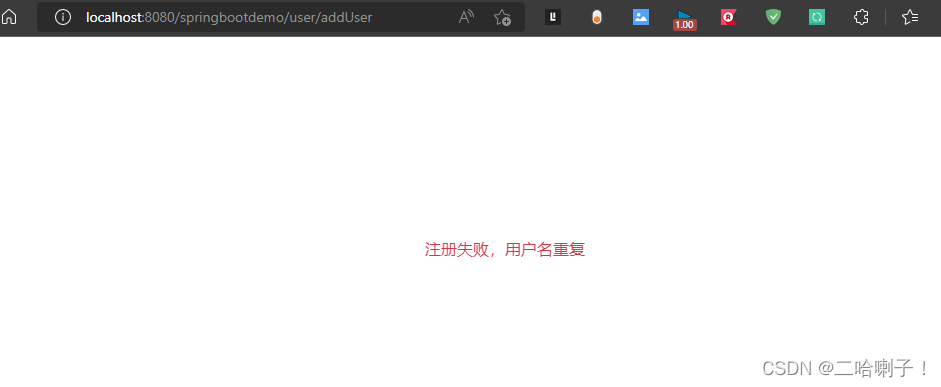
6、现在注册不成功的结果出来了,但是页面太简单了,起码有个跳转加个超链接,不可能让用户按左上角返回箭头返回,无论注册成功与否都要有个超链接,让他跳转一下
所以接着写result.html页面:
	<div class = "row">
		<div class="m-auto">
			<a th:href="@{/}">返回首页</a>
			<a th:href="@{/user/getUserList}">查看所有用户</a>
		</div>
	</div>
然后就多了这两个超链接,点进去后他们显示的页面也分别放在了下面
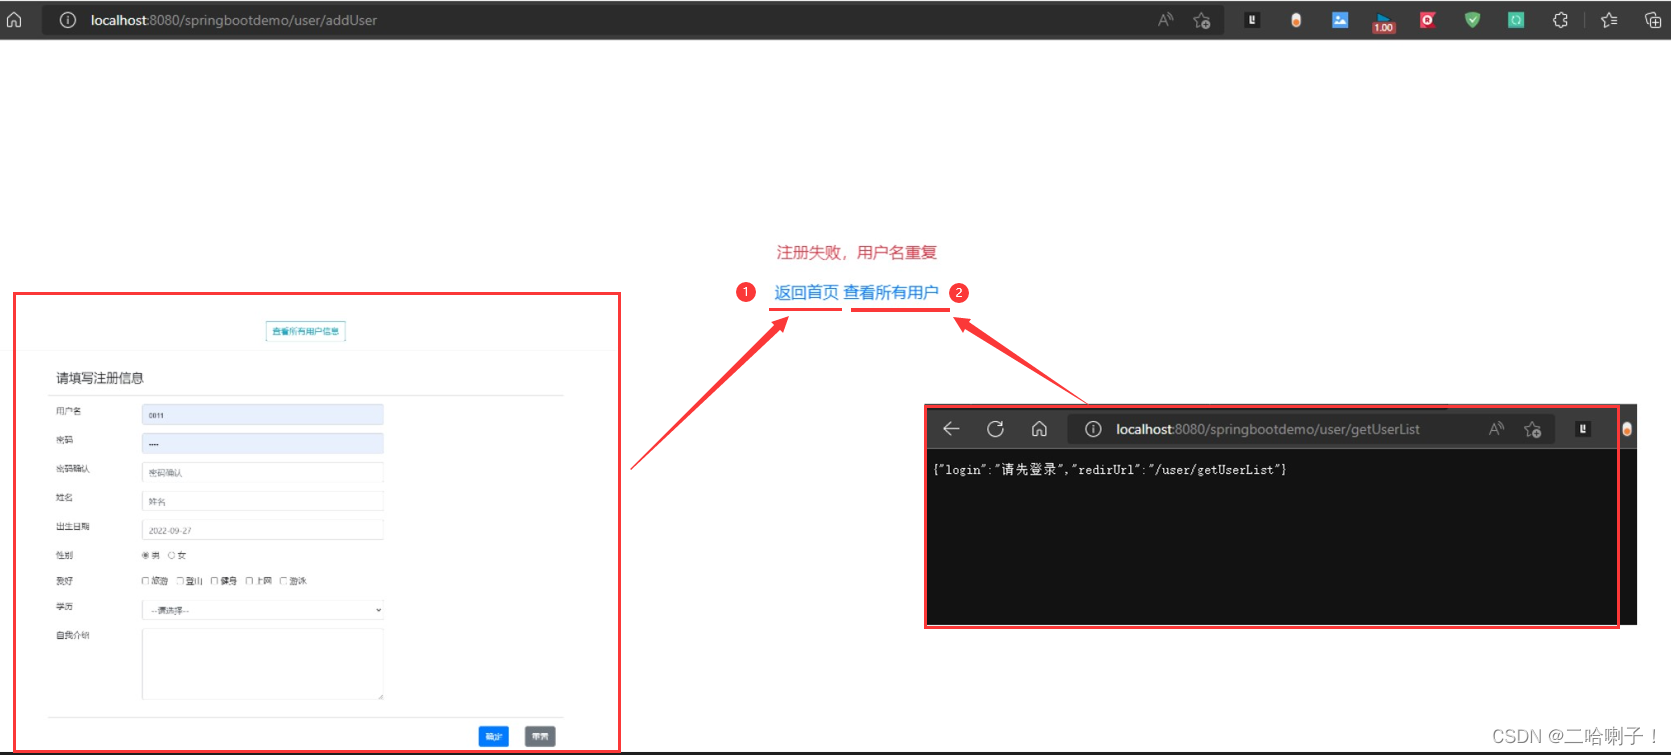
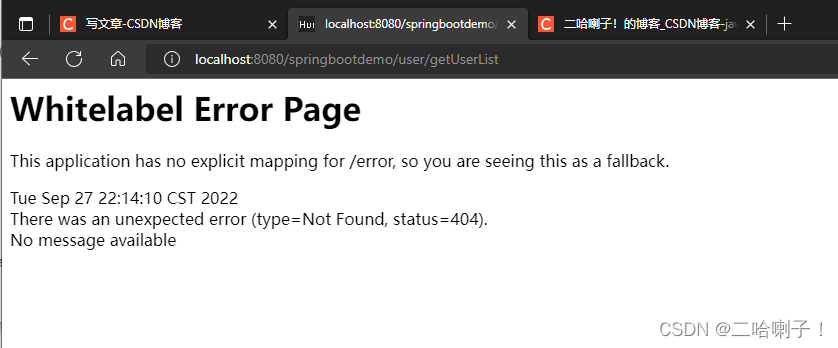
在点查看用户的时候显示的是:
{“login”:“请先登录”,“redirUrl”:"/user/getUserList"}
要求先登录,跳转的路径是/user/getUserList,假如要在做其他的东西,必须要把login这个功能做了,否则他都会拦截
在common文件夹里有个LoginInterceptor.java(拦截器功能)

在新的页面中可以看到:他的要求就是请先登录
2、登录功能(查)
我们先把LoginInterceptor.java(拦截器功能)里面最后几行注释掉,这几行是输出流的功能
需要注释的代码:

我们在这注释代码下面做一个跳转到登录页面的功能:
arg0.getRequestDispatcher("login").forward(arg0,arg1);
再运行下:
还是先显示注册页面,添加信息
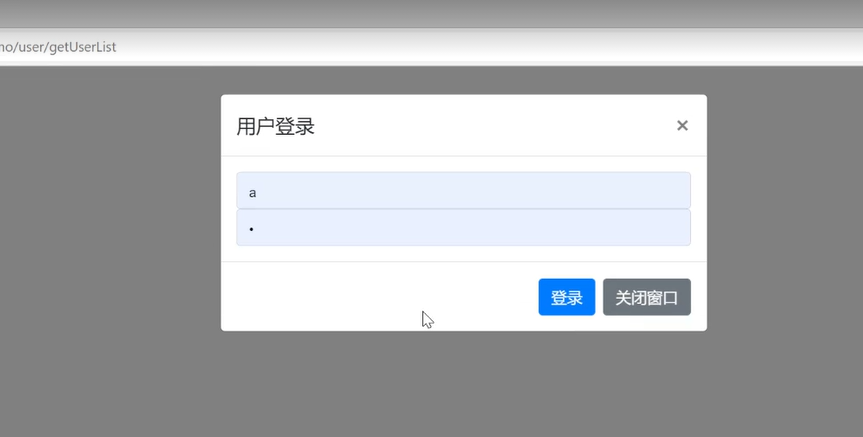
然后这次点击查看所有用户
然后就跳转到 login页面了
注册前的检测
这个功能就是在你注册这个用户前检测数据库有没有这个用户名
这个功能的实现的逻辑在home.html页面内
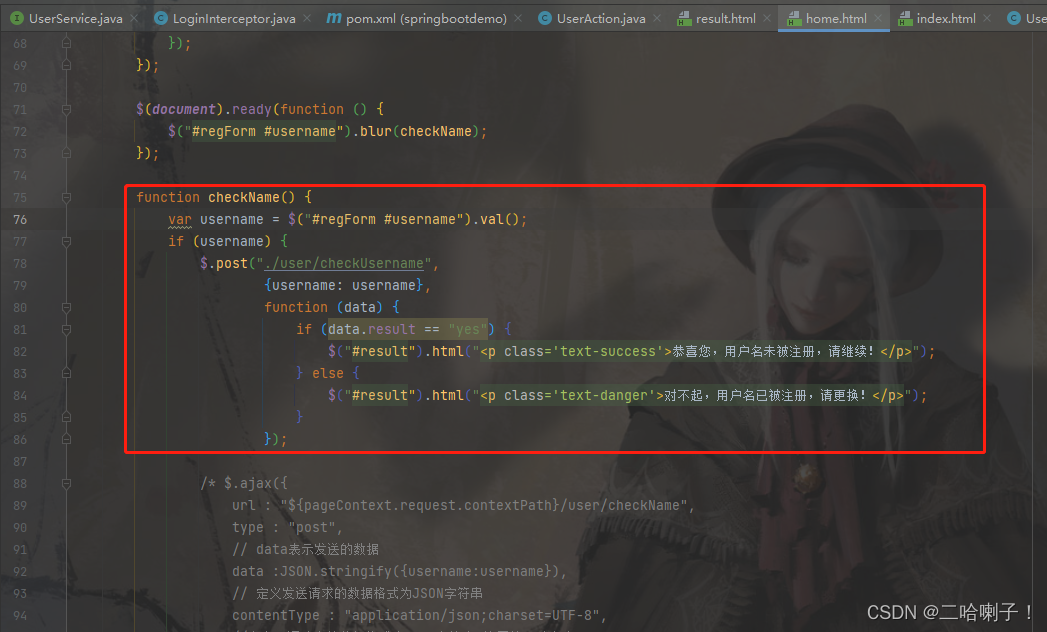
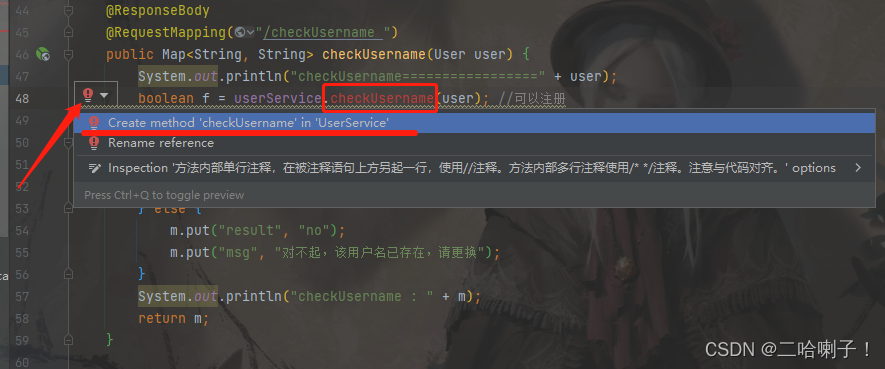
1、我们回到UserAction里写checkUsername这个函数
    @ResponseBody
    @RequestMapping("/checkUsername")
    public Map<String, String> checkUsername(User user) {
        System.out.println("checkUsername=================" + user);
        boolean f = userService.checkUsername(user); //可以注册
        Map<String, String> m = new HashMap<String,String>();
        if (f) {
            m.put("result", "yes");
            m.put("msg", "");
        } else {
            m.put("result", "no");
            m.put("msg", "对不起,该用户名已存在,请更换");
        }
        System.out.println("checkUsername : " + m);
        return m;
    }
2、这时候我们可以看到checkUsername这里有个报错,我们把鼠标放上去后点击红色的提示,在UserService里面创建这个checkUsername方法,它会自动生成
自动生成的那行代码的意思是:根据用户名判断是否有该用户,如果没有则可以注册
3、这时候UserServiceImpl类中有个报错,我们【Alt+回车】导入这个方法即可
然后在这里面写个简单的逻辑:
如果existUser(user)==0就是没有注册,如果 !=0 就是已经注册了
  @Override
    public boolean checkUsername(User user) {
        if(mapper.existUser(user)==0){
            return true;
        }else{
        return false;
        }
    }
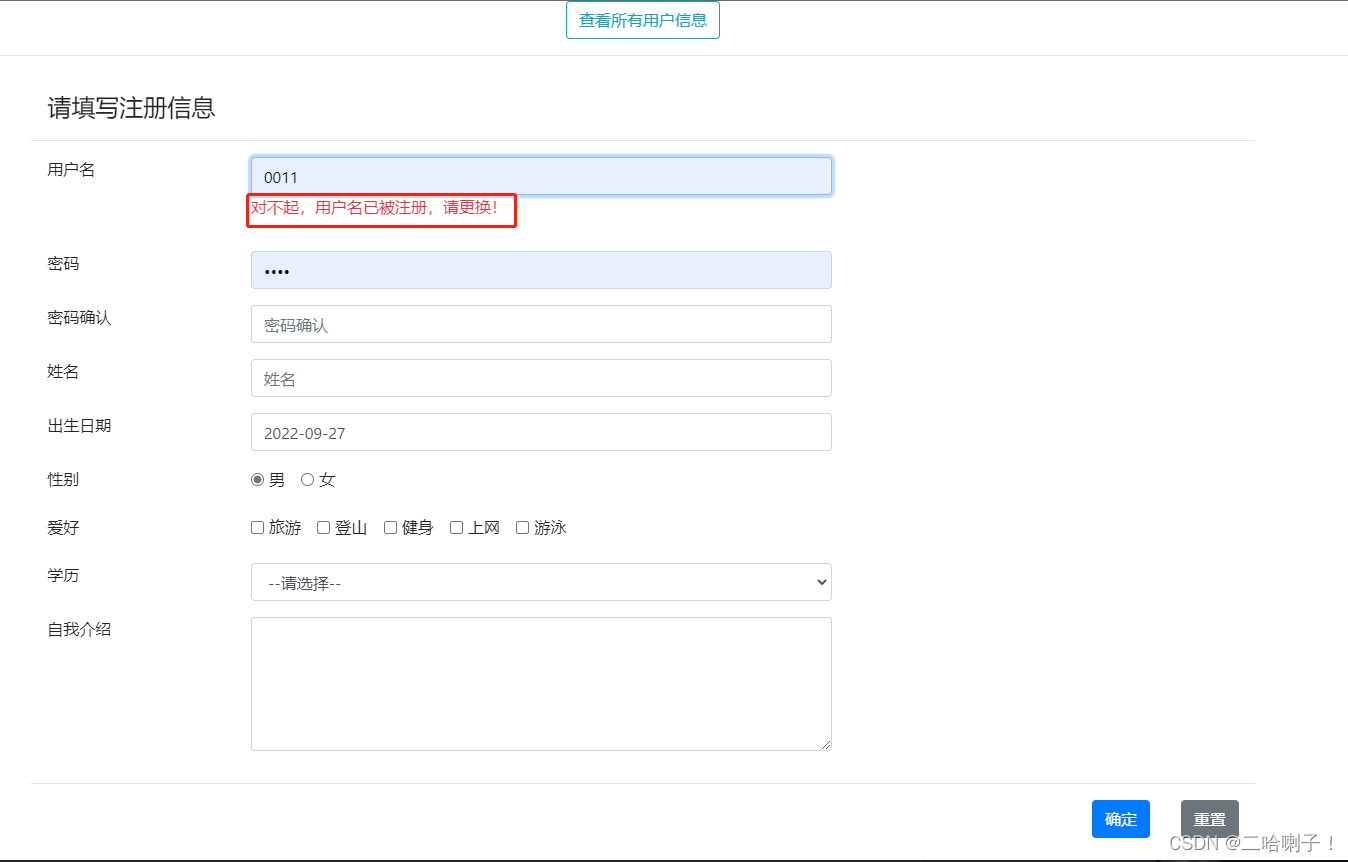
运行截图:

登录功能的编写
1、我们现在统一一下 login.html页面
完整的 login.html代码
里面就是一个表单和俩按钮
<!DOCTYPE html>
<html xmlns:th="http://www.thymeleaf.org">
<head>
<title>Insert title here</title>
<meta charset="UTF-8">
<meta name="viewport"
content="width=device-width, initial-scale=1, shrink-to-fit=no">
<title></title>
<!-- 最新 Bootstrap4 核心 CSS 文件 -->
<link rel="stylesheet" href="https://cdn.staticfile.org/twitter-bootstrap/4.4.1/css/bootstrap.min.css">
<!-- jQuery文件。务必在bootstrap.min.js 之前引入 -->
<script src="https://cdn.staticfile.org/jquery/3.4.1/jquery.min.js"></script>
<!-- bootstrap.bundle.min.js 用于弹窗、提示、下拉菜单,包含了 popper.min.js -->
<script src="https://cdn.staticfile.org/popper.js/1.16.0/umd/popper.min.js"></script>
<!-- 最新的 Bootstrap4 核心 JavaScript 文件 -->
<script src="https://cdn.staticfile.org/twitter-bootstrap/4.4.1/js/bootstrap.min.js"></script>
<script th:src="@{/js/functions.js}"></script>
<script type="text/javascript" th:inline="javascript">
$(document).ready(
function () {
$('#loginFormModal').modal();
}
);
</script>
</head>
<body>
<div class="modal fade" id="loginFormModal" role="dialog" aria-hidden="true" aria-labelledby="myModalLabel">
<div class="modal-dialog">
<div class="modal-content"> <!-- 对loginForm这个表单进行提交,提交方式是post,提交路径是/user/login -->
<form class="form-signin" id="loginForm" th:method="post" th:action="@{/user/login}">
<div class="modal-header">
<h5 class="modal-title" id="myModalLabel">用户登录</h5>
<button type="button" class="close" data-dismiss="modal" aria-label="Close">
<span aria-hidden="true">×</span>
</button>
</div>
<div class="modal-body">
<label for="username" class="sr-only">用户名</label>
<input type="text" id="username" name="username" class="form-control"
placeholder="用户名" required autofocus>
<label for="password" class="sr-only">密码</label>
<input type="password" id="password" name="password" class="form-control"
placeholder="密码" required>
<div class="text-danger" th:text="${login!='yes'?login:''}"></div>
</div>
<div class="modal-footer">
<button class="btn btn-primary" type="submit" id="loginBtn">登录</button>
<button class="btn btn-secondary" type="button" data-dismiss="modal">关闭窗口</button>
</div>
</form>
</div>
</div>
</div>
</body>
</html>
我们现在需要写一个http://localhost:8080/springbootdemo/user/login这样的URL,到这个里面写逻辑
2、我们直接进到action这个页面,写user/login这个逻辑:
//1、查数据库有没有这个人
//2、如果有就登入,登录信息存起来,跳转到目标页
//3、没有还得回到登录页
因为我们在UserMapper接口里面已经定义完了,所以我们先进到UserService接口里面查有没有这个人
3、UserService接口内新增代码:User existsUser(User user);
然后到UserServiceImpl实现类里面【Alt+回车】把这个方法加进来
其实就是向数据库查,查有没有这个人,查询的语句写过了,我们调用一下就行:return mapper.existsUser(user);
4、现在就可以到 action里面写逻辑了
//登录功能
    @RequestMapping("/login") //目标地址
    public String login(User user, HttpSession session, Map<String, String> m) {
        //1、查数据库有没有这个人
        User dbUser=userService.existsUser(user);
        //2、如果有就登入,登录信息存起来,跳转到目标页
        if(dbUser !=null){
            session.setAttribute(Constants.LOGIN_USER,dbUser);  //存起来
            m.put("login","yes");
           String redirUrl = (String) session.getAttribute(Constants.ORIGINAL_URL);
           return "/redirect"+redirUrl;
        }else{
        //3、没有还得回到登录页
            m.put("login",Constants.LOGIN_ERR);
        return "/login";
        }
    }
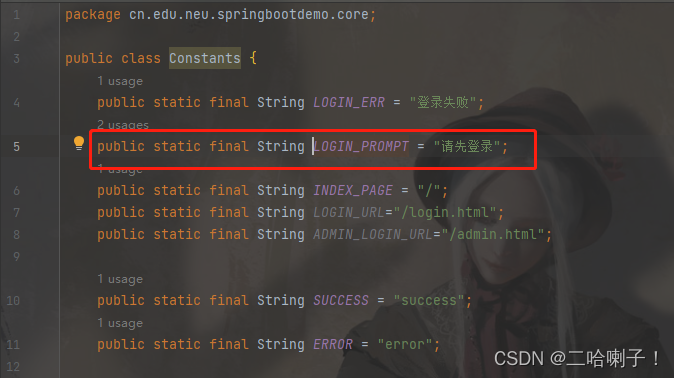
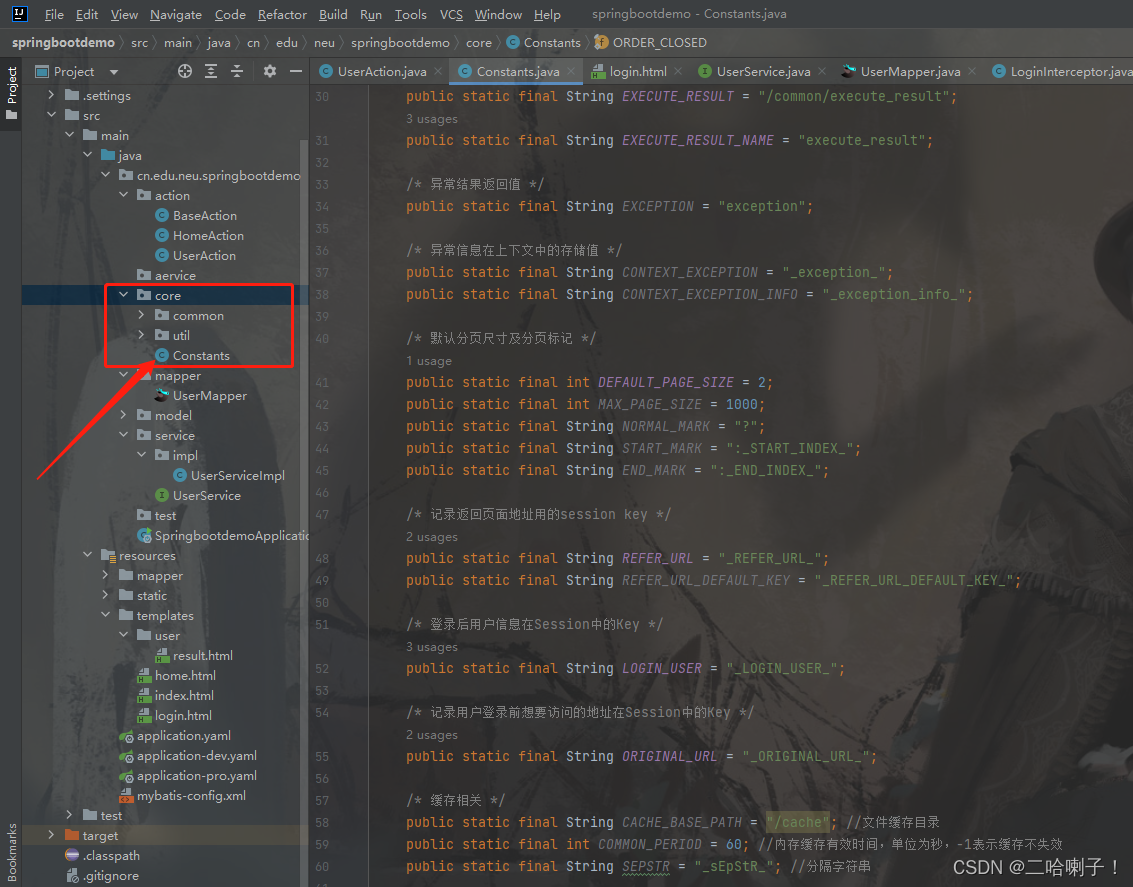
其中Constants. 后面的名字在core文件夹下的Constants类里面找,或者在这里面改
运行后查看所有用户后登录:
3、显示用户表格页面(查)
紧接上图,因为user/getUserList还没写,他就是向后台拿所有的用户信息,把所有的用户拿到后存到一个list里面,然后通过前端Thymeleaf把他渲染出来
1、我们接着去UserAction里面去写getUserList
    @RequestMapping("/getUserList")
    public String getUserList(User user, Map<String, List<User>> m) {
        //向数据库查询user信息,存储到list里,再把list放到map里
         return "user/userList";
    }
2、我们现在还没有 userList页面,需要创建一个
我直接就把 user文件夹下的 result.html复制了一下,重新粘回 user文件夹下,重命名为:userList.html
在这里面随便写点东西,看看能不能返回
在运行程序后,填写注册信息后点击确定,选择查看所有用户
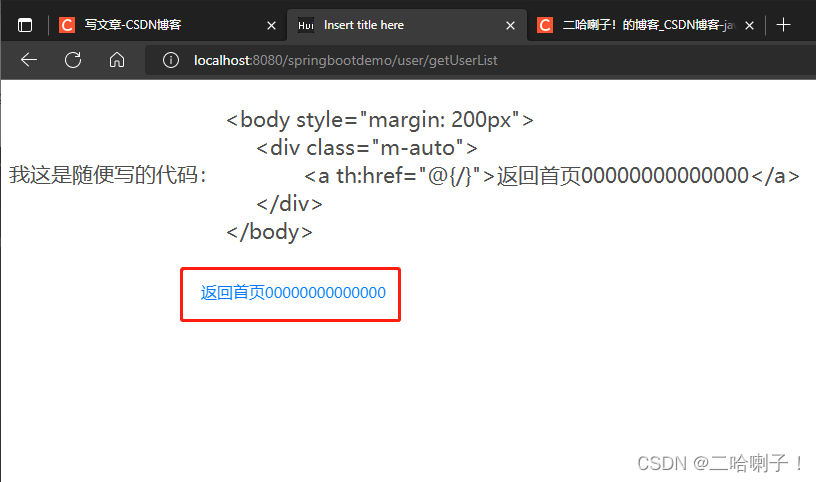
可以看到里面已近有返回了
3、我们接着写UserAction里的逻辑,我们向数据库查,是操作xml文件,在这里面进行数据库的增删改查,对应的Mapper接口文件里定义查询规则
首先在mapper文件夹下的UserMapper里面定义规则 List<User>
List<User> getUserList(User user); //查询数据库里面所有用户信息
4、然后到UserMapper.xml 里面写查询语句:
我们不仅要查全部的,还要有模糊查询(用户名、性别)
    <select id="getUserList" parameterType="User" resultType="User">
        select  * from demo_users
        <where>
            <if test = "username != null and username != ''">
                and username like concat('%',#{username},'%')
                  <!-- SELECT * FROM demo_users WHERE username LIKE CONCAT('%','a','%')
                    这条语句是在图形可视化页面查找用户名带a的 -->
            </if>
            <if test = "gender != null and gender != ''">
                and gender = #{gender}
            </if>
        </where>
    </select>
5、接着就在service定义接口,然后在接口实现类把他的逻辑写出来
首先在service文件夹下的UserService接口里面写接口:
List<User> getUserList(User user);//查询用户信息,存到list里
然后在实现类impl文件夹下的UserServiceImpl里面(导包),把返回值改一下:
return mapper.getUserList(user);
6、接着回到controller里面写逻辑
@RequestMapping("/getUserList")
public String getUserList(User user, Map<String, List<User>> m) {
//向数据库查询user信息,存储到list里,再把list放到map里
//Mapper定义规则List<User>,在xml里查询
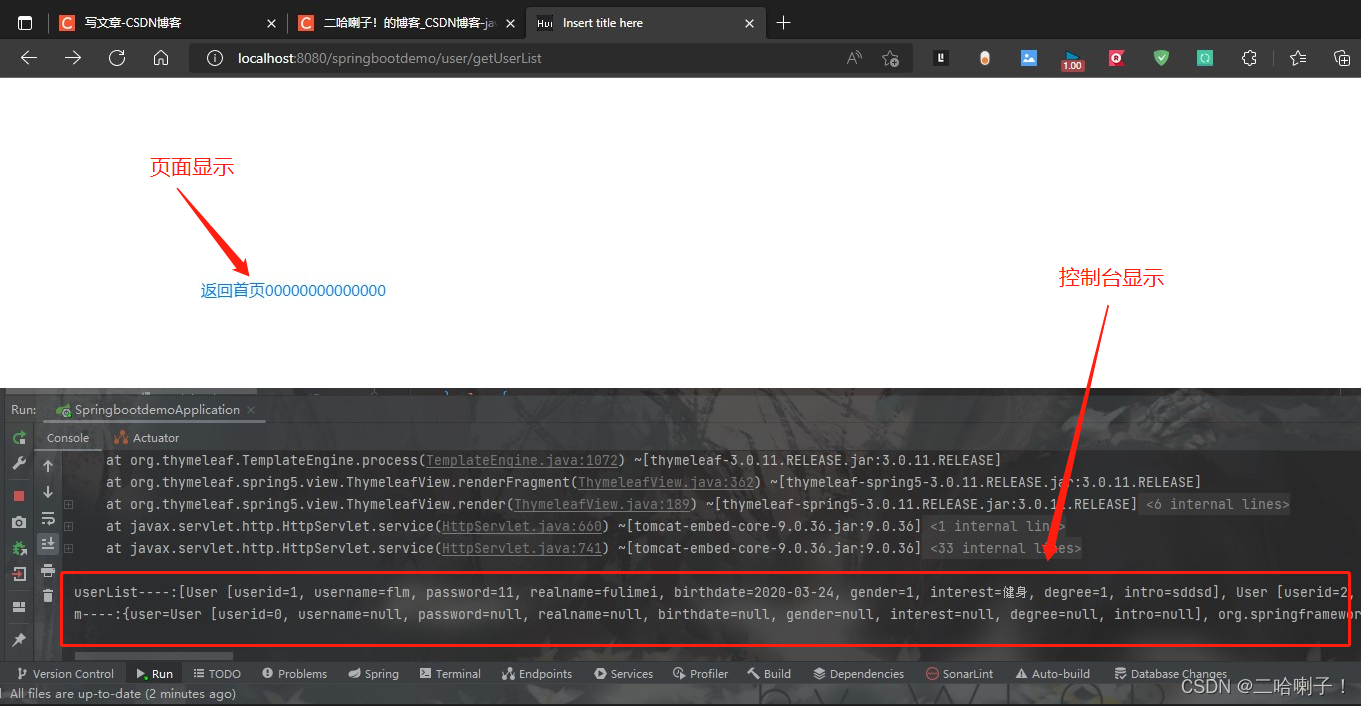
List<User> userList = userService.getUserList(user);
System.out.println("userList----:"+userList);//sout快捷键
return "user/userList";
}
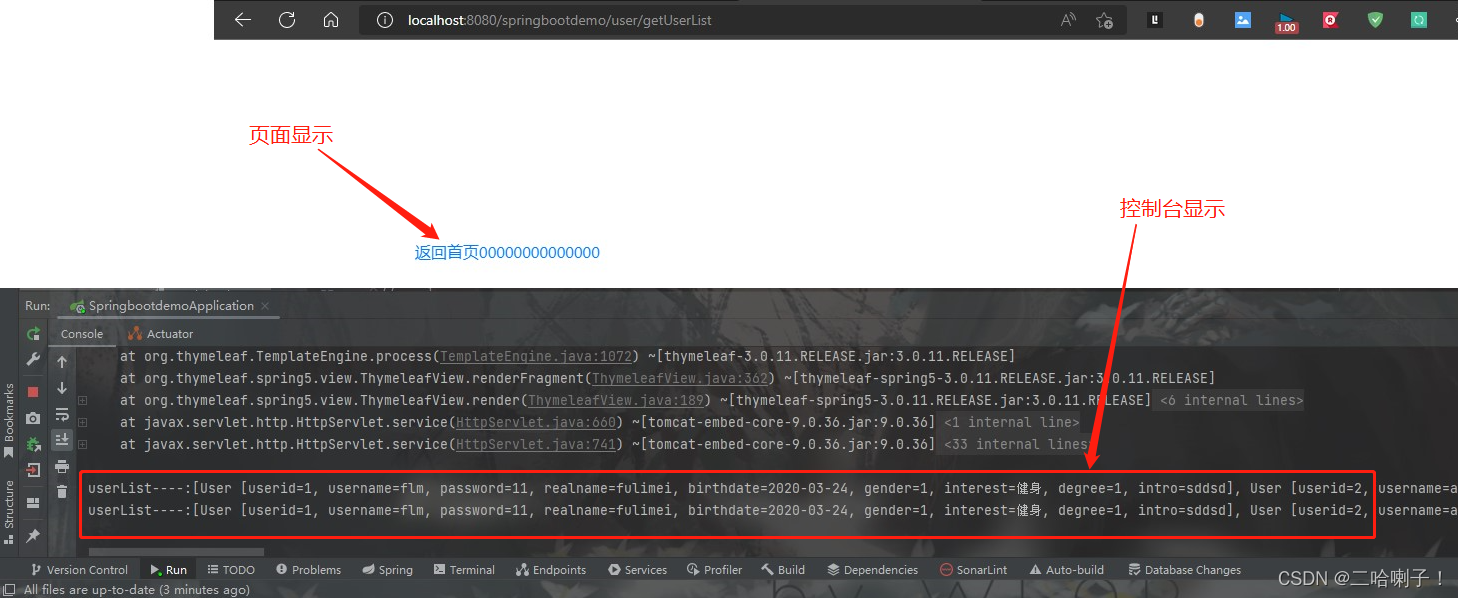
随后我们运行程序,输入注册信息后点击查看所有用户,再点击登录:
能显示页面
并且回到控制台看到有输出,证明已经从后台已经读到user了,并且存到list了
现在已经拿到userList了,接着存到map里面
在 return “user/userList”; 上面写:
        m.put("userList",userList);
        System.out.println("m----:"+m);//sout快捷键
随后我们运行程序,输入注册信息后点击查看所有用户,再点击登录:
能显示页面
并且回到控制台看到m也有输出
7、下面就到前端去做userList页面渲染
这里用到了bootstrap表格
<body style="margin: 200px">
<div class="container-fluid" >
	<div class="row">
		<div class="col-md-12" >
			<table class="table table-bordered">
				<caption>边框表格布局</caption>
				<thead>
				<tr>
					<th>用户名</th>
					<th>真名</th>
					<th>生日</th>
					<th>性别</th>
					<th>兴趣爱好</th>
					<th>学历</th>
					<th>自我介绍</th>
					<th>操作</th>
				</tr>
				</thead>
				<tbody>
				<tr>
					<td>Tanmay</td>
					<td>Bangalore</td>
					<td>560001</td>
					<td>Tanmay</td>
					<td>Bangalore</td>
					<td>560001</td>
					<td>Tanmay</td>
					<td>Bangalore</td>
				</tr>
				</tbody>
			</table>
		</div>
	</div>
</div>
</body>
刚才在controller里面已经能从数据库查的数据,这个userList,这个数据拿到后已经能存到map里面了,而且map在做页面跳转的时候通过键值对的形式已经把userList传递给user/userList页面了
我们拿到数据后对userList做循环(对数据做循环):th:each="tag:${user.getTags()}"
所以userList页面里面的body代码改成:
<body style="margin: 200px">
<div class="container-fluid" >
	<div class="row">
		<div class="col-md-12" >
			<table class="table table-bordered">
				<caption>边框表格布局</caption>
				<thead>
				<tr>
					<th>序号</th>
					<th>用户名</th>
					<th>真名</th>
					<th>生日</th>
					<th>性别</th>
					<th>兴趣爱好</th>
					<th>学历</th>
					<th>自我介绍</th>
					<th>操作</th>
				</tr>
				</thead>
				<tbody>
				<tr th:each="user,stat:${userList}">
					<td th:text="${stat.count}">1</td>
					<td th:text="${user.username}">Tanmay</td>
					<td th:text="${user.realname}">二哈喇子</td>
					<td th:text="${user.birthdate}">2022-09-08</td>
					<td th:text="${user.gender == '1'?'男':'女'}">1</td>
					<td th:switch="${user.degree}">
						<span th:case="'0'">高中</span>
						<span th:case="'1'">专科</span>
						<span th:case="'2'">本科</span>
						<span th:case="'3'">研究生</span>
					</td>
					<td th:text="${user.intro}">本人积极向上</td>
					<td>
						<a href="#">修改</a>
						<a href="#">删除</a>
					</td>

				</tr>
				</tbody>
			</table>
		</div>
	</div>
</div>
</body>
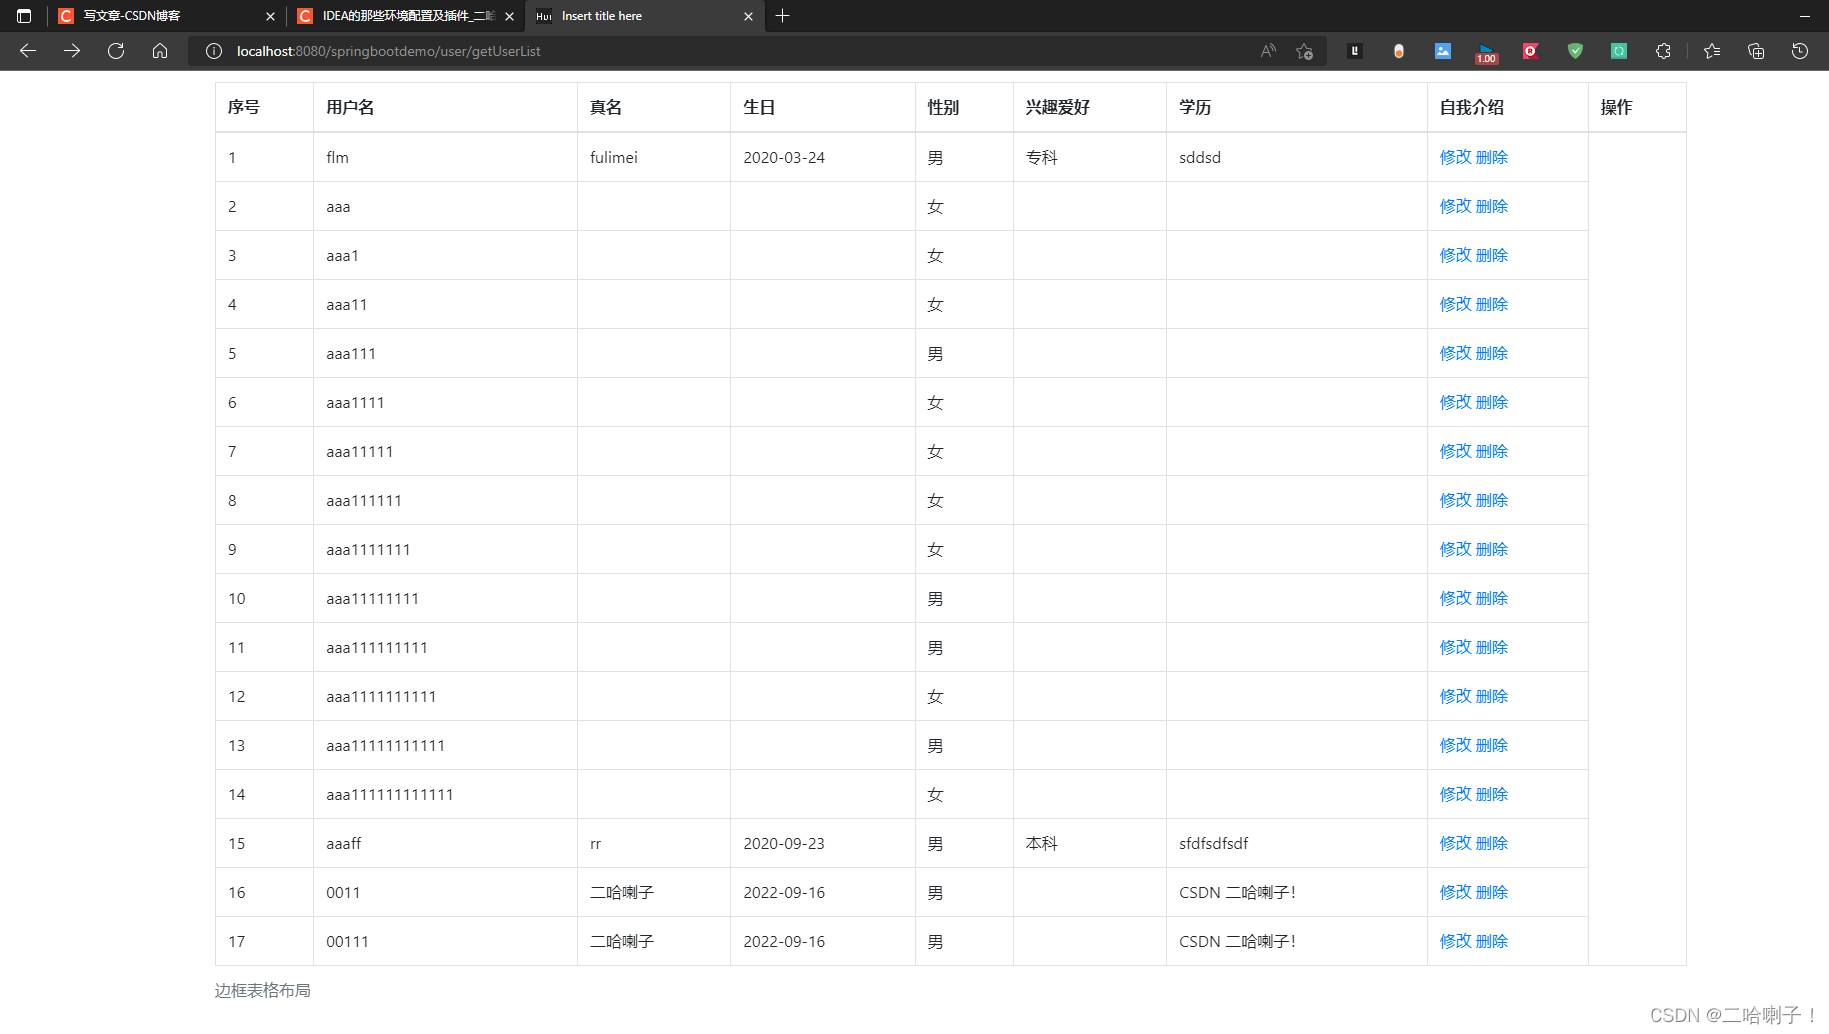
随后我们运行程序,输入注册信息后点击查看所有用户,看到的显示用户表格页面
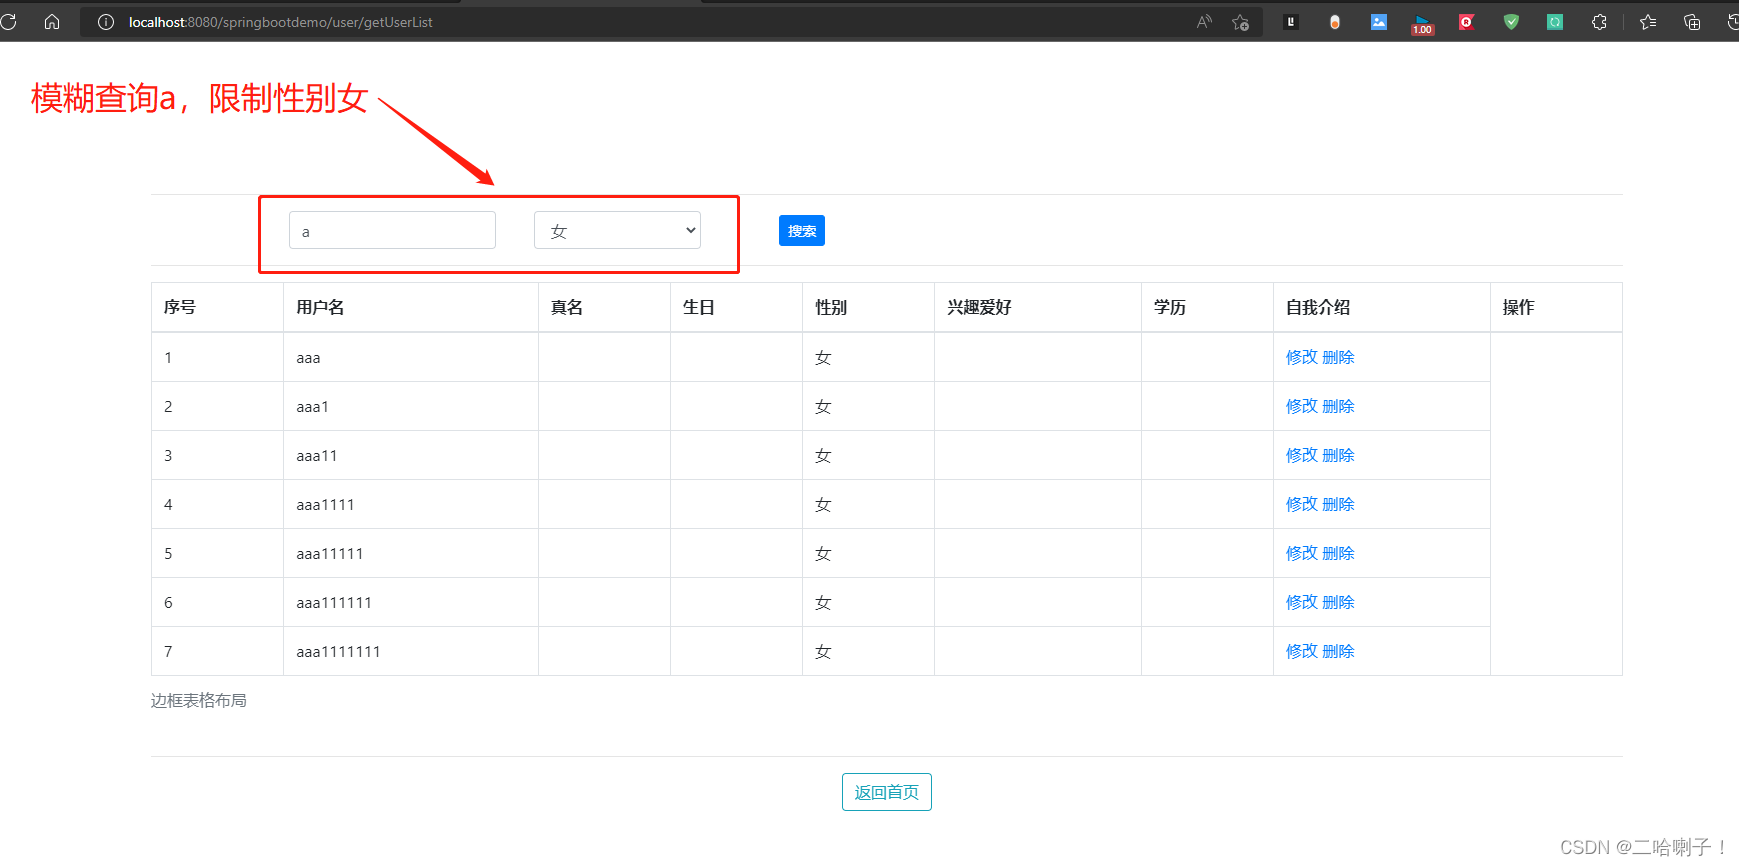
模糊查询和返回首页按钮功能
我们继续完善该页面,加入模糊查询和返回首页按钮
模糊查询代码:
放在<div class="row">之上
	    <hr>
	    <div class="row">
	        <div class="col-md-12">
	            <form class="form-inline" role="form" id="searchForm" th:method="post" th:action="@{/user/getUserList}">
	                <div class="form-group col-md-2 offset-1">
	                    <input class="form-control input-sm" type="text" id="username" name="username" placeholder="用户名"
						th:value="${param.username}"/>
	                </div>
	                <div class="form-group col-md-2">
	                    <select class="form-control input-sm" id="gender" name="gender" >
	                        <option value="">---不限制性别---</option>
	                        <option value="1" th:selected="${#strings.trim(param.gender)=='1'}">男</option>
	                        <option value="0" th:selected="${#strings.trim(param.gender)=='0'}">女</option>
	                    </select>
	                </div>
	                <div class="form-group col-md-1">
	                    <button class="btn btn-primary btn-sm" type="submit" >搜索</button>
	                </div>
	            </form>
	        </div>
	    </div>
	    <hr>
返回首页按钮代码
放在表格之下
	    <hr>
	    <div class="row">
	        <div class="col-md-12">
	            <div class="text-center">
	                <a type="button" class="btn btn-outline-info" th:href="@{/}">返回首页</a>
	            </div>
	        </div>
	    </div>
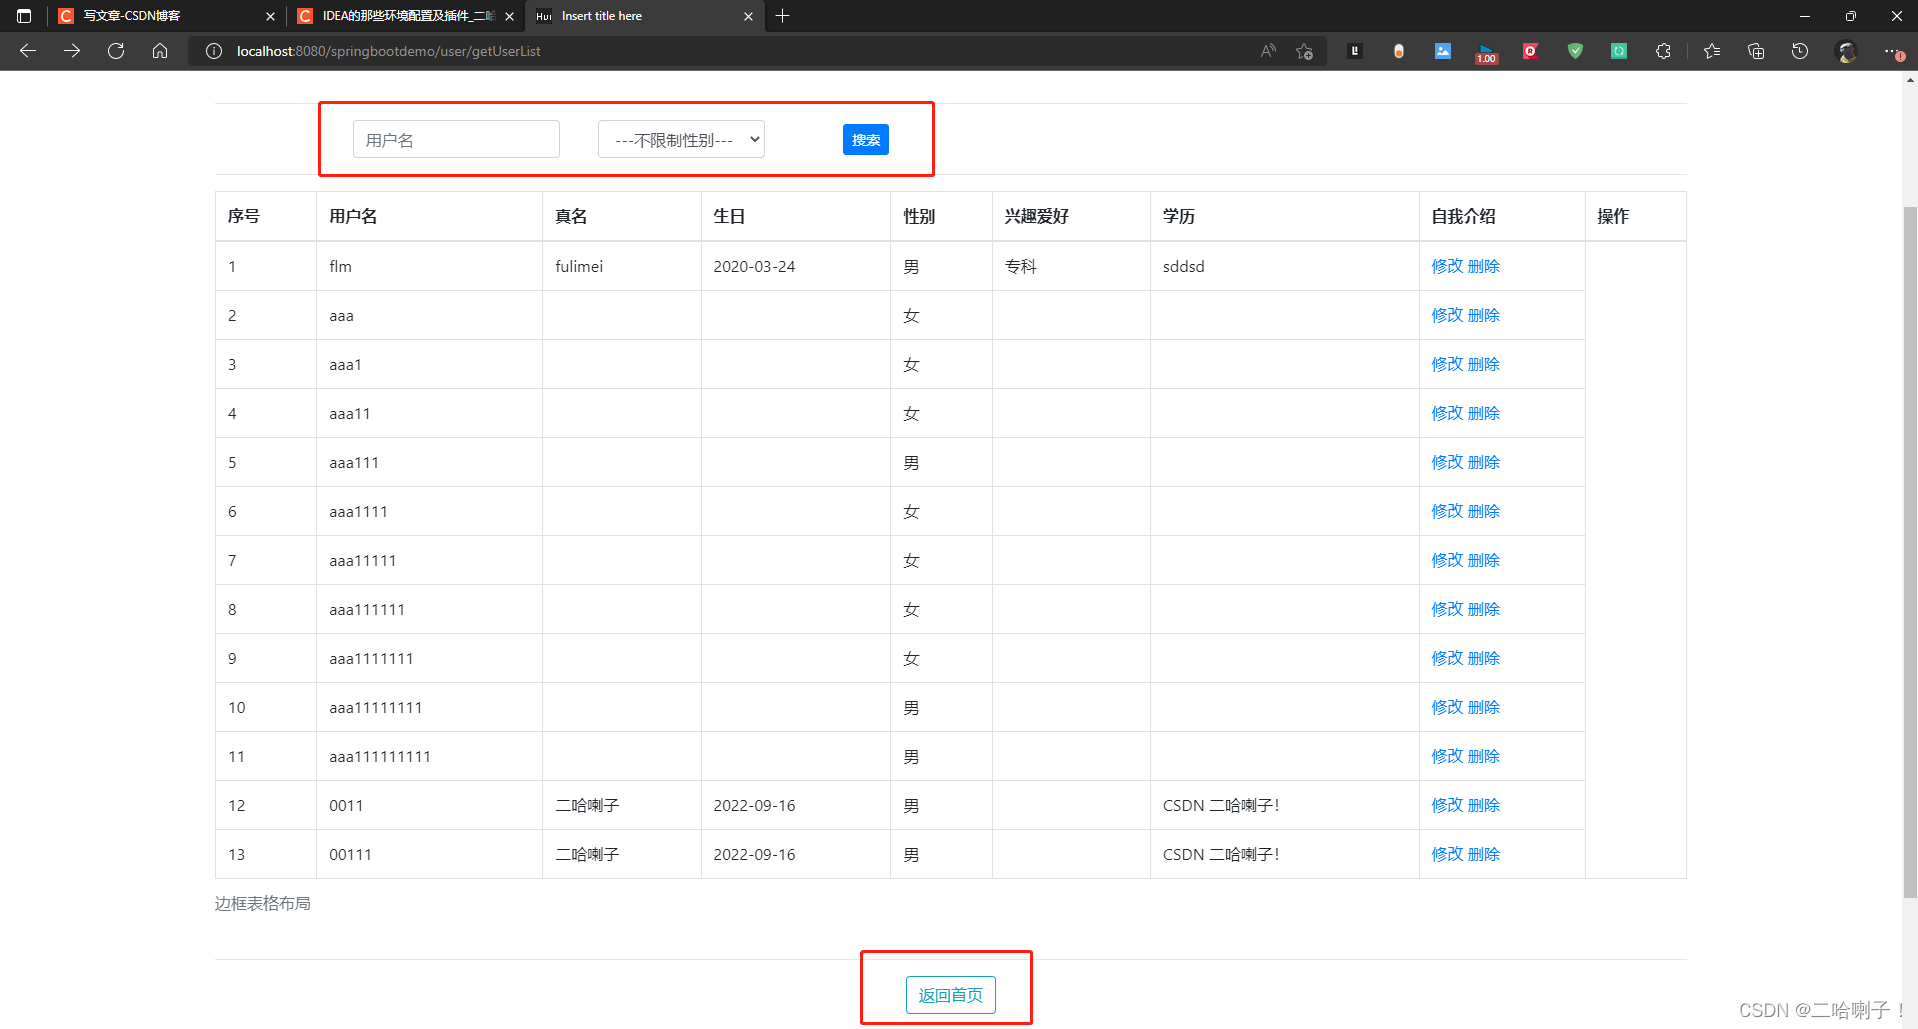
页面显示:
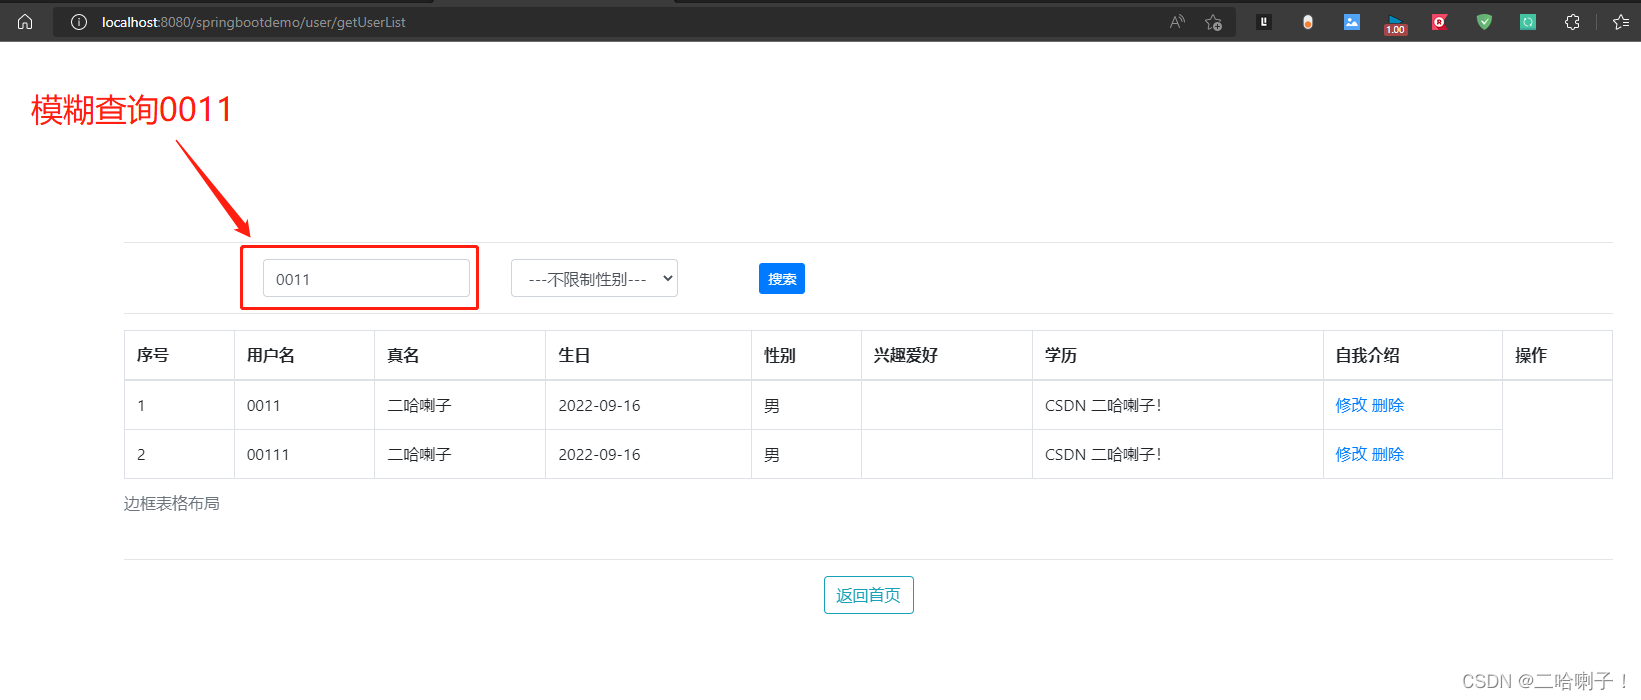
模糊查询功能实现页面
返回首页功能页面

- 点赞
- 收藏
- 关注作者
评论(0)