Vue模块化开发使用路由
【摘要】 一、Vue模块化开发使用路由模块化开发使用前端路由也是遵照上一篇文章的步骤,只是形式上有些变化。先利用Vue CLI创建一个Vue3.0的脚手架项目,项目名为myroute,直接选择Default(Vue 3 Preview)([Vue 3] babel,eslint),开始项目创建。项目创建成功后启动VSCode打开项目所在文件夹,接下来按照以下步骤开始前端路由的配置。 1、为项目安装v...
一、Vue模块化开发使用路由
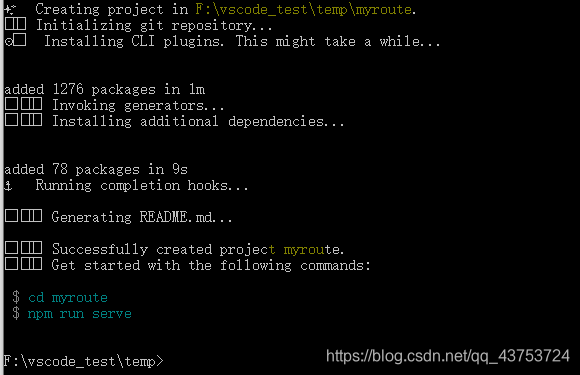
模块化开发使用前端路由也是遵照上一篇文章的步骤,只是形式上有些变化。先利用Vue CLI创建一个Vue3.0的脚手架项目,项目名为myroute,直接选择Default(Vue 3 Preview)([Vue 3] babel,eslint),开始项目创建。项目创建成功后启动VSCode打开项目所在文件夹,接下来按照以下步骤开始前端路由的配置。
1、为项目安装vue-router,选择终端->新终端选项,在弹出的终端窗口中输入以下命令安装vue-router。
创建项目
vue create myroute

安装vue-router
npm install vue-router@next --save

2、在App.vue中设置导航链接和组件渲染的位置。修改其模板内容,并将应用HelloWorld组件的地方删除。修改后的代码如下所示。
App.vue
<template>
  <div>
    <img alt="Vue logo" src="./assets/logo.png">
    <p>
        <router-link to="/">主页</router-link>
        <router-link to="/news">新闻</router-link>
        <router-link to="/books">图书</router-link>
        <router-link to="/videos">视频</router-link>
    </p>
    <router-view></router-view>
  </div>
</template>

<script>


export default {
  name: 'App',
  components: {

  }
}
</script>

<style>
#app {
  font-family: Avenir, Helvetica, Arial, sans-serif;
  -webkit-font-smoothing: antialiased;
  -moz-osx-font-smoothing: grayscale;
  text-align: center;
  color: #2c3e50;
  margin-top: 60px;
}
</style>
3、定义路由组件。在components目录下新建Home.vue、News.vue、Books.vue和Videos.vue四个文件。
Home.vue
<template>
  <div>主页面</div>
</template>

<script>
export default {

}
</script>

<style>

</style>
News.vue
<template>
  <div>新闻页面</div>
</template>

<script>
export default {

}
</script>

<style>

</style>
Books.vue
<template>
  <div>图书页面</div>
</template>

<script>
export default {

}
</script>

<style>

</style>
Videos.vue
<template>
  <div>视频页面</div>
</template>

<script>
export default {

}
</script>

<style>

</style>
4、单独定义一个模块文件,配置路由信息。
在src目录下新建一个router文件夹,在该文件夹下新建一个index.js文件。编辑该文件
index.js
import Home from '@/components/Home'
import News from '@/components/News'
import Books from '@/components/Books'
import Videos from '@/components/Videos'
import { createRouter,createWebHashHistory } from 'vue-router'

//定义路由
const routes=[
    {
        path:'/',
        component:Home
    },
    {
        path:'/news',
        component:News
    },
    {
        path:'/books',
        component:Books
    },
    {
        path:'/videos',
        name:'videos',
        component:Videos
    }
]


export default createRouter({
    history:createWebHashHistory(),
    routes:routes
})
5、在程序入口main.js文件中,使用router实例让整个应用都有路由功能。
main.js
import { createApp } from 'vue'
import App from './App.vue'
import router from './router'

createApp(App).use(router).mount('#app')
在基于Vue.js的项目开发中,如果要导入一个目录中的index.js文件,可以直接导入该目录,内置的webpack会自动导入index.js文件。
至此,前端路由已经全部配置完毕。打开终端窗口,输入npm run serve明林,运行项目。


【版权声明】本文为华为云社区用户原创内容,未经允许不得转载,如需转载请自行联系原作者进行授权。如果您发现本社区中有涉嫌抄袭的内容,欢迎发送邮件进行举报,并提供相关证据,一经查实,本社区将立刻删除涉嫌侵权内容,举报邮箱:
cloudbbs@huaweicloud.com
- 点赞
- 收藏
- 关注作者


评论(0)