Canvas学习笔记 Canvas的基础知识点(上)

【摘要】 文章目录前言一、导航初始化属性与方法小demo二、绘制功能2.1、绘制矩形2.1.1、非面向思想实现动画2.1.2、面向对象思维实现动画2.2、绘制路径2.3、绘制圆弧(动态圆形示例)2.4、设置线型透明度(小球碰撞案例)2.5、线型的属性2.6、设置文字2.7、渐变(线型与径向)2.8、设置阴影三、绘制图片四、资源管理器(手动创建类进行管理)五、变形5.1、transloate(移动画布)5.2
@[toc]
前言
本篇博客是Canvas的学习笔记,若文章中出现相关问题,请指出!
所有博客文件目录索引:博客目录索引(持续更新)
一、导航
初始化
VScode快捷canvas提示,添加下面一条代码即可:
/** @type {HTMLCanvasElement} */
初始化:
<canvas id="test-canvas" width="200" height="200">
    <p>Current Price: 25.51</p>
</canvas>
<script>
    /** @type {HTMLCanvasElement} */
    //通过id来拿到cavas对象
    var canvas = document.getElementById('test-canvas');
    if (canvas.getContext) {  //true表示支持;false表示不支持
        console.log('你的浏览器支持Canvas!');
    } else {
        console.log('你的浏览器不支持Canvas!');
    }
    //绘制2D图像
    var context = canvas.getContext('2d');
</script>
canvas的大小由width与height限制,js中创建>这两个值的不会生效!
属性与方法
属性与方法
//清除画布
ctx.clearRect(0, 0, 800, 300);//起点为(0,0),宽800高300

//矩形填充
context.fillstyle=blue;   //(选择填充色),默认为black
context.fillRect(10, 10, 100, 100);  //(绘制矩形填充)

//矩形绘制
contex.strokeStyle="blue";   //设置描边样式(路径、形状、文字,可设置参数有颜色、渐变、图案)
context.strokeRect(x, y, width, height);  //参数:起点横坐标、起点纵坐标、宽度、高度

//***绘制圆形(必须三步骤)***
context.beginPath(); //表示开始新的路径了,和之前路径分开
//context.arc(x, y, radius, startAngle, endAngle [, anticlockwise]);
context.arc(100, 100, 100, 0, Math.PI / 2 , true);  //Math.PI * 2表示一整个圆,初始从圆的右半径开始顺时针,true的话逆向画圆到指定位置
context.stroke();  //对路径进行描边绘制(真正进行绘制的操作)
//***绘制圆形***
其他属性:
contex.lineWidth= 2.0; //线宽度,默认值为1px,单位为px
//方法
context.moveTo(100, 120);  //移动到坐标为(100,120)
  //前提条件:进行画线点的定位移动ctx.moveTo(50, 20),否则无法画线
context.lineTo(200, 100);  //当前坐标横坐标为200 =》当前坐标的纵坐标100位置,描述绘制路线
小demo
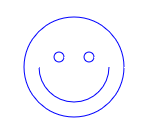
1、路径绘画的较好方法
借助Path2D()
//定义路径
var path = new Path2D();
path.arc(75, 75, 50, 0, Math.PI * 2, true);  //整个圆
path.moveTo(110, 75);  //移动到指定位置(之后进行stoke绘画时省略这段距离)。这里若是不进行移动就会额外划线
path.arc(75, 75, 35, 0, Math.PI, false);   //笑脸
path.moveTo(65, 65);
path.arc(60, 65, 5, 0, Math.PI * 2, true);
path.moveTo(95, 65);
path.arc(90, 65, 5, 0, Math.PI * 2, true);
ctx.strokeStyle = '#0000ff';
ctx.stroke(path);
注意:记住画笔的点一定要移动至绘画开始的地方,对于画圆、矩形这类其中的参数只是进行画的物体的描述,绘画的笔的位置为当前位置!!!所以需要进行额外moveTo定位移动。还有就是第一次进行绘画的位置根据指定的形状或方式决定!
绘制文字
var ctx = canvas.getContext('2d');
ctx.clearRect(0, 0, canvas.width, canvas.height);
ctx.shadowOffsetX = 2;
ctx.shadowOffsetY = 2;
ctx.shadowBlur = 2;
ctx.shadowColor = '#666666';
ctx.font = '24px Arial';
ctx.fillStyle = '#333333';
ctx.fillText('带阴影的文字', 20, 40);
二、绘制功能
2.1、绘制矩形
2.1.1、非面向思想实现动画
动画过程:清屏—更新—渲染。
<body>
    <canvas id="mycavas" width="800" height="200px">
    </canvas>
    <script>
        /** @type {HTMLCanvasElement} */
        const canvas = document.getElementById("mycavas");
        const ct = canvas.getContext("2d");
        ct.fillstyle = "blue";
        // console.log(ct);

        let left = 100;
        const timer = setInterval(() => {
            ct.clearRect(0, 0, 800, 200);   //清屏
            left++;
            if (left > 600) {
                clearInterval(timer);
            }
            ct.fillRect(left, 100, 200, 200);  //绘制矩形
        });
    </script>
</body>
2.1.2、面向对象思维实现动画
面向对象思想实现动画:使用面向对象的方式来维持canvas需要的属性与状态。
<body>
    <canvas id="mycanvas" width="800" height="300px">
    </canvas>
    <script>
        /** @type {HTMLCanvasElement} */
        const mcanvas = document.getElementById("mycanvas");
        const ctx = mcanvas.getContext("2d");
        //面向对象思维
        function rect(x, y, w, h, color) {
            this.x = x;
            this.y = y;
            this.w = w;
            this.h = h;
            this.color = color;
        }

        //更新操作
        rect.prototype.update = function () {
            this.x++
        }

        //执行渲染操作
        rect.prototype.render = function () {
            ctx.fillStyle = this.color;
            ctx.fillRect(this.x, this.y, this.w, this.h);
        }

        //实例化对象
        const r1 = new rect(50, 50, 100, 100, "blue");
        const r2 = new rect(50, 200, 100, 150, "red");

        setInterval(() => {
            ctx.clearRect(0, 0, 800, 300);
            // 更新
            r1.update();
            r2.update();
            // 渲染
            r1.render();
            r2.render();
        }, 10);

    </script>
</body>
2.2、绘制路径
基本路径绘制
核心API:
ctx.moveTo(x,y); //移动到目标位置(x,y),这个移动路径不会被绘制
ctx.lineTo(x,y);// 从当前路径绘制到目标位置(x,y)
ctx.fill();  //填充绘制的路线
ctx.stoke();  //绘制描绘的路径。
目的:设置一个不规则的多边形状态,路径都是闭合的,使用路径进行绘制的时候需要既定的步骤。
如下几个步骤:
- 设置路径的起点。
- 使用绘制命令画出路径。
- 封闭路径。
- 填充或者绘制已经封闭路径的形状。
<body>
    <canvas id="mycanvas" width="800" height="300px">
    </canvas>
    <script>
        /** @type {HTMLCanvasElement} */
        const mcanvas = document.getElementById("mycanvas");
        const ctx = mcanvas.getContext("2d");
        //创建一个路径
        ctx.beginPath();
        // 指定目标点(100,100)
        ctx.moveTo(100, 100);
        // 画线至(200,100),下面就是进行绘制一个矩形
        ctx.lineTo(200, 100);
        ctx.lineTo(200, 200);
        ctx.lineTo(100, 200);
        // 关闭路径
        ctx.closePath();
        // 进行绘制
        ctx.stroke();
    </script>
</body>
配合定时器动态画线
动态绘制路径:
<body>
    <canvas id="mycanvas" width="800" height="300px">
    </canvas>
    <script>
        /** @type {HTMLCanvasElement} */
        const mcanvas = document.getElementById("mycanvas");
        const ctx = mcanvas.getContext("2d");
        //创建一个路径
        ctx.beginPath();
        ctx.moveTo(100, 100);
        //进行动态绘制
        const arr = [];
        arr.push({ x: 200, y: 100 });
        arr.push({ x: 200, y: 200 });
        arr.push({ x: 100, y: 200 });
        arr.push({ x: 100, y: 100 });
        let i = 0;
        const timer = setInterval(() => {
            if (i == arr.length) {
                clearInterval(timer);
                ctx.fillStyle = "red";
                ctx.fill();  //填充绘制的路径
            }
            ctx.lineTo(arr[i].x, arr[i].y);
            ctx.stroke();
            i++;
        }, 1000);
    </script>
</body>
2.3、绘制圆弧(动态圆形示例)
核心API:
ctx.beginPath();  //一定要调用开始路径,否则会出现连线情况!
ctx.arc(this.x, this.y, this.r, 0, Math.PI * 2, true);
ctx.fill();
示例:
<!DOCTYPE html>
<html lang="en">

<head>
    <meta charset="UTF-8">
    <meta http-equiv="X-UA-Compatible" content="IE=edge">
    <meta name="viewport" content="width=device-width, initial-scale=1.0">
    <title>Document</title>
    <style>
        canvas {
            /* border: 1px solid #000; */
            background-color: (0, 0, 0, 0.452);
            position: absolute;
            top: 0;
            left: 0;
            right: 0;
            bottom: 0;
            z-index: 10;
        }

        .mbody {
            width: 800px;
            height: 800px;
            border: 1px solid #000;
            z-index: 999;
        }
    </style>
</head>

<body>
    <canvas id="mycanvas" width="1680px" height="1280px">
    </canvas>
    <div class="mbody"></div>
    <script>
        /** @type {HTMLCanvasElement} */
        const mcanvas = document.getElementById("mycanvas");
        const ctx = mcanvas.getContext("2d");

        // 存放圆形的数组
        const cirArr = [];

        // 实例化圆
        function circle(x, y, r, color) {
            this.x = x;
            this.y = y;
            this.r = r;
            this.color = color;
            // 指定移动方向 [-5-5]
            this.dictX = parseInt(Math.random() * 10 + 1) - 5;
            this.dictY = parseInt(Math.random() * 10 + 1) - 5;
        }

        // 更新状态
        circle.prototype.update = function () {
            //半径减小
            this.r -= 0.5;
            //方向改变
            this.x += this.dictX;
            this.y += this.dictY;
            // 一旦半径<0,直接移除该元素
            if (this.r < 0) {
                this.remove();
            }
        }

        // 移除当前元素
        circle.prototype.remove = function () {
            for (let i = 0; i < cirArr.length; i++) {
                if (this === cirArr[i]) {
                    cirArr.splice(i, 1);
                    break;
                }
            }
        }

        // 执行渲染操作
        circle.prototype.render = function () {
            ctx.fillStyle = this.color;
            ctx.beginPath();  //一定要调用开始路径,否则会出现连线情况!
            ctx.arc(this.x, this.y, this.r, 0, Math.PI * 2, true);
            ctx.fill();
        }


        // 监听鼠标移入事件(实例化圆)
        mcanvas.addEventListener('mousemove', (e) => {
            console.log(e.offsetX, e.offsetY);
            cirArr.push(new circle(e.offsetX, e.offsetY, 20, getColor()));
        }, false);

        // 监听器(进行更新以及渲染操作)
        setInterval(() => {
            ctx.clearRect(0, 0, mcanvas.width, mcanvas.height);
            for (let i = 0; i < cirArr.length; i++) {
                cirArr[i].update();
                if (cirArr[i] !== undefined) {
                    cirArr[i].render();
                }
            }
        }, 30);

        // 获取随机颜色
        function getColor() {
            const colorStr = "0,1,2,3,4,5,6,7,8,9,A,B,C,D,E,F";
            const colorArr = colorStr.split(",");
            let color = "#";
            for (let i = 0; i < 6; i++) {
                const num = parseInt(Math.random() * 16);
                color += colorArr[num];
            }
            return color;
        }

        console.log(getColor());;
        console.log(getColor());;

    </script>
</body>

</html>
2.4、设置线型透明度(小球碰撞案例)
核心API:
ctx.globalAlpha = 0.1; //透明度的值为0.0 (完全透明)到 1.0(完全不透明)
示例:
<!doctype html>
<html>

<head>
    <title>Love</title>
    <meta charset="utf-8" />
</head>

<body>
    <canvas id="mycanvas">
        您的浏览器不支持canvas
    </canvas>
    <script>
        const mycanvas = document.getElementById("mycanvas");
        const ctx = mycanvas.getContext("2d");

        // 设置画布尺寸为当前浏览器的尺寸
        mycanvas.width = document.documentElement.clientWidth - 21;
        mycanvas.height = document.documentElement.clientHeight - 21;

        //小球半径
        const ballRadius = 10;
        const lineToLinePath = 120;
        // 定义小球与鼠标的状态,设置于小球的属性中
        const condition = 0;  //0=>初始状态(与鼠标无任何关系)  1=>进入鼠标临近范围   2=>小球与鼠标重合   3=>脱离鼠标范围

        // 获取随机颜色
        function getColor() {
            const colorStr = "0,1,2,3,4,5,6,7,8,9,A,B,C,D,E,F";
            const colorArr = colorStr.split(",");
            let color = "#";
            for (let i = 0; i < 6; i++) {
                const num = parseInt(Math.random() * 16);
                color += colorArr[num];
            }
            return color;
        }

        // 定义小球
        function ball(index) {
            this.x = Math.random() * mycanvas.width - ballRadius;
            this.y = Math.random() * mycanvas.height - ballRadius;
            do {
                this.directX = parseInt(Math.random() * 15 + 1) - 8;
                this.directY = parseInt(Math.random() * 15 + 1) - 8;
            } while (this.directX == 0 || this.directY == 0);
            this.r = ballRadius;
            this.color = getColor();
            this.index = index;
            this.condition = 0;
        }
        //更新操作
        ball.prototype.update = function () {
            this.x += this.directX;
            this.y += this.directY;

            //鼠标范围中情况
            if (this.offsetX && this.offsetY) {
                console.log("xx", Math.abs(this.x - this.offsetX), Math.abs(this.y - this.offsetX), this.offsetX, this.offsetY);
                if (Math.abs(this.x - this.offsetX) <= 5 && Math.abs(this.y - this.offsetY) <= 5) {
                    this.condition = 2; //进入范围
                    console.log("xxxxx", Math.abs(this.x - this.offsetX), Math.abs(this.y - this.offsetY));
                    this.x = this.offsetX;
                    this.y = this.offsetY;
                    this.directX = 0;
                    this.directY = 0;
                }
                if (this.condition == 3) {
                    do {
                        this.directX = parseInt(Math.random() * 15 + 1) - 8;
                        this.directY = parseInt(Math.random() * 15 + 1) - 8;
                    } while (this.directX == 0 || this.directY == 0);
                    this.condition = 0;
                }
            }

            //如果碰到边界了
            if (this.x < ballRadius || this.x > (mycanvas.width - ballRadius)) {
                this.directX = -this.directX;
            }
            if (this.y < ballRadius || this.y > (mycanvas.height - ballRadius)) {
                this.directY = -this.directY;
            }
            // console.log(this.x, this.y)
            return this;
        }

        //渲染操作
        ball.prototype.render = function () {
            ctx.fillStyle = this.color;
            ctx.beginPath();
            ctx.arc(this.x, this.y, this.r, 0, 2 * Math.PI, false);//画圆
            // this.drawLine();//画线
            ctx.fill();
            // ctx.stroke();
            // this.drawLine();
            return this;
        }

        //画线操作
        ball.prototype.drawLine = function () {
            for (let i = this.index; i < ballArr.length; i++) {
                if (Math.abs(this.x - ballArr[i].x) < lineToLinePath && Math.abs(this.y - ballArr[i].y) < lineToLinePath) {
                    ctx.beginPath();
                    // ctx.globalAlpha = Math.abs(this.x - ballArr[i].x) / lineToLinePath;
                    ctx.globalAlpha = 0.1;
                    ctx.moveTo(this.x, this.y);
                    ctx.lineTo(ballArr[i].x, ballArr[i].y);
                    ctx.closePath();
                    ctx.stroke();
                }
            }
        }

        // 小球数组
        const ballArr = [];
        //初始化
        (function init() {
            for (let i = 0; i < 20; i++) {
                ballArr.push(new ball(i));
            }
        })();
        console.log(ballArr)

        // 添加监听器
        mycanvas.addEventListener("mousemove", (e) => {
            // console.log(e.offsetX, e.offsetY);
            for (let i = 0; i < ballArr.length; i++) {
                if (Math.abs(e.offsetX - ballArr[i].x) < lineToLinePath && Math.abs(e.offsetY - ballArr[i].y) < lineToLinePath) {
                    //保存当前鼠标的位置
                    ballArr[i].offsetX = e.offsetX;
                    ballArr[i].offsetY = e.offsetY;
                    ballArr[i].condition = 1; //进入范围
                    ctx.beginPath();
                    ctx.moveTo(e.offsetX, e.offsetY);
                    ctx.lineTo(ballArr[i].x, ballArr[i].y);
                    ctx.closePath();
                    ctx.stroke();
                    // 改变小球的行径方向 向鼠标靠拢
                    ballArr[i].directX = Math.abs(e.offsetX - ballArr[i].x) > 10 ? (e.offsetX - ballArr[i].x) / 40 : (e.offsetX - ballArr[i].x) / 20;
                    ballArr[i].directY = Math.abs(e.offsetY - ballArr[i].y) > 10 ? (e.offsetY - ballArr[i].y) / 40 : (e.offsetY - ballArr[i].y) / 20;
                    console.log(ballArr[i].directX, ballArr[i].directY)
                } else if (ballArr[i].condition == 1) {
                    ballArr[i].condition = 3;
                }

            }
        }, false);

        // 定时器执行更新与渲染操作
        setInterval(() => {
            ctx.clearRect(0, 0, mycanvas.width, mycanvas.height);
            for (let i = 0; i < ballArr.length; i++) {
                ballArr[i].update().render();
            }
        }, 20);


    </script>
</body>

</html>
2.5、线型的属性
核心API:
ctx.linewidth = 20;  //线型宽度,默认为1.0
ctx.lineCap = "round"; //线的顶部与末端改变形状,包含butt、round、square,默认为butt,使用square会跟随宽度而改变大小
ctx.lineJoin = "round";  //两线连接处的样式,包含round、bevel、miter,默认为miter尖尖的

//虚线
ctx.setLineDash([10,20]);  //第一个参数为虚线的长度,第二个为虚线之间的距离长度。也可以是多个数,多个数时就是对应你想要线型的规律。
ctx.lineDashOffset = 10;//虚线开始的起始偏移量,设置了之后虚线的位置向后偏移指定位置
2.6、设置文字
核心API:
//样式
ctx.font = "48px serif";  //设置文字字体
textAlign = "center"; //位置
//填充文本
ctx.fillText("changlu", 100, 100);  //设置文字,后面两个参数为x轴与y轴
//文本用当前的边框样式被绘制
ctx.strokeText("changlu", 100, 100);
//测量文本宽度
var text = ctx.measureText("foo"); // 拿到文本对象,可以参考其中的属性
text.width; // 16;
2.7、渐变(线型与径向)
核心:使用渐变可以赋值给fillStyle或其他样式,之后进行绘制路径就会有对应的效果!
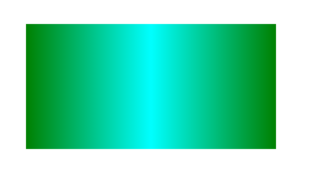
线型渐变:一个矩形
示例:
// 设置起点x,y以及终点x,y轴
var gradient = ctx.createLinearGradient(20, 0, 220, 0);

// 整个过程为0-1,你中间可以设置多个颜色
gradient.addColorStop(0, 'green');
gradient.addColorStop(.5, 'cyan');
gradient.addColorStop(1, 'green');
// 设置填充对象就是上面的gradient
ctx.fillStyle = gradient;
ctx.fillRect(20, 20, 200, 100);
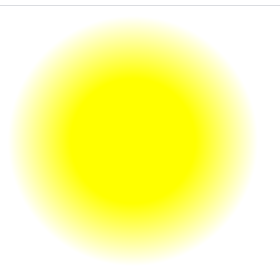
径向渐变:放射型渐变
示例:实现发光小球
// 前三个参数为圆的坐标及半径,后三个同样如此
var gradient = ctx.createRadialGradient(100, 100, 100, 100, 100, 50);
gradient.addColorStop(0, "white");//设置白色
gradient.addColorStop(1, "yellow");
ctx.fillStyle = gradient;
ctx.fillRect(0, 0, 200, 200);
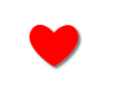
2.8、设置阴影
示例:核心API为如下1-4行
ctx.shadowOffsetX = 2;//负值表示阴影会往上或左延伸,正值则表示会往下或右延伸
ctx.shadowOffsetY = 2;//负值表示阴影会往上或左延伸,正值则表示会往下或右延伸
ctx.shadowBlur = 2;//设定阴影的模糊程度
ctx.shadowColor = "rgba(0, 0, 0, 0.5)";//设定阴影颜色效果
ctx.font = "50px serif";  //设置文字字体
ctx.fillStyle = "red"
ctx.fillText("❤", 100, 100);

【声明】本内容来自华为云开发者社区博主,不代表华为云及华为云开发者社区的观点和立场。转载时必须标注文章的来源(华为云社区)、文章链接、文章作者等基本信息,否则作者和本社区有权追究责任。如果您发现本社区中有涉嫌抄袭的内容,欢迎发送邮件进行举报,并提供相关证据,一经查实,本社区将立刻删除涉嫌侵权内容,举报邮箱:
cloudbbs@huaweicloud.com
- 点赞
- 收藏
- 关注作者
评论(0)