RabbitMQ学习笔记 04、Springboot集成RabbitMQ

【摘要】 文章目录前言springboot继承rabbitmq实操生产者服务消费者服务测试
前言
本篇博客是SpringBoot集成RabbitMQ,若文章中出现相关问题,请指出!
所有博客文件目录索引:博客目录索引(持续更新)
博客案例代码可见:Gitee-demoexer/RabbitMQ、Github-javademos/RabbitMQ
springboot继承rabbitmq实操
生产者服务
此
@[toc]
前言
本篇博客是SpringBoot集成RabbitMQ,若文章中出现相关问题,请指出!
所有博客文件目录索引:博客目录索引(持续更新)
博客案例代码可见:Gitee-demoexer/RabbitMQ、Github-javademos/RabbitMQ
springboot继承rabbitmq实操

生产者服务
此时我们通过使用springboot来快速搭建一个生产者服务
step1:引入依赖以及配置rabbitmq
<dependency>
    <groupId>org.springframework.boot</groupId>
    <artifactId>spring-boot-starter-amqp</artifactId>
</dependency>
application.yml
server:
  port: 8080

spring:
  application:
    name: producter
  rabbitmq:
    addresses: 192.168.118.128:5672
    username: admin
    password: password
    virtual-host: /
    connection-timeout: 15000
注意:对应的rabbitmq服务默认是跑在5672端口的,千万不要填15672,其是管理后台的端口号!!!
step2:定义队列、交换机以及绑定的routingkey
说明:该配置就相当于我们之前案例中在消费者的配置操作!!!
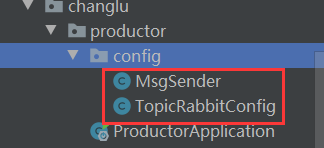
TopicRabbitConfig.java
import org.springframework.amqp.core.Binding;
import org.springframework.amqp.core.BindingBuilder;
import org.springframework.amqp.core.Queue;
import org.springframework.amqp.core.TopicExchange;
import org.springframework.context.annotation.Bean;
import org.springframework.context.annotation.Configuration;

/**
 * @ClassName TopicRabbitConfig
 * @Author ChangLu
 * @Date 2021/9/25 13:37
 * @Description Topic类型交换机配置
 */
@Configuration
public class TopicRabbitConfig {

    //配置队列
    @Bean
    public Queue queue1(){
        return new Queue("queue1");
    }

    @Bean
    public Queue queue2(){
        return new Queue("queue2");
    }

    //配置交换机
    @Bean
    public TopicExchange exchange(){
        return new TopicExchange("bootExchange");
    }

    //绑定队列到交换机并且执行routingkey,之后指定消费者即可通过指定队列来拿到信息
    @Bean
    public Binding bindingExchangeMessage1(Queue queue1,TopicExchange exchange){
        return BindingBuilder.bind(queue1).to(exchange).with("cat.red");
    }

    @Bean
    public Binding bindingExchangeMessage2(Queue queue2,TopicExchange exchange){
        return BindingBuilder.bind(queue2).to(exchange).with("*.red");
    }

}
step3:编写发送方法并添加测试方法
MsgSender.java
import org.springframework.amqp.core.AmqpTemplate;
import org.springframework.beans.factory.annotation.Autowired;
import org.springframework.stereotype.Component;

/**
 * @ClassName MsgSender
 * @Author ChangLu
 * @Date 2021/9/25 13:42
 * @Description 发送消息到指定交换机
 */
@Component
public class MsgSender {

    @Autowired
    private AmqpTemplate amqpTemplate;

    private static String EXCHANGE_NAME = "bootExchange";

    //发送信息的routingkey=>"cat.red"
    public void send1(){
        String routingKey = "cat.red";
        String msg = "this is my message,routingkey is "+routingKey;
        //交换机名称、routingkey以及发送的信息
        amqpTemplate.convertAndSend(EXCHANGE_NAME,routingKey,msg);
        System.out.println("已成功发送信息:"+msg);
    }

    //发送信息的routingkey=>"dog.red"
    public void send2(){
        String routingKey = "dog.red";
        String msg = "this is my message,routingkey is "+routingKey;
        //交换机名称、routingkey以及发送的信息
        amqpTemplate.convertAndSend(EXCHANGE_NAME,routingKey,msg);
        System.out.println("已成功发送信息:"+msg);
    }
}
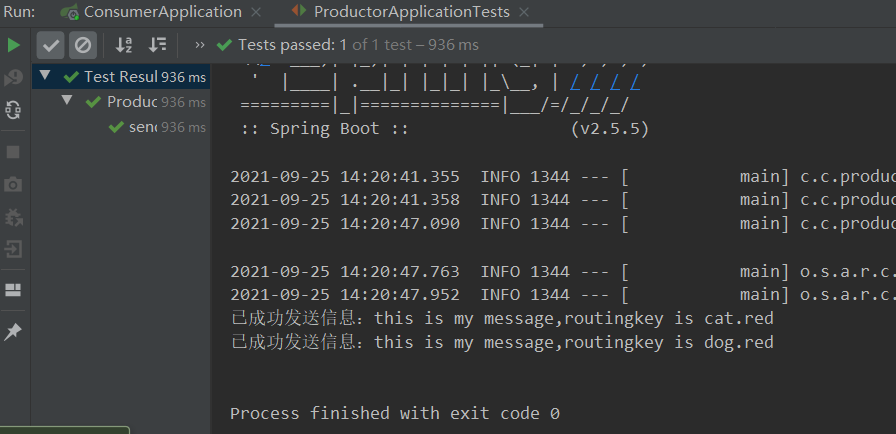
接着我们在测试类中进行两个方法调用:
import com.changlu.productor.config.MsgSender;
import org.junit.jupiter.api.Test;
import org.springframework.beans.factory.annotation.Autowired;
import org.springframework.boot.test.context.SpringBootTest;

@SpringBootTest
class ProductorApplicationTests {

    @Autowired
    private MsgSender msgSender;

    @Test
    void sendMsg1() {
        msgSender.send1();
        msgSender.send2();
    }

}
消费者服务
step1:引入依赖以及配置rabbitmq
<dependency>
    <groupId>org.springframework.boot</groupId>
    <artifactId>spring-boot-starter-amqp</artifactId>
</dependency>
application.yml
server:
  port: 8081  # 设置8081端口,不要与生产者服务其冲突

spring:
  application:
    name: consumer
  rabbitmq:
    addresses: 192.168.118.128:5672  # 同样注意rabbitmq运行端口默认为5672
    username: admin
    password: password
    virtual-host: /
    connection-timeout: 15000
step2:定义消费者并进行绑定监听
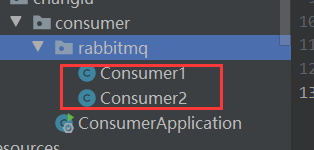
消费者1:绑定对应的queue1
import org.springframework.amqp.rabbit.annotation.RabbitHandler;
import org.springframework.amqp.rabbit.annotation.RabbitListener;
import org.springframework.stereotype.Component;

/**
 * @ClassName Consumer1
 * @Author ChangLu
 * @Date 2021/9/25 13:52
 * @Description queue1对应routingkey=>cat.red
 */
@Component
@RabbitListener(queues = "queue1")
public class Consumer1 {

    @RabbitHandler
    public void process(String msg){
        System.out.println("queue1收到消息:"+msg);
    }

}
消费者2:绑定对应的queue2
import org.springframework.amqp.rabbit.annotation.RabbitHandler;
import org.springframework.amqp.rabbit.annotation.RabbitListener;
import org.springframework.stereotype.Component;

/**
 * @ClassName Consumer1
 * @Author ChangLu
 * @Date 2021/9/25 13:52
 * @Description queue2对应routingkey=>*.red
 */
@Component
@RabbitListener(queues = "queue2")
public class Consumer2 {

    @RabbitHandler
    public void process(String msg){
        System.out.println("queue2收到消息:"+msg);
    }

}
测试
对于生产者服务或是消费者服务在该案例中任一一方启动都没有关系。本案例是topic类型的交换机,生产者服务先启动发送的消息会被暂时存储到指定队列中。
这里的话就先让生产者执行,发送了两条信息:
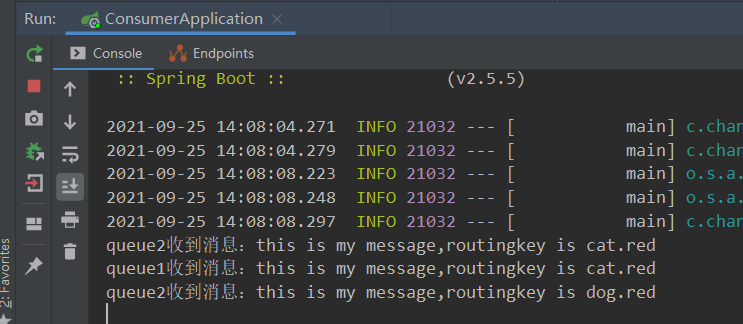
紧接着我们启动消费者服务,可以看到对应的queue1、queue2消费者分别收到了对应routingkey匹配的信息,此时我们可以来进行处理了!

【声明】本内容来自华为云开发者社区博主,不代表华为云及华为云开发者社区的观点和立场。转载时必须标注文章的来源(华为云社区)、文章链接、文章作者等基本信息,否则作者和本社区有权追究责任。如果您发现本社区中有涉嫌抄袭的内容,欢迎发送邮件进行举报,并提供相关证据,一经查实,本社区将立刻删除涉嫌侵权内容,举报邮箱:
cloudbbs@huaweicloud.com
- 点赞
- 收藏
- 关注作者
评论(0)