SpringBoot整合篇 04、Springboot整合Redis

【摘要】 1、配置序列化器(使用fastjson来进行序列化)以及RedisTemplate的bean初始化。注解,表示开启Spring的Cache缓存。ok此时就已经快速集成好redis!
@[toc]
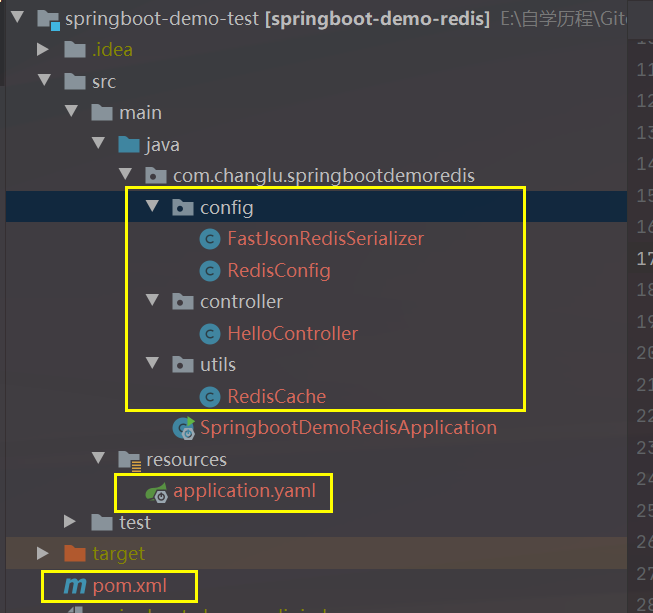
一、SpringBoot集成Redis
1.1、快速集成
引入依赖:
<!--   redis的starter启动器依赖     -->
<dependency>
    <groupId>org.springframework.boot</groupId>
    <artifactId>spring-boot-starter-data-redis</artifactId>
</dependency>

<!--fastjson依赖-->
<dependency>
    <groupId>com.alibaba</groupId>
    <artifactId>fastjson</artifactId>
    <version>1.2.33</version>
</dependency>
application.yaml:
server:
  port: 8001

spring:
  redis:
    # 地址
    host: localhost
    # 端口,默认为6379
    port: 6379
    # 数据库索引
    database: 0
    # 密码
    password: 123456
    # 连接超时时间
    timeout: 10s
    lettuce:
      pool:
        # 连接池中的最小空闲连接
        min-idle: 0
        # 连接池中的最大空闲连接
        max-idle: 8
        # 连接池的最大数据库连接数
        max-active: 8
        # #连接池最大阻塞等待时间(使用负值表示没有限制)
        max-wait: -1ms
1、配置序列化器(使用fastjson来进行序列化)以及RedisTemplate的bean初始化
config/FastJsonRedisSerializer.java:
package com.changlu.springbootdemoredis.config;

import com.alibaba.fastjson.JSON;
import com.alibaba.fastjson.parser.ParserConfig;
import com.alibaba.fastjson.serializer.SerializerFeature;
import com.fasterxml.jackson.databind.JavaType;
import com.fasterxml.jackson.databind.type.TypeFactory;
import org.springframework.data.redis.serializer.RedisSerializer;
import org.springframework.data.redis.serializer.SerializationException;

import java.nio.charset.Charset;

/**
 * Redis使用FastJson序列化
 *
 * @author changlu
 */
public class FastJsonRedisSerializer<T> implements RedisSerializer<T>
{

    public static final Charset DEFAULT_CHARSET = Charset.forName("UTF-8");

    private Class<T> clazz;

    static
    {
        ParserConfig.getGlobalInstance().setAutoTypeSupport(true);
    }

    public FastJsonRedisSerializer(Class<T> clazz)
    {
        super();
        this.clazz = clazz;
    }

    @Override
    public byte[] serialize(T t) throws SerializationException
    {
        if (t == null)
        {
            return new byte[0];
        }
        return JSON.toJSONString(t, SerializerFeature.WriteClassName).getBytes(DEFAULT_CHARSET);
    }

    @Override
    public T deserialize(byte[] bytes) throws SerializationException
    {
        if (bytes == null || bytes.length <= 0)
        {
            return null;
        }
        String str = new String(bytes, DEFAULT_CHARSET);

        return JSON.parseObject(str, clazz);
    }


    protected JavaType getJavaType(Class<?> clazz)
    {
        return TypeFactory.defaultInstance().constructType(clazz);
    }
}
config/RedisConfig.java:
package com.changlu.springbootdemoredis.config;

import org.springframework.context.annotation.Bean;
import org.springframework.context.annotation.Configuration;
import org.springframework.data.redis.connection.RedisConnectionFactory;
import org.springframework.data.redis.core.RedisTemplate;
import org.springframework.data.redis.serializer.StringRedisSerializer;

@Configuration
public class RedisConfig {

    @Primary
    @Bean
    @SuppressWarnings(value = { "unchecked", "rawtypes" })
    public RedisTemplate<Object, Object> redisTemplate(RedisConnectionFactory connectionFactory)
    {
        RedisTemplate<Object, Object> template = new RedisTemplate<>();
        template.setConnectionFactory(connectionFactory);

        FastJsonRedisSerializer serializer = new FastJsonRedisSerializer(Object.class);

        // 使用StringRedisSerializer来序列化和反序列化redis的key值
        template.setKeySerializer(new StringRedisSerializer());
        template.setValueSerializer(serializer);

        // Hash的key也采用StringRedisSerializer的序列化方式
        template.setHashKeySerializer(new StringRedisSerializer());
        template.setHashValueSerializer(serializer);

        template.afterPropertiesSet();
        return template;
    }
}
2、封装RedisTemplate工具类
utils/RedisCache.java:
package com.chuangmeng.horserace.utils;

import org.springframework.beans.factory.annotation.Autowired;
import org.springframework.data.redis.core.*;
import org.springframework.stereotype.Component;
import redis.clients.jedis.ScanParams;
import redis.clients.jedis.ScanResult;
import redis.clients.jedis.commands.JedisCommands;
import redis.clients.jedis.commands.MultiKeyCommands;

import java.util.*;
import java.util.concurrent.TimeUnit;

/**
 * redis工具类
 */
@SuppressWarnings(value = { "unchecked", "rawtypes" })
@Component
public class RedisCache
{
    @Autowired
    public RedisTemplate redisTemplate;

    /**
     * 缓存基本的对象,Integer、String、实体类等
     *
     * @param key 缓存的键值
     * @param value 缓存的值
     */
    public <T> void setCacheObject(final String key, final T value)
    {
        redisTemplate.opsForValue().set(key, value);
    }

    /**
     * 为指定的key新增1
     *
     * @param key 缓存的键值
     * @param value 缓存的值
     */
    public <T> void increment(final String key)
    {
        redisTemplate.opsForValue().increment(key);
    }

    /**
     * 缓存基本的对象,Integer、String、实体类等
     *
     * @param key 缓存的键值
     * @param value 缓存的值
     * @param timeout 时间
     * @param timeUnit 时间颗粒度
     */
    public <T> void setCacheObject(final String key, final T value, final Integer timeout, final TimeUnit timeUnit)
    {
        redisTemplate.opsForValue().set(key, value, timeout, timeUnit);
    }

    /**
     * 设置有效时间
     *
     * @param key Redis键
     * @param timeout 超时时间
     * @return true=设置成功;false=设置失败
     */
    public boolean expire(final String key, final long timeout)
    {
        return expire(key, timeout, TimeUnit.SECONDS);
    }

    /**
     * 设置有效时间
     *
     * @param key Redis键
     * @param timeout 超时时间
     * @param unit 时间单位
     * @return true=设置成功;false=设置失败
     */
    public boolean expire(final String key, final long timeout, final TimeUnit unit)
    {
        return redisTemplate.expire(key, timeout, unit);
    }

    /**
     * 获得缓存的基本对象。
     *
     * @param key 缓存键值
     * @return 缓存键值对应的数据
     */
    public <T> T getCacheObject(final String key)
    {
        ValueOperations<String, T> operation = redisTemplate.opsForValue();
        return operation.get(key);
    }

    /**
     * 删除单个对象
     *
     * @param key
     */
    public boolean deleteObject(final String key)
    {
        return redisTemplate.delete(key);
    }

    /**
     * 删除集合对象
     *
     * @param collection 多个对象
     * @return
     */
    public long deleteObject(final Collection collection)
    {
        return redisTemplate.delete(collection);
    }

    /**
     * 缓存List数据
     *
     * @param key 缓存的键值
     * @param dataList 待缓存的List数据
     * @return 缓存的对象
     */
    public <T> long setCacheList(final String key, final List<T> dataList)
    {
        Long count = redisTemplate.opsForList().rightPushAll(key, dataList);
        return count == null ? 0 : count;
    }

    /**
     * 获得缓存的list对象
     *
     * @param key 缓存的键值
     * @return 缓存键值对应的数据
     */
    public <T> List<T> getCacheList(final String key)
    {
        return redisTemplate.opsForList().range(key, 0, -1);
    }

    /**
     * 缓存Set
     *
     * @param key 缓存键值
     * @param dataSet 缓存的数据
     * @return 缓存数据的对象
     */
    public <T> BoundSetOperations<String, T> setCacheSet(final String key, final Set<T> dataSet)
    {
        BoundSetOperations<String, T> setOperation = redisTemplate.boundSetOps(key);
        Iterator<T> it = dataSet.iterator();
        while (it.hasNext())
        {
            setOperation.add(it.next());
        }
        return setOperation;
    }

    /**
     * 获得缓存的set
     *
     * @param key
     * @return
     */
    public <T> Set<T> getCacheSet(final String key)
    {
        return redisTemplate.opsForSet().members(key);
    }

    /**
     * 缓存Map
     *
     * @param key
     * @param dataMap
     */
    public <T> void setCacheMap(final String key, final Map<String, T> dataMap)
    {
        if (dataMap != null) {
            redisTemplate.opsForHash().putAll(key, dataMap);
        }
    }

    /**
     * 获得缓存的Map
     *
     * @param key
     * @return
     */
    public <T> Map<String, T> getCacheMap(final String key)
    {
        return redisTemplate.opsForHash().entries(key);
    }

    /**
     * 往Hash中存入数据
     *
     * @param key Redis键
     * @param hKey Hash键
     * @param value 值
     */
    public <T> void setCacheMapValue(final String key, final String hKey, final T value)
    {
        redisTemplate.opsForHash().put(key, hKey, value);
    }

    /**
     * 获取Hash中的数据
     *
     * @param key Redis键
     * @param hKey Hash键
     * @return Hash中的对象
     */
    public <T> T getCacheMapValue(final String key, final String hKey)
    {
        HashOperations<String, String, T> opsForHash = redisTemplate.opsForHash();
        return opsForHash.get(key, hKey);
    }

    /**
     * 删除Hash中的数据
     *
     * @param key
     * @param hkey
     */
    public void delCacheMapValue(final String key, final String hkey)
    {
        HashOperations hashOperations = redisTemplate.opsForHash();
        hashOperations.delete(key, hkey);
    }

    /**
     * 获取多个Hash中的数据
     *
     * @param key Redis键
     * @param hKeys Hash键集合
     * @return Hash对象集合
     */
    public <T> List<T> getMultiCacheMapValue(final String key, final Collection<Object> hKeys)
    {
        return redisTemplate.opsForHash().multiGet(key, hKeys);
    }

    /**
     * 获得缓存的基本对象列表
     *
     * @param pattern 字符串前缀
     * @return 对象列表
     */
    public Collection<String> keys(final String pattern)
    {
        return redisTemplate.keys(pattern);
    }

    /**
     *
     * @param key 要匹配的key前缀
     * @return 匹配到的批量key值
     */
    public Set<String> scan(String key) {
        return (Set<String>) redisTemplate.execute((RedisCallback<Set<String>>) connection -> {
            HashSet<String> keys = new HashSet<>();
            JedisCommands commands = (JedisCommands) connection.getNativeConnection();
            MultiKeyCommands multiKeyCommands = (MultiKeyCommands) commands;
            //组装scan请求参数(匹配内容+请求数量)
            ScanParams scanParams = new ScanParams();
            scanParams.match("*" + key + "*");
            scanParams.count(1000);
            //执行scan命令(批量去获取)
            ScanResult<String> scan = multiKeyCommands.scan("0", scanParams);
            while (scan.getCursor() != null) {
                keys.addAll(scan.getResult());
                if ("0".equals(scan.getCursor())) {
                    break;
                }
                scan = multiKeyCommands.scan(scan.getCursor(), scanParams);
            }
            return keys;
        });
    }
}
1.2、编写测试类及测试
controller/HelloController.java:
package com.changlu.springbootdemoredis.controller;
import com.changlu.springbootdemoredis.utils.RedisCache;
import org.springframework.beans.factory.annotation.Autowired;
import org.springframework.web.bind.annotation.GetMapping;
import org.springframework.web.bind.annotation.RestController;
/**
* @Description:
* @Author: changlu
* @Date: 9:03 PM
*/
@RestController
public class HelloController {
@Autowired
private RedisCache redisCache;
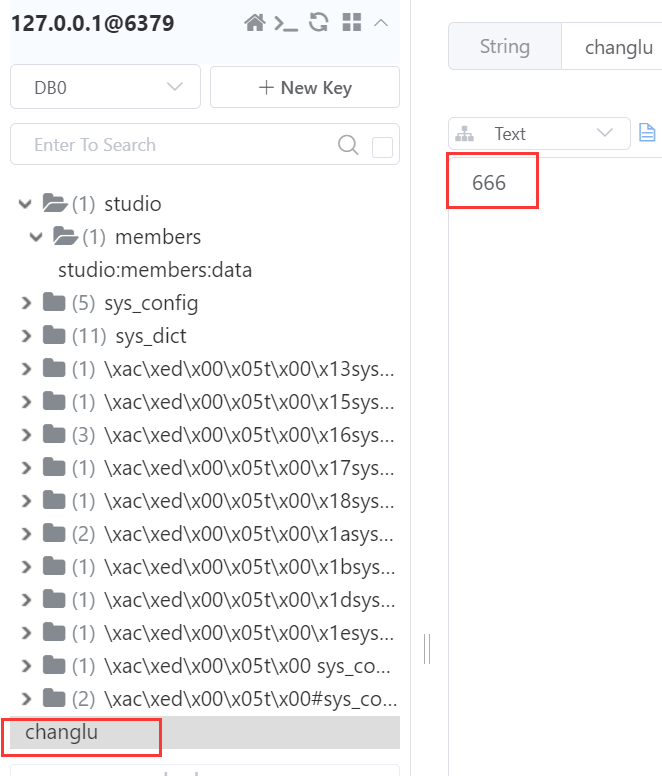
@GetMapping("/hello")
public String hello(){
redisCache.setCacheObject("changlu", 666);
return "success";
}
}
接着我们运行项目:
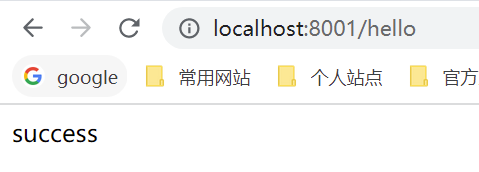
ok此时就已经快速集成好redis!
二、SpringCache集成Redis
2.1、快速集成
Spring cache 使用Redis做分布式缓存:非常详细
接着我们继续一章节继续来集成Spring Cache。
1、首先来添加依赖:
<!--   cache stater依赖     -->
<dependency>
    <groupId>org.springframework.boot</groupId>
    <artifactId>spring-boot-starter-cache</artifactId>
</dependency>
2、在RedisConfig.java中添加一个Bean的注入,这个Bean对应的cache stater中的RedisCacheConfiguration:

@Bean
public RedisCacheManager cacheManager(RedisConnectionFactory factory, RedisTemplate customRedisTemplate){
    //可以配置缓存过期时间,是否缓存null值,配置前缀,配置数据转换器
    RedisCacheConfiguration config = RedisCacheConfiguration.defaultCacheConfig()
        .serializeValuesWith(RedisSerializationContext.SerializationPair.fromSerializer(customRedisTemplate.getValueSerializer()));
    RedisCacheManager cacheManager = RedisCacheManager.builder(RedisCacheWriter.lockingRedisCacheWriter(factory))
        .cacheDefaults(config)
        .build();
    return cacheManager;
}
3、在启动器上添加@EnableCaching注解,表示开启Spring的Cache缓存。
@EnableCaching
4、开始使用注解来达到缓存效果
@Cacheable
	标注位置:方法或者类上,标识该方法或类支持缓存
	效果:Spring调用注解标识方法后会将返回值缓存到redis,以保证下次同条件调用该方法时直接从缓存中获取返回值。这样就不需要再重新执行该方法的业务处理过程,提高效率
	常用三个参数:
		cacheNames 缓存名称
		key 缓存的key,需要注意key的写法哈
		condition 缓存执行的条件,返回true时候执行
2.2、快速实现cache查询
初始demo参考:Spring cache 使用Redis做分布式缓存
失效时间:Springboot使用@Cacheable 更优雅的使用缓存 以及如何设置失效时间、@cacheable设置过期时间_Spring cache整合Redis,并给它一个过期时间!
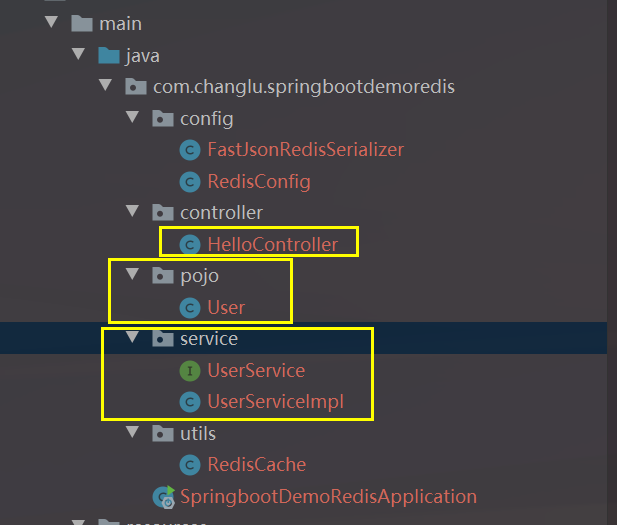
pojo/user.java:
package com.changlu.springbootdemoredis.pojo;

/**
 * @Description:
 * @Author: changlu
 * @Date: 9:16 PM
 */
public class User {

    private String name;
    private String password;
    private Integer age;

    public User() {
    }

    public User(String name, String password, Integer age) {
        this.name = name;
        this.password = password;
        this.age = age;
    }

    public String getName() {
        return name;
    }

    public void setName(String name) {
        this.name = name;
    }

    public String getPassword() {
        return password;
    }

    public void setPassword(String password) {
        this.password = password;
    }

    public Integer getAge() {
        return age;
    }

    public void setAge(Integer age) {
        this.age = age;
    }

    @Override
    public String toString() {
        return "User{" +
                "name='" + name + '\'' +
                ", password='" + password + '\'' +
                ", age=" + age +
                '}';
    }
}
service/UserService.java:
package com.changlu.springbootdemoredis.service;

import com.changlu.springbootdemoredis.pojo.User;

/**
 * @Description:
 * @Author: changlu
 * @Date: 9:17 PM
 */
public interface UserService {

    User getUserById(Integer id);

    User updateUser(User user);

}
service/UserServiceImpl.java:
package com.changlu.springbootdemoredis.service;

import com.changlu.springbootdemoredis.pojo.User;
import org.springframework.cache.annotation.Cacheable;
import org.springframework.stereotype.Service;

/**
 * @Description:
 * @Author: changlu
 * @Date: 9:17 PM
 */
@Service
public class UserServiceImpl implements UserService{

    @Override
    @Cacheable(cacheNames = "cache_user", key="'user_' + #id")
    public User getUserById(Integer id) {
        return new User("changlu", "123456", id);
    }

    @Override
    public User updateUser(User user) {
        return null;
    }
}
接着在HelloController中添加一个查询代码:
@Autowired
private UserService userService;
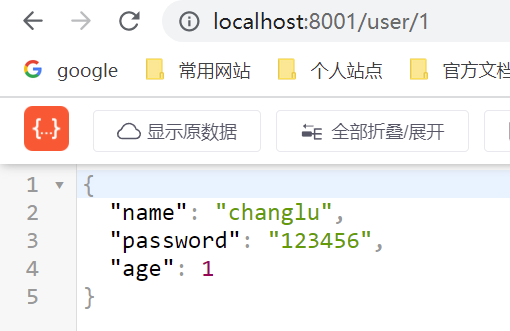
@GetMapping("/user/{id}")
public User getUserById(@PathVariable("id") Integer id) {
return userService.getUserById(id);
}

参考文章

【声明】本内容来自华为云开发者社区博主,不代表华为云及华为云开发者社区的观点和立场。转载时必须标注文章的来源(华为云社区)、文章链接、文章作者等基本信息,否则作者和本社区有权追究责任。如果您发现本社区中有涉嫌抄袭的内容,欢迎发送邮件进行举报,并提供相关证据,一经查实,本社区将立刻删除涉嫌侵权内容,举报邮箱:
cloudbbs@huaweicloud.com
- 点赞
- 收藏
- 关注作者
评论(0)