SpringBoot入门篇 03、员工管理系统(基于内存)
@[toc]
前言
本篇博客是根据【狂神说Java】SpringBoot最新教程IDEA版通俗易懂 整理的学习笔记,若文章中出现相关问题,请指出!
所有博客文件目录索引:博客目录索引(持续更新)
本章节环境
IDE工具:IDEA2020.1
框架版本:springboot2.4.1
前面准备工作(1-3)
一、准备好dao以及pojo
二、准备好静态资源以及导入thymeleaf依赖
三、将静态资源放置到static目录中,然后使用thymeleaf的语法格式来进行对url静态资源的指定
注意点:如果不适用thymeleaf中的语法来指定url,那么一旦在配置文件中更改server.servlet.context-path=/changlu虚拟目录,那么我们访问对应网址时,静态资源就不会跟随着加了虚拟目录一样增加。
原本:href="/js" 替换:th:href="@{/css/...}" 使用时需要html引入头部声明xmlns:th="http://www.thymeleaf.org"
关闭模板引擎的缓存(yaml配置文件):spring.thymeleaf.cache=false
自定义配置类中添加跳转路径,重写:
@Configuration
public class MyMvcConfig implements  WebMvcConfigurer{
    @Override
    public void addViewControllers(ViewControllerRegistry registry) {
        registry.addViewController("/").setViewName("index");
        registry.addViewController("/index.html").setViewName("index");
    }
}
四、页面国际化
参考文章:SpringBoot日记——国际化篇
1、IDEA中创建i18n目录
通过在i18n目录中设置properteis文件
确保idea中的fileEncoding中都是UTF-8
Idea大概创建步骤
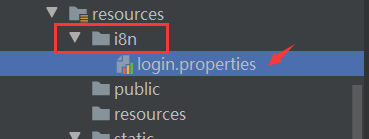
再添加一个login_zh_CN.properties就会进行合并,因为他们的前缀相同,idea就会识别login适配不同的版本
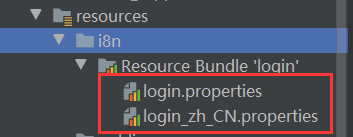
若是想在Bundle中再创建只需要右击选择如下,再添加对应的后缀即可为添加了不同版本


IDEA有一个操作更加来控制login三个版本不同的值

点击+好选择对应的key名

特别人性化,这样我们就能够进行一个键多个配置文件的值修改了!!!

2、配置文件配置国际化
MessageSourceAutoConfiguration类中messageSourceProperties()方法中返回的实体类是MessageSourceProperties
这个实体类中的basename属性是用来管理国际化文件的,默认是message。
那么若是想要自定义国际化,那么就要更改其配置在配置文件中:

# 配置i18n的真实路径
spring.messages.basename=i18.login
3、使用thymeleaf语法来显示国际化
当我们配置好对应的国际化之后,来使用thymeleaf语法来显示国际化的内容
使用语法:#{}

对于之后中英文进行自动转换同样需要发送请求,下面是两个超链接:
<!-- 使用@{}表示链接  ()中的内容表示url的参数 也就是url?key=value中?后的内容   -->
<a class="btn btn-sm" th:href="@{/index.html(l='zh_CN')}">中文</a>|
<a class="btn btn-sm" th:href="@{/index.html(l='en_US')}">English</a>
效果:

4、自定义配置LocalResolver

我们首先自定义一个配置类MyLocaleResolver:
package com.changlu.config;
import org.springframework.context.annotation.Configuration;
import org.springframework.util.StringUtils;
import org.springframework.web.servlet.LocaleResolver;
import javax.servlet.http.HttpServletRequest;
import javax.servlet.http.HttpServletResponse;
import java.util.Locale;

@Configuration
public class MyLocaleResolver implements LocaleResolver {
    @Override
    public Locale resolveLocale(HttpServletRequest httpServletRequest) {
        String l = httpServletRequest.getParameter("l");
        //获取默认的Locale
        Locale locale = Locale.getDefault();
        //判断是否有参数
        if(!StringUtils.isEmpty(l)){
            //将对应中英文参数进行分割,并创建新的Locale,填充语言与城市
            String[] split = l.split("_");
            locale = new Locale(split[0],split[1]);
        }

        return locale;
    }

    @Override
    public void setLocale(HttpServletRequest httpServletRequest, HttpServletResponse httpServletResponse, Locale locale) {

    }
}
为了使这个配置类进行生效,我们继续在MyMvcConfig中让自定义国际化配置生效:
@Configuration
public class MyMvcConfig implements  WebMvcConfigurer{
    @Override
    public void addViewControllers(ViewControllerRegistry registry) {
        registry.addViewController("/").setViewName("index");
        registry.addViewController("/index.html").setViewName("index");
        registry.addViewController("/404.html").setViewName("404");
        registry.addViewController("/dashboard.html").setViewName("dashboard");
        registry.addViewController("/list.html").setViewName("list");
    }

    //自定义的国际化组件就生效了!
    @Bean
    public LocaleResolver localeResolver(){
        return new MyLocaleResolver();
    }
}
效果展示:
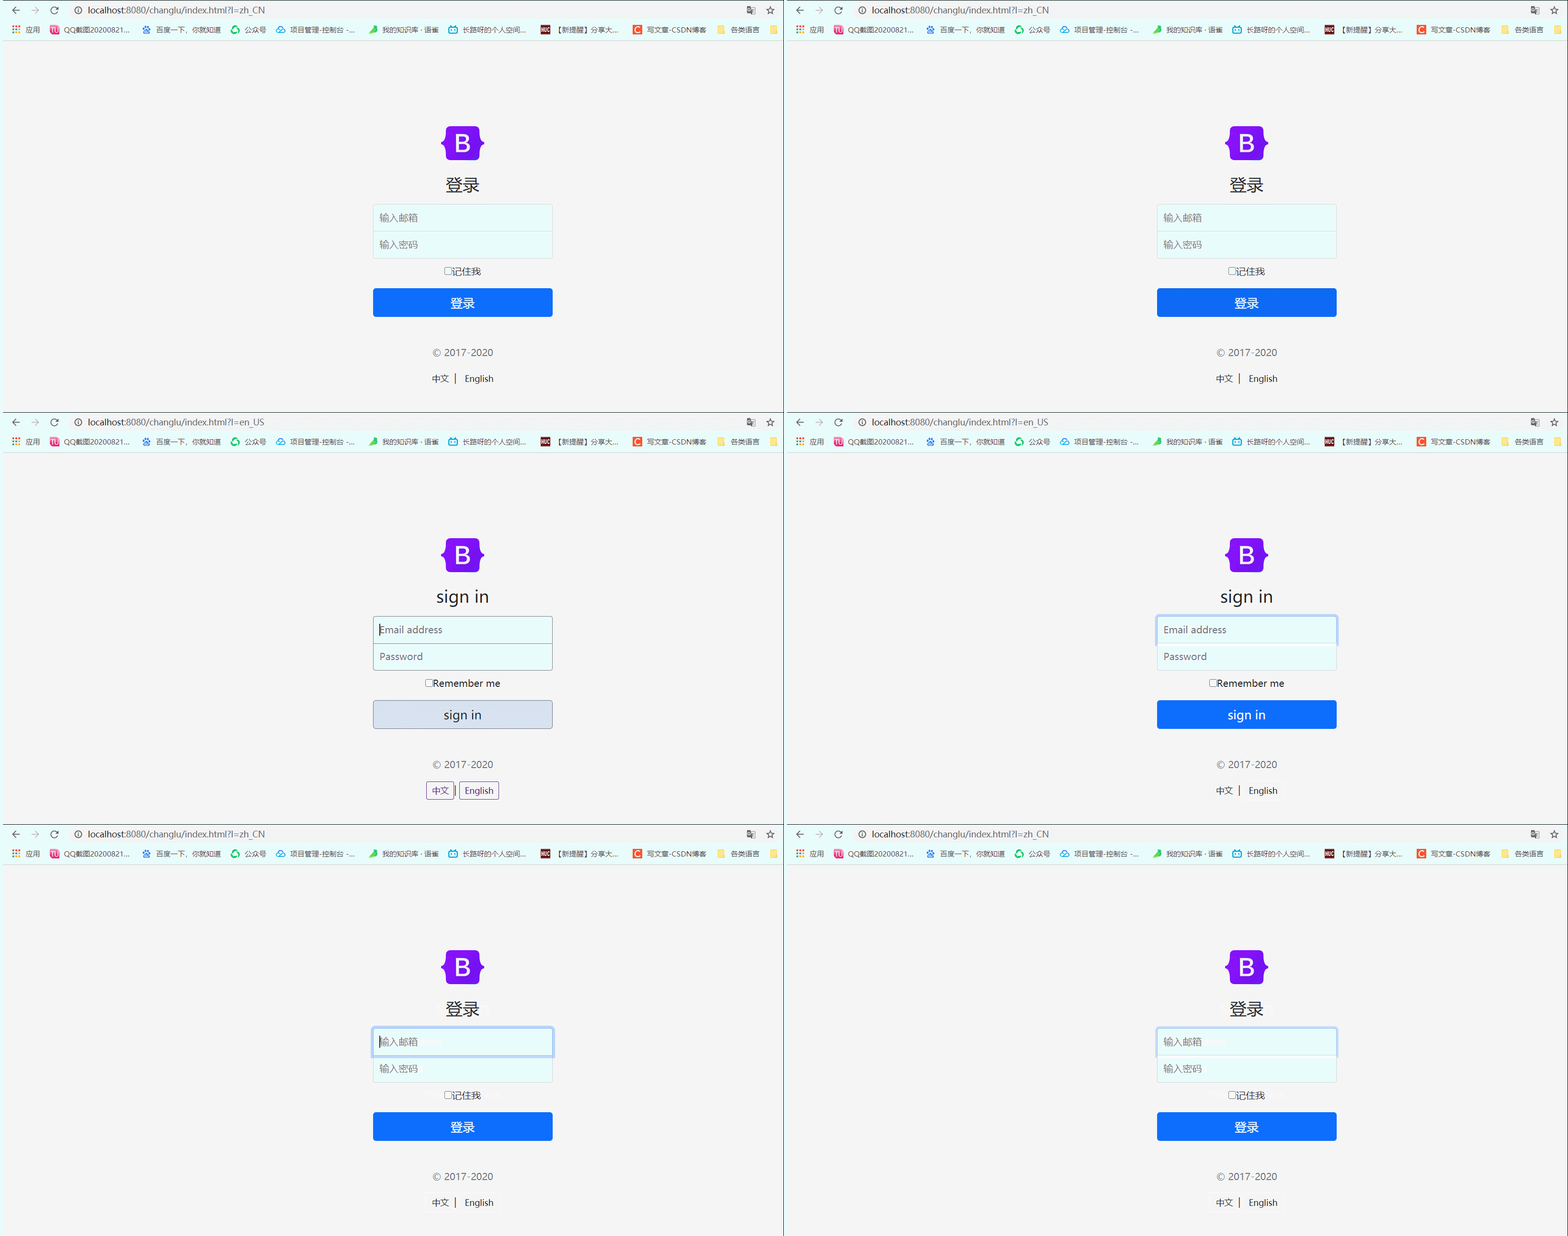
原理分析
对于我们浏览器发送请求,都是会发送对应的请求语言,这跟我们对浏览器的设置是有关系的:

对于服务器端,那么我们也会有一个对应的方法来去进行获取这个请求的语言并进行自动配置,这个在springmvc中已经帮我们配置好了,对于springboot同样也已经做了自动配置,依旧是在WebMvcAutoConfiguration这个自动配置类里:
里面有一个自动配置的javaConfig,用于自动配置LocaleResolver

注意看红框,通过AcceptHeaderLocaleResolver获取到的实例来进行返回,我们来看下这个类

那么我们只需要把其中的resolveLocale()重写为自己指定的国际化并进行配置即可!!!
关键就是我们要定义一个自己的LocaleResolver类,并实现其方法即可,这也就是我为什么要自定义其类并通过@Bean来进行spring的自动装配!!!
普通使用
只需要在resources目录添加一个messages.properties,其中设置key与value,例如footer.qq=QQ:93997488
在template中只需要使用thymeleaf语法如th:text="#{footer.qq}"即可获取到,国际化则需要在yaml中设置包名。
五、功能实现
1、登陆功能
简单实现
前提描述
实现输入用户名及密码来进行跳转页面,若是用户名不为空及密码正确进行跳转页面,否则回到初始页面并显示错误信息!!!
核心部分
html中使用到thymleaf中的几个表达式
- 表单url:
th:action="@{/user/login}" - 接收请求域中参数:
th:text="${msg}" - 使用其自带工具类strings(不为空即显示):
th:if="#!strings.isEmpty(msg)"
LoginController:
@Controller
public class LoginController {
    @RequestMapping("/user/login")
    public String hello(@RequestParam("email")String email,
                        @RequestParam("password")String password,
                        Model model) {

        //判断是否接收到用户名及密码是否正确
        if(!StringUtils.isEmpty(email) && "123456".equals(password)){
            return "redirect:/main.html";
        }else{
            model.addAttribute("msg","用户名或密码有错误!");
            return "index";
        }
    }

}
注意唯一要说明的是用户名不为空以及密码正确进行的是重定向,改main.html是不存在的,通过自定义配置类中设置跳转路径进行跳转。通过这种形式可以给出一种感觉提交表单是跳转到main.html页面
配置类:
@Configuration
public class MyMvcConfig implements  WebMvcConfigurer{
    @Override
    public void addViewControllers(ViewControllerRegistry registry) {
    	...
        //以这种形式来进行跳转
        registry.addViewController("/main.html").setViewName("dashboard");
    }
    //自定义的国际化组件就生效了!自动注入到spring容器中
    @Bean
    public LocaleResolver localeResolver(){
        return new MyLocaleResolver();
    }
}
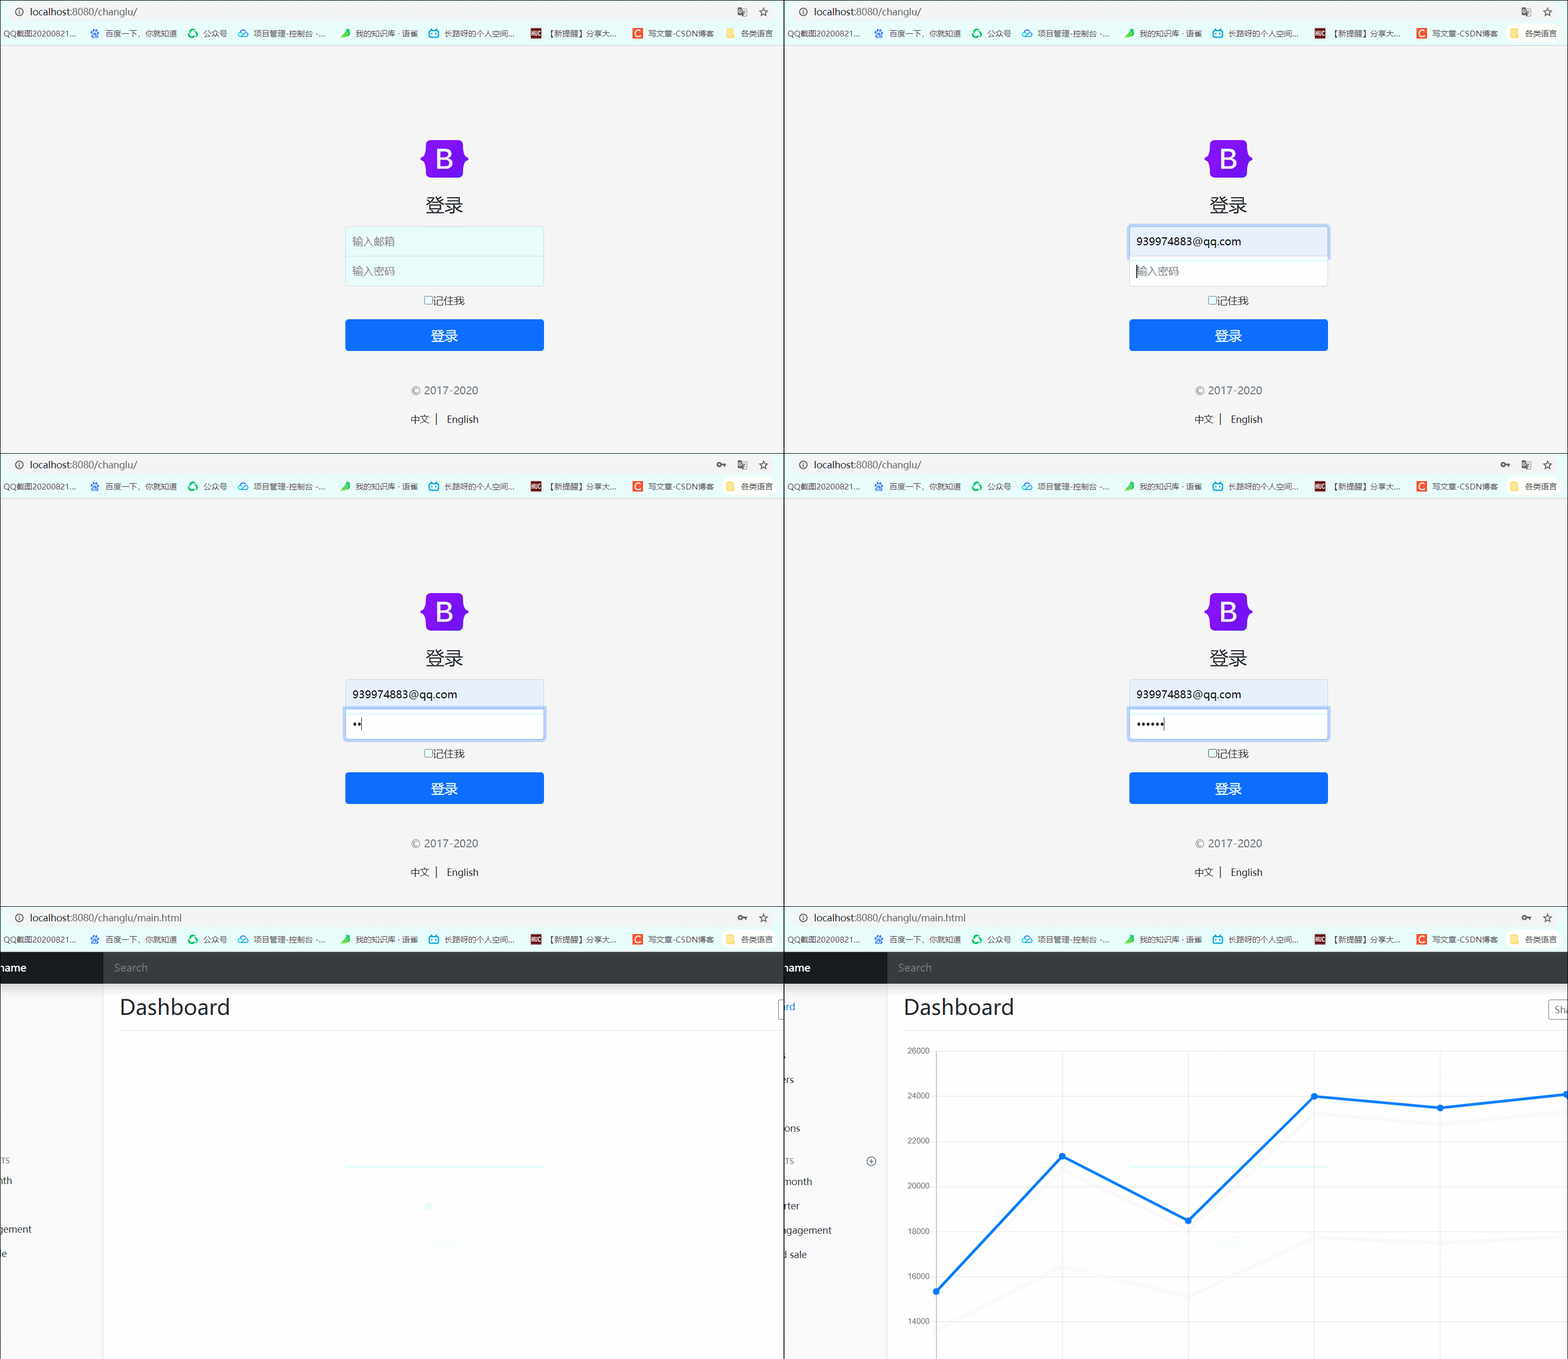
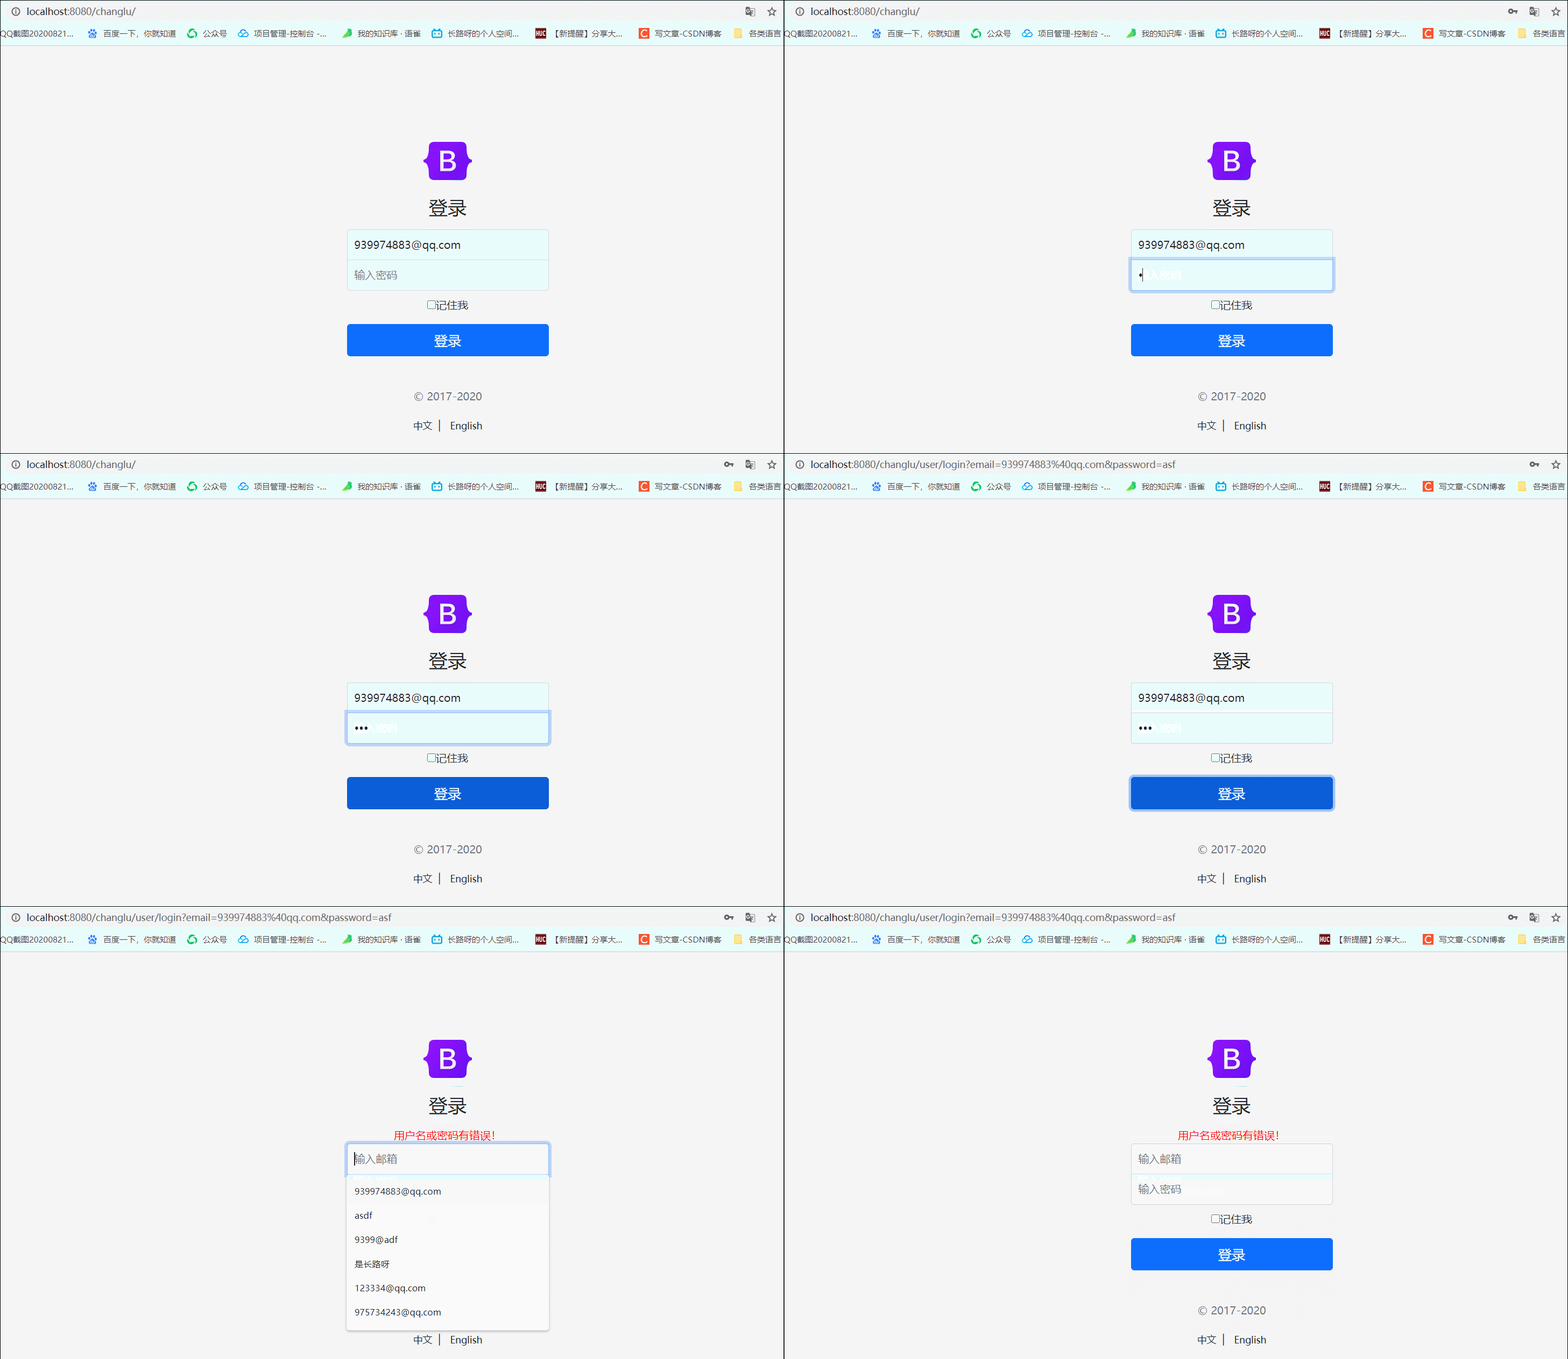
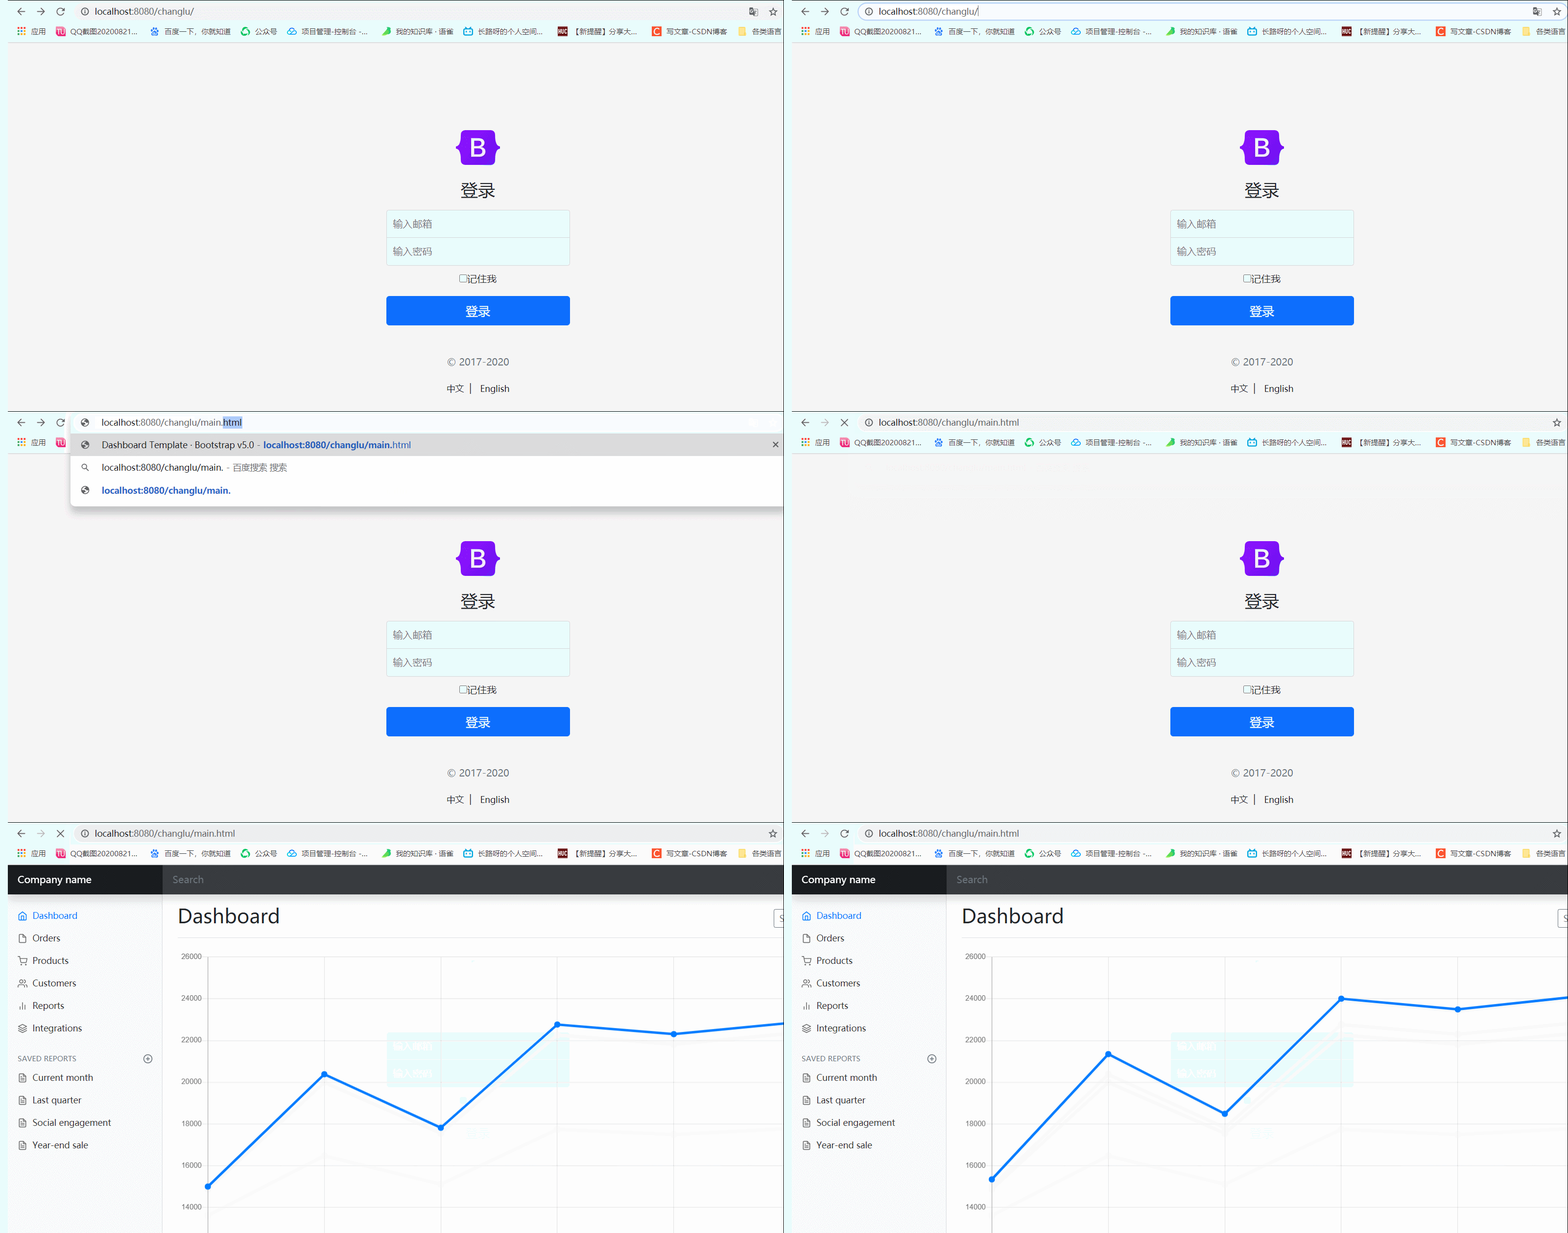
效果:
成功跳转情况:
失败的跳转情况:
添加拦截器
拦截器添加的作用是什么呢?
-
我们在上面进行简单实现登录,通过简单校验中账号密码,如通过跳转路径/main.html则会直接跳转到/dashboard.html了。中间会经过一个main.html作为跳板(并不是一个真实页面)。此时就有个问题,若是直接访问main.html不就直接跳转过去到登录后的界面了嘛。

-
解决措施:通过添加拦截器进行拦截,若是直接访问这个main.html,则要进行session校验,若存在直接放行,不存在拦截
首先做一个前提条件:在登陆成功跳转之时创建session并传给浏览器。
//只需要在对应控制器中添加HttpSession参数,并执行方法生成session即可
session.setAttribute("loginUser",email);
自定义拦截器类:
public class MyInterceptor implements HandlerInterceptor {

    //访问指定请求前进行拦截判断,return true放行,return false不放行
    @Override
    public boolean preHandle(HttpServletRequest request, HttpServletResponse response, Object handler) throws Exception {
        Object loginUser = request.getSession().getAttribute("loginUser");
        if(loginUser!=null){//若是有该session,通过
            return true;
        }else{
            request.setAttribute("msg","没有权限,无法登录");
            request.getRequestDispatcher("/index.html").forward(request,response);
            return false;
        }
    }
}
自定义拦截器生成之后我们则回到自定义mvc配置类中重写方法:
@Configuration
public class MyMvcConfig implements  WebMvcConfigurer{

    ...

	@Override
    public void addInterceptors(InterceptorRegistry registry) {
     //使用registry来添加刚刚自定义的拦截器,并且添加拦截路径(addPathPatterns),不拦截的资源(excludePathPatterns)
        registry.addInterceptor(new MyInterceptor()).addPathPatterns("/**")
                .excludePathPatterns("/index.html","/","/user/login","/css/**","/image/**","/js/**");
    }
}
由于上面登陆采用跳板形式,所以仅仅不拦截/user/login即可,拦截main.html时进行拦截校验!!!
效果:
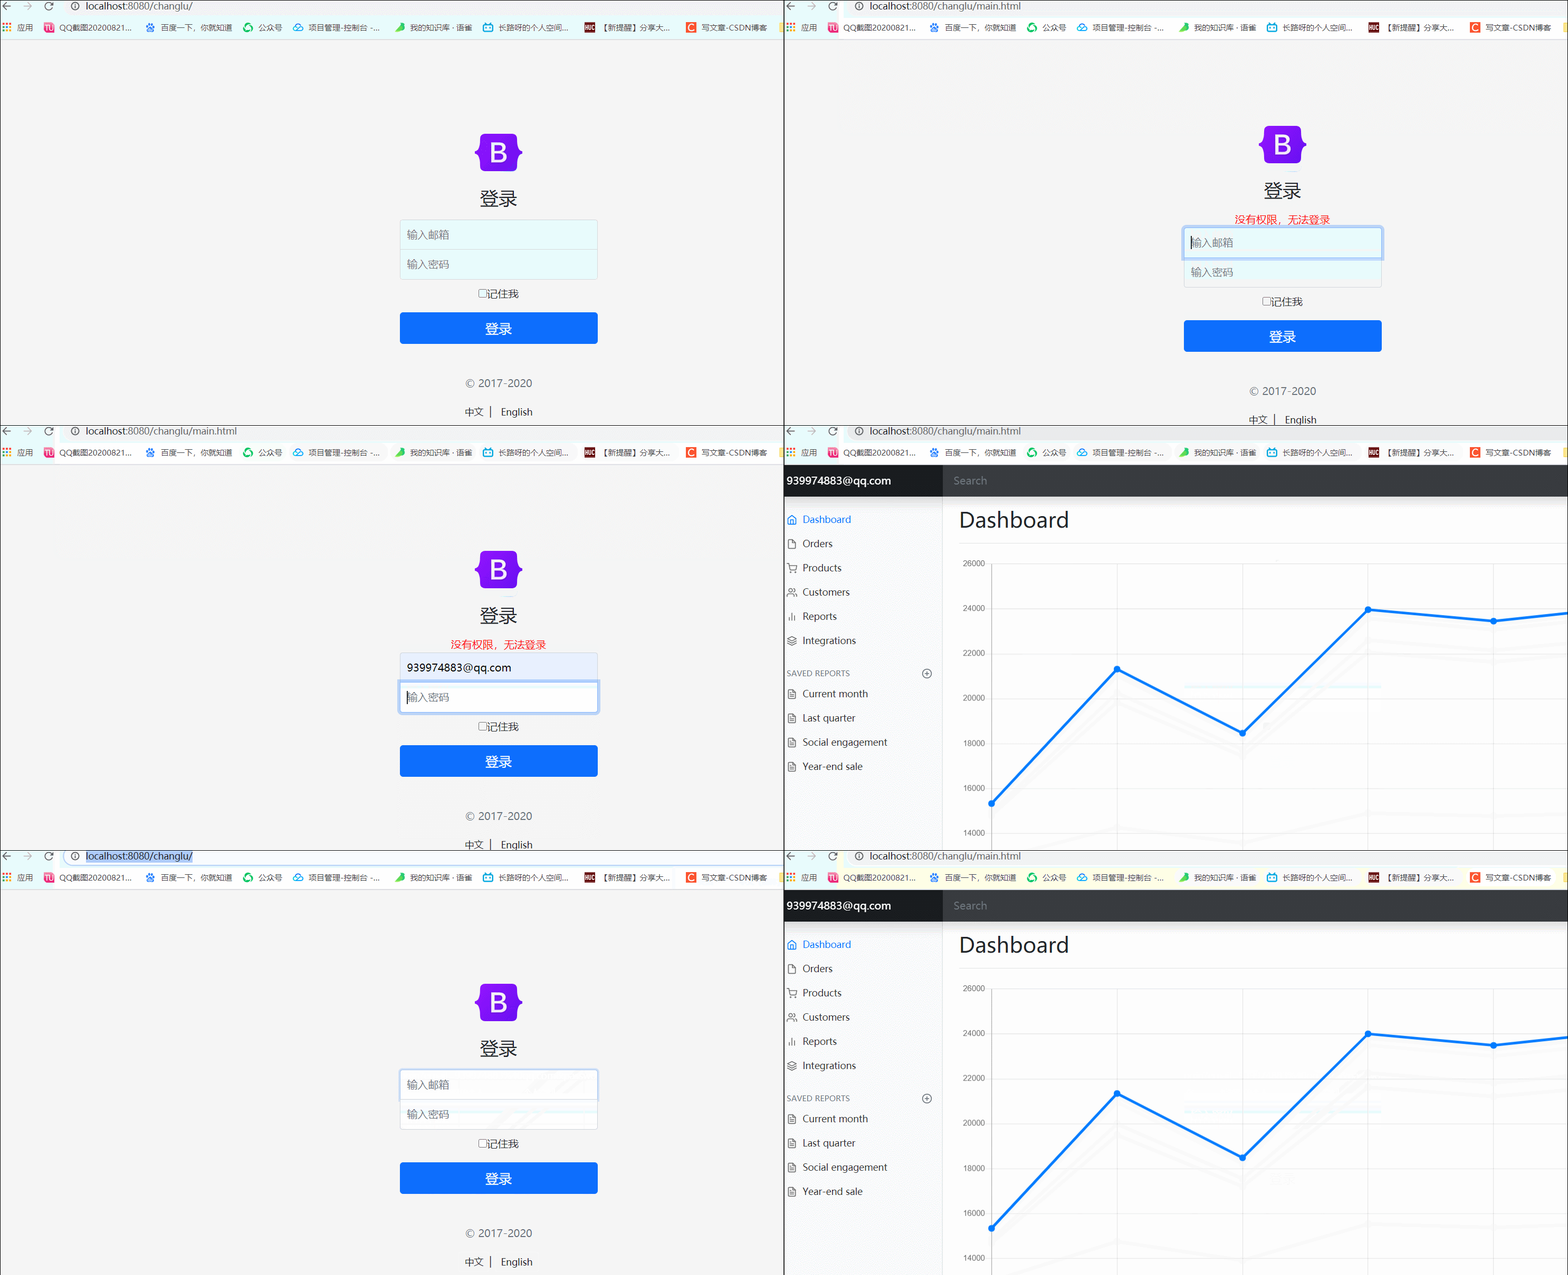
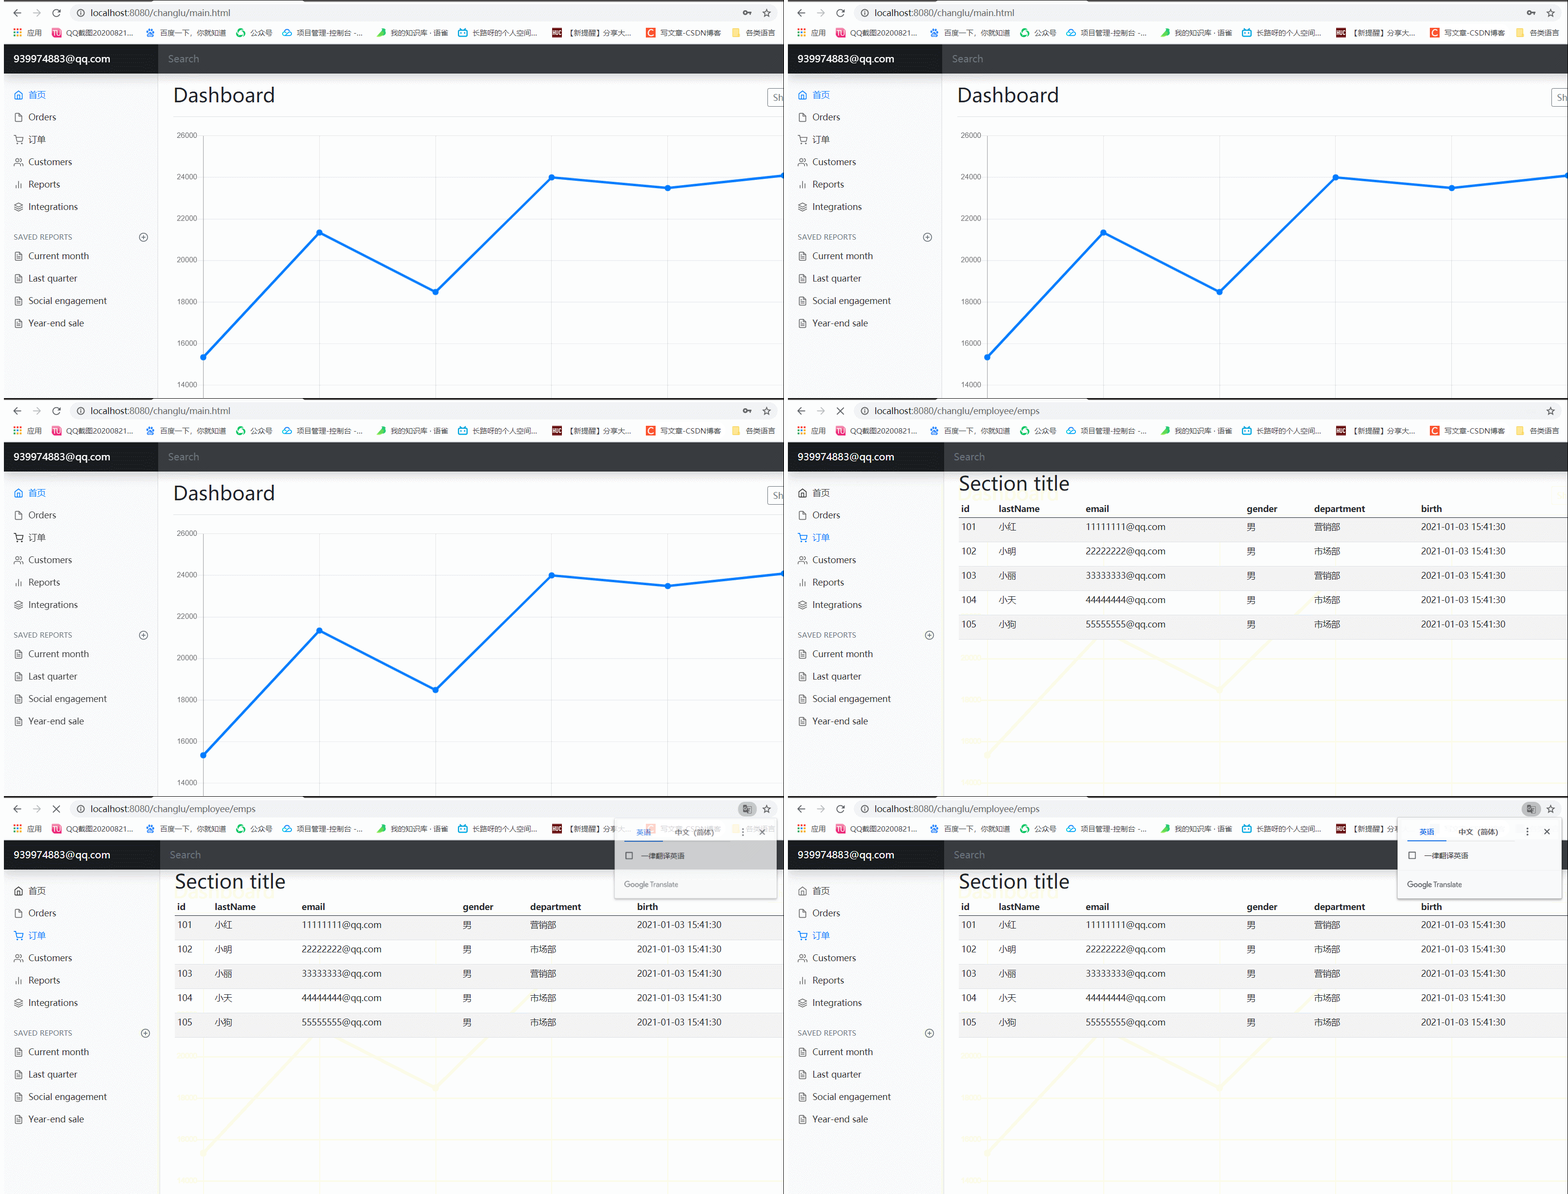
2、展示员工列表
首先说明这部分需要完成的内容
- 将头部部分、侧边栏部分进行组件化,单独抽取一个页面(通过使用
th:flagment="①"以及th:replace="~(组件页面前缀::①)"来获取组件) - 跳转页面侧边栏对应部分高亮(通过在
th:replace中添加请求参数,在组件部分中使用三元运算符中处理高亮) - 编写一个controller来返回数据到页面中,应当跳转视图到list.html
- 使用
th:each来遍历列表内容,并使用${单个实体}来展示数据,其中数字表示性别使用三元运算符解决,其中的日期使用thymeleaf模板中的例如${#dates.format(emp.getBirth(),'yyyy-MM-dd HH:mm:ss')
组件化思路:
抽取对应重复使用的单独模块到公共页面(该页面通常放置到commons目录中),指定模块使用th:fragment="headBar"表示,在其他页面如图表页面、展示列表页面使用组件时,例如:th:replace="~{/commons/commons::sideBarMenu}"即可使用组件!!!
标签高亮的思路:
对于bootstap高亮只需要在其class中添加active即可产生高亮。基于上面组件化,我们在如th:replace="...(key=value)"中添加请求参数,紧接着在公共页面的指定标签如a标签部分的th:class其中进行运算符判断是否有改参数,有的话高亮,无的话不高亮。
Controller部分:
@Controller
public class EmployeeController {

    @Autowired
    private EmployeeDao employeeDao;//这里为了简便直接调用dao
    @RequestMapping("/employee/emps")
    public String queryAll(Model model){
        Collection<Employee> employees = employeeDao.queryAllEmployee();//该方法只是通过获取模拟数据来进行返回
        model.addAttribute("emps",employees);
        return "list";
    }
}
页面遍历列表:
<tr th:each="emp:${emps}" >
    <td th:text="${emp.getId()}"></td>
    <td th:text="${emp.getLastName()}"></td>
    <td th:text="${emp.getEmail()}"></td>
    <!-- 三元运算符 -->
    <td th:text="${emp.getGender()}==0?'男':'女'"></td>
    <td th:text="${emp.getDepartment().getDepartmentName()}"></td>
    <!-- 使用自带的dates类进行格式化 -->
    <td th:text="${#dates.format(emp.getBirth(),'yyyy-MM-dd HH:mm:ss')}"></td>
    <td>
        <button class="btn btn-sm btn-primary">编辑</button>
        <button class="btn btn-sm btn-danger">删除</button>
    </td>
</tr>
效果:
3、添加员工
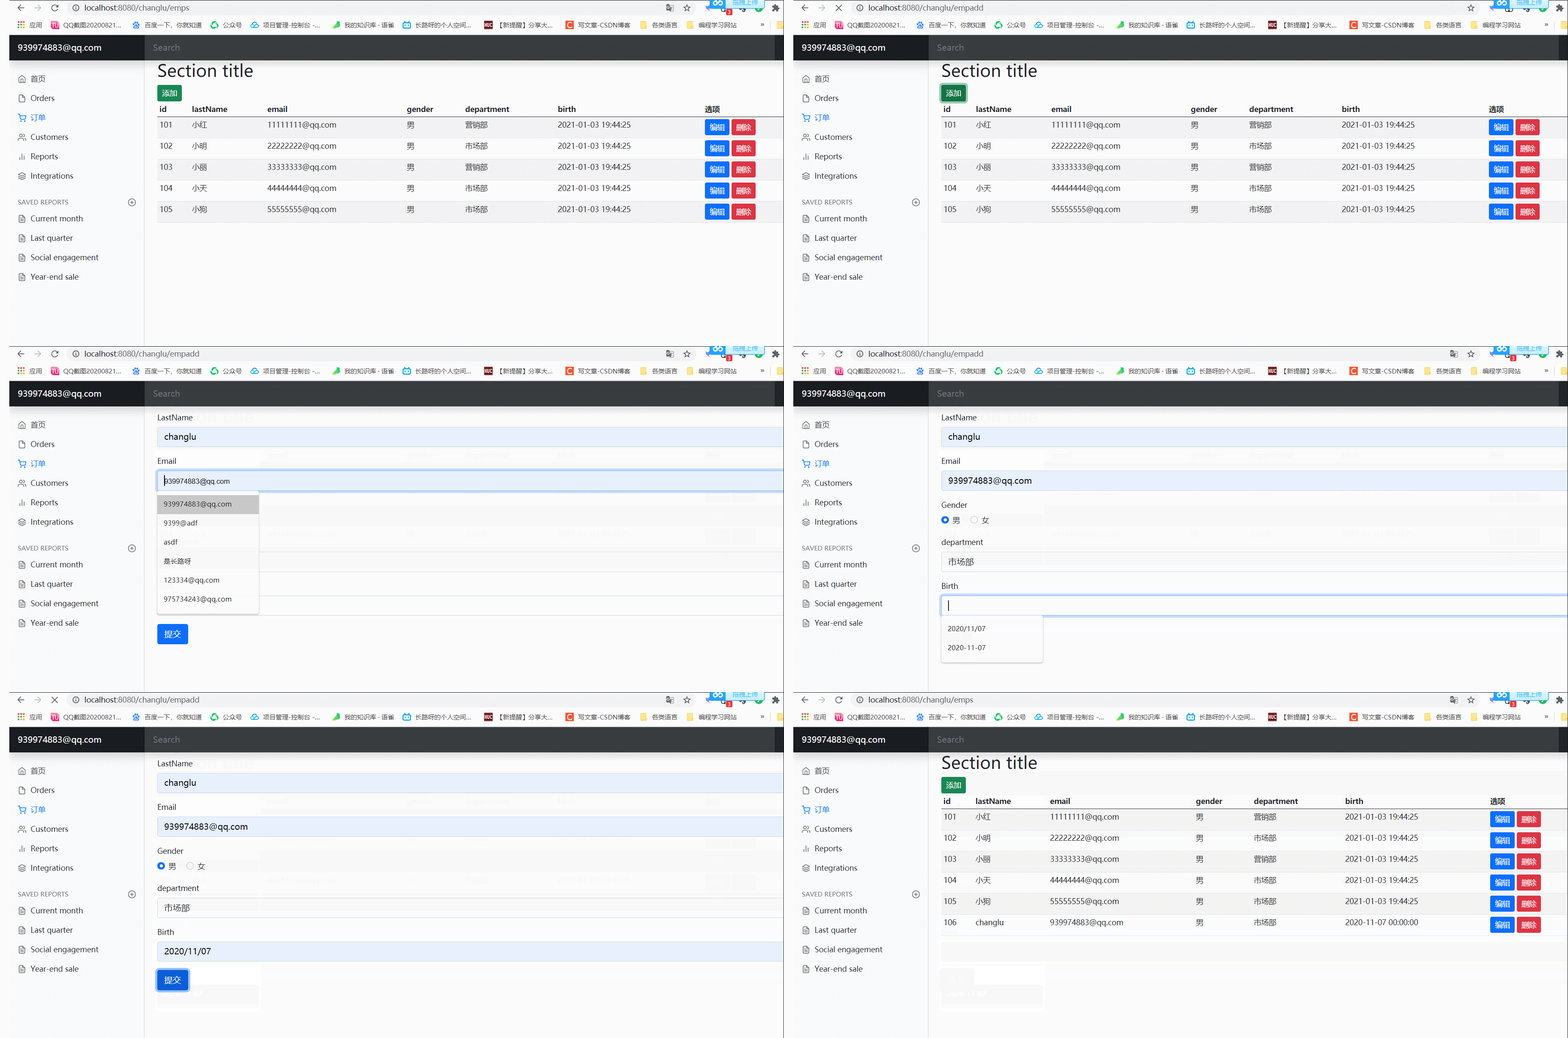
首先大致介绍流程
- 需要创建一个新的添加页面
add.html,并且在list.html基础上添加一个按钮用来跳转页面 - 整体是需要两个controller的,第一个是用来进行跳转到
add.html,其中需要controller原因是添加页面中需要选择部门,其中的遍历所有部门需要在controller中查询并返回到add.html。 - 第二个controller是为了填写完
add.html页面时,再次点击提交,controller中会执行保存该员工的信息到虚拟map数据结构中,进行重定向到员工列表展示页面(也经过了一个controller重新查询并跳转)。
list.html中的添加按钮:
<!-- 添加一个添加成员按钮-->
<div>
    <a th:href="@{/empadd}" class="btn btn-sm btn-success">添加</a>
</div>
add.html中的form表单:
<main class="col-md-9 ms-sm-auto col-lg-10 px-md-4">
    <!-- 添加一个表单 -->
    <form style="margin-top: 10px" method="post" th:action="@{/empadd}">
        <!-- 账号邮箱 -->
        <div class="mb-3">
            <label for="exampleInputEmail1" class="form-label">LastName</label>
            <input th:name="lastName" type="text" class="form-control" id="exampleInputEmail1" aria-describedby="emailHelp">
        </div>
        <div class="mb-3">
            <label for="exampleInputPassword1" class="form-label">Email</label>
            <input th:name="email" type="email" class="form-control" id="exampleInputPassword1">
        </div>

        <!-- 单选框 -->
        <div class="mb-3">
            <label for="exampleInputPassword1" class="form-label">Gender</label><br>
            <div class="form-check form-check-inline">
                <input th:name="gender" class="form-check-input" type="radio" id="inlineCheckbox1"  value="0">
                <label class="form-check-label" for="inlineCheckbox1">男</label>
            </div>
            <div class="form-check form-check-inline">
                <input th:name="gender" class="form-check-input" type="radio" id="inlineCheckbox2"  value="1">
                <label class="form-check-label" for="inlineCheckbox2">女</label>
            </div>
        </div>

        <!-- 选择框 -->
        <div class="mb-3">
            <label for="exampleInputPassword1" class="form-label">department</label><br>
            <select class="form-select" aria-label="Default select example" th:name="department.id">
                <!-- 进行遍历所有部门 -->
                <option th:each="dep:${deps}" th:text="${dep.getDepartmentName()}" th:value="${dep.getId()}">Open this select menu</option>
            </select>
        </div>

        <!-- 生日日期-->
        <div class="mb-3">
            <label for="exampleInputPassword1" class="form-label">Birth</label><br>
            <input th:name="birth" type="text" class="form-control" aria-describedby="emailHelp">
        </div>

        <button type="submit" class="btn btn-primary">提交</button>
    </form>
两个controller:控制跳转页面及重定向(保存employee)
@Controller
public class EmployeeController {
    @Autowired
    private EmployeeDao employeeDao;

    @Autowired
    private DepartmentDao departmentDao;

    ...

    //跳转到添加页面
    @GetMapping("/empadd")
    public String toAddPage(Model model){
        //查询部门信息,并保存到request域中,跳转视图
        Collection<Department> departments = departmentDao.queryAllDepartment();
        model.addAttribute("deps",departments);
        return "emp/add";
    }

    //执行添加员工操作,并且重新加载并展示所有员工信息
    @PostMapping("/empadd")
    public String addEmployee(Employee employee){
        employeeDao.addEmployee(employee);
        System.out.println("employee=>"+employeeDao);
        //重定向
        return "redirect:/emps";
    }
}
效果:
额外注意点
若是提交表单中,对于日期格式是很严格的,springboot中默认为yyyy/MM/dd,若是填写了如1998-07-20就会报错
解决方案:
yaml配置文件中进行配置指定的日期格式即可
# 提交表单中默认日期格式
spring.mvc.format.date=yyyy-MM-dd

4、修改员工
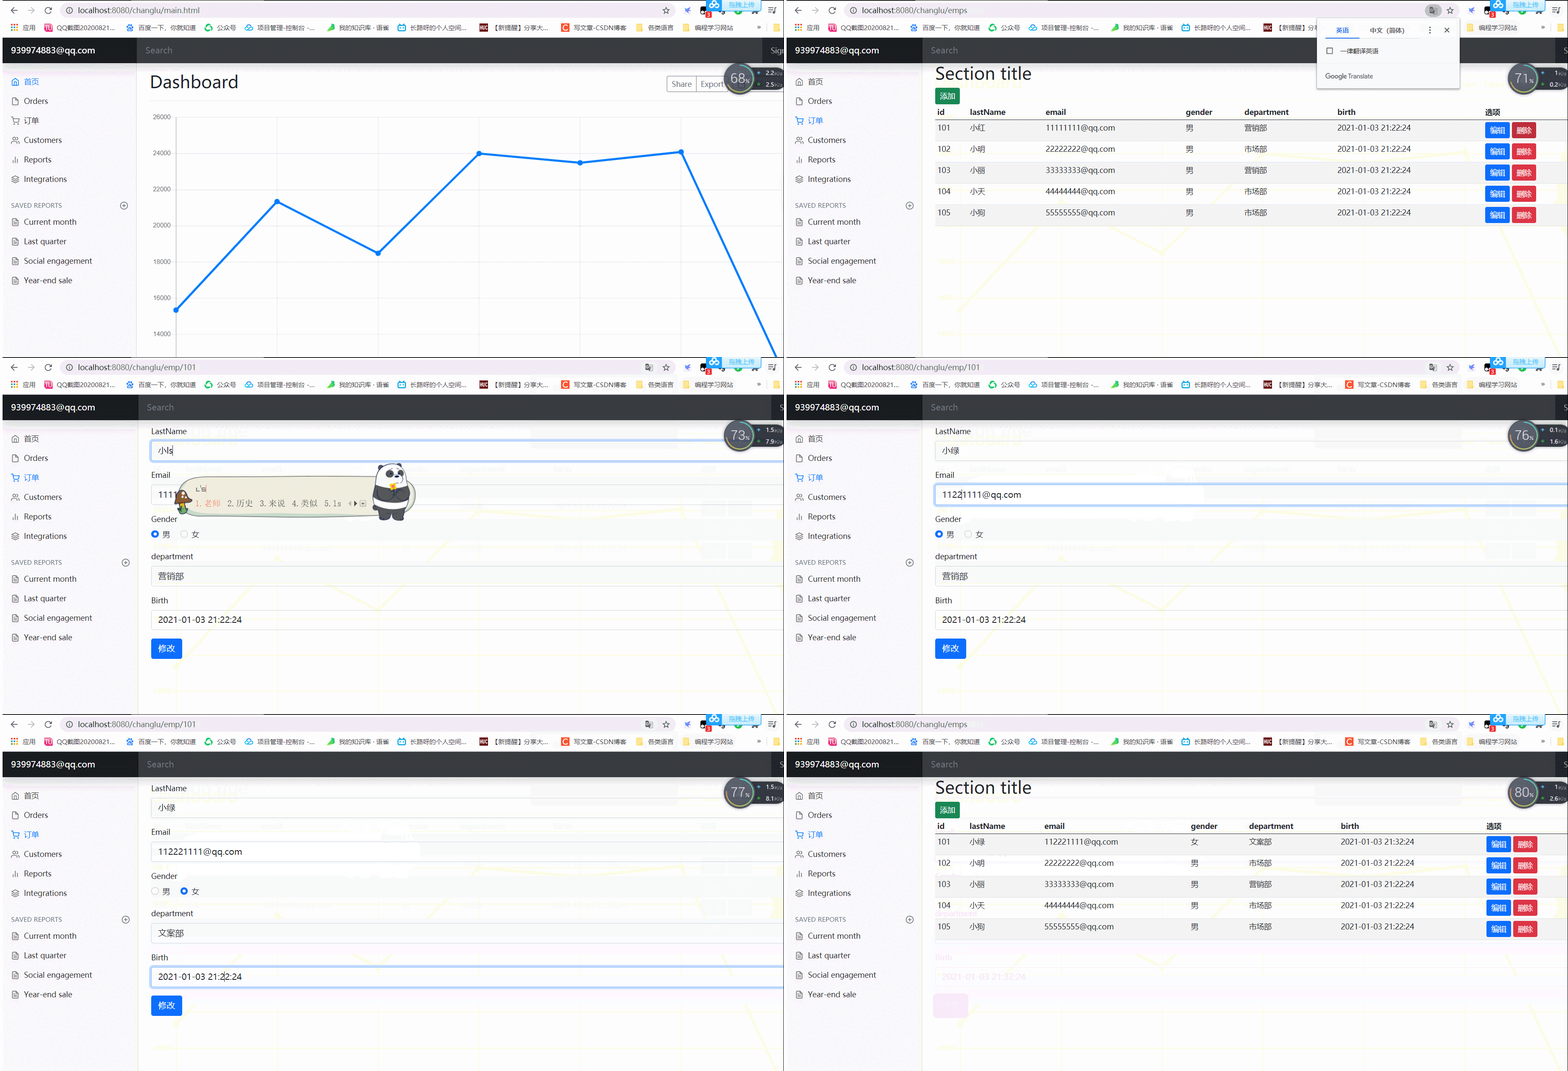
前提描述
- 在list.html页面中点击指定员工的编辑按钮跳转到
update.html中,其中经过一个controller,该controller根据请求参数id来查询到指定员工的信息以及查询所有的部门信息,返回到update.html中 - 根据传来的员工信息及部门信息,预先填写好指定的表单,点击修改按钮前,注意添加一个隐藏域用来传递员工的id
- 因为我们模拟数据的是HashMap,添加员工使用put方法,若是key不变,重复put达到一个覆盖效果,也就是更新的效果,秒妙妙!!!,我们复用一个controller中的添加方法即可!!!
list.html中的编辑按钮:rest风格
<!-- rest风格请求,例如:http://localhost:8080/changlu/emp/101 -->
<a class="btn btn-sm btn-primary" th:href="@{/emp/}+${emp.getId()}">编辑</a>
Controller编写:
@Controller
public class EmployeeController {

    @Autowired
    private EmployeeDao employeeDao;

    @Autowired
    private DepartmentDao departmentDao;

    ...

    //跳转update页面 rest风格,获取id值
    @GetMapping("/emp/{id}")
    public String toUpdatePage(@PathVariable("id")Integer id,Model model){
        //根据参数id查询指定的员工信息
        Employee employee = employeeDao.queryEmployeeById(id);
        model.addAttribute("emp",employee);
        //查询所有的部门信息,之后需要遍历部门的名称
        Collection<Department> departments = departmentDao.queryAllDepartment();
        model.addAttribute("deps",departments);
        return "emp/update";
    }
}
update.html:添加一个隐藏域以及实现自动填写表单
 <!-- 添加一个隐藏域,用于传输id, -->
<input type="hidden" name="id" th:value="${emp.getId()}">

 <!-- 覆盖lastName -->
<input th:value="${emp.getLastName()}" th:name="lastName" ...>

 <!-- 覆盖单选框,使用到判断 -->
<input th:checked="${emp.getGender()==0}" th:name="gender"

 <!-- 覆盖选择框,使用到判断 -->
<select class="form-select" aria-label="Default select example" th:name="department.id">
	<option th:selected="${emp.getDepartment().getId()==dep.getId()}" th:each="dep:${deps}" ...>

 <!-- 覆盖日期框,使用到判断 -->
<input th:value="${#dates.format(emp.getBirth(),'yyyy-MM-dd HH:mm:ss')}" th:name="birth" ...>
效果:
5、删除员工
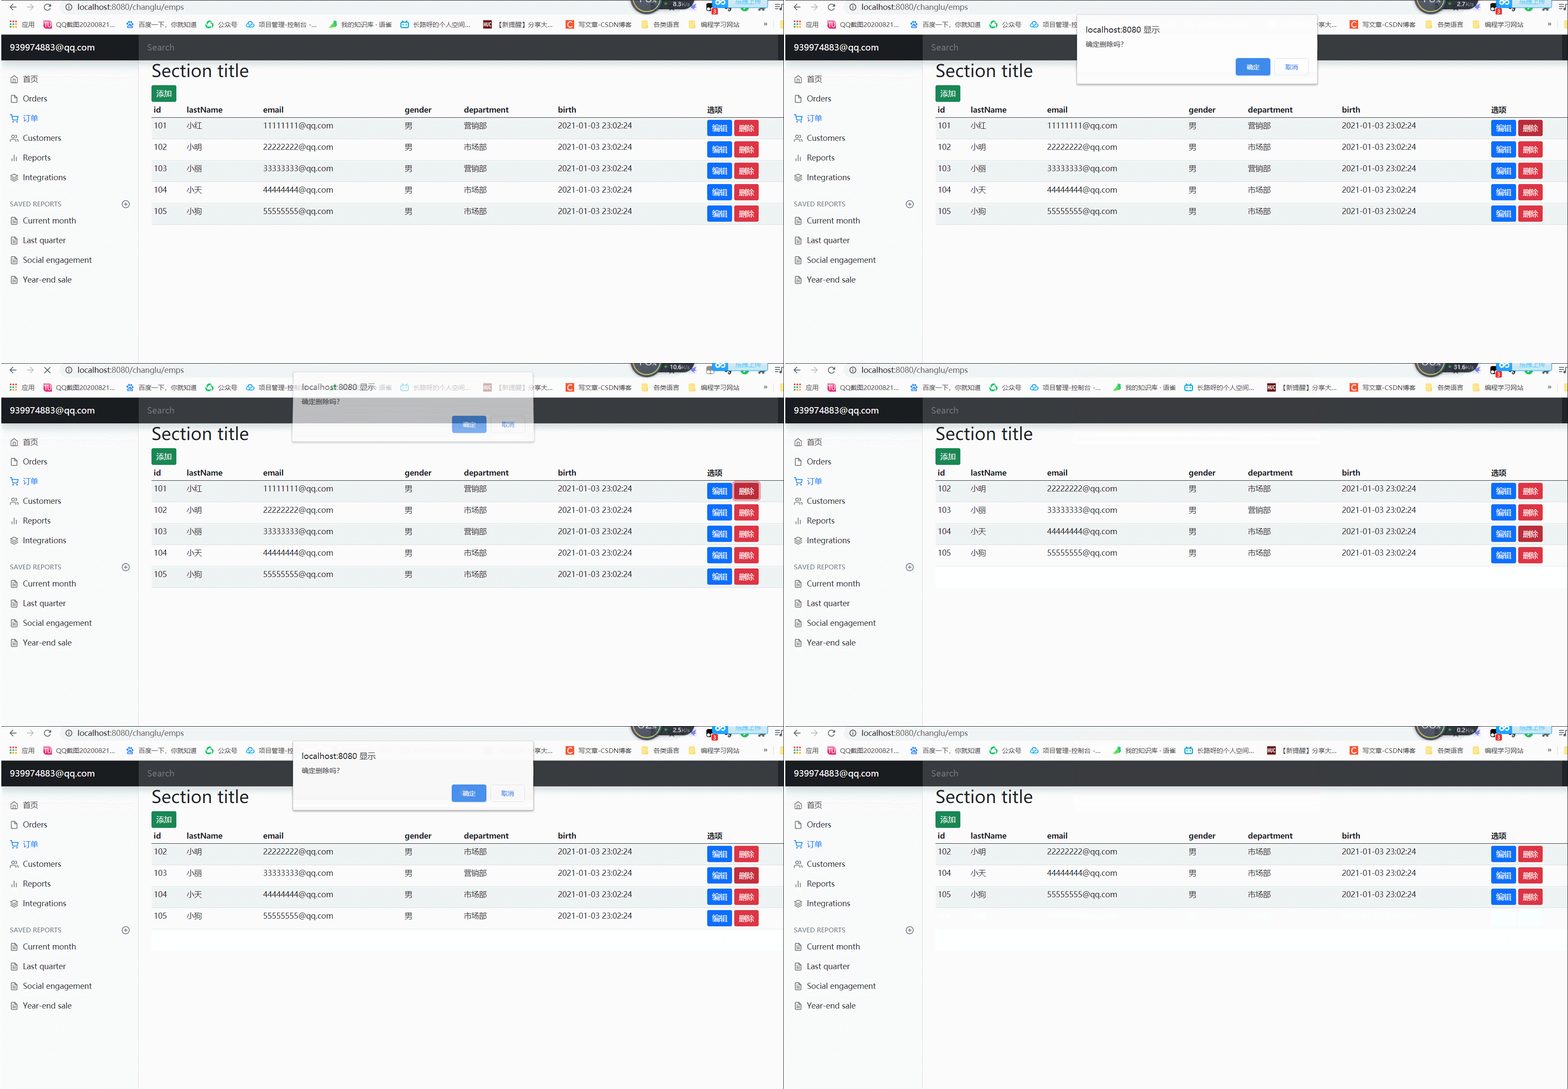
前提描述
- 在
list.html中添加一个按钮即可,使用jquery来添加一个确定事件 - 发送请求到controller进行删除即可,最后重定向到列表展示页面
list.html
<!-- 绑定弹窗事件,用于删除的确认与否 -->
<script src="https://cdn.bootcdn.net/ajax/libs/jquery/3.5.1/jquery.js"></script>
<script>
    $(function () {
        $("a[class='btn btn-sm btn-danger']").click(function () {
            return confirm("确定删除吗?");
        });
    });
</script>

<!-- 同样是rest风格进行请求 -->
<a class="btn btn-sm btn-danger" th:href="@{/delemp/}+${emp.getId()}">删除</a>
Controller类:
@Controller
public class EmployeeController {

    @Autowired
    private EmployeeDao employeeDao;

    @Autowired
    private DepartmentDao departmentDao;

    ...

    //删除员工
    @GetMapping("/delemp/{id}")
    public String delEmp(@PathVariable("id") Integer id){
        employeeDao.deleteEmployeeById(id);
        //重定向到展示列表controller并跳转展示页
        return "redirect:/emps";
    }
}
效果:
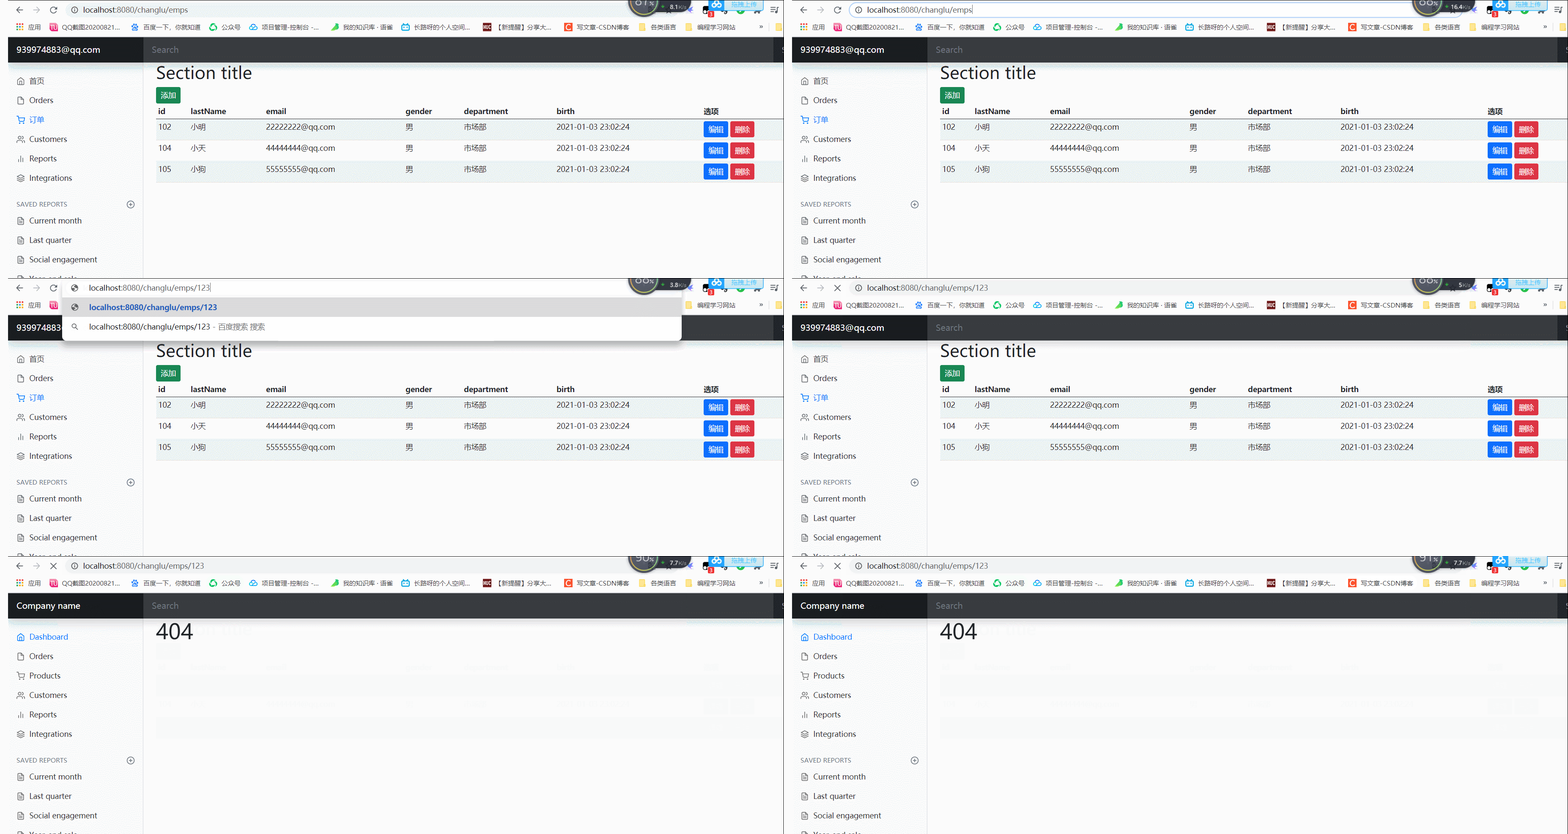
错误页
在springboot中,我们可以将错误页放置到template目录中的error目录里,当访问出现对应异常时会跳转到指定错误页面!!!

效果:
注销登录
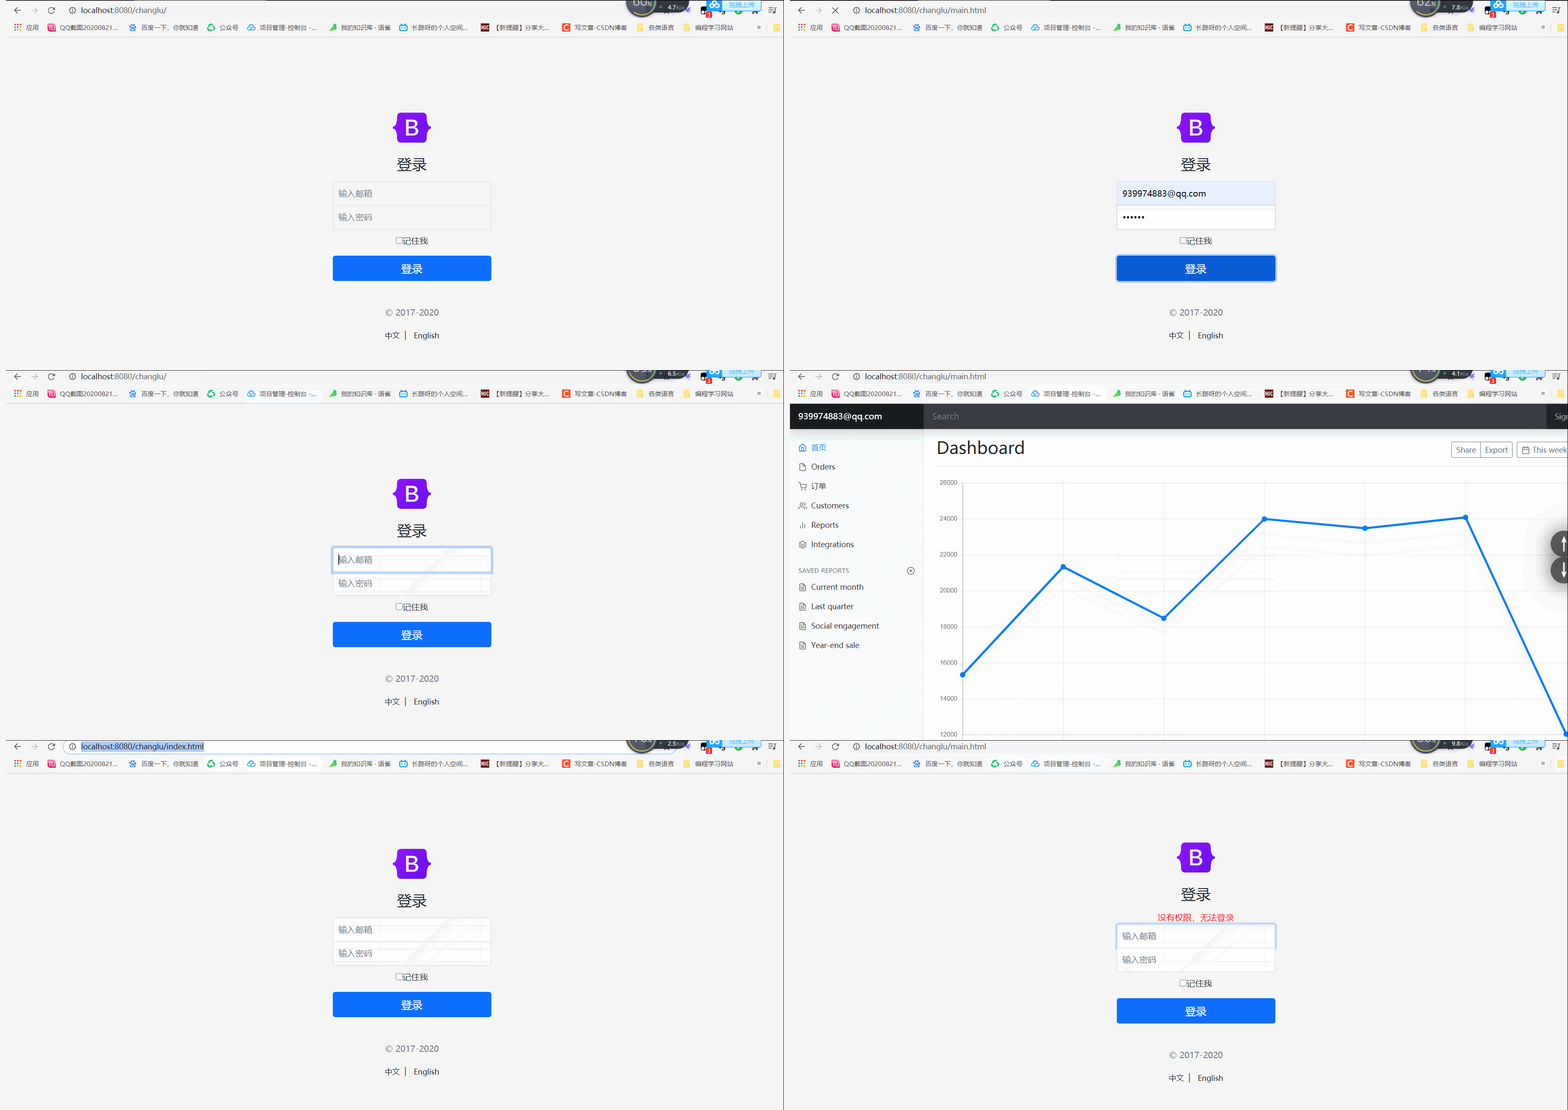
前面我们在登录成功时生成session,后面又使用了拦截器对部分页面进行拦截。那么我们再添加一个注销的功能
/template/commons/commons.html
<!-- 这是headBar部分的标签 -->
<a class="nav-link" th:href="@{/logout}">Sign out</a>
loginController:使用invalidate()立即销毁session即可
@RequestMapping("/logout")
public String logout(HttpSession session){
    //立即销毁session
    session.invalidate();
    return "redirect:/index.html";
}
效果:点击的是右上角的sign out
注意点
- controller中重定向如:
return “redirect:/emps”:后需要有/,会自动调整虚拟目录的名称(根据template的目录跳转而不是请求) - 若只是普通跳转视图层:
return "emps",不需要加/ - href的话,thymeleaf中
th:href="@{/emps}",加不加/都没关系,自动定位到虚拟目录后

- ModelAndView视图使用
setViewName("error/error")设置。
- 点赞
- 收藏
- 关注作者


评论(0)