Spring5本地源码构建
@[toc]
一、Spring源码构建
1.1、构建过程
1、配置好Gradle(版本为6.0以下):编译成功的由5.6.4【高版本不行已测试过】
2、到Spring官网来进行下载源码:Spring仓库

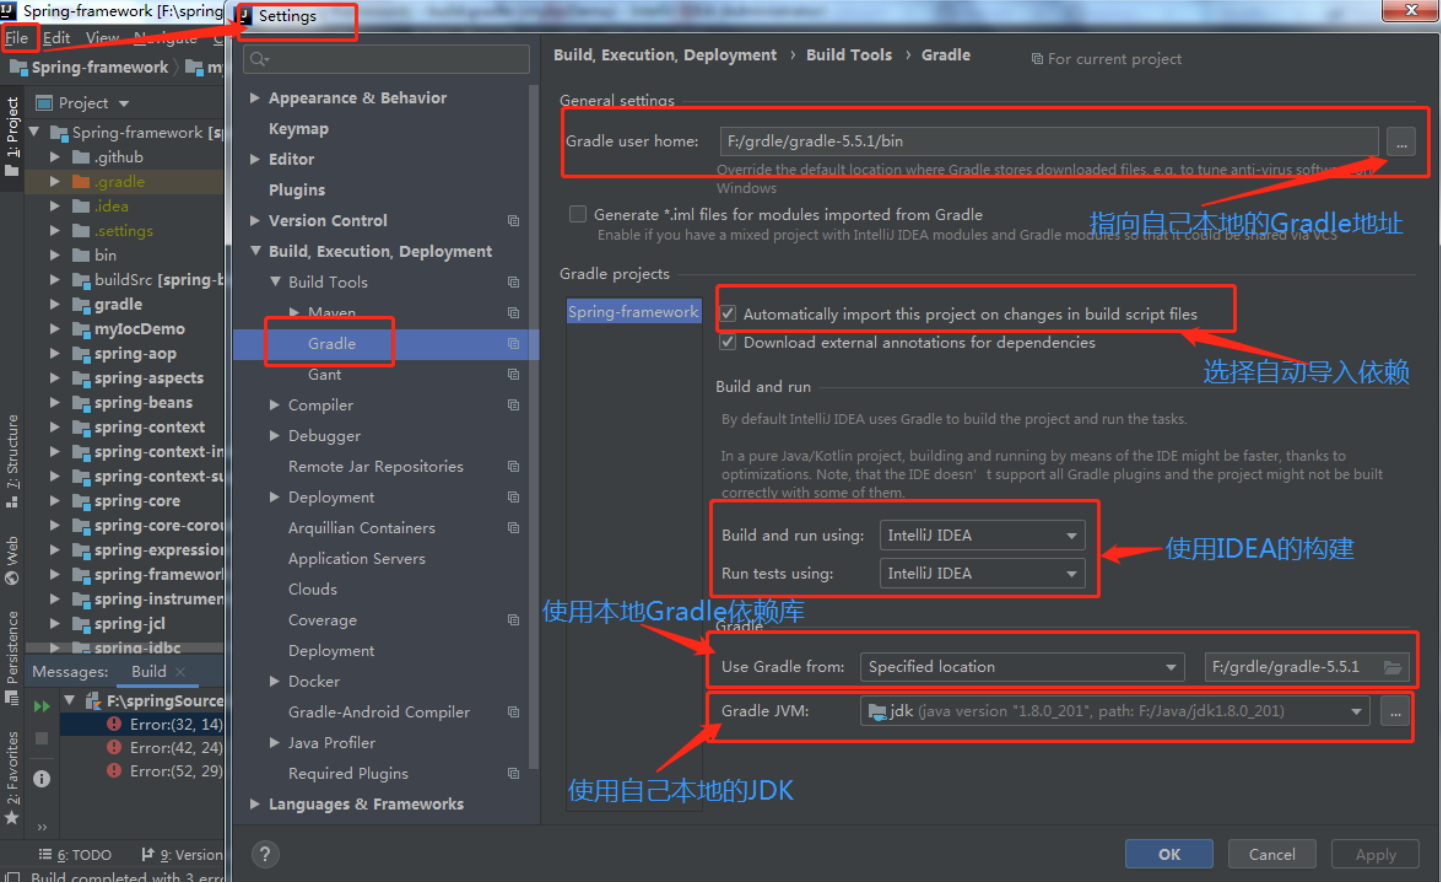
3、下载完成之后使用IDEA来打开,接着我们来配置IDEA中的Gradle
根据下图进行配置即可,引用 Spring源码调试环境搭建
4、成功编译结果

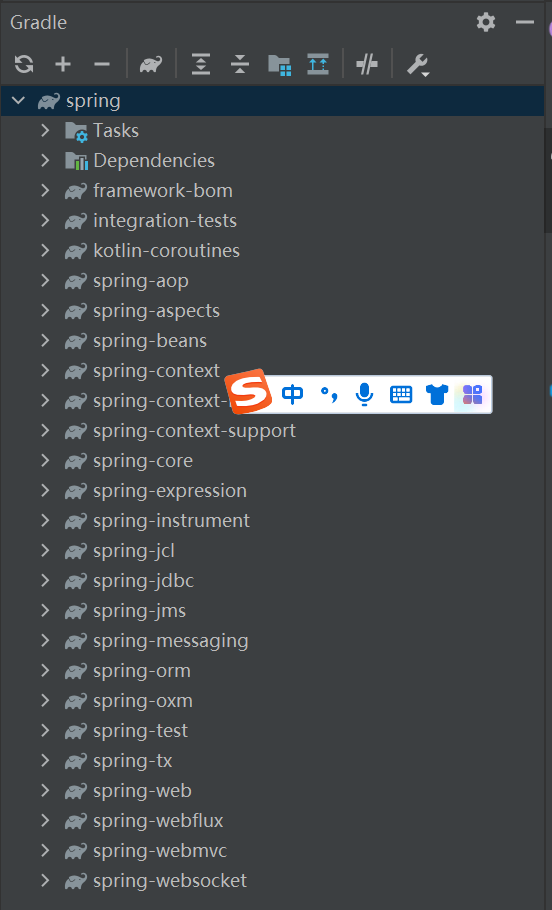
编译结束以后,选择项目右侧的gradle,如出现以下视图,则说明编译成功
1.2、构建过程中问题整理
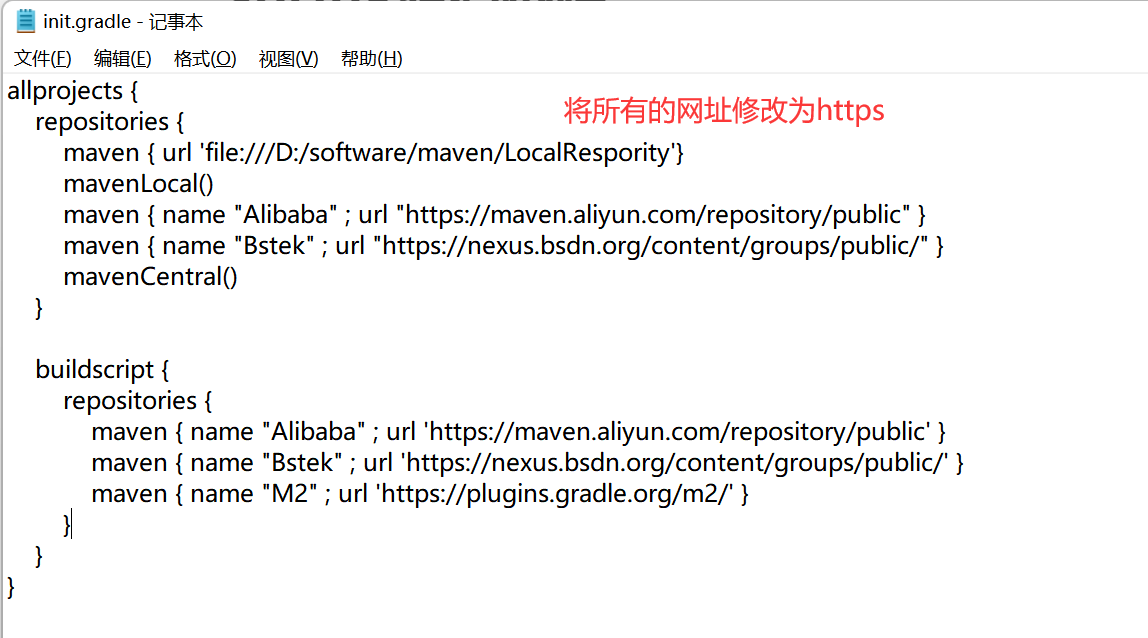
①gradle的url配置不允许为http
原因:1:29 PM Gradle sync failed: Using insecure protocols with repositories, without explicit opt-in, is unsupported. Switch Maven repository ‘Bstek(http://nexus.bsdn.org/content/groups/public/)’ to redirect to a secure protocol (like HTTPS) or allow insecure protocols. 
解决方案:将原本的gradle配置中的url都改为https
②Gradle的版本不能超过6.0及以上
原因:1:33 PM Gradle sync failed: The build scan plugin is not compatible with Gradle 6.0 and later.

解决方案:更改版本为5.6
③git相关报错(Process ‘command ‘git’’ finished with non-zero exit value 128)

说明:git的问题,暂时还不知道如何解决,不影响构建。
看到BUILD SUCCESSFUL说明已经编译成功。
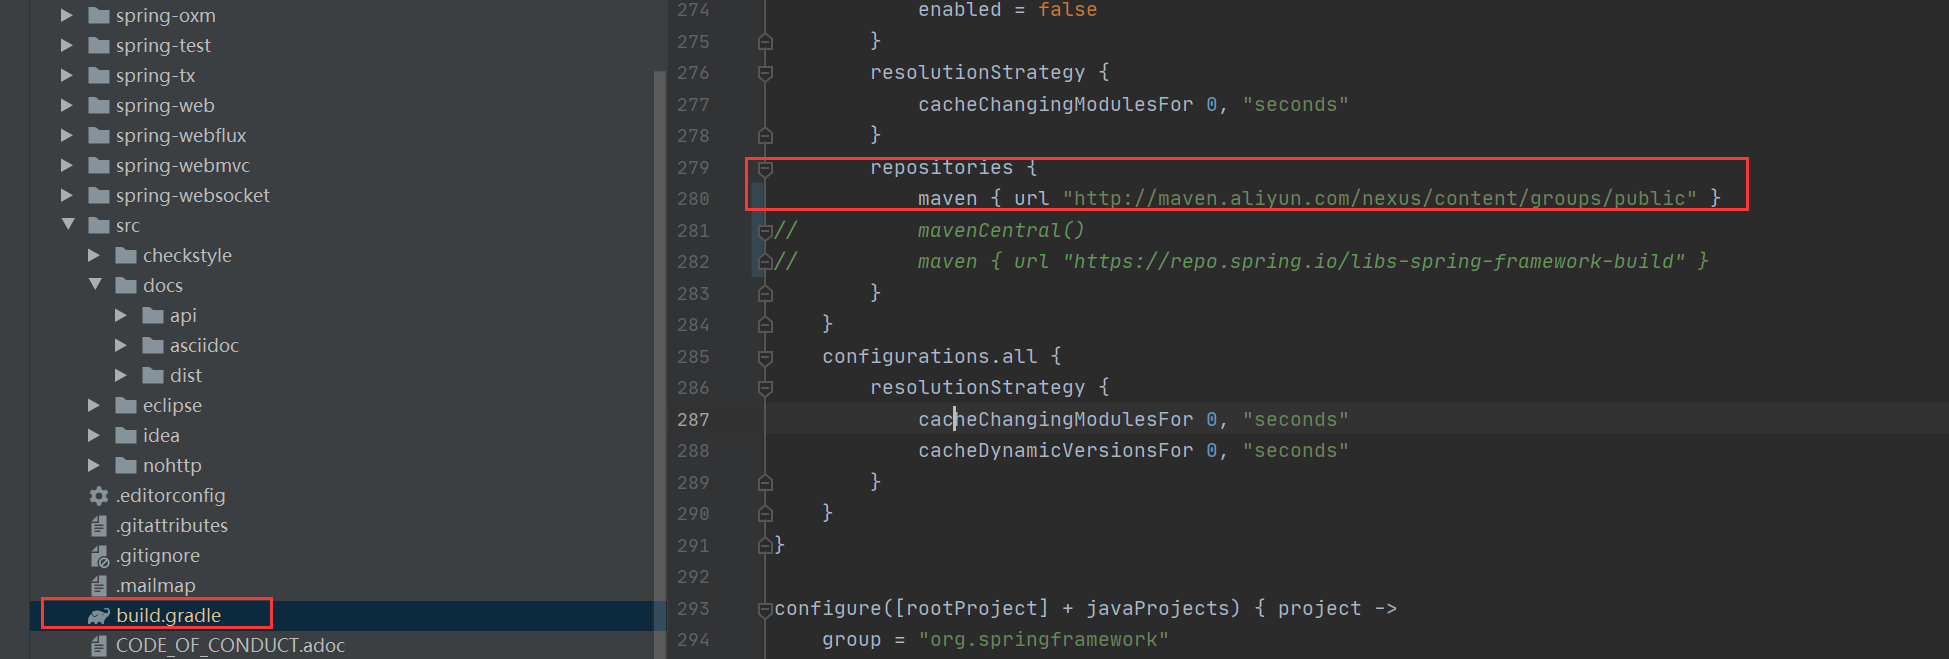
④导包速度很慢:修改spring项目中的build.gradle设置镜像源
搜索repositories,来进行修改替换
maven { url "http://maven.aliyun.com/nexus/content/groups/public" }
二、添加测试模块
参考文章:Spring搭建本地源码调试环境
2.1、添加过程
2.1.1、创建module,选择gradle
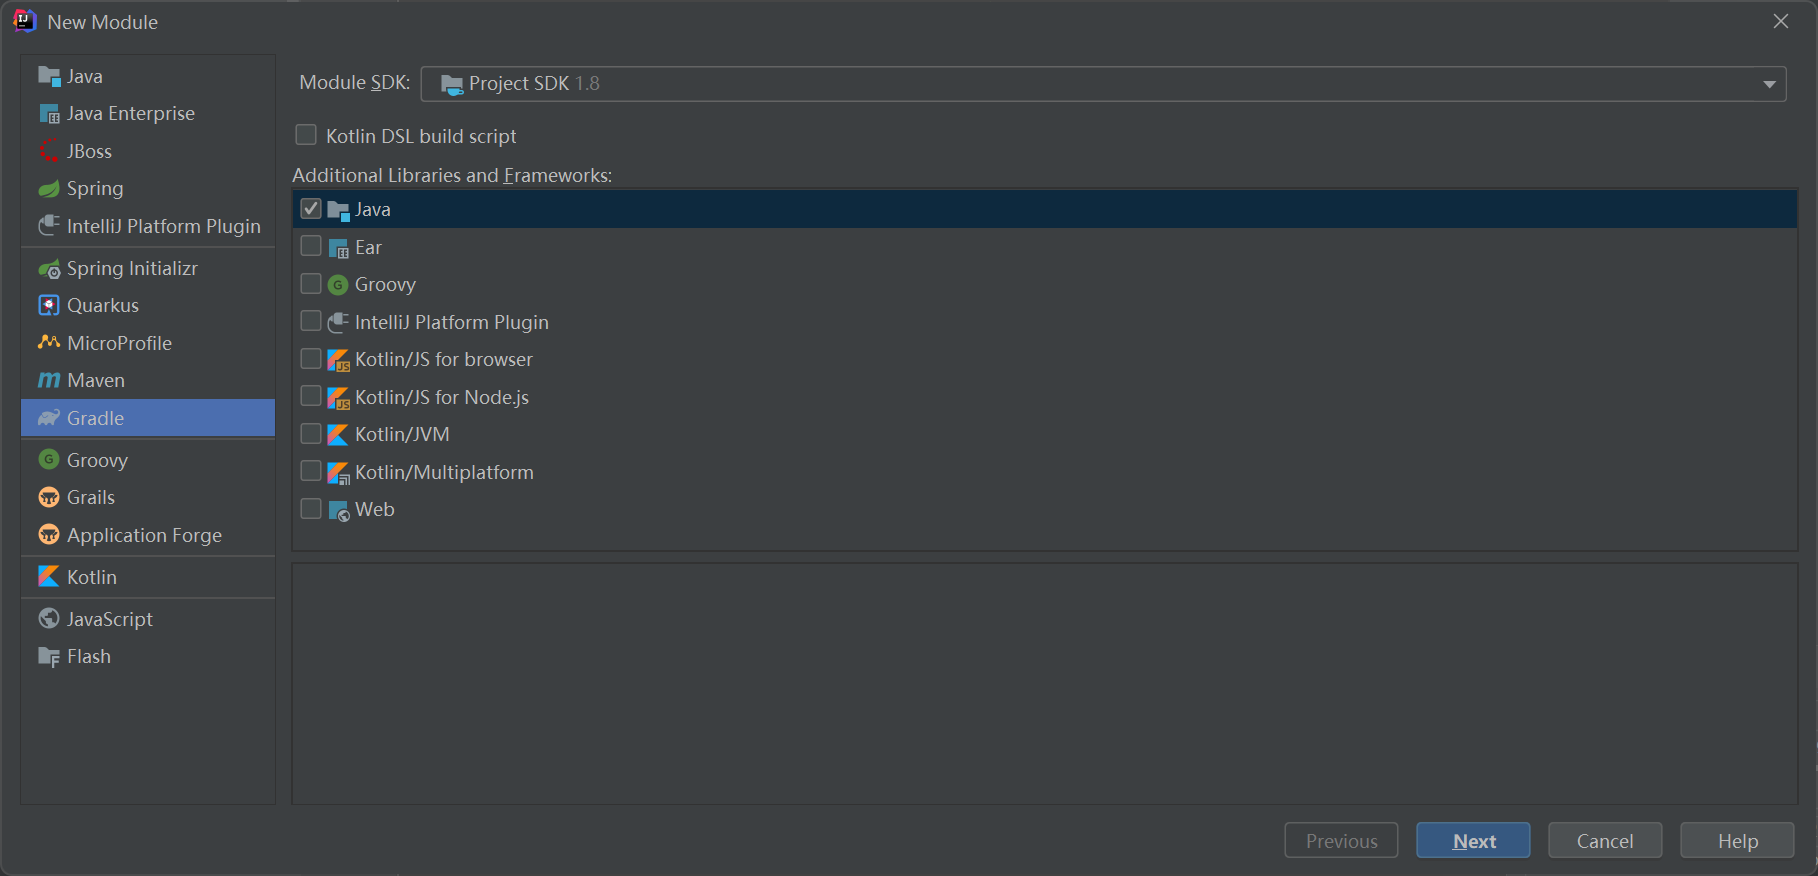
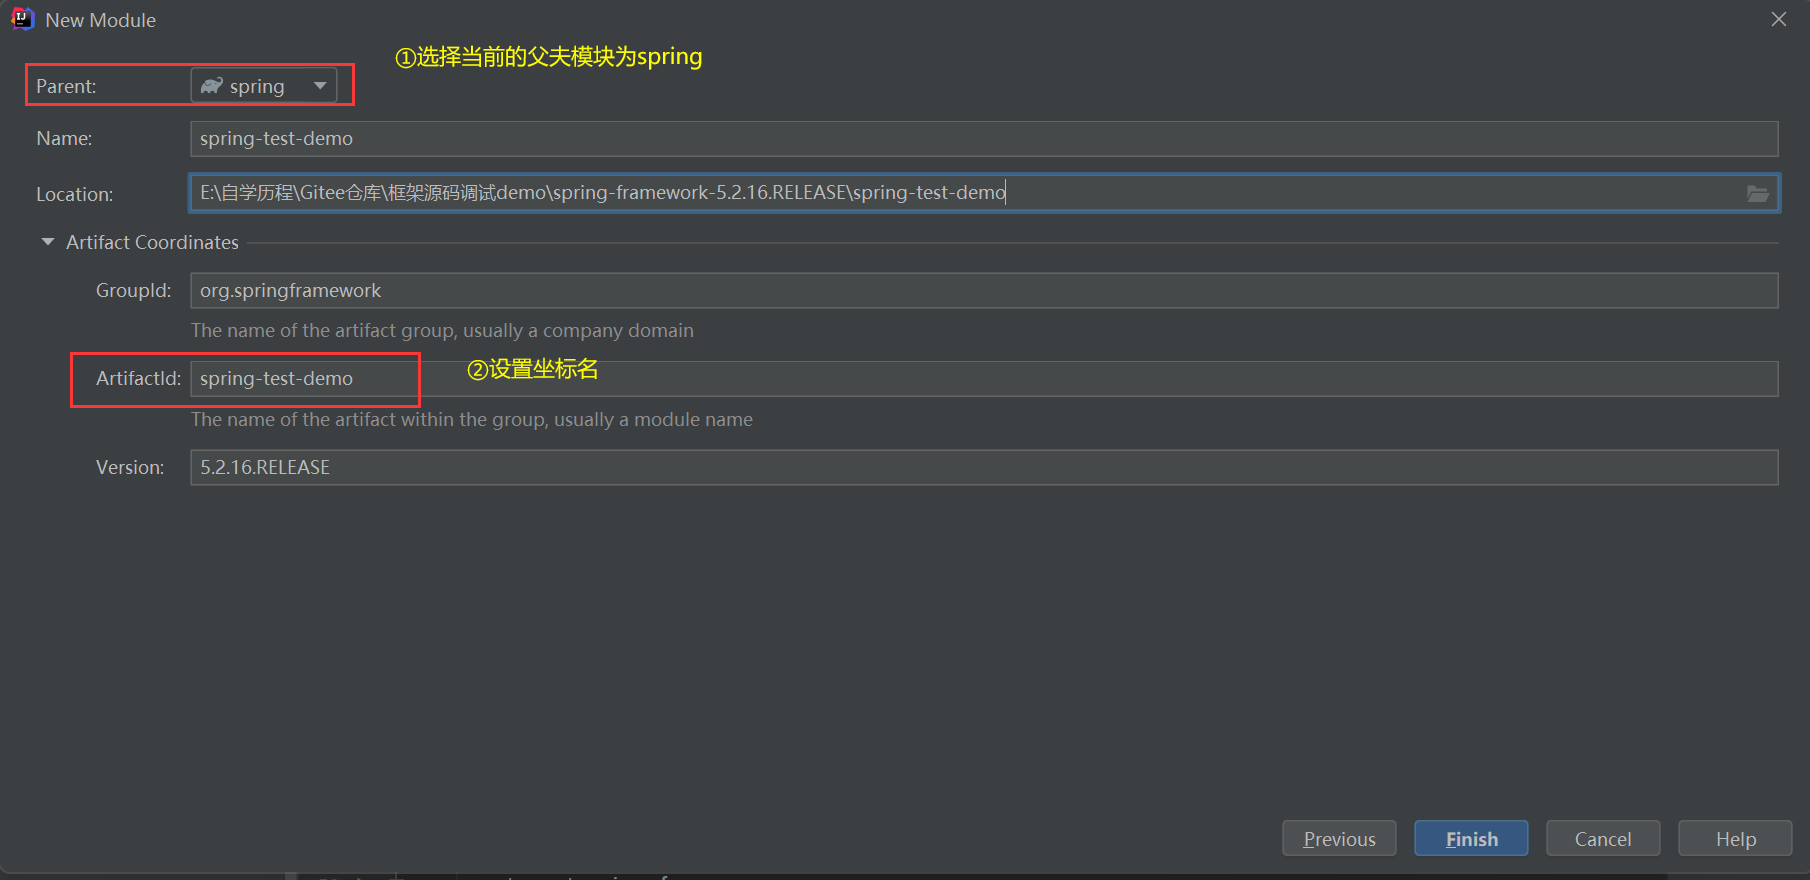
点击finsh,此时我们的模块已经创建完成如下:
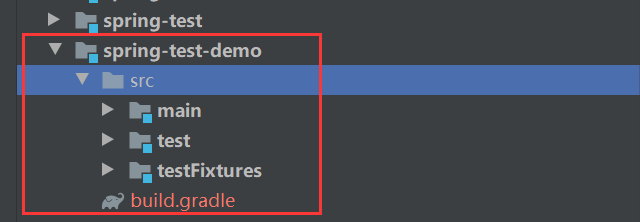
你可以在项目目录中下的settings.gradle文件里看到添加了这个模块:

2.1.2、在当前module中的配置文件里添加依赖

dependencies {
    //添加依赖
    compile(project(":spring-beans"))
    compile(project(":spring-core"))
    compile(project(":spring-context"))
    testCompile group: 'junit', name: 'junit', version: '4.12'
}
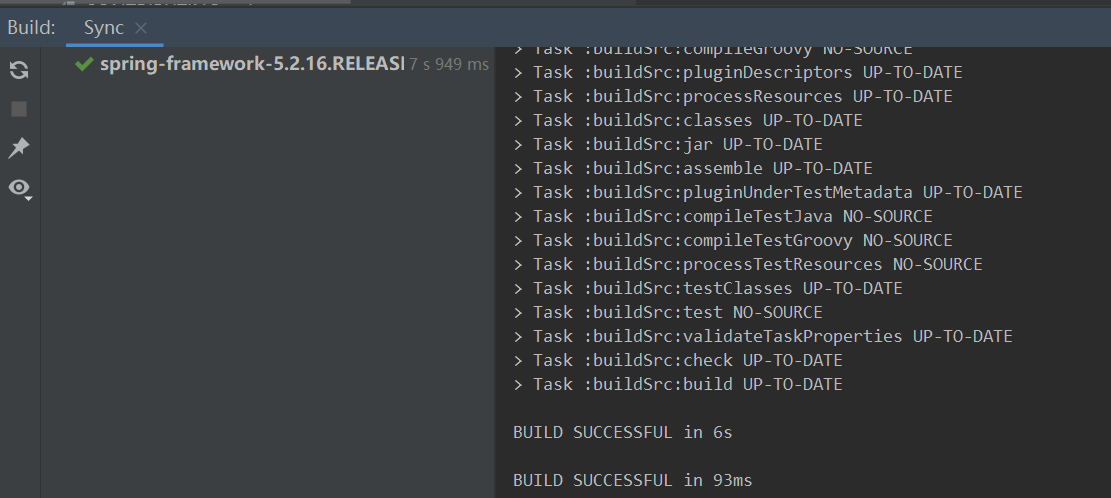
然后点击右边的build即可进行添加依赖。
若是出现success,表示引入成功:
2.1.3、编写bean配置文件,来进行测试
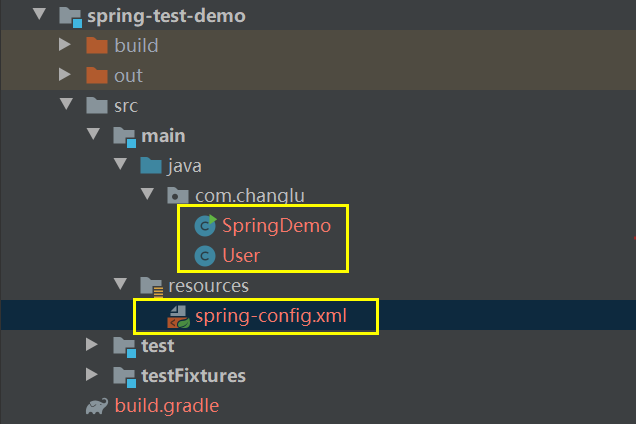
①添加Spring的配置文件:spring-config.xml
<?xml version="1.0" encoding="UTF-8"?>
<beans xmlns="http://www.springframework.org/schema/beans"
	   xmlns:xsi="http://www.w3.org/2001/XMLSchema-instance"
	   xsi:schemaLocation="http://www.springframework.org/schema/beans http://www.springframework.org/schema/beans/spring-beans.xsd">

	<!--配置Bean: User-->
	<bean id="user" class="com.changlu.User"/>

</beans>
②创建一个User对象
package com.changlu;

/**
 * @ClassName User
 * @Author ChangLu
 * @Date 4/30/2022 1:07 PM
 * @Description 用户类
 */
public class User {

	public void sayHello(){
		System.out.println("hello,spring!");
	}

}
③编写测试方法
package com.changlu;

import org.springframework.context.ApplicationContext;
import org.springframework.context.support.ClassPathXmlApplicationContext;

/**
 * @ClassName SpringDemo
 * @Author ChangLu
 * @Date 4/30/2022 1:08 PM
 * @Description 测试类
 */
public class SpringDemo {
	public static void main(String[] args) {
		ApplicationContext context = new ClassPathXmlApplicationContext("classpath:spring-config.xml");
		User user = (User) context.getBean("user");
		user.sayHello();
	}
}
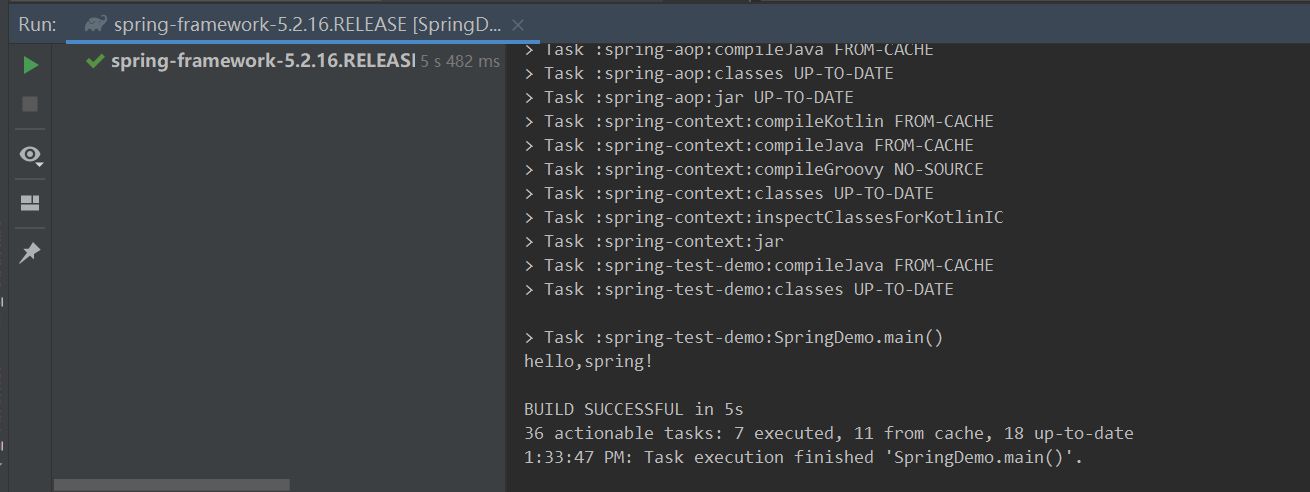
接着运行即可:
build过程报错
问题1、Could not find com.ibm.websphere:uow:6.0.2.17.
原因:之前build.gradle中镜像地址改成了阿里云的,把它自己的注释掉了

解决方式:把它原来的取消注释即可

2.2、解决运行main方法不编译整个项目的问题
参考文章:idea运行main方法或Test避免编译整个应用的方法、解决idea 运行main方法自动编译整个工程引发的问题
起因:在进行测试模块的main方法测试时点击main运行,发现要进行编译整个项目后才执行main()方法。
解决方案:
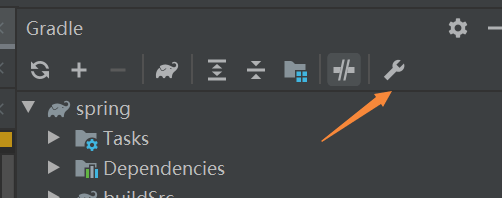
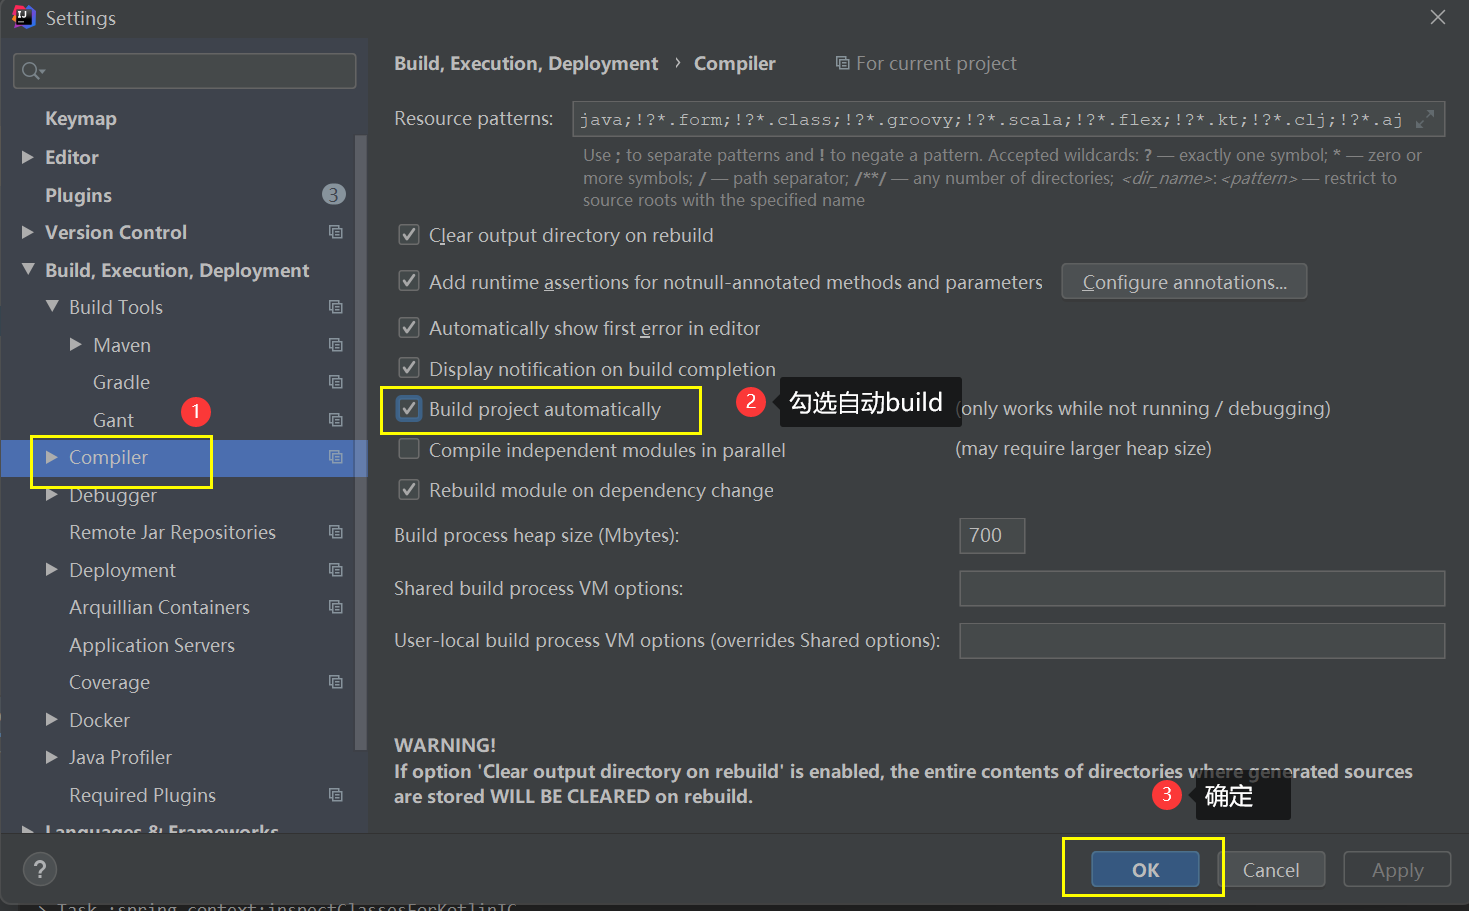
1、点击Gradle小扳手
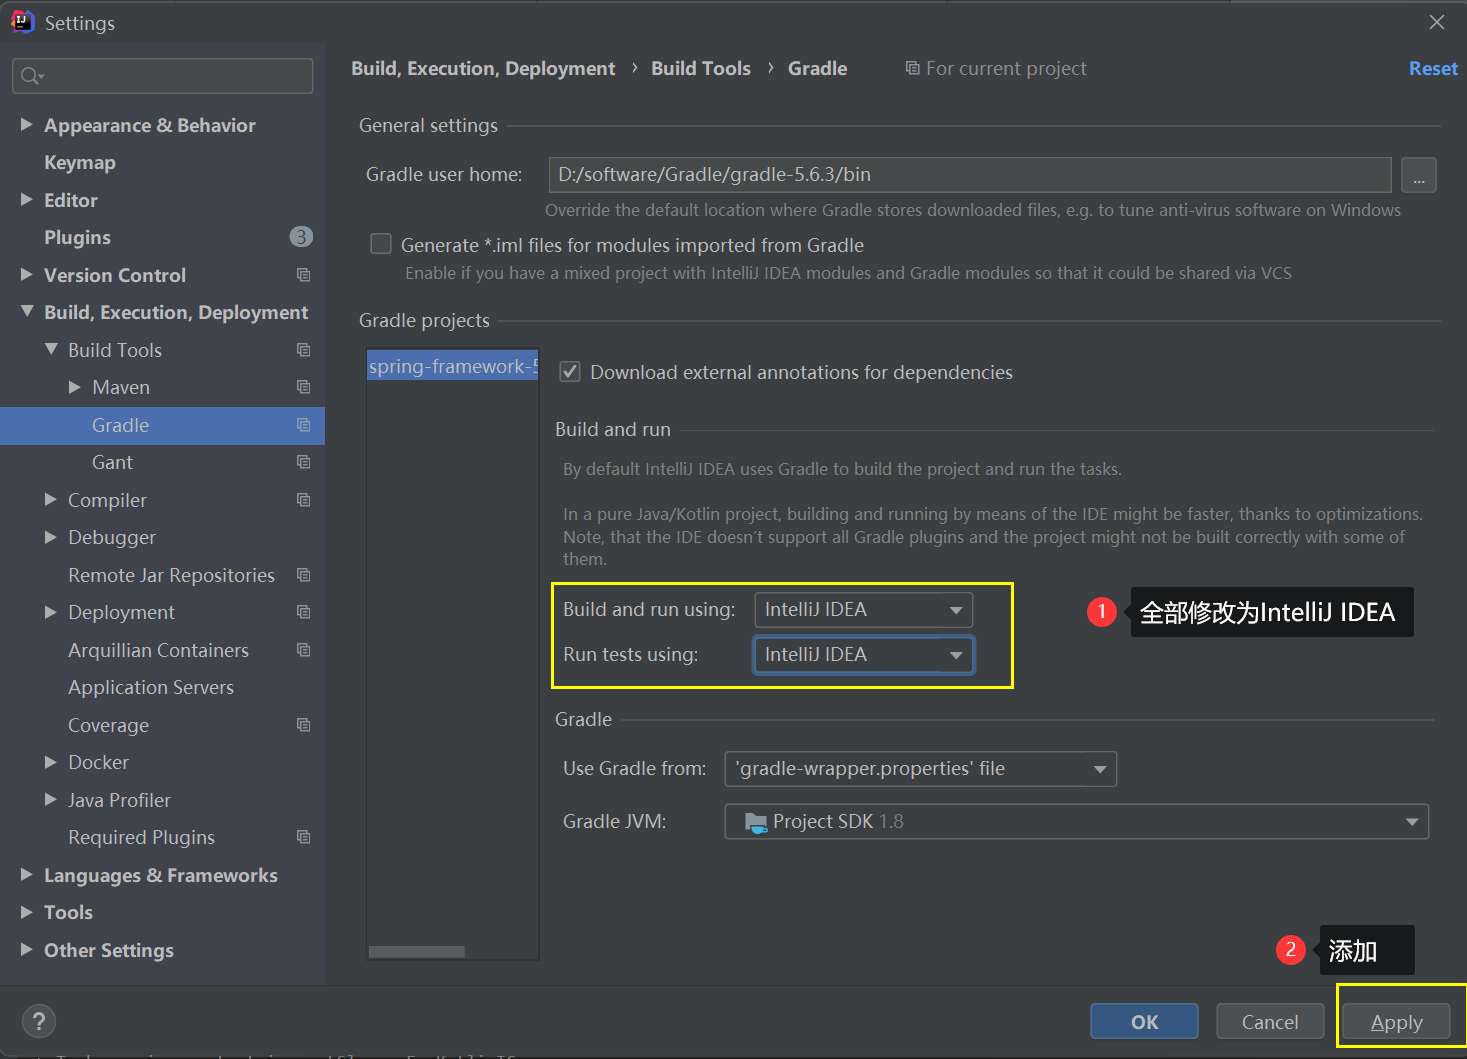
2、勾选settings里compiler中的自动配置
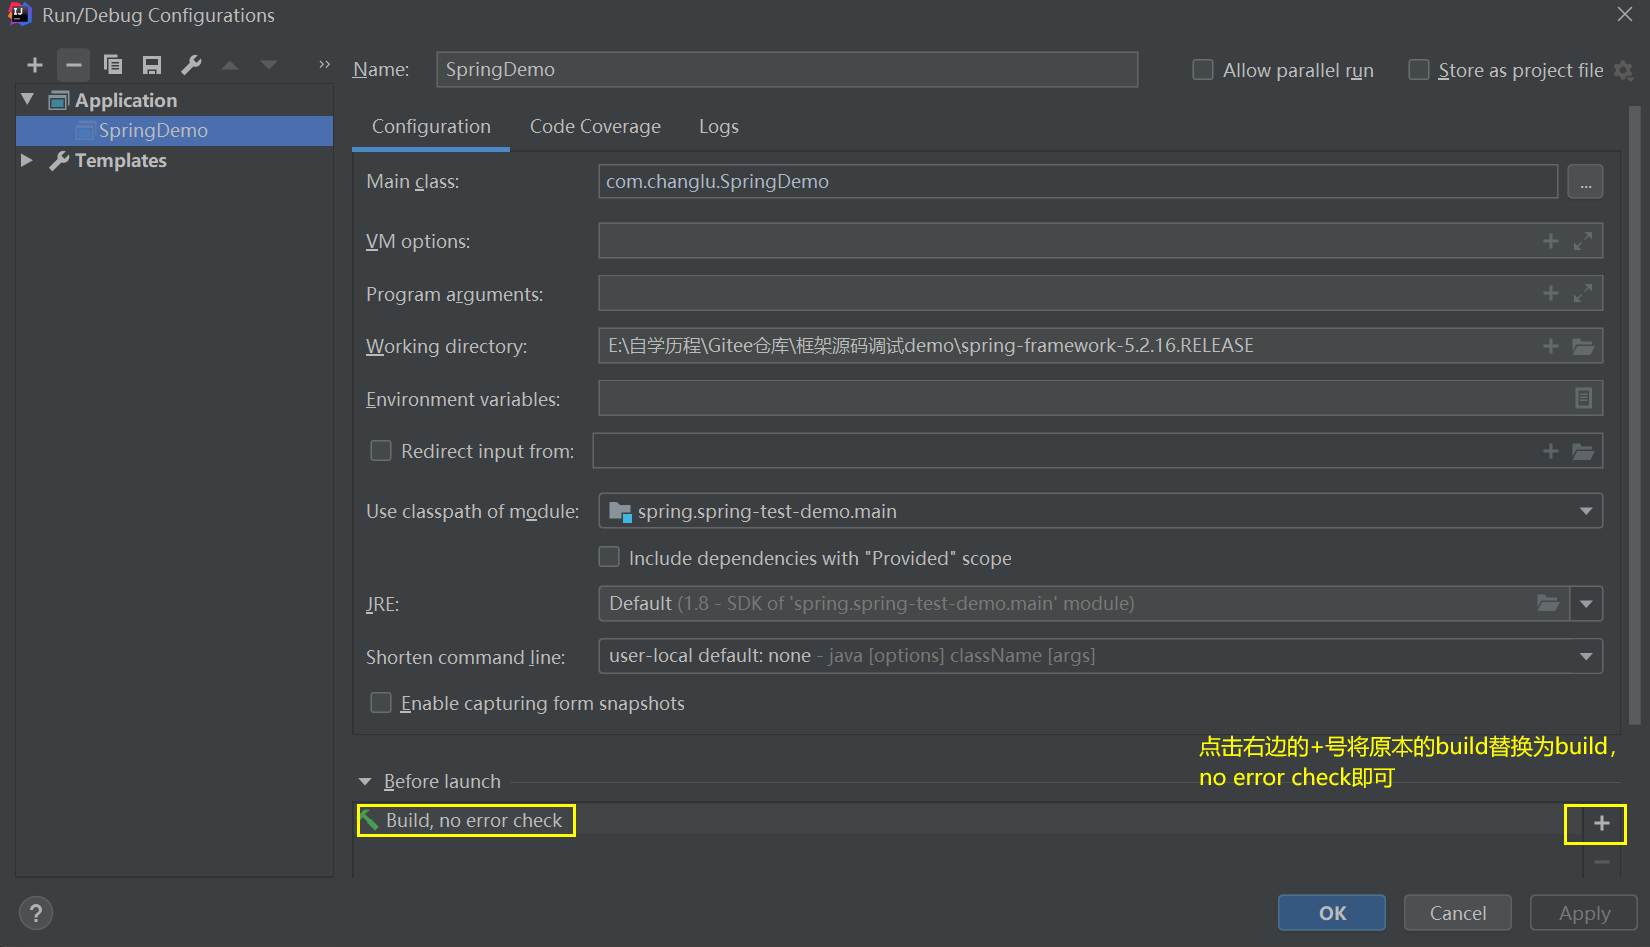
3、修改Application中的Before launch为Build no error check
修改这个的主要原因就是防止直接运行过程中出现其他模块的一些报错问题。
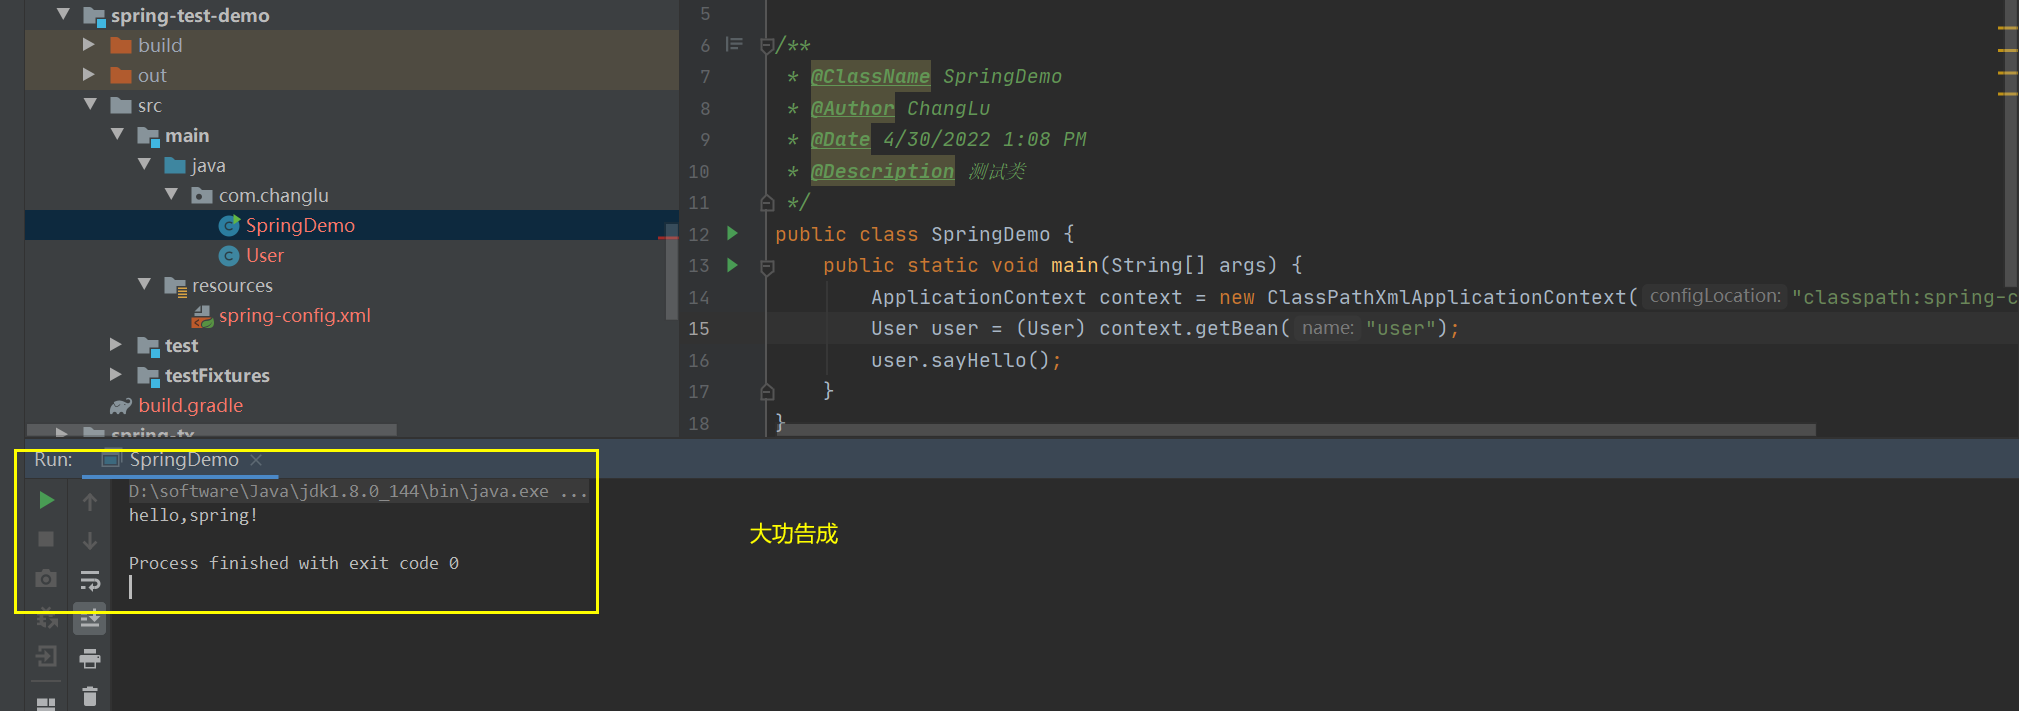
最后我们来运行一下:
参考文章
- 点赞
- 收藏
- 关注作者


评论(0)