Spring数据源配置

举报
执久呀 发表于 2022/10/22 21:04:05 2022/10/22
【摘要】 ​ 目录Spring相关的APIApplicationContext的继承体系ApplicationContext的实现类getBean()方法使用 Spring配置数据源(连接池)数据源的开发步骤 加载配置文件方式创建将DateSource的创建权交给Spring容器去完成抽取jdbc配置文件Spring相关的APIApplicationContext的继承体系applicationCon...

 目录


Spring相关的API

ApplicationContext的继承体系

ApplicationContext的实现类

getBean()方法使用

 Spring配置数据源(连接池)

数据源的开发步骤

 加载配置文件方式创建

将DateSource的创建权交给Spring容器去完成

抽取jdbc配置文件


Spring相关的API

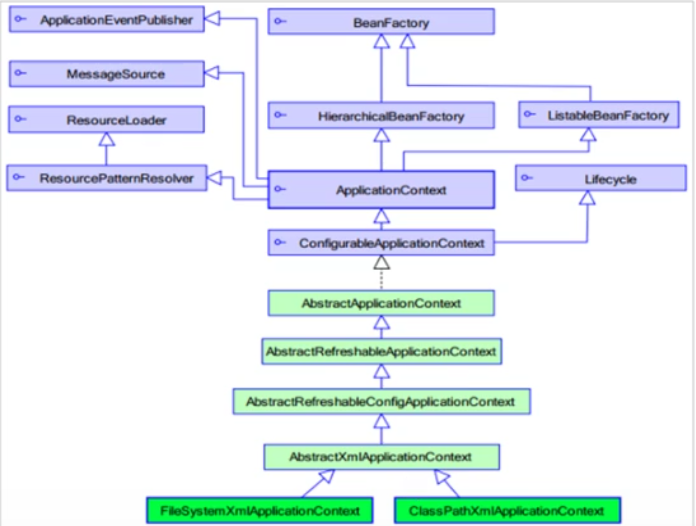
ApplicationContext的继承体系

applicationContext:接口类型,代表应用上下文,可以通过其实例获得Spring容器中的Bean对象

编辑


 紫色的为接口浅绿色的为抽象类,绿色的为实现类

ApplicationContext的实现类

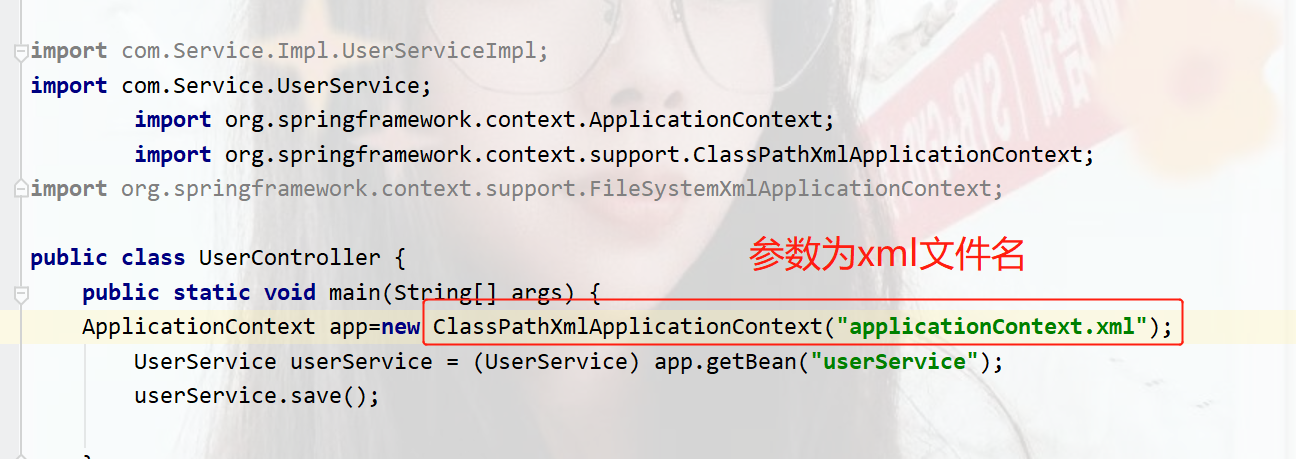
①ClassPathXmlApplicationContext

它是从类的跟路径下加载配置文件,只需要创建resource下的xml,参数写入xxx.xml即可(推荐使用)

编辑


②FileSystemXmlApplicationContext

他是从磁盘路径上加载配置文件,配置文件可以在磁盘的任意位置。

编辑


③AnnotationConfigApplicationContext

当使用注解配置容器对象时,需要食用此类来创建spring容器骂他用来读取注解

getBean()方法使用

//根据id找
public object getBean(String name) throws BeansException {
    assertBeanFactoryActive();
    return getBeanFactory().getBean(name);
}

//根据字节码对象找
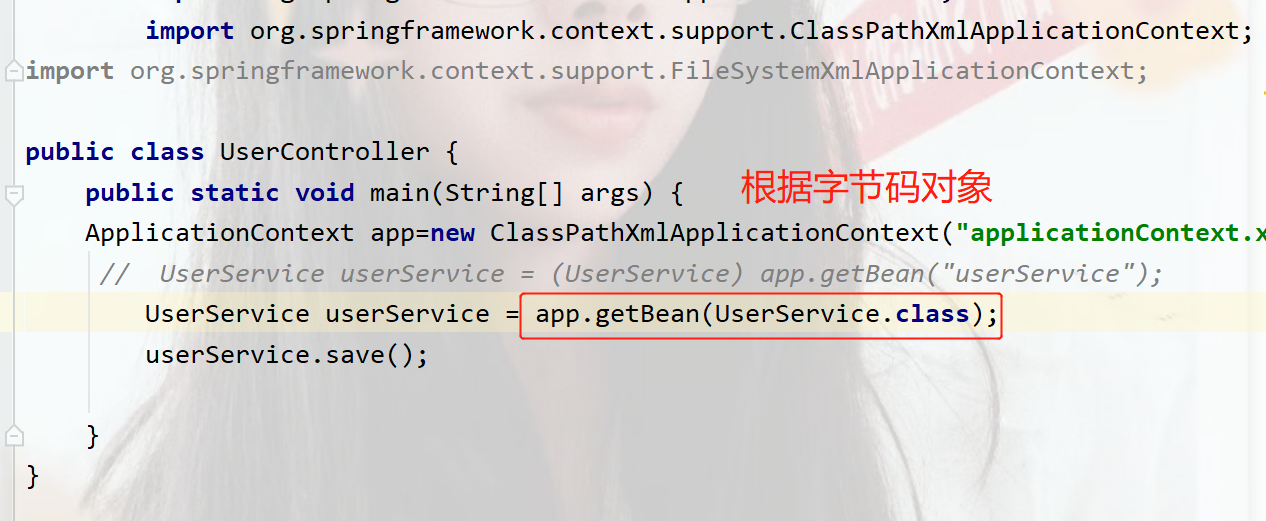
public <T> T getBean(Class<T> requiredType) throws BeansException {
    assertBeanFactoryActive();
    return getBeanFactory().getBean(requiredType);
}

其中,当参数的数据类型是字符串时,表示根据Bean的id从容器这种获得Bean实例,返回Object,需要强转。当参数的数据类型是Class类型是,表示根据类型从容器中匹配Bean实例,当容器中相同类型的Bean有多个是是,则clss方法会报错

根据id

编辑


 根据字节码对象

编辑

某一类型的bean对象存在多对时,只能使用id,因为id是唯一的,某一类型的bean对象存在一对是时,可以用id,也可以使用字节码对象,使用字节码对象更方便些。

编辑

 Spring配置数据源(连接池)

  •  数据源(连接池)是提高程序性能出现的
  • 事先实例化数据源,初始化部分连接资源
  • 使用连接资源时从数据源中获取
  • 使用完毕后将连接资源归还给数据源

常见的数据源(连接池):DBCP、C3P0、BoneCP、Druid

数据源的开发步骤

  1. 导入数据源的坐标和数据库驱动坐标
  2. 创建数据源对象
  3. 设置数据源的基本连接数据
  4. 使用数据源获取连接资源和归还连接资源


①:导入数据源坐标


  <dependencies>
    <dependency>
      <groupId>mysql</groupId>
      <artifactId>mysql-connector-java</artifactId>
      <version>5.1.32</version>
    </dependency>
//c3p0数据源
    <dependency>
      <groupId>c3p0</groupId>
      <artifactId>c3p0</artifactId>
      <version>0.9.1.2</version>
    </dependency>
//druid数据源
    <dependency>
      <groupId>com.alibaba</groupId>
      <artifactId>druid</artifactId>
      <version>1.1.10</version>
    </dependency>
    
    <dependency>
      <groupId>junit</groupId>
      <artifactId>junit</artifactId>
      <version>4.11</version>
      <scope>test</scope>
    </dependency>
  </dependencies>

在test测试中创建类

package com.test;

import com.mchange.v2.c3p0.ComboPooledDataSource;
import org.junit.Test;

import java.sql.Connection;

public class DateSourceTest {
    @Test
    public void test1() throws Exception{
        ComboPooledDataSource dataSource=new ComboPooledDataSource();
        dataSource.setDriverClass("com.mysql.jdbc.Driver");
        //访问数据库中kc_db01库
        dataSource.setJdbcUrl("jdbc:mysql://localhost:3306/kc_db01");
        //数据库的账号密码
        dataSource.setUser("root");
        dataSource.setPassword("123456");
        Connection connection=dataSource.getConnection();
        System.out.println(connection);
        connection.close();
    }
}

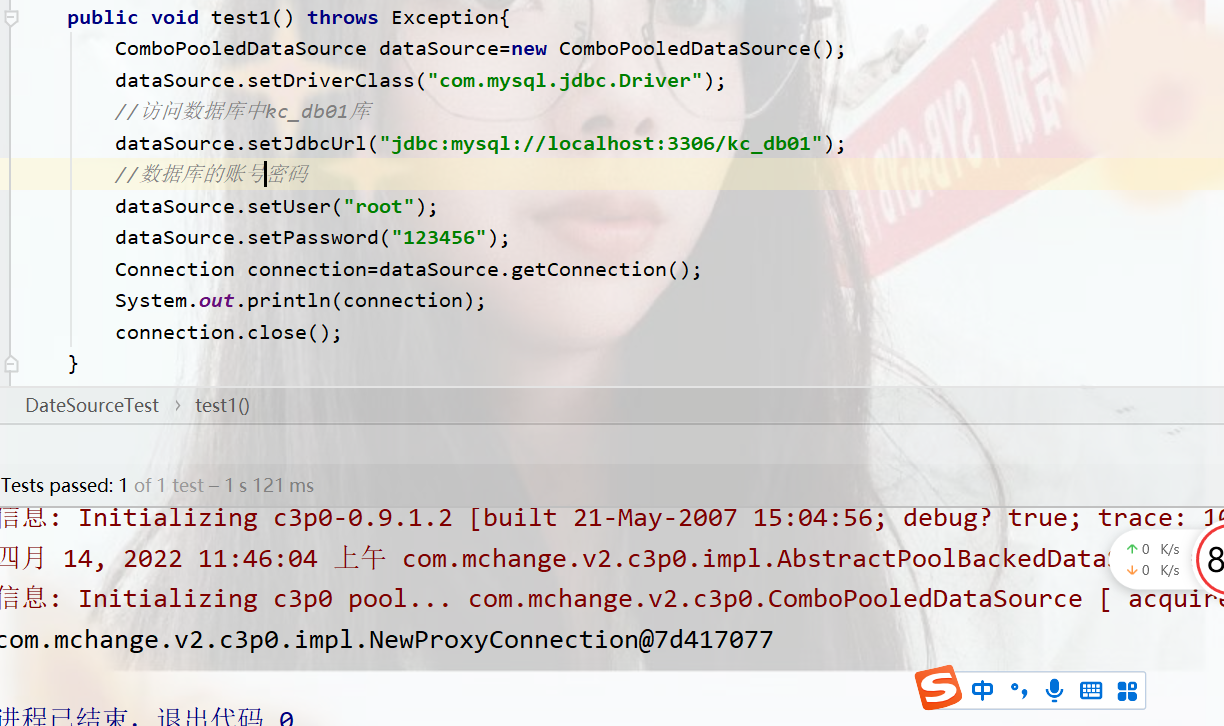
 运行结果

编辑

 打印出地址说明连接成功

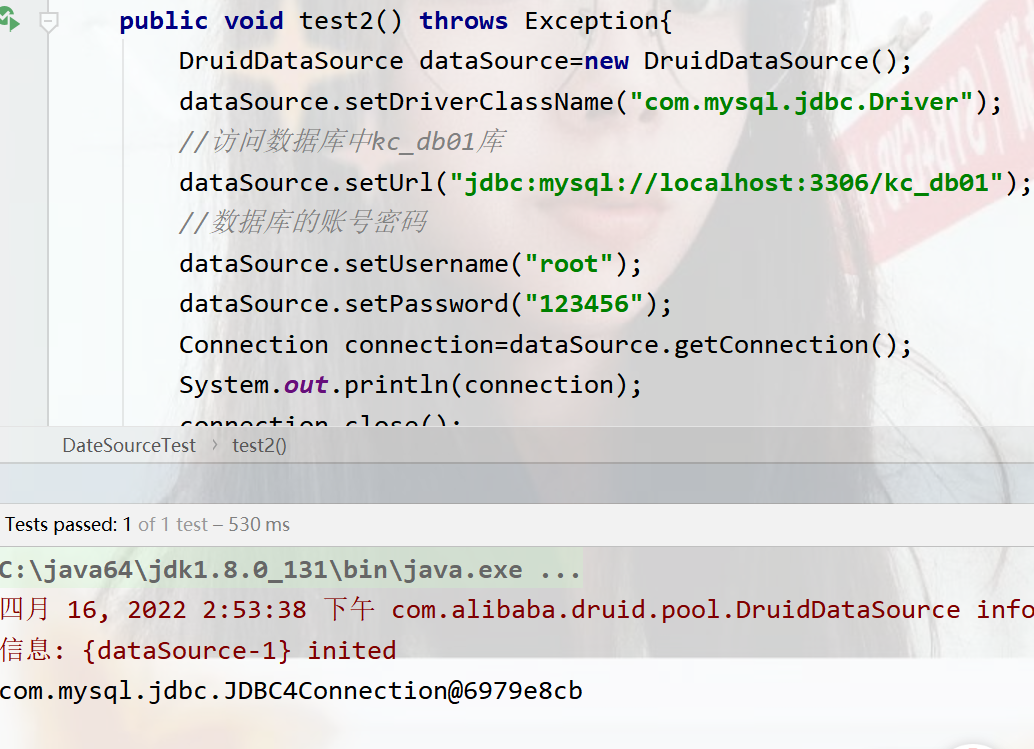
测试连接druid 


    @Test
    public void test2() throws Exception{
        DruidDataSource dataSource=new DruidDataSource();
        dataSource.setDriverClassName("com.mysql.jdbc.Driver");
        //访问数据库中kc_db01库
        dataSource.setUrl("jdbc:mysql://localhost:3306/kc_db01");
        //数据库的账号密码
        dataSource.setUsername("root");
        dataSource.setPassword("123456");
        Connection connection=dataSource.getConnection();
        System.out.println(connection);
        connection.close();
    }

编辑

 加载配置文件方式创建

在resource资源下创建一个MyJdbc.properties文件测试c3p0数据源)

内容是:

jdbc.driver=com.mysql.jdbc.Driver
jdbc.url=jdbc:mysql://localhost:3306/kc_db01
jdbc.username=root
jdbc.password=123456

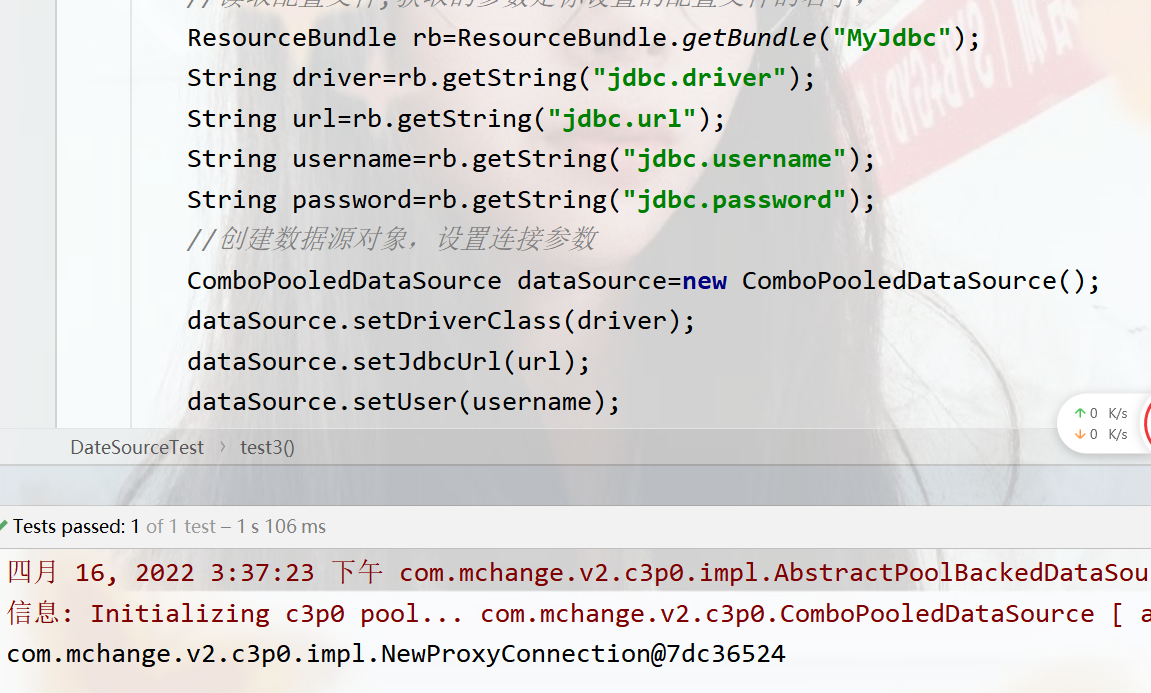
在测试类中:

  @Test
    //测试手动创建c3p0数据库源(加载properties配置文件)
    public void test3() throws Exception{
        //读取配置文件,获取的参数是你设置的配置文件的名字,
        ResourceBundle rb=ResourceBundle.getBundle("MyJdbc");
        String driver=rb.getString("jdbc.driver");
        String url=rb.getString("jdbc.url");
        String username=rb.getString("jdbc.username");
        String password=rb.getString("jdbc.password");
        //创建数据源对象,设置连接参数
        ComboPooledDataSource dataSource=new ComboPooledDataSource();
        dataSource.setDriverClass(driver);
        dataSource.setJdbcUrl(url);
        dataSource.setUser(username);
        dataSource.setPassword(password);
        Connection connection=dataSource.getConnection();
        System.out.println(connection);
        connection.close();
    }

运行结果:

编辑

 配置文件的好处有给程序解耦,打完包之后不会变化,程序打完包都是对应的字节码文件,而配置文件还是原模原样。

将DateSource的创建权交给Spring容器去完成

先在pom.xml导入spring的基本坐标

    <dependency>
      <groupId>org.springframework</groupId>
      <artifactId>spring-context</artifactId>
      <version>5.0.5.RELEASE</version>
    </dependency>

在resource资源下创建ApplicationContext.xml

<?xml version="1.0" encoding="UTF-8"?>
<beans xmlns="http://www.springframework.org/schema/beans"
       xmlns:xsi="http://www.w3.org/2001/XMLSchema-instance"
       xsi:schemaLocation="http://www.springframework.org/schema/beans http://www.springframework.org/schema/beans/spring-beans.xsd">

  <!--这个value是ComboPooledDataSource数据源的路径 -->
<bean id="dataSource" class="com.mchange.v2.c3p0.ComboPooledDataSource">

<!--这里面的name值是数据源中的set的内容-->
    <property name="driverClass" value="com.mysql.jdbc.Driver"></property>
    <property name="jdbcUrl" value="jdbc:mysql://localhost:3306/kc_db01"></property>
    <property name="user" value="root"></property>
    <property name="password" value="123456"></property>
</bean>

</beans>

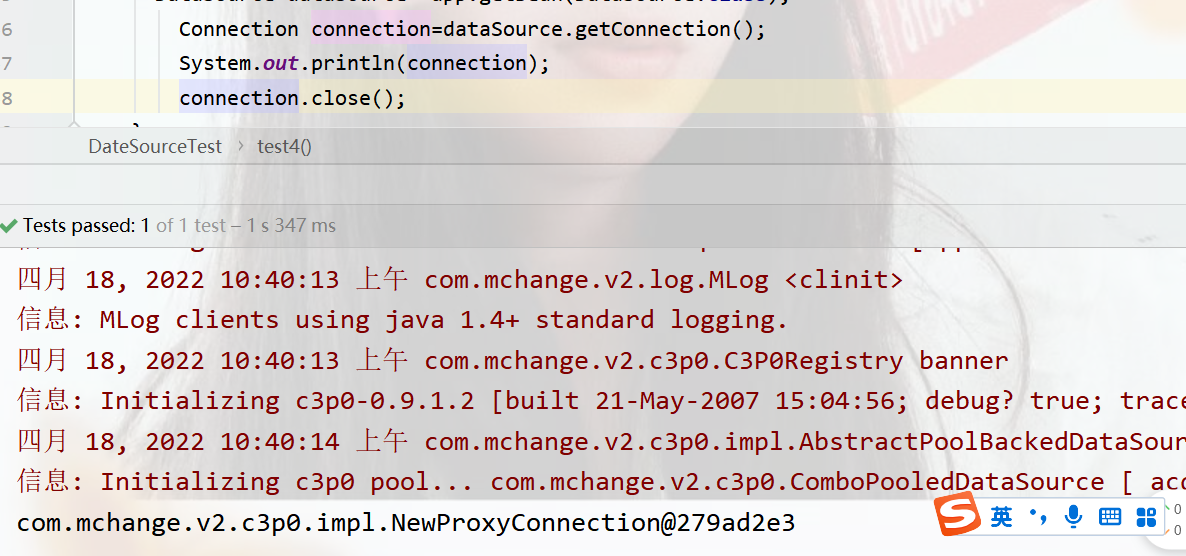
在DataSourceTest类下

   @Test
    public void test4() throws Exception{
        ApplicationContext app=new ClassPathXmlApplicationContext("applicationContext.xml");
       // DataSource dataSource= (DataSource) app.getBean("dataSource");
      DataSource dataSource= app.getBean(DataSource.class);
        Connection connection=dataSource.getConnection();
        System.out.println(connection);
        connection.close();
    }

运行结果

编辑

抽取jdbc配置文件

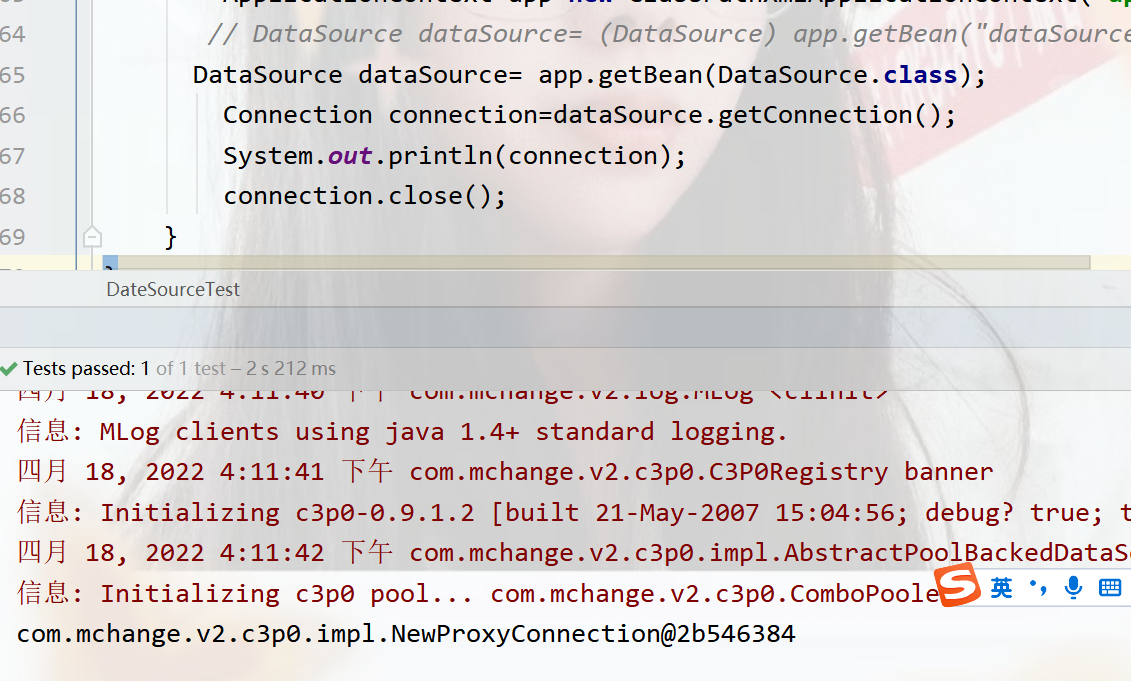
applicationContext.xml加载jdbc.properties配置文件获得连接信息

首先,需要引入context命名空间和约束路径:

命名空间:

xmlns:context="http://www.springframework.org/schema/context"

约束路径:

http://www.springframework.org/schema/context

http://www.springframework.org/schema/context/spring-context.xsd

 applicationContext.xml文件

<?xml version="1.0" encoding="UTF-8"?>
<beans xmlns="http://www.springframework.org/schema/beans"
       xmlns:xsi="http://www.w3.org/2001/XMLSchema-instance"
       xmlns:context="http://www.springframework.org/schema/context"
       xsi:schemaLocation=
               "http://www.springframework.org/schema/beans http://www.springframework.org/schema/beans/spring-beans.xsd
            http://www.springframework.org/schema/context http://www.springframework.org/schema/context/spring-context.xsd">

<!-- 加载外部properties文件   -->
    <context:property-placeholder location="classpath:MyJdbc.properties"/>
    <!--这个value是ComboPooledDataSource数据源的路径 -->
<bean id="dataSource" class="com.mchange.v2.c3p0.ComboPooledDataSource">
<!--这里面的name值是数据源中的set的内容-->

    <property name="driverClass" value="${jdbc.driver}"></property>
    <property name="jdbcUrl" value="${jdbc.url}"></property>
    <property name="user" value="${jdbc.username}"></property>
    <property name="password" value="${jdbc.password}"></property>

</bean>

</beans>

MyJdbc.properties文件下

jdbc.driver=com.mysql.jdbc.Driver
jdbc.url=jdbc:mysql://localhost:3306/kc_db01
jdbc.username=root
jdbc.password=123456

类中代码不变,运行结果为

【版权声明】本文为华为云社区用户原创内容,转载时必须标注文章的来源(华为云社区)、文章链接、文章作者等基本信息, 否则作者和本社区有权追究责任。如果您发现本社区中有涉嫌抄袭的内容,欢迎发送邮件进行举报,并提供相关证据,一经查实,本社区将立刻删除涉嫌侵权内容,举报邮箱: cloudbbs@huaweicloud.com
  • 点赞
  • 收藏
  • 关注作者

评论(0

0/1000
抱歉,系统识别当前为高风险访问,暂不支持该操作

全部回复

上滑加载中

设置昵称

在此一键设置昵称,即可参与社区互动!

*长度不超过10个汉字或20个英文字符,设置后3个月内不可修改。

*长度不超过10个汉字或20个英文字符,设置后3个月内不可修改。