Uniapp

【摘要】
1.uni.navigateBack之后通知上一个页面刷新
uni.navigateBack({ delta:1, success: function() { let pages = getCurrentPages(); // 当前页面 let beforePage = pages[pages.length - 2]; // 前一...
1.uni.navigateBack之后通知上一个页面刷新
-
uni.navigateBack({
-
delta:1,
-
success: function() {
-
let pages = getCurrentPages(); // 当前页面
-
let beforePage = pages[pages.length - 2]; // 前一个页面
-
beforePage.$vm.refreshDataList(); // 执行前一个页面的刷新函数
-
}
-
})
2.手动刷新页面
this.$forceUpdate()
3.全局事件消息
-
//发送事件消息
-
uni.$emit('userInfoReadyCallback',res.data.Data);
-
-
//接受事件消息
-
uni.$on("userInfoReadyCallback",function(userInfo){
-
console.log(userinfo);
-
})
-
-
//接受事件消息,只接收一次然后就移除监听
-
uni.$once("userInfoReadyCallback",function(userInfo){
-
console.log(userinfo);
-
})
-
-
//移除监听
-
uni.$off("userInfoReadyCallback",function(e){
-
console.log(e);
-
})

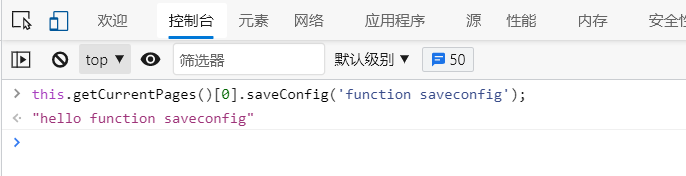
4.在浏览器console里调用uniapp的方法。
-
this.getCurrentPages()[0].saveConfig('function saveconfig');
-
-
或者
-
-
this.getCurrentPages().slice(-1)[0].saveConfig('function saveconfig');
5.格式化日期时间的公共函数
-
//将以下代码拷贝到App.vue的<script>标签内,这样就可以全局调用
-
// 对Date的扩展,将 Date 转化为指定格式的String
-
// 月(M)、日(d)、小时(h)、分(m)、秒(s)、季度(q) 可以用 1-2 个占位符,
-
// 年(y)可以用 1-4 个占位符,毫秒(S)只能用 1 个占位符(是 1-3 位的数字)
-
// 例子:
-
// (new Date()).Format("yyyy-MM-dd hh:mm:ss.S") ==> 2006-07-02 08:09:04.423
-
// (new Date()).Format("yyyy-M-d h:m:s.S") ==> 2006-7-2 8:9:4.18
-
Date.prototype.Format = function(fmt) { //author: meizz
-
var o = {
-
"M+": this.getMonth() + 1, //月份
-
"d+": this.getDate(), //日
-
"h+": this.getHours(), //小时
-
"m+": this.getMinutes(), //分
-
"s+": this.getSeconds(), //秒
-
"q+": Math.floor((this.getMonth() + 3) / 3), //季度
-
"S": this.getMilliseconds() //毫秒
-
};
-
if (/(y+)/.test(fmt))
-
fmt = fmt.replace(RegExp.$1, (this.getFullYear() + "").substr(4 - RegExp.$1.length));
-
for (var k in o)
-
if (new RegExp("(" + k + ")").test(fmt))
-
fmt = fmt.replace(RegExp.$1, (RegExp.$1.length == 1) ? (o[k]) : (("00" + o[k]).substr(("" + o[k])
-
.length)));
-
return fmt;
-
}
其他页面调用
-
var myDate=(new Date()).Format("yyyy-MM-dd hh:mm:ss");
-
-
var myDate=(new Date()).Format("yyyy-MM-dd");
-
-
var myTime=(new Date()).Format("hh:mm:ss");
6.view内左右滑动
style="width: 1050px;overflow-x:scroll;"
7.view加边框
border:10px solid #6b9de1;
8.自动换行瀑布布局
-
<view class="flex" style="width: 100%;flex-wrap: wrap;">
-
<view class="node" v-for="item in list">
-
//.........
-
</view>
-
</view>
文章来源: zzzili.blog.csdn.net,作者:清雨小竹,版权归原作者所有,如需转载,请联系作者。
原文链接:zzzili.blog.csdn.net/article/details/116740075

【版权声明】本文为华为云社区用户转载文章,如果您发现本社区中有涉嫌抄袭的内容,欢迎发送邮件进行举报,并提供相关证据,一经查实,本社区将立刻删除涉嫌侵权内容,举报邮箱:
cloudbbs@huaweicloud.com
- 点赞
- 收藏
- 关注作者
评论(0)