【愚公系列】2022年08月 微信小程序-下拉刷新功能实现
【摘要】 前言下拉刷新是移动端的专有名词,是指通过手指在屏幕上的下拉滑动操作,从而重新加载页面数据的行为。 一、下拉刷新功能实现 1.自定义下拉刷新<wxs module="refresh">var pullingMessage = "下拉刷新"module.exports = { onRefresh: function(e, instance) { // 此时手拉开了,进入了加载中的状态 pu...
前言
下拉刷新是移动端的专有名词,是指通过手指在屏幕上的下拉滑动操作,从而重新加载页面数据的行为。
一、下拉刷新功能实现
1.自定义下拉刷新
<wxs module="refresh">
var pullingMessage = "下拉刷新"

module.exports = {
	onRefresh: function(e, instance) {
		// 此时手拉开了,进入了加载中的状态
		pullingMessage = "更新中"
		console.log(pullingMessage)
		instance.callMethod("setData", {
			pullingMessage: pullingMessage,
			refresherTriggered: true
		})
		instance.callMethod("willCompleteRefresh", {})
	},
	onAbort: function(e, instance) {
		// 异常状态,例如被事件突然打断,事件包括电话等,被迫松手了
		pullingMessage = "下拉刷新"
		console.log(pullingMessage)
	},
	onRestore: function(e, instance) {
		// 回去了,松手了,恢复原位了,不刷了
		pullingMessage = "下拉刷新"
		console.log(pullingMessage)
	},
	onPulling: function(e, instance) {
		// 80的高度,因为refresher-threshold设置的是80,手指按住往下拉的状态
		var p = Math.min(e.detail.dy / 80, 1)
		// console.log(p)
		// 这里在视图层,不怕频繁操作DOM
		var icon = instance.selectComponent('#refresherIcon')
		icon.setStyle({
			opacity: p,
			transform: "rotate(" + (90 + p * 180) + "deg)"
		})
		var view = instance.selectComponent('.refresh-container')
		view.setStyle({
			opacity: p,
			transform: "scale(" + p + ")"
		})
		if (e.detail.dy >= 80) {
			if (pullingMessage == "下拉刷新") {
				pullingMessage = "释放更新"
				instance.callMethod("setData", {
					pullingMessage
				})
			}
		}
	}
}
</wxs>

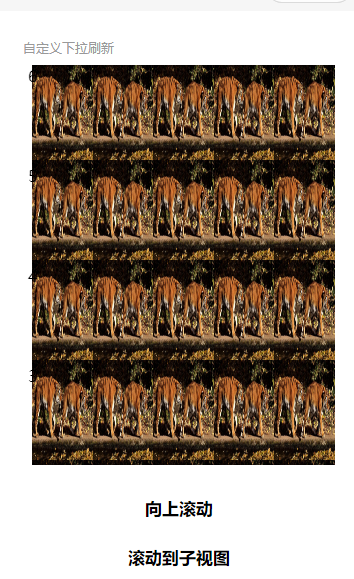
<view class="page-section">
	<view class="page-section-title">自定义下拉刷新</view>
	<scroll-view scroll-y style="width: 100%; height: 400px;overflow-anchor:auto;" bindscroll="onScroll" bindscrolltoupper="onScrolltoupper" scroll-top="{{scrollTopValue}}" scroll-into-view="{{scrollIntoViewId}}" scroll-with-animation enable-back-to-top enable-flex scroll-anchoring refresher-enabled refresher-threshold="{{80}}" refresher-default-style="none" refresher-background="#FFF" bindrefresherpulling="{{refresh.onPulling}}" bindrefresherrefresh="{{refresh.onRefresh}}" bindrefresherrestore="{{refresh.onRestore}}" bindrefresherabort="{{refresh.onAbort}}" refresher-triggered="{{refresherTriggered}}">
		<view slot="refresher" class="refresh-container" style="display: block; width: 100%; height: 80px; background: #F8f8f8; display: flex; align-items: center;">
			<view class="view1" style="position: absolute; text-align: center; width: 100%;display:flex;align-items:center;justify-content:center;color:#888;">
				<mp-icon id="refresherIcon" icon="arrow" color="#888" size="{{20}}" style="margin-right:5px;transform:rotate(90deg)"></mp-icon>
				<text style="min-width:80px;text-align:left;">{{pullingMessage}}</text>
			</view>
		</view>

		<view wx:for="{{arr}}" id="view{{item+1}}" style="display: flex;height: 100px;">
			<text style="position:relative;top:5px;left:5px;color:black;">{{item+1}}</text>
			<image src="https://img1.baidu.com/it/u=3749523982,1411558844&fm=253&fmt=auto&app=138&f=JPEG?w=1070&h=500"></image>
			<image src="https://img1.baidu.com/it/u=3749523982,1411558844&fm=253&fmt=auto&app=138&f=JPEG?w=1070&h=500"></image>
			<image src="https://img1.baidu.com/it/u=3749523982,1411558844&fm=253&fmt=auto&app=138&f=JPEG?w=1070&h=500"></image>
			<image src="https://img1.baidu.com/it/u=3749523982,1411558844&fm=253&fmt=auto&app=138&f=JPEG?w=1070&h=500"></image>
			<image src="https://img1.baidu.com/it/u=3749523982,1411558844&fm=253&fmt=auto&app=138&f=JPEG?w=1070&h=500"></image>
		</view>
	</scroll-view>
	<view class="btn-area">
		<button bindtap="plusScrollUpValue">向上滚动</button>
		<button bindtap="scrollToView1">滚动到子视图</button>
		<button bindtap="unshiftOnePic">顶部添加一张图</button>
	</view>
</view>
const app = getApp()
let viewId = 5
const createRecycleContext = require('miniprogram-recycle-view')
function rpx2px(rpx) {
  return (rpx / 750) * wx.getSystemInfoSync().windowWidth
}

Page({
  data: {
    arr: [],
    triggered: false,
    scrollTopValue:0,
    scrollIntoViewId:'',
    pullingMessage:'下拉刷新',//下拉刷新,释放更新,加新中...
    refresherTriggered:false,//
    tabs:[]
  },
  willCompleteRefresh(){
    console.log('更新中')
    let intervalId = setInterval(()=>{
      let pullingMessage = this.data.pullingMessage
      console.log(pullingMessage,pullingMessage == '更新中')
      if (pullingMessage.length < 7){
        pullingMessage += '.'
      }else{
        pullingMessage = '更新中'
      }
      this.setData({
        pullingMessage
      })
    },500)
    setTimeout(()=>{
      console.log('更新完成了')
      clearInterval(intervalId)
      this.setData({
        pullingMessage:"已刷新",
        refresherTriggered:false,
      })
    },2000)
  },
  unshiftOnePic(){
    let arr = this.data.arr
    arr.unshift(arr.length+1)
    this.setData({
      arr
    })
  },
  scrollToView1(){
    viewId += 2
    this.setData({
      scrollIntoViewId:'childview'+viewId
    })
    console.log(this.data.scrollIntoViewId)
  },
  plusScrollUpValue(){
    this.setData({
      scrollTopValue:this.data.scrollTopValue+50
    })
  },


  onPulling(e) {
    console.log('onPulling:', e)
  },

  onRefresh() {
    if (this._freshing) return
    this._freshing = true
    setTimeout(() => {
      this.setData({
        triggered: false,
      })
      this._freshing = false
    }, 3000)
  },
  onRestore(e) {
    console.log('onRestore:', e)
  },

  onAbort(e) {
    console.log('onAbort', e)
  },
  onScroll(e){
    console.log(e.detail.scrollTop, e.detail.scrollLeft, e.detail.scrollHeight,e.detail.scrollWidth)
  },
  onScrolltoupper(e){
    console.log('已达顶部后,小于50,是一种状态')
  },
})

2.recycle-view的使用
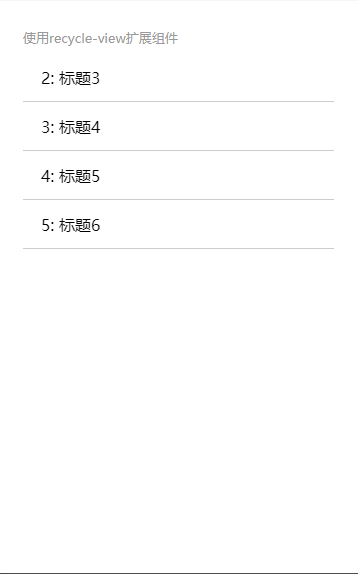
recycle-view是属于weui的组件,具体使用如下:
全局app.json
"useExtendedLib": {
  "weui": true
}
页面的四个文件如下:
{
  "component": true,
  "usingComponents": {
    "recycle-view": "miniprogram-recycle-view/recycle-view",
    "recycle-item": "miniprogram-recycle-view/recycle-item"
  },
  "pageOrientation": "auto"
}
<view class="page-section">
	<view class="page-section-title">使用recycle-view扩展组件</view>
	<recycle-view height="200" batch="{{batchSetRecycleData}}" id="recycleId" batch-key="batchSetRecycleData" style="background:white;">
		<recycle-item wx:for="{{recycleList}}" wx:key="index" class='item'>
			<view>
				{{item.id}}: {{item.name}}
			</view>
		</recycle-item>
	</recycle-view>
</view>
const app = getApp()
let viewId = 5
const createRecycleContext = require('miniprogram-recycle-view')
function rpx2px(rpx) {
  return (rpx / 750) * wx.getSystemInfoSync().windowWidth
}

Page({
  data: {
  },
  onReady: function () {
    var ctx = createRecycleContext({
      id: 'recycleId',
      dataKey: 'recycleList',
      page: this,
      itemSize: {
        width: rpx2px(650),
        height: rpx2px(100)
      }
    })
    let newList = []
    for (let i = 0; i < 20; i++) {
      newList.push({
        id: i,
        name: `标题${i + 1}`
      })
    }
    ctx.append(newList)
      const arr = []
      for (let i = 0; i < 20; i++) arr.push(i)
      this.setData({
        arr
      })

      setTimeout(() => {
        this.setData({
          triggered: true,
        })
      }, 1000)
      //
      let activeTab = 0, page=1, res = {something:''}
      let tabsData = this.data.tabs[activeTab] || {list:[]}
      tabsData.page = page+1
      tabsData.list.push(res)
      let key = `tabs[${activeTab}]`
      this.setData({
        [key]: tabsData
      })
      console.log(this.data.tabs)
  },
})

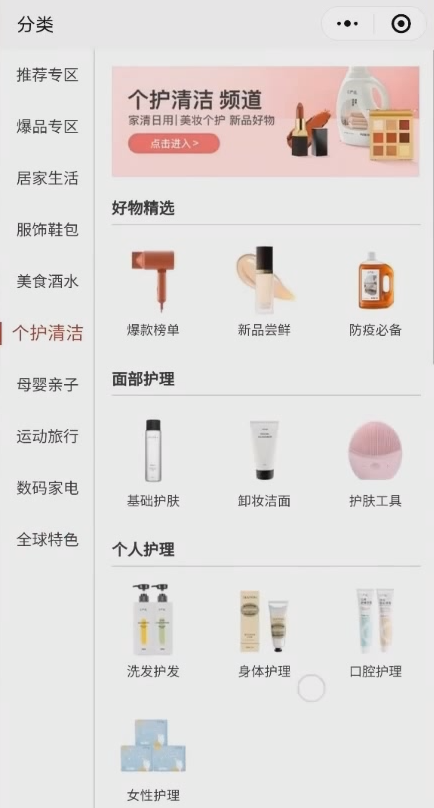
3.案例

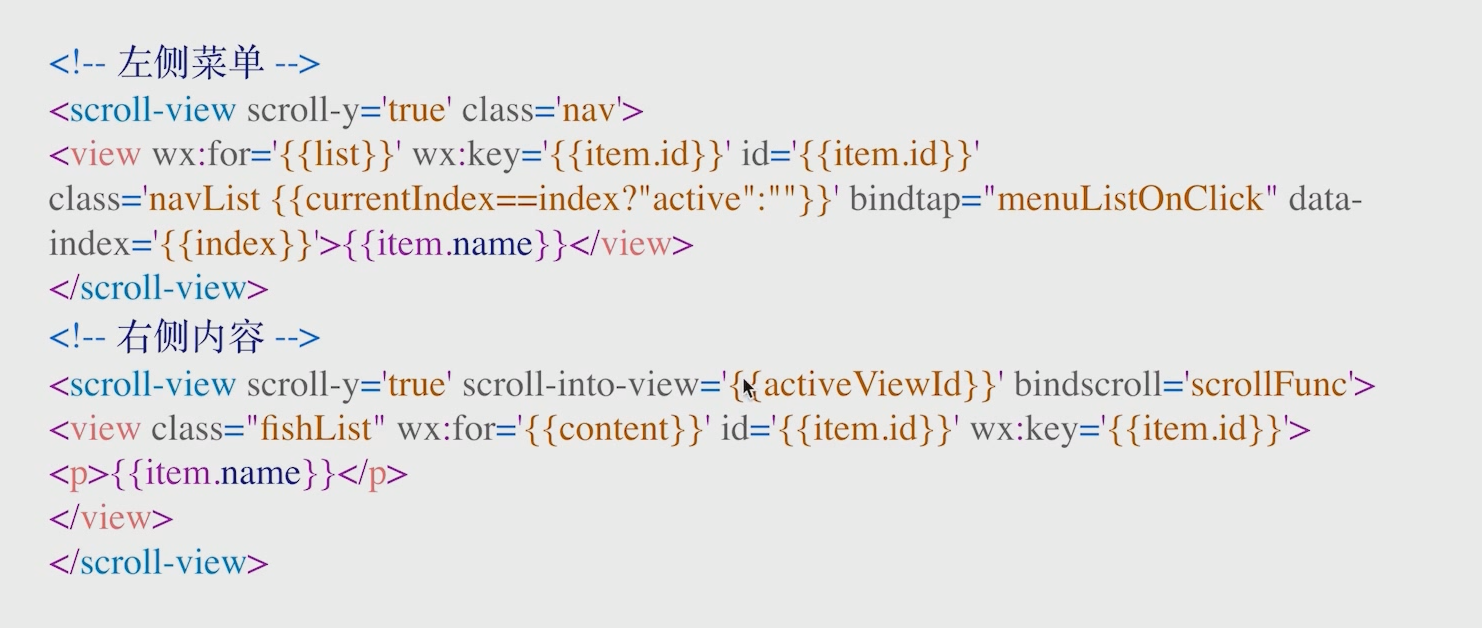
//1 单击左侧菜单
menuListOnClick: function (e){
	let me=this;
	me.setData ({
		activeViewld:e.target.id,
		currentIndex:e.target.dataset.index
	})
}
//滚动时触发,计算当前滚动到的位置对应的菜单是哪个
scrollFunc:function (e){
	this.setData ({
		scrollTop:e.detail.scrollTop
	})
	for (let i= 0;i<this.data.heightList.length; i++){
		let height1 = this. data.heightlist [il;
		let height2 = this.data.heightList [i + 1];
		if (!height2ll (e.detail.scrollTop >= height1 && e.detail.scrollTop<height2)){
			this.setData ({
				currentIndex: i
			})
			return;
		}
	}
	this.setData ({
		currentIndex:0
	})
}

【声明】本内容来自华为云开发者社区博主,不代表华为云及华为云开发者社区的观点和立场。转载时必须标注文章的来源(华为云社区)、文章链接、文章作者等基本信息,否则作者和本社区有权追究责任。如果您发现本社区中有涉嫌抄袭的内容,欢迎发送邮件进行举报,并提供相关证据,一经查实,本社区将立刻删除涉嫌侵权内容,举报邮箱:
cloudbbs@huaweicloud.com
- 点赞
- 收藏
- 关注作者


评论(0)