spring-Cloud-netflix-快速入门(三)-服务间调用
环境准备
源码下载地址
服务结构
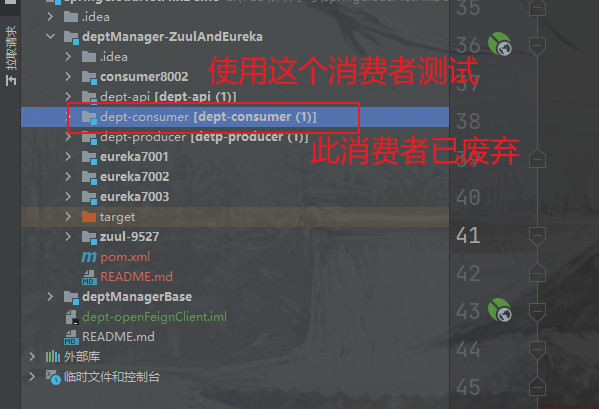
**从上面图片中可以看到,producer(生产者)和consumer(消费者),等会要使用的服务间调用就是基于生产者和消费者的(以下所有操作均在消费者端进行)。 **
基于(Eureka)服务注册中心的服务间调用
Eureka
关于Eureka的详细介绍请参考如下博客:
springCloud.微服务.零基础搭建注册中心(Eureka)(一)_康世行的博客-CSDN博客
注意:服务间调用是基于注册中心实现的,如果没有注册中心的话,服务间调用就有点不是很完美了!因为需要写具体的地址,并且生产者的地址改变了。消费者还需要改代码
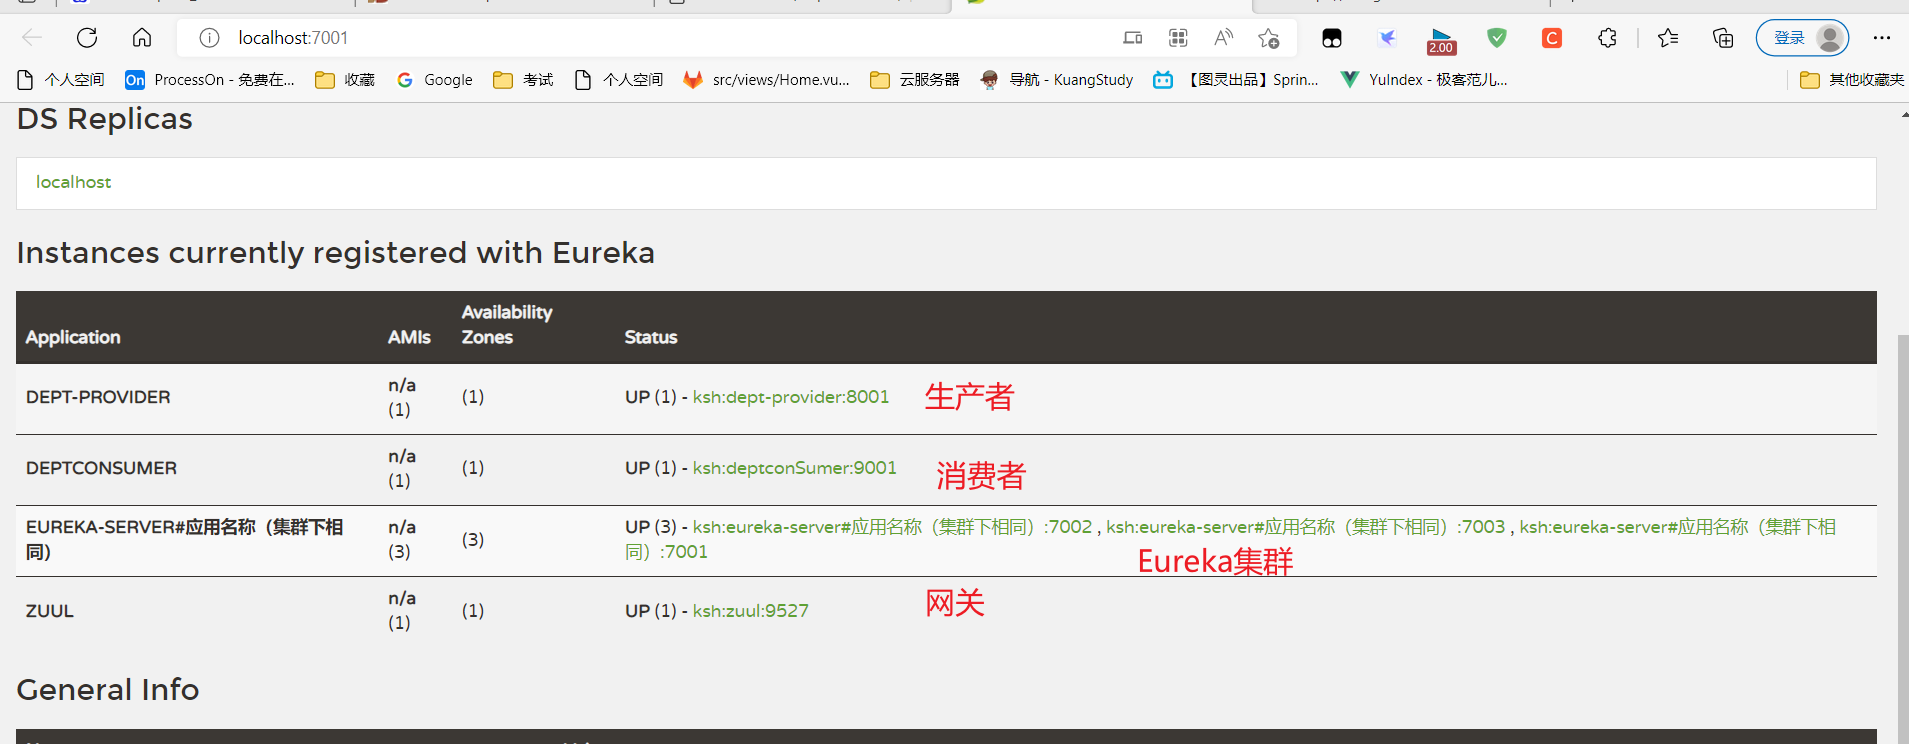
注册中心运行截图
RestTemplate
传统情况下在java代码里访问restful服务,一般使用Apache的HttpClient。不过此种方法使用起来太过繁琐。spring提供了一种简单便捷的模板类来进行操作,这就是RestTemplate。类似的这种模板类springboot里还有很多。比如redistemplate ,RabbitMQTemplate 等等!所以从这些细节上就可以看出,springboot的 目标是简化开发。
基于服务名称调用生产者代码
package com.kuang.consumer;


import com.kuang.utils.FrontResult;
import io.swagger.annotations.Api;
import io.swagger.annotations.ApiOperation;
import org.springframework.beans.factory.annotation.Autowired;
import org.springframework.web.bind.annotation.GetMapping;
import org.springframework.web.bind.annotation.PathVariable;
import org.springframework.web.bind.annotation.RequestMapping;
import org.springframework.web.bind.annotation.RestController;
import org.springframework.web.client.RestTemplate;

import javax.annotation.Resource;

/**
 * @Description TODO
 * @ClassName DeptConsumer
 * @Author 康世行
 * @Date 17:10 2022/5/22
 * @Version 1.0
 **/
@RestController
@RequestMapping("/deptConsumer")
@Api( "部门管理-消费者")
public class DeptConsumer {

    @Autowired
    private RestTemplate restTemplate;

    //通过 服务名获取对应地址
    private static final String REST_URL_PREFIX="http://DEPT-PROVIDER";

    @GetMapping("/addDeptConsumer/{deptName}")
    @ApiOperation("添加部门")
    public FrontResult addDeptConsumer( @PathVariable("deptName") String deptName){
        FrontResult forObject = restTemplate.getForObject(REST_URL_PREFIX+"/dept/addDept/" + deptName, FrontResult.class);
       return  forObject;
    }

    @GetMapping("/queryDeptConsumer/{deptno}")
    @ApiOperation("查询部门")
    public FrontResult queryDeptConsumer( @PathVariable("deptno") String deptno){
         FrontResult forObject = restTemplate.getForObject(REST_URL_PREFIX+"/dept/queryDept/" + deptno, FrontResult.class);
        return forObject;
    }
}
- 1
- 2
- 3
- 4
- 5
- 6
- 7
- 8
- 9
- 10
- 11
- 12
- 13
- 14
- 15
- 16
- 17
- 18
- 19
- 20
- 21
- 22
- 23
- 24
- 25
- 26
- 27
- 28
- 29
- 30
- 31
- 32
- 33
- 34
- 35
- 36
- 37
- 38
- 39
- 40
- 41
- 42
- 43
- 44
- 45
- 46
- 47
- 48
结果(查询id=1的部门信息)
localhost:9001/deptConsumer/queryDeptConsumer/1
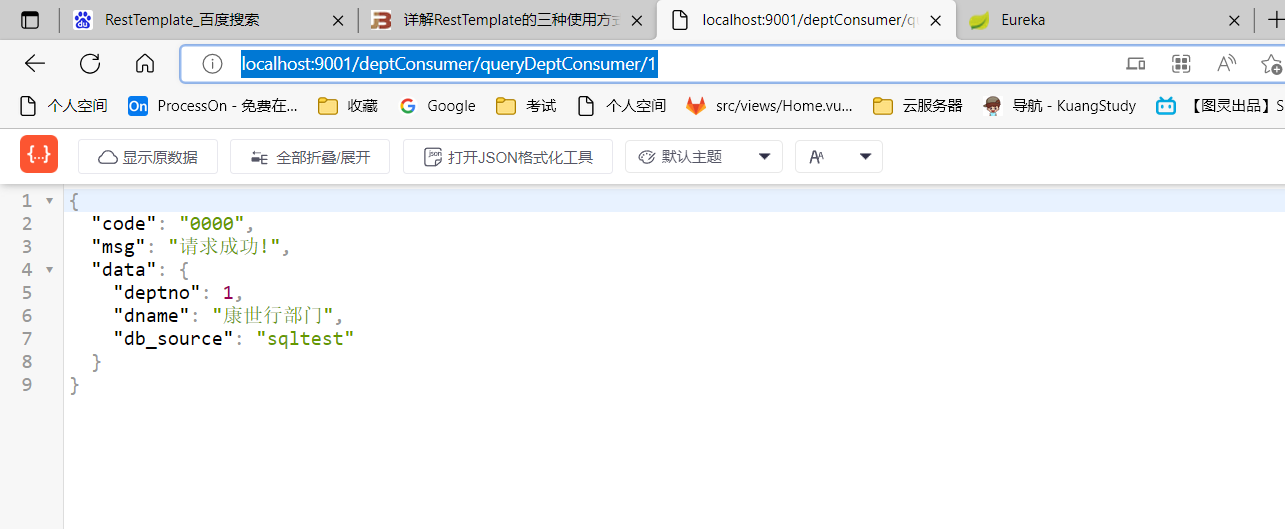
因为restTemplate是boot内置的所以不需要其它的多余依赖!!!!!
OpenFeign
上面演示的RestTemplate是相对比较简单的一种服务间调用形式,下面演示把生产者的接口当做本地接口使用。基于openFegin调用生产者,就像调用自己的本地接口
什么是Feign?
Feign makes writing java http clients easier,这是官方给出的一个说明,本意翻译是:Feign使编写Java http客户端更容易,Feign是一个http请求调用的轻量级框架,可以以Java接口注解的方式调用Http请求,Feign可以通过处理注解,将请求模板化,当实际调用的时候,传入参数,根据参数再应用到请求上,进而转化成真正的请求。
pom依赖
     <!--openFeign依赖-->
         <dependency>
             <groupId>org.springframework.cloud</groupId>
             <artifactId>spring-cloud-starter-openfeign</artifactId>
         </dependency>
- 1
- 2
- 3
- 4
- 5
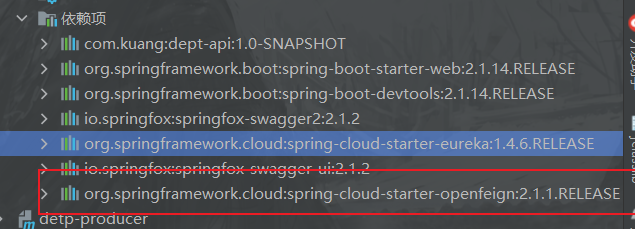
启动类加上开启Feign调用注解

新建客户端类
新建client包
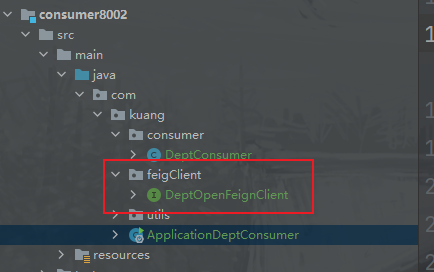
新建client类
package com.kuang.feigClient;

import com.kuang.utils.FrontResult;
import org.springframework.cloud.openfeign.FeignClient;
import org.springframework.web.bind.annotation.GetMapping;
import org.springframework.web.bind.annotation.PathVariable;

/**
 * @Description (部门管理)生产者客户接口
 * @ClassName DeptClient
 * @Author 康世行
 * @Date 20:41 2022/8/22
 * @Version 1.0
 **/

@FeignClient(value="DEPT-PROVIDER",path = "/dept/")
public interface DeptOpenFeignClient {
    /**
    * @author 康世行
    * @description: 根据id查询部门信息
    * @date  2022/8/22 20:46
    * @param deptno
    * @return com.kuang.utils.FrontResult
    * @Version1.0
    **/
    @GetMapping("queryDept/{id}")
    FrontResult queryDept(@PathVariable("id") String deptno);
}
- 1
- 2
- 3
- 4
- 5
- 6
- 7
- 8
- 9
- 10
- 11
- 12
- 13
- 14
- 15
- 16
- 17
- 18
- 19
- 20
- 21
- 22
- 23
- 24
- 25
- 26
- 27
- 28
- 29
消费者通过客户端类调用生产者接口
基于客户端类调用生产者代码
package com.kuang.consumer;

import com.kuang.feigClient.DeptOpenFeignClient;
import com.kuang.utils.FrontResult;
import org.springframework.beans.factory.annotation.Autowired;
import org.springframework.web.bind.annotation.GetMapping;
import org.springframework.web.bind.annotation.PathVariable;
import org.springframework.web.bind.annotation.RequestMapping;
import org.springframework.web.bind.annotation.RestController;
import org.springframework.web.client.RestTemplate;

/**
 * @Description TODO
 * @ClassName DeptConsumer
 * @Author 康世行
 * @Date 17:10 2022/5/22
 * @Version 1.0
 **/
@RestController
@RequestMapping("/deptConsumer")
public class DeptConsumer {

    @Autowired
    private DeptOpenFeignClient deptOpenFeign;

    @GetMapping("/queryDeptConsumer/{deptno}")
    public FrontResult queryDeptConsumer( @PathVariable("deptno") String deptno){
        //使用openFegin调用
        FrontResult frontResult = deptOpenFeign.queryDept(deptno);
        return frontResult;
    }
}
- 1
- 2
- 3
- 4
- 5
- 6
- 7
- 8
- 9
- 10
- 11
- 12
- 13
- 14
- 15
- 16
- 17
- 18
- 19
- 20
- 21
- 22
- 23
- 24
- 25
- 26
- 27
- 28
- 29
- 30
- 31
- 32
- 33
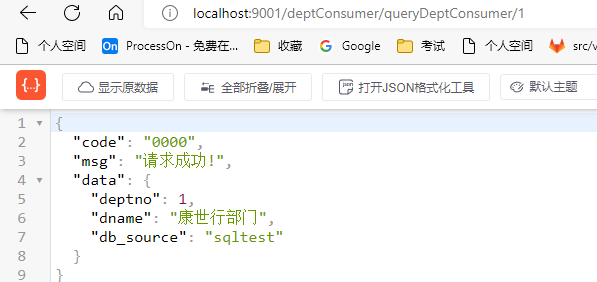
结果
localhost:9001/deptConsumer/queryDeptConsumer/1

``
服务间调用演示完毕,敬请期待本系列博客后面的更新内容。感谢阅读,辛苦给一键三连,点赞收藏!
文章来源: kangshihang.blog.csdn.net,作者:康世行,版权归原作者所有,如需转载,请联系作者。
原文链接:kangshihang.blog.csdn.net/article/details/126489109
- 点赞
- 收藏
- 关注作者


评论(0)