基于 dynamic-datasource 实现 DB 多数据源及事物控制、读写分离、负载均衡解决方案

一、dynamic-datasource
dynamic-datasource-spring-boot-starter 是一个基于springboot的快速集成多数据源的启动器。
特征
- 支持 数据源分组 ,适用于多种场景 纯粹多库 读写分离 一主多从 混合模式。
- 支持数据库敏感配置信息 加密
ENC()。 - 支持每个数据库独立初始化表结构
schema和数据库database。 - 支持无数据源启动,支持懒加载数据源(需要的时候再创建连接)。
- 支持 自定义注解 ,需继承
DS(3.2.0+)。 - 提供并简化对
Druid,HikariCp,BeeCp,Dbcp2的快速集成。 - 提供对
Mybatis-Plus,Quartz,ShardingJdbc,P6sy,Jndi等组件的集成方案。 - 提供 自定义数据源来源 方案(如全从数据库加载)。
- 提供项目启动后 动态增加移除数据源 方案。
- 提供
Mybatis环境下的 纯读写分离 方案。 - 提供使用
spel动态参数 解析数据源方案。内置spel,session,header,支持自定义。 - 支持 多层数据源嵌套切换 。
(ServiceA >>> ServiceB >>> ServiceC)。 - 提供 基于
seata的分布式事务方案。 - 提供 本地多数据源事务方案。 附:不能和原生
spring事务混用。
约定
- 本框架只做 切换数据源 这件核心的事情,并不限制你的具体操作,切换了数据源可以做任何
CRUD。 - 配置文件所有以下划线 _ 分割的数据源 首部 即为组的名称,相同组名称的数据源会放在一个组下。
- 切换数据源可以是组名,也可以是具体数据源名称。组名则切换时采用负载均衡算法切换。
- 默认的数据源名称为
master,你可以通过spring.datasource.dynamic.primary修改。 - 方法上的注解优先于类上注解。
DS支持继承抽象类上的DS,暂不支持继承接口上的DS。
官方文档地址:https://www.kancloud.cn/tracy5546/dynamic-datasource/2264611
下面分别从 多数据源及事物控制、读写分离实现、负载均衡实现三个方面进行实践。
二、环境准备
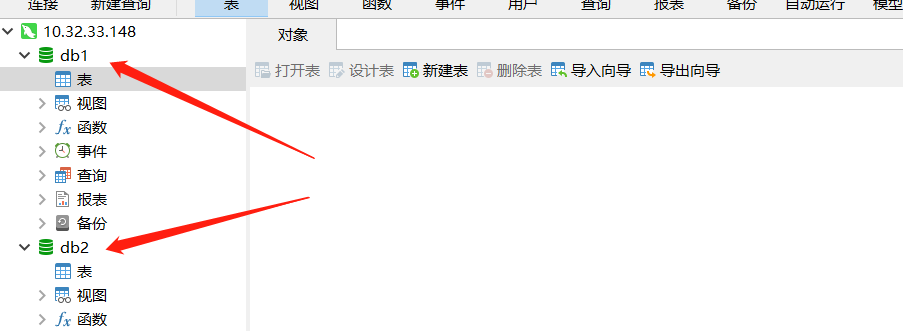
在实验开始前,先准备两个数据库,来进行实验测试:
create database db1;
create database db2;
- 1
- 2
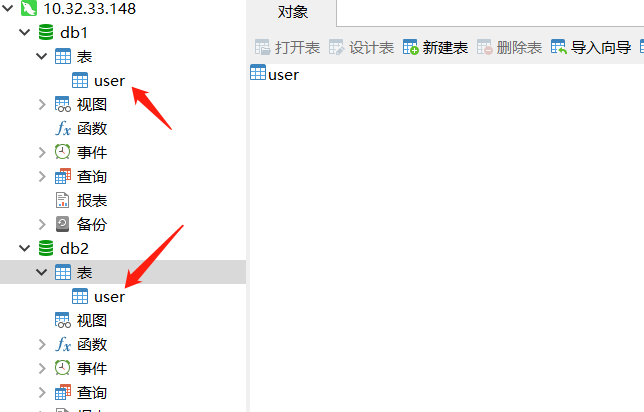
然后在两个库中分别创建测试表:
CREATE TABLE `user` (
  `id` int(11) NOT NULL AUTO_INCREMENT,
  `name` varchar(255) DEFAULT NULL,
  `age` int(11) DEFAULT NULL,
  PRIMARY KEY (`id`)
) ENGINE=InnoDB DEFAULT CHARSET=utf8mb4;
- 1
- 2
- 3
- 4
- 5
- 6
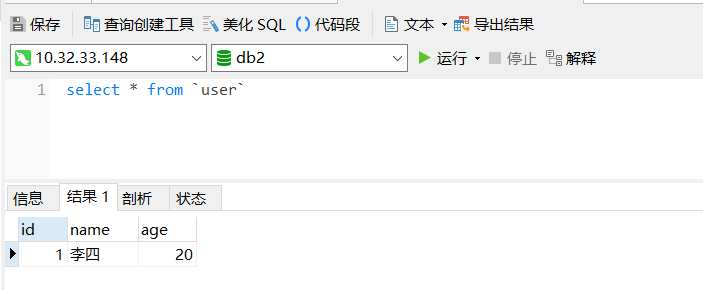
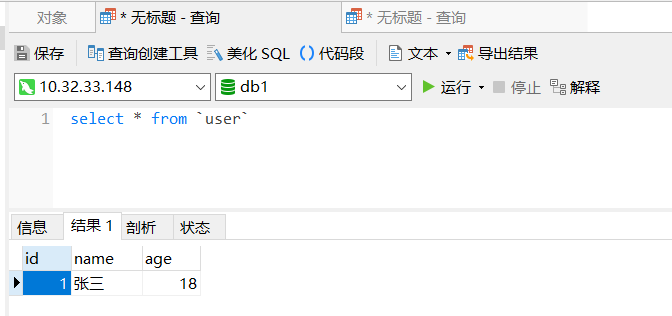
接着分别在db1 和 db2 中写入一条数据,数据id一致,但内容不一致,主要用于下面实验的区分:
db1:
INSERT INTO `user`(`id`, `name`, `age`) VALUES (1, '张三', 18);
- 1
db2:
INSERT INTO `user`(`id`, `name`, `age`) VALUES (1, '李四', 20);
- 1
下面首先创建一个 SpringBoot 项目,在 pom 中引入 dynamic-datasource 的依赖,以及 mysql 和 mybatisplus :
<dependency>
    <groupId>com.baomidou</groupId>
    <artifactId>mybatis-plus-boot-starter</artifactId>
    <version>3.3.2</version>
</dependency>

<dependency>
    <groupId>mysql</groupId>
    <artifactId>mysql-connector-java</artifactId>
</dependency>

<dependency>
    <groupId>com.alibaba</groupId>
    <artifactId>druid-spring-boot-starter</artifactId>
    <version>1.1.23</version>
</dependency>

<dependency>
    <groupId>org.projectlombok</groupId>
    <artifactId>lombok</artifactId>
    <version>1.18.12</version>
</dependency>

<dependency>
    <groupId>com.baomidou</groupId>
    <artifactId>dynamic-datasource-spring-boot-starter</artifactId>
    <version>3.3.2</version>
</dependency>
- 1
- 2
- 3
- 4
- 5
- 6
- 7
- 8
- 9
- 10
- 11
- 12
- 13
- 14
- 15
- 16
- 17
- 18
- 19
- 20
- 21
- 22
- 23
- 24
- 25
- 26
- 27
- 28
下面创建上面测试表的实体 entity:
@Data
@TableName("user")
public class UserEntity {
    @TableId(value = "id", type = IdType.AUTO)
    private Long id;
    private String name;
    private Integer age;
}
- 1
- 2
- 3
- 4
- 5
- 6
- 7
- 8
三、多数据源及事物控制
dynamic-datasource 针对于多数据源的切换推出了 @DS 注解,@DS 可以注解在方法上或类上,同时存在就近原则 方法上注解 优先于 类上注解。
下面开始实施:
修改配置文件增加数据库连接:
server:
  port: 8080
spring:
  application:
    name: dynamic-datasource-demo
  autoconfigure:
    exclude: com.alibaba.druid.spring.boot.autoconfigure.DruidDataSourceAutoConfigure
  datasource:
    dynamic:
      primary: db1 #设置默认的数据源或者数据源组,默认值即为master
      strict: true #设置严格模式,默认false不启动. 启动后在未匹配到指定数据源时候回抛出异常,不启动会使用默认数据源.
      datasource:
        db1:
          driver-class-name: com.mysql.jdbc.Driver
          type: com.alibaba.druid.pool.DruidDataSource
          url: jdbc:mysql://10.32.33.148:3307/db1?useUnicode=true&characterEncoding=utf8
          username: root
          password: root123
        db2:
          driver-class-name: com.mysql.jdbc.Driver
          type: com.alibaba.druid.pool.DruidDataSource
          url: jdbc:mysql://10.32.33.148:3307/db2?useUnicode=true&characterEncoding=utf8
          username: root
          password: root123

mybatis-plus:
  configuration:
    map-underscore-to-camel-case: false
  mapper-locations: classpath:mapper/*.xml
  type-aliases-package: com.bxc.dynamicdatasourcedemo.entity
- 1
- 2
- 3
- 4
- 5
- 6
- 7
- 8
- 9
- 10
- 11
- 12
- 13
- 14
- 15
- 16
- 17
- 18
- 19
- 20
- 21
- 22
- 23
- 24
- 25
- 26
- 27
- 28
- 29
- 30
然后分别创建两个 DAO,并通过 @DS 切换数据源:
@Repository
@Mapper
@DS("db1")
public interface DB1UserDao extends BaseMapper<UserEntity>{
    @Insert("insert into user(name,age) values(#{name},#{age})")
    int addUser(UserEntity entity);
}
- 1
- 2
- 3
- 4
- 5
- 6
- 7
@Repository
@Mapper
@DS("db2")
public interface DB2UserDao extends BaseMapper<UserEntity> {
    @Insert("insert into user(name,age) values(#{name},#{age})")
    int addUser(UserEntity entity);
}
- 1
- 2
- 3
- 4
- 5
- 6
- 7
下面创建一个测试类测试一下是否正常:
@Slf4j
@SpringBootTest
class DynamicDatasourceDemoApplicationTests {

    @Autowired
    DB1UserDao db1UserDao;

    @Autowired
    DB2UserDao db2UserDao;

    @Test
    void test1() {
        UserEntity db1UserEntity = db1UserDao.selectById(1);
        log.info("db1 查询结果:{} ",db1UserEntity.toString());
        UserEntity db2UserEntity = db2UserDao.selectById(1);
        log.info("db2 查询结果:{} ",db2UserEntity.toString());
    }
}
- 1
- 2
- 3
- 4
- 5
- 6
- 7
- 8
- 9
- 10
- 11
- 12
- 13
- 14
- 15
- 16
- 17
- 18

已经实现多数据源查询效果,下面继续事物的控制,应该都了解在 Spring 中事物使用 @Transactional 注解即可,但是仅针对于单个数据源的情况,多数据源下我们可以使用 jta 来控制,不过在 dynamic-datasource 中又推出了 @DSTransactional 注解来代替 Spring 的 @Transactional 注解,下面我们实验一下:
@Slf4j
@SpringBootTest
class DynamicDatasourceDemoApplicationTests {

    @Autowired
    DB1UserDao db1UserDao;

    @Autowired
    DB2UserDao db2UserDao;

    @Test
    @DSTransactional
    void test1() {
        UserEntity entity = new UserEntity();
        entity.setName("王五");
        entity.setAge(16);
        int db1 = db1UserDao.insert(entity);
        log.info("db1写入个数:{} ", db1);
        int db2 = db2UserDao.insert(entity);
        log.info("db2写入个数:{} ", db2);
        //模拟异常
        int a = 1 / 0;
    }
}
- 1
- 2
- 3
- 4
- 5
- 6
- 7
- 8
- 9
- 10
- 11
- 12
- 13
- 14
- 15
- 16
- 17
- 18
- 19
- 20
- 21
- 22
- 23
- 24
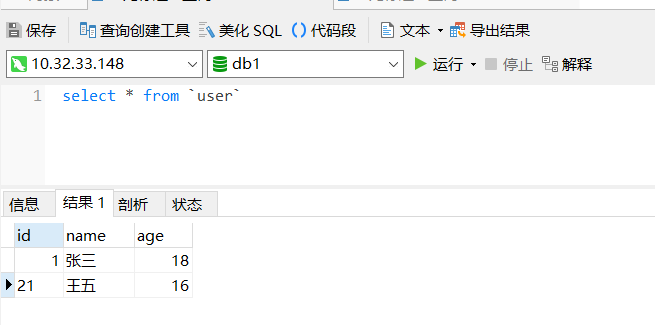
数据已经回滚!
四、读写分离
从上面的步骤中,已经了解到了 @DS 这个注解,那么通过这个注解我们可以简单的实现下读写分离结构,比如:
@Repository
@Mapper
public interface DBUserDao  {

    @DS("db1")
    @Insert("insert into user(name,age) values(#{name},#{age})")
    int addUser(UserEntity entity);

    @DS("db2")
    @Select("select * from user where id = #{id}")
    UserEntity findUser(@Param("id") Long id);
}
- 1
- 2
- 3
- 4
- 5
- 6
- 7
- 8
- 9
- 10
- 11
- 12
不过这种方式有点繁琐,每个 dao 都需要添加注解,那我们是不是可以通过 mybatis 的拦截器来完成呢,下面开始操作下:
创建一个 mybatis 的拦截器:
@Intercepts({@Signature(
        type = Executor.class,
        method = "query",
        args = {MappedStatement.class, Object.class, RowBounds.class, ResultHandler.class}
), @Signature(
        type = Executor.class,
        method = "query",
        args = {MappedStatement.class, Object.class, RowBounds.class, ResultHandler.class, CacheKey.class, BoundSql.class}
), @Signature(
        type = Executor.class,
        method = "update",
        args = {MappedStatement.class, Object.class}
)})
@Slf4j
@Component
@Primary
public class MasterSlaveAutoRoutingPlugin implements Interceptor {

    private static final String MASTER = "db1";

    private static final String SLAVE = "db2";

    @Override
    public Object intercept(Invocation invocation) throws Throwable {
        Object[] args = invocation.getArgs();
        MappedStatement ms = (MappedStatement) args[0];
        try {
            DynamicDataSourceContextHolder.push(SqlCommandType.SELECT == ms.getSqlCommandType() ? SLAVE : MASTER);
            return invocation.proceed();
        } finally {
            DynamicDataSourceContextHolder.clear();
        }
    }

    @Override
    public Object plugin(Object target) {
        return target instanceof Executor ? Plugin.wrap(target, this) : target;
    }

    @Override
    public void setProperties(Properties properties) {
    }
}
- 1
- 2
- 3
- 4
- 5
- 6
- 7
- 8
- 9
- 10
- 11
- 12
- 13
- 14
- 15
- 16
- 17
- 18
- 19
- 20
- 21
- 22
- 23
- 24
- 25
- 26
- 27
- 28
- 29
- 30
- 31
- 32
- 33
- 34
- 35
- 36
- 37
- 38
- 39
- 40
- 41
- 42
- 43
修改上面的 Dao 去除 @DS 注解:
@Repository
@Mapper
public interface DBUserDao {

    @Insert("insert into user(name,age) values(#{name},#{age})")
    int addUser(UserEntity entity);

    @Select("select * from user where id = #{id}")
    UserEntity findUser(@Param("id") Long id);
}
- 1
- 2
- 3
- 4
- 5
- 6
- 7
- 8
- 9
- 10
测试:
@Slf4j
@SpringBootTest
class DynamicDatasourceDemoApplicationTests {

    @Autowired
    DBUserDao dbUserDao;

    @Test
    void test2() {
        UserEntity entity = new UserEntity();
        entity.setName("王五");
        entity.setAge(16);
        int update = dbUserDao.addUser(entity);
        log.info("写入个数:{} ", update);
        UserEntity user = dbUserDao.findUser(1L);
        log.info("读取数据:{} ", user.toString());
    }
}
- 1
- 2
- 3
- 4
- 5
- 6
- 7
- 8
- 9
- 10
- 11
- 12
- 13
- 14
- 15
- 16
- 17
- 18

通过日志可以看出,读取的数据库是 db2 ,而写入的数据库呢,来看下db1 中的内容:
已经实现读写分离的效果。
五、负载均衡
上面通过 mybatis 的拦截器实现了读写分离,同时 dynamic-datasource 还为我们提供了负载的效果,同一个组下的默认就是负载均衡效果,怎么才是同一个组呢,上面有提到只需以下划线 _ 分割即可,下面修改配置文件:
spring:
  application:
    name: dynamic-datasource-demo
  autoconfigure:
    exclude: com.alibaba.druid.spring.boot.autoconfigure.DruidDataSourceAutoConfigure
  datasource:
    dynamic:
      primary: db_1 #设置默认的数据源或者数据源组,默认值即为master
      strict: true #设置严格模式,默认false不启动. 启动后在未匹配到指定数据源时候回抛出异常,不启动会使用默认数据源.
      datasource:
        db_1:
          driver-class-name: com.mysql.cj.jdbc.Driver
          type: com.alibaba.druid.pool.DruidDataSource
          url: jdbc:mysql://10.32.33.148:3307/db1?useUnicode=true&characterEncoding=utf8
          username: root
          password: root123
        db_2:
          driver-class-name: com.mysql.cj.jdbc.Driver
          type: com.alibaba.druid.pool.DruidDataSource
          url: jdbc:mysql://10.32.33.148:3307/db2?useUnicode=true&characterEncoding=utf8
          username: root
          password: root123
- 1
- 2
- 3
- 4
- 5
- 6
- 7
- 8
- 9
- 10
- 11
- 12
- 13
- 14
- 15
- 16
- 17
- 18
- 19
- 20
- 21
- 22
声明 Dao ,指定数据源为 db :
@Mapper
@Repository
@DS("db")
public interface FindUserDao extends BaseMapper<UserEntity> {
}
- 1
- 2
- 3
- 4
- 5
测试:
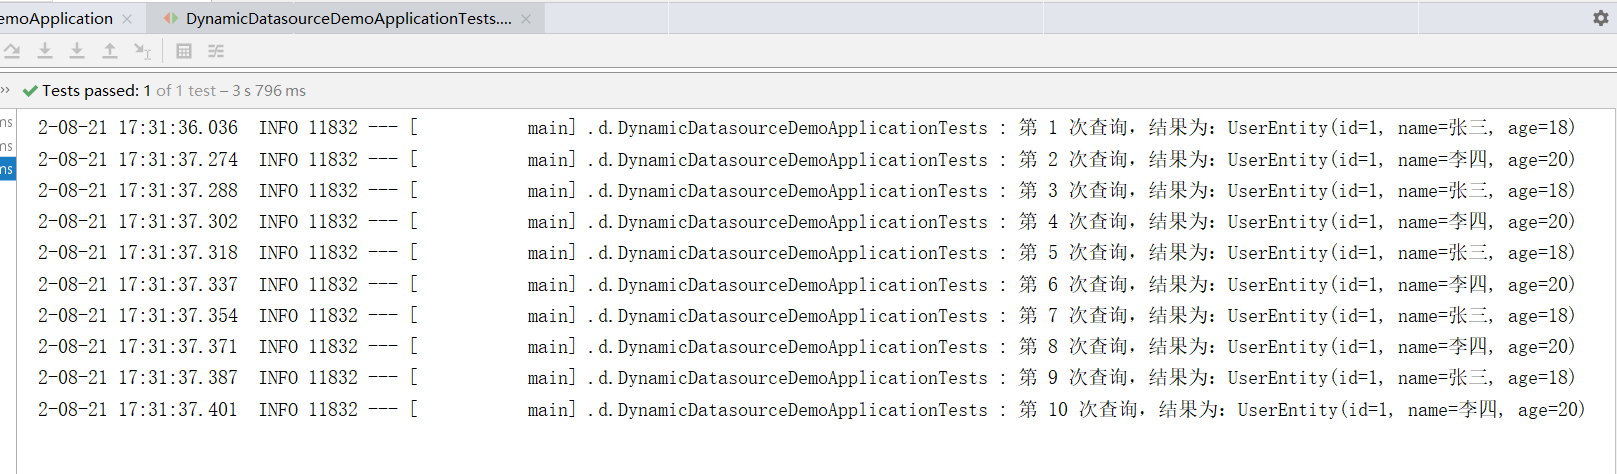
可以看到明显的负载轮训效果了。
文章来源: blog.csdn.net,作者:小毕超,版权归原作者所有,如需转载,请联系作者。
原文链接:blog.csdn.net/qq_43692950/article/details/126450821

- 点赞
- 收藏
- 关注作者
评论(0)