粗暴项目监控,快速上手 Spring 家族的亲儿子 SpringAdmin 监控项目

【摘要】 粗暴项目监控,快速上手 Spring 家族的亲儿子 SpringAdmin 监控项目

🍁 作者:知识浅谈,CSDN签约讲师,CSDN博客专家,华为云云享专家,阿里云星级博主
📌 擅长领域:全栈工程师、爬虫、ACM算法
💒 公众号:知识浅谈
🔥 联系方式vx:zsqtcc
🤞部署SpringAdmin监控springboot项目总结🤞
坑点:注意SpringAdmin版本号和监控的项目中Springboot版本保持一致。
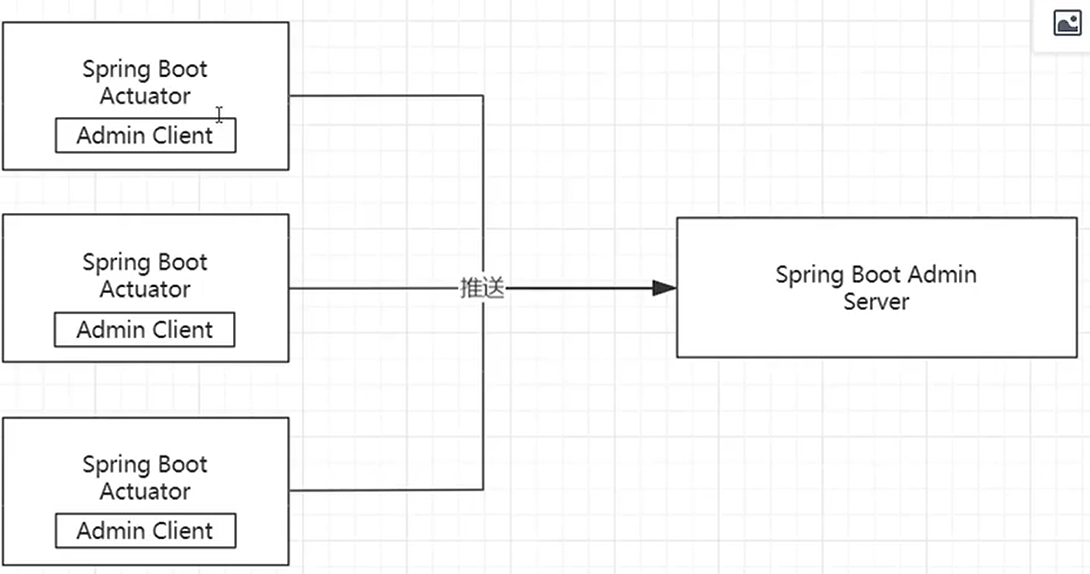
SpringAdmin监控使用的是CF的模式,就是监控端需要单独搭建一个SpringAdminServer服务器,SpringAdminCient要在监控的Springboot项目中引入。
🎐第一步:新建项目,增加依赖spring-boot-admin-starter-server对应的springboot版本为2.7.2
<dependency>
  <groupId>de.codecentric</groupId>
  <artifactId>spring-boot-admin-starter-server</artifactId>
  <version>2.7.2</version>
</dependency>
<dependency>
  <groupId>org.springframework.boot</groupId>
  <artifactId>spring-boot-starter-web</artifactId>
</dependency>
🎐第二步:配置文件设置
server: #设置server端口号为9000
  port: 9000
🎐第三步:启动类上添加注解
@EnableAdminServer //加上这个注解,才对外界提供adminserver的服务。
@SpringBootApplication
public class EsDemoApplication {

    public static void main(String[] args)  {
        SpringApplication.run(EsDemoApplication.class, args);
    }
}
🎐第四步:查看结果http://localhost:9000/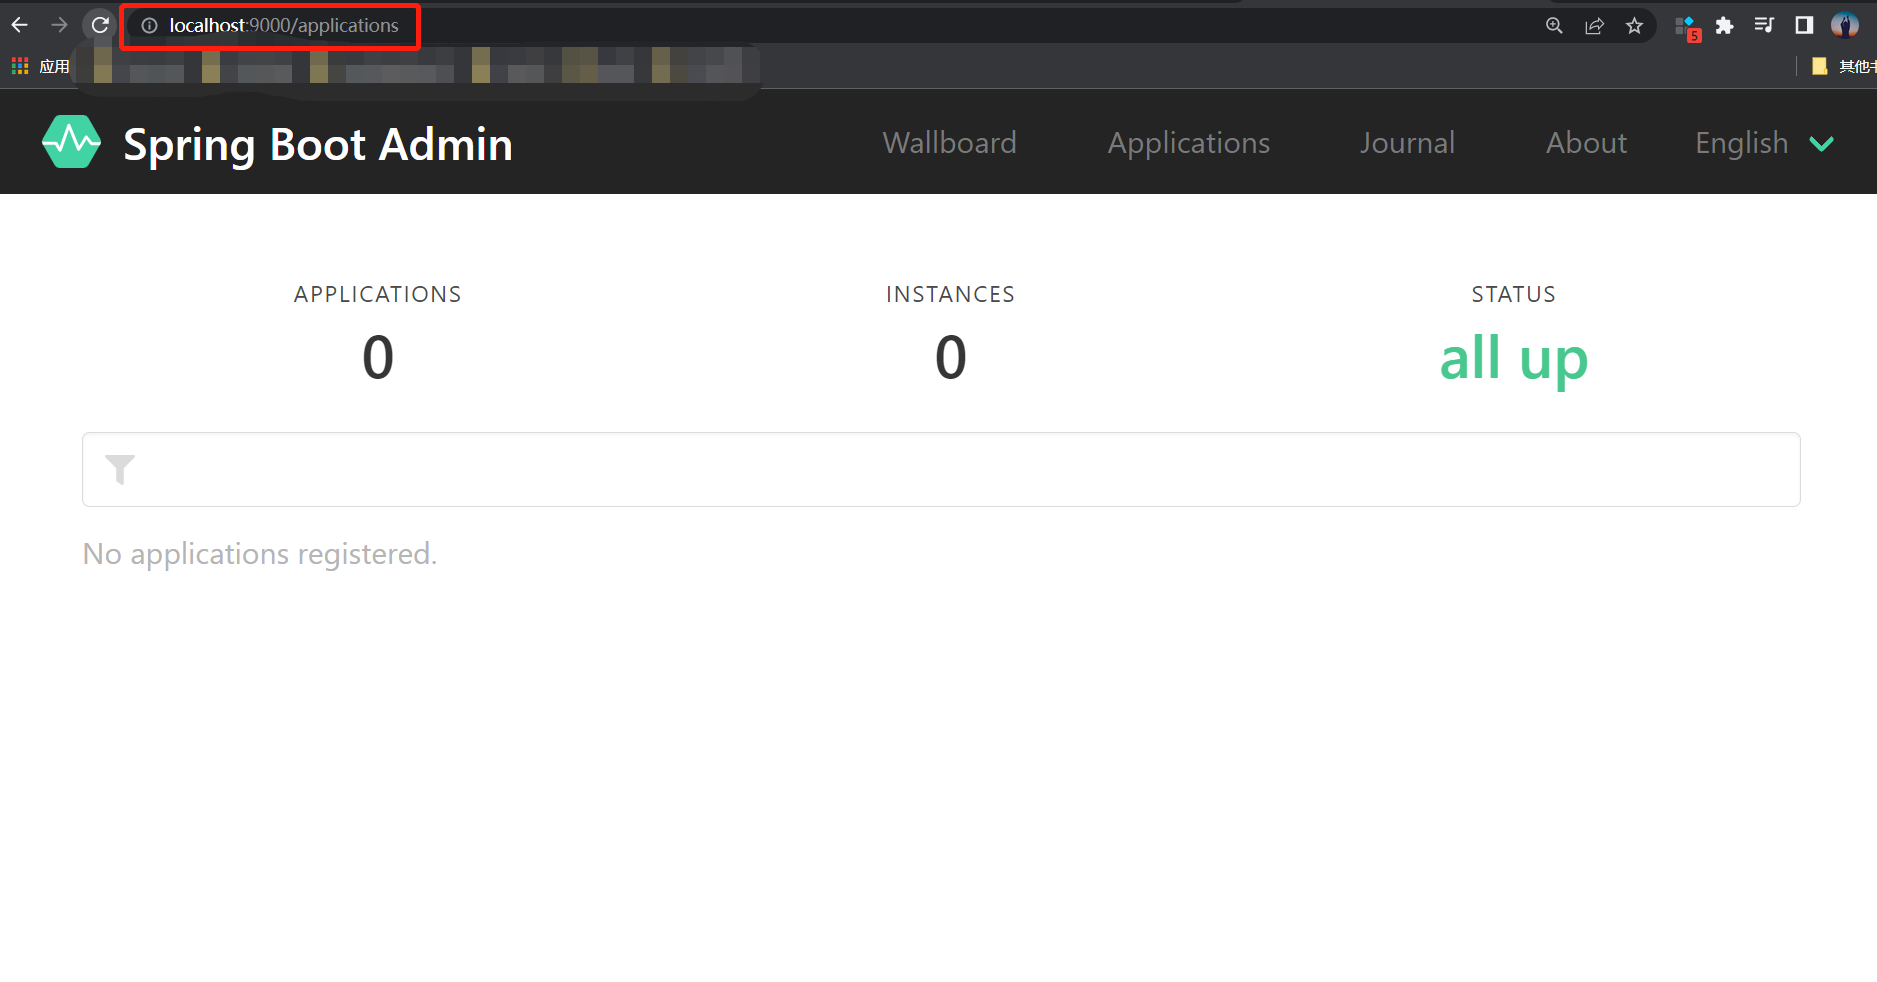
🎐第一步:新建项目,增加依赖spring-boot-admin-starter-server对应的springboot版本为2.7.2
<!---->
<dependency>
    <groupId>org.springframework.boot</groupId>
    <artifactId>spring-boot-starter-actuator</artifactId>
</dependency>
<dependency>
    <groupId>de.codecentric</groupId>
    <artifactId>spring-boot-admin-starter-client</artifactId>
    <version>2.7.2</version>
</dependency>
<dependency>
    <groupId>org.springframework.boot</groupId>
    <artifactId>spring-boot-starter-web</artifactId>
</dependency>
🎐第二步:配置文件设置
spring:
  boot:
    admin:
      client:
        url: http://localhost:9000
        instance:
          prefer-ip: true #基于ip地址向服务器注册,默认域名注册

management:
  endpoints:
    web:
      exposure:
        include: '*'
    enabled-by-default: true #开启所有监控端点
  endpoint:
    health:
      show-details: always
      enabled: true
    info:
      enabled: true
    metrics:
      enabled: true
🎐第三步:查看结果http://localhost:9000/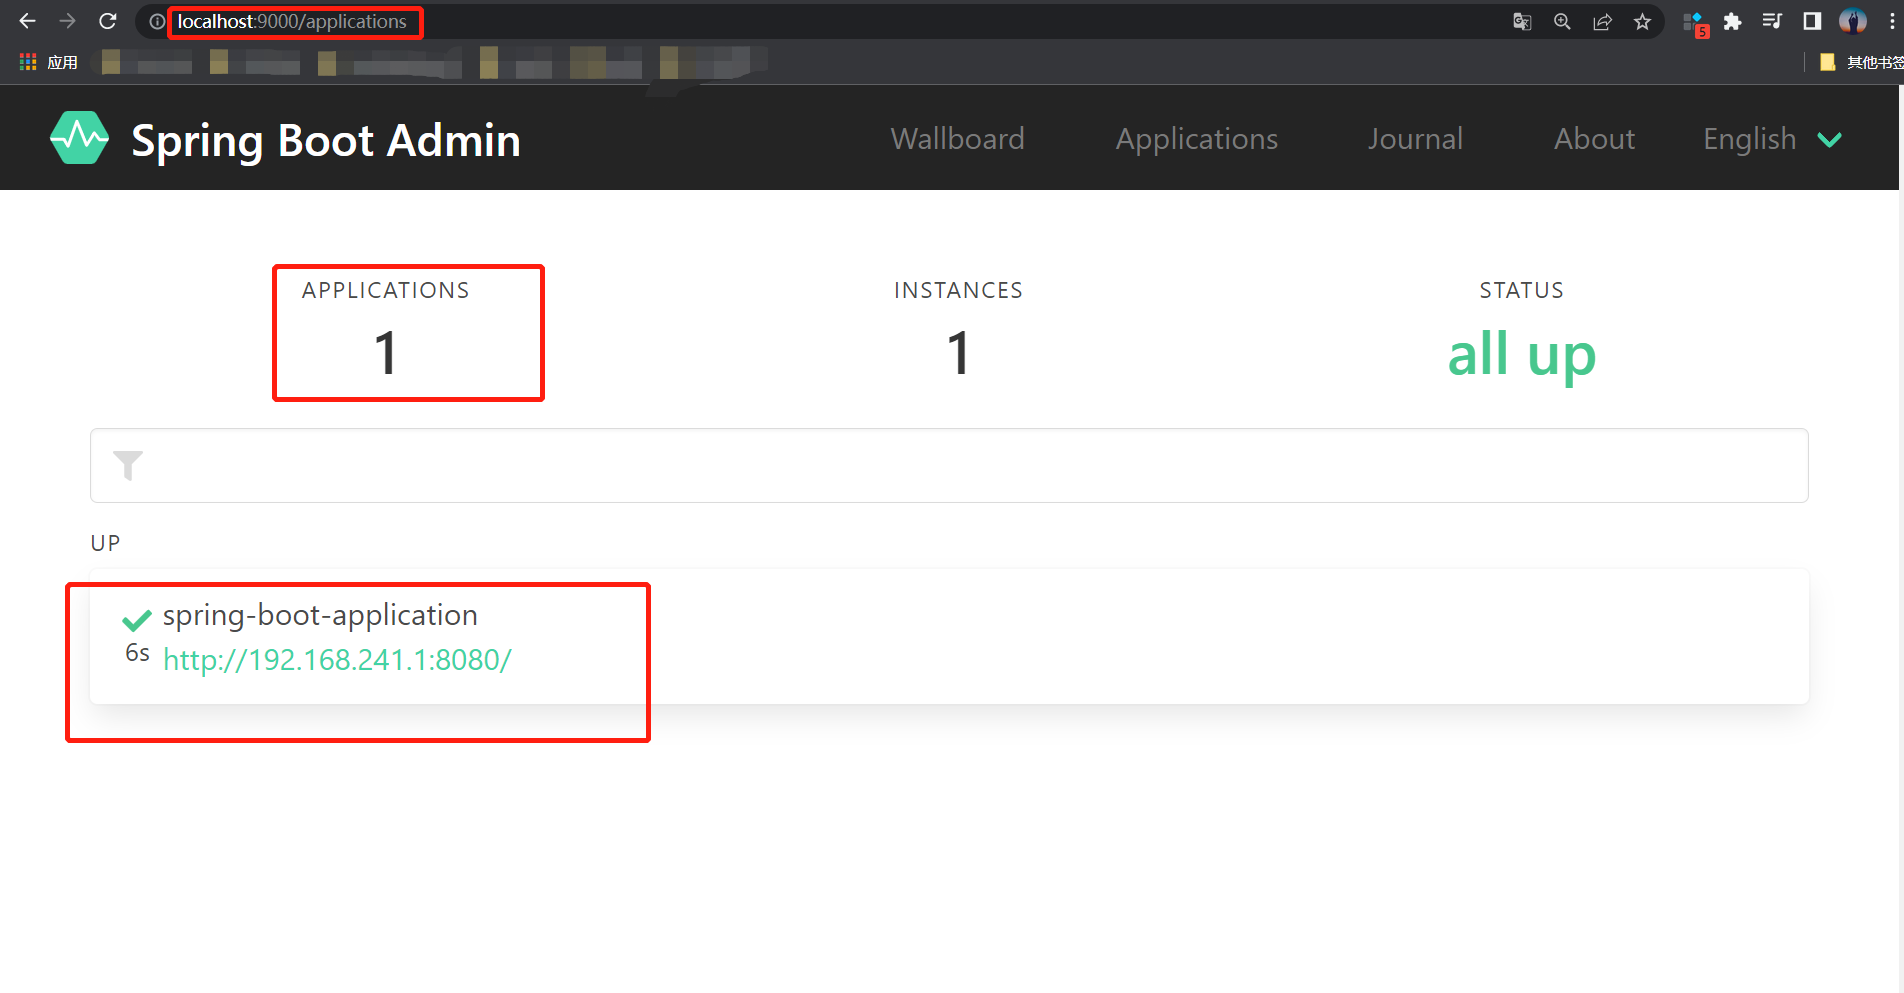
进入详细的实例中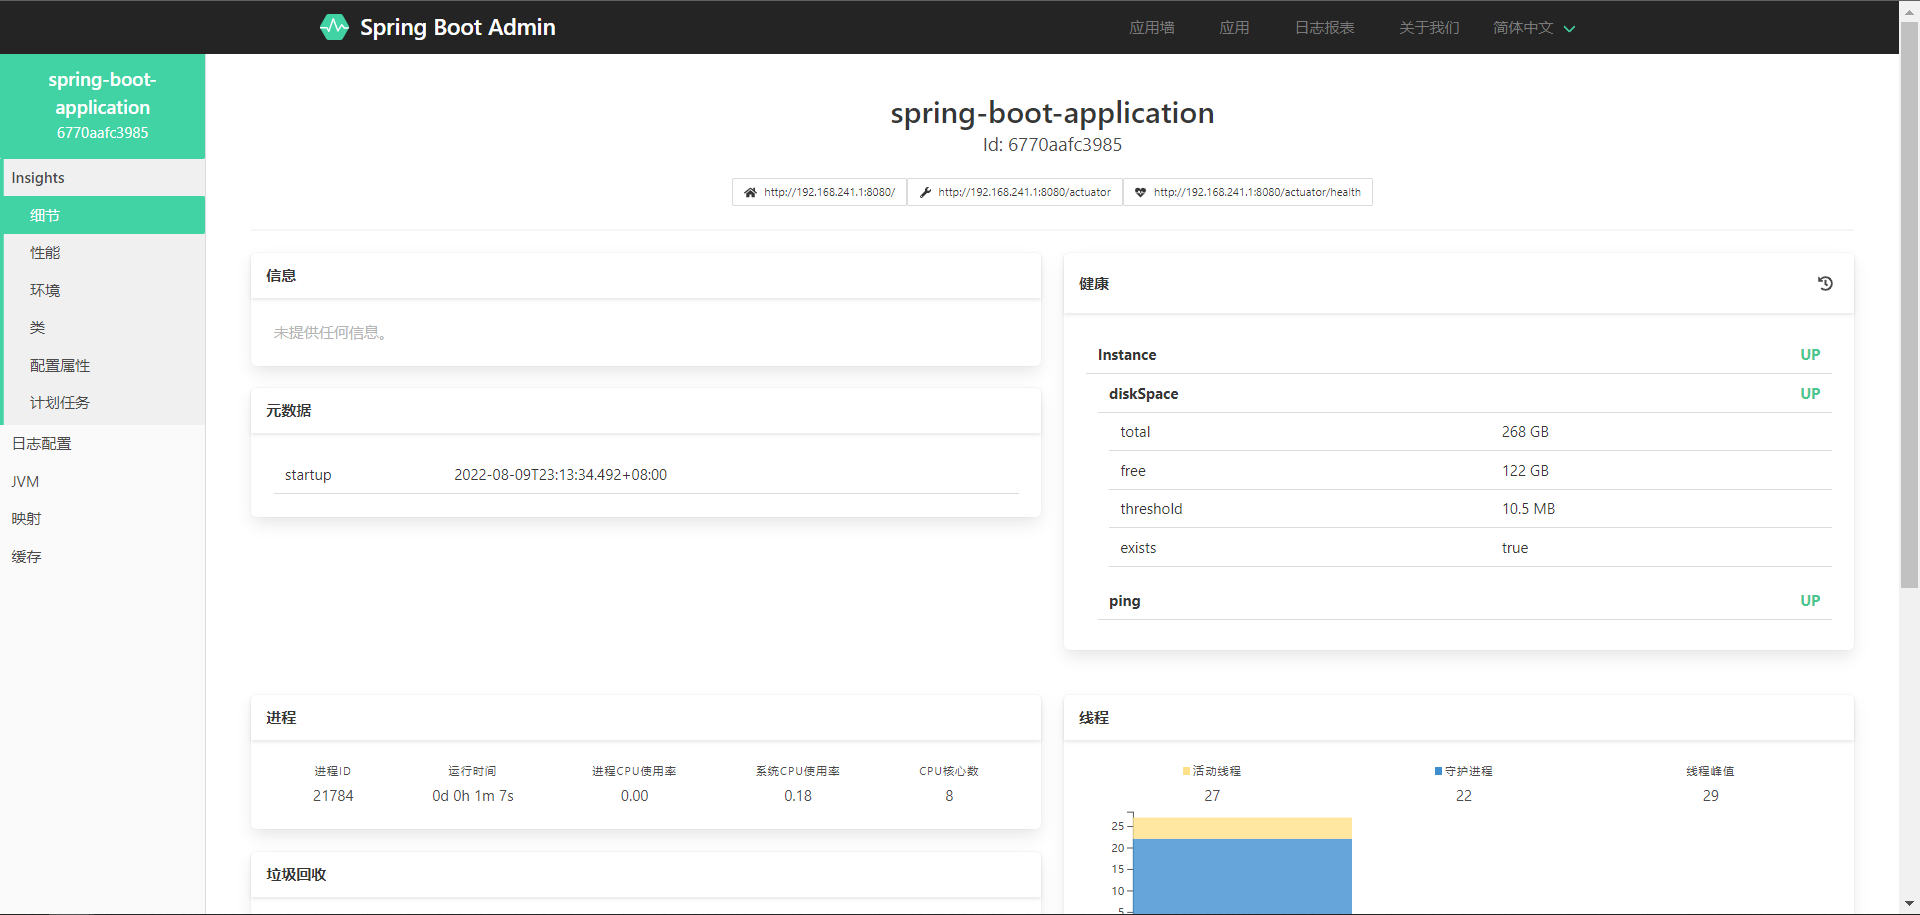
以上就从头到尾进行了实现,有需要的可以借鉴一下,希望对你有所帮助。

【声明】本内容来自华为云开发者社区博主,不代表华为云及华为云开发者社区的观点和立场。转载时必须标注文章的来源(华为云社区)、文章链接、文章作者等基本信息,否则作者和本社区有权追究责任。如果您发现本社区中有涉嫌抄袭的内容,欢迎发送邮件进行举报,并提供相关证据,一经查实,本社区将立刻删除涉嫌侵权内容,举报邮箱:
cloudbbs@huaweicloud.com
- 点赞
- 收藏
- 关注作者
评论(0)