前置准备 -- json-server的介绍与服务搭建、axios的介绍与页面配置
json-server
什么是json-server
Json-Server 作为工具,基于 Express 开发,而且它足够简单,写少量数据,即可使用,Json-Server 的主要作用就是搭建本地的数据接口,创建 json 文件,便于调试调用。
Json-Server 支持 CORS 和 JSONP 跨域请求,支持 GET, POST, PUT, PATCH 和 DELETE 方法,更提供了一系列的查询方法。
为我们快速搭建一个http服务,因为我们后面使用axios的时候需要向服务端发送请求,我们需要服务端这样一个角色来与axios结合做实践
Json-Server作用
在开发过程中,接口多半是滞后于页面开发的。利用 Json-Server 快速搭建模拟返回 REST 风格的后台数据,搭建本地的数据接口,保证前后端开发的分离。
前后端开发只要设定好接口以及数据的定义,剩下的就可以各自开发,最后集成测试。
json-server的安装
在安装过程中最好使用管理员身份打开编译器
打开终端,输入:
npm install -g json-server
- 1
然后创建一个以db.json为名字的文件,然后将以下代码复制粘贴进入此文件:
{
  "posts": [
    { "id": 1, "title": "json-server", "author": "typicode" }
  ],
  "comments": [
    { "id": 1, "body": "some comment", "postId": 1 }
  ],
  "profile": { "name": "typicode" }
}
- 1
- 2
- 3
- 4
- 5
- 6
- 7
- 8
- 9
接下来启动JSON SERVER,终端使用命令:
json-server --watch db.json
- 1
注意:使用这条命令的时候,一定要处于db.json这个文件的文件夹中。
这个时候你会得到:

如果你进入http://localhost:3000/posts/1,你将会得到:
{ "id": 1, "title": "json-server", "author": "typicode" }
- 1
还有一些其他API:
GET    /posts           //获得全部文章
GET    /posts/1			//获取指定ID文章
POST   /posts
PUT    /posts/1
PATCH  /posts/1
DELETE /posts/1
- 1
- 2
- 3
- 4
- 5
- 6
GET    /profile
POST   /profile
PUT    /profile
PATCH  /profile
- 1
- 2
- 3
- 4
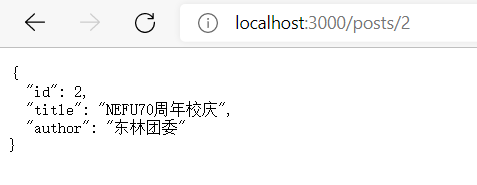
例如:对于以下db文件:
{
    "posts": [
        {
            "id": 1,
            "title": "json-server",
            "author": "typicode"
        },
        {
            "id": 2,
            "title": "NEFU70周年校庆",
            "author": "东林团委"
        }
    ],
    "comments": [
        {
            "id": 1,
            "body": "some comment",
            "postId": 1
        },
        {
            "body": "喜大普奔",
            "postId": 2,
            "id": 2
        }
    ],
    "profile": {
        "name": "typicode"
    }
}
- 1
- 2
- 3
- 4
- 5
- 6
- 7
- 8
- 9
- 10
- 11
- 12
- 13
- 14
- 15
- 16
- 17
- 18
- 19
- 20
- 21
- 22
- 23
- 24
- 25
- 26
- 27
- 28
- 29

axios
Axios,是一个基于promise网络请求库(客户端),作用于node.js和浏览器中,它是 isomorphic 的(即同一套代码可以运行在浏览器和node.js中)。在服务端它使用原生node.js http模块, 而在客户端 (浏览端) 则使用XMLHttpRequests。
在浏览器端,借助于axios可以向服务端发送Ajax请求,来获取数据。
在node.js中,借助于axios可以向远端服务发送http请求。
原理:
axios本质上也是对原生XHR的封装,只不过它是Promise的实现版本,符合最新的ES规范。
axios的特点
- 基于 xhr + promise 的异步 ajax 请求库
- 浏览器端/node 端都可以使用
- 支持请求/响应拦截器
- 支持请求取消
- 请求/响应数据转换
- 批量发送多个请求
安装axios
三种方式:
Using npm:(项目中多用)
$ npm install axios
- 1
Using bower:
$ bower install axios
- 1
Using cdn:
<script src="https://unpkg.com/axios/dist/axios.min.js"></script>
- 1
因为这是国外的源,速度可能会有影响,可以用国内的源(https://www.bootcdn.cn/axios/):
https://cdn.bootcdn.net/ajax/libs/axios/0.26.1/axios.js
- 1
例如:
<!DOCTYPE html>
<html lang="en">
<head>
    <meta charset="UTF-8">
    <meta http-equiv="X-UA-Compatible" content="IE=edge">
    <meta name="viewport" content="width=device-width, initial-scale=1.0">
    <title>Document</title>
    <script src="https://cdn.bootcdn.net/ajax/libs/axios/0.26.1/axios.js"></script>
</head>
<body>
    <script>
        console.log(axios);
    </script>
</body>
</html>
- 1
- 2
- 3
- 4
- 5
- 6
- 7
- 8
- 9
- 10
- 11
- 12
- 13
- 14
- 15

说明配置成功
文章来源: blog.csdn.net,作者:十八岁讨厌编程,版权归原作者所有,如需转载,请联系作者。
原文链接:blog.csdn.net/zyb18507175502/article/details/124046758
- 点赞
- 收藏
- 关注作者


评论(0)