Vue组件化编程④

【摘要】
文章目录
单文件组件
单文件组件
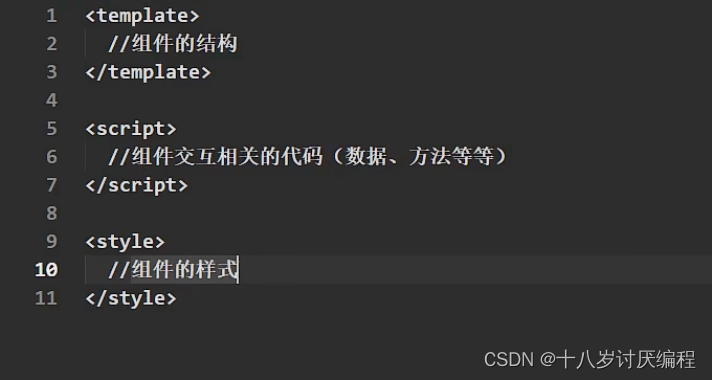
这也就意味着我们需要把一个个的组件写成.vue文件。我们知道组件由三个部分组成,部分html代码、css、js。在vue文件中为我们提供了三种标签,去完成...
单文件组件
这也就意味着我们需要把一个个的组件写成.vue文件。我们知道组件由三个部分组成,部分html代码、css、js。在vue文件中为我们提供了三种标签,去完成每部分的内容:
由此我们可以看出非单文件组件的一个弊病:css样式不能跟着组件走
就拿我们前面写过的代码来说:
如果要定义样式还需要去head标签里面写一个style标签,然后再找到要定义标签的元素,再开始写样式。
我们现在尝试把上图中的student组件放入到vue文件中去:
<template>
    <div>
        <h2 class="stu">学生名称:{{studentName}}</h2>
        <h2>学生年纪:{{studentAge}}</h2>

    </div>
</template>

<script>
    const student = Vue.extend({
        data(){
            return {
                studentName:'张三',
                studentAge:18
            }
        }
    })
	export default {
    	student
	}
</script>

<style>
    .stu{
        background-color:red;
    }
</style>
- 1
- 2
- 3
- 4
- 5
- 6
- 7
- 8
- 9
- 10
- 11
- 12
- 13
- 14
- 15
- 16
- 17
- 18
- 19
- 20
- 21
- 22
- 23
- 24
- 25
- 26
- 27
记得要暴露东西,否则引入了之后没有可以用的
如果组件没有样式,我们可以不要style标签,上面代码中的样式是我临时加的
还可以更简洁一点,我们知道Vue.extend()是有简便写发的,然后我们再给组件添加一个名字:
<template>
    <div>
        <h2 class="stu">学生名称:{{studentName}}</h2>
        <h2>学生年纪:{{studentAge}}</h2>

    </div>
</template>

<script>
    export default {
        name:'Student',
        data(){
            return {
                studentName:'张三',
                studentAge:18
            }
        }
    }

</script>

<style>
    .stu{
        background-color:red;
    }
</style>
- 1
- 2
- 3
- 4
- 5
- 6
- 7
- 8
- 9
- 10
- 11
- 12
- 13
- 14
- 15
- 16
- 17
- 18
- 19
- 20
- 21
- 22
- 23
- 24
- 25
- 26
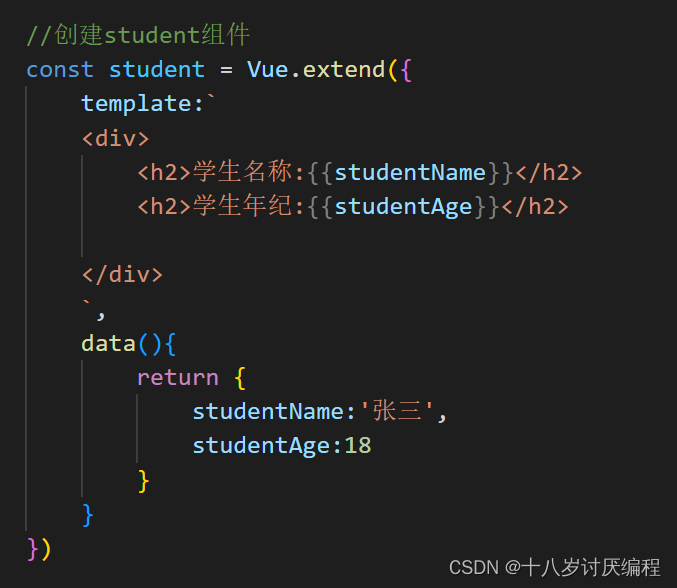
接下来我们将以下代码按照单文件组建的方式进行编写:
<body>
    <div id="root">
        <app></app>
    </div>


</body>
<script>


    //创建student组件
    const student = Vue.extend({
        template:`
        <div>
            <h2>学生名称:{{studentName}}</h2>
            <h2>学生年纪:{{studentAge}}</h2>

        </div>
        `,
        data(){
            return {
                studentName:'张三',
                studentAge:18
            }
        }
    })


    //创建school组件
    const school = Vue.extend({
        name:'NEFU',
        template:`
        <div>
            <h2>学校名称:{{schoolName}}</h2>
            <h2>学校地址:{{schoolAddress}}</h2>
            <hr>
        </div>
        `,
        data(){
            return {
                schoolName:'NEFU',
                schoolAddress:'哈尔滨',
            }
        },
    })

    //创建app组件
    const app = Vue.extend({
        components:{
            school,
            student
        },
        template:`
            <div>
                <hello></hello>
                <school></school>
                <student></student>
            </div>

        `
    })

    new Vue({
        el:'#root',
        //注册组件
        components:{
            app
        },

    })
</script>
- 1
- 2
- 3
- 4
- 5
- 6
- 7
- 8
- 9
- 10
- 11
- 12
- 13
- 14
- 15
- 16
- 17
- 18
- 19
- 20
- 21
- 22
- 23
- 24
- 25
- 26
- 27
- 28
- 29
- 30
- 31
- 32
- 33
- 34
- 35
- 36
- 37
- 38
- 39
- 40
- 41
- 42
- 43
- 44
- 45
- 46
- 47
- 48
- 49
- 50
- 51
- 52
- 53
- 54
- 55
- 56
- 57
- 58
- 59
- 60
- 61
- 62
- 63
- 64
- 65
- 66
- 67
- 68
- 69
- 70
- 71
文件结构:
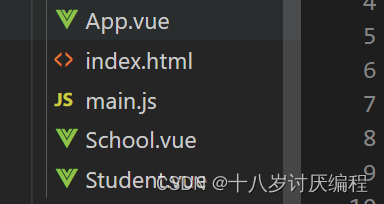
App.vue:
<template>
    <div>
        <School></School>
        <Student></Student>
    </div>
</template>

<script>
        import School from './School.vue'
        import Student from './Student.vue'
        const app = Vue.extend({
        components:{
            School,
            Student
        },
    })
export default {
    app
}
</script>

<style>

</style>
- 1
- 2
- 3
- 4
- 5
- 6
- 7
- 8
- 9
- 10
- 11
- 12
- 13
- 14
- 15
- 16
- 17
- 18
- 19
- 20
- 21
- 22
- 23
- 24
index.html:
<!DOCTYPE html>
<html lang="en">
<head>
    <meta charset="UTF-8">
    <meta http-equiv="X-UA-Compatible" content="IE=edge">
    <meta name="viewport" content="width=device-width, initial-scale=1.0">
    <title>Document</title>

</head>
<body>
    <div id="root"></div>
    <script type="text/javascript" src="../VueEnvironment/vue.js"></script>
    <script src="./main.js"></script>
</body>
</html>
- 1
- 2
- 3
- 4
- 5
- 6
- 7
- 8
- 9
- 10
- 11
- 12
- 13
- 14
- 15
注意这里的引入顺序和位置。不能放在head里面去引入,此时结构还没有被加载!
其实我们这里的引入是没有多大意义的,我们后期会借助脚手架来进行编译。
main.js:
import App from './App.vue'

new Vue({
    template:`
        <App></App>
    `,
    el:'#root',
    //注册组件
    components:{
        App
    },

})
- 1
- 2
- 3
- 4
- 5
- 6
- 7
- 8
- 9
- 10
- 11
- 12
- 13
main.js文件中一般放着vm的代码。并且一般只有App.vue能与他直接对话!
School.vue:
<template>
        <div>
            <h2>学校名称:{{schoolName}}</h2>
            <h2>学校地址:{{schoolAddress}}</h2>
            <hr>
        </div>
</template>

<script>
    const school = Vue.extend({
        name:'NEFU',
        data(){
            return {
                schoolName:'NEFU',
                schoolAddress:'哈尔滨',
            }
        },
    })
export default {
    school
}
</script>

<style>

</style>
- 1
- 2
- 3
- 4
- 5
- 6
- 7
- 8
- 9
- 10
- 11
- 12
- 13
- 14
- 15
- 16
- 17
- 18
- 19
- 20
- 21
- 22
- 23
- 24
- 25
- 26
Student.vue:
<template>
    <div>
        <h2 class="stu">学生名称:{{studentName}}</h2>
        <h2>学生年纪:{{studentAge}}</h2>

    </div>
</template>

<script>
    export default {
        name:'Student',
        data(){
            return {
                studentName:'张三',
                studentAge:18
            }
        }
    }

</script>

<style>
    .stu{
        background-color:red;
    }
</style>
- 1
- 2
- 3
- 4
- 5
- 6
- 7
- 8
- 9
- 10
- 11
- 12
- 13
- 14
- 15
- 16
- 17
- 18
- 19
- 20
- 21
- 22
- 23
- 24
- 25
- 26
做完这一切之后,我们直接打开index.html文件是没有用的,我们还需要一个强大的工具–脚手架.
文章来源: blog.csdn.net,作者:十八岁讨厌编程,版权归原作者所有,如需转载,请联系作者。
原文链接:blog.csdn.net/zyb18507175502/article/details/125318825

【版权声明】本文为华为云社区用户转载文章,如果您发现本社区中有涉嫌抄袭的内容,欢迎发送邮件进行举报,并提供相关证据,一经查实,本社区将立刻删除涉嫌侵权内容,举报邮箱:
cloudbbs@huaweicloud.com
- 点赞
- 收藏
- 关注作者
评论(0)