Vue中的Ajax②(slot插槽)
案例引入
我们现在有一个需求:
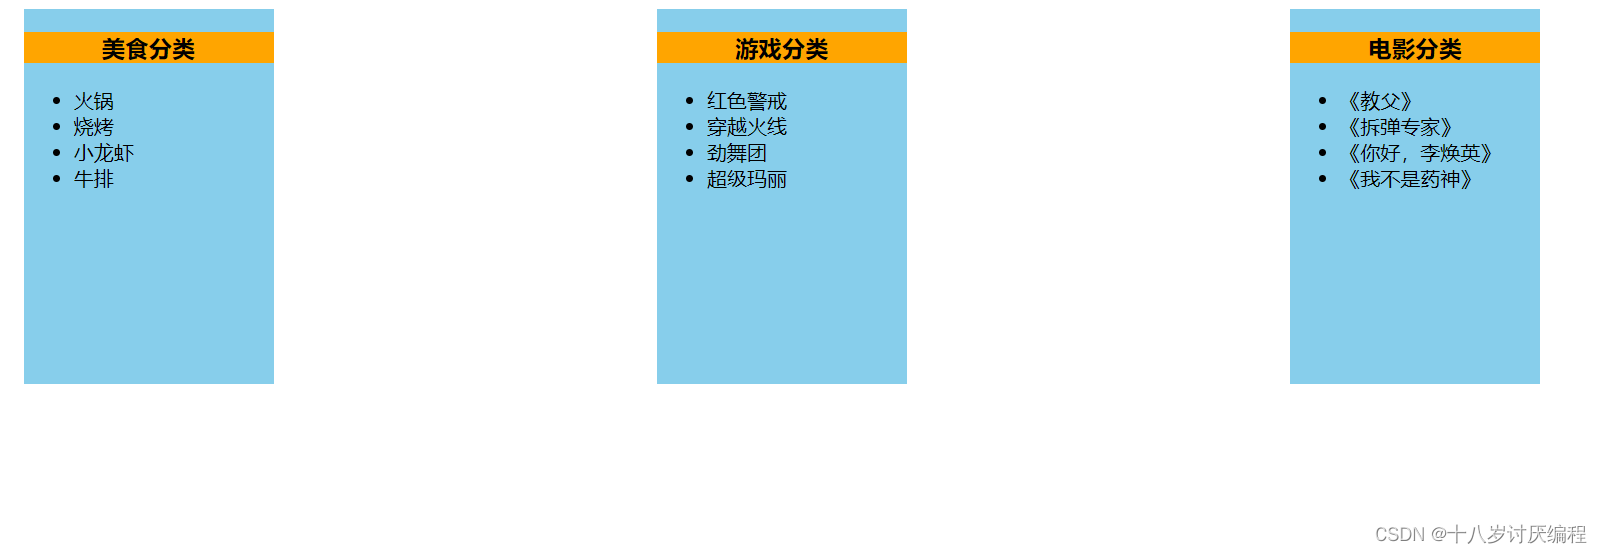
代码:
App组件:
<template>
  <div class="container">
    <Category title="美食" :mydata="foods"></Category>

    <Category title="游戏" :mydata="games"></Category>

    <Category title="电影" :mydata="films"></Category>
  </div>
</template>

<script>
  import Category from './components/Category'
  export default {
    name:'App',
    components:{Category},
    data() {
      return {
        foods:['火锅','烧烤','小龙虾','牛排'],
        games:['红色警戒','穿越火线','劲舞团','超级玛丽'],
        films:['《教父》','《拆弹专家》','《你好,李焕英》','《我不是药神》']
      }
    },
  }
</script>

<style scoped>
  .container{
    display: flex;
    justify-content: space-around;
  }
</style>
- 1
- 2
- 3
- 4
- 5
- 6
- 7
- 8
- 9
- 10
- 11
- 12
- 13
- 14
- 15
- 16
- 17
- 18
- 19
- 20
- 21
- 22
- 23
- 24
- 25
- 26
- 27
- 28
- 29
- 30
- 31
Category组件
<template>
    <div class="category">
        <h3>{{title}}分类</h3>
        <ul>
            <li v-for="(item,index) in mydata" :key="index">
                {{item}}
            </li>
        </ul>
    </div>
</template>

<script>
    export default {
        name:'MyCategory',
        props:['title','mydata']
    }
</script>

<style scoped>
    .category{
        background-color: skyblue;
        width: 200px;
        height: 300px;
    }
    h3{
        text-align: center;
        background-color: orange;
    }
    video{
        width: 100%;
    }
    img{
        width: 100%;
    }
</style>
- 1
- 2
- 3
- 4
- 5
- 6
- 7
- 8
- 9
- 10
- 11
- 12
- 13
- 14
- 15
- 16
- 17
- 18
- 19
- 20
- 21
- 22
- 23
- 24
- 25
- 26
- 27
- 28
- 29
- 30
- 31
- 32
- 33
- 34
- 35
现在我们有一个新需求:
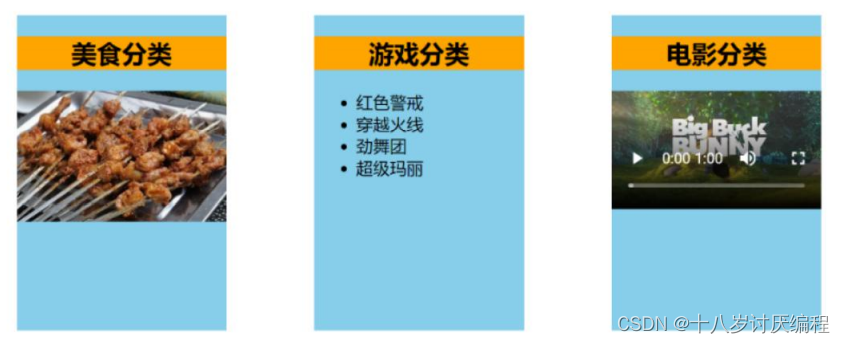
这该如何去实现呢?如果我们使用条件渲染,那当需求多了之后,代码逻辑就会变得非常的混乱。
这个时候我们可以使用 – 默认插槽
默认插槽
使用默认插槽有两个步骤:
- 在组件标签中放入相应的资源
- 在组件中使用slot标签为资源占位置,使资源在此处呈现
实现以上的需求我们的代码如下:
App组件:
<template>
  <div class="container">
    <Category title="美食" >
      <img src="https://s3.ax1x.com/2021/01/16/srJlq0.jpg">
    </Category>

    <Category title="游戏" >
      <ul>
        <li v-for="(item,index) in games" :key="index">
          {{item}}
        </li>
      </ul>
    </Category>

    <Category title="电影" >
      <video controls src="http://clips.vorwaerts-gmbh.de/big_buck_bunny.mp4"></video>
    </Category>
  </div>
</template>

<script>
  import Category from './components/Category'
  export default {
    name:'App',
    components:{Category},
    data() {
      return {
        foods:['火锅','烧烤','小龙虾','牛排'],
        games:['红色警戒','穿越火线','劲舞团','超级玛丽'],
        films:['《教父》','《拆弹专家》','《你好,李焕英》','《我不是药神》']
      }
    },
  }
</script>

<style scoped>
  .container{
    display: flex;
    justify-content: space-around;
  }
</style>
- 1
- 2
- 3
- 4
- 5
- 6
- 7
- 8
- 9
- 10
- 11
- 12
- 13
- 14
- 15
- 16
- 17
- 18
- 19
- 20
- 21
- 22
- 23
- 24
- 25
- 26
- 27
- 28
- 29
- 30
- 31
- 32
- 33
- 34
- 35
- 36
- 37
- 38
- 39
- 40
- 41
Category组件:
<template>
    <div class="category">
        <h3>{{title}}分类</h3>
        <!-- 定义一个插槽(挖个坑,等着组件的使用者进行填充) -->
        <slot></slot>
    </div>
</template>

<script>
    export default {
        name:'MyCategory',
        props:['title']
    }
</script>

<style scoped>
    .category{
        background-color: skyblue;
        width: 200px;
        height: 300px;
    }
    h3{
        text-align: center;
        background-color: orange;
    }
    video{
        width: 100%;
    }
    img{
        width: 100%;
    }
</style>
- 1
- 2
- 3
- 4
- 5
- 6
- 7
- 8
- 9
- 10
- 11
- 12
- 13
- 14
- 15
- 16
- 17
- 18
- 19
- 20
- 21
- 22
- 23
- 24
- 25
- 26
- 27
- 28
- 29
- 30
- 31
- 32
注意:
如果使用者没有传递一个结构,但是用slot标签进行占位,那么会显示slot的默认值。
这个默认值可以之间在slot标签之间进行定义,例如:
注意:
在上面的代码中:
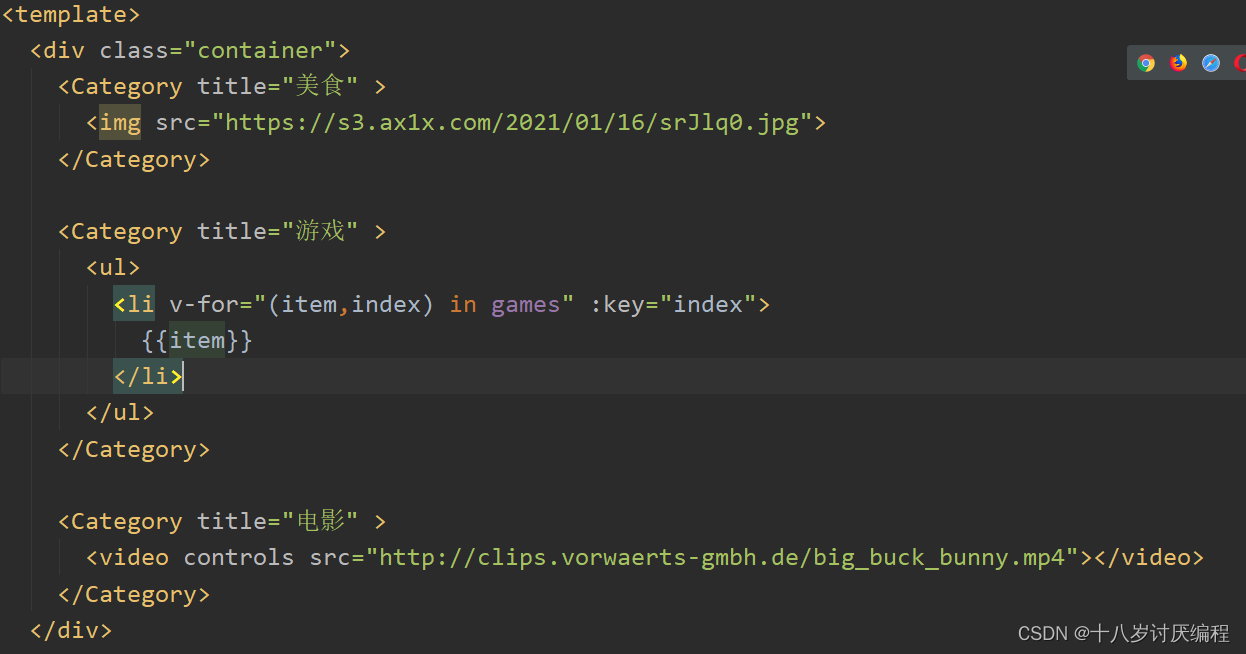
你的img、ul、video标签都是在App组件里面解析完成之后才放到Category组件里面去的,所以说如果我们想控制img、ul、video的样式,我们完全可以把他们写在App组件中
具名插槽
默认插槽显然不能满足我们的所有需求,就比方说我们如果设置多个插槽,那该怎么呢?我们的结构该往哪个地方放?这个时候我们就需要用到 – 具名插槽
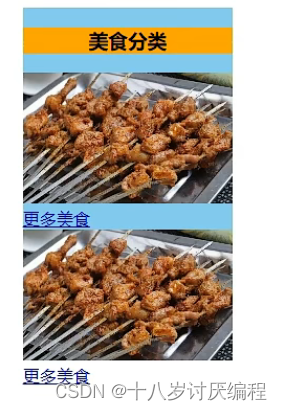
例如我们现在有一个需求:
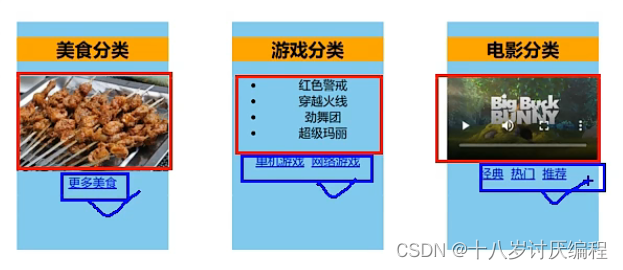
我们想新加入一个插槽,把我们蓝色方框之中的东西放进去。
当然我们使用一个插槽也可以完成,但这里我们要体现具名插槽的功能
具名插槽使用方法:
- 给slot标签添加name属性
- 想把结构放在哪个插槽,就往结构上添加slot属性,其值为插槽名
如果你不命名而使用多个插槽的话,那么他会把你的结构在每个插槽都放一份
例如:
接下来我们使用代码实现:
App组件:
<template>
  <div class="container">
    <Category title="美食" >
      <img slot="center" src="https://s3.ax1x.com/2021/01/16/srJlq0.jpg">
      <a href="#" slot="footer">更多美食</a>
    </Category>

    <Category title="游戏" >
      <ul slot="center">
        <li v-for="(item,index) in games" :key="index">
          {{item}}
        </li>
      </ul>
      <a href="#" slot="footer">单机游戏</a>
      <a href="#" slot="footer">网络游戏</a>
    </Category>

    <Category title="电影" >
      <video slot="center" controls src="http://clips.vorwaerts-gmbh.de/big_buck_bunny.mp4"></video>
      <a href="#" slot="footer">经典</a>
      <a href="#" slot="footer">热门</a>
      <a href="#" slot="footer">推荐</a>
    </Category>
  </div>
</template>

<script>
  import Category from './components/Category'
  export default {
    name:'App',
    components:{Category},
    data() {
      return {
        foods:['火锅','烧烤','小龙虾','牛排'],
        games:['红色警戒','穿越火线','劲舞团','超级玛丽'],
        films:['《教父》','《拆弹专家》','《你好,李焕英》','《我不是药神》']
      }
    },
  }
</script>

<style scoped>
  .container{
    display: flex;
    justify-content: space-around;
  }
</style>
- 1
- 2
- 3
- 4
- 5
- 6
- 7
- 8
- 9
- 10
- 11
- 12
- 13
- 14
- 15
- 16
- 17
- 18
- 19
- 20
- 21
- 22
- 23
- 24
- 25
- 26
- 27
- 28
- 29
- 30
- 31
- 32
- 33
- 34
- 35
- 36
- 37
- 38
- 39
- 40
- 41
- 42
- 43
- 44
- 45
- 46
- 47
- 48
Category组件:
<template>
    <div class="category">
        <h3>{{title}}分类</h3>
        <slot name="center">没有传入结构我就会显示</slot>
        <slot name="footer">没有传入结构我就会显示</slot>
    </div>
</template>

<script>
    export default {
        name:'MyCategory',
        props:['title']
    }
</script>

<style scoped>
    .category{
        background-color: skyblue;
        width: 200px;
        height: 300px;

    }
    h3{
        text-align: center;
        background-color: orange;
    }
    video{
        width: 100%;
    }
    img{
        width: 100%;
    }
</style>
- 1
- 2
- 3
- 4
- 5
- 6
- 7
- 8
- 9
- 10
- 11
- 12
- 13
- 14
- 15
- 16
- 17
- 18
- 19
- 20
- 21
- 22
- 23
- 24
- 25
- 26
- 27
- 28
- 29
- 30
- 31
- 32
- 33
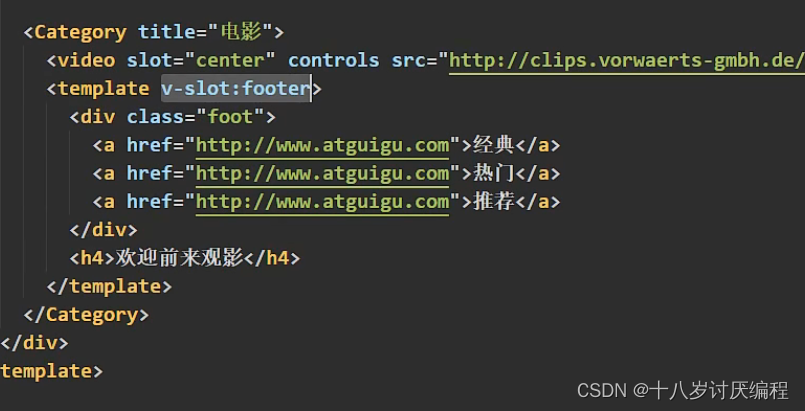
如果你觉得一个个的元素去添加slot属性很麻烦,我们有两种解决办法:
- 使用div包裹,然后直接在div身上加slot属性即可
- 使用template包裹,然后直接在template身上加slot属性即可
使用第二个方法更好,因为template标签不会影响最终的结构。
给template添加slot属性有两种方法:
- 老方法:
slot="插槽名" - 新方法:
v-slot:插槽名
作用域插槽
首先我们来说一说他的使用场景:
数据在插槽定义的组件里,使用此数据生成的结构是由插槽的使用者决定的
接下来我们还是用过一个案例来体会:
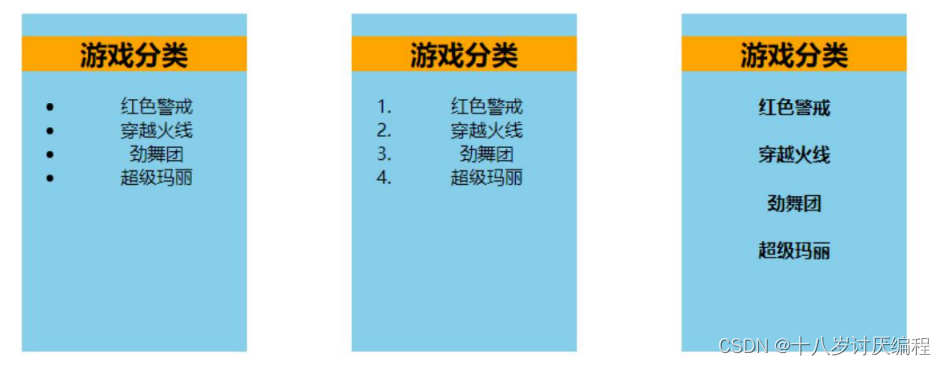
代码如下:
App组件:
<template>
  <div class="container">

    <Category title="游戏" >
      <ul slot-scope="gameData">
        <li v-for="(item,index) in gameData.games" :key="index">
          {{item}}
        </li>
      </ul>

    </Category>

      <Category title="游戏" >
          <ol slot-scope="gameData">
              <li v-for="(item,index) in gameData.games" :key="index">
                  {{item}}
              </li>
          </ol>
      </Category>

      <Category title="游戏" >
          <template slot-scope="gameData">
              <h4 v-for="(item,index) in gameData.games" :key="index" >{{item}}</h4>
          </template>

      </Category>

  </div>
</template>

<script>
  import Category from './components/Category'
  export default {
    name:'App',
    components:{Category},
    // data() {
    //   return {
    //     foods:['火锅','烧烤','小龙虾','牛排'],
    //     games:['红色警戒','穿越火线','劲舞团','超级玛丽'],
    //     films:['《教父》','《拆弹专家》','《你好,李焕英》','《尚硅谷》']
    //   }
    // },
  }
</script>

<style scoped>
  .container{
    display: flex;
    justify-content: space-around;
  }
</style>
- 1
- 2
- 3
- 4
- 5
- 6
- 7
- 8
- 9
- 10
- 11
- 12
- 13
- 14
- 15
- 16
- 17
- 18
- 19
- 20
- 21
- 22
- 23
- 24
- 25
- 26
- 27
- 28
- 29
- 30
- 31
- 32
- 33
- 34
- 35
- 36
- 37
- 38
- 39
- 40
- 41
- 42
- 43
- 44
- 45
- 46
- 47
- 48
- 49
- 50
- 51
- 52
Category组件:
<template>
    <div class="category">
        <h3>{{title}}分类</h3>
        <slot :games="games"></slot>
    </div>
</template>

<script>
    export default {
        name:'MyCategory',
        props:['title'],
        data() {
            return {
                // foods:['火锅','烧烤','小龙虾','牛排'],
                games:['红色警戒','穿越火线','劲舞团','超级玛丽'],
                // films:['《教父》','《拆弹专家》','《你好,李焕英》','《尚硅谷》']
            }
        },
    }
</script>

<style scoped>
    .category{
        background-color: skyblue;
        width: 200px;
        height: 300px;

    }
    h3{
        text-align: center;
        background-color: orange;
    }
    video{
        width: 100%;
    }
    img{
        width: 100%;
    }
</style>
- 1
- 2
- 3
- 4
- 5
- 6
- 7
- 8
- 9
- 10
- 11
- 12
- 13
- 14
- 15
- 16
- 17
- 18
- 19
- 20
- 21
- 22
- 23
- 24
- 25
- 26
- 27
- 28
- 29
- 30
- 31
- 32
- 33
- 34
- 35
- 36
- 37
- 38
- 39
我们可以总结一下步骤:
- 首先在slot标签中使用
:games="games"把数据传出去。注意传给的是插槽的使用者! - 使用的时候先使用
slot-scope定义一个对象,传过来的数据会成为这个对象的一个属性,而属性名就是games
注意:
- 如果是在templatde标签上使用,则
scope和slot-scope都可以,而其他标签只能使用slot-scope - 可以使用解构赋值

总结
插槽
-
作用:让父组件可以向子组件指定位置插入html结构,也是一种组件间通信的方式,适用于 父组件 ===> 子组件 。
-
分类:默认插槽、具名插槽、作用域插槽
-
使用方式:
-
默认插槽:
父组件中: <Category> <div>html结构1</div> </Category> 子组件中: <template> <div> <!-- 定义插槽 --> <slot>插槽默认内容...</slot> </div> </template>- 1
- 2
- 3
- 4
- 5
- 6
- 7
- 8
- 9
- 10
- 11
-
具名插槽:
父组件中: <Category> <template slot="center"> <div>html结构1</div> </template> <template v-slot:footer> <div>html结构2</div> </template> </Category> 子组件中: <template> <div> <!-- 定义插槽 --> <slot name="center">插槽默认内容...</slot> <slot name="footer">插槽默认内容...</slot> </div> </template>- 1
- 2
- 3
- 4
- 5
- 6
- 7
- 8
- 9
- 10
- 11
- 12
- 13
- 14
- 15
- 16
- 17
- 18
-
作用域插槽:
-
理解:数据在组件的自身,但根据数据生成的结构需要组件的使用者来决定。(games数据在Category组件中,但使用数据所遍历出来的结构由App组件决定)
-
具体编码:
父组件中: <Category> <template scope="scopeData"> <!-- 生成的是ul列表 --> <ul> <li v-for="g in scopeData.games" :key="g">{{g}}</li> </ul> </template> </Category> <Category> <template slot-scope="scopeData"> <!-- 生成的是h4标题 --> <h4 v-for="g in scopeData.games" :key="g">{{g}}</h4> </template> </Category> 子组件中: <template> <div> <slot :games="games"></slot> </div> </template> <script> export default { name:'Category', props:['title'], //数据在子组件自身 data() { return { games:['红色警戒','穿越火线','劲舞团','超级玛丽'] } }, } </script>- 1
- 2
- 3
- 4
- 5
- 6
- 7
- 8
- 9
- 10
- 11
- 12
- 13
- 14
- 15
- 16
- 17
- 18
- 19
- 20
- 21
- 22
- 23
- 24
- 25
- 26
- 27
- 28
- 29
- 30
- 31
- 32
- 33
- 34
- 35
-
-
文章来源: blog.csdn.net,作者:十八岁讨厌编程,版权归原作者所有,如需转载,请联系作者。
原文链接:blog.csdn.net/zyb18507175502/article/details/125600136
- 点赞
- 收藏
- 关注作者




评论(0)