基于 SSE 实现服务端消息主动推送解决方案

一、SSE 服务端消息推送
SSE 是 Server-Sent Events 的简称, 是一种服务器端到客户端(浏览器)的单项消息推送。对应的浏览器端实现 Event Source 接口被制定为HTML5 的一部分。不过现在IE不支持该技术,只能通过轮训的方式实现。相比于 WebSocket,SSE 简单很多,服务器端和客户端工作量都要小很多、简单很多,同时实现的功能也要有局限。
相比于 WebSocket 两者的区别:
-
WebSocket是全双工通道,可以双向通信,功能更强。SSE是单向通道,只能服务器向浏览器端发送。 -
WebSocket是一个新的协议,需要服务器端支持。SSE则是部署在HTTP协议之上的,现有的服务器软件都支持。 -
SSE是一个轻量级协议,相对简单。WebSocket是一种较重的协议,相对复杂。 -
SSE默认支持断线重连,WebSocket则需要额外部署。 -
SSE支持自定义发送的数据类型。 -
SSE不支持CORS,参数url就是服务器网址,必须与当前网页的网址在同一个网域(domain),而且协议和端口都必须相同。
在我们平常使用 SpringBoot 进行开发中,其实已经集成好了 SSE ,里面有个 SseEmitter 类已经封装好了相关操作,可以方便的实现功能。
但是在实现的时候需要注意下是否要兼容 IE 浏览器的使用,IE 浏览器目前不支持 Event Source 接口,如果需要兼容 IE 可以创建一个顺序队列比如放在 Redis 中或 消息队列中,IE 客户端通过接口轮训的方式每次都从队列中消费消息,以实现 SSE 的功能。
下面分别从 服务端 和 客户端进行实施。
二、服务端
服务端需要考虑 IE 浏览器不支持的情况,对于 IE 可以通过轮训的方式实现,首先新建一个 SpringBoot 项目,声明 SseEmitter 连接:
@Slf4j
public class SseEmitterServer {

    private static AtomicInteger count = new AtomicInteger(0);

    private static Map<String, SseEmitter> sseEmitterMap = new ConcurrentHashMap<>();

    public static SseEmitter connect(String userId) {
        SseEmitter sseEmitter = new SseEmitter(0L);
        sseEmitter.onCompletion(() -> {
            log.info("结束连接:{}", userId);
            removeUser(userId);
        });
        sseEmitter.onError(throwable -> {
            log.info("连接异常:{}", userId);
            removeUser(userId);
        });
        sseEmitter.onTimeout(() -> {
            log.info("连接超时:{}", userId);
            removeUser(userId);
        });
        sseEmitterMap.put(userId, sseEmitter);
        count.getAndIncrement();
        log.info("创建新的sse连接,当前用户:{}", userId);
        return sseEmitter;
    }


    public static void sendMessage(String userId, Object message) {
        if (sseEmitterMap.containsKey(userId)) {
            try {
                sseEmitterMap.get(userId).send(message);
                log.info("SSE 发送信息成功!id = {} , message: {} ", userId, message);
            } catch (IOException e) {
                log.error("[{}]推送异常:{}", userId, e.getMessage());
                removeUser(userId);
            }
        } else {
            log.warn("SSE 发送信息异常,用户不存在:id = {} ", userId);
        }
    }

    private static void removeUser(String userId) {
        sseEmitterMap.remove(userId);
        count.getAndDecrement();
    }
}
- 1
- 2
- 3
- 4
- 5
- 6
- 7
- 8
- 9
- 10
- 11
- 12
- 13
- 14
- 15
- 16
- 17
- 18
- 19
- 20
- 21
- 22
- 23
- 24
- 25
- 26
- 27
- 28
- 29
- 30
- 31
- 32
- 33
- 34
- 35
- 36
- 37
- 38
- 39
- 40
- 41
- 42
- 43
- 44
- 45
- 46
- 47
然后声明 SSEWebServer 释放对客户端的接口,对于 IE 的话我们就直接提供一个接口,每次都从队列中消费消息,这里以 LinkedBlockingDeque 为例实现一个单机的队列,如果是分布式的可能就要考虑 Redis 或 消息队列 :
@Slf4j
@CrossOrigin
@RestController
@RequestMapping("/sse")
public class SSEWebServer {

    private static Cache<String, LinkedBlockingDeque<SseEvent>> sseCache = CacheBuilder.newBuilder()
            .maximumSize(1000)
            .expireAfterWrite(60, TimeUnit.MINUTES)
            .build();

    /* *
     * sse 连接服务
     */
    @GetMapping("/sseEvent/{userId}")
    public SseEmitter push(@PathVariable("userId") String userId) {
        return SseEmitterServer.connect(userId);
    }

    //IE 浏览器不支持SSE 采用轮训
    @GetMapping("/sseEventIE/{userId}")
    public ResponseEntity pushIe(@PathVariable("userId") String userId) {
        if (StringUtils.isEmpty(userId)) {
            return ResponseEntity.status(HttpStatus.BAD_REQUEST).body(" userId is Empty ! ");
        }
        log.info("IE 连接,userId = {} ", userId);
        try {
            SseEvent poll = Objects.requireNonNull(sseCache.getIfPresent(userId)).poll();
            return poll == null ? ResponseEntity.status(HttpStatus.BAD_REQUEST).body("连接失败!") : ResponseEntity.ok().body(poll.getMsg());
        } catch (Exception e) {
            return ResponseEntity.status(HttpStatus.BAD_REQUEST).body(e.getMessage());
        }
    }

    static boolean publicMsg(SseEvent event) {
        LinkedBlockingDeque<SseEvent> ifPresent = sseCache.getIfPresent(event.getUserId());
        if (ifPresent == null) {
            sseCache.put(event.getUserId(), new LinkedBlockingDeque<SseEvent>());
        }
        log.info("添加到队列,userId:{} ", event.getUserId());
        return Objects.requireNonNull(sseCache.getIfPresent(event.getUserId())).offer(event);
    }
}
- 1
- 2
- 3
- 4
- 5
- 6
- 7
- 8
- 9
- 10
- 11
- 12
- 13
- 14
- 15
- 16
- 17
- 18
- 19
- 20
- 21
- 22
- 23
- 24
- 25
- 26
- 27
- 28
- 29
- 30
- 31
- 32
- 33
- 34
- 35
- 36
- 37
- 38
- 39
- 40
- 41
- 42
- 43
上面为考虑 IE 的兼容性,多增加了一个接口和队列,因此在发布的时候,就需要同时向 SSE 和 队列 抛数据,因此这块可以在增加一个事件发布:
事件发布我们就使用 Spring 自带的 ApplicationListener 来实现。
首先创建一个事件交易类:
@Getter
@Setter
@ToString
public class SseEvent<T> extends ApplicationEvent {
    private int code;
    private String userId;
    private T msg;

    public SseEvent(Object source) {
        super(source);
    }
}
- 1
- 2
- 3
- 4
- 5
- 6
- 7
- 8
- 9
- 10
- 11
- 12
声明事件监听,在这里同时向 SSE 和 队列发送消息:
@Slf4j
@Component
public class SseListener implements ApplicationListener<SseEvent> {
    @Override
    public void onApplicationEvent(SseEvent event) {
        SseEmitterServer.sendMessage(event.getUserId(), event.getMsg());
        SSEWebServer.publicMsg(event);
    }
}
- 1
- 2
- 3
- 4
- 5
- 6
- 7
- 8
- 9
最后再 创建一个测试接口,便于我们下面的测试:
@RestController
public class TestController {

    @Autowired
    private ApplicationEventPublisher applicationEventPublisher;


    @GetMapping("/test/{userId}/{message}")
    public ResponseEntity test(@PathVariable("userId") String userId, @PathVariable("message") String message) {
        SseEvent<String> sseEvent = new SseEvent<>(this);
        sseEvent.setCode(200);
        sseEvent.setMsg(message);
        sseEvent.setUserId(userId);
        applicationEventPublisher.publishEvent(sseEvent);
        return ResponseEntity.ok().build();
    }

}
- 1
- 2
- 3
- 4
- 5
- 6
- 7
- 8
- 9
- 10
- 11
- 12
- 13
- 14
- 15
- 16
- 17
- 18
到此服务端就已经完成了,下面开始客户端的对接:
三、客户端
相比于服务端,客户端就显得非常简单了,但也要考虑 IE 不支持的情况,需要进行判断,如果是 IE 的话,就换成轮训的方式:
<!DOCTYPE html>
<html lang="en">
<head>
    <meta charset="UTF-8">
    <title>Title</title>
</head>
<body>

</body>
<script src="js/jquery-1.10.2.min.js"></script>
<script>

    openSSE("1122", function (msg) {
        console.log("收到服务器推送消息:" + msg);
    });

    function openSSE(userId, callback) {
        if (window.EventSource) {
            var source = new EventSource('http://localhost:8080/sse/sseEvent/' + userId);
            source.onmessage = function (event) {
                callback(event.data);
            };
        } else {
            //ie 不支持sse 采用轮训
            window.setInterval(function () {
                $.ajax({
                    url: "http://localhost:8080/sse/sseEventIE/" + userId + "?" + new Date().getTime(),
                    method: "GET",
                    success: function (result) {
                        callback(result);
                    }
                })
            }, 1000);
        }
    }

</script>
</html>
- 1
- 2
- 3
- 4
- 5
- 6
- 7
- 8
- 9
- 10
- 11
- 12
- 13
- 14
- 15
- 16
- 17
- 18
- 19
- 20
- 21
- 22
- 23
- 24
- 25
- 26
- 27
- 28
- 29
- 30
- 31
- 32
- 33
- 34
- 35
- 36
- 37
- 38
四、效果测试
启动服务端,首先演示 SSE 的效果,使用 goole 浏览器打开客户端网页,可以看到服务端日志的打印:

可以看到客户端已经连接,下面使用测试接口对 1122 用户发送消息,使用浏览器访问下面地址: http://localhost:8080/test/1122/测试 SSE 发送消息!
查看服务端日志打印:

可以看到同时向SSE 和 队列抛出了消息,下面看客户端浏览器打印的日志:
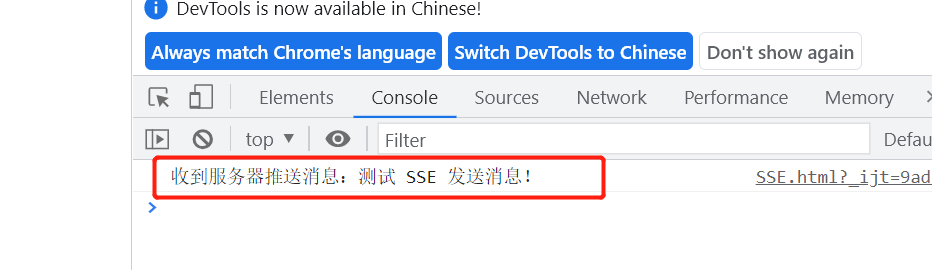
已经收到了服务端推送的消息。
下面开始对 IE 浏览器进行测试,用 IE 浏览器打开页面:
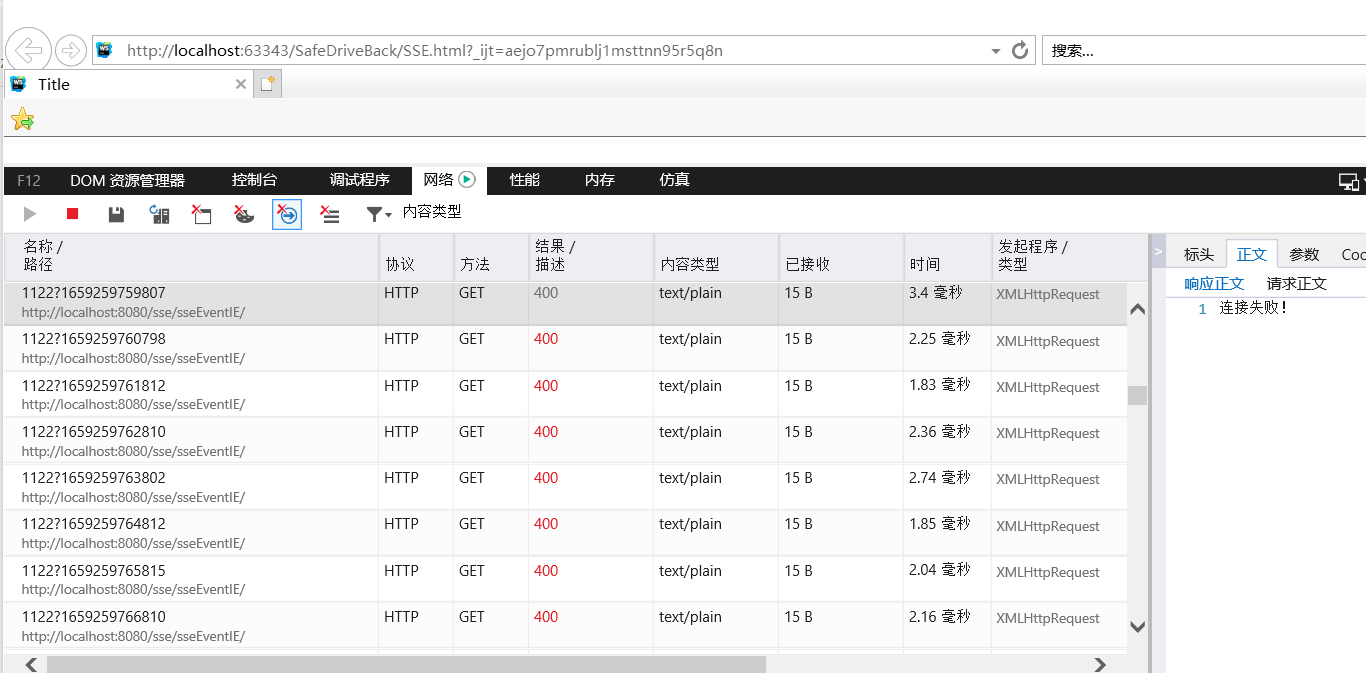
开始了每秒一次的轮训,由于服务端没有消息,一直返回的 400 状态,下面使用上面的接口发送一次消息: http://localhost:8080/test/1122/测试 IE 发送消息!
查看IE浏览器打印的日志:
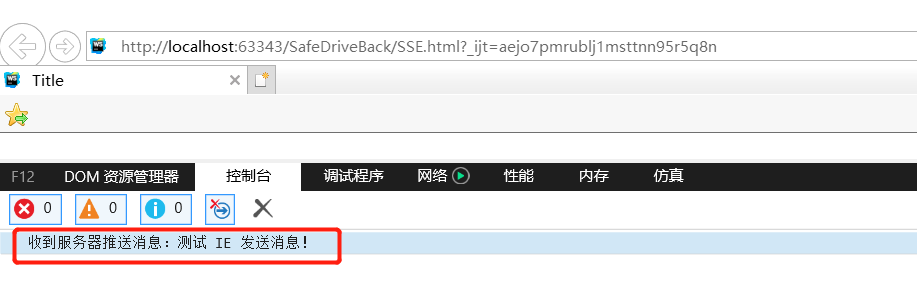
已经接收到了服务端推送的消息!
文章来源: blog.csdn.net,作者:小毕超,版权归原作者所有,如需转载,请联系作者。
原文链接:blog.csdn.net/qq_43692950/article/details/126086836

- 点赞
- 收藏
- 关注作者
评论(0)