如何在 Alma Linux 8 上安装 GitLab?

GitLab 是一款免费的开源 DevOps 软件,它附带多种工具,可在单个应用程序中开发、保护和操作软件。它提供免费的无限存储库和无限的协作者。它主要用于托管 Git 存储库,并具有其他与开发相关的功能,例如问题跟踪。它与 Github 和 Bitbucket 非常相似,允许个人和团队与他人远程共享代码。
GitLab 有四个主要版本:
- GitLab 社区版- 免费、开源和自托管。
- GitLab 企业版- 自托管和付费附加功能。
- GitLab.com - 免费和 SaaS。
- GitLab.io - 由 GitLab Inc. 管理的私有 GitLab 实例。
在这篇文章中,我们将解释如何在 Alma Linux 8 上安装 GitLab CE。
先决条件
- 运行 Alma Linux 8 的服务器。
- 使用您的服务器 IP 指向的有效域名。
- 在服务器上配置了 root 密码。
添加 GitLab CE 存储库
默认情况下,GitLab 包不包含在 Alma Linux 默认存储库中。因此,您需要将 GitLab 官方存储库添加到您的系统中。您可以下载并添加以下脚本以添加 GitLab 存储库。
curl https://packages.gitlab.com/install/repositories/gitlab/gitlab-ce/script.rpm.sh | bash
- 1
您将获得以下输出:
Complete!
Generating yum cache for gitlab_gitlab-ce...
Importing GPG key 0x51312F3F:
 Userid     : "GitLab B.V. (package repository signing key) <packages@gitlab.com>"
 Fingerprint: F640 3F65 44A3 8863 DAA0 B6E0 3F01 618A 5131 2F3F
 From       : https://packages.gitlab.com/gitlab/gitlab-ce/gpgkey
Importing GPG key 0xF27EAB47:
 Userid     : "GitLab, Inc. <support@gitlab.com>"
 Fingerprint: DBEF 8977 4DDB 9EB3 7D9F C3A0 3CFC F9BA F27E AB47
 From       : https://packages.gitlab.com/gitlab/gitlab-ce/gpgkey/gitlab-gitlab-ce-3D645A26AB9FBD22.pub.gpg
Generating yum cache for gitlab_gitlab-ce-source...

The repository is setup! You can now install packages.
- 1
- 2
- 3
- 4
- 5
- 6
- 7
- 8
- 9
- 10
- 11
- 12
- 13
您可以使用以下命令验证已安装的存储库:
cat /etc/yum.repos.d/gitlab_gitlab-ce.repo
- 1
您将获得以下输出:
[gitlab_gitlab-ce]
name=gitlab_gitlab-ce
baseurl=https://packages.gitlab.com/gitlab/gitlab-ce/el/8/$basearch
repo_gpgcheck=1
gpgcheck=1
enabled=1
gpgkey=https://packages.gitlab.com/gitlab/gitlab-ce/gpgkey
       https://packages.gitlab.com/gitlab/gitlab-ce/gpgkey/gitlab-gitlab-ce-3D645A26AB9FBD22.pub.gpg
sslverify=1
sslcacert=/etc/pki/tls/certs/ca-bundle.crt
metadata_expire=300

[gitlab_gitlab-ce-source]
name=gitlab_gitlab-ce-source
baseurl=https://packages.gitlab.com/gitlab/gitlab-ce/el/8/SRPMS
repo_gpgcheck=1
gpgcheck=1
enabled=1
gpgkey=https://packages.gitlab.com/gitlab/gitlab-ce/gpgkey
       https://packages.gitlab.com/gitlab/gitlab-ce/gpgkey/gitlab-gitlab-ce-3D645A26AB9FBD22.pub.gpg
sslverify=1
sslcacert=/etc/pki/tls/certs/ca-bundle.crt
metadata_expire=300

- 1
- 2
- 3
- 4
- 5
- 6
- 7
- 8
- 9
- 10
- 11
- 12
- 13
- 14
- 15
- 16
- 17
- 18
- 19
- 20
- 21
- 22
- 23
您还可以使用以下命令列出 GitLab 存储库:
dnf repolist
- 1
您将获得以下输出:
repo id                                                               repo name
appstream                                                             Rocky Linux 8 - AppStream
baseos                                                                Rocky Linux 8 - BaseOS
extras                                                                Rocky Linux 8 - Extras
gitlab_gitlab-ce                                                      gitlab_gitlab-ce
gitlab_gitlab-ce-source                                               gitlab_gitlab-ce-source
- 1
- 2
- 3
- 4
- 5
- 6
在 Alma Linux 8 上安装 GitLab CE
此时,GitLab 存储库已在您的系统上创建。您现在可以通过运行以下命令来安装 GitLab CE:
dnf install gitlab-ce -y
- 1
安装 GitLab CE 后,您将获得以下输出:
It looks like GitLab has not been configured yet; skipping the upgrade script.

       *.                  *.
      ***                 ***
     *****               *****
    .******             *******
    ********            ********
   ,,,,,,,,,***********,,,,,,,,,
  ,,,,,,,,,,,*********,,,,,,,,,,,
  .,,,,,,,,,,,*******,,,,,,,,,,,,
      ,,,,,,,,,*****,,,,,,,,,.
         ,,,,,,,****,,,,,,
            .,,,***,,,,
                ,*,.


     _______ __  __          __
    / ____(_) /_/ /   ____ _/ /_
   / / __/ / __/ /   / __ `/ __ \
  / /_/ / / /_/ /___/ /_/ / /_/ /
  \____/_/\__/_____/\__,_/_.___/


Please configure a URL for your GitLab instance by setting `external_url`
Thank you for installing GitLab!
GitLab was unable to detect a valid hostname for your instance.
configuration in /etc/gitlab/gitlab.rb file.
Then, you can start your GitLab instance by running the following command:
  sudo gitlab-ctl reconfigure

For a comprehensive list of configuration options please see the Omnibus GitLab readme
https://gitlab.com/gitlab-org/omnibus-gitlab/blob/master/README.md

Help us improve the installation experience, let us know how we did with a 1 minute survey:
https://gitlab.fra1.qualtrics.com/jfe/form/SV_6kVqZANThUQ1bZb?installation=omnibus&release=14-8


  Verifying        : gitlab-ce-14.8.2-ce.0.el8.x86_64                       1/1

Installed:
  gitlab-ce-14.8.2-ce.0.el8.x86_64

Complete!
- 1
- 2
- 3
- 4
- 5
- 6
- 7
- 8
- 9
- 10
- 11
- 12
- 13
- 14
- 15
- 16
- 17
- 18
- 19
- 20
- 21
- 22
- 23
- 24
- 25
- 26
- 27
- 28
- 29
- 30
- 31
- 32
- 33
- 34
- 35
- 36
- 37
- 38
- 39
- 40
- 41
- 42
- 43
- 44
配置 GitLab CE
接下来,您需要在 GitLab 配置文件中定义您的域名。为此,请编辑 GitLab 配置文件:
nano /etc/gitlab/gitlab.rb
- 1
使用您的域名更改以下行:
external_url 'http://gitlab.example.com'
- 1
保存并关闭文件,然后使用以下命令重新配置 GitLab:
gitlab-ctl reconfigure
- 1
重新配置 GitLab CE 后,您将获得以下输出:
Notes:
Default admin account has been configured with following details:
Username: root
Password: You didn't opt-in to print initial root password to STDOUT.
Password stored to /etc/gitlab/initial_root_password. This file will be cleaned up in first reconfigure run after 24 hours.

NOTE: Because these credentials might be present in your log files in plain text, it is highly recommended to reset the password following https://docs.gitlab.com/ee/security/reset_user_password.html#reset-your-root-password.

gitlab Reconfigured!
- 1
- 2
- 3
- 4
- 5
- 6
- 7
- 8
- 9
您现在可以使用以下命令检查 GitLab CE 的状态:
gitlab-ctl status
- 1
您将获得以下输出:
run: gitaly: (pid 26684) 69s; run: log: (pid 25075) 351s
run: gitlab-exporter: (pid 26617) 73s; run: log: (pid 25555) 207s
run: gitlab-kas: (pid 26585) 75s; run: log: (pid 25339) 334s
run: gitlab-workhorse: (pid 26595) 74s; run: log: (pid 25472) 229s
run: grafana: (pid 26665) 70s; run: log: (pid 26315) 110s
run: logrotate: (pid 25000) 364s; run: log: (pid 25008) 363s
run: nginx: (pid 25488) 226s; run: log: (pid 25499) 222s
run: node-exporter: (pid 26603) 74s; run: log: (pid 25541) 213s
run: postgres-exporter: (pid 26659) 70s; run: log: (pid 25891) 168s
run: postgresql: (pid 25207) 341s; run: log: (pid 25218) 340s
run: prometheus: (pid 26631) 72s; run: log: (pid 25629) 194s
run: puma: (pid 25406) 249s; run: log: (pid 25417) 246s
run: redis: (pid 25039) 358s; run: log: (pid 25047) 357s
run: redis-exporter: (pid 26620) 73s; run: log: (pid 25575) 201s
run: sidekiq: (pid 25423) 243s; run: log: (pid 25435) 239s
- 1
- 2
- 3
- 4
- 5
- 6
- 7
- 8
- 9
- 10
- 11
- 12
- 13
- 14
- 15
要停止 GitLab,请运行以下命令:
gitlab-ctl stop
- 1
要启动 GitLab,请运行以下命令:
gitlab-ctl start
- 1
完成后,您可以继续下一步。
配置防火墙
接下来,您需要允许 HTTP 服务通过 firewalld。您可以使用以下命令允许它:
firewall-cmd --permanent --add-service=http
- 1
接下来,重新加载 firewalld 守护进程以应用更改:
systemctl reload firewalld
- 1
配置防火墙后,您可以继续下一步。
访问 GitLab CE
在访问 GitLab CE 之前,使用以下命令检索 GitLab 根密码:
cat /etc/gitlab/initial_root_password
- 1
您应该在以下输出中看到 GitLab CE 根密码:
# WARNING: This value is valid only in the following conditions
#          1. If provided manually (either via `GITLAB_ROOT_PASSWORD` environment variable or via `gitlab_rails['initial_root_password']` setting in `gitlab.rb`, it was provided before database was seeded for the first time (usually, the first reconfigure run).
#          2. Password hasn't been changed manually, either via UI or via command line.
#
#          If the password shown here doesn't work, you must reset the admin password following https://docs.gitlab.com/ee/security/reset_user_password.html#reset-your-root-password.

Password: XIlQ4/J7oQ49ZdNuGZto3f5vEJGHZJSTRSIuYL9z0/k=

# NOTE: This file will be automatically deleted in the first reconfigure run after 24 hours.
- 1
- 2
- 3
- 4
- 5
- 6
- 7
- 8
- 9
现在,打开您的 Web 浏览器并使用 URL http://gitlab.example.com访问 GitLab Web 界面。您将被重定向到 GitLab 登录页面:
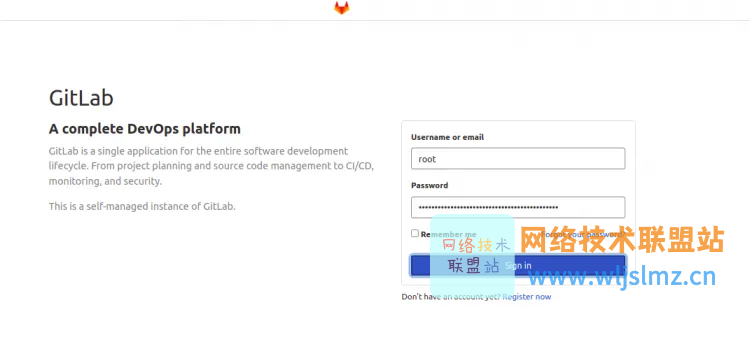
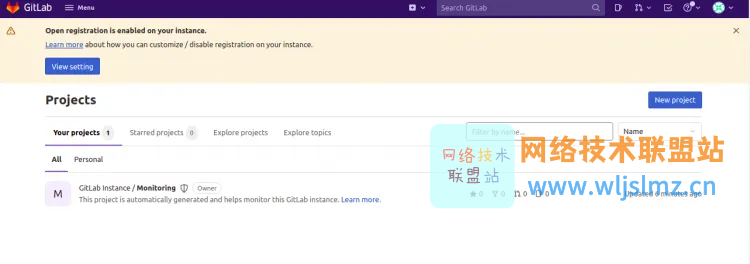
提供您的 root 用户名和密码,然后单击登录按钮。您应该在以下页面上看到 GitLab Web 界面:
配置 GitLab 备份
GitLab 还允许您创建 GitLab 实例的备份。要创建 GitLab 实例的备份,请运行以下命令:
gitlab-rake gitlab:backup:create
- 1
创建备份后,您将获得以下输出:
2022-03-11 11:13:11 +0000 -- done
2022-03-11 11:13:11 +0000 -- Dumping uploads ...
2022-03-11 11:13:11 +0000 -- done
2022-03-11 11:13:11 +0000 -- Dumping builds ...
2022-03-11 11:13:11 +0000 -- done
2022-03-11 11:13:11 +0000 -- Dumping artifacts ...
2022-03-11 11:13:11 +0000 -- done
2022-03-11 11:13:11 +0000 -- Dumping pages ...
2022-03-11 11:13:11 +0000 -- done
2022-03-11 11:13:11 +0000 -- Dumping lfs objects ...
2022-03-11 11:13:11 +0000 -- done
2022-03-11 11:13:11 +0000 -- Dumping terraform states ...
2022-03-11 11:13:11 +0000 -- done
2022-03-11 11:13:11 +0000 -- Dumping container registry images ...
2022-03-11 11:13:11 +0000 -- [DISABLED]
2022-03-11 11:13:11 +0000 -- Dumping packages ...
2022-03-11 11:13:11 +0000 -- done
Creating backup archive: 1646997191_2022_03_11_14.8.2_gitlab_backup.tar ... done
Uploading backup archive to remote storage  ... skipped
Deleting tmp directories ... done
- 1
- 2
- 3
- 4
- 5
- 6
- 7
- 8
- 9
- 10
- 11
- 12
- 13
- 14
- 15
- 16
- 17
- 18
- 19
- 20
默认情况下,GitLab 备份存储在/var/opt/gitlab/backups。您可以通过编辑位于/etc/gitlab/gitlab.rb的 GitLab 配置文件中的设置来更改备份路径。
您可以使用以下命令验证生成的备份:
ls /var/opt/gitlab/backups
- 1
您将获得以下输出:
1646997191_2022_03_11_14.8.2_gitlab_backup.tar
- 1
重置 GitLab 根密码
如果您忘记了 GitLab 管理员密码,则可以使用以下命令轻松重置它:
gitlab-rake "gitlab:password:reset"
- 1
系统将要求您设置新密码,如下所示:
Enter username: root
Enter password:
Confirm password:
Password successfully updated for user with username root.
- 1
- 2
- 3
- 4
结论
恭喜!您已在 Alma Linux 8 上成功安装 GitLab CE,您现在可以开始在您的开发环境中使用 GitLab。如果您有任何问题,请随时问我。
文章来源: blog.csdn.net,作者:wljslmz,版权归原作者所有,如需转载,请联系作者。
原文链接:blog.csdn.net/weixin_43025343/article/details/124023698

- 点赞
- 收藏
- 关注作者
评论(0)