alicloud3搭建wordpress
alicloud linux3安装和部署wordpress,手动安装,没用面板。
Lnmp
通过 LNMP一键安装包一键搭建服务器环境。
下载地址:https://lnmp.org/download.html
下载后解压下,然后执行 ./install.sh 安装。

大概需要20分钟,建议除了数据库密码外,其他全选默认版本,一路回车就可以。
Mysql
登录: mysql -uroot -p
创建wordpress数据库:CREATE DATABASE wordpress
添加wordpress数据库用户,wordpress是账号,password123是密码,自己改改。
create user 'wordpress'@'localhost' identified by 'password123';
grant all privileges on wordpress.* to 'wordpress'@'localhost' identified by 'password123';
- 1
- 2
Nginx
更改 nginx.conf 配置文件,主要换路径。
server {
        listen   80;
		# 下面youhost换成你自己的域名
        server_name  yourhost.com   www.youhost.com;
		# 下面这个是wordpress部署路径
        root   /usr/local/nginx/html/wordpress;
        location / {
            index  index.php index.html index.htm;
        }

        location ~ \.php$ {
            fastcgi_pass   127.0.0.1:9000;
            fastcgi_index  index.php;
            fastcgi_param   SCRIPT_FILENAME    $document_root$fastcgi_script_name;
            fastcgi_param   SCRIPT_NAME        $fastcgi_script_name;
            include        fastcgi_params;
        }

    }
- 1
- 2
- 3
- 4
- 5
- 6
- 7
- 8
- 9
- 10
- 11
- 12
- 13
- 14
- 15
- 16
- 17
- 18
- 19
- 20
wordpress
下载安装包并解压
wget https://cn.wordpress.org/latest-zh_CN.tar.gz

tar -zxvf latest-zh_CN.tar.gz
- 1
- 2
- 3
复制到nginx部署目录
mv ./wordpress /usr/local/nginx/html/
- 1
然后对目录文件设置权限,要保证nginx和部署目录的用户组一致。
首先查看并确认nginx用户组
cat /etc/passwd
- 1
看下有nginx没,没有的话就自己加一下。
root:x:0:0:root:/root:/bin/bash
nginx:x:996:995:nginx user:/var/cache/nginx:/sbin/nologin
- 1
- 2
没有的话就创建用户组
useradd -r -M -s /sbin/nologin nginx
- 1
然后
cd /usr/local/nginx/html/
chown -R nginx.nginx wordpress
cd wordpress
chmod 777 *
- 1
- 2
- 3
- 4
最后操作
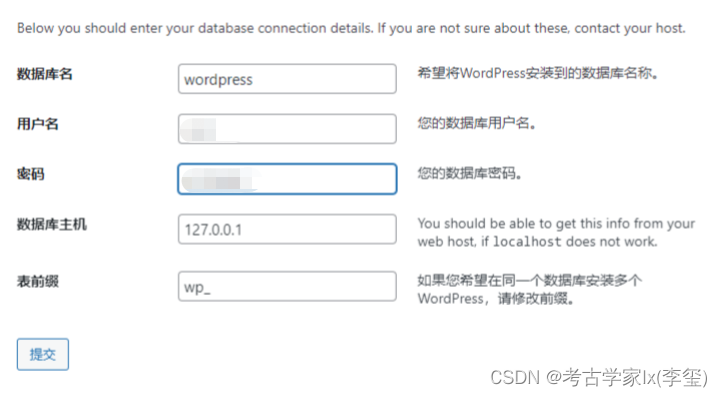
现在访问域名即可,填数据库信息,DB用户建议不要用root,用后面创建的user,提交成功后会给出一段文字。

在/usr/local/nginx/html/wordpress下新建 wp-config.php 文件。
然后把给出的文字内容,复制到 wp-config.php 文件中。
保存后,继续操作即可完成部署。
搭建成功。

文章来源: blog.csdn.net,作者:考古学家lx(李玺),版权归原作者所有,如需转载,请联系作者。
原文链接:blog.csdn.net/weixin_43582101/article/details/125787346
- 点赞
- 收藏
- 关注作者


评论(0)