使用yum来安装PostgreSQL13.3数据库

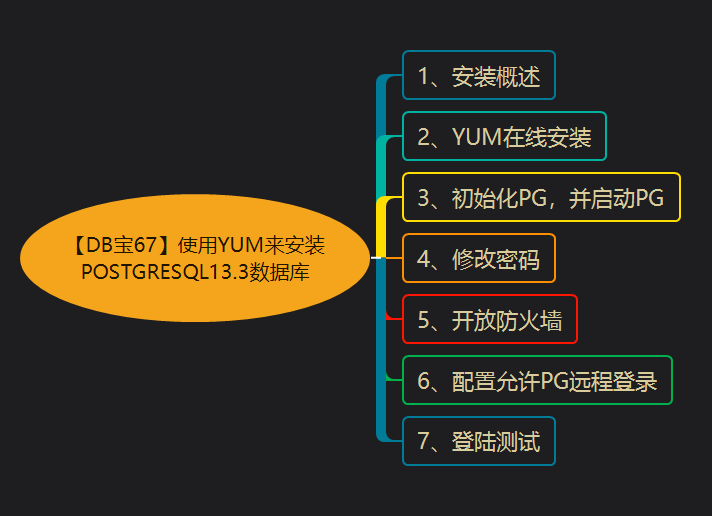
1、安装概述
PG安装方法很多,和MySQL类似,给用户提供很大的选择空间。如:RPM包安装(在线、离线)、源码编译安装、系统自带、二进制、NDB安装等。
https://yum.postgresql.org/rpmchart.php
https://yum.postgresql.org/11/redhat/rhel-6-x86_64/repoview/postgresqldbserver11.group.html
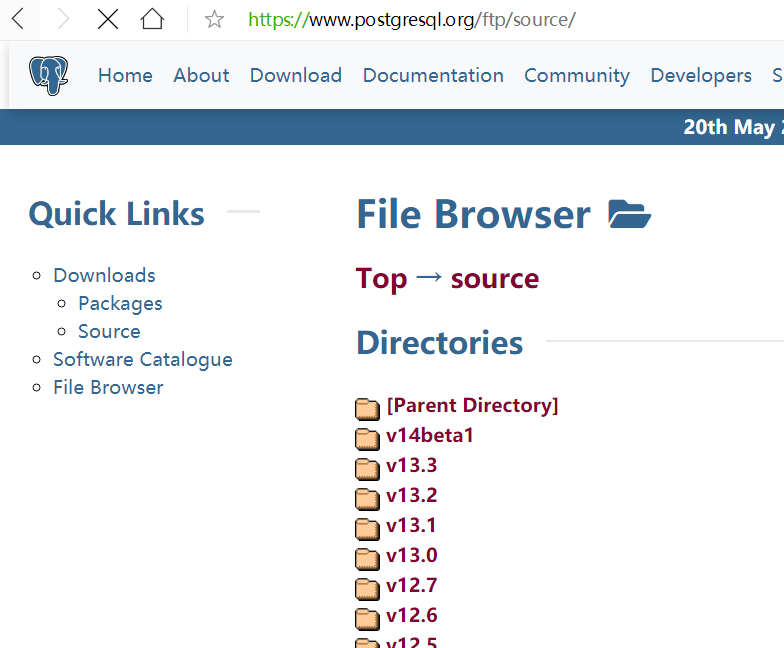
https://www.postgresql.org/ftp/source/
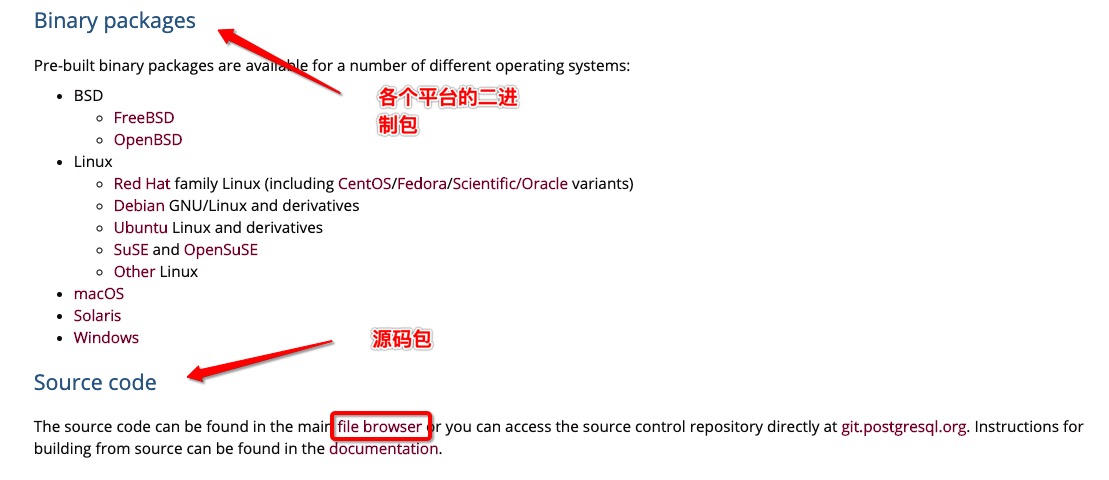
打开 PostgreSQL 官网 https://www.postgresql.org/,点击菜单栏上的 Download ,可以看到这里包含了很多平台的安装包,包括 Linux、Windows、Mac OS等 。
各个安装包:https://www.postgresql.org/ftp/source/
Linux 我们可以看到支持 Ubuntu 和 Red Hat 等各个平台,点击具体的平台链接,即可查看安装方法:

点击上图中的 file browser,我们还能下载 PostgreSQL 最新的源码。

下载地址:
https://www.postgresql.org/download
https://yum.postgresql.org/repopackages.php
文档:https://www.postgresql.org/download/linux/redhat/
rpm下载:https://yum.postgresql.org/rpmchart/
2、yum在线安装
-- 一些依赖包
yum install -y cmake make gcc zlib gcc-c++ perl readline readline-devel zlib zlib-devel \
perl python36 tcl openssl ncurses-devel openldap pam


-- 删除已存在的PG
yum remove -y postgresql* && rm -rf  /var/lib/pgsql && rm -rf  /usr/pgsql* && userdel -r postgres && groupdel postgres
yum install -y sysbench

-- 安装yum源
yum install -y https://download.postgresql.org/pub/repos/yum/reporpms/EL-7-x86_64/pgdg-redhat-repo-latest.noarch.rpm
# yum install -y https://download.postgresql.org/pub/repos/yum/reporpms/EL-6-x86_64/pgdg-redhat-repo-latest.noarch.rpm

yum repolist all | grep pgdg
yum repolist enabled | grep pgdg

-- 安装pg
yum install -y postgresql13 postgresql13-server postgresql13-contrib postgresql13-libs
# yum install -y postgresql9.6 postgresql9.6-server
# yum install postgresql10-server postgresql10-contrib postgresql10 postgresql10.x86_64

-- 验证
[root@lhrpg /]# rpm -aq| grep postgres
postgresql13-server-13.3-1PGDG.rhel7.x86_64
postgresql13-13.3-1PGDG.rhel7.x86_64
postgresql13-libs-13.3-1PGDG.rhel7.x86_64
postgresql13-contrib-13.3-1PGDG.rhel7.x86_64

-- 环境变量
echo "export PATH=/usr/pgsql-13/bin:$PATH" >> /etc/profile
3、初始化PG,并启动PG
/usr/pgsql-13/bin/postgresql-13-setup initdb
systemctl enable postgresql-13
systemctl start postgresql-13
systemctl status postgresql-13
4、修改密码
-- 本地登陆
su - postgres
psql

-- 安装插件
create extension pageinspect;
create extension pg_stat_statements;

select * from pg_extension ;
select * from pg_available_extensions order by name;

-- 修改postgres密码
alter user postgres with encrypted password 'lhr'; 或 \password
select * from pg_tables;
select version();
5、开放防火墙
-- 开放防火墙
firewall-cmd --add-port=5432/tcp --permanent
firewall-cmd --reload
firewall-cmd --list-port
6、配置允许PG远程登录
-- 配置允许PG远程登录,注意版本:
cat >> /var/lib/pgsql/13/data/postgresql.conf <<"EOF"
listen_addresses = '*'
port=5432
unix_socket_directories='/var/lib/pgsql/13/data'
logging_collector = on
log_directory = 'pg_log'
log_filename = 'postgresql-%a.log'
log_truncate_on_rotation = on
EOF

cat  << EOF > /var/lib/pgsql/13/data/pg_hba.conf
# TYPE  DATABASE    USER    ADDRESS       METHOD
local     all       all                    trust
host      all       all    ::1/128         trust
host      all       all   127.0.0.1/32     trust
host      all       all    0.0.0.0/0        md5
host   replication  all    0.0.0.0/0        md5
EOF

systemctl restart postgresql-13
7、登陆测试
-- 远程登陆
psql -U postgres -h 192.168.66.35 -d postgres -p54327

-- 从Postgresql 9.2开始,还可以使用URI格式进行远程连接:psql postgresql://myuser:mypasswd@myhost:5432/mydb
psql postgresql://postgres:lhr@192.168.66.35:54327/postgres
其中-h参数指定服务器地址,默认为127.0.0.1,默认不指定即可,-d指定连接之后选中的数据库,默认也是postgres,-U指定用户,默认是当前用户,-p 指定端口号,默认是"5432",其它更多的参数选项可以执行: ./bin/psql --help 查看。
C:\Users\lhrxxt>psql -U postgres -h 192.168.66.35 -d postgres -p54327
Password for user postgres:
psql (13.3)
Type "help" for help.

postgres=# select version();
                                                     version
------------------------------------------------------------------------------------------------------------------
 PostgreSQL 13.3 (Debian 13.3-1.pgdg100+1) on x86_64-pc-linux-gnu, compiled by gcc (Debian 8.3.0-6) 8.3.0, 64-bit
(1 row)

postgres=# \l
                                        List of databases
   Name    |  Owner   | Encoding |      Collate      |       Ctype       |   Access privileges
-----------+----------+----------+-------------------+-------------------+-----------------------
 postgres  | postgres | UTF8     | Chinese_China.936 | Chinese_China.936 |
 template0 | postgres | UTF8     | Chinese_China.936 | Chinese_China.936 | =c/postgres          +
           |          |          |                   |                   | postgres=CTc/postgres
 template1 | postgres | UTF8     | Chinese_China.936 | Chinese_China.936 | =c/postgres          +
           |          |          |                   |                   | postgres=CTc/postgres
(3 rows)


postgres=# CREATE DATABASE lhrdb WITH OWNER=postgres ENCODING='UTF-8';
CREATE DATABASE
postgres=# \c lhrdb
You are now connected to database "lhrdb" as user "postgres".
lhrdb=#
lhrdb=# create table student (
lhrdb(#   id integer not null,
lhrdb(#   name character(32),
lhrdb(#   number char(5),
lhrdb(#   constraint student_pkey primary key (id)
lhrdb(# );
CREATE TABLE
lhrdb=#
lhrdb=# \d student
                 Table "public.student"
 Column |     Type      | Collation | Nullable | Default
--------+---------------+-----------+----------+---------
 id     | integer       |           | not null |
 name   | character(32) |           |          |
 number | character(5)  |           |          |
Indexes:
    "student_pkey" PRIMARY KEY, btree (id)


lhrdb=#
lhrdb=# INSERT INTO student (id, name, number) VALUES (1, '张三', '1023');
INSERT 0 1
lhrdb=# SELECT * FROM student WHERE id=1;
 id |                name                | number
----+------------------------------------+--------
  1 | 张三                               | 1023
(1 row)
8、配置环境变量
mkdir -p /home/postgres
chown postgres.postgres /home/postgres -R
sed -i 's|/var/lib/pgsql|/home/postgres|' /etc/passwd
echo "lhr" |passwd --stdin postgres

cat > /home/postgres/.bash_profile <<"EOF"
export PGPORT=5432
export PGHOME=/usr/pgsql-13
export PGDATA=/var/lib/pgsql/13/data
export PATH=$PGHOME/bin:$PATH
export MANPATH=$PGHOME/share/man:$MANPATH
export LANG=en_US.UTF-8
export DATE='date +"%Y%m%d%H%M"'
export LD_LIBRARY_PATH=$PGHOME/lib:$LD_LIBRARY_PATH
export PGHOST=$PGDATA
export PGUSER=postgres
export PGPASSWORD=lhr
export PGDATABASE=postgres
export PS1="[\u@\h \W]\$ "

alias psql='rlwrap psql'
EOF


chown postgres.postgres /home/postgres/.bash_profile
安装配置完成,若有不懂,可以私聊麦老师。
- 点赞
- 收藏
- 关注作者


评论(0)