安卓案例:利用单选按钮实现底部导航栏

【摘要】
文章目录
一、运行效果二、涉及知识点三、实现步骤(一)创建安卓应用(二)准备图片素材(三)创建背景选择器1、创建背景选择器 - welcome_selector.xml2、创建背景选择器 - da...
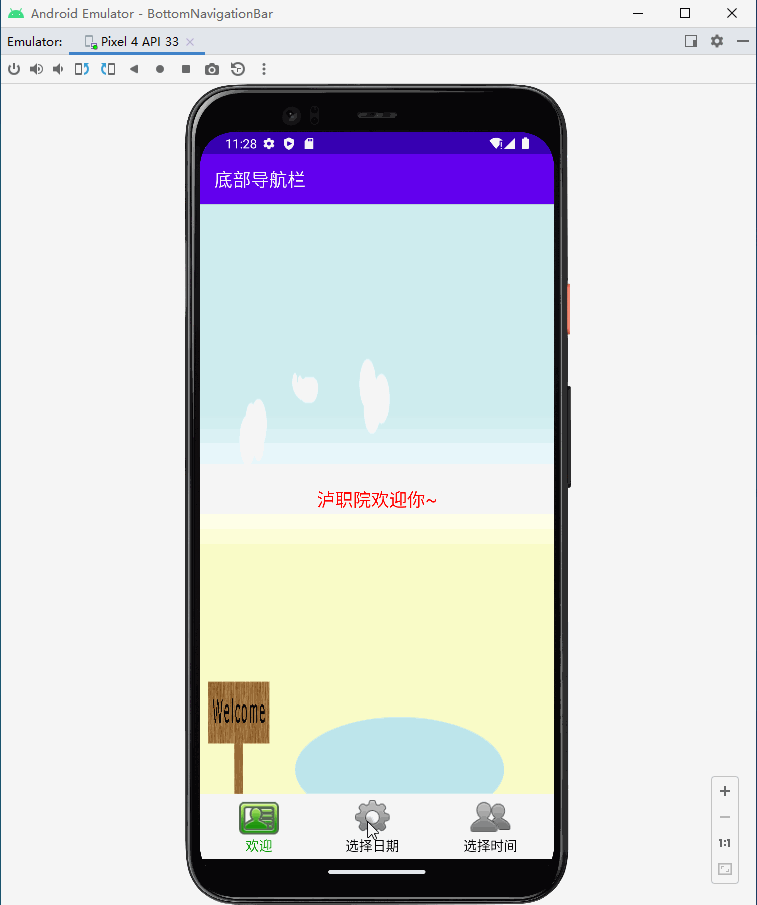
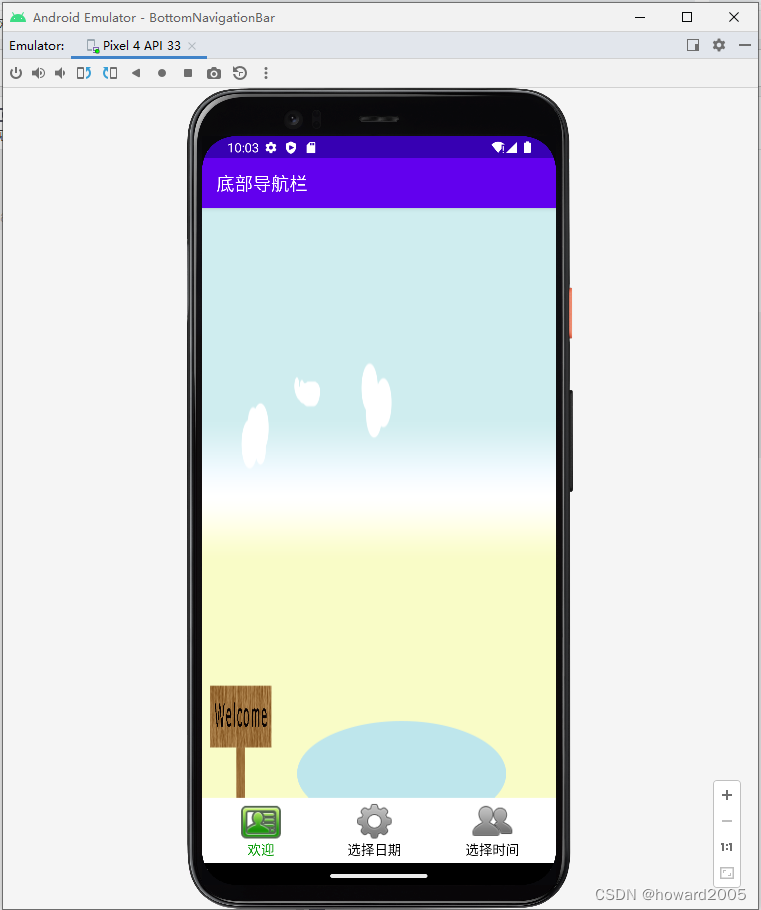
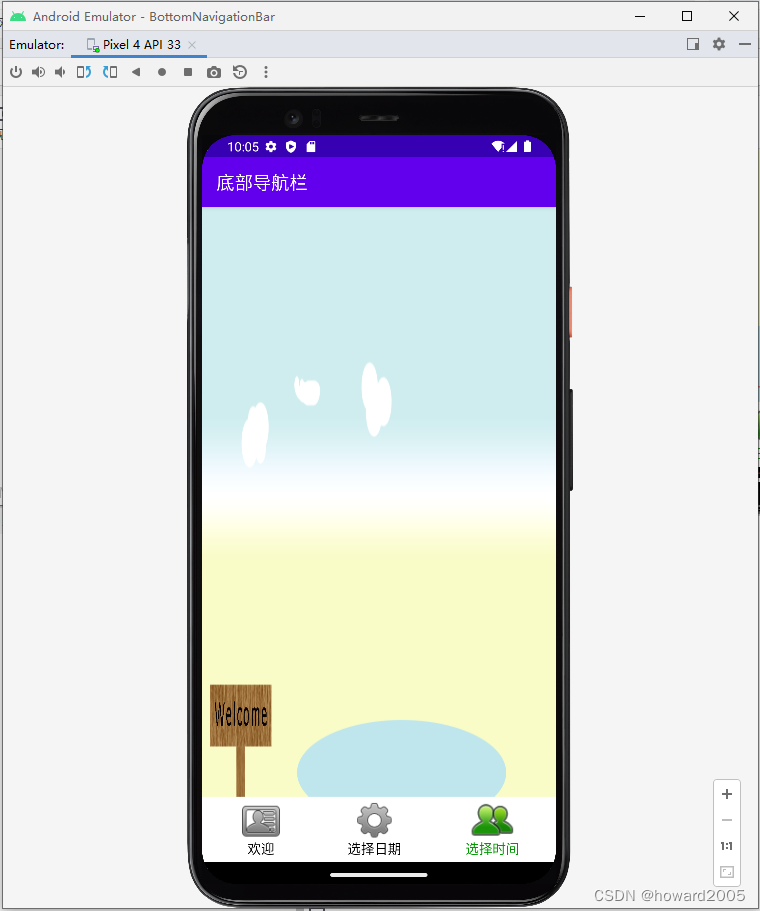
一、运行效果
二、涉及知识点
- 活动(Activity)
- 碎片(Fragment)
- 标签(TextView)
- 按钮(Button)
- 单选按钮组(RadioGroup)
- 单选按钮(RadioButton)
- 日期选择器(DatePicker)
- 时间选择器(TimePicker)
- 背景选择器
三、实现步骤
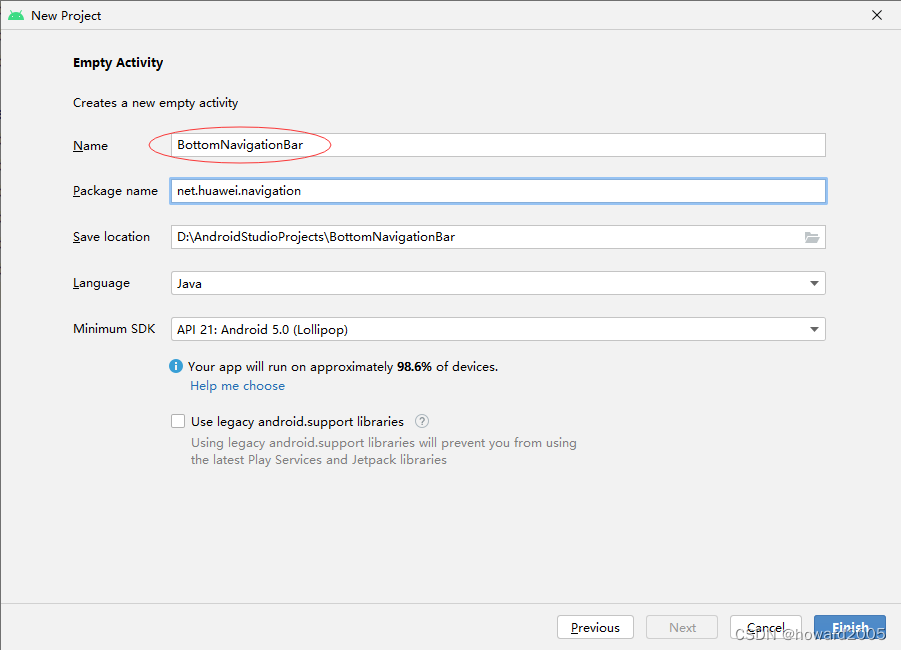
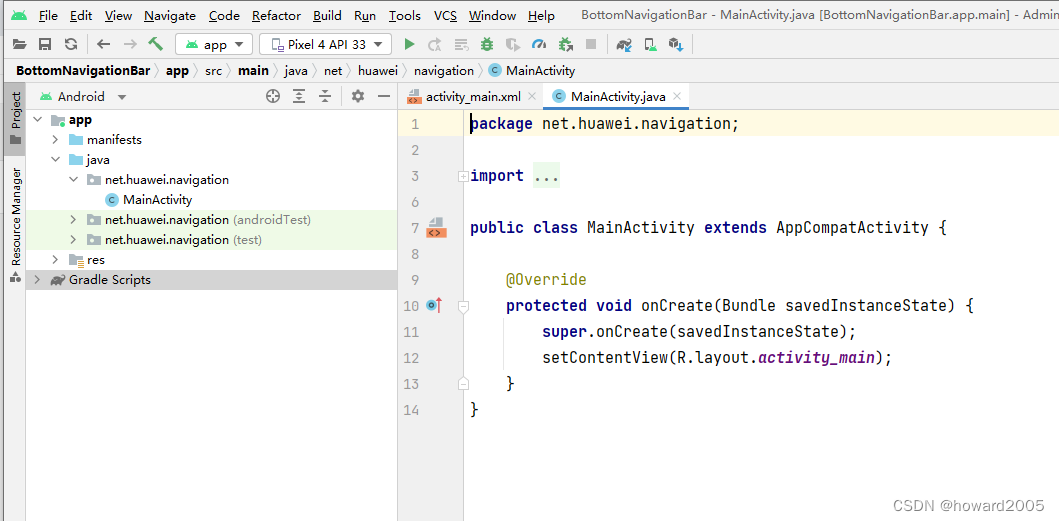
(一)创建安卓应用
- 基于Empty Activity创建安卓应用 -
BottomNavigationBar

- 单击【Finish】按钮
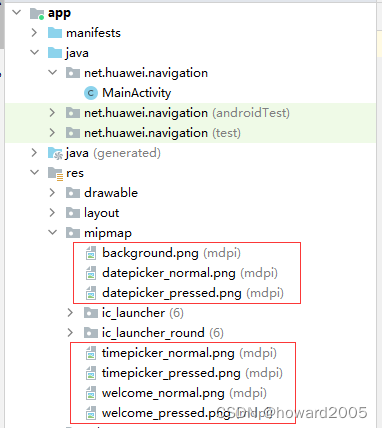
(二)准备图片素材
- 将项目所需图片拷贝到
mipmap-mdpi目录
(三)创建背景选择器
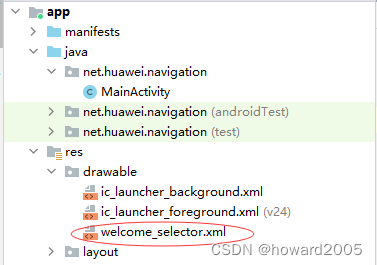
1、创建背景选择器 - welcome_selector.xml
- 在
drawable目录里创建welcome_selector.xml
<?xml version="1.0" encoding="utf-8"?>
<selector xmlns:android="http://schemas.android.com/apk/res/android">
    <item android:drawable="@mipmap/welcome_normal" android:state_checked="false"/>
    <item android:drawable="@mipmap/welcome_pressed" android:state_checked="true"/>
</selector>
- 1
- 2
- 3
- 4
- 5
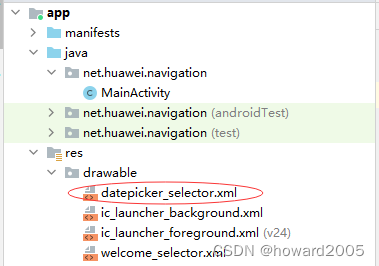
2、创建背景选择器 - datepicker_selector.xml
- 在
drawable目录里创建datepicker_selector.xml
<?xml version="1.0" encoding="utf-8"?>
<selector xmlns:android="http://schemas.android.com/apk/res/android">
    <item android:drawable="@mipmap/datepicker_normal" android:state_checked="false"/>
    <item android:drawable="@mipmap/datepicker_pressed" android:state_checked="true"/>
</selector>
- 1
- 2
- 3
- 4
- 5
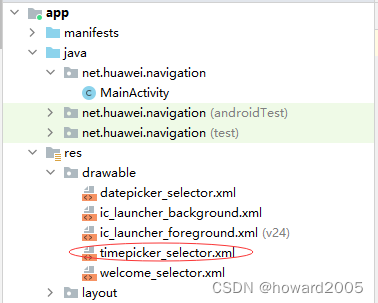
3、创建背景选择器 - timepicker_selector.xml
- 在
drawable目录里创建timepicker_selector.xml
<?xml version="1.0" encoding="utf-8"?>
<selector xmlns:android="http://schemas.android.com/apk/res/android">
    <item android:drawable="@mipmap/timepicker_normal" android:state_checked="false"/>
    <item android:drawable="@mipmap/timepicker_pressed" android:state_checked="true"/>
</selector>
- 1
- 2
- 3
- 4
- 5
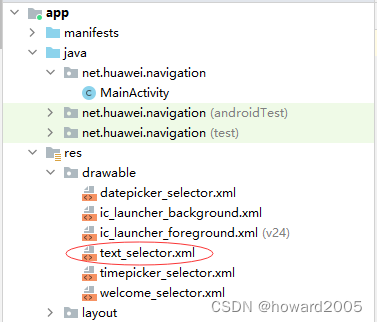
4、创建背景选择器 - text_selector.xml
- 在
drawable目录里创建text_selector.xml
<?xml version="1.0" encoding="utf-8"?>
<selector xmlns:android="http://schemas.android.com/apk/res/android">
    <item android:state_checked="true" android:state_pressed="false" android:color="#009900"/>
    <item android:drawable="@mipmap/ic_launcher" android:color="#000000"/>
</selector>
- 1
- 2
- 3
- 4
- 5
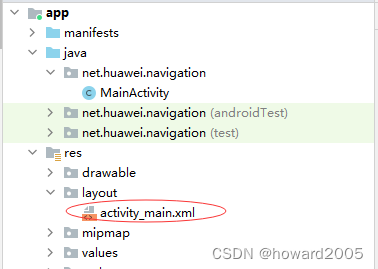
(四)主布局资源文件
- 主布局资源文件 -
activity_main.xml
<?xml version="1.0" encoding="utf-8"?>
<RelativeLayout xmlns:android="http://schemas.android.com/apk/res/android"
    android:layout_width="match_parent"
    android:layout_height="match_parent">

    <FrameLayout
        android:id="@+id/container"
        android:layout_width="match_parent"
        android:layout_height="wrap_content"
        android:layout_above="@+id/rl_bottom_bar"
        android:layout_alignParentTop="true"
        android:layout_centerHorizontal="true"
        android:background="@mipmap/background">
    </FrameLayout>

    <RelativeLayout
        android:id="@+id/rl_bottom_bar"
        android:layout_width="match_parent"
        android:layout_height="wrap_content"
        android:layout_alignParentBottom="true"
        android:layout_alignParentLeft="true"
        android:background="#fff">

        <RadioGroup
            android:id="@+id/rg_bottom_bar"
            android:layout_width="match_parent"
            android:layout_height="wrap_content"
            android:gravity="left"
            android:orientation="horizontal"
            android:padding="5dp">

            <RadioButton
                android:id="@+id/rb_welcome"
                android:layout_width="wrap_content"
                android:layout_height="wrap_content"
                android:layout_weight="1"
                android:button="@null"
                android:checked="true"
                android:drawableTop="@drawable/welcome_selector"
                android:gravity="center"
                android:text="@string/welcome"
                android:textColor="@drawable/text_selector"
                android:textSize="15sp" />

            <RadioButton
                android:id="@+id/rb_select_date"
                android:layout_width="wrap_content"
                android:layout_height="wrap_content"
                android:layout_weight="1"
                android:button="@null"
                android:drawableTop="@drawable/datepicker_selector"
                android:gravity="center"
                android:text="@string/datepicker"
                android:textColor="@drawable/text_selector"
                android:textSize="15sp" />

            <RadioButton
                android:id="@+id/rb_select_time"
                android:layout_width="wrap_content"
                android:layout_height="wrap_content"
                android:layout_weight="1"
                android:button="@null"
                android:drawableTop="@drawable/timepicker_selector"
                android:gravity="center"
                android:text="@string/timepicker"
                android:textColor="@drawable/text_selector"
                android:textSize="15sp" />
        </RadioGroup>
    </RelativeLayout>
</RelativeLayout>
- 1
- 2
- 3
- 4
- 5
- 6
- 7
- 8
- 9
- 10
- 11
- 12
- 13
- 14
- 15
- 16
- 17
- 18
- 19
- 20
- 21
- 22
- 23
- 24
- 25
- 26
- 27
- 28
- 29
- 30
- 31
- 32
- 33
- 34
- 35
- 36
- 37
- 38
- 39
- 40
- 41
- 42
- 43
- 44
- 45
- 46
- 47
- 48
- 49
- 50
- 51
- 52
- 53
- 54
- 55
- 56
- 57
- 58
- 59
- 60
- 61
- 62
- 63
- 64
- 65
- 66
- 67
- 68
- 69
- 70
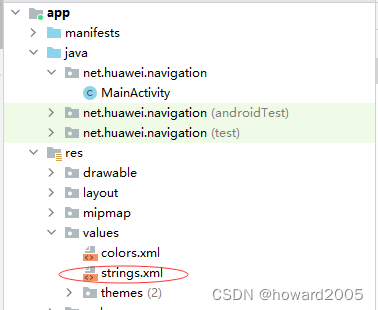
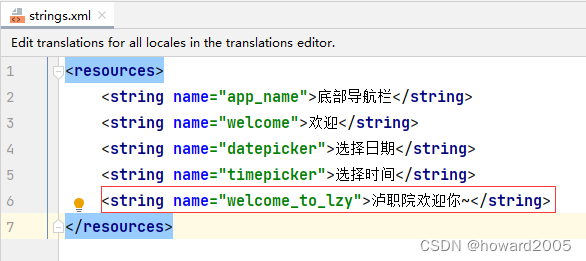
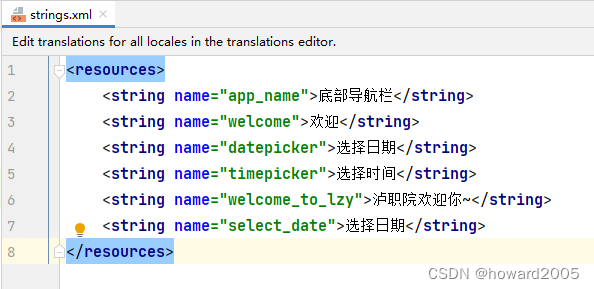
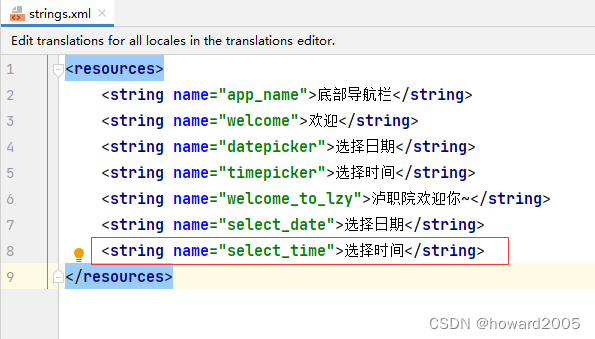
(五)字符串资源文件
- 在字符串资源文件 -
strings.xml里定义变量
<resources>
    <string name="app_name">底部导航栏</string>
    <string name="welcome">欢迎</string>
    <string name="datepicker">选择日期</string>
    <string name="timepicker">选择时间</string>
</resources>
- 1
- 2
- 3
- 4
- 5
- 6
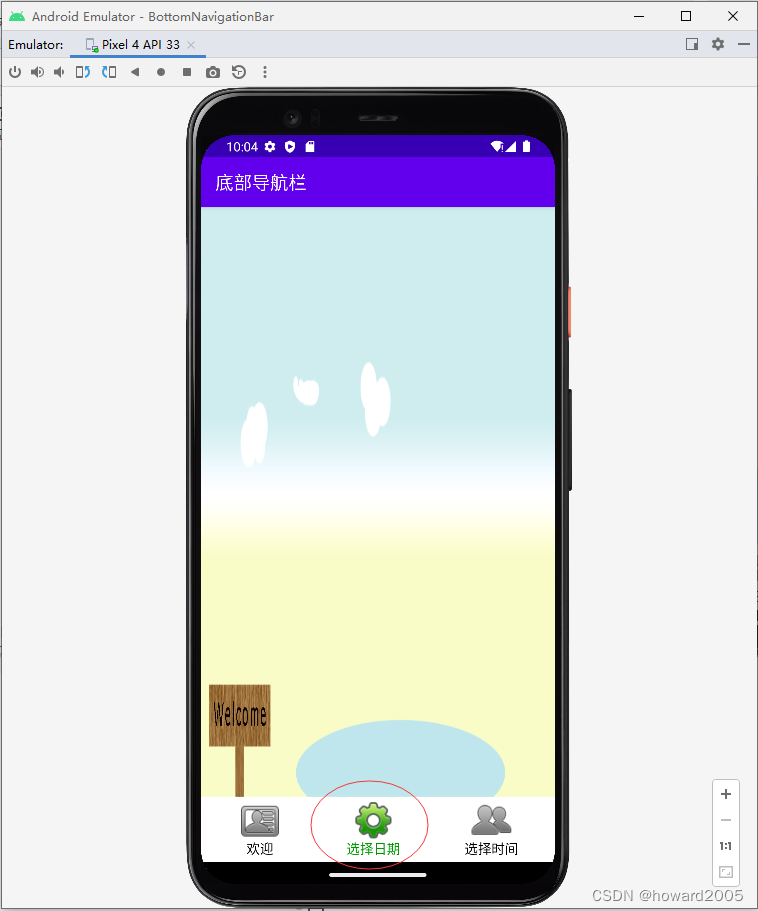
- 运行程序,查看效果
- 单击【选择日期】按钮
- 单击【选择时间】按钮
- 下面我们就要创建三个碎片(Fragment),用底部导航按钮来切换。
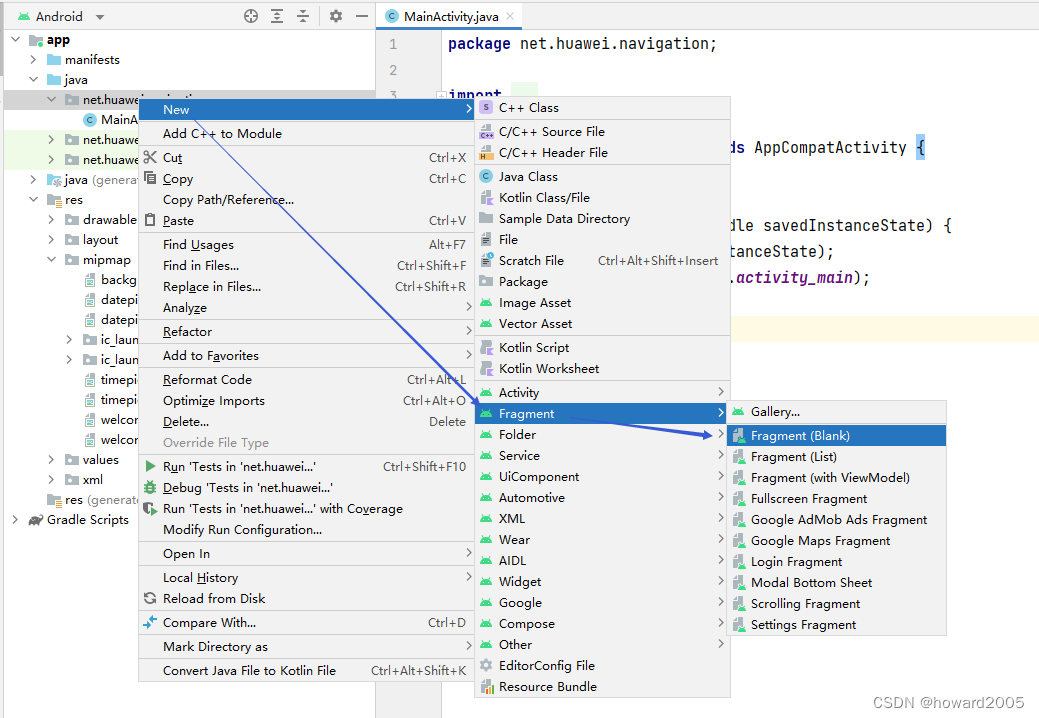
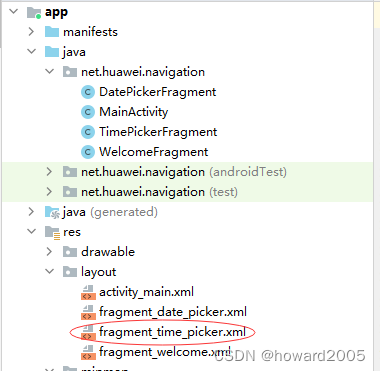
(六)创建碎片
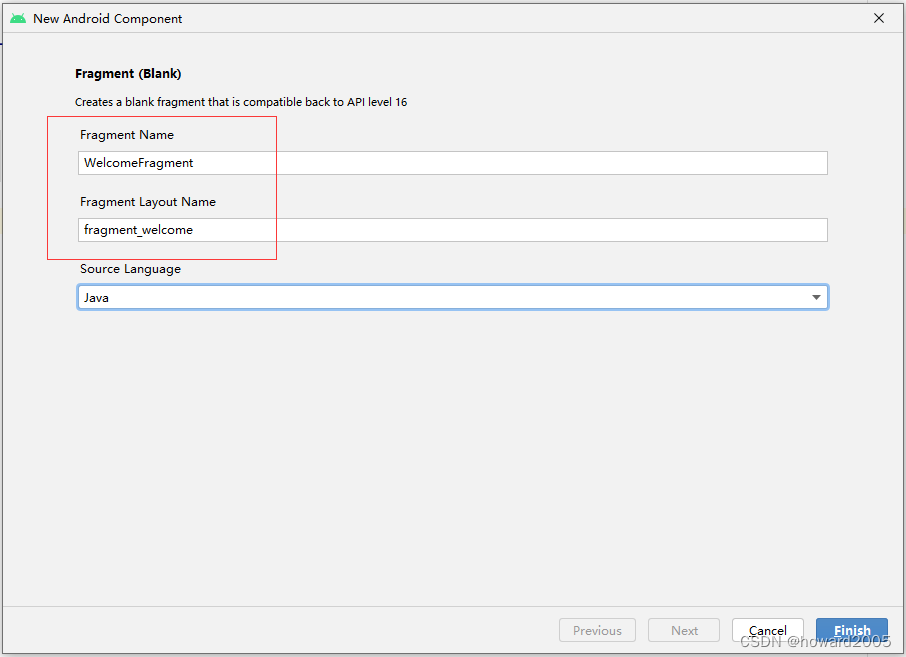
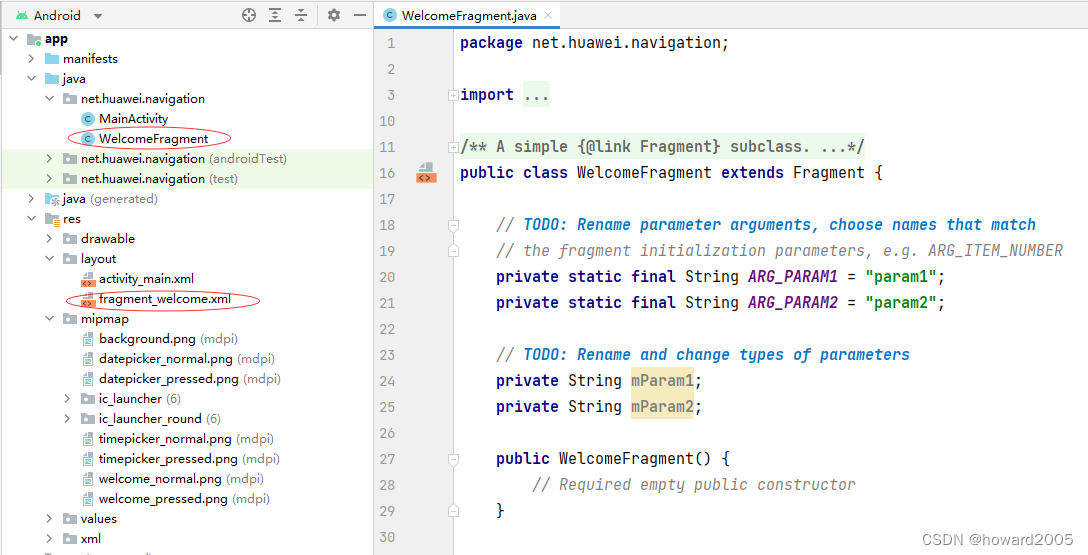
1、创建欢迎碎片
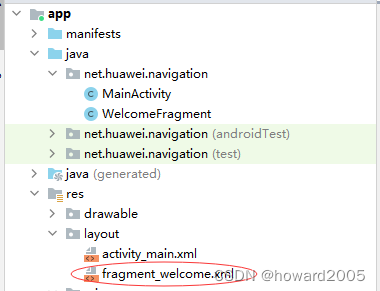
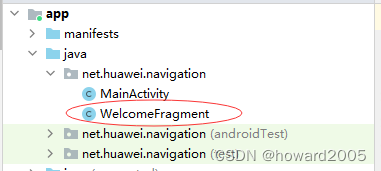
- 基于模板创建
WelcomeFragment
- 修改欢迎碎片布局文件
<?xml version="1.0" encoding="utf-8"?>
<FrameLayout xmlns:android="http://schemas.android.com/apk/res/android"
    xmlns:tools="http://schemas.android.com/tools"
    android:layout_width="match_parent"
    android:layout_height="match_parent"
    android:background="@mipmap/background"
    tools:context=".WelcomeFragment">

    <TextView
        android:layout_width="match_parent"
        android:layout_height="match_parent"
        android:gravity="center"
        android:textSize="20sp"
        android:textColor="#ff0000"
        android:text="@string/welcome_to_lzy" />
</FrameLayout>
- 1
- 2
- 3
- 4
- 5
- 6
- 7
- 8
- 9
- 10
- 11
- 12
- 13
- 14
- 15
- 16
- 修改字符串资源文件 -
strings.xml
- 修改碎片界面类 -
WelcomeFragment
package net.huawei.navigation;

import android.os.Bundle;

import androidx.fragment.app.Fragment;

import android.view.LayoutInflater;
import android.view.View;
import android.view.ViewGroup;

public class WelcomeFragment extends Fragment {

    @Override
    public void onCreate(Bundle savedInstanceState) {
        super.onCreate(savedInstanceState);
    }

    @Override
    public View onCreateView(LayoutInflater inflater, ViewGroup container,
                             Bundle savedInstanceState) {
        return initView();
    }

    private View initView() {
        // 获取布局打气筒
        LayoutInflater inflater = LayoutInflater.from(getActivity());
        // 获取碎片视图
        View view = inflater.inflate(R.layout.fragment_welcome, null);
        // 返回视图
        return view;
    }
}
- 1
- 2
- 3
- 4
- 5
- 6
- 7
- 8
- 9
- 10
- 11
- 12
- 13
- 14
- 15
- 16
- 17
- 18
- 19
- 20
- 21
- 22
- 23
- 24
- 25
- 26
- 27
- 28
- 29
- 30
- 31
- 32
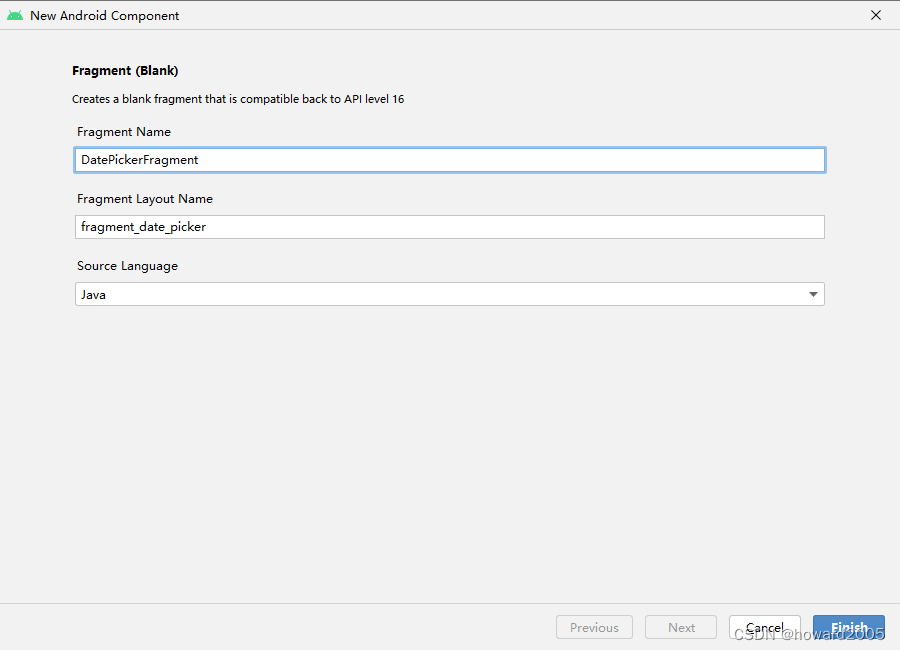
2、创建选择日期碎片
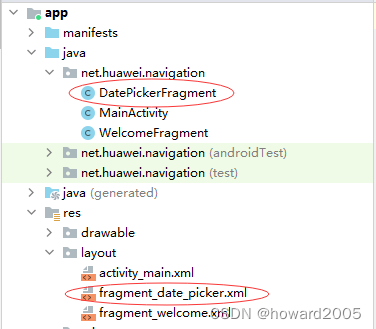
- 基于模板创建 -
DatePickerFragment
- 选择日期碎片布局文件
<?xml version="1.0" encoding="utf-8"?>
<LinearLayout xmlns:android="http://schemas.android.com/apk/res/android"
    xmlns:tools="http://schemas.android.com/tools"
    android:layout_width="match_parent"
    android:layout_height="match_parent"
    android:background="@mipmap/background"
    android:gravity="center_vertical"
    android:orientation="vertical"
    android:padding="20dp"
    tools:context=".DatePickerFragment">

    <DatePicker
        android:id="@+id/datepicker"
        android:layout_width="match_parent"
        android:layout_height="wrap_content"/>

    <Button
        android:id="@+id/btn_select_date"
        android:layout_width="match_parent"
        android:layout_height="wrap_content"
        android:textSize="20sp"
        android:text="@string/select_date"/>
</LinearLayout>
- 1
- 2
- 3
- 4
- 5
- 6
- 7
- 8
- 9
- 10
- 11
- 12
- 13
- 14
- 15
- 16
- 17
- 18
- 19
- 20
- 21
- 22
- 23
- 字符串资源文件
- 选择日期碎片界面类
package net.huawei.navigation;

import android.os.Bundle;

import androidx.fragment.app.Fragment;

import android.view.LayoutInflater;
import android.view.View;
import android.view.ViewGroup;
import android.widget.Button;
import android.widget.DatePicker;
import android.widget.Toast;

public class DatePickerFragment extends Fragment {
    private Button btnSelectDate;
    private DatePicker datePicker;

    @Override
    public View onCreateView(LayoutInflater inflater, ViewGroup container,
                             Bundle savedInstanceState) {
        return initView();
    }

    private View initView() {
        // 获取布局打气筒
        LayoutInflater inflater = LayoutInflater.from(getActivity());
        // 获取碎片视图
        View view = inflater.inflate(R.layout.fragment_date_picker, null);
        // 通过资源标识符获取控件实例
        btnSelectDate = view.findViewById(R.id.btn_select_date);
        datePicker = view.findViewById(R.id.datepicker);
        // 进行事件处理
        eventHandling();
        // 返回碎片视图
        return view;
    }

    private void eventHandling() {
        // 对选择日期按钮进行事件处理
        btnSelectDate.setOnClickListener(new View.OnClickListener() {
            @Override
            public void onClick(View v) {
                int year = datePicker.getYear();
                int month = datePicker.getMonth() + 1;
                int day = datePicker.getDayOfMonth();
                Toast.makeText(getActivity(), year + "年" + month + "月" + day + "日", Toast.LENGTH_SHORT).show();
            }
        });
    }
}
- 1
- 2
- 3
- 4
- 5
- 6
- 7
- 8
- 9
- 10
- 11
- 12
- 13
- 14
- 15
- 16
- 17
- 18
- 19
- 20
- 21
- 22
- 23
- 24
- 25
- 26
- 27
- 28
- 29
- 30
- 31
- 32
- 33
- 34
- 35
- 36
- 37
- 38
- 39
- 40
- 41
- 42
- 43
- 44
- 45
- 46
- 47
- 48
- 49
- 50
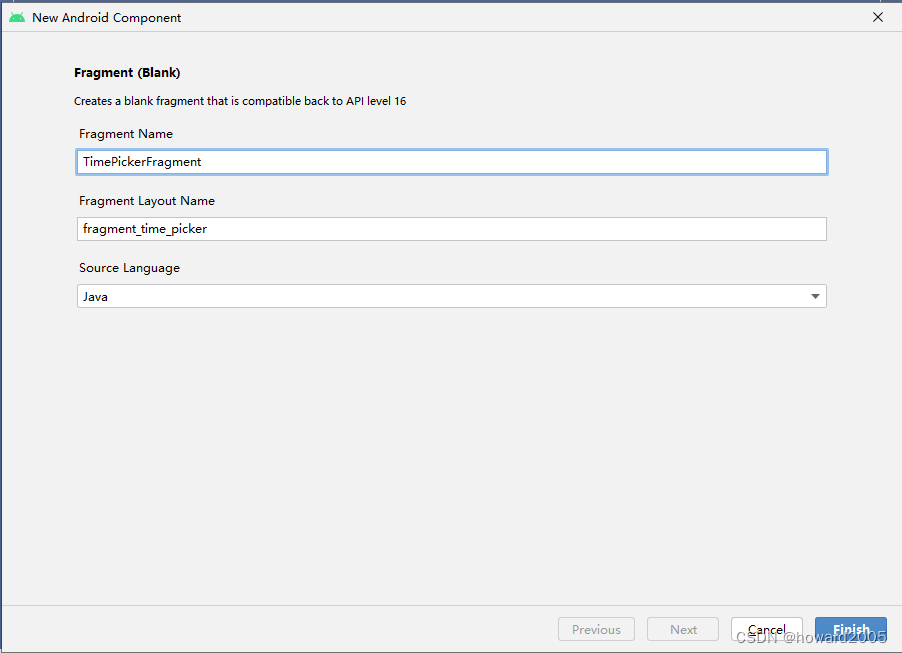
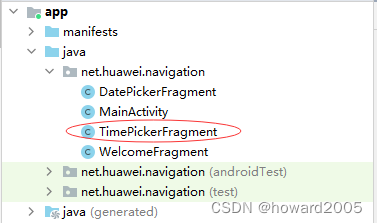
3、创建选择时间碎片
- 基于模板创建 -
TimePickerFragment
- 选择时间碎片布局文件
<?xml version="1.0" encoding="utf-8"?>
<LinearLayout xmlns:android="http://schemas.android.com/apk/res/android"
    xmlns:tools="http://schemas.android.com/tools"
    android:layout_width="match_parent"
    android:layout_height="match_parent"
    android:background="@mipmap/background"
    android:gravity="center_vertical"
    android:orientation="vertical"
    android:padding="20dp"
    tools:context=".TimePickerFragment">

    <TimePicker
        android:id="@+id/timepicker"
        android:layout_width="match_parent"
        android:layout_height="wrap_content"/>

    <Button
        android:id="@+id/btn_select_time"
        android:layout_width="match_parent"
        android:layout_height="wrap_content"
        android:textSize="20sp"
        android:text="@string/select_time"/>
</LinearLayout>
- 1
- 2
- 3
- 4
- 5
- 6
- 7
- 8
- 9
- 10
- 11
- 12
- 13
- 14
- 15
- 16
- 17
- 18
- 19
- 20
- 21
- 22
- 23
- 字符串资源文件
- 选择时间碎片界面类
package net.huawei.navigation;
import android.os.Bundle;
import androidx.fragment.app.Fragment;
import android.view.LayoutInflater;
import android.view.View;
import android.view.ViewGroup;
import android.widget.Button;
import android.widget.DatePicker;
import android.widget.TimePicker;
import android.widget.Toast;
public class TimePickerFragment extends Fragment {
private Button btnSelectTime;
private TimePicker timePicker;
@Override
public View onCreateView(LayoutInflater inflater, ViewGroup container,
Bundle savedInstanceState) {
return initView();
}
private View initView() {
// 获取布局打气筒
LayoutInflater inflater = LayoutInflater.from(getActivity());
// 获取碎片视图
View view = inflater.inflate(R.layout.fragment_time_picker, null);
// 通过资源标识符获取控件实例
btnSelectTime = view.findViewById(R.id.btn_select_time);
timePicker = view.findViewById(R.id.timepicker);
// 进行事件处理
eventHandling();
// 返回碎片视图
return view;
}
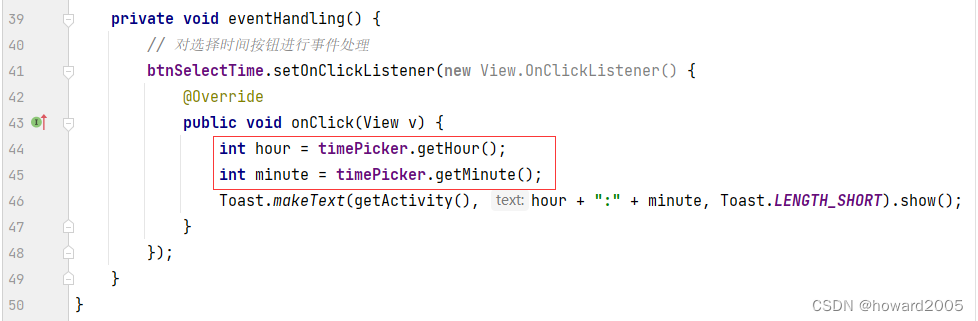
private void eventHandling() {
// 对选择时间按钮进行事件处理
btnSelectTime.setOnClickListener(new View.OnClickListener() {
@Override
public void onClick(View v) {
int hour = timePicker.getHour();
int minute = timePicker.getMinute();
Toast.makeText(getActivity(), hour + ":" + minute, Toast.LENGTH_SHORT).show();
}
});
}
}
- 1
- 2
- 3
- 4
- 5
- 6
- 7
- 8
- 9
- 10
- 11
- 12
- 13
- 14
- 15
- 16
- 17
- 18
- 19
- 20
- 21
- 22
- 23
- 24
- 25
- 26
- 27
- 28
- 29
- 30
- 31
- 32
- 33
- 34
- 35
- 36
- 37
- 38
- 39
- 40
- 41
- 42
- 43
- 44
- 45
- 46
- 47
- 48
- 49
- 50
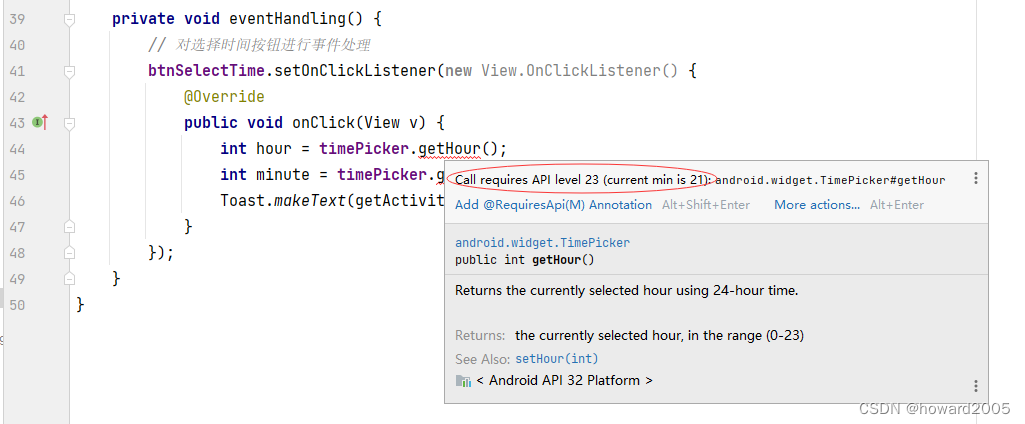
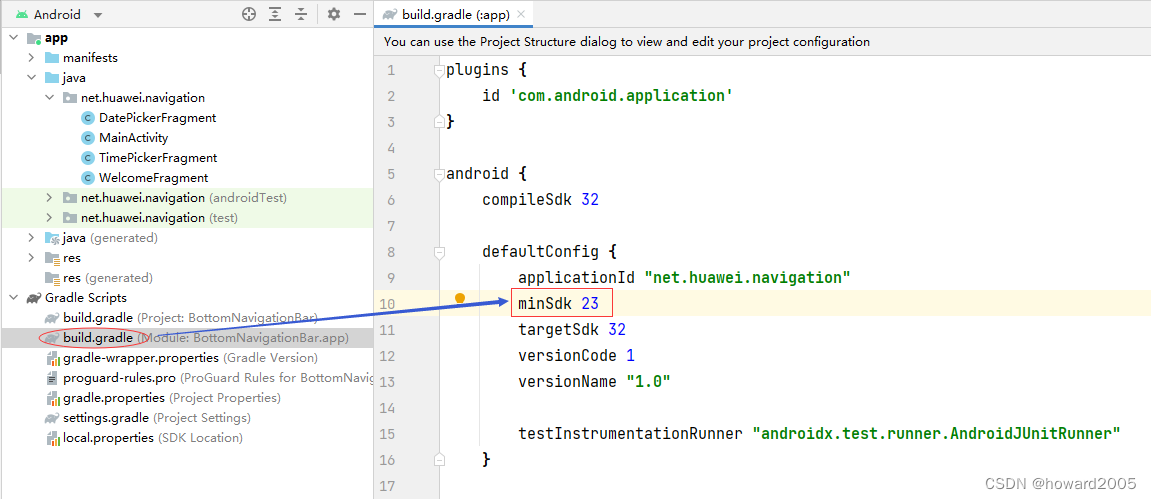
- 有一个版本导致的错误
- 需要在模块的构建文件里修改
minSdk,由21改成23
- 此时,查看代码,就没有错误了
(七)修改主界面类
- 主界面类 -
MainActivity
package net.huawei.navigation;

import androidx.appcompat.app.AppCompatActivity;
import androidx.fragment.app.Fragment;
import androidx.fragment.app.FragmentManager;
import androidx.fragment.app.FragmentTransaction;

import android.os.Bundle;
import android.widget.RadioButton;
import android.widget.RadioGroup;

public class MainActivity extends AppCompatActivity {
    private RadioGroup rgBottomBar;
    private RadioButton rbWelcome;
    private RadioButton rbSelectDate;
    private RadioButton rbSelectTime;
    private WelcomeFragment welcomeFragment;
    private DatePickerFragment datePickerFragment;
    private TimePickerFragment timePickerFragment;

    @Override
    protected void onCreate(Bundle savedInstanceState) {
        super.onCreate(savedInstanceState);
        // 利用布局资源文件设置用户界面
        setContentView(R.layout.activity_main);
        // 通过资源标识符获取控件实例
        rgBottomBar = findViewById(R.id.rg_bottom_bar);
        rbWelcome = findViewById(R.id.rb_welcome);
        rbSelectDate = findViewById(R.id.rb_select_date);
        rbSelectTime = findViewById(R.id.rb_select_time);
        // 创建三个碎片实例
        welcomeFragment = new WelcomeFragment();
        datePickerFragment = new DatePickerFragment();
        timePickerFragment = new TimePickerFragment();
        // 进行事件处理
        eventHandling();
        // 显示欢迎碎片
        showFragment(welcomeFragment);
    }

    /**
     * 显示碎片
     *
     * @param fragment
     */
    private void showFragment(Fragment fragment) {
        // 创建碎片管理器
        FragmentManager fm = getSupportFragmentManager();
        // 创建碎片事务
        FragmentTransaction ft = fm.beginTransaction();
        // 在容器里显示碎片
        ft.replace(R.id.container, fragment);
        // 提交碎片事务
        ft.commit();
    }

    private void eventHandling() {
        rgBottomBar.setOnCheckedChangeListener(new RadioGroup.OnCheckedChangeListener() {
            @Override
            public void onCheckedChanged(RadioGroup group, int checkedId) {
                switch (checkedId) {
                    case R.id.rb_welcome: // 欢迎
                        showFragment(welcomeFragment);
                        break;
                    case R.id.rb_select_date: // 选择日期
                        showFragment(datePickerFragment);
                        break;
                    case R.id.rb_select_time: // 选择时间
                        showFragment(timePickerFragment);
                        break;
                }
            }
        });
    }
}
- 1
- 2
- 3
- 4
- 5
- 6
- 7
- 8
- 9
- 10
- 11
- 12
- 13
- 14
- 15
- 16
- 17
- 18
- 19
- 20
- 21
- 22
- 23
- 24
- 25
- 26
- 27
- 28
- 29
- 30
- 31
- 32
- 33
- 34
- 35
- 36
- 37
- 38
- 39
- 40
- 41
- 42
- 43
- 44
- 45
- 46
- 47
- 48
- 49
- 50
- 51
- 52
- 53
- 54
- 55
- 56
- 57
- 58
- 59
- 60
- 61
- 62
- 63
- 64
- 65
- 66
- 67
- 68
- 69
- 70
- 71
- 72
- 73
- 74
- 75
(八)运行程序,查看效果
- 操作录屏
文章来源: howard2005.blog.csdn.net,作者:howard2005,版权归原作者所有,如需转载,请联系作者。
原文链接:howard2005.blog.csdn.net/article/details/125586732

【版权声明】本文为华为云社区用户转载文章,如果您发现本社区中有涉嫌抄袭的内容,欢迎发送邮件进行举报,并提供相关证据,一经查实,本社区将立刻删除涉嫌侵权内容,举报邮箱:
cloudbbs@huaweicloud.com
- 点赞
- 收藏
- 关注作者
评论(0)