Nexus3 搭建私服 maven 仓库
一、Nexus3
上篇文章实验了使用Nexus3搭建私服 docker 仓库及代理仓库,本篇文章继续使用 Nexus3 搭建私服maven 仓库,有关 Nexus3 的安装请参考上篇博客:
下面开始实验 maven 私服的搭建:
二、搭建maven 私服仓库
在 Nexus3 安装完毕后,细心的小伙伴应该可以看出,Nexus3 已经帮我们搭建好了一套 maven 私服:
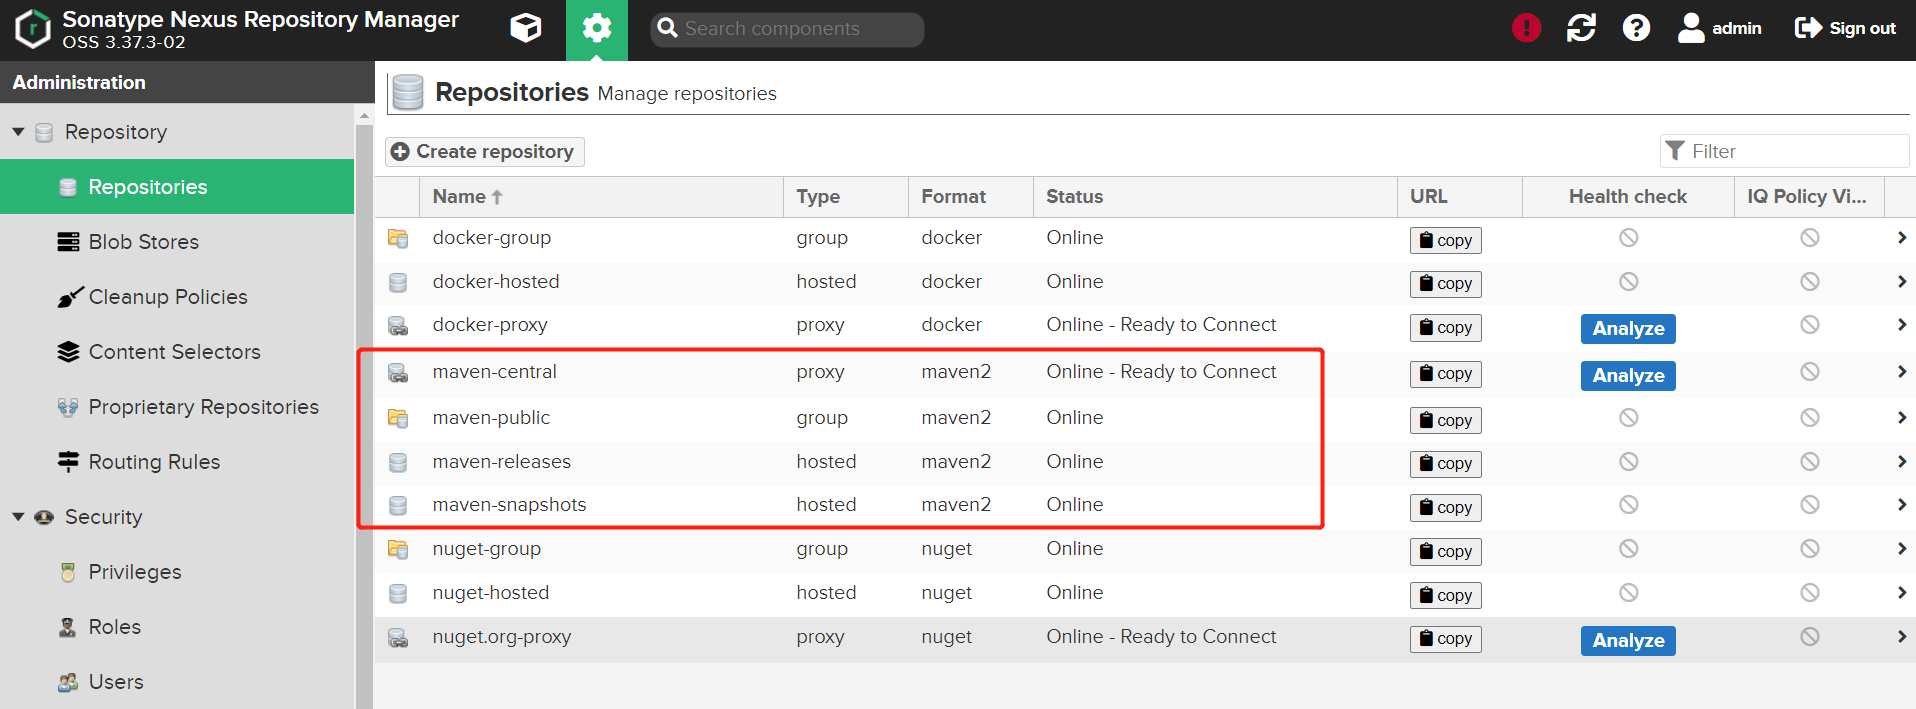
其中 proxy、hosted、group 和上篇文章搭建 docker 私服中的概念是一样的:
-
proxy(代理仓库):用来代理远程的公共仓库,默认是从远程中央仓库中寻找数据的仓库下载需要的 jar 包。 -
hosted(宿主仓库):用来部署我们自己项目打包的构建,供内部人员下载。 -
group(仓库组):用来合并多个hosted/proxy仓库,都加入到一个仓库组中,提供统一的访问地址,下载时按配置顺序从中依次查找。
这里为了更细致的实验,就不使用 Nexus3 自带的 maven 仓库了,我们自己创建proxy、hosted、group 三种类型的仓库,其中 proxy 我们代理阿里云的maven 仓库。
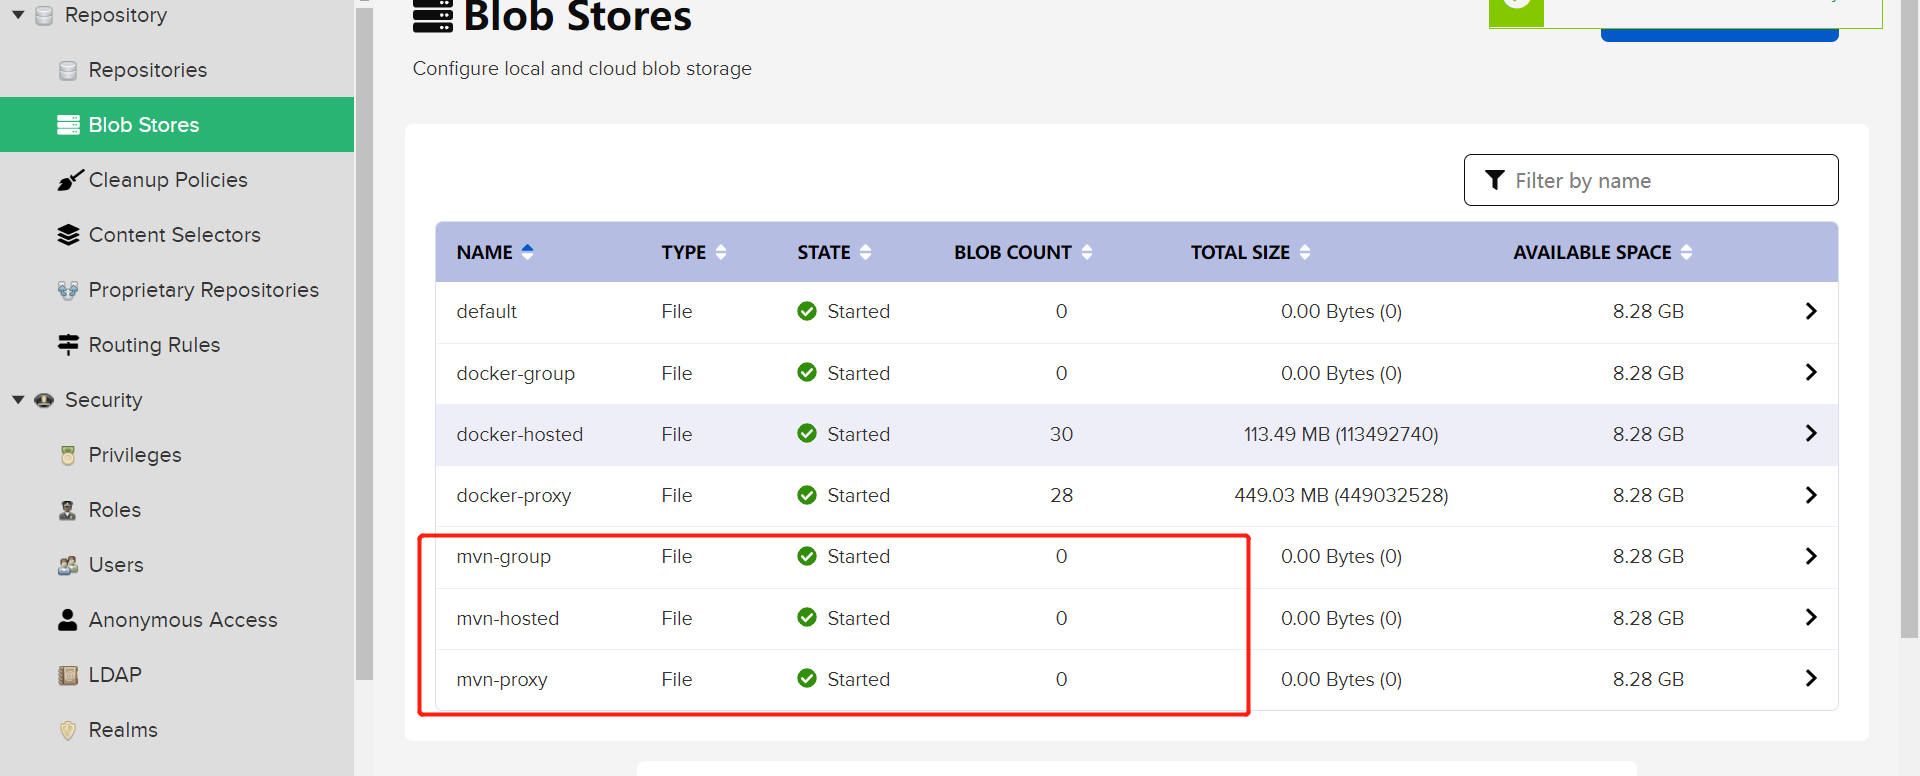
在开始前同样创建三个 Blob Stores :
1. proxy 类型仓库
点击 Create repositories ,选择 proxy 类型的 maven 仓库:

然后将 版本选为 Release ,每次都拉取已发布依赖,下面代理地址填写 阿里云的maven仓库地址:https://maven.aliyun.com/nexus/content/groups/public/
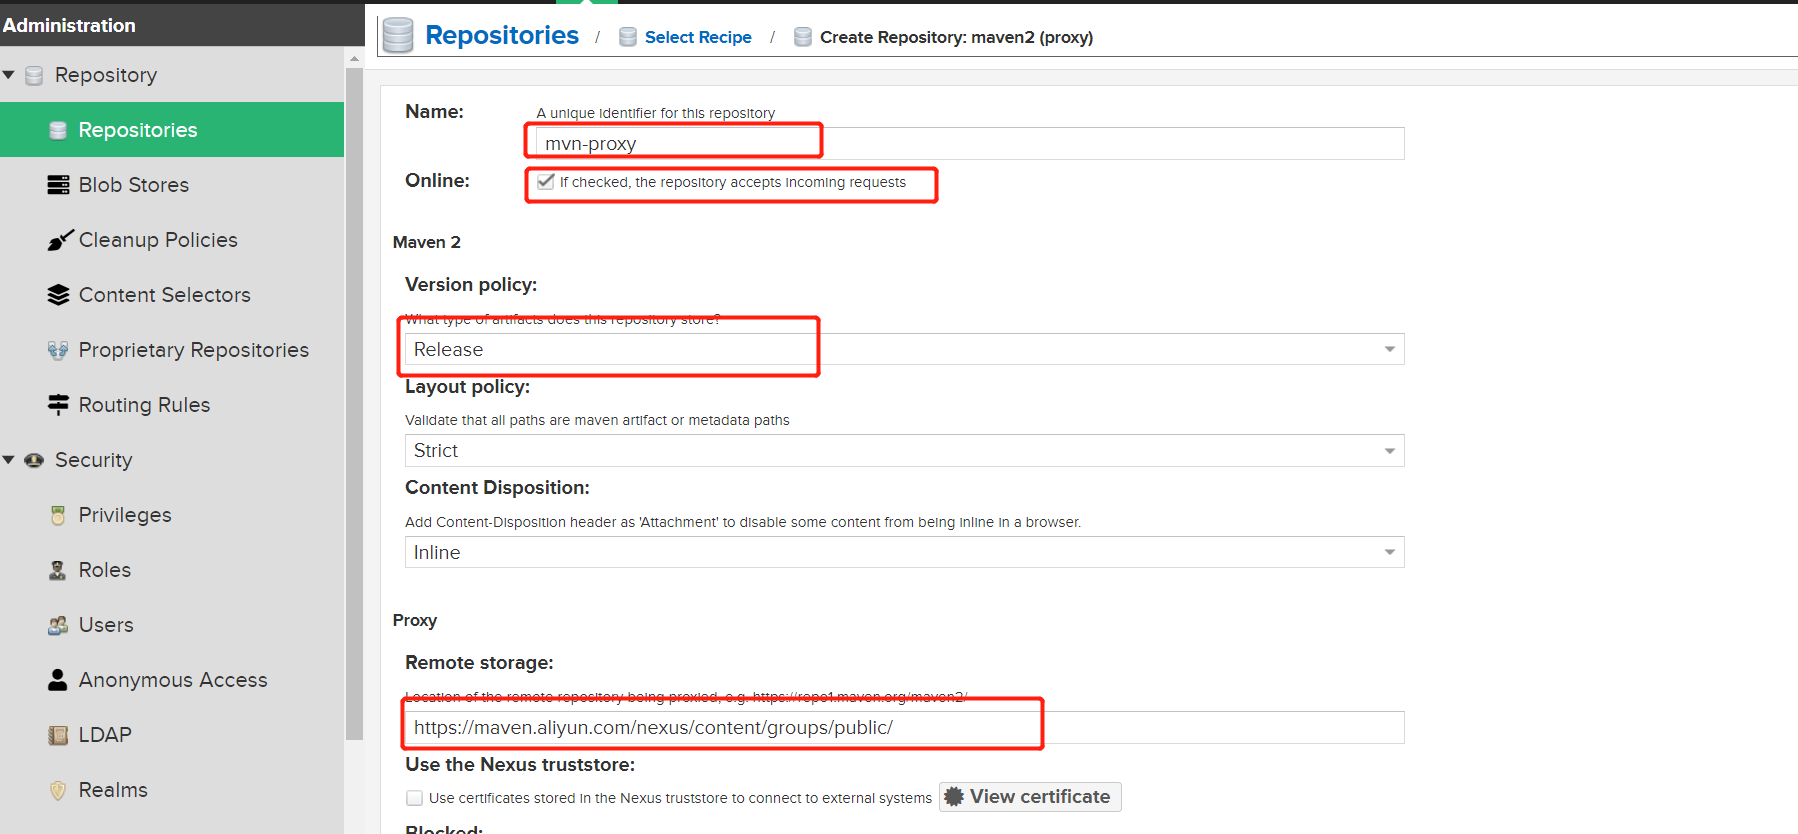
然后 Blob Store 选中上面创建的:

最后点击 Create repositories 完成创建。
2. hosted 类型仓库
点击 Create repositories ,选择 hosted 类型的 maven 仓库:

将版本同样选为 Release ,表示该仓库中的是已发布的依赖, Blob Store 同样选中上面创建的:
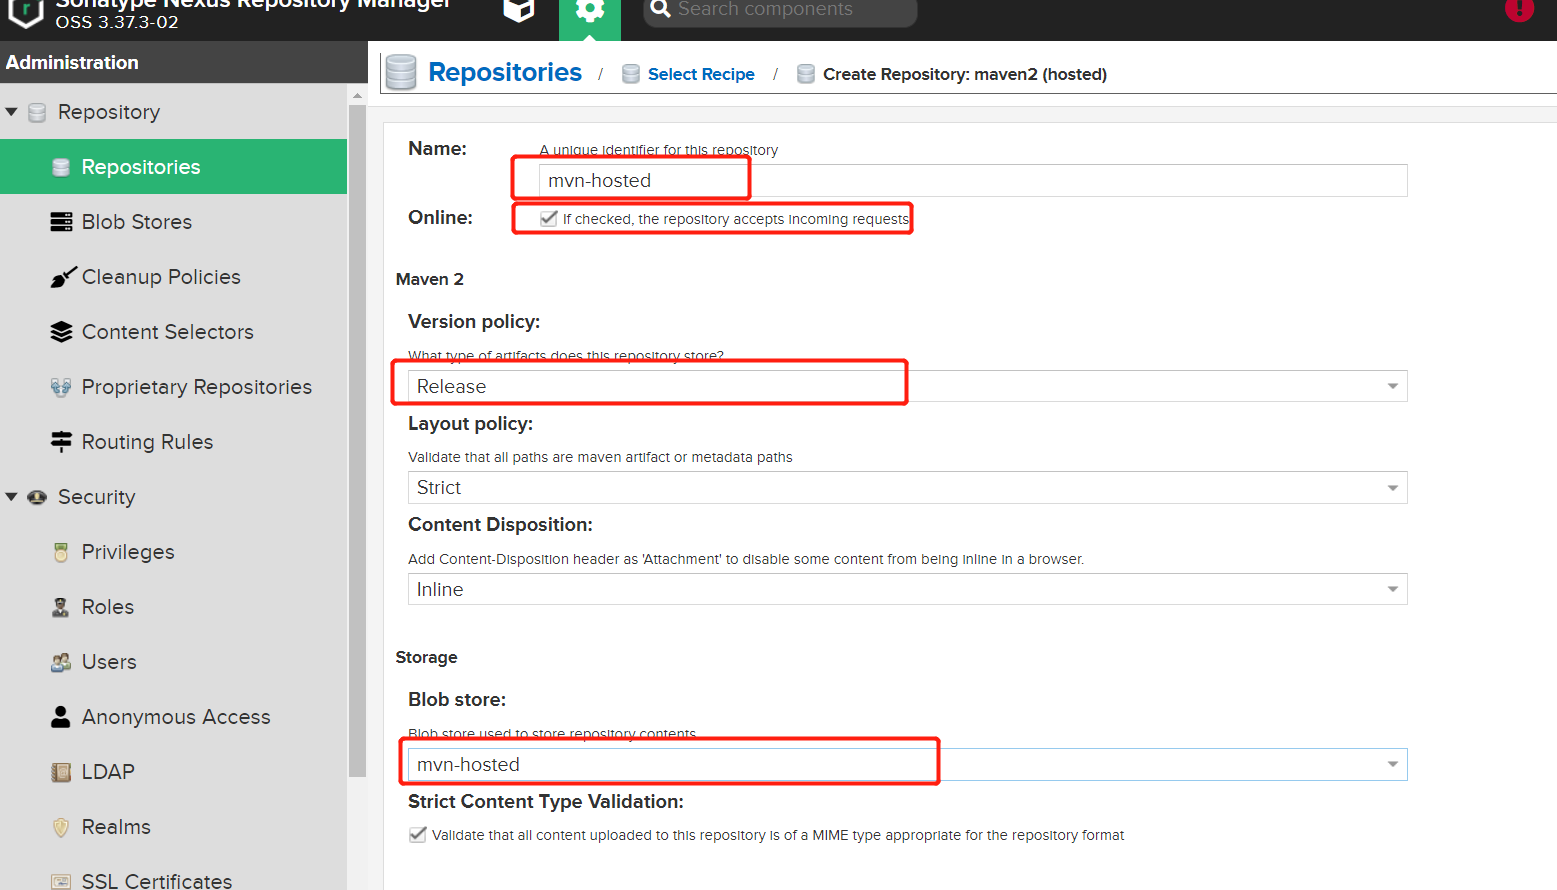
最后点击 Create repositories 完成创建。
3. group 类型仓库
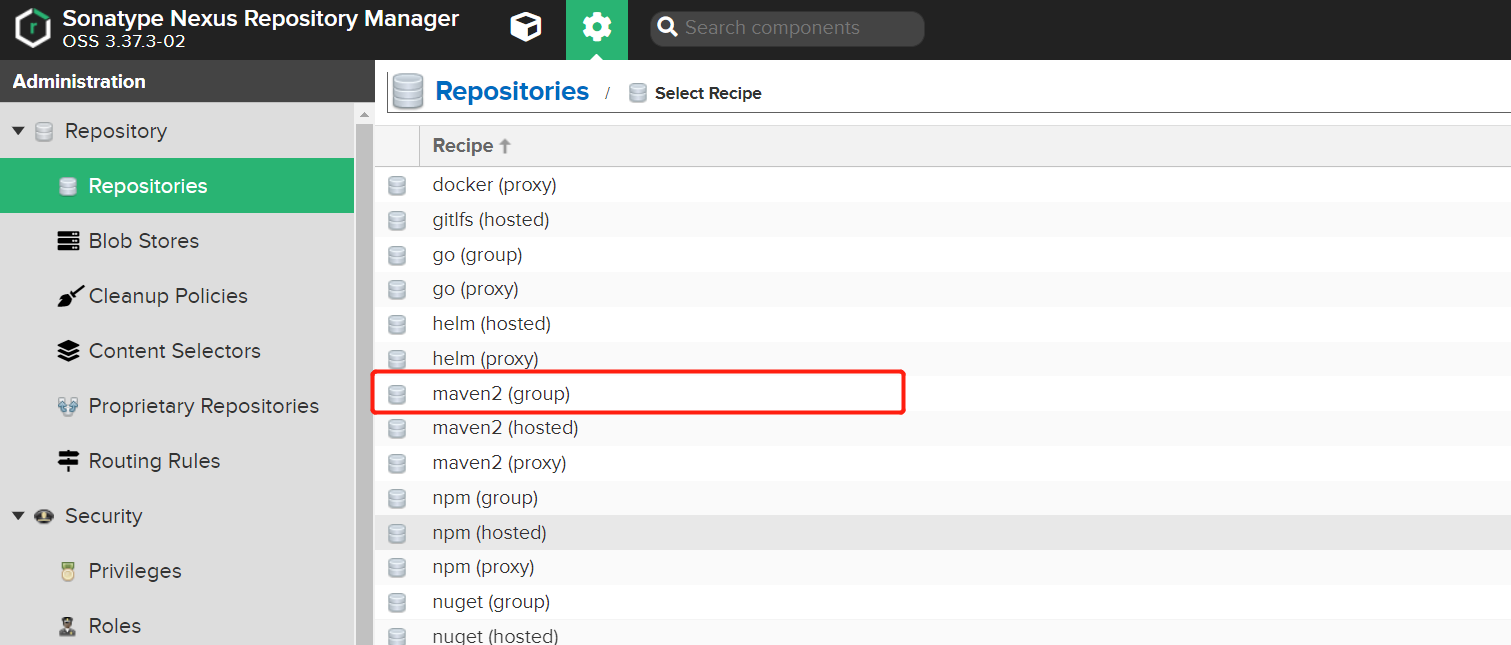
点击 Create repositories ,选择 group 类型的 maven 仓库:
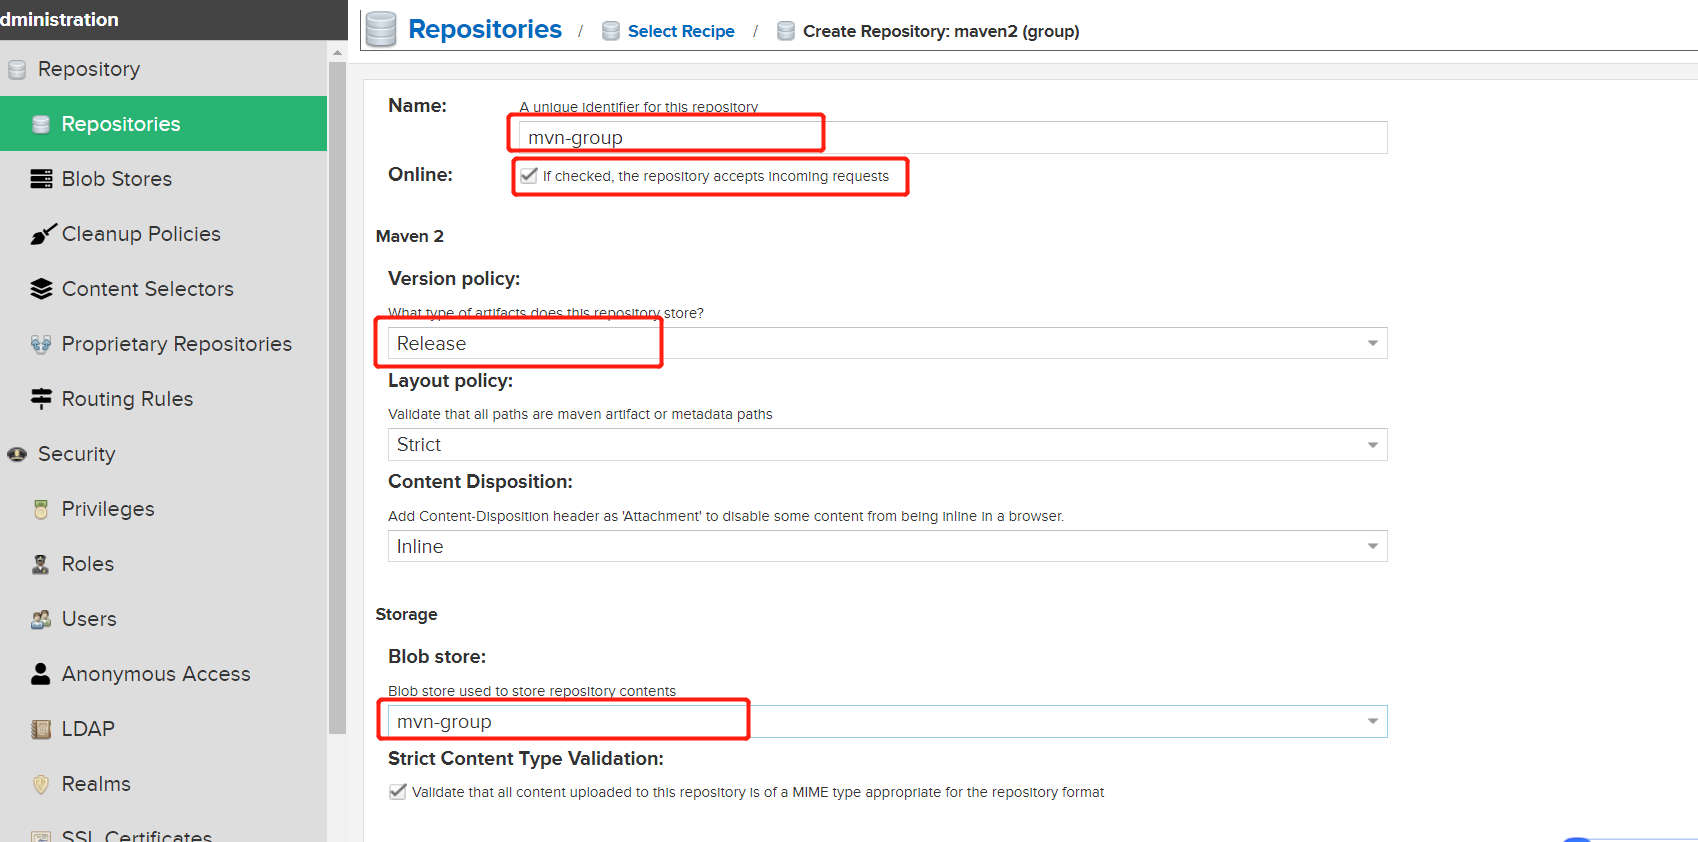
将版本同样选为 Release , Blob Store 同样选中上面创建的:
然后下面的分组需要将上面创建的两个仓库加上,注意顺序,在拉取依赖的时候是根据这个顺序从上往下进行的:
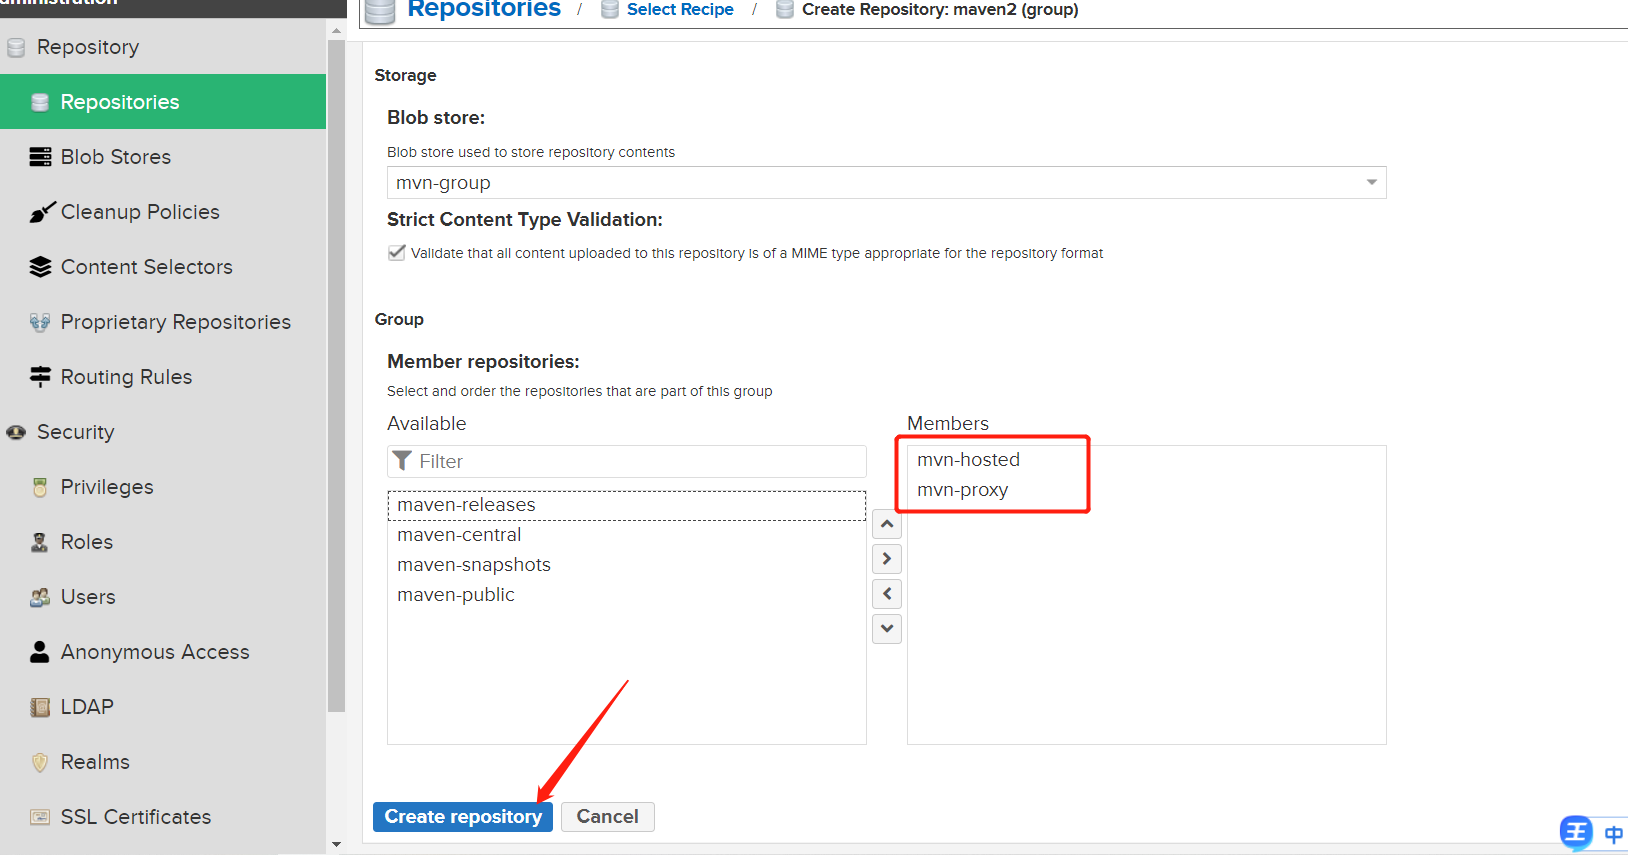
最后点击 Create repositories 完成创建。
现在就完成了 maven 私服的创建,下面开始进行测试。
三、客户端测试
maven 配置远程仓库的方式有两种,一种是在 项目的 pom.xml 中添加 repository 指定远程仓库的地址,一种是在 setting.xml 中添加镜像的方式指定远程仓库。这两种方式都需要在 setting.xml 添加 server 标签指定远程仓库的用户名和密码,下面分别进行演示:
1. pom.xml 方式 下载依赖
首先创建一个普通的 maven 项目,在 pom 中添加下面配置:
<repositories>
    <repository>
        <id>maven-nexus</id>
        <url>http://192.168.40.171:8081/repository/mvn-group/</url>
        <releases>
            <enabled>true</enabled>
        </releases>
        <snapshots>
            <enabled>true</enabled>
        </snapshots>
    </repository>
</repositories>
- 1
- 2
- 3
- 4
- 5
- 6
- 7
- 8
- 9
- 10
- 11
- 12
其中上面的 url 可以在 nexus3 的web 界面中看到:
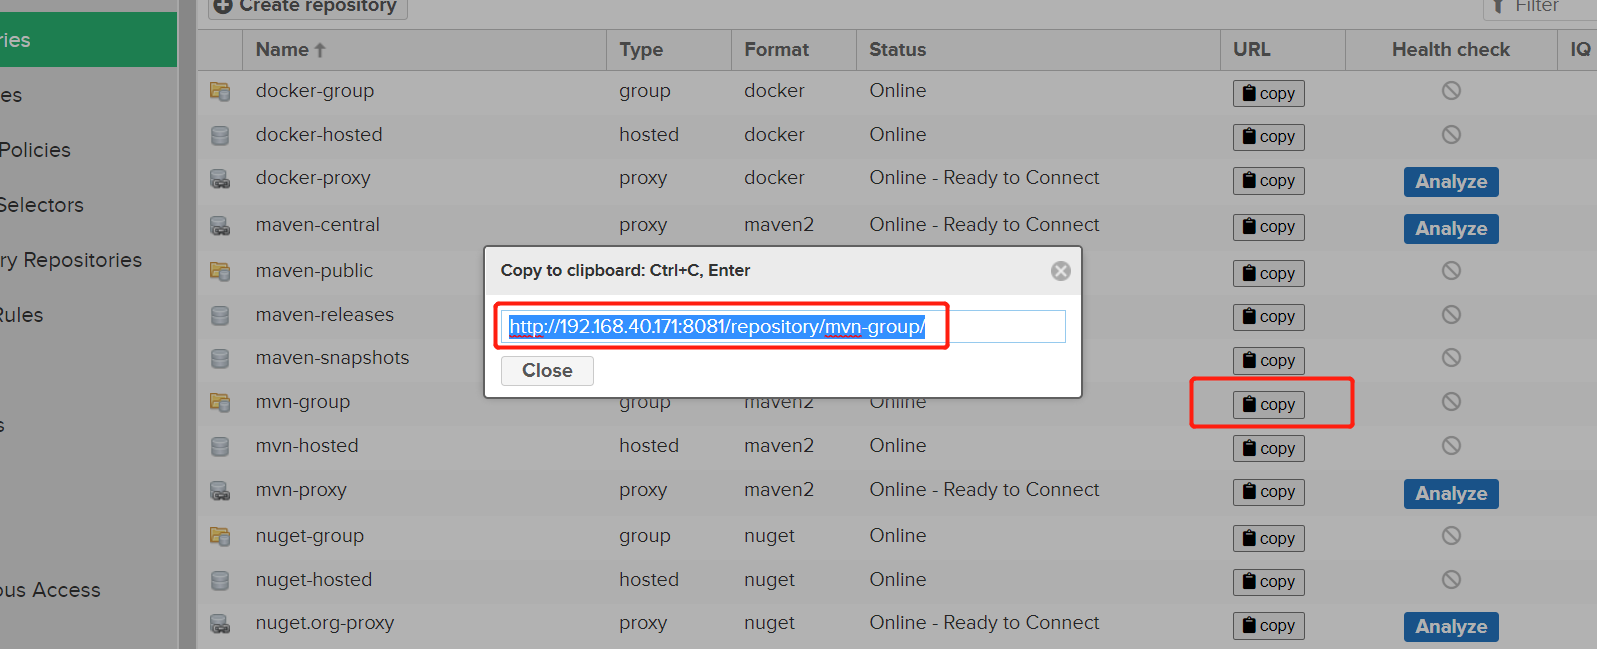
因为nexus3是需要用户名和密码才能访问,在setting.xml 中添加如下配置:
<server>
  <id>maven-nexus</id>
  <username>admin</username>
  <password>nexus</password>
</server>
- 1
- 2
- 3
- 4
- 5
注意上面的 id 一定要和 pom 中 id 一致!
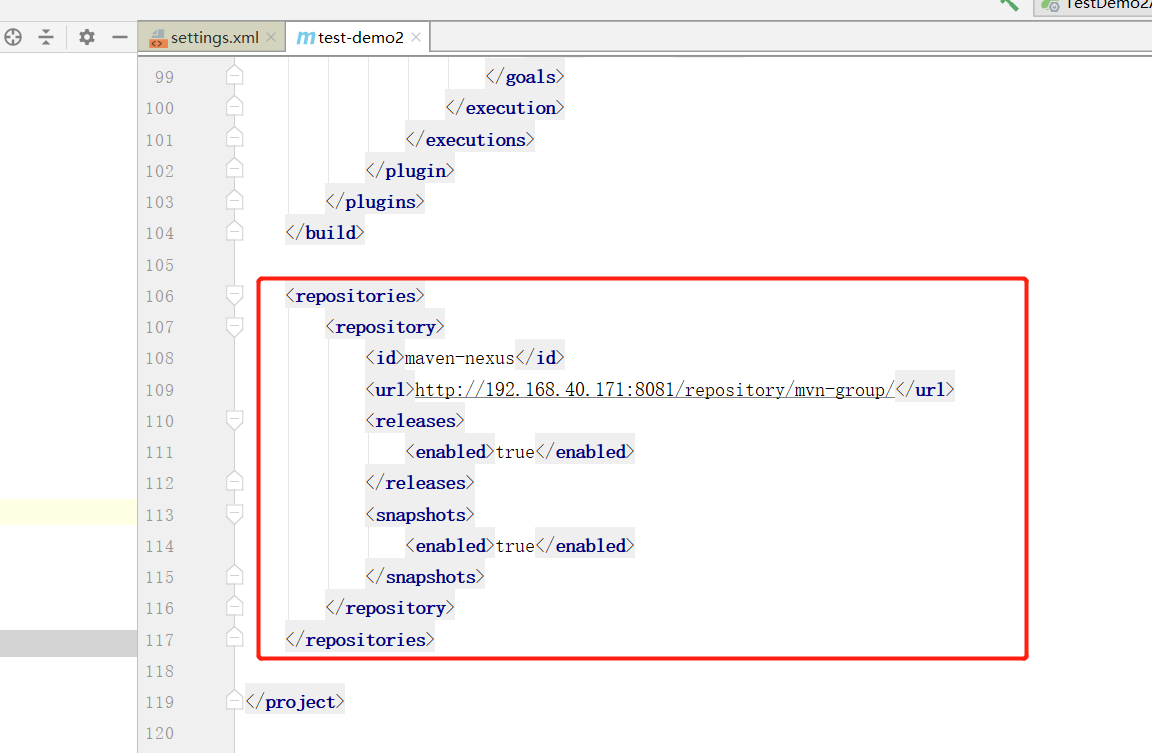
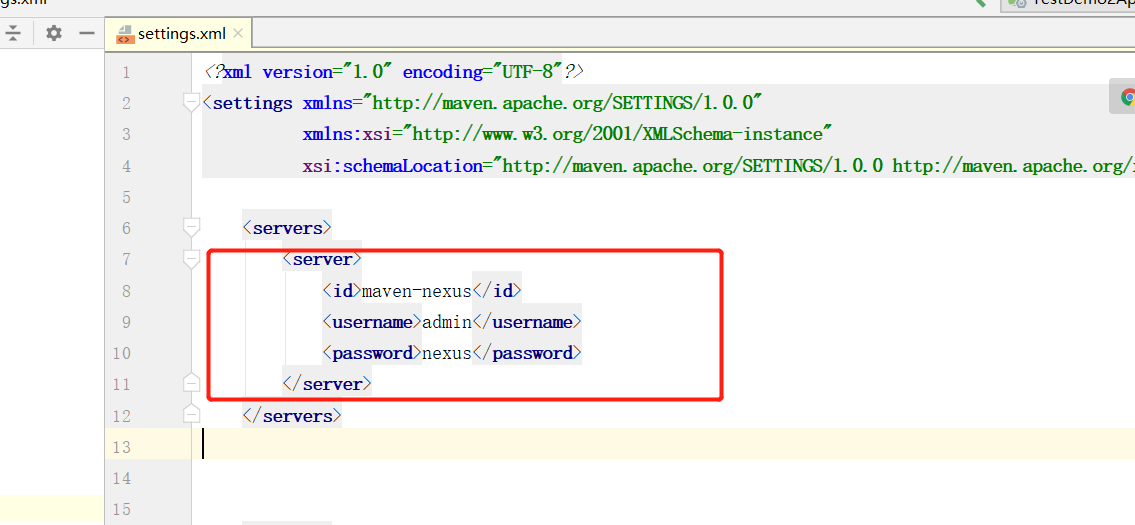
下面添加一个依赖,看是否从nexus3 中拉取,拉取前确保本地的 mavne 仓库中没有该依赖:
<dependency>
    <groupId>com.baomidou</groupId>
    <artifactId>mybatis-plus-boot-starter</artifactId>
    <version>3.5.2</version>
</dependency>
- 1
- 2
- 3
- 4
- 5
然后可以对项目 mvn compile 编译下:

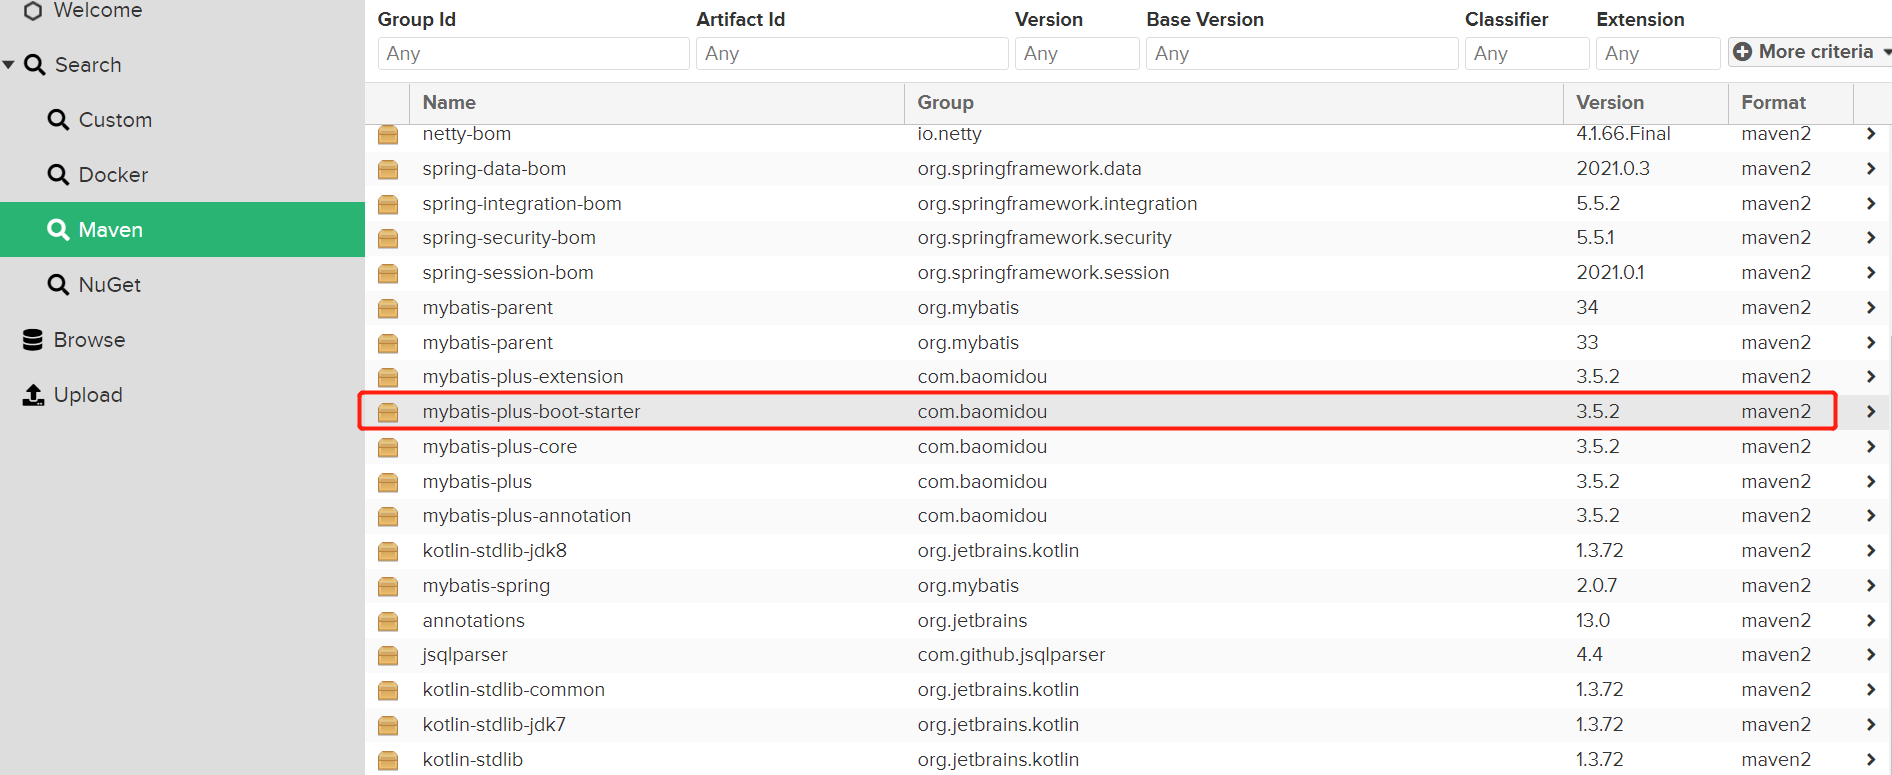
可以看到已经从我们的 maven 私服中拉取依赖,还可以在 Nexus3 的web 页面中进行查看:
2. 镜像方式 下载依赖
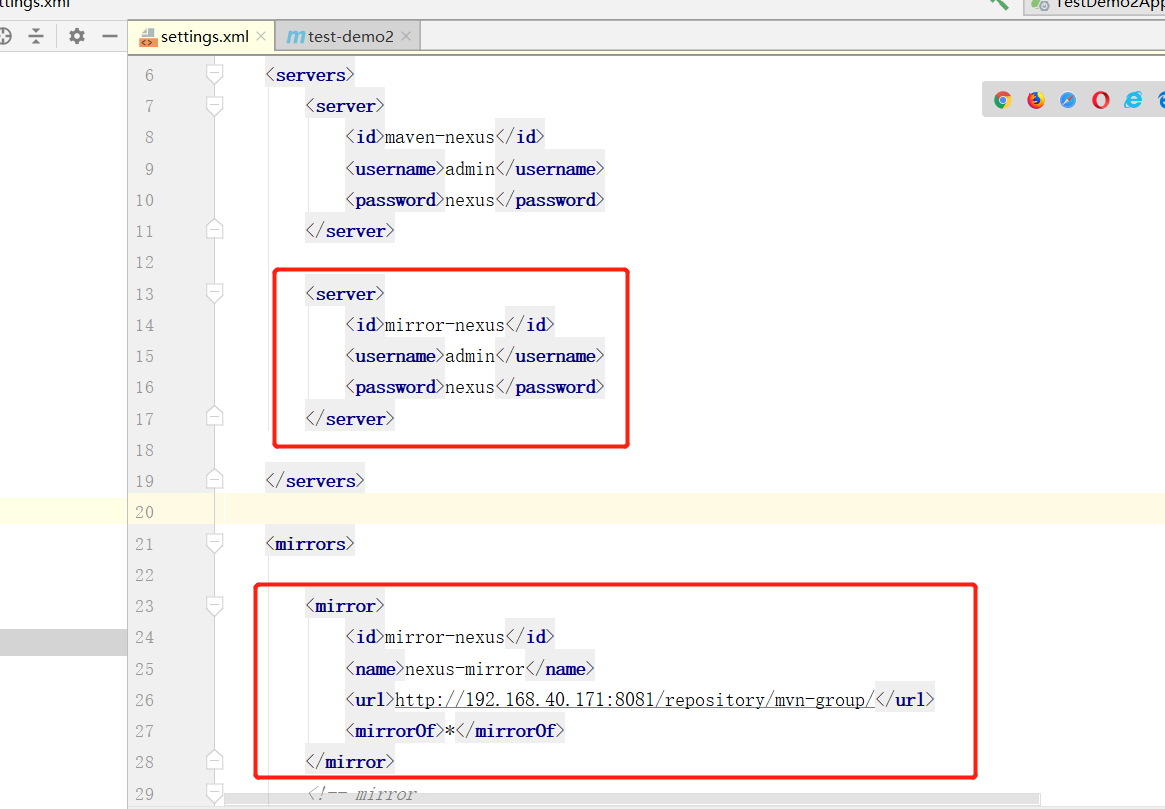
在 setting.xml 中添加依赖配置:
<mirror>
    <id>mirror-nexus</id>
    <name>nexus-mirror</name>
    <url>http://192.168.40.171:8081/repository/mvn-group/</url>
    <mirrorOf>*</mirrorOf>
</mirror>
- 1
- 2
- 3
- 4
- 5
- 6
同样 还需要添加用户信息,注意 id 保持一致:
<server>
    <id>mirror-nexus</id>
    <username>admin</username>
    <password>nexus</password>
</server>
- 1
- 2
- 3
- 4
- 5
下面将项目中 pom 中的仓库去除,同时将本地仓库中上面下载的依赖也删除掉,然后再次编译项目:

同样去 私服中进行下载 。
3. 上传 release 版本依赖
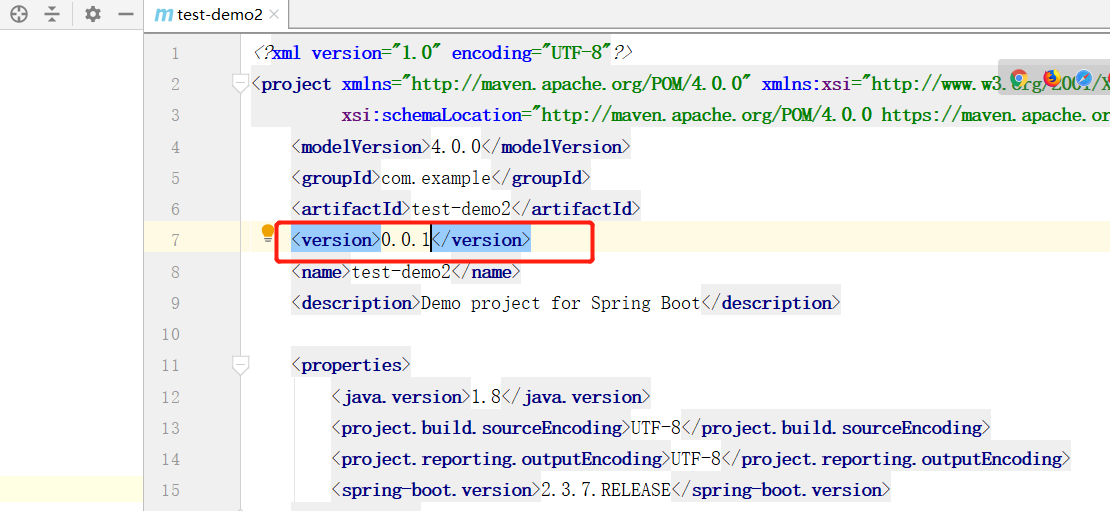
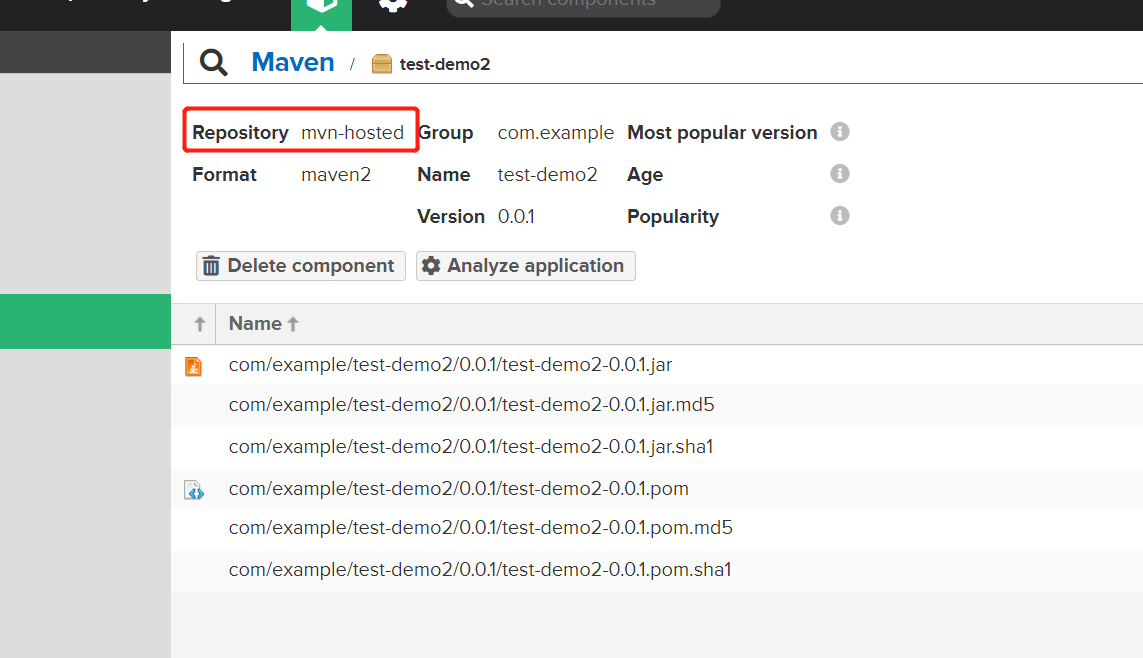
在上传依赖时需要注意的是,上面我们创建的 hosted 类型的仓库,版本是选择的 release,如果项目中的版本带有 -SNAPSHOT 则会上传失败,因此首先将项目中的 -SNAPSHOT 删除,这样就可以上传至我们创建的 mvn-hosted 仓库中:
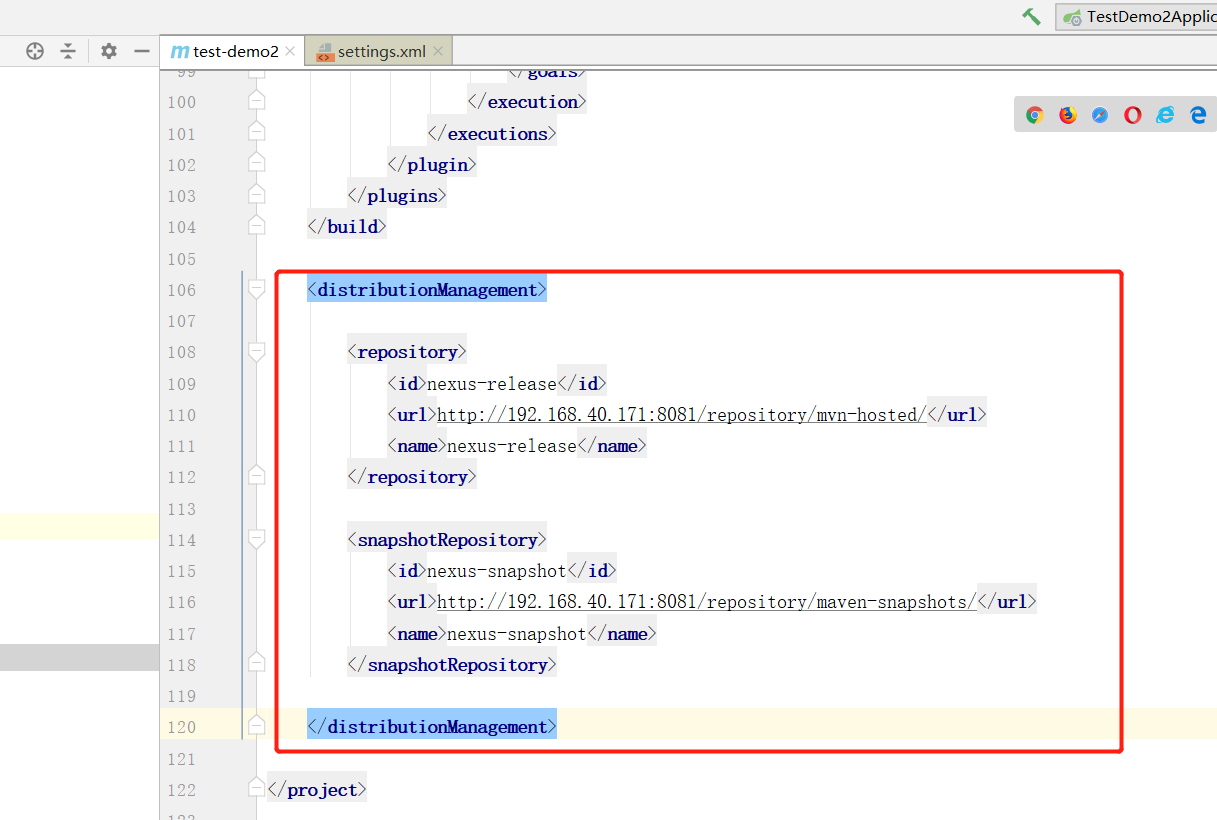
在 pom 中添加配置:
<distributionManagement>

    <repository>
        <id>nexus-release</id>
        <url>http://192.168.40.171:8081/repository/mvn-hosted/</url>
        <name>nexus-release</name>
    </repository>

    <snapshotRepository>
        <id>nexus-snapshot</id>
        <url>http://192.168.40.171:8081/repository/maven-snapshots/</url>
        <name>nexus-snapshot</name>
    </snapshotRepository>

</distributionManagement>
- 1
- 2
- 3
- 4
- 5
- 6
- 7
- 8
- 9
- 10
- 11
- 12
- 13
- 14
- 15
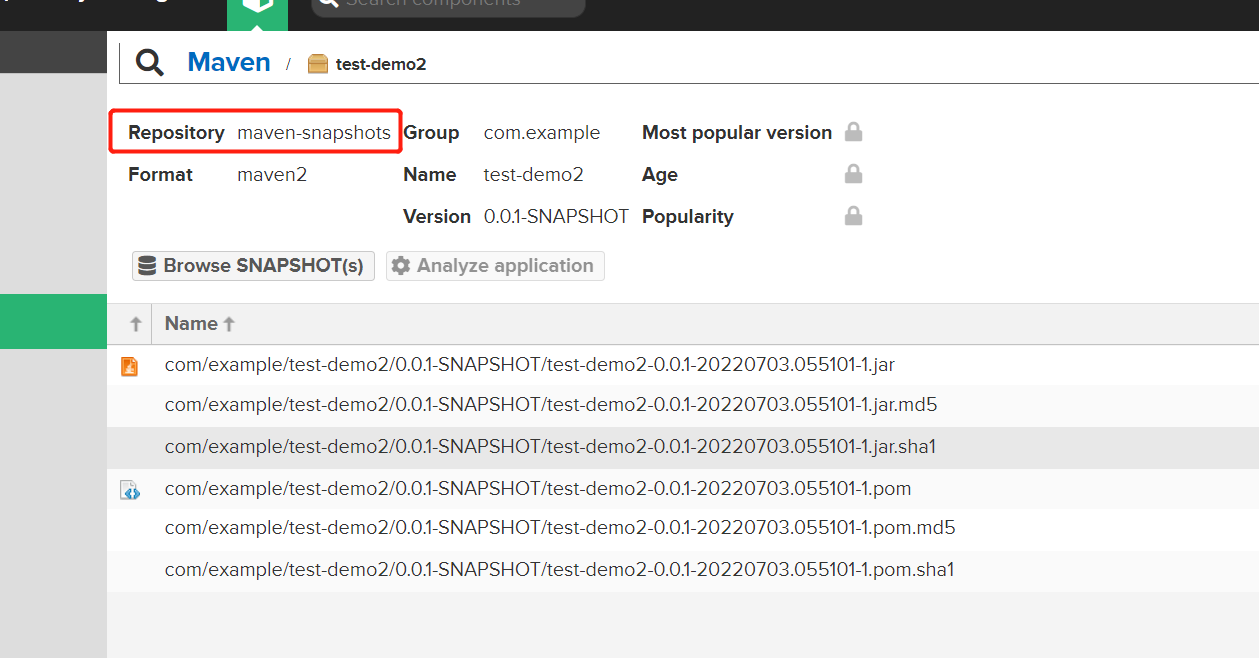
其中 release 发布到上面我们自己创建的 mvn-hosted 中,snapshot 版本就发布到原来 Nexus3 帮我们默认创建好的 maven-snapshots 中。
下面同样需要在 setting.xml 中添加用户信息:
<server>
    <id>nexus-release</id>
    <username>admin</username>
    <password>nexus</password>
</server>

<server>
    <id>nexus-snapshot</id>
    <username>admin</username>
    <password>nexus</password>
</server>
- 1
- 2
- 3
- 4
- 5
- 6
- 7
- 8
- 9
- 10
- 11
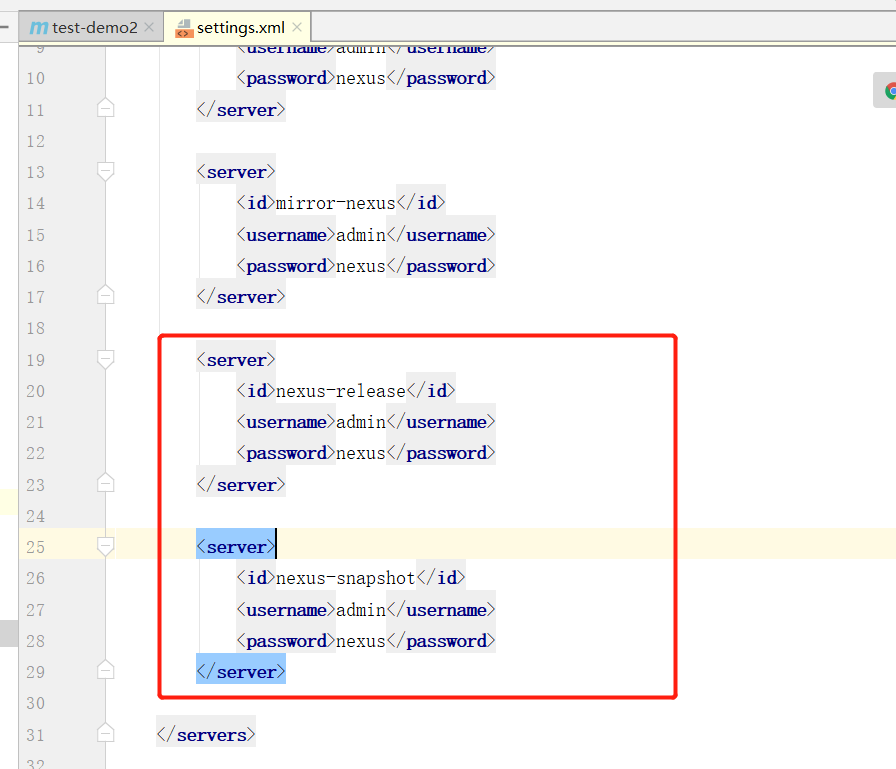
下面使用 mvn deploy 上传依赖:
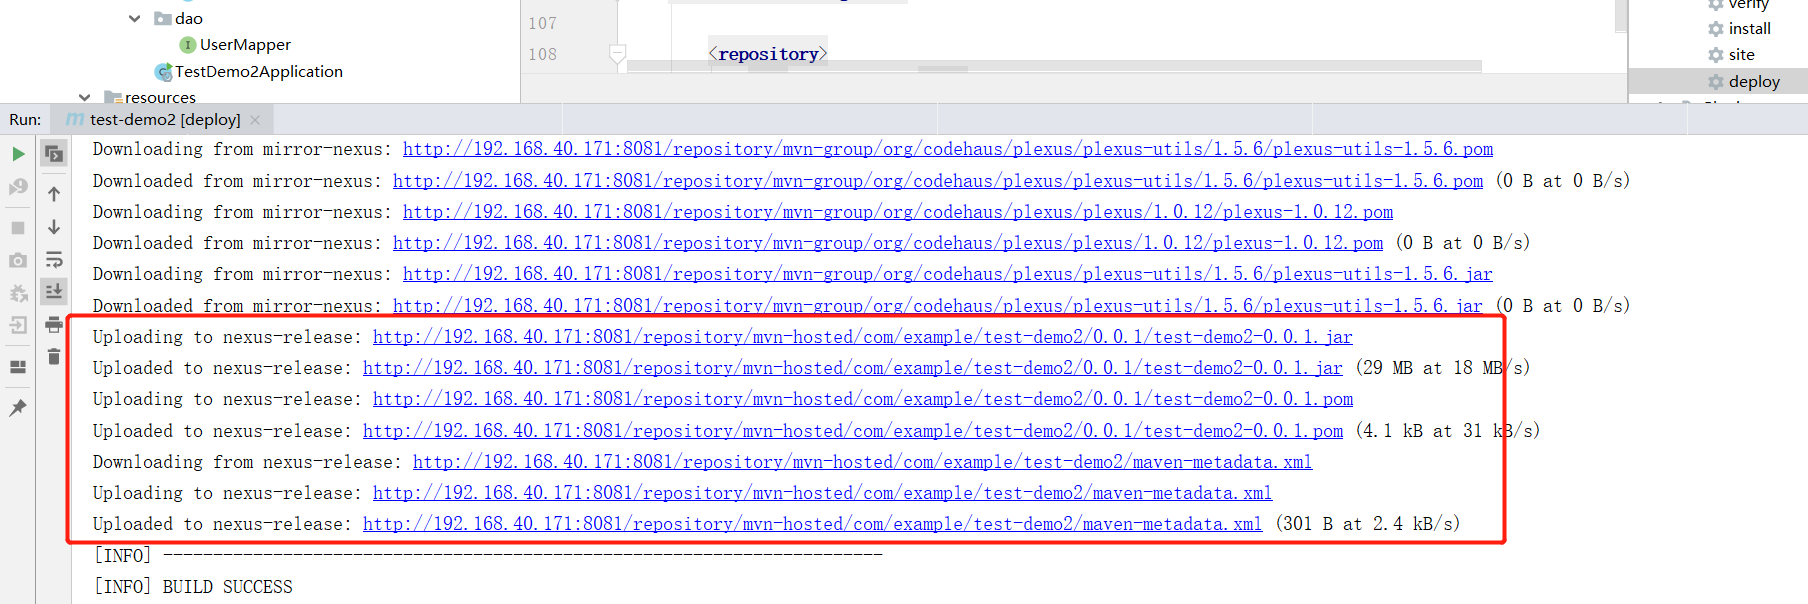
在 Nexus3 中查看:

4. 上传 snapshot 版本依赖
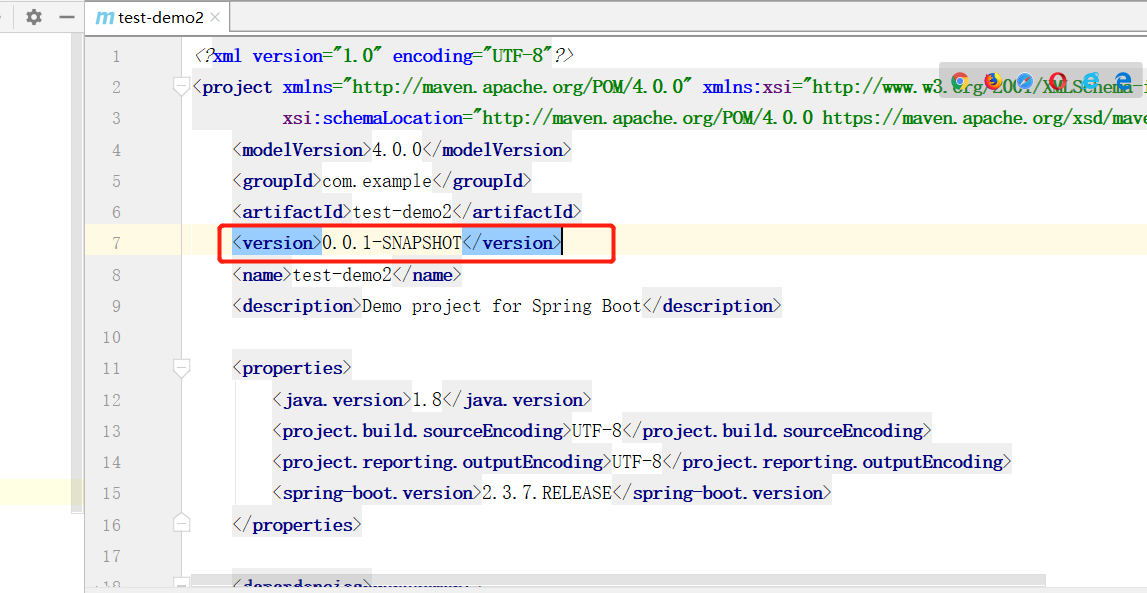
上传snapshot 版本依赖,只需在版本中添加 -SNAPSHOT 后缀:
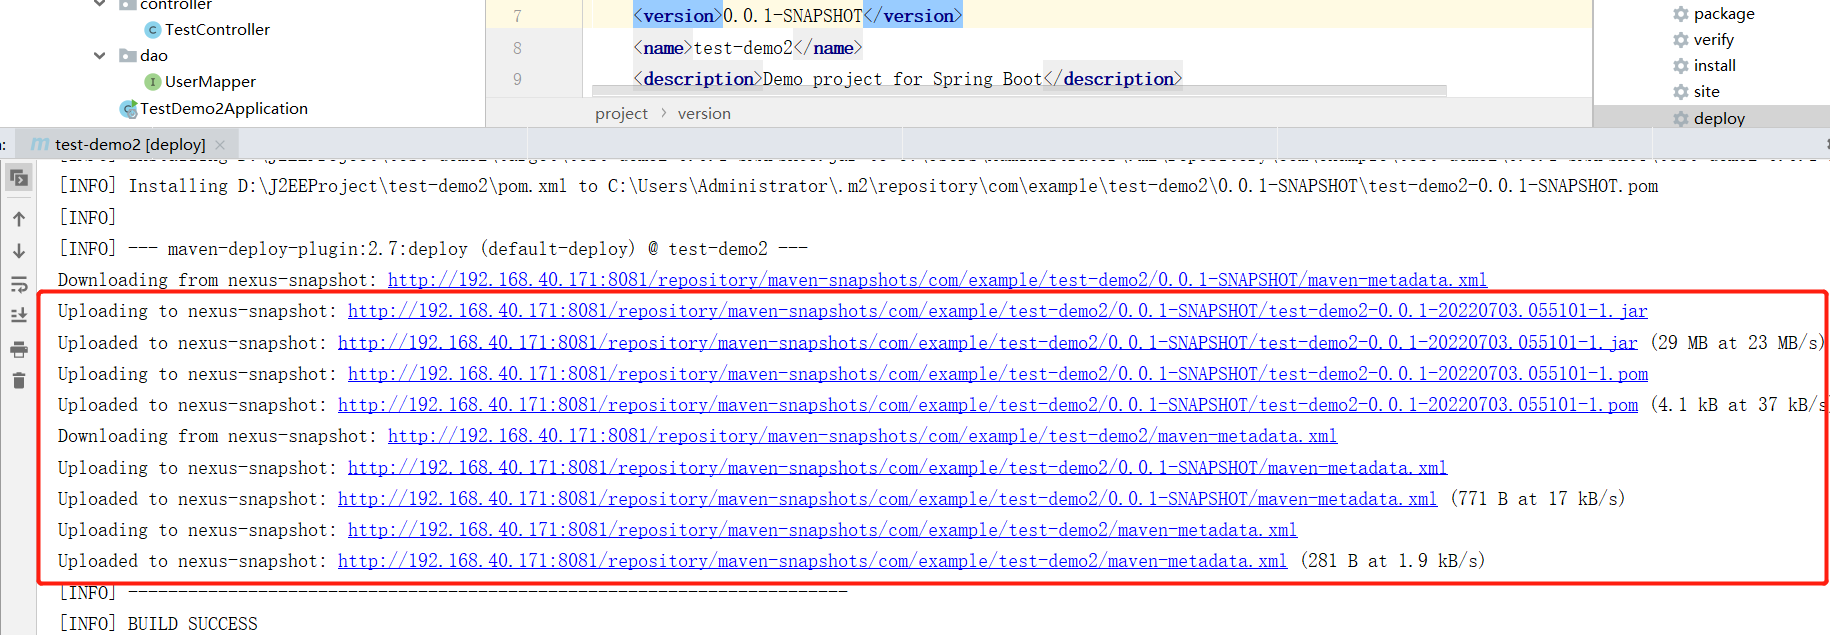
然后 使用 mvn deploy 上传依赖:
在 Nexus3 中查看:

5. 手动上传 jar 包
手动上传 jar 包,可以通过 Nexus3 web 页面提供的入口:

选中要上传的仓库,需要输入 必要参数:
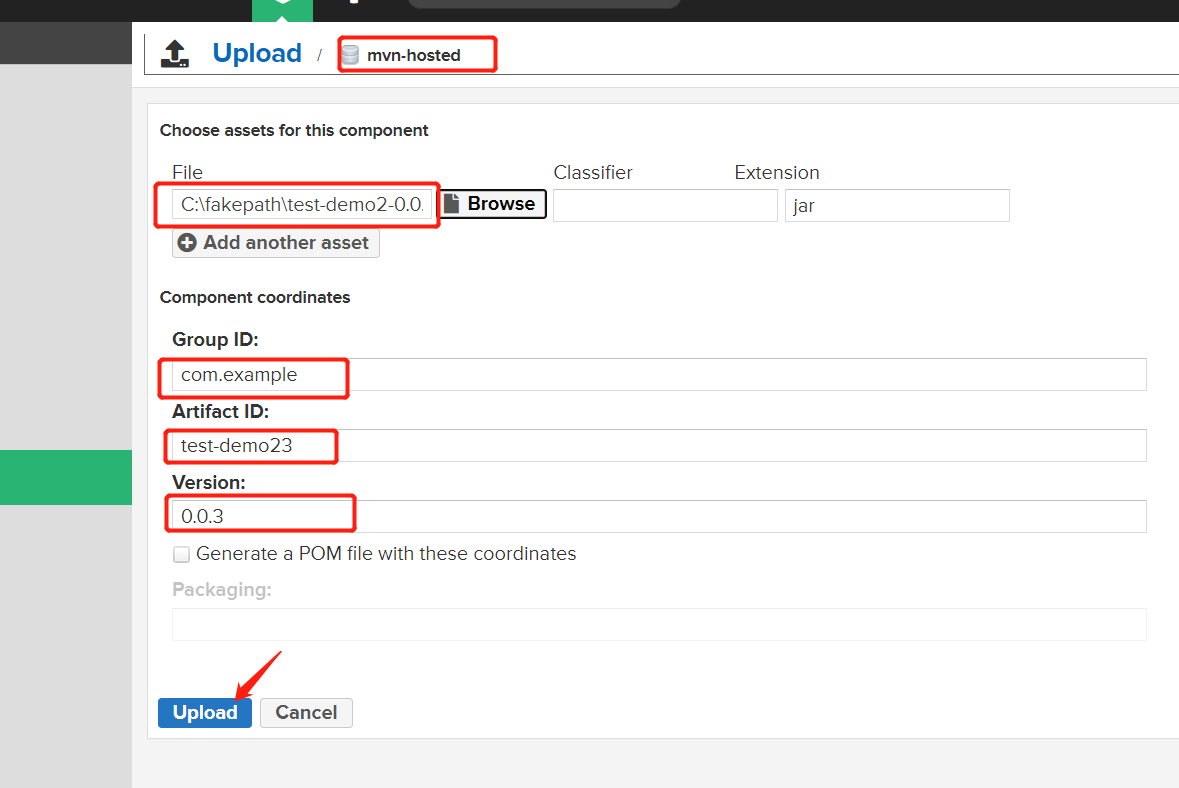
查看上传的 依赖:

6. 使用命令上传 jar 包
mvn deploy:deploy-file -DgroupId=com.example -DartifactId=test-demo2 -Dversion=2.0 -Dpackaging=jar -Dfile=C:/Users/Administrator/Desktop/test-demo2-0.0.1.jar -Durl=http://192.168.40.171:8081/repository/mvn-hosted/ -DrepositoryId=nexus-release
- 1
其中:
- DgroupId: 分组
- DartifactId: 工程id
- Dversion:版本
- Dpackaging :依赖类型
- Dfile:文件目录
- Durl:远程仓库地址
- DrepositoryId:用户配置id,需对应
setting.xml中的server中的id

查看上传的 依赖:

文章来源: blog.csdn.net,作者:小毕超,版权归原作者所有,如需转载,请联系作者。
原文链接:blog.csdn.net/qq_43692950/article/details/125583313
- 点赞
- 收藏
- 关注作者


评论(0)